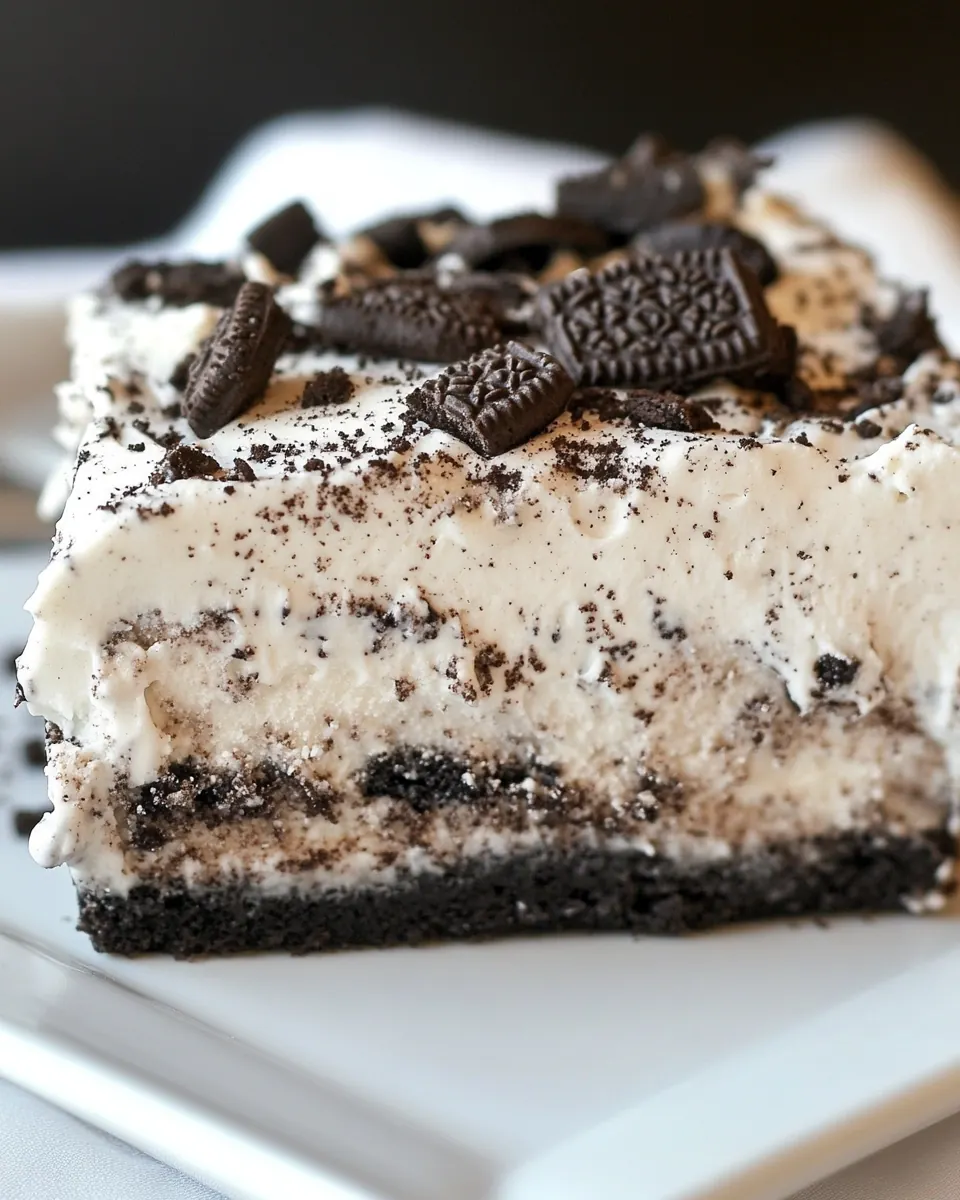
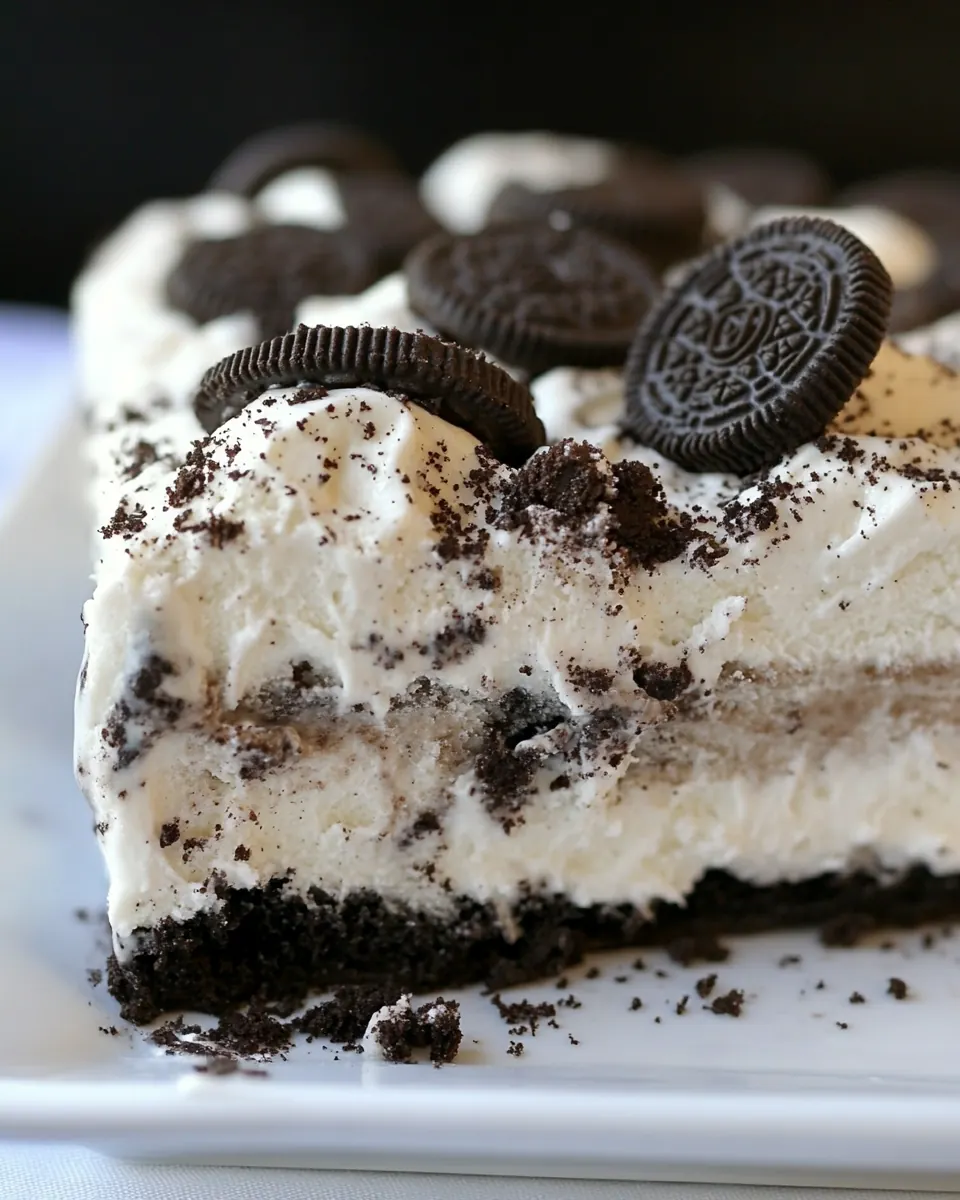
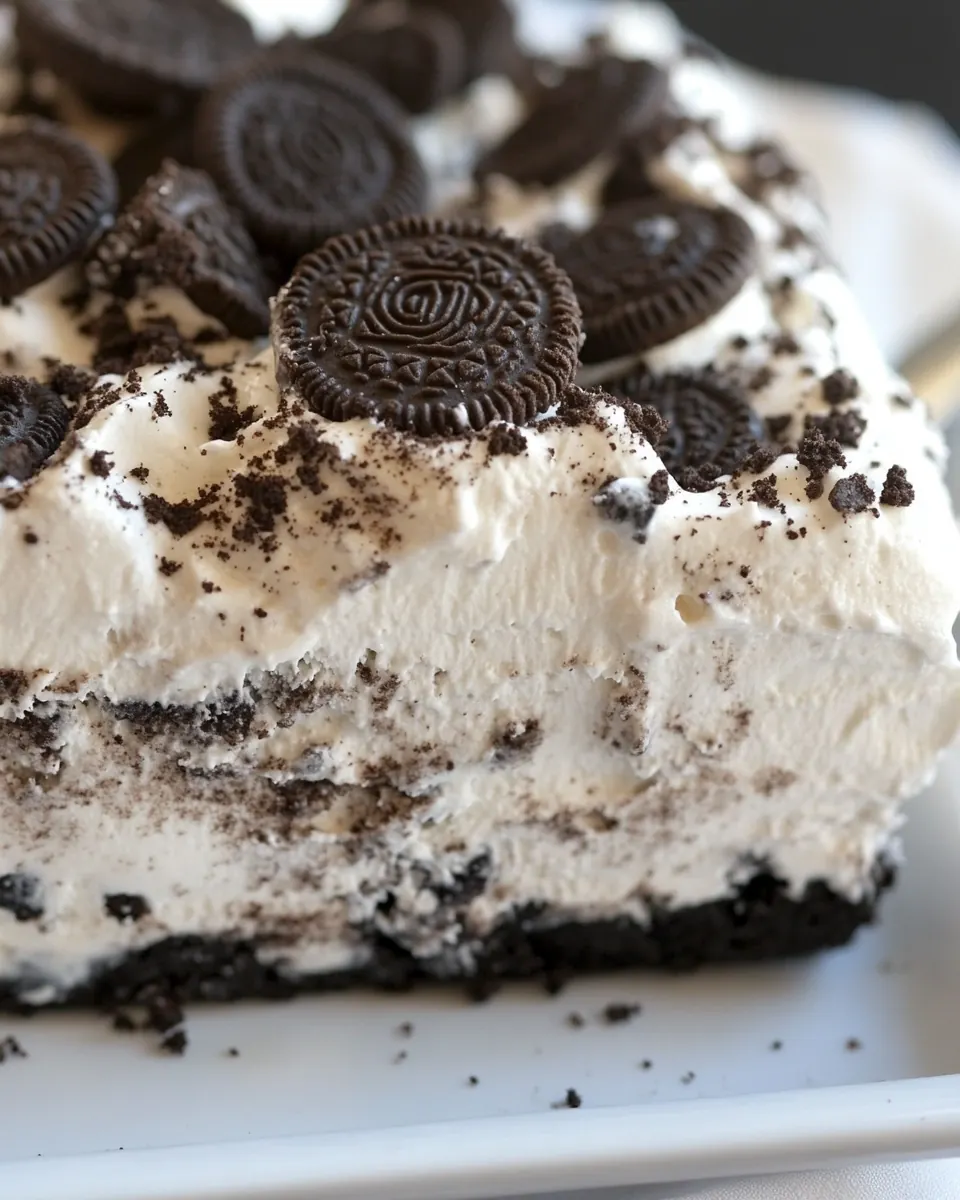
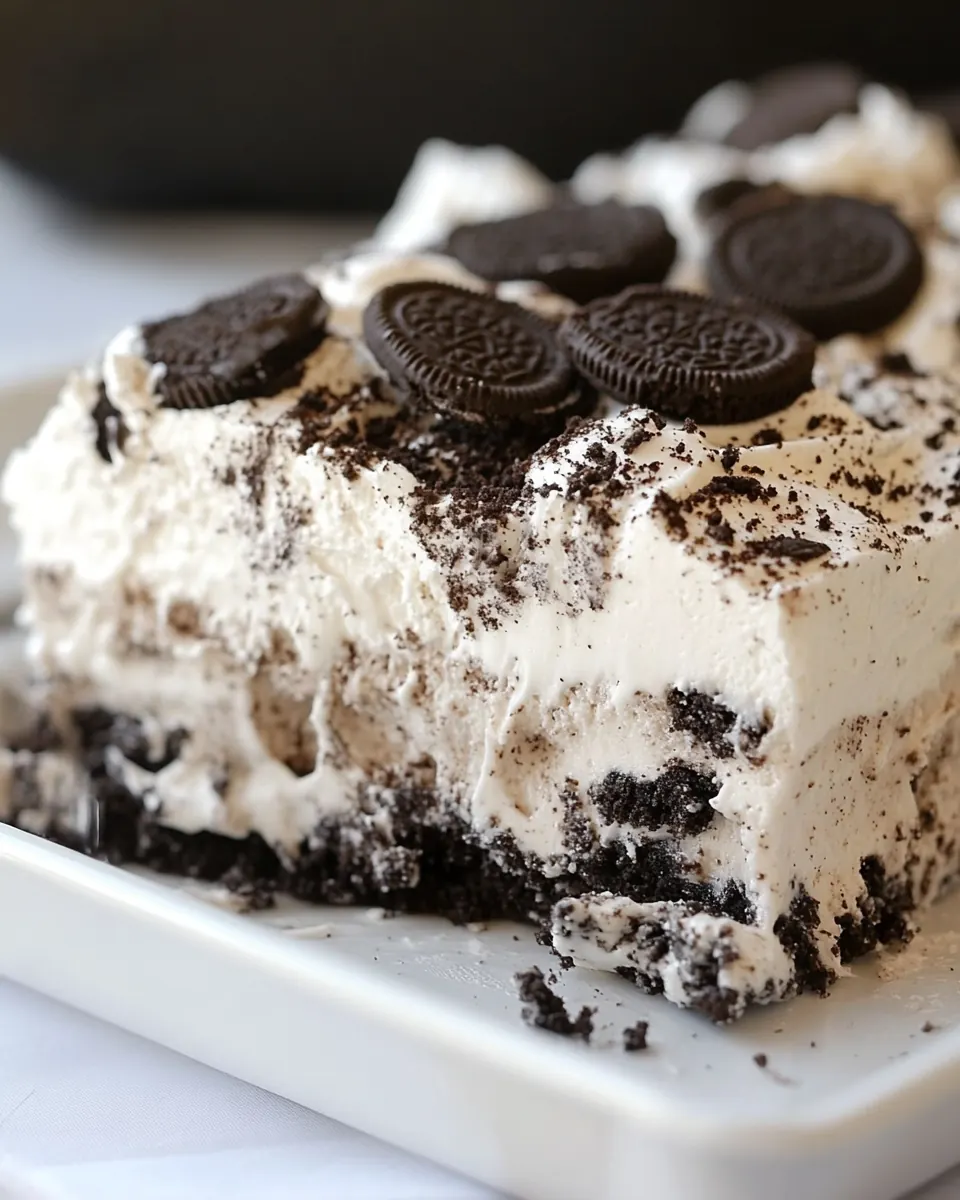
Oreo Ice Cream Cake
Oreo Ice Cream Cake is the sort of dessert that turns an ordinary weekend into a memory, and I still remember the first time I made one for a backyard summer gathering. I walked into the kitchen with a tired suitcase of errands and left with a pan of something that made everyone stop mid conversation. The mix of crunchy cookie, cold ice cream, and glossy hot fudge felt indulgent but unfussy, which is exactly my favorite kind of treat to pull together when guests arrive unexpectedly.
I learned to keep a stash of favorite components on hand after watching how quickly hungry friends gravitate toward the freezer when they know a layered dessert awaits. This cake is forgiving in its timings, yet precise in its satisfying contrasts, and I like that it rewards a little planning without demanding a bakery level of skill. Throughout the years I have tweaked little things like how finely to crush the cookies and whether to soften the cookies and cream ice cream just enough to spread smoothly. That small attention changes the texture in the best way.
Recipe Snapshot
11 mins
10 mins
1 mins
Easy
350 kcal
American
Keto, Gluten-Free
Desserts
9×13 pan, Mixing bowl, Measuring cup, Spatula, Microwave or small saucepan
What Makes This Oreo Ice Cream Cake Special
Textural Contrast That Steals the Show
One reason I keep making Oreo Ice Cream Cake is the way the crunchy Oreos meet the smooth ice cream and the ribbon of warm hot fudge. I find that when I press the crust firmly, each bite offers a satisfying snap followed by cold creaminess. That interplay makes every forkful interesting, and I guarantee your guests will comment on it.
Simple Ingredients, Maximum Impact
We use familiar pantry heroes like crushed Oreos and melted butter, plus ready made cookies and cream ice cream and a jar of hot fudge. Because the parts are reliable, the result is consistently successful. I appreciate recipes that let quality ingredients shine without complicated techniques, and this one fits that bill perfectly.
Make Ahead Friendly
I love that you can build this cake hours or even a day ahead. The freezing stages make it ideal for prepping before guests arrive, and the texture actually benefits from resting in the freezer. When I host, I assemble it in the morning, then relax knowing dessert is handled, which is a small domestic victory I relish.
Kid Friendly and Crowd Pleasing
Kids, teens, and adults alike flock to this dessert. The familiar Oreos and creamy ice cream are universal crowd pleasers, and the final whipped topping layer adds an approachable, celebratory look. I’ve found it’s a safe bet for birthdays, summer potlucks, or simple family dinners where you want to finish on a high note.
Easy to Customize
While I usually follow the classic formula, there is room to adjust. You can increase the crust for more crunch, or swap the whipped topping style to suit your preferences. I often experiment with drizzle thickness when I warm the hot fudge, because a thinner ribbon soaks a touch into the ice cream while a thicker pour stays glossy on top. Either way, the result feels special with minimal effort.
What’s In This Oreo Ice Cream Cake
I approach these ingredients as teammates, each bringing a distinct role to the composition. The crushed Oreos form a flavorful foundation, the melted butter binds the crust, the softened cookies and cream ice cream provides the creamy body, the warmed hot fudge introduces a warm, chocolatey ribbon, and the thawed whipped topping finishes things with lightness and visual appeal. Together they create a balance of crunch, cream, richness, and lift.
- 1 (13.29-ounce) package Oreos, crushed (see notes): Crushed and crunchy, provides the primary chocolate sandwich cookie flavor and texture for the cake base and layers; use as directed to form a sturdy crust and add signature Oreo pieces throughout. Can be pulsed to varied sizes to balance structural integrity with pleasant cookie bits that contrast the creamy ice cream.
- 1/4 cup butter, melted: Melted and rich, binds the crushed cookies into a compact, sliceable crust while adding subtle buttery flavor; pour over crumbs and press firmly to form an even foundation for the cake. Chilling briefly after pressing helps the crust set and prevents crumbling when slicing.
- 1/2 gallon cookies and cream ice cream, softened: Softened and creamy, supplies the main frozen filling that defines the cake’s cookies-and-cream character and smooth, scoopable texture; spread evenly over the crust for uniform layers. Allow to become pliable but not melted so it re-freezes into a dense, scoopable layer that holds shape.
- 1 (16-ounce) jar hot fudge, warmed: Warm and glossy, introduces a decadent, fudgy ribbon of chocolate that contrasts the cold ice cream and adds intense flavor and moisture; drizzle or layer to create pockets of oozy fudge inside the cake. Warming slightly eases spreading and helps it set into ribbons between frozen layers.
- 8 ounce whipped topping, thawed: Thawed and airy, delivers light, sweet topping to finish the cake with creamy peaks and a smooth surface; spread or pipe for an attractive presentation and softer bite. Keep chilled after applying to maintain structure and prevent runniness.
Making Oreo Ice Cream Cake
Bringing this dessert together is reassuringly straightforward, but each step benefits from attention to detail. I like to move methodically through the stages so textures set properly. Below I expand the original directions into rich, sensory guidance so you know exactly what to watch and what to expect.
- Add crushed cookie crumbs to a bowl reserving 1/2 cup for the top. Add butter and mix well. Press into a greased 9×13 pan.: The bowl should fill with fragrant, chocolatey dust that smells like fresh cookies, and as you stir the crumbs you can feel the varied particle sizes between your fingers. This reserved half cup will become the finishing flourish on top, adding visual contrast, so keep it aside dry and separate. Why this matters, the reserved crumbs give a crunchy accent after freezing, and skipping this step can leave the final presentation muted. A common mistake here is over crushing, which produces too fine a powder that will not provide that satisfying crunch, so aim for a mix of fine crumbs and small pieces.
- Spread softened ice cream over crust and freeze for 2 hours.: When you pour the warm, melted butter into the crumbs, watch the mixture darken and develop a glossy sheen as the fats coat the pieces. Mixing until thoroughly combined ensures the crust will bind when pressed. You are looking for a texture that feels like damp sand, not soupy, which means the ratio is right. If you add too much butter , the crust will become greasy and loose, so measure and mix carefully. If the mixture seems too dry, add a teaspoon of melted butter at a time until the right consistency is reached.
- Drizzle warm fudge over ice cream and freeze for 1 hour.: As you press the crumb mixture into the greased pan, listen for the faint compressing sounds and notice the surface smooth out under gentle pressure. A flat, even crust is essential so the ice cream layer sits uniformly, and using the bottom of a measuring cup helps compact the crumbs. This compaction is what prevents the crust from falling apart when sliced. If you press too lightly, the crust will crumble, and if you press too hard, it may become overly dense, so aim for firm, even pressure.
- Add whipped topping, sprinkle with reserved Oreos, and freeze for 2 hours. Remove from the freezer and let it set out for 15 minutes before serving. ENJOY!: The softened ice cream should spread like a velvet blanket, studded with cookie bits, and your spatula will leave gentle trails as you smooth it. This texture is key because it freezes into a scoopable yet sliceable layer. Freezing for 2 hours helps the ice cream set so the next layers do not sink or blend. Avoid spreading ice cream that is too soft, which can create air pockets and an uneven set, so if it becomes too loose, return it to the freezer briefly before proceeding.
- Drizzle warm fudge over ice cream and freeze for 1 hour: When you warm the hot fudge , it should be just pourable and glossy; as you drizzle it over the cold surface, you will see the fudge form ribbons that slightly set on contact, creating beautiful streaks. This creates a contrast of warm, molten chocolate and cold, creamy ice cream which elevates the eating experience. Freezing for 1 hour locks the fudge in place. One mistake is heating the fudge too much, which makes it too thin and causes it to sink into the ice cream rather than decorate it, so heat gently and stir to keep viscosity right.
- Add whipped topping, sprinkle with reserved Oreos, and freeze for 2 hours: The thawed whipped topping should be airy and light as you spread it, and when you smooth it across the surface it softens the visual transitions between layers. Sprinkling the reserved Oreos adds a finishing crunch and a lovely contrast against the white topping. Freezing for another 2 hours ensures everything is solid and sliceable. A common slip is applying the topping to a surface that is not fully set, which can cause the layers to compress and smear, so be sure the prior layers are firm before spreading the topping.
- Remove from the freezer and let it set out for 15 minutes before serving: As the cake rests at room temperature for about 15 minutes, you will notice the edges soften and the knife glide more smoothly through the layers, making clean slices easier. The brief tempering balances the frozen interior with a slightly softer eating temperature that highlights flavors and textures. Avoid leaving it out too long, which will cause the ice cream to melt and lose structure; watch for a slight give when you press gently at the center to know it is ready.
How to Switch It Up
You can adapt Oreo Ice Cream Cake in small ways to suit mood, season, or what is in your pantry. Below I share practical, tested options that keep the core idea intact while offering different textures and presentation.
- Make a thicker crust: Increase the quantity of crushed Oreos and butter proportionally to deepen the crunch and create a more substantial base for hearty slices.
- Use different ice cream: Swap the cookies and cream ice cream for a complementary flavor like chocolate or caramel to shift the overall profile while keeping the same assembly method.
- Vary the topping: Replace the whipped topping with a lightly sweetened mascarpone dollop for a richer, creamier finish that is still spreadable and pairs well with warm hot fudge.
- Adjust fudge thickness: Warm the hot fudge less for thicker ribbons or a touch more for thinner streaks that sink just slightly into the ice cream.
- Change presentation: Make individual portions in ramekins or silicone molds so each person gets a neatly layered serving without slicing a large pan.
Best Served With
This Oreo Ice Cream Cake is versatile for many occasions and pairs well with light accompaniments that complement its richness. Below I describe serving styles, occasions, and storage notes to help you plan.
- Casual summer parties: Serve chilled slices straight from the freezer at outdoor gatherings where the cold treat is a welcome relief from warm evenings.
- Birthday celebrations: Present the cake with a few extra reserved Oreos on top for a festive, kid friendly centerpiece that requires minimal decorating.
- Family dessert after dinner: Let the cake temper for about 15 minutes so slices cut cleanly and plates are not dripping, making it an easy finish to a comforting meal.
- Storage tips: Keep leftovers wrapped tightly with plastic wrap or in an airtight container in the freezer to prevent ice crystals and preserve texture for up to one week.
- Seasonal pairing: Highlight this dessert in summer when cold, creamy treats are most appreciated, and pair with fresh berries for a bright contrast if desired.
FAQ
Conclusion
What makes this Oreo Ice Cream Cake special is the effortless combination of crunchy cookie crust, creamy cookies and cream ice cream, warm hot fudge ribbons, and a light whipped topping, all coming together for an impressive, no bake dessert. If you love contrasts in texture and a dessert that you can assemble ahead of time, give it a try the next time you want an easy, celebratory sweet. It is forgiving, adaptable, and always a crowd pleaser, so enjoy making it your own and sharing it with friends and family.
Oreo Ice Cream Cake
Equipment
- 9x13 pan
- Mixing Bowl
- Measuring Cup
- Spatula
- Microwave or small saucepan
Ingredients
- 1 (13.29-ounce) package Oreos, crushed (see notes) Crushed and crunchy, provides the primary chocolate sandwich cookie flavor and texture for the cake base and layers; use as directed to form a sturdy crust and add signature Oreo pieces throughout. Can be pulsed to varied sizes to balance structural integrity with pleasant cookie bits that contrast the creamy ice cream.
- 1/4 cup butter, melted Melted and rich, binds the crushed cookies into a compact, sliceable crust while adding subtle buttery flavor; pour over crumbs and press firmly to form an even foundation for the cake. Chilling briefly after pressing helps the crust set and prevents crumbling when slicing.
- 1/2 gallon cookies and cream ice cream, softened Softened and creamy, supplies the main frozen filling that defines the cake’s cookies-and-cream character and smooth, scoopable texture; spread evenly over the crust for uniform layers. Allow to become pliable but not melted so it re-freezes into a dense, scoopable layer that holds shape.
- 1 (16-ounce) jar hot fudge, warmed Warm and glossy, introduces a decadent, fudgy ribbon of chocolate that contrasts the cold ice cream and adds intense flavor and moisture; drizzle or layer to create pockets of oozy fudge inside the cake. Warming slightly eases spreading and helps it set into ribbons between frozen layers.
- 8 ounce whipped topping, thawed Thawed and airy, delivers light, sweet topping to finish the cake with creamy peaks and a smooth surface; spread or pipe for an attractive presentation and softer bite. Keep chilled after applying to maintain structure and prevent runniness.
Instructions
- Add crushed cookie crumbs to a bowl reserving 1/2 cup for the top. Add butter and mix well. Press into a greased 9×13 pan.: The bowl should fill with fragrant, chocolatey dust that smells like fresh cookies, and as you stir the crumbs you can feel the varied particle sizes between your fingers. This reserved half cup will become the finishing flourish on top, adding visual contrast, so keep it aside dry and separate. Why this matters, the reserved crumbs give a crunchy accent after freezing, and skipping this step can leave the final presentation muted. A common mistake here is over crushing, which produces too fine a powder that will not provide that satisfying crunch, so aim for a mix of fine crumbs and small pieces.
- Spread softened ice cream over crust and freeze for 2 hours.: When you pour the warm, melted butter into the crumbs, watch the mixture darken and develop a glossy sheen as the fats coat the pieces. Mixing until thoroughly combined ensures the crust will bind when pressed. You are looking for a texture that feels like damp sand, not soupy, which means the ratio is right. If you add too much butter , the crust will become greasy and loose, so measure and mix carefully. If the mixture seems too dry, add a teaspoon of melted butter at a time until the right consistency is reached.
- Drizzle warm fudge over ice cream and freeze for 1 hour.: As you press the crumb mixture into the greased pan, listen for the faint compressing sounds and notice the surface smooth out under gentle pressure. A flat, even crust is essential so the ice cream layer sits uniformly, and using the bottom of a measuring cup helps compact the crumbs. This compaction is what prevents the crust from falling apart when sliced. If you press too lightly, the crust will crumble, and if you press too hard, it may become overly dense, so aim for firm, even pressure.
- Add whipped topping, sprinkle with reserved Oreos, and freeze for 2 hours. Remove from the freezer and let it set out for 15 minutes before serving. ENJOY!: The softened ice cream should spread like a velvet blanket, studded with cookie bits, and your spatula will leave gentle trails as you smooth it. This texture is key because it freezes into a scoopable yet sliceable layer. Freezing for 2 hours helps the ice cream set so the next layers do not sink or blend. Avoid spreading ice cream that is too soft, which can create air pockets and an uneven set, so if it becomes too loose, return it to the freezer briefly before proceeding.
- Drizzle warm fudge over ice cream and freeze for 1 hour: When you warm the hot fudge , it should be just pourable and glossy; as you drizzle it over the cold surface, you will see the fudge form ribbons that slightly set on contact, creating beautiful streaks. This creates a contrast of warm, molten chocolate and cold, creamy ice cream which elevates the eating experience. Freezing for 1 hour locks the fudge in place. One mistake is heating the fudge too much, which makes it too thin and causes it to sink into the ice cream rather than decorate it, so heat gently and stir to keep viscosity right.
- Add whipped topping, sprinkle with reserved Oreos, and freeze for 2 hours: The thawed whipped topping should be airy and light as you spread it, and when you smooth it across the surface it softens the visual transitions between layers. Sprinkling the reserved Oreos adds a finishing crunch and a lovely contrast against the white topping. Freezing for another 2 hours ensures everything is solid and sliceable. A common slip is applying the topping to a surface that is not fully set, which can cause the layers to compress and smear, so be sure the prior layers are firm before spreading the topping.
- Remove from the freezer and let it set out for 15 minutes before serving: As the cake rests at room temperature for about 15 minutes, you will notice the edges soften and the knife glide more smoothly through the layers, making clean slices easier. The brief tempering balances the frozen interior with a slightly softer eating temperature that highlights flavors and textures. Avoid leaving it out too long, which will cause the ice cream to melt and lose structure; watch for a slight give when you press gently at the center to know it is ready.
Notes
- Make a thicker crust: Increase the quantity of crushed Oreos and butter proportionally to deepen the crunch and create a more substantial base for hearty slices.
- Use different ice cream: Swap the cookies and cream ice cream for a complementary flavor like chocolate or caramel to shift the overall profile while keeping the same assembly method.
- Vary the topping: Replace the whipped topping with a lightly sweetened mascarpone dollop for a richer, creamier finish that is still spreadable and pairs well with warm hot fudge.
- Adjust fudge thickness: Warm the hot fudge less for thicker ribbons or a touch more for thinner streaks that sink just slightly into the ice cream.
- Change presentation: Make individual portions in ramekins or silicone molds so each person gets a neatly layered serving without slicing a large pan.