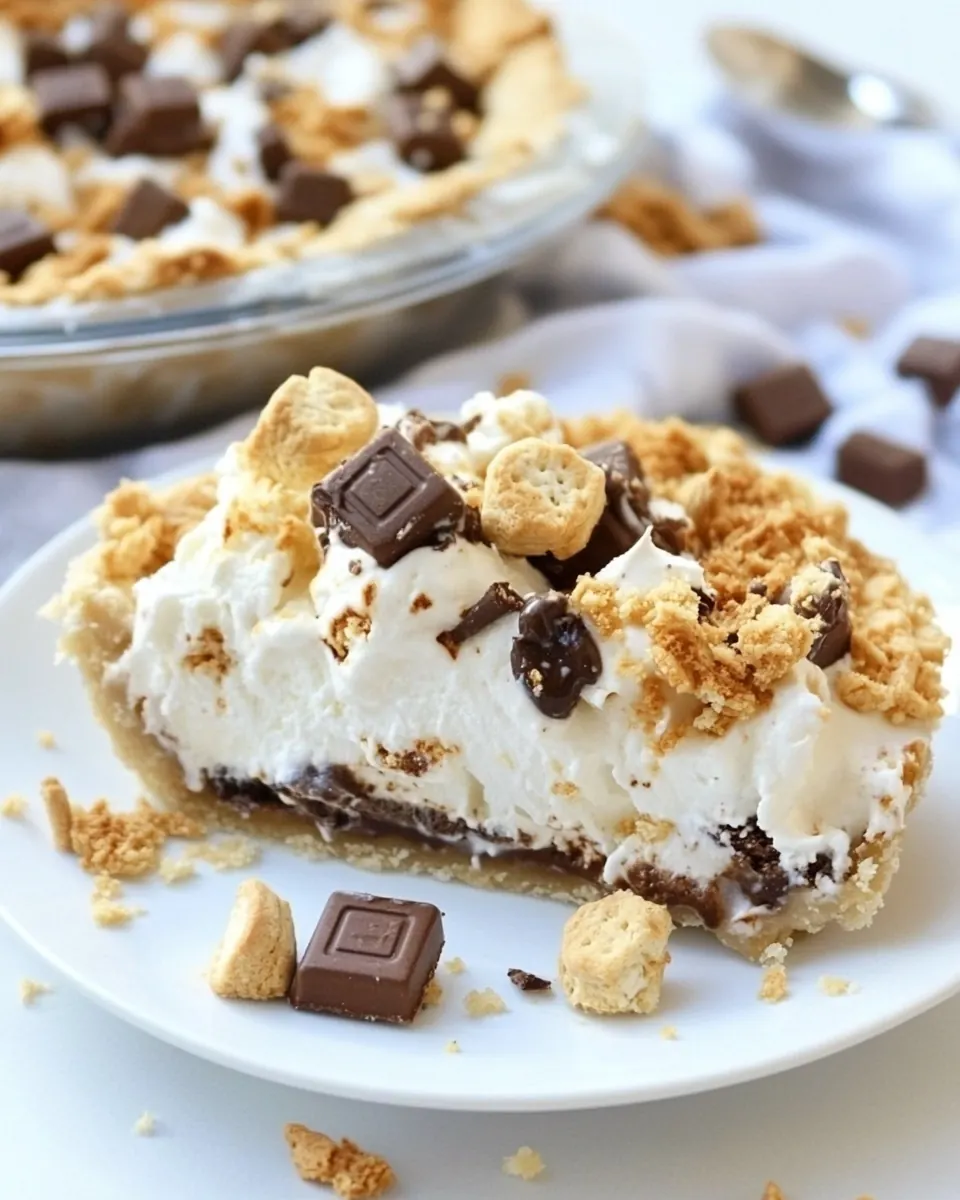
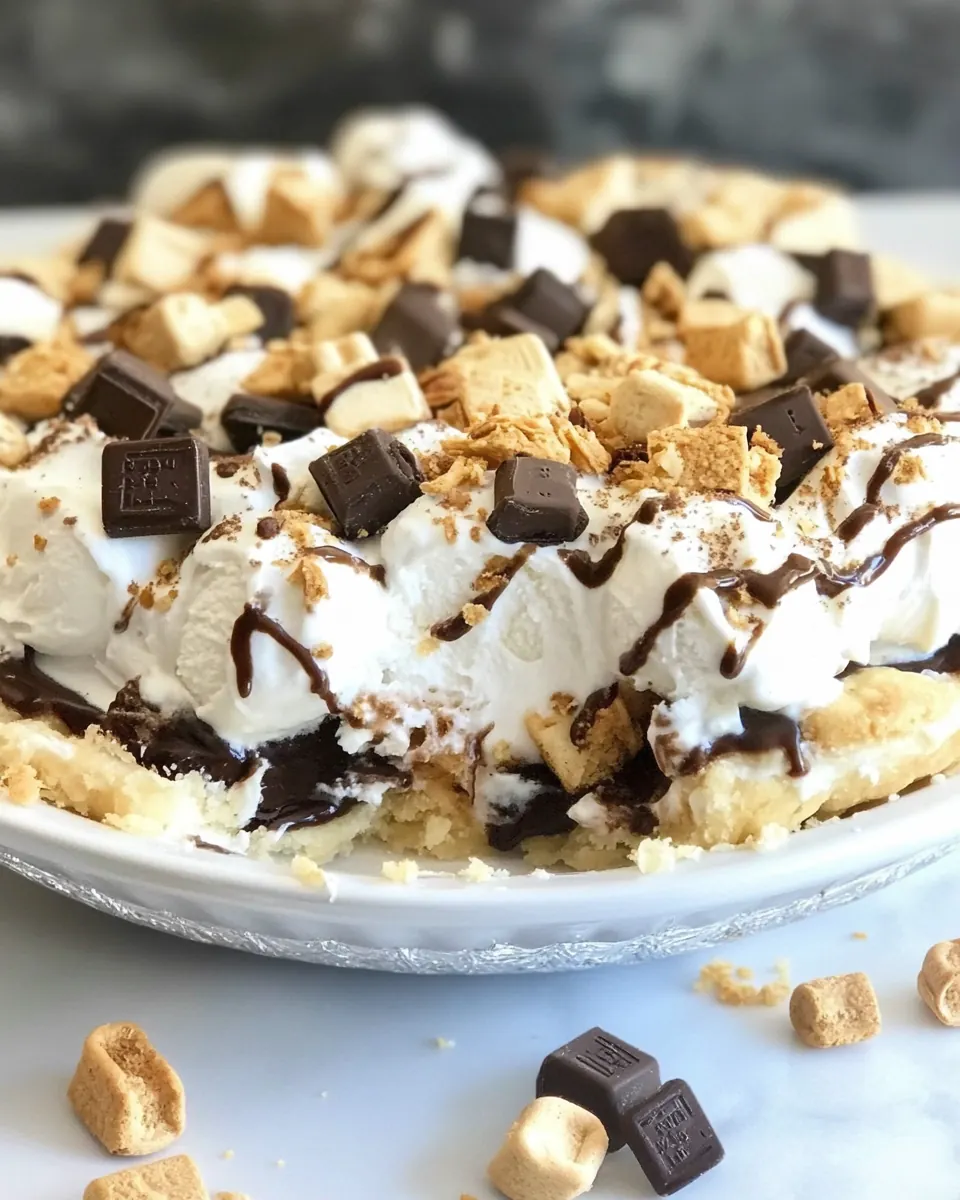
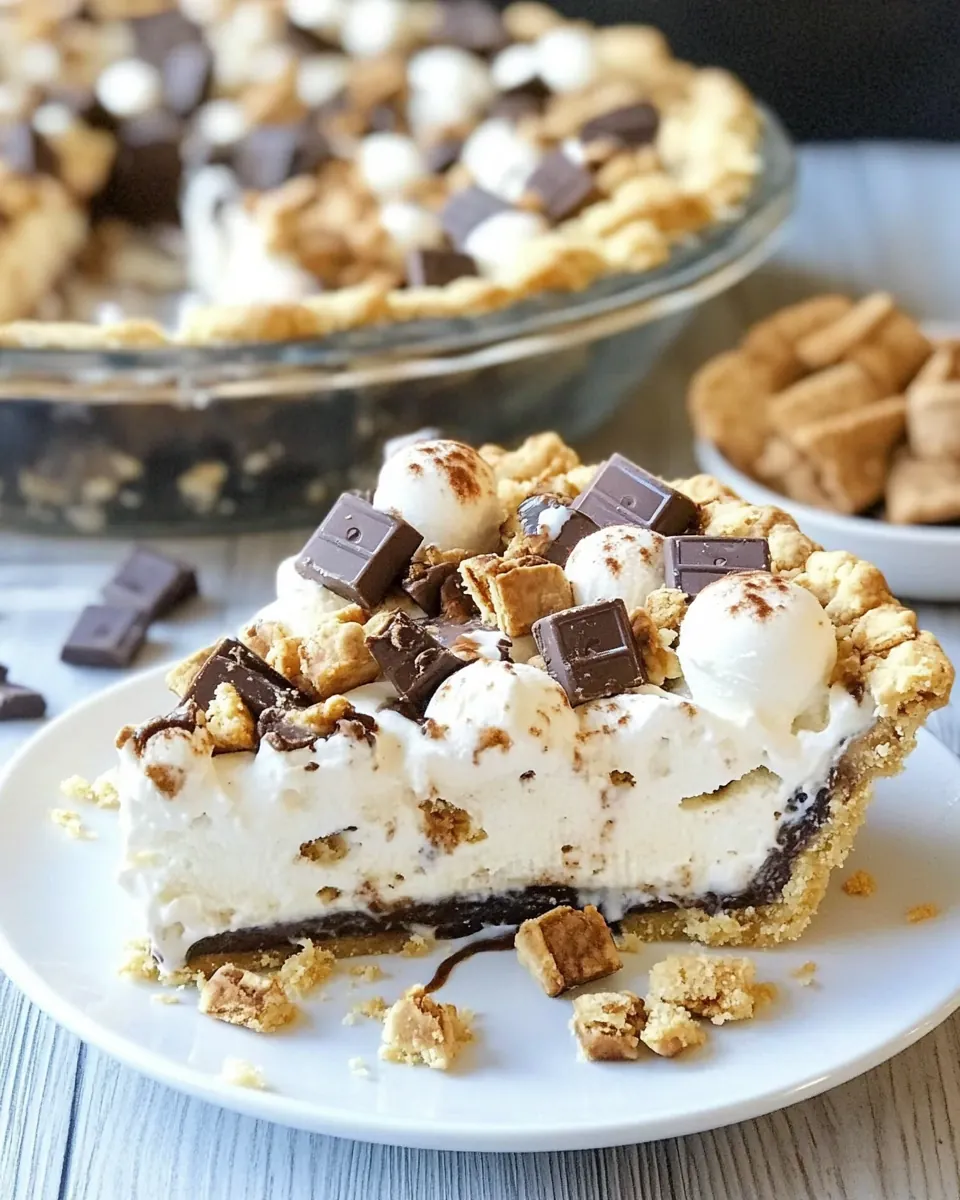
S’mores Ice Cream Pie
S’mores Ice Cream Pie is the kind of dessert that makes a warm evening feel like a tiny celebration, and I still remember the first time I served it at a backyard get together.
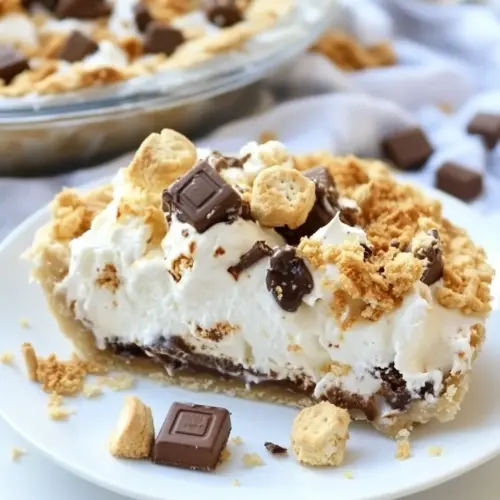
I was running late setting up, plates scattered, and folks gathered around the fire pit. Someone asked if I had dessert, and I pulled this out, cold and gleaming. The contrast between the chilled ice cream filling and the warm, toasty mini marshmallows on top had people smiling before forks even hit the plate. That night taught me how comforting contrast can be, and why simple components like crunchy graham cracker crumbs and chopped chocolate bars can sing together.
Over the years I’ve tweaked little things, like toasting a portion of the marshmallows in the oven and saving some for torching at the end, and that method became my signature trick for getting a perfect toasted top without melting the filling. Guests kept asking how the marshmallows got so perfectly golden while the filling stayed frozen. I’d say it’s a mix of timing and a modest culinary ego, but mostly practice. Whenever friends ask for a showstopping, no bake dessert that still feels nostalgic, I recommend S’mores Ice Cream Pie.
Recipe Snapshot
25 mins
15 mins
10 mins
Medium
300 kcal
American
Gluten-Free, Vegan
Desserts
9-inch pie pan, Mixing bowl, Measuring cup, Spatula, Baking sheet, Silpat or baking mat, Wire cooling rack, Chef’s torch
Why We Love This S’mores Ice Cream Pie
Comfort plus nostalgia
I love how S’mores Ice Cream Pie taps into childhood memories. The combination of crunchy graham cracker crumbs, melty chocolate, and toasted mini marshmallows brings back campfire nights, and yet presenting it as a chilled pie feels modern and grown up. I find people instantly connect with that sweet familiarity.
Effortless wow factor
We often want desserts that look impressive but don’t steal the whole evening, and this pie fits that need. With straightforward assembly and a few minutes under a broiler or a quick torch, you get a dessert that looks like you spent ages on it. I enjoy the audible gasp when the torch hits the marshmallow topping for the first time.
Great for gatherings
I bring this to summer parties because it’s easy to scale and it survives transport. The pie freezes solid, so you can make it ahead and finish just before guests arrive. That flexibility has saved my hosting more than once, and I appreciate a recipe that gives me breathing room.
Play between textures and temperatures
What makes this recipe stand out to me is the delightful contrast. The crunchy graham cracker crust anchors the silky vanilla ice cream interior, while pockets of chopped chocolate and toasted mini marshmallows add bursts of chew and goo. That textural interplay keeps every bite interesting.
Accessible ingredients, big payoff
Finally, the pantry friendly ingredients are a huge plus. Most components are easy to find, and you probably already have them. I like that you can riff on the mix ins without overcomplicating the technique. That accessibility is why I keep this recipe in heavy rotation.
Ingredients Required for S’mores Ice Cream Pie
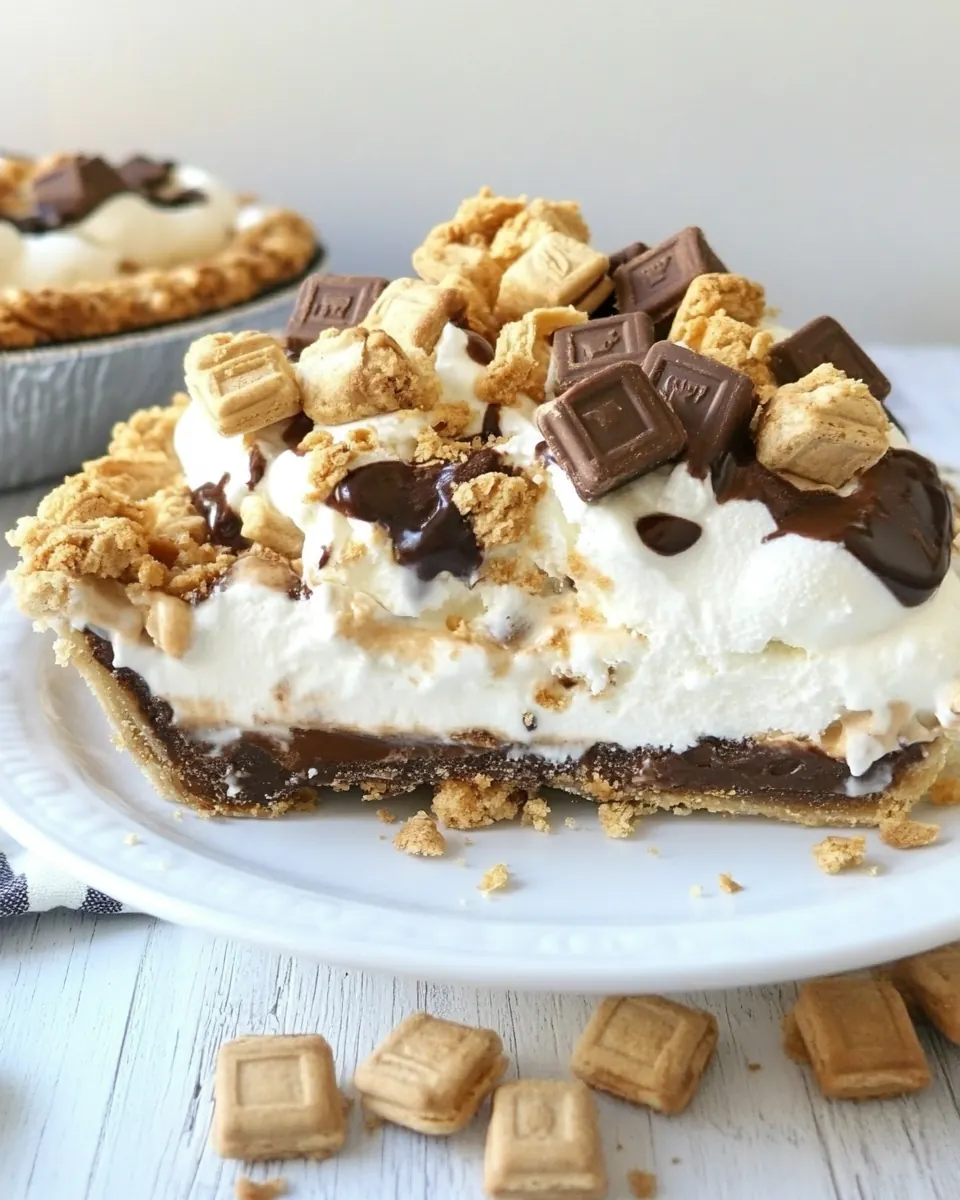
These ingredients are all about balance. The crust provides structure and a toasty backdrop, the vanilla ice cream brings creamy richness, and the marshmallows and chopped chocolate create those signature s’mores pockets. Each element plays a concise role, so quality matters more than complexity.
- 1 1/2 cups Annie's Honey Graham Cracker crumbs about 10 full sheet graham crackers: Crushed to form the pie crust base, providing a sweet, crunchy foundation that holds together when mixed with melted butter. Enhances classic s'mores flavor with a honeyed graham profile and a pleasant texture contrast to the creamy filling.
- 6 tablespoons unsalted butter melted: Melted to bind the graham cracker crumbs into a cohesive crust, delivering rich flavor and a tender bite. Adds necessary fat to set the crust firmly once chilled, ensuring easy slicing and serving.
- 1/4 cup granulated sugar: Added to the crust mixture to balance sweetness and help with slight caramelization during refrigeration or brief torching. Enhances overall flavor complexity while supporting the structural integrity of the crust.
- 3/4 cup mini marshmallows: Scattered into the filling to add chewy, melty pockets reminiscent of campfire s'mores, contributing lightness and tiny bursts of sweetness. Toasting or briefly broiling after assembly can create a golden exterior and amplify toasted marshmallow aroma.
- 3 cups vanilla ice cream softened: Softened to a scoopable consistency for easy folding and spreading into the crust, forming the creamy ice cream filling that defines the pie. Provides the primary cold, smooth texture and vanilla flavor that contrasts the crunchy crust and melty chocolate.
- 1 cup chopped chocolate bars: Folded into the ice cream filling to introduce rich, chocolatey chunks and deepen the s'mores character of the pie. Melts slightly when assembled, creating ribbons of chocolate and adding textural variety.
- 1/2 cup chopped Annie's Honey Graham Crackers: Chopped to sprinkle through the filling or along the edges for additional graham texture and intensified honey flavor, echoing the crust components. Offers extra crunch and visual appeal when mixed into the ice cream.
- 1 1/2 cups mini marshmallows: Layered on top or mixed into the filling to amplify marshmallow flavor and create a pillowy, toasted topping when broiled briefly. Provides volume, chewiness, and the signature s'mores finish that complements chocolate and graham elements.
Preparation Steps for S’mores Ice Cream Pie
These steps guide you through building a sturdy crust, creating toasted marshmallow flavor, blending the filling, and finishing with a showy topping. Read through, then gather your chilled and softened elements before you start.
- Preheat oven to 350 degrees F.: The kitchen will warm slightly and you may catch a gentle scent of heated air, which signals the oven is getting ready to brown the crust properly. Preheating ensures the crust begins to set immediately, giving you a uniformly baked shell rather than one that bakes unevenly. One common mistake is not allowing the oven to fully reach temperature, which can leave the crust underbaked and crumbly instead of firm enough to hold the filling.
- In a medium bowl, combine graham cracker crumbs, melted butter, and sugar. Mix until combined. Press the mixture into a 9-inch pie pan. Make sure the crust goes up the sides of the pie pan. I like to use the bottom of a measuring cup to press the mixture into the pan. Bake the pie crust for 8-10 minutes. Remove from oven and let the crust cool completely on a wire cooling rack.: When you mix the crumbs with warm butter , the aroma shifts to toasted and nutty, and the texture moves from loose sand to a slightly tacky mixture that will clump when pressed. Pressing firmly with a flat tool creates compact layers that resist sogginess from the filling. The visual cue is a smooth, even surface and clean edges along the pan. Avoid packing too hard, which can make the crust feel dense instead of pleasantly crisp.
- While the crust is cooling, place the 3/4 cup of mini marshmallows on a baking sheet that has been lined with a Silpat baking mat. Turn the oven on broil. Place the pan under the broiler and broil for 2 minutes or until the marshmallows are slightly toasted. Make sure you watch the marshmallows closely, it won't take them long to toast. Remove marshmallows from oven and let cool. When cool, carefully remove the marshmallows. They will be sticky, but should peel back from the Silpat. You can use a spatula or your hands.: As the crust bakes, you'll notice a toasty smell and the crumbs will set, becoming golden brown at the edges. Cooling on a wire rack prevents steam from softening the base, preserving crispness. If you skip cooling, the warm crust can melt the ice cream filling and cause textural problems. A frequent error is slicing the timing short, leaving a soft center that cannot support the filling.
- In a large bowl, combine the softened vanilla ice cream, chopped chocolate, chopped graham crackers, toasted mini marshmallows. Stir until well combined. Pour ice cream into graham cracker pie crust. Smooth with a spatula. Freeze the pie for 3 hours or until the pie is completely solid.: Broiling concentrates sugars in the mini marshmallows , creating browned surfaces that taste caramelized and smoky. The visual sign is a pale golden top with tiny browned spots. Because marshmallows can char quickly, stay close and watch for gentle browning rather than deep blackening. A typical mishap is leaving them unattended, which can turn flavor from toasty to bitter in moments.
- When ready to serve, top the S'mores Ice Cream pie with the remaining mini marshmallows. Use a culinary or chef's torch to toast the tops of the marshmallows. Do this carefully. The marshmallows will toast quickly. You want to just barely toast them.: As you fold these elements into softened vanilla ice cream , the mixture will become creamy and streaked with chocolate and bits of graham cracker . The aroma will be cool and sweet with warm toasted notes from the marshmallows. Smoothing with a spatula gives a uniform top that will freeze evenly; rough peaks can trap air and form ice crystals. If the ice cream is too hard to stir, let it soften briefly at room temperature for just a minute, but avoid letting it become runny or you risk a loose filling that takes much longer to freeze.
- Cut the pie into slices and serve! Enjoy!: Toasting with a torch creates immediate visual drama and a crisp, slightly charred exterior on the top layer of mini marshmallows while keeping the interior cold. Watch for quick golden spots to appear, and move the flame steadily to avoid burning. If you don't have a torch, a quick broil works but increases the chance of warming the filling. A common slip is torching too long in one spot which causes blackened marshmallow instead of an even golden top.
- Note – to make the graham cracker crumbs, use a food processor or put the graham crackers in a Ziploc bag and smash with a rolling pin. The pie will keep in the freezer, covered with plastic wrap, for one week.: The first cut should reveal clean layers contrast between the firm crust and the frozen filling, studded with chocolate and toasted marshmallow bits. Serve immediately so guests experience the warm toasted top against the cold interior. Waiting too long lets the toasted marshmallows lose their crisp exterior and the pie may soften, changing the intended texture balance.
- Note – to make the graham cracker crumbs, use a food processor or put the graham crackers in a Ziploc bag and smash with a rolling pin. The pie will keep in the freezer, covered with plastic wrap, for one week.: Crushing crackers by hand yields a satisfying rustic texture and you can control chunk size visually. If you process them too long in a food processor, they turn into dust which alters the crust's mouthfeel. For storage, wrapping tightly prevents freezer burn and flavor transfer. A common oversight is leaving the pie exposed in the freezer, which can dull the bright toasted notes and make the crust chewy.
Tips for Success
I rely on a few practical habits to get consistent results with S’mores Ice Cream Pie. The tips below cover timing, texture, and safe handling so your pie arrives at the table with crisp edges, a solid filling, and a perfectly toasted top.
- Use room temperature butter for the crust: It mixes evenly with the graham cracker crumbs and prevents clumps, giving a uniform texture when pressed into the pan.
- Soften ice cream just enough: Let vanilla ice cream sit out for a few minutes until it is scoopable but not melted, which makes folding mix ins easier without becoming soupy.
- Toast marshmallows in two stages: Toast some in advance under the broiler for flavor inside the filling, then toast remaining on top at the end with a torch for presentation and contrast.
- Press the crust firmly: Use the flat bottom of a measuring cup to compact the crumb mixture so the crust is stable and resists crumbling when sliced.
- Freeze on a flat surface: Place the pie on a level shelf in the freezer so it sets evenly, preventing tilting and textural inconsistency.
- Protect against freezer odors: Wrap the pie well in plastic wrap or an airtight container to preserve clean flavors and avoid odor transfer.
Serving Options for S’mores Ice Cream Pie
This pie is versatile and makes a great finale for casual gatherings or a cozy family treat. Here are several ways I like to serve it, depending on the occasion and who is at the table.
- Classic party slices: Cut into wedges and plate with a small extra sprinkle of crushed graham cracker crumbs for texture, perfect for summer potlucks or BBQs.
- After dinner dessert: Serve a thinner slice alongside a hot beverage, letting guests enjoy the contrast between the toasted top and the icy interior.
- Family style: Place the pie whole in the center of the table and let everyone help themselves, ideal for casual dinners or holiday gatherings.
- Picnic friendly: Keep the pie frozen in a cooler for an outdoor lunch, then torch the marshmallow topping briefly before serving if you have a portable torch.
- Make ahead convenience: Freeze the assembled pie up to one week, then finish toasting the top minutes before serving to maintain that fresh toasted flavor.
- Seasonal pairing: This shines in summer when people crave cold treats, and it also works well for late spring gatherings when grills and fire pits are out.
FAQ
Conclusion
S’mores Ice Cream Pie shines because it blends nostalgic flavors with a simple, reliable technique that delivers contrast in every bite. I encourage you to make it for your next gathering, because it’s forgiving to prepare ahead and dramatic to finish with a torch or quick broil. Serve it straight from the freezer, enjoy the interplay of crunchy crust, cold creamy filling, and warm toasted marshmallow, and notice how such basic pantry ingredients can create a memorable dessert that brings people together.
S'mores Ice Cream Pie
Equipment
- 9-inch pie pan
- Mixing Bowl
- Measuring Cup
- Spatula
- Baking Sheet
- Silpat or baking mat
- wire cooling rack
- Chef's torch
Ingredients
- 1 1/2 cups Annie's Honey Graham Cracker crumbs about 10 full sheet graham crackers Crushed to form the pie crust base, providing a sweet, crunchy foundation that holds together when mixed with melted butter. Enhances classic s'mores flavor with a honeyed graham profile and a pleasant texture contrast to the creamy filling.
- 6 tablespoons unsalted butter melted Melted to bind the graham cracker crumbs into a cohesive crust, delivering rich flavor and a tender bite. Adds necessary fat to set the crust firmly once chilled, ensuring easy slicing and serving.
- 1/4 cup granulated sugar Added to the crust mixture to balance sweetness and help with slight caramelization during refrigeration or brief torching. Enhances overall flavor complexity while supporting the structural integrity of the crust.
- 3/4 cup mini marshmallows Scattered into the filling to add chewy, melty pockets reminiscent of campfire s'mores, contributing lightness and tiny bursts of sweetness. Toasting or briefly broiling after assembly can create a golden exterior and amplify toasted marshmallow aroma.
- 3 cups vanilla ice cream softened Softened to a scoopable consistency for easy folding and spreading into the crust, forming the creamy ice cream filling that defines the pie. Provides the primary cold, smooth texture and vanilla flavor that contrasts the crunchy crust and melty chocolate.
- 1 cup chopped chocolate bars Folded into the ice cream filling to introduce rich, chocolatey chunks and deepen the s'mores character of the pie. Melts slightly when assembled, creating ribbons of chocolate and adding textural variety.
- 1/2 cup chopped Annie's Honey Graham Crackers Chopped to sprinkle through the filling or along the edges for additional graham texture and intensified honey flavor, echoing the crust components. Offers extra crunch and visual appeal when mixed into the ice cream.
- 1 1/2 cups mini marshmallows Layered on top or mixed into the filling to amplify marshmallow flavor and create a pillowy, toasted topping when broiled briefly. Provides volume, chewiness, and the signature s'mores finish that complements chocolate and graham elements.
Instructions
- Preheat oven to 350 degrees F.: The kitchen will warm slightly and you may catch a gentle scent of heated air, which signals the oven is getting ready to brown the crust properly. Preheating ensures the crust begins to set immediately, giving you a uniformly baked shell rather than one that bakes unevenly. One common mistake is not allowing the oven to fully reach temperature, which can leave the crust underbaked and crumbly instead of firm enough to hold the filling.
- In a medium bowl, combine graham cracker crumbs, melted butter, and sugar. Mix until combined. Press the mixture into a 9-inch pie pan. Make sure the crust goes up the sides of the pie pan. I like to use the bottom of a measuring cup to press the mixture into the pan. Bake the pie crust for 8-10 minutes. Remove from oven and let the crust cool completely on a wire cooling rack.: When you mix the crumbs with warm butter , the aroma shifts to toasted and nutty, and the texture moves from loose sand to a slightly tacky mixture that will clump when pressed. Pressing firmly with a flat tool creates compact layers that resist sogginess from the filling. The visual cue is a smooth, even surface and clean edges along the pan. Avoid packing too hard, which can make the crust feel dense instead of pleasantly crisp.
- While the crust is cooling, place the 3/4 cup of mini marshmallows on a baking sheet that has been lined with a Silpat baking mat. Turn the oven on broil. Place the pan under the broiler and broil for 2 minutes or until the marshmallows are slightly toasted. Make sure you watch the marshmallows closely, it won't take them long to toast. Remove marshmallows from oven and let cool. When cool, carefully remove the marshmallows. They will be sticky, but should peel back from the Silpat. You can use a spatula or your hands.: As the crust bakes, you'll notice a toasty smell and the crumbs will set, becoming golden brown at the edges. Cooling on a wire rack prevents steam from softening the base, preserving crispness. If you skip cooling, the warm crust can melt the ice cream filling and cause textural problems. A frequent error is slicing the timing short, leaving a soft center that cannot support the filling.
- In a large bowl, combine the softened vanilla ice cream, chopped chocolate, chopped graham crackers, toasted mini marshmallows. Stir until well combined. Pour ice cream into graham cracker pie crust. Smooth with a spatula. Freeze the pie for 3 hours or until the pie is completely solid.: Broiling concentrates sugars in the mini marshmallows , creating browned surfaces that taste caramelized and smoky. The visual sign is a pale golden top with tiny browned spots. Because marshmallows can char quickly, stay close and watch for gentle browning rather than deep blackening. A typical mishap is leaving them unattended, which can turn flavor from toasty to bitter in moments.
- When ready to serve, top the S'mores Ice Cream pie with the remaining mini marshmallows. Use a culinary or chef's torch to toast the tops of the marshmallows. Do this carefully. The marshmallows will toast quickly. You want to just barely toast them.: As you fold these elements into softened vanilla ice cream , the mixture will become creamy and streaked with chocolate and bits of graham cracker . The aroma will be cool and sweet with warm toasted notes from the marshmallows. Smoothing with a spatula gives a uniform top that will freeze evenly; rough peaks can trap air and form ice crystals. If the ice cream is too hard to stir, let it soften briefly at room temperature for just a minute, but avoid letting it become runny or you risk a loose filling that takes much longer to freeze.
- Cut the pie into slices and serve! Enjoy!: Toasting with a torch creates immediate visual drama and a crisp, slightly charred exterior on the top layer of mini marshmallows while keeping the interior cold. Watch for quick golden spots to appear, and move the flame steadily to avoid burning. If you don't have a torch, a quick broil works but increases the chance of warming the filling. A common slip is torching too long in one spot which causes blackened marshmallow instead of an even golden top.
- Note - to make the graham cracker crumbs, use a food processor or put the graham crackers in a Ziploc bag and smash with a rolling pin. The pie will keep in the freezer, covered with plastic wrap, for one week.: The first cut should reveal clean layers contrast between the firm crust and the frozen filling, studded with chocolate and toasted marshmallow bits. Serve immediately so guests experience the warm toasted top against the cold interior. Waiting too long lets the toasted marshmallows lose their crisp exterior and the pie may soften, changing the intended texture balance.
- Note - to make the graham cracker crumbs, use a food processor or put the graham crackers in a Ziploc bag and smash with a rolling pin. The pie will keep in the freezer, covered with plastic wrap, for one week.: Crushing crackers by hand yields a satisfying rustic texture and you can control chunk size visually. If you process them too long in a food processor, they turn into dust which alters the crust's mouthfeel. For storage, wrapping tightly prevents freezer burn and flavor transfer. A common oversight is leaving the pie exposed in the freezer, which can dull the bright toasted notes and make the crust chewy.
Notes
- Use room temperature butter for the crust: It mixes evenly with the graham cracker crumbs and prevents clumps, giving a uniform texture when pressed into the pan.
- Soften ice cream just enough: Let vanilla ice cream sit out for a few minutes until it is scoopable but not melted, which makes folding mix ins easier without becoming soupy.
- Toast marshmallows in two stages: Toast some in advance under the broiler for flavor inside the filling, then toast remaining on top at the end with a torch for presentation and contrast.
- Press the crust firmly: Use the flat bottom of a measuring cup to compact the crumb mixture so the crust is stable and resists crumbling when sliced.
- Freeze on a flat surface: Place the pie on a level shelf in the freezer so it sets evenly, preventing tilting and textural inconsistency.
- Protect against freezer odors: Wrap the pie well in plastic wrap or an airtight container to preserve clean flavors and avoid odor transfer.