Baked Marsala Pears
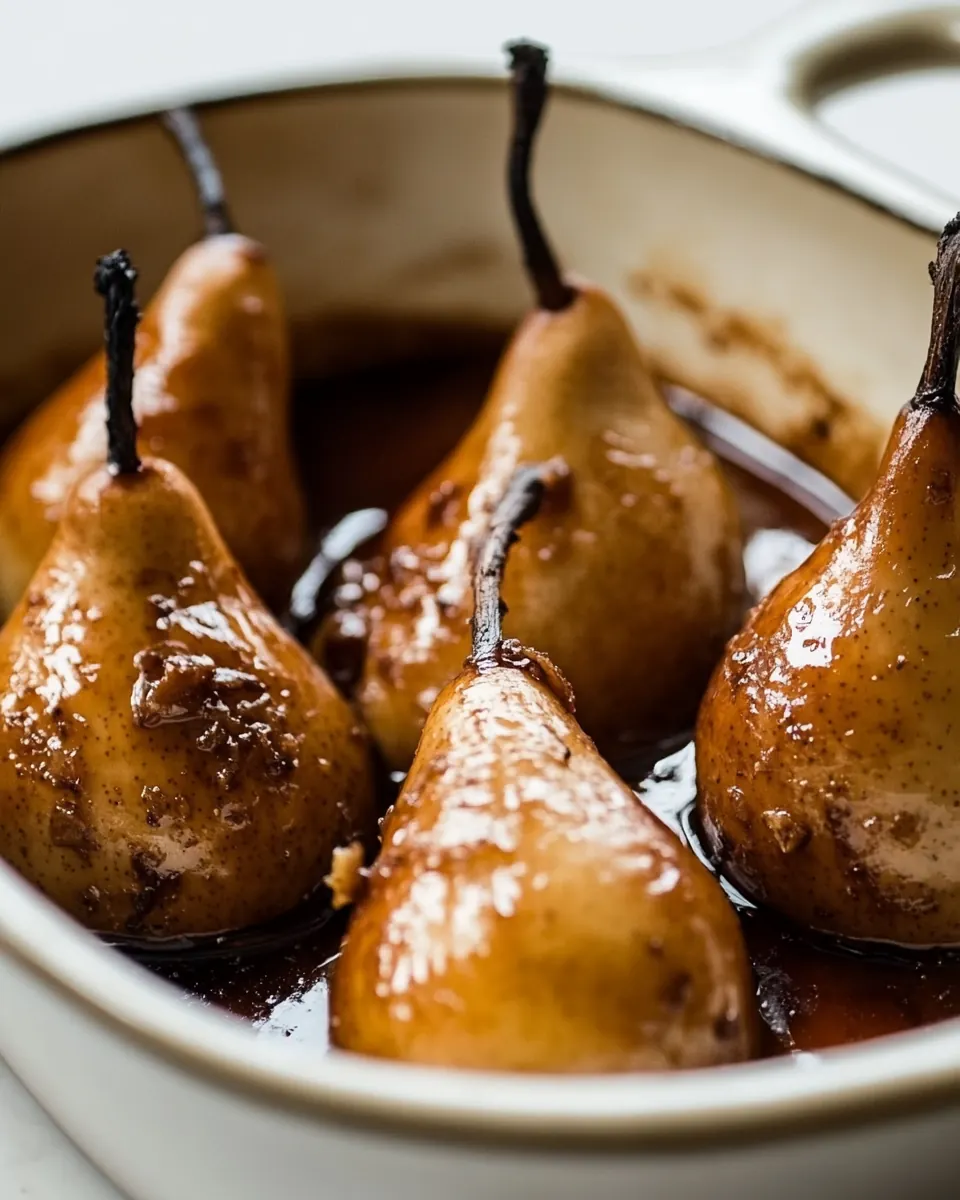
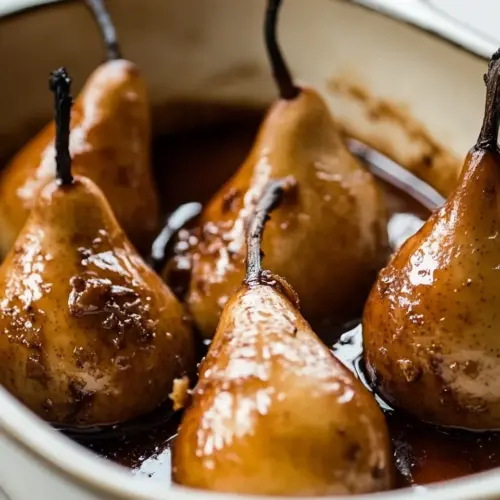
Baked Marsala Pears is one of those desserts I return to when I want something that feels special but is surprisingly simple to make. The first time I roasted pears in a warm, spiced marsala bath I was struck by how the fruit’s natural sweetness deepened into honeyed caramel, while the sauce reduced to a glossy syrup that begged to be spooned over each slice. I remember standing at the oven window, the kitchen filling with a cozy, floral aroma that made everyone wander over and ask what I was baking. It felt like a small, elegant celebration you could serve any night.
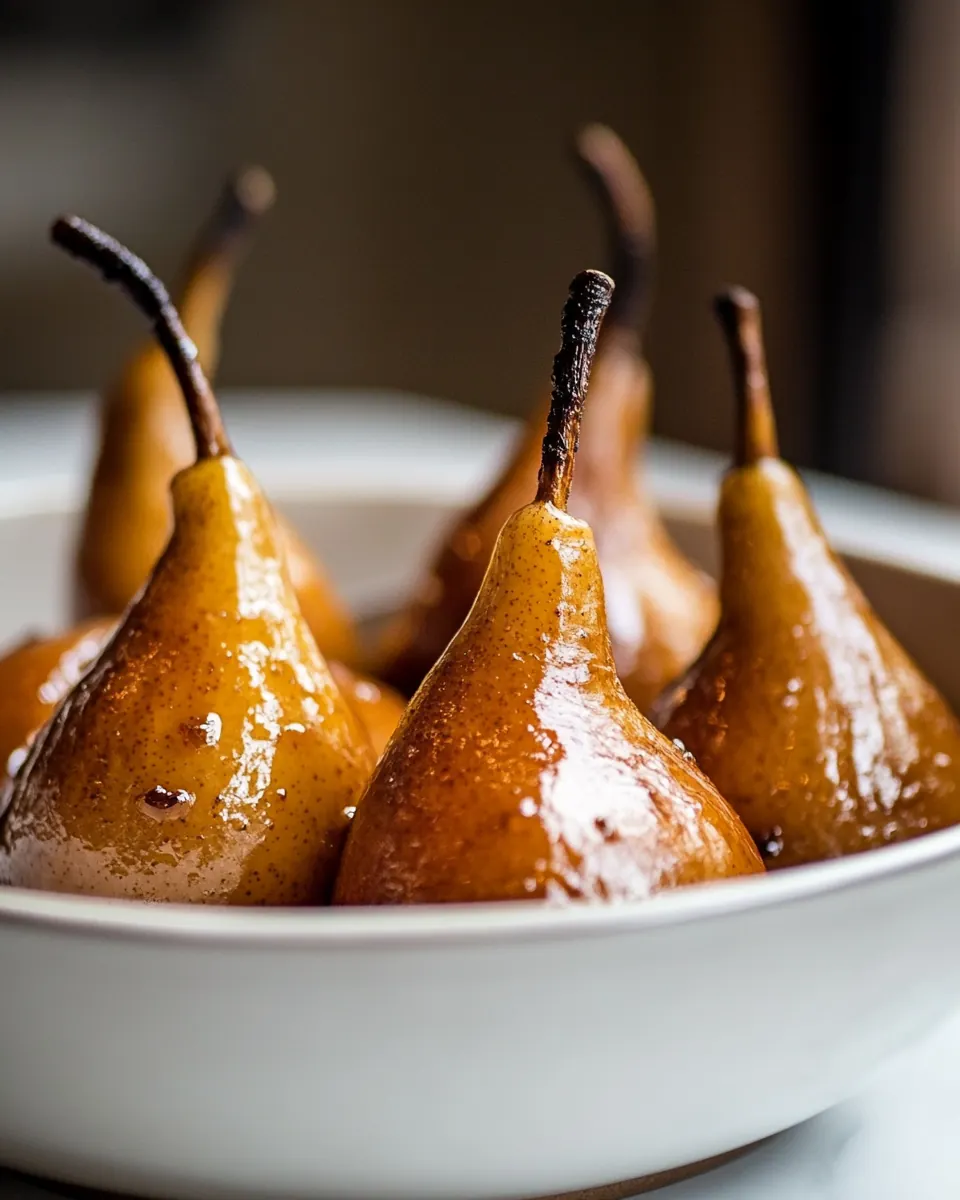
Years later I still reach for this recipe when I want to impress with minimal fuss. I like the ritual of trimming a tiny disk from the pear base so each one stands tall and proud in the dish. While they roast, the marsala loosens the pear flesh and the honey gives the sauce a warm, rounded sweetness. There is a slow unfolding to the process, a comforting patience in frequent basting, that always rewards you with tender fruit and syrup that clings to the spoon.
Whether I’m making a late autumn treat for a friend who dropped by unexpectedly, or preparing a light dessert after a big family meal, these baked pears never feel heavy. They keep their shape, they develop that beautiful, translucent sheen, and they hold a whisper of caramel on each forkful. I hope you find, as I did, that this recipe becomes one of those staples you go back to when you want something memorable but not fussy.
Recipe Snapshot
1 hr 15 mins
15 mins
60 mins
Medium
200 kcal
American
Gluten-Free, Vegan
Desserts
Baking dish, Turkey baster or spoon, Saucepan, Whisk, Knife
The Beauty of This Baked Marsala Pears
Elegant and approachable
I adore how Baked Marsala Pears delivers a restaurant worthy finish with very little technique. The recipe relies on simple steps and everyday tools, so you can create an elegant dessert without a lot of stress. I often serve it when guests drop in because it looks refined, yet it is straightforward to prepare.
Fresh fruit becomes something luxurious
One of the best things about this dish is how plain pears transform in the oven. The gentle heat concentrates their sugars and the marsala teases out floral, almost nutty notes. The result is tender, slightly jammy fruit with a syrup that feels indulgent but not cloying.
Flexible sweetness and sauce control
I love that you can tweak the sweetness level easily. The honey and sugar ratios are forgiving, so you can make the syrup lighter or richer depending on your tastes. If you want extra sauce for ice cream, the small sauce step lets you boost the glaze without any fuss.
Comforting aromas and seasonal appeal
Roasting pears in marsala fills the kitchen with warm, inviting scents that feel perfect for cooler months. I almost always make this during fall when pears are at their peak, and it pairs beautifully with cozy gatherings, quiet dinners, or when I want a dessert that is both comforting and a little refined.
Make ahead friendly
Another reason I return to Baked Marsala Pears is that the sauce can be made ahead and refrigerated. That small convenience means you can prep part of the recipe in advance, freeing up time on the day you serve it. I often make the sauce a day ahead, so on the night of the meal I only need to roast and baste the fruit.
What Goes Into Baked Marsala Pears
These ingredients are chosen to coax out maximum flavor from simple fruit. The key players are the firm ripe pears that hold their shape, the marsala that provides depth and a slightly nutty sweetness, and honey and sugar which caramelize and thicken into a glossy sauce. Each element works together to enhance texture, aroma, and balance.
- 8 firm ripe pears, (see headnote for varieties): Peel and core before baking; provides the primary fruit base and texture for the dish while absorbing Marsala and sweeteners, yielding tender, flavorful pears.
- 1 cup (250 ml) sweet or dry marsala: Enhance and deglaze with aromatics; adds a fortified wine character and depth, contributing both sweetness and a subtle nutty, dried-fruit note to the poaching liquid.
- 1 tablespoon honey: Brush or drizzle for glazing; supplies natural sweetness and shine, helping form a glossy finish and balancing the wine’s acidity.
- 1/4 cup (50 g) sugar: Sprinkle to sweeten and caramelize; adds granulated sweetness that helps create a lightly caramelized surface during baking and balances the overall flavor.
- 1 1/2 cups (375 ml) marsala: Pour as the main braising liquid; supplies additional fortified wine to ensure pears cook evenly and infuse a rich, concentrated Marsala flavor into the dessert.
- 1 tablespoon corn starch: Dissolve and thicken the sauce; absorbs moisture and stabilizes the Marsala liquid into a silky, slightly thickened sauce that clings to the pears.
- 1/2 cup (130 g) plus 2 tablespoons sugar: Sweeten and finish for texture; provides additional granulated sugar to adjust sweetness and encourage caramelization, contributing to a glossy, slightly crunchy topping.
The Process for Making Baked Marsala Pears
Roasting these pears is ritual like and gratifying. I will walk you through each stage so you can sense when the fruit is perfectly tender and the sauce has the ideal sheen. Keep a basting tool handy and plan to check the pears closely as they soften.
- Preheat the oven to 375ºF (190ºC).: The warm, bakery like scent that greets you as the oven comes to temperature is a good sign the kitchen will be ready to transform the pears . Setting an accurate oven temperature matters because too hot will brown the outsides before the inside softens, and too cool will extend the cooking time and yield less caramelization. A common misstep is not preheating long enough, which leads to uneven cooking; wait until the oven reaches the full temperature before placing the dish inside.
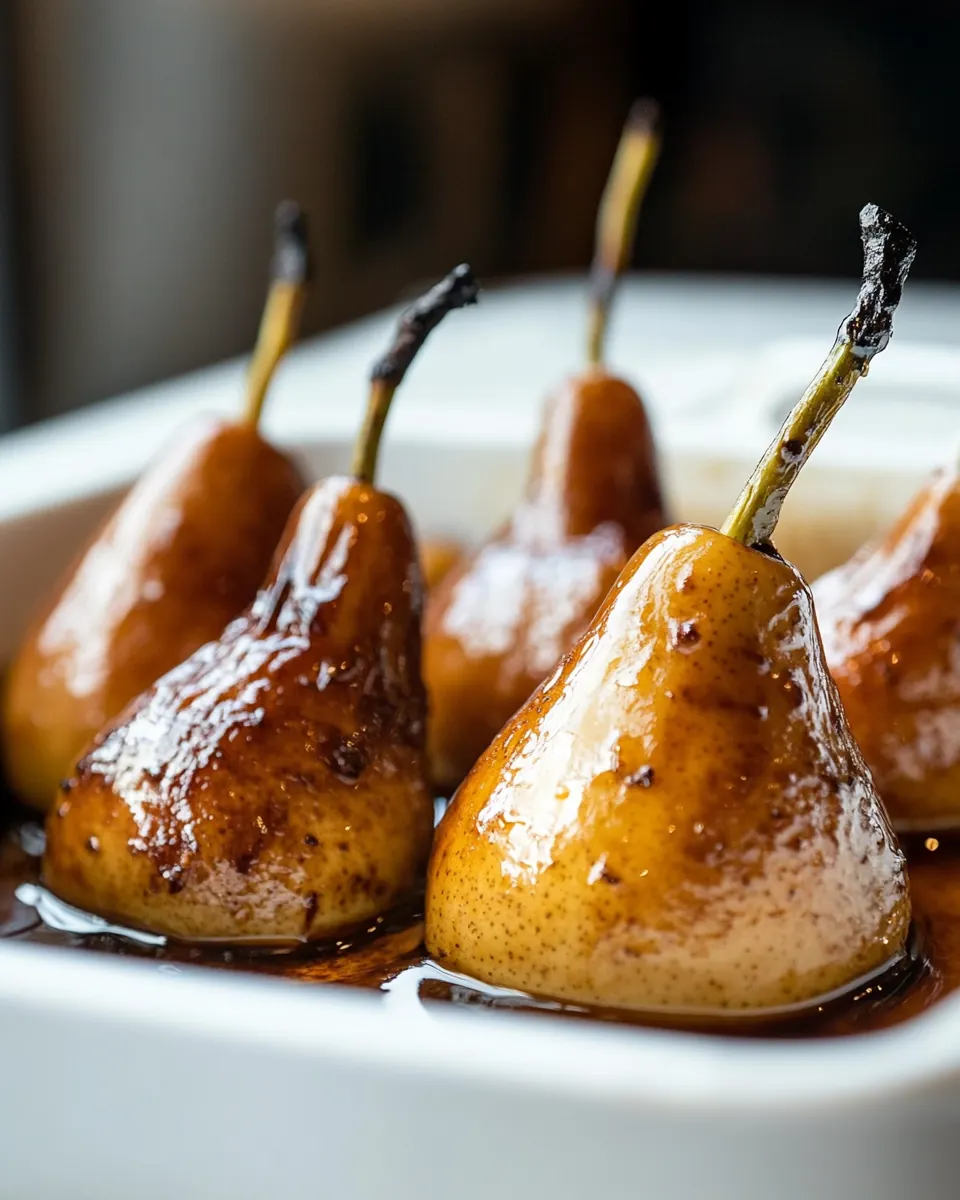
- Trim a disk off the bottom of each pear, providing a flat bottom so you can stand the pears up in a baking dish. Fit the pears in a baking dish that’s big enough to hold them all, without a great deal of room around them.: You will feel the satisfying stability when each pear sits upright like a little tower. This step helps them cook evenly and soak up the sauce around the base. If you cut too much you risk exposing the seed cavity and making the pear unstable. Use a sharp knife and remove only a thin slice for balance.
- Pour the marsala over the pears, then drizzle the honey over them. Sprinkle the sugar over the pears.: When the pears are snug but not crowded they roast uniformly and the sauce pools beautifully. Too much space allows the sauce to spread too thin, reducing contact with the fruit. Conversely, overfilling the pan makes it hard to baste each pear properly. Choose a dish that holds the liquid around the bases comfortably.
- Bake the pears, basting them frequently with the liquid (I use a turkey baster, although a soup spoon will work) as they cook. I usually baste them more frequently closer to the end of the cooking time, when the sauce thickens to a syrup.: As the marsala meets the fruit you will notice a glossy sheen and a floral aroma rising from the dish. The honey adds depth and encourages caramelization. Pour evenly so each pear gets an aromatic bath. A frequent oversight is pouring unevenly which causes some pears to remain dry on one side.
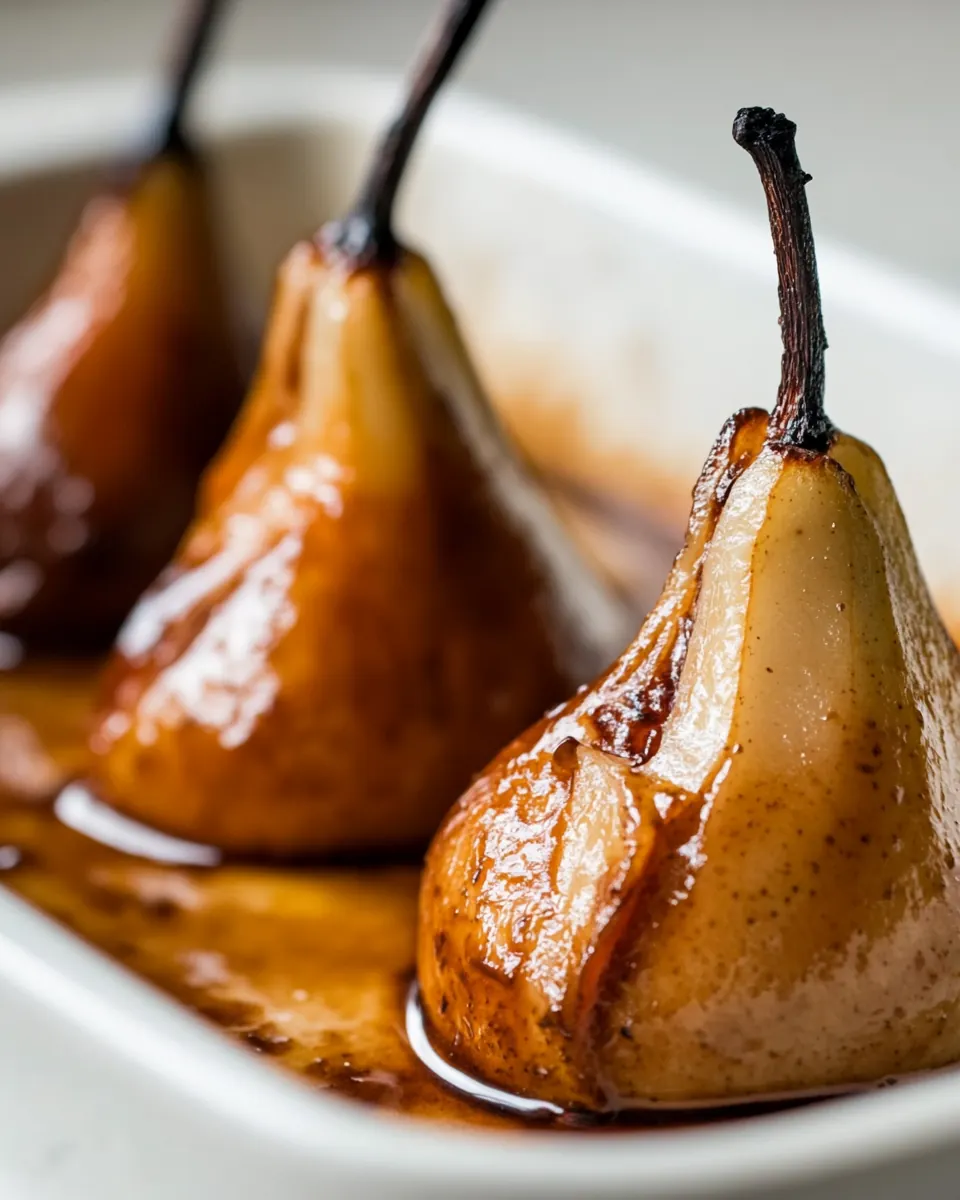
- Cook the pears until a paring knife inserted into one meets no resistance, meaning the pears are cooked through. They should take between 50 and 60 minutes to cook, although because fruit can vary (due to variety and ripeness), check them before the recommended time. And if necessary, they may take longer.: The sugar will melt and begin to form a delicate crust as the liquid reduces, adding texture and a deep color to the tops. I like to sprinkle sparingly at first and adjust later if I want more glaze. If you add too much too early you may end up with burnt edges as the sugars concentrate; monitor the baking closely.
- Remove from oven and continue to baste the pears, as they cool. Serve warm or at room temperature.: The sound of the sauce gently bubbling and the sight of syrup clinging to a spoon are the most rewarding cues here. Basting keeps the surface moist and ensures the sauce infuses the flesh. Near the end, as the sauce thickens, baste more often to build glossy layers. A common mistake is forgetting to baste, which leaves the tops dry and prevents even caramelization.
- Although cooking the pears this way provides some sauce, if you want extra (especially if you are serving them with ice cream), you can use this recipe to make more: Mix a few tablespoons of the marsala with the corn starch in a saucepan, stirring until the corn starch is completely dissolved. Whisk in the sugar, then the rest of the marsala. Bring the mixture to a boil, stirring frequently with the whisk. When the sauce begins to boil, reduce the heat and cook for about 1 1/2 minutes, stirring constantly with the whisk, until it noticeably thickens to the consistency of warmed maple syrup. Remove from heat. The sauce will thicken more as it cools. (The sauce can be made up to one week ahead and refrigerated.): Using a tool to lift and pour warm syrup over the pears creates a shiny, sticky coating that highlights the fruit’s contours. A baster is especially good at reaching the base where the sauce pools. If you try to skip this, the pears may roast without absorbing enough sauce, resulting in drier texture.
- Cook the pears until a paring knife inserted into one meets no resistance meaning the pears are cooked through: When the tip of a knife glides tenderly into the flesh you know the fruit is perfect, neither raw nor mushy. The exterior should look translucent and slightly caramelized. Under baking leaves the core firm, while over baking turns the flesh mealy, so check early if your fruit seems riper than expected.
- They should take between 50 and 60 minutes to cook although because fruit can vary due to variety and ripeness check them before the recommended time: The kitchen will fill with a warm, honeyed aroma as sugars concentrate. Timing depends on pear size and starting firmness, so use visual cues and the knife test rather than the clock alone. A usual error is relying strictly on time which can either undercook or over soften the pears.
- And if necessary they may take longer: If the pears resist the knife, continue roasting and test every 10 minutes; patience pays off with evenly tender fruit. Extending the bake also intensifies the sauce, so watch the color to avoid burning. Pushing the oven too high to speed things up will brown the outside before the core softens.
- Remove from oven and continue to baste the pears as they cool Serve warm or at room temperature: As the pears rest the sauce thickens and clings even more, creating a silky glaze. Serving warm makes the aroma more pronounced, while room temperature mellows the flavors for a gentler finish. A common misstep is serving them straight from piping hot oven which can make the sauce run too freely; allow a short rest so it sets slightly.
- Although cooking the pears this way provides some sauce if you want extra especially if you are serving them with ice cream you can use this recipe to make more: The bonus sauce step gives you a deeper, spoonable glaze that pairs beautifully with cold accompaniments. Making extra ensures you do not run out when plating and allows for a silky drizzle. Skipping this may leave you with a thinner syrup that does not coat ice cream as luxuriously.
- Mix a few tablespoons of the marsala with the corn starch in a saucepan stirring until the corn starch is completely dissolved: The first whisking yields a pale, smooth slurry that prevents lumps in the hot pan. This step primes the mixture for a glossy finish. A typical error is adding the corn starch directly to heat which forms gritty clumps; dissolving it first avoids that.
- Whisk in the sugar then the rest of the marsala: As the sugar dissolves the mixture brightens and the pan begins to steam with fragrant vapors. Adding the remaining marsala balances sweetness and keeps the sauce fluid before boiling. If you pour cold liquid into hot paste, you may see curdling or separation, so add slowly and whisk constantly.
- Bring the mixture to a boil stirring frequently with the whisk: The sauce will begin to bubble and smell richly of caramelized grapes. Stirring prevents scorching and ensures even thickening. Letting it boil unattended risks burning and an acrid taste, which is a common pitfall here.
- When the sauce begins to boil reduce the heat and cook for about 1 1/2 minutes stirring constantly with the whisk until it noticeably thickens to the consistency of warmed maple syrup: The rapid change from thin to syrup like happens quickly, and the visual cue of it coating the whisk tells you it is ready. Remove promptly to avoid over thickening. A frequent mistake is overcooking which yields a paste like texture once cooled.
- Remove from heat The sauce will thicken more as it cools The sauce can be made up to one week ahead and refrigerated: Cooling concentrates the body further, so plan for slightly looser sauce while hot. Storing the sauce gives you lovely convenience; rewarm gently before serving. Avoid reheating aggressively which can thin the sauce or change its flavor profile.
Tips and Variations
Below are practical tips I use every time I make Baked Marsala Pears. They cover ingredient choices, timing, and simple variations that maintain the recipe’s integrity while letting you adapt it to what you have on hand.
- Choose the right pear Select a variety that is ripe but firm; they should yield slightly to pressure near the stem but not be soft. This ensures the pear will hold its shape while the interior becomes tender and translucent.
- Adjust marsala style Sweet marsala will create a deeper, more dessert like sauce while dry marsala keeps the flavor more restrained. Pick according to how sweet you want the final dish to be.
- Control sweetness Taste the sauce as it reduces and adjust the sugar or honey to suit your preference; remember the fruit itself contributes natural sweetness and syrup will concentrate as it cools.
- Baste with purpose Use a turkey baster or spoon to scoop warm sauce and pour it over the pears frequently; this builds layers of glaze and prevents any area from drying out during the roast.
- Make sauce ahead The marsala glaze can be made up to one week in advance and refrigerated; gently reheat before serving to restore its pouring consistency, stirring to recombine if separated.
What Complements This Baked Marsala Pears
This dessert pairs wonderfully with creamy, cool accompaniments and simple garnishes. Below I outline serving suggestions, occasion ideas, and storage tips to help you present these Baked Marsala Pears beautifully. Use the list to mix and match depending on whether you want something casual or more celebratory.
- Serve with vanilla ice cream A scoop of cold vanilla ice cream contrasts the warm pear and glossy sauce, creating a perfect hot and cold interplay on the plate.
- Plate with mascarpone or crème fraîche A dollop of lightly sweetened mascarpone adds a creamy tang that balances the syrupy pear.
- For a lighter finish Serve the pears at room temperature with a scattering of toasted nuts for crunch and texture contrast.
- Occasion pairings These pears are lovely for intimate dinners, holiday meals in fall, or a relaxed weekend dessert when you want something seasonal and comforting.
- Storage tips Store leftover pears and sauce separately in airtight containers in the refrigerator for up to three days; rewarm gently to serve, the sauce may thicken and benefit from a splash of marsala or water when reheating.
- Presentation ideas Serve the pears standing upright in shallow bowls, spoon the warm sauce over them at the table, and consider a few mint leaves or citrus zest as a bright finishing note if desired.
FAQ
Conclusion
Baked Marsala Pears shine because they turn humble fruit into a refined, syrup kissed dessert with minimal effort. The balance of tender pear flesh and a glossy marsala and honey syrup creates a comforting yet elegant finish that works for weeknights and small celebrations alike. Give these pears a try next time you want a dessert that feels special without being complicated; you may find they become a go to in your seasonal repertoire. Enjoy the warm aromas, the silky sauce, and the pleasure of serving something both simple and memorable.
Baked Marsala Pears
Equipment
- Baking Dish
- Turkey baster or spoon
- Saucepan
- Whisk
- Knife
Ingredients
- 8 firm ripe pears, (see headnote for varieties) Peel and core before baking; provides the primary fruit base and texture for the dish while absorbing Marsala and sweeteners, yielding tender, flavorful pears.
- 1 cup (250 ml) sweet or dry marsala Enhance and deglaze with aromatics; adds a fortified wine character and depth, contributing both sweetness and a subtle nutty, dried-fruit note to the poaching liquid.
- 1 tablespoon honey Brush or drizzle for glazing; supplies natural sweetness and shine, helping form a glossy finish and balancing the wine’s acidity.
- 1/4 cup (50 g) sugar Sprinkle to sweeten and caramelize; adds granulated sweetness that helps create a lightly caramelized surface during baking and balances the overall flavor.
- 1 1/2 cups (375 ml) marsala Pour as the main braising liquid; supplies additional fortified wine to ensure pears cook evenly and infuse a rich, concentrated Marsala flavor into the dessert.
- 1 tablespoon corn starch Dissolve and thicken the sauce; absorbs moisture and stabilizes the Marsala liquid into a silky, slightly thickened sauce that clings to the pears.
- 1/2 cup (130 g) plus 2 tablespoons sugar Sweeten and finish for texture; provides additional granulated sugar to adjust sweetness and encourage caramelization, contributing to a glossy, slightly crunchy topping.
Instructions
- Preheat the oven to 375ºF (190ºC).: The warm, bakery like scent that greets you as the oven comes to temperature is a good sign the kitchen will be ready to transform the pears . Setting an accurate oven temperature matters because too hot will brown the outsides before the inside softens, and too cool will extend the cooking time and yield less caramelization. A common misstep is not preheating long enough, which leads to uneven cooking; wait until the oven reaches the full temperature before placing the dish inside.
- Trim a disk off the bottom of each pear, providing a flat bottom so you can stand the pears up in a baking dish. Fit the pears in a baking dish that’s big enough to hold them all, without a great deal of room around them.: You will feel the satisfying stability when each pear sits upright like a little tower. This step helps them cook evenly and soak up the sauce around the base. If you cut too much you risk exposing the seed cavity and making the pear unstable. Use a sharp knife and remove only a thin slice for balance.
- Pour the marsala over the pears, then drizzle the honey over them. Sprinkle the sugar over the pears.: When the pears are snug but not crowded they roast uniformly and the sauce pools beautifully. Too much space allows the sauce to spread too thin, reducing contact with the fruit. Conversely, overfilling the pan makes it hard to baste each pear properly. Choose a dish that holds the liquid around the bases comfortably.
- Bake the pears, basting them frequently with the liquid (I use a turkey baster, although a soup spoon will work) as they cook. I usually baste them more frequently closer to the end of the cooking time, when the sauce thickens to a syrup.: As the marsala meets the fruit you will notice a glossy sheen and a floral aroma rising from the dish. The honey adds depth and encourages caramelization. Pour evenly so each pear gets an aromatic bath. A frequent oversight is pouring unevenly which causes some pears to remain dry on one side.
- Cook the pears until a paring knife inserted into one meets no resistance, meaning the pears are cooked through. They should take between 50 and 60 minutes to cook, although because fruit can vary (due to variety and ripeness), check them before the recommended time. And if necessary, they may take longer.: The sugar will melt and begin to form a delicate crust as the liquid reduces, adding texture and a deep color to the tops. I like to sprinkle sparingly at first and adjust later if I want more glaze. If you add too much too early you may end up with burnt edges as the sugars concentrate; monitor the baking closely.
- Remove from oven and continue to baste the pears, as they cool. Serve warm or at room temperature.: The sound of the sauce gently bubbling and the sight of syrup clinging to a spoon are the most rewarding cues here. Basting keeps the surface moist and ensures the sauce infuses the flesh. Near the end, as the sauce thickens, baste more often to build glossy layers. A common mistake is forgetting to baste, which leaves the tops dry and prevents even caramelization.
- Although cooking the pears this way provides some sauce, if you want extra (especially if you are serving them with ice cream), you can use this recipe to make more: Mix a few tablespoons of the marsala with the corn starch in a saucepan, stirring until the corn starch is completely dissolved. Whisk in the sugar, then the rest of the marsala. Bring the mixture to a boil, stirring frequently with the whisk. When the sauce begins to boil, reduce the heat and cook for about 1 1/2 minutes, stirring constantly with the whisk, until it noticeably thickens to the consistency of warmed maple syrup. Remove from heat. The sauce will thicken more as it cools. (The sauce can be made up to one week ahead and refrigerated.): Using a tool to lift and pour warm syrup over the pears creates a shiny, sticky coating that highlights the fruit’s contours. A baster is especially good at reaching the base where the sauce pools. If you try to skip this, the pears may roast without absorbing enough sauce, resulting in drier texture.
- Cook the pears until a paring knife inserted into one meets no resistance meaning the pears are cooked through: When the tip of a knife glides tenderly into the flesh you know the fruit is perfect, neither raw nor mushy. The exterior should look translucent and slightly caramelized. Under baking leaves the core firm, while over baking turns the flesh mealy, so check early if your fruit seems riper than expected.
- They should take between 50 and 60 minutes to cook although because fruit can vary due to variety and ripeness check them before the recommended time: The kitchen will fill with a warm, honeyed aroma as sugars concentrate. Timing depends on pear size and starting firmness, so use visual cues and the knife test rather than the clock alone. A usual error is relying strictly on time which can either undercook or over soften the pears.
- And if necessary they may take longer: If the pears resist the knife, continue roasting and test every 10 minutes; patience pays off with evenly tender fruit. Extending the bake also intensifies the sauce, so watch the color to avoid burning. Pushing the oven too high to speed things up will brown the outside before the core softens.
- Remove from oven and continue to baste the pears as they cool Serve warm or at room temperature: As the pears rest the sauce thickens and clings even more, creating a silky glaze. Serving warm makes the aroma more pronounced, while room temperature mellows the flavors for a gentler finish. A common misstep is serving them straight from piping hot oven which can make the sauce run too freely; allow a short rest so it sets slightly.
- Although cooking the pears this way provides some sauce if you want extra especially if you are serving them with ice cream you can use this recipe to make more: The bonus sauce step gives you a deeper, spoonable glaze that pairs beautifully with cold accompaniments. Making extra ensures you do not run out when plating and allows for a silky drizzle. Skipping this may leave you with a thinner syrup that does not coat ice cream as luxuriously.
- Mix a few tablespoons of the marsala with the corn starch in a saucepan stirring until the corn starch is completely dissolved: The first whisking yields a pale, smooth slurry that prevents lumps in the hot pan. This step primes the mixture for a glossy finish. A typical error is adding the corn starch directly to heat which forms gritty clumps; dissolving it first avoids that.
- Whisk in the sugar then the rest of the marsala: As the sugar dissolves the mixture brightens and the pan begins to steam with fragrant vapors. Adding the remaining marsala balances sweetness and keeps the sauce fluid before boiling. If you pour cold liquid into hot paste, you may see curdling or separation, so add slowly and whisk constantly.
- Bring the mixture to a boil stirring frequently with the whisk: The sauce will begin to bubble and smell richly of caramelized grapes. Stirring prevents scorching and ensures even thickening. Letting it boil unattended risks burning and an acrid taste, which is a common pitfall here.
- When the sauce begins to boil reduce the heat and cook for about 1 1/2 minutes stirring constantly with the whisk until it noticeably thickens to the consistency of warmed maple syrup: The rapid change from thin to syrup like happens quickly, and the visual cue of it coating the whisk tells you it is ready. Remove promptly to avoid over thickening. A frequent mistake is overcooking which yields a paste like texture once cooled.
- Remove from heat The sauce will thicken more as it cools The sauce can be made up to one week ahead and refrigerated: Cooling concentrates the body further, so plan for slightly looser sauce while hot. Storing the sauce gives you lovely convenience; rewarm gently before serving. Avoid reheating aggressively which can thin the sauce or change its flavor profile.
Notes
- Choose the right pear Select a variety that is ripe but firm; they should yield slightly to pressure near the stem but not be soft. This ensures the pear will hold its shape while the interior becomes tender and translucent.
- Adjust marsala style Sweet marsala will create a deeper, more dessert like sauce while dry marsala keeps the flavor more restrained. Pick according to how sweet you want the final dish to be.
- Control sweetness Taste the sauce as it reduces and adjust the sugar or honey to suit your preference; remember the fruit itself contributes natural sweetness and syrup will concentrate as it cools.
- Baste with purpose Use a turkey baster or spoon to scoop warm sauce and pour it over the pears frequently; this builds layers of glaze and prevents any area from drying out during the roast.
- Make sauce ahead The marsala glaze can be made up to one week in advance and refrigerated; gently reheat before serving to restore its pouring consistency, stirring to recombine if separated.