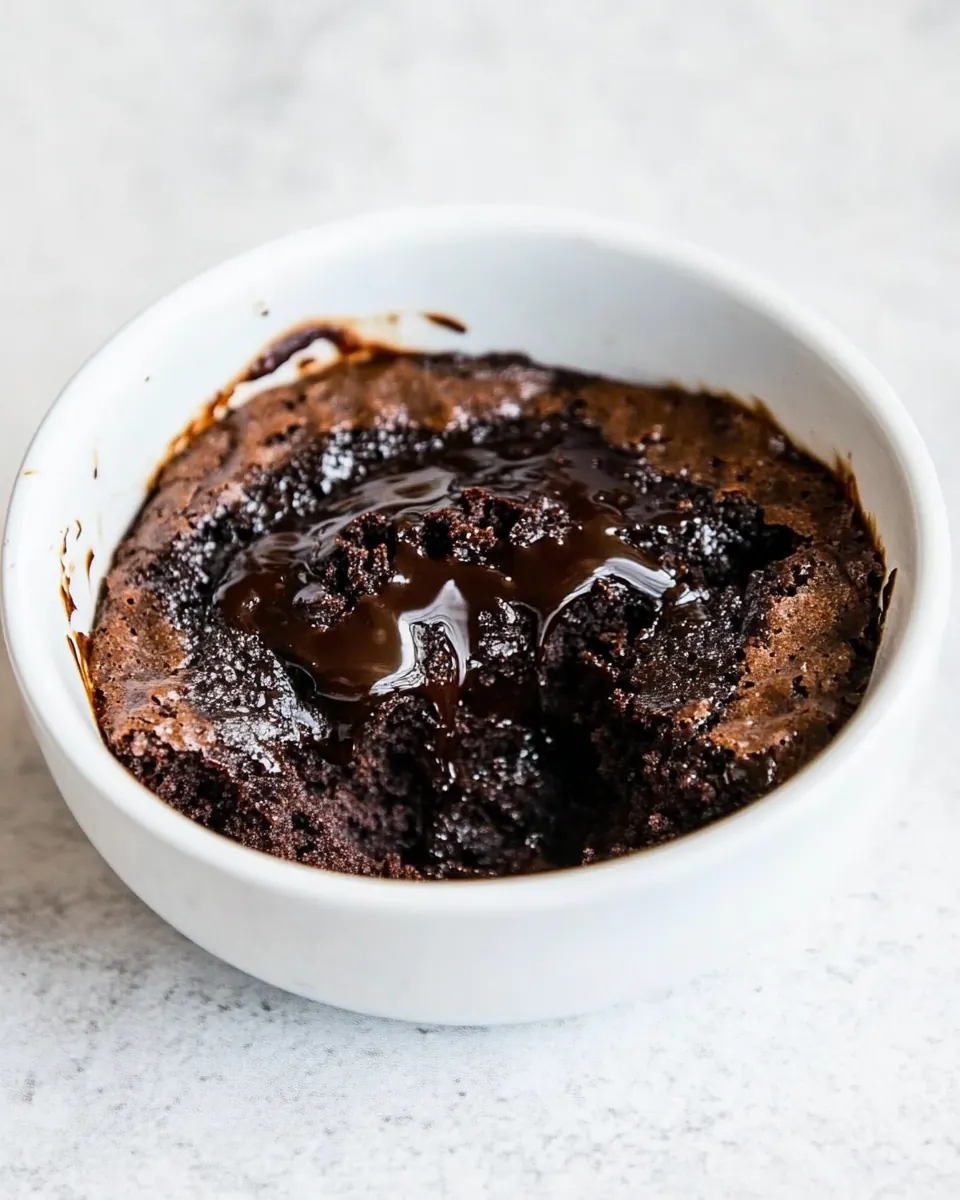
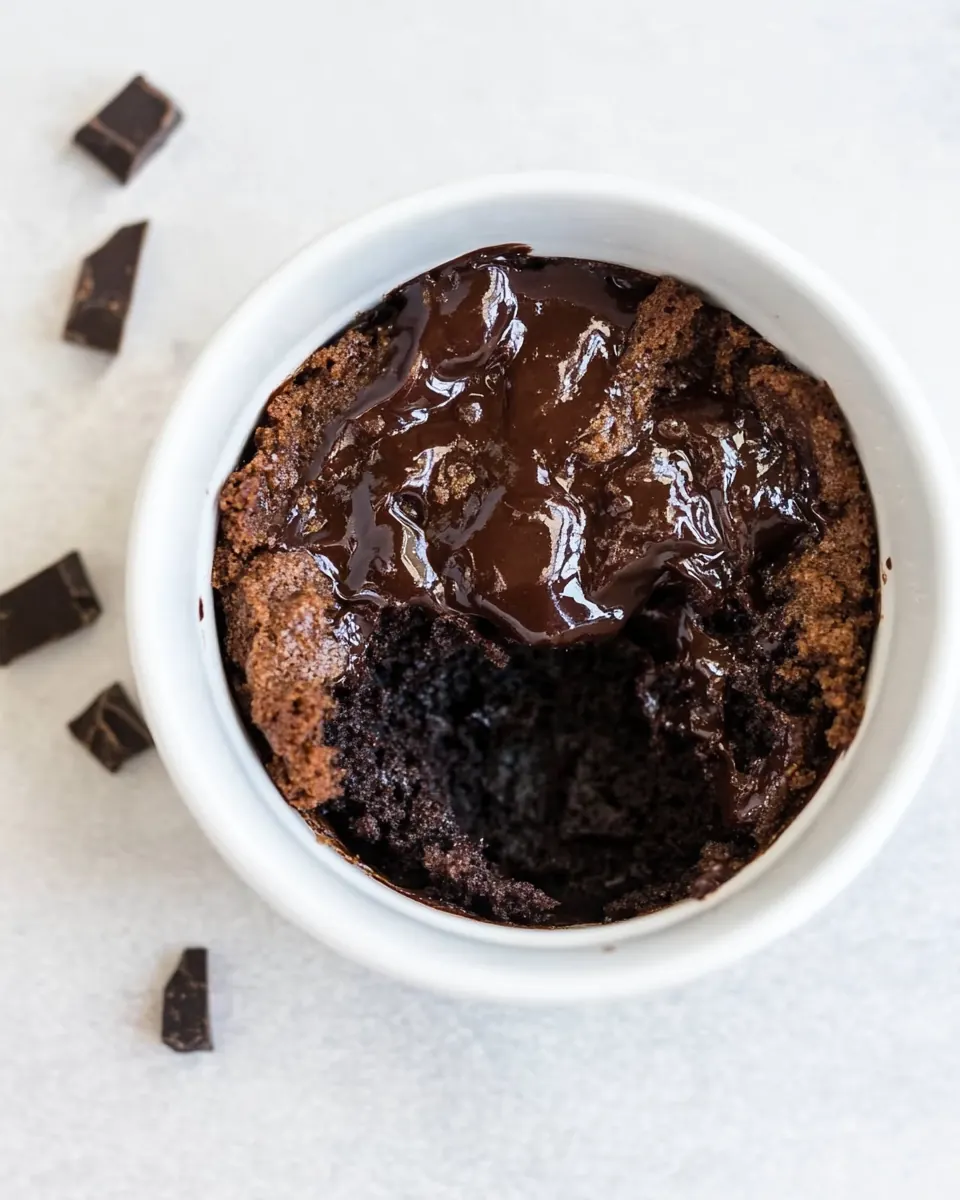
Slow Cooker Chocolate Lava Cake
Slow Cooker Chocolate Lava Cake is the sort of dessert that sneaks up on you, turning a quiet evening into something a little bit magical. I first made this after a long week when friends dropped by unannounced, and the way the warm, glossy sauce pooled at the bottom of the slow cooker felt like a small, delicious rebellion against how busy life had been. Right away I knew I would keep this in my repertoire for easy gatherings and cozy nights.
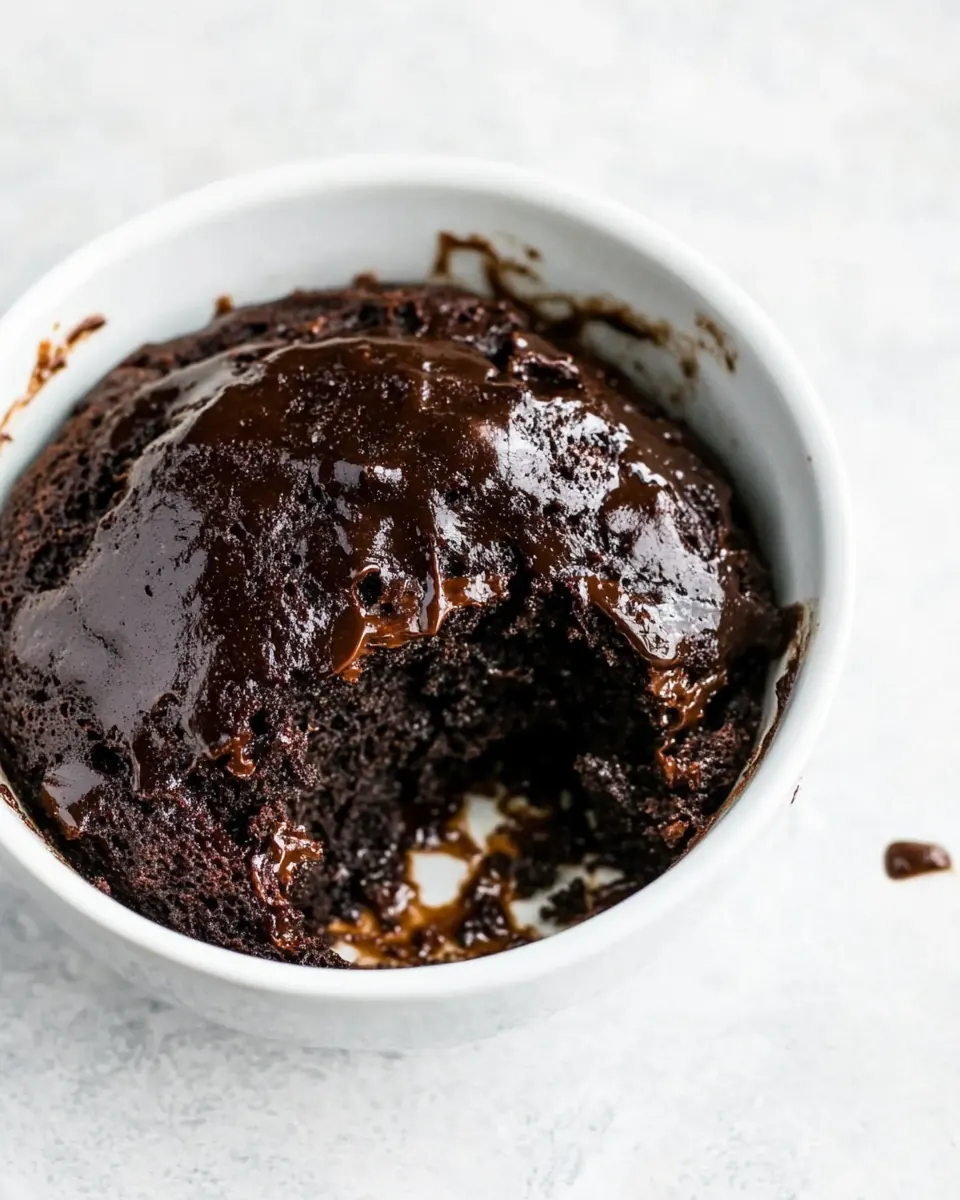
There is a comfort to the simplicity of this dessert that I adore. The batter comes together in bowls I already have on the shelf, and the slow cooker does the heavy lifting, creating a contrast between a tender cake top and a molten, saucy center. Over time I learned small adjustments that made the texture more reliable, and those little discoveries are why I return to this recipe when I want an effortless showstopper. It has saved many evenings, turning plain moments into celebrations with very little fuss.
Recipe Snapshot
4 hr 15 mins
15 mins
240 mins
Hard
350 kcal
American
Gluten-Free, Low FODMAP
Desserts
Slow Cooker, Large Bowl, Whisk, Measuring Cups, Measuring Spoons
Why Try This Slow Cooker Chocolate Lava Cake
One Pot, Big Impact
I love that Slow Cooker Chocolate Lava Cake asks for almost no babysitting. Using a slow cooker means you can set it and carry on with other things, and yet the final dessert tastes as if it took attention and time. For busy hosts this is a revelation, because it frees you from the oven while delivering dramatic results.
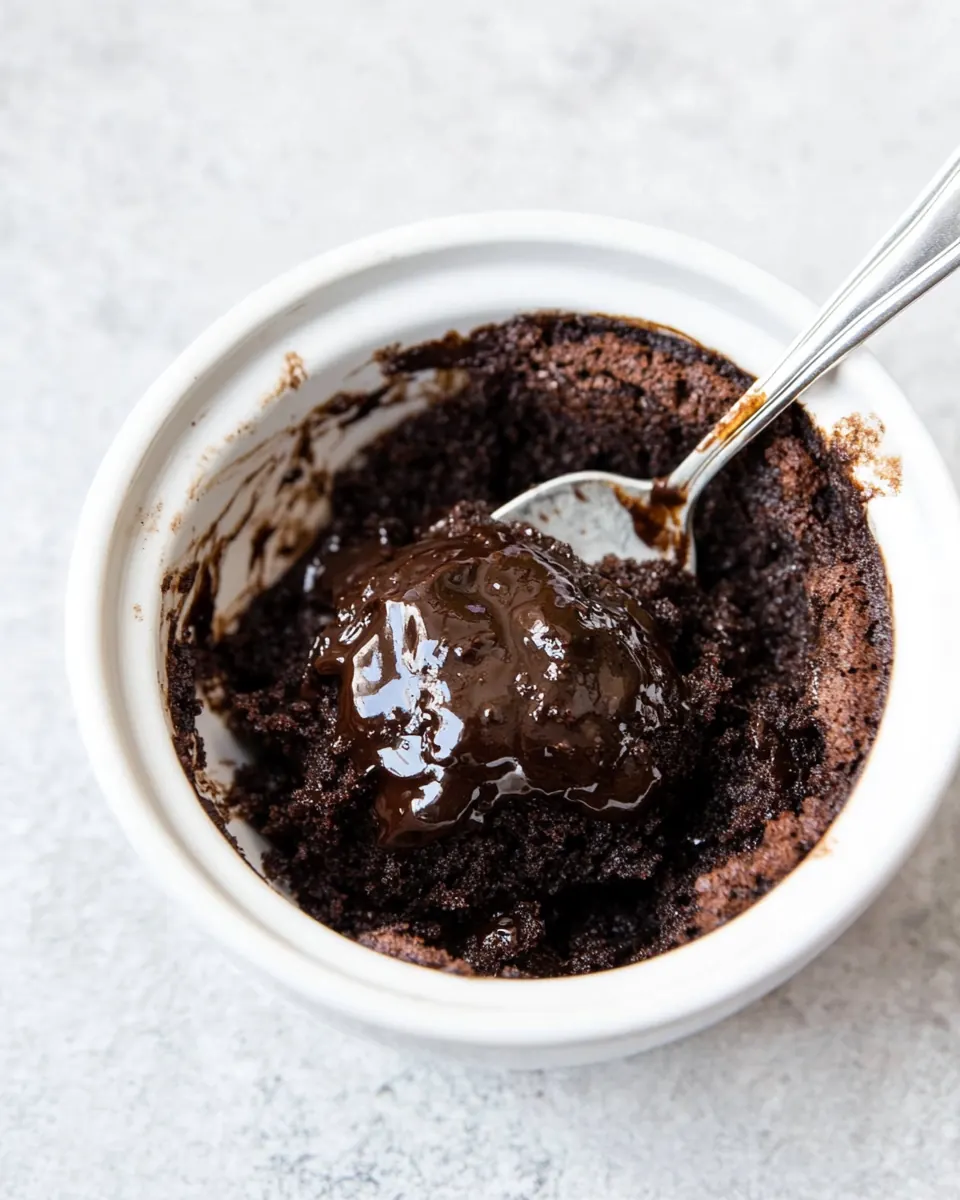
Textural Contrast
The charm here is the interplay between the soft cake and the glossy sauce beneath. I enjoy how every spoonful shifts from airy cake to liquid chocolate, creating a layered mouthfeel that feels indulgent without being fussy. That contrast is what keeps guests reaching back for seconds.
Flexible and Forgiving
This recipe is forgiving. I have had batches that needed a few extra minutes and ones that came out perfectly on time. The method accommodates small variations in slow cooker heat, and that flexibility makes it approachable for cooks at any level. You can tweak the toppings but the base always performs.
Comfort Food with a Crowd Appeal
I often make this when groups drop by because it scales to serve a crowd without an elaborate mise en place. It feels nostalgic and celebratory at once, which is why it works for casual dinners, holiday evenings, or late night cravings. I find people respond to the warm sauce and familiar chocolate notes every time.
Simple Ingredients, Big Flavor
The ingredient list reads like pantry staples, yet when combined they create something greater than the sum of parts. I appreciate that you do not need exotic items to create a memorable dessert, which lowers the barrier to making something special on a weeknight.
What Goes Into Slow Cooker Chocolate Lava Cake
The philosophy behind these ingredients is straightforward: combine pantry staples that build deep chocolate flavor while balancing structure and moisture. The dry ingredients form a tender crumb, the fats and liquids add silkiness, and the separate topping transforms into a molten sauce as it meets the hot water. The key players are the flours and cocoa for body, the sugars for sweetness and caramel notes, and the butter and milk to keep the cake rich and velvety.
- 1 cup all-purpose flour: Provide structure and crumb to the cake batter by forming the gluten network when mixed with liquids; sift to avoid lumps and ensure a light texture. Balance absorbs moisture from wet ingredients and helps the cake rise evenly when combined with leavening agents. Works best measured accurately to maintain proper batter consistency.
- 3/4 cup granulated sugar: Add sweetness and tenderize the batter by dissolving into liquids and interacting with flour proteins; also contributes to caramelization during cooking. Help brown the cake surface slightly and enhance overall flavor depth when used in conjunction with cocoa. Measure precisely to avoid overly dense or overly sweet results.
- 3 tablespoons cocoa powder: Contribute deep chocolate flavor and a touch of bitterness that intensifies the dessert; dissolves into the batter to distribute cocoa notes evenly. Help color the cake and accentuate the molten center when combined with additional cocoa in the sauce layer. Use unsweetened cocoa for pure chocolate intensity.
- 2 teaspoons baking powder: Provide lift by releasing gases that expand during cooking, helping create a light, tender cake crumb. React with moisture and heat to produce rise; ensure even distribution by sifting with dry ingredients. Work in tandem with proper mixing and liquid ratios for best texture.
- 1/4 teaspoons salt: Enhance flavor complexity by balancing sweetness and strengthening gluten structure slightly; aid in controlling fermentation of any dairy components. Help amplify other flavors like chocolate when used sparingly, and prevent a flat-tasting cake. Measure carefully because too much salt can overpower sweetness.
- 1/2 cup milk: Add moisture and fat balance to the batter while contributing to tenderness and mouthfeel; helps dissolve sugar and distribute flavorings. Provide a medium for activating leavening agents and creating a smooth batter consistency. Use at room temperature for best incorporation.
- 1/3 cup buttermelted: Introduce richness and a subtle tang to the batter that brightens chocolate flavors while contributing fat for a moist texture. Melted form blends smoothly into the batter, creating a silkier crumb and aiding in heat transfer during cooking. Ensure actually melted and warm enough to incorporate without solidifying.
- 2 teaspoons vanilla extract: Bring aromatic warmth and rounded vanilla notes that enhance the chocolate profile while masking any bitter edges. Blend into the wet ingredients to evenly distribute flavor throughout the cake. Use pure extract for best intensity.
- 3/4 cup granulated sugar: Create additional sweetness in the cake layer while helping with structure and moisture retention when dissolved into wet ingredients. Duplicate sugar presence can help differentiate textures between cake and sauce layers, contributing to a balanced final dessert. Measure carefully to avoid graininess in the batter.
- 3/4 cup brown sugar firmly packed: Provide deep, molasses-like sweetness and a chewy, moist quality to the sauce layer that complements the chocolate components. Firmly packed brown sugar contributes acidity and complexity, which can enhance the molten center’s flavor. Helps produce a glossy, rich sauce when combined with hot water and cocoa.
- 1/4 cup plus 2 tablespoons cocoa powder: Intensify chocolate flavor in the sauce with concentrated cocoa that blends into hot water to form a rich, chocolaty syrup. Addation strengthens color and provides the characteristic lava effect when poured over the batter. Use carefully to avoid making the sauce too bitter.
- 2 1/4 cups hot water: Create the hot liquid layer that activates the cocoa and dissolves sugars to form the molten sauce beneath the cake; temperature aids in producing a flowing center. Provide necessary liquidity to penetrate the batter and produce the lava effect during slow cooking. Pour slowly over batter to ensure even coverage.
- Vanilla ice cream or whipped cream: Serve as a cold, creamy contrast that balances the warm, rich cake with temperature and textural contrast; adds additional sweetness and a smooth finish. Complement the molten center by melting slightly into the cake for an indulgent bite. Offer scoops at serving time for best effect.
- Maraschino cherries (optional): Provide a bright, fruity garnish option that adds visual contrast and a sweet-tart pop to each serving; pair with creaminess for nostalgic presentation. Use as an optional decorative accent to complement chocolate flavors and enhance plating appeal.
Cooking Method for Slow Cooker Chocolate Lava Cake
This slow cooker method is relaxed and rewarding. I find the key to success is layering and patience, because the slow cooker transforms simple ingredients into a molten dessert over time. Below are the cleaned steps expanded with sensory cues, reasons behind each technique, and troubleshooting tips to keep you confident while you cook.
- Coat a slow cooker with nonstick spray. In a large bowl, whisk together the flour, sugar, cocoa powder, baking powder, and salt. In a second bowl, whisk together the milk, melted butter, and vanilla.: The aroma of warm butter will be missing here, but greasing the bowl prevents the cake from sticking to the sides, giving you clean edges when serving. You should feel the slickness across the inner surface as you spray, and the visual sheen is a good cue that the bowl is ready. If you skip this you risk tearing the cake when you scoop it out, so do not be tempted to omit the spray.
- Make a well in the middle of the dry ingredients. Pour the wet ingredients in to the well and whisk until smooth. Pour into the bottom of a slow cooker.: As you whisk these dry ingredients, you will see the mixture lighten and become uniform in color, releasing a concentrated cocoa scent. Combining them thoroughly ensures even leavening and prevents pockets of baking powder or salt. A common mistake is rushing this step, which can leave lumps or uneven rise, so whisk until the texture looks even and smooth.
- Whisk together the sugar, brown sugar, cocoa powder until evenly combined. Sprinkle evenly over the batter in the slow cooker.: The wet mix should look glossy and cohesive, with tiny ribbons of butter dispersing into the milk. This emulsion delivers moisture and richness to the batter, which translates to a tender top layer. If your melted butter is too hot it can cook the milk slightly, so allow it to cool a bit before combining to keep the mixture smooth.
- Pour the hot water over the top of the batter and topping. Do not stir. Cover and cook on HIGH for 3 to 4 hours or LOW for 5 hours, or until a toothpick inserted in to the middle of the cake comes out clean with a few crumbs attached.: Creating a well gives you a place to pour the wet ingredients so they incorporate gently, helping to avoid overmixing. As you pour the wet into the center and whisk outward, you will notice the batter becoming silkier and more homogeneous. Overworking here can develop gluten and yield a tougher cake, so stop whisking once smooth.
- Serve with ice cream or whipped cream, spooning the chocolate sauce from the bottom of the slow cooker over the top. Garnish with maraschino cherries if desired.: The batter should be free of streaks and feel slightly thick, with a glossy sheen from the butter. The tactile cue of smoothness means the flour is hydrated and ready to set in the cooker. If you still see dry specks, they will create dry pockets in the cake, so whisk until the batter appears even.
- Pour into the bottom of a slow cooker: When you pour the batter into the prepared slow cooker, it should settle into an even layer that looks velvety on top. The visual uniformity helps the cake bake evenly across the surface. If the batter pools on one side because the cooker is not level, rotate the cooker gently to level it before continuing, otherwise the bake will be uneven.
- Whisk together the sugar, brown sugar, cocoa powder until evenly combined: This topping mix should smell deeply chocolatey and have a slightly damp, sand like texture when properly combined. Ensuring the sugars and cocoa are uniform prevents streaks of overly sweet or bitter sauce once the water is added. If you notice clumps, press them through the sieve or break them up, because unmixed clumps will create uneven sauce pockets.
- Sprinkle evenly over the batter in the slow cooker: Even distribution is crucial so the saucy layer forms consistently under the cake. As you sprinkle, the surface should be fully covered in a thin, uniform dusting rather than concentrated piles. Uneven sprinkling can create areas that are too sweet or too dry, so take a moment to spread the mixture gently with the back of a spoon if needed.
- Pour the hot water over the top of the batter and topping: The steam rising from the hot water is part of the sensory experience, and when poured slowly you will see the granulated topping begin to dissolve. Do not stir, because the separation between the cake batter and the sauce is what creates the lava effect. If the water is not hot enough the sugars may not dissolve fully, resulting in a thinner sauce, so use very warm water from a kettle.
- Do not stir: Resisting the urge to mix after adding water is hard, but this restraint is essential. The cake sets on top while the liquid works beneath, creating that molten center. Stirring would homogenize the layers and you would lose the contrast, so step back and trust the process.
- Cover and cook on HIGH for 3 to 4 hours or LOW for 5 hours, or until a toothpick inserted in to the middle of the cake comes out clean with a few crumbs attached: You will notice a sweet, chocolate steam as the cooker warms, and the top will shift from glossy to set and slightly matte. The toothpick test should reveal a mostly set top with a few moist crumbs, signaling that the bottom remains saucy. A mistake is opening the lid too often to check, which releases heat and extends cook time, so try to minimize lid lifts.
- Serve with ice cream or whipped cream, spooning the chocolate sauce from the bottom of the slow cooker over the top: The final contrast between warm cake and cold ice cream is the moment of payoff, and you will hear a soft hiss as the hot sauce meets the cold topping. Spoon generously so each bite has both cake and sauce. If you let the dessert sit too long before serving, the sauce will thicken and lose some of its silkiness, so serve soon after uncovering.
- Garnish with maraschino cherries if desired: The bright pop of the cherries adds color and a hint of sweet acidity that complements the chocolate. Place them on top right before serving so they keep their shine. Leaving them in the cooker during storage can make them soggy, so add them at plating time.
Tips and Variations
I like to keep this section full of small ideas that make the recipe more reliable or let you customize the experience. These tips come from repeated testing and the little notes I jot down after each batch. Below I expand the notes into practical guidance so you can get consistent results every time.
- Cocoa powder choice: Look for unsweetened baking cocoa powder, not a hot chocolate mix. Both natural and Dutch process will work but each gives a slightly different flavor profile. Natural cocoa provides a bright, tangy chocolate note while Dutch process is smoother and darker. Make sure the cocoa is fresh for the deepest flavor.
- Yield note: This recipe makes about 6 cups of lava cake, enough for roughly 6 servings at 1 cup each, though the provided servings say 8. I often portion smaller scoops for a richer presentation. Adjust your serving plan based on appetite and sides.
- Storage guidance: Store leftovers covered at room temperature for 2 to 3 days. Keep the dessert in the slow cooker insert or transfer to an airtight container to retain moisture. Reheat gently in a warm oven or microwave so the sauce loosens without overcooking the cake.
- Serving timing: Serve immediately after cooking for best texture contrast. If you wait too long the sauce firms up and you lose the lava effect. A quick microwave burst will revive the sauce if needed.
- Portioning tip: Use an ice cream scoop to serve neat portions with sauce and topping, which helps keep plate edges clean and ensures each guest gets the ideal cake to sauce ratio.
Side Dish Ideas for Slow Cooker Chocolate Lava Cake
This dessert plays well with simple accompaniments that complement its richness. Serving choices range from casual family dinners to festive evenings, and the right pairing can elevate the experience. Below are ideas for sides, occasions, storage, and seasonal pairings to help you present the cake beautifully.
- Vanilla ice cream: A classic pairing, the cold creamy vanilla ice cream contrasts the hot sauce and tempers the richness. It is perfect for dinner parties where guests expect comfort and indulgence.
- Whipped cream: Lightly sweetened whipped cream adds an airy finish that brightens each bite. Use it when you want a lighter topping than ice cream, especially for smaller portions.
- Maraschino cherries: These add visual pop and a hint of sweetness and acidity. They are ideal for special occasions or holiday presentations when you want a festive garnish.
- Casual gatherings: For friendly get togethers, serve the cake right from the slow cooker with bowls of vanilla ice cream and spoons. It requires minimal plating and keeps the mood relaxed.
- Romantic dinners: Plate individual portions with a neat scoop of ice cream and a single cherry, adding an elegant touch for date nights or anniversaries.
- Storage tips: Store leftovers at room temperature for up to 2 to 3 days, covered. For longer storage, refrigerate in an airtight container and reheat gently before serving to preserve the sauce texture.
- Seasonal pairings: In colder months like winter, serve with warm spices or a cup of coffee. The dessert feels especially comforting on chilly evenings when you want something warm and indulgent.
- Occasion ideas: Works well for birthday gatherings, casual dinner parties, or holiday evenings where you want an impressive dessert without intensive prep.
- Portion control: Offer smaller scoops for large groups to stretch servings, pairing each with a small dollop of whipped cream to maintain satisfaction.
- Presentation tip: Use white bowls or plates to make the dark sauce and bright cherries stand out visually, creating an attractive contrast for serving guests.
FAQ
Conclusion
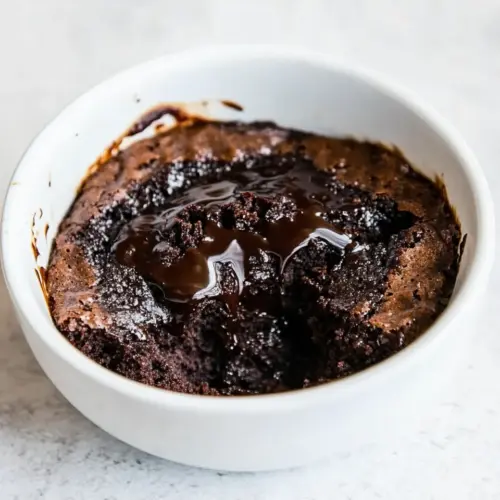
The comforting contrast of a tender cake top and warm molten chocolate sauce is what makes this recipe special. I encourage you to give it a try, because the slow cooker does most of the work while delivering an impressive dessert that feels indulgent and effortless. Share it with friends or keep it for a cozy night in, and enjoy how such simple ingredients transform into something memorable.
Slow Cooker Chocolate Lava Cake
Equipment
- Slow Cooker
- Large Bowl
- Whisk
- Measuring Cups
- Measuring Spoons
Ingredients
- 1 cup all-purpose flour Provide structure and crumb to the cake batter by forming the gluten network when mixed with liquids; sift to avoid lumps and ensure a light texture. Balance absorbs moisture from wet ingredients and helps the cake rise evenly when combined with leavening agents. Works best measured accurately to maintain proper batter consistency.
- 3/4 cup granulated sugar Add sweetness and tenderize the batter by dissolving into liquids and interacting with flour proteins; also contributes to caramelization during cooking. Help brown the cake surface slightly and enhance overall flavor depth when used in conjunction with cocoa. Measure precisely to avoid overly dense or overly sweet results.
- 3 tablespoons cocoa powder Contribute deep chocolate flavor and a touch of bitterness that intensifies the dessert; dissolves into the batter to distribute cocoa notes evenly. Help color the cake and accentuate the molten center when combined with additional cocoa in the sauce layer. Use unsweetened cocoa for pure chocolate intensity.
- 2 teaspoons baking powder Provide lift by releasing gases that expand during cooking, helping create a light, tender cake crumb. React with moisture and heat to produce rise; ensure even distribution by sifting with dry ingredients. Work in tandem with proper mixing and liquid ratios for best texture.
- 1/4 teaspoons salt Enhance flavor complexity by balancing sweetness and strengthening gluten structure slightly; aid in controlling fermentation of any dairy components. Help amplify other flavors like chocolate when used sparingly, and prevent a flat-tasting cake. Measure carefully because too much salt can overpower sweetness.
- 1/2 cup milk Add moisture and fat balance to the batter while contributing to tenderness and mouthfeel; helps dissolve sugar and distribute flavorings. Provide a medium for activating leavening agents and creating a smooth batter consistency. Use at room temperature for best incorporation.
- 1/3 cup buttermelted Introduce richness and a subtle tang to the batter that brightens chocolate flavors while contributing fat for a moist texture. Melted form blends smoothly into the batter, creating a silkier crumb and aiding in heat transfer during cooking. Ensure actually melted and warm enough to incorporate without solidifying.
- 2 teaspoons vanilla extract Bring aromatic warmth and rounded vanilla notes that enhance the chocolate profile while masking any bitter edges. Blend into the wet ingredients to evenly distribute flavor throughout the cake. Use pure extract for best intensity.
- 3/4 cup granulated sugar Create additional sweetness in the cake layer while helping with structure and moisture retention when dissolved into wet ingredients. Duplicate sugar presence can help differentiate textures between cake and sauce layers, contributing to a balanced final dessert. Measure carefully to avoid graininess in the batter.
- 3/4 cup brown sugar firmly packed Provide deep, molasses-like sweetness and a chewy, moist quality to the sauce layer that complements the chocolate components. Firmly packed brown sugar contributes acidity and complexity, which can enhance the molten center’s flavor. Helps produce a glossy, rich sauce when combined with hot water and cocoa.
- 1/4 cup plus 2 tablespoons cocoa powder Intensify chocolate flavor in the sauce with concentrated cocoa that blends into hot water to form a rich, chocolaty syrup. Addation strengthens color and provides the characteristic lava effect when poured over the batter. Use carefully to avoid making the sauce too bitter.
- 2 1/4 cups hot water Create the hot liquid layer that activates the cocoa and dissolves sugars to form the molten sauce beneath the cake; temperature aids in producing a flowing center. Provide necessary liquidity to penetrate the batter and produce the lava effect during slow cooking. Pour slowly over batter to ensure even coverage.
- Vanilla ice cream or whipped cream Serve as a cold, creamy contrast that balances the warm, rich cake with temperature and textural contrast; adds additional sweetness and a smooth finish. Complement the molten center by melting slightly into the cake for an indulgent bite. Offer scoops at serving time for best effect.
- Maraschino cherries optional Provide a bright, fruity garnish option that adds visual contrast and a sweet-tart pop to each serving; pair with creaminess for nostalgic presentation. Use as an optional decorative accent to complement chocolate flavors and enhance plating appeal.
Instructions
- Coat a slow cooker with nonstick spray. In a large bowl, whisk together the flour, sugar, cocoa powder, baking powder, and salt. In a second bowl, whisk together the milk, melted butter, and vanilla.: The aroma of warm butter will be missing here, but greasing the bowl prevents the cake from sticking to the sides, giving you clean edges when serving. You should feel the slickness across the inner surface as you spray, and the visual sheen is a good cue that the bowl is ready. If you skip this you risk tearing the cake when you scoop it out, so do not be tempted to omit the spray.
- Make a well in the middle of the dry ingredients. Pour the wet ingredients in to the well and whisk until smooth. Pour into the bottom of a slow cooker.: As you whisk these dry ingredients, you will see the mixture lighten and become uniform in color, releasing a concentrated cocoa scent. Combining them thoroughly ensures even leavening and prevents pockets of baking powder or salt. A common mistake is rushing this step, which can leave lumps or uneven rise, so whisk until the texture looks even and smooth.
- Whisk together the sugar, brown sugar, cocoa powder until evenly combined. Sprinkle evenly over the batter in the slow cooker.: The wet mix should look glossy and cohesive, with tiny ribbons of butter dispersing into the milk. This emulsion delivers moisture and richness to the batter, which translates to a tender top layer. If your melted butter is too hot it can cook the milk slightly, so allow it to cool a bit before combining to keep the mixture smooth.
- Pour the hot water over the top of the batter and topping. Do not stir. Cover and cook on HIGH for 3 to 4 hours or LOW for 5 hours, or until a toothpick inserted in to the middle of the cake comes out clean with a few crumbs attached.: Creating a well gives you a place to pour the wet ingredients so they incorporate gently, helping to avoid overmixing. As you pour the wet into the center and whisk outward, you will notice the batter becoming silkier and more homogeneous. Overworking here can develop gluten and yield a tougher cake, so stop whisking once smooth.
- Serve with ice cream or whipped cream, spooning the chocolate sauce from the bottom of the slow cooker over the top. Garnish with maraschino cherries if desired.: The batter should be free of streaks and feel slightly thick, with a glossy sheen from the butter. The tactile cue of smoothness means the flour is hydrated and ready to set in the cooker. If you still see dry specks, they will create dry pockets in the cake, so whisk until the batter appears even.
- Pour into the bottom of a slow cooker: When you pour the batter into the prepared slow cooker, it should settle into an even layer that looks velvety on top. The visual uniformity helps the cake bake evenly across the surface. If the batter pools on one side because the cooker is not level, rotate the cooker gently to level it before continuing, otherwise the bake will be uneven.
- Whisk together the sugar, brown sugar, cocoa powder until evenly combined: This topping mix should smell deeply chocolatey and have a slightly damp, sand like texture when properly combined. Ensuring the sugars and cocoa are uniform prevents streaks of overly sweet or bitter sauce once the water is added. If you notice clumps, press them through the sieve or break them up, because unmixed clumps will create uneven sauce pockets.
- Sprinkle evenly over the batter in the slow cooker: Even distribution is crucial so the saucy layer forms consistently under the cake. As you sprinkle, the surface should be fully covered in a thin, uniform dusting rather than concentrated piles. Uneven sprinkling can create areas that are too sweet or too dry, so take a moment to spread the mixture gently with the back of a spoon if needed.
- Pour the hot water over the top of the batter and topping: The steam rising from the hot water is part of the sensory experience, and when poured slowly you will see the granulated topping begin to dissolve. Do not stir, because the separation between the cake batter and the sauce is what creates the lava effect. If the water is not hot enough the sugars may not dissolve fully, resulting in a thinner sauce, so use very warm water from a kettle.
- Do not stir: Resisting the urge to mix after adding water is hard, but this restraint is essential. The cake sets on top while the liquid works beneath, creating that molten center. Stirring would homogenize the layers and you would lose the contrast, so step back and trust the process.
- Cover and cook on HIGH for 3 to 4 hours or LOW for 5 hours, or until a toothpick inserted in to the middle of the cake comes out clean with a few crumbs attached: You will notice a sweet, chocolate steam as the cooker warms, and the top will shift from glossy to set and slightly matte. The toothpick test should reveal a mostly set top with a few moist crumbs, signaling that the bottom remains saucy. A mistake is opening the lid too often to check, which releases heat and extends cook time, so try to minimize lid lifts.
- Serve with ice cream or whipped cream, spooning the chocolate sauce from the bottom of the slow cooker over the top: The final contrast between warm cake and cold ice cream is the moment of payoff, and you will hear a soft hiss as the hot sauce meets the cold topping. Spoon generously so each bite has both cake and sauce. If you let the dessert sit too long before serving, the sauce will thicken and lose some of its silkiness, so serve soon after uncovering.
- Garnish with maraschino cherries if desired: The bright pop of the cherries adds color and a hint of sweet acidity that complements the chocolate. Place them on top right before serving so they keep their shine. Leaving them in the cooker during storage can make them soggy, so add them at plating time.
Notes
- Cocoa powder choice: Look for unsweetened baking cocoa powder, not a hot chocolate mix. Both natural and Dutch process will work but each gives a slightly different flavor profile. Natural cocoa provides a bright, tangy chocolate note while Dutch process is smoother and darker. Make sure the cocoa is fresh for the deepest flavor.
- Yield note: This recipe makes about 6 cups of lava cake, enough for roughly 6 servings at 1 cup each, though the provided servings say 8. I often portion smaller scoops for a richer presentation. Adjust your serving plan based on appetite and sides.
- Storage guidance: Store leftovers covered at room temperature for 2 to 3 days. Keep the dessert in the slow cooker insert or transfer to an airtight container to retain moisture. Reheat gently in a warm oven or microwave so the sauce loosens without overcooking the cake.
- Serving timing: Serve immediately after cooking for best texture contrast. If you wait too long the sauce firms up and you lose the lava effect. A quick microwave burst will revive the sauce if needed.
- Portioning tip: Use an ice cream scoop to serve neat portions with sauce and topping, which helps keep plate edges clean and ensures each guest gets the ideal cake to sauce ratio.