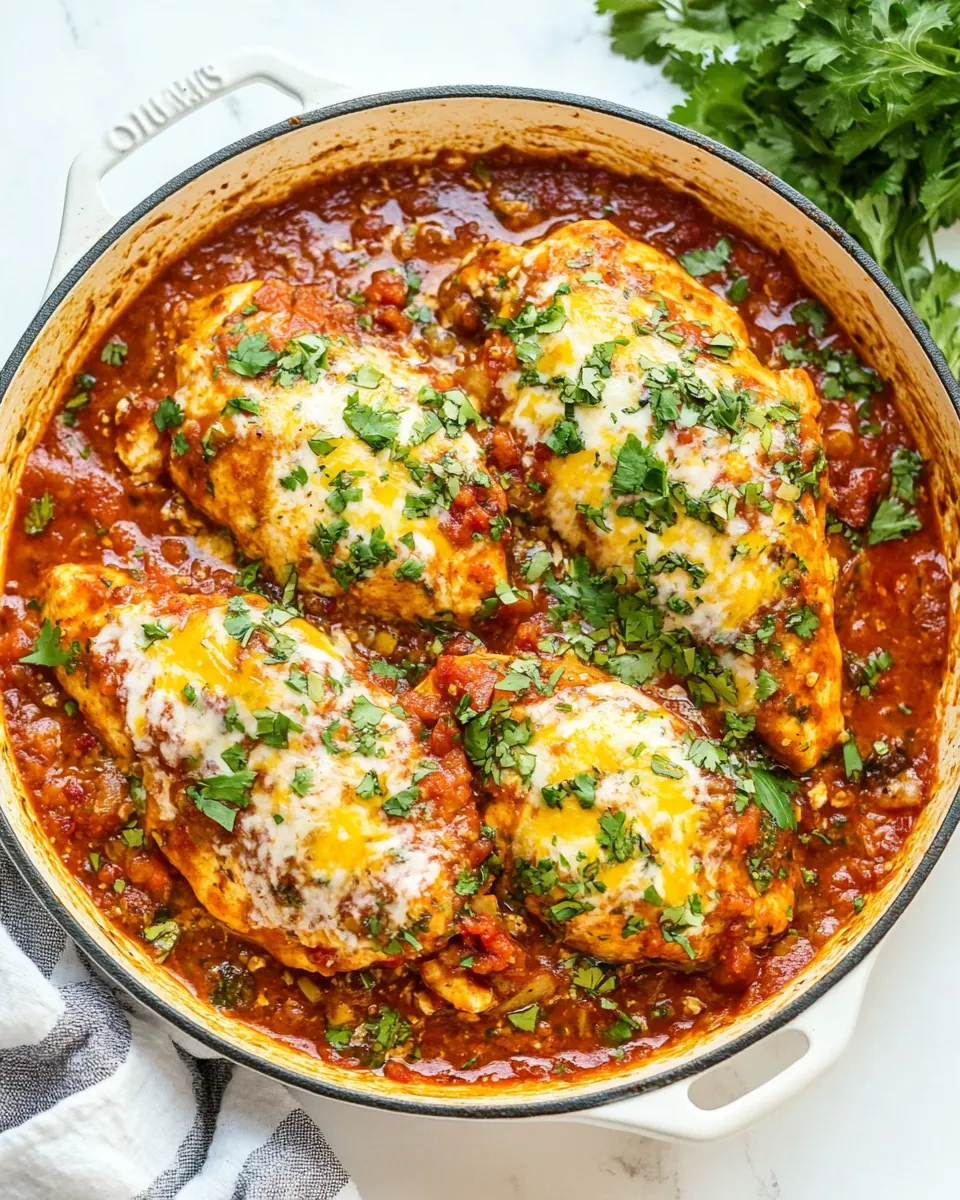
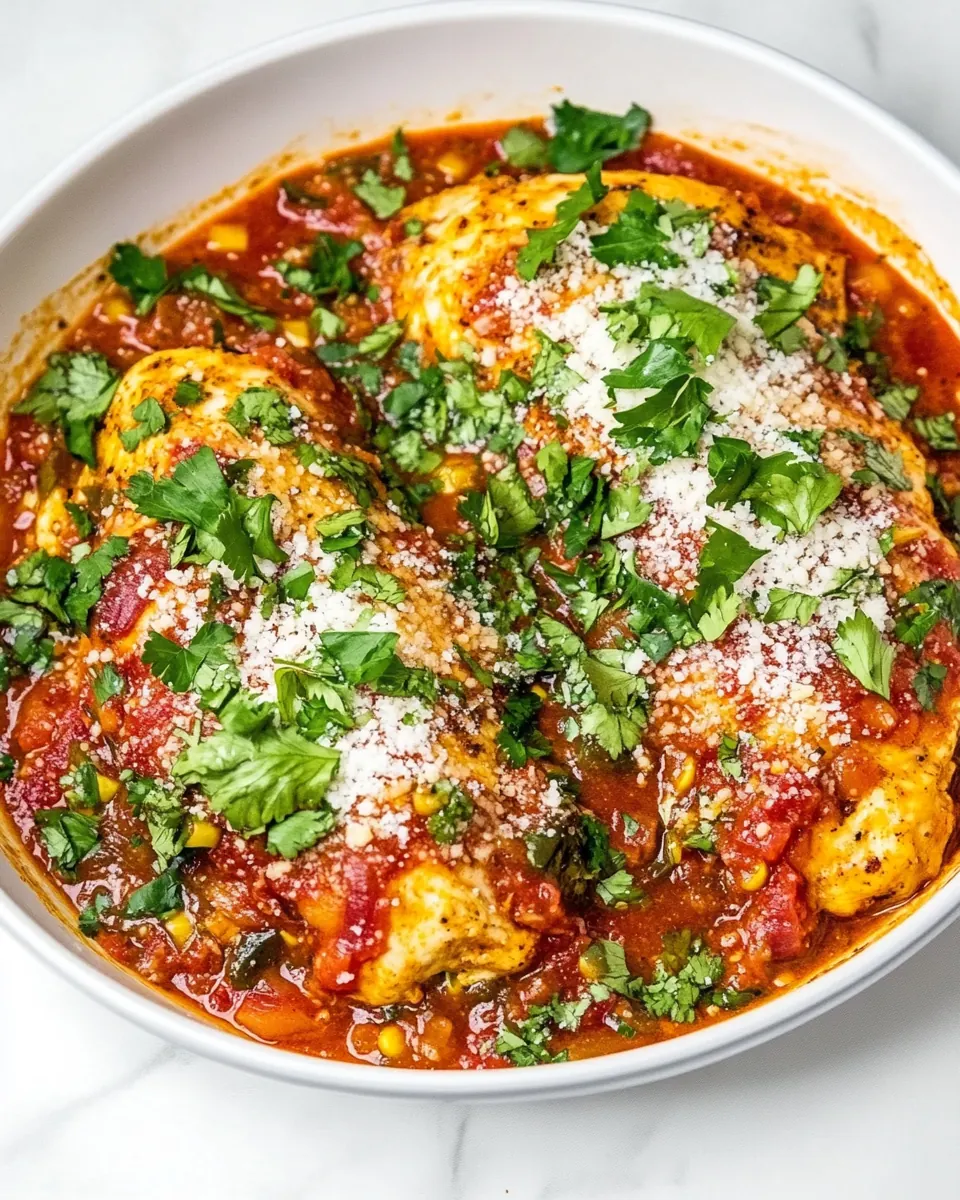
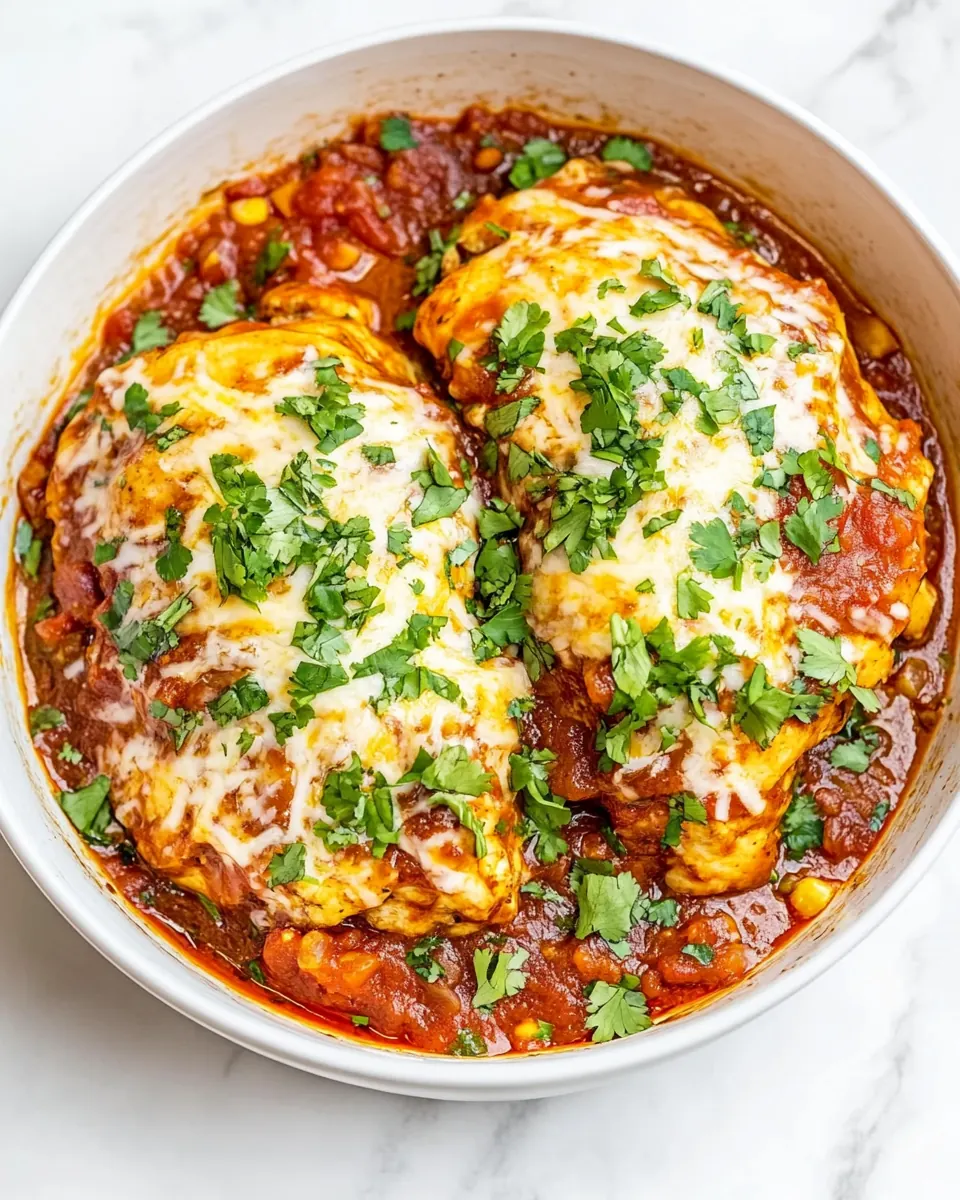
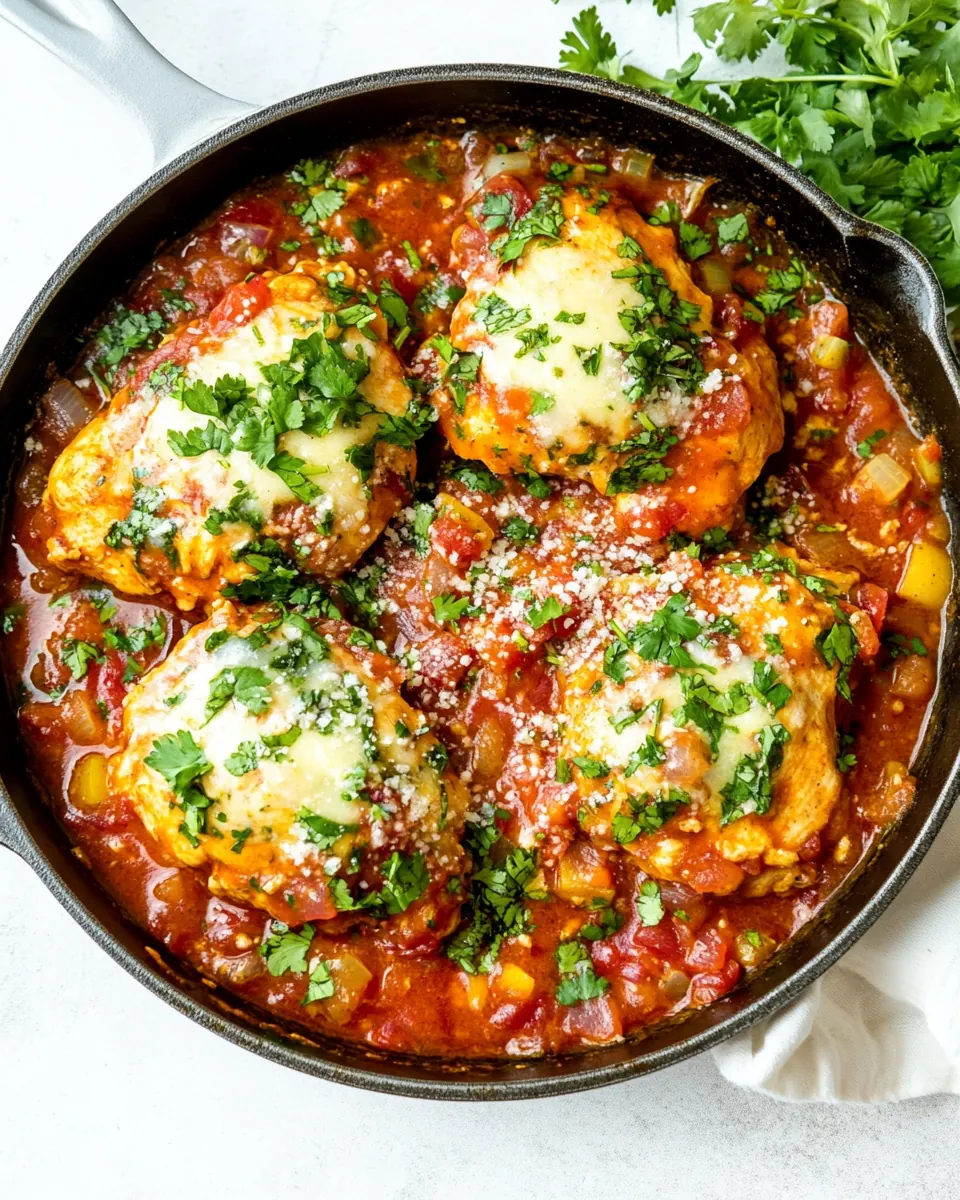
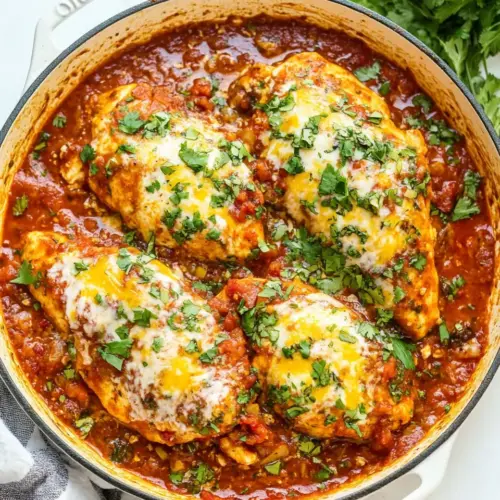
Skillet Salsa Chicken
Skillet Salsa Chicken is one of those recipes I reach for when the week has been long and I want something quick, flavorful, and satisfying without a lot of fuss.
One evening, after juggling work calls and after-school activities, I found myself staring into the fridge with two chicken breasts and an open jar of salsa. I decided to sear the chicken, let the salsa take center stage, and finish everything in the oven. The result was a bright, saucy dinner that felt celebratory despite being unbelievably simple. The first bite was warm, tangy, and comforting, and I remember thinking how such a tiny ingredient list delivered big flavor.
Since then, I’ve turned this into a go to for nights when I want something that feels homemade but comes together fast. I love the way the cheese melts into the bubbling salsa, and how the light sear on the chicken adds textural contrast. The dish has become my fallback when guests drop by unannounced, because it looks like effort even when it requires very little. You can personalize the salsa and the level of spice to match your mood, and the whole skillet presentation makes it feel special.
Recipe Snapshot
30 mins
10 mins
20 mins
Medium
350 kcal
Mexican
Gluten-Free, Keto
Dinner
Oven safe skillet, Spatula, Measuring spoons, Instant read thermometer
Why You’ll Love This Skillet Salsa Chicken
Fast but Flavorful
I adore how Skillet Salsa Chicken delivers bold taste with minimal hands on time. The sear on the chicken locks in juices, while the salsa brings acidity and brightness so you do not need complicated sauces. This is perfect when I want dinner on the table without sacrificing flavor.
Very Flexible
We can easily switch jarred salsa styles and cheese blends, and the recipe still sings. I often swap in a milder salsa for family meals or a chunkier roasted variety when I want more texture. That flexibility makes this a pantry friendly meal that adapts to what I have on hand.
Great for Weeknights and Guests
I love serving this when friends arrive unexpectedly. The skillet looks homey and presentable, and the bubbling cheese over the chicken gives an instant wow factor. It feels like a treat but takes very little active time, which is why it has earned a permanent spot in my rotation.
Comfort with Bright Notes
The combination of warmed salsa and melted cheese creates a comforting, slightly tangy profile that hits both hearty and fresh notes. That contrast is what keeps me coming back to Skillet Salsa Chicken, especially on nights when I want something cozy but not heavy.
Simple Technique, Big Results
The technique is straightforward, but each step matters. A proper sear builds texture, deglazing the pan concentrates flavor, and finishing under heat melts the cheese into a luscious topping. When we follow those steps, the end result feels much more elaborate than it actually is.
Shopping List for Skillet Salsa Chicken
These ingredients are about harmony and speed. I choose items that layer texture and flavor quickly, with the chicken as the main stage player, salsa bringing acidity and spice, and cheese adding richness. Each piece has a job, and together they make a satisfying skillet meal that is both simple and crowd pleasing.
- 2 large boneless skinless chicken breasts: Pound or slice thinly to ensure even cooking and quicker searing; serves as the primary protein and main body of the dish, providing texture and substance for the salsa to complement.
- 1/2 teaspoon garlic powder: Season lightly to add a mellow garlic aroma and deepen savory notes; helps build background flavor that enhances the chicken without overpowering the salsa.
- 1/2 teaspoon chili powder: Sprinkle to introduce gentle warmth and smoky complexity; works with other spices to give the chicken a subtle southwestern character that pairs well with tomato-based sauces.
- Salt & pepper to taste: Season sparingly to balance flavors and enhance natural tastes; helps bring out the chicken's savory profile and can be adjusted to personal preference for saltiness and heat.
- Flour for dredging: Coat lightly to create a thin crust when dredged, helping the chicken brown evenly and slightly thicken pan juices; contributes a crisp surface that contrasts the saucy topping.
- 1 tablespoon butter: Melt to baste and aid in browning during searing; adds a subtle richness and helps carry flavors while preventing sticking in the skillet.
- 1 tablespoon olive oil: Heat to provide a high smoke point fat for searing; combines with butter for a balanced flavor and helps achieve a golden exterior on the chicken.
- 1/4 cup chicken broth: Deglaze the pan to lift browned bits and build a flavorful base for the sauce; adds moisture and concentrates savory notes before adding salsa.
- 1 (14.5 ounce) jar salsa your favorite kind: Spoon over the cooked chicken to create the primary sauce component, contributing acidity, sweetness, and spice; forms the signature flavor profile and keeps the dish moist.
- 1 cup shredded Mexican cheese blend: Sprinkle over the finished skillet to add melty, gooey richness and a creamy, tangy finish; helps bind the salsa to the chicken and adds visual appeal.
- Fresh cilantro, chopped to taste () (optional): Garnish as desired to add a fresh, bright herbal note and a pop of color; enhances aroma and lightens the overall flavor when sprinkled before serving.
Skillet Salsa Chicken Instructions
I like to move confidently through these steps, keeping the heat lively for a solid sear and finishing gently so the chicken cooks through while the cheese melts. Read each step before you begin so you have a plan, and keep a close eye when you transfer to the oven or broiler.
- Preheat the oven to 400 F and move the rack to the middle position.: When the oven reaches temperature you will notice a steady hum and warmth filling the space, which ensures even finishing heat for the skillet. This mid oven placement lets the top heat penetrate the cheese without burning it, and preheating avoids extended oven times that dry the chicken . A common mistake is skipping preheat, which causes uneven cooking and soggy cheese. If your oven runs hot, watch closely the first time to avoid overbrowning.
- Cut the chicken in half lengthwise so you have 4 thinner cutlets. Sprinkle the chicken pieces with the garlic powder, chili powder, and salt & pepper, then coat them in flour.: You will feel the difference as you slice through, creating thinner pieces that take less time to cook and brown more evenly. The dry rub of powder and salt seasons the meat through and the light flour helps form a crisp exterior and helps the sauce cling later. If you do not pat the chicken dry first, the flour will clump and prevent proper browning. Avoid oversalting, especially when your salsa has salt already.
- Add the butter and oil to an oven-safe skillet over medium-high heat. Once the pan is hot, sear the chicken for 3-4 minutes/side until lightly golden. Take the chicken out of the pan and set it aside.: As the fats shimmer you will smell a toasty richness, and when the chicken hits the pan it should sizzle audibly. That sizzle signals effective Maillard reaction that creates complex flavors and a golden crust. When flipping you should see a golden color, not a pale surface, which means you waited long enough to let the crust form. A common issue is crowding the pan, which drops the temperature and causes steaming instead of searing; work in batches if necessary.
- Add the chicken broth to the pan and scrape up any browned bits. Stir in the salsa.: Deglazing lifts concentrated flavor from the pan, producing an aromatic liquid that will blend with the salsa into a cohesive sauce. You will notice small dark bits dissolve and the aroma deepen as the pan releases those caramelized notes. Stirring helps incorporate those flavors evenly. A pitfall is adding too much liquid, which can thin the sauce; use just enough to loosen the fond and marry it to the salsa.
- Add the chicken back into the pan and let the sauce start to bubble. Spoon some of the salsa over the chicken and sprinkle the cheese over top.: As the sauce begins to bubble gently, it will cling to the chicken and warm through the pieces. Spoon the sauce so each piece gets a glossy coating, then scatter the cheese to form a melty blanket that will brown attractively. The bubbling tells you moisture is evaporating and flavors are concentrating, which is crucial for a balanced finish. A mistake is adding cold cheese too early in a very cool pan; it will simply sit rather than melt. Make sure the sauce is warm before adding cheese.
- Place the skillet in the oven and let it cook for 5-7 minutes (chicken will cook through completely and the cheese will melt). Optional: broil it for a couple minutes (watch it carefully).: broil it for a couple minutes watch it carefully. : In the oven the heat finishes cooking the chicken through while the cheese becomes velvety and slightly golden. You will see the edges of the cheese bubble and perhaps brown, and the sauce will settle into a glossy finish. Use an instant read thermometer if uncertain, aiming for 165 F at the thickest part. Avoid leaving it unattended under the broiler since cheese can go from golden to burnt in moments.
- Serve with fresh chopped cilantro if desired. Season with extra salt & pepper as needed.: The final garnish brightens the dish and adds a fresh contrast to the warmed salsa and cheese. I like to sprinkle cilantro right before serving so the herb retains its color and aroma. Taste a small bite to adjust salt and pepper, because salsa saltiness can vary. Overlooking this final seasoning is common, which can leave the dish tasting flat; a quick taste test remedies that.
Pro Tips and Tweaks
I keep these tips handy because small tweaks change the final texture and flavor dramatically. Below are practical ideas for getting the best results and for adapting the recipe to what you have on hand.
- Choose the right skillet: An oven safe cast iron or stainless steel pan distributes heat evenly and helps develop a deep sear on the chicken. If you do not have one, transfer contents to a baking dish before finishing in the oven.
- Control moisture: Pat chicken dry to prevent the flour from clumping and to promote browning. Excess moisture leads to steaming instead of a crisp surface.
- Adjust spice level: Select mild or hot salsa depending on the heat you enjoy, and balance with extra cheese or a touch more chicken broth if the salsa feels intense.
- Watch broiling closely: If you broil for color, it takes only a minute or two to go from golden to burnt, so stand nearby and keep the oven door slightly ajar when your broiler allows it.
- Use a thermometer: An instant read thermometer removes doubt about doneness, ensuring the chicken hits 165 F without overcooking.
- Fresh herbs last minute: Add the cilantro after the dish comes out of the oven to preserve its bright flavor and color, which enhances the finished plate.
How to Enjoy Skillet Salsa Chicken
This dish is versatile for weeknight dinners and casual gatherings. Pairings and serving ideas below highlight seasonal and situational options so you can match the meal to your occasion.
- Serve over rice: Spoon the saucy chicken and melted cheese over steamed white rice for an easy, comforting bowl that soaks up the flavorful juices.
- With tortillas: Warm corn or flour tortillas make great vessels for turning the skillet into tacos or enchilada style plates, letting guests customize with extra salsa or cilantro.
- Casual dinner: For an effortless weeknight meal, pair with a simple salad and some warm bread to mop up the sauce, making a balanced plate without extra effort.
- Entertaining: The bubbling skillet looks impressive on the table, so serve it family style for informal gatherings where everyone can help themselves.
- Storage tips: Refrigerate leftovers in an airtight container for up to three days. Reheat gently in a skillet over medium low heat so the cheese melts slowly and the sauce loosens without drying the chicken.
- Seasonal pairings: In warmer months, add a side of fresh lime wedges and a crisp green salad. In cooler seasons, complement with roasted vegetables for extra heartiness.
FAQ
Conclusion
Skillet Salsa Chicken stands out because it pairs a quick sear with a vibrant salsa and gooey melted cheese for a comforting meal that feels elevated but is utterly simple to make. Give it a try when you want a fast dinner that still impresses, whether for family weeknights or impromptu guests. The straightforward technique and pantry friendly ingredients mean you can adapt it easily, and once you taste that tangy sauce with a golden crust of cheese, it won’t be long before this becomes one of your go to dinners.
Skillet Salsa Chicken
Equipment
- Oven-safe skillet
- Spatula
- Measuring Spoons
- Instant read thermometer
Ingredients
- 2 large boneless skinless chicken breasts Pound or slice thinly to ensure even cooking and quicker searing; serves as the primary protein and main body of the dish, providing texture and substance for the salsa to complement.
- 1/2 teaspoon garlic powder Season lightly to add a mellow garlic aroma and deepen savory notes; helps build background flavor that enhances the chicken without overpowering the salsa.
- 1/2 teaspoon chili powder Sprinkle to introduce gentle warmth and smoky complexity; works with other spices to give the chicken a subtle southwestern character that pairs well with tomato-based sauces.
- Salt & pepper to taste Season sparingly to balance flavors and enhance natural tastes; helps bring out the chicken's savory profile and can be adjusted to personal preference for saltiness and heat.
- Flour for dredging Coat lightly to create a thin crust when dredged, helping the chicken brown evenly and slightly thicken pan juices; contributes a crisp surface that contrasts the saucy topping.
- 1 tablespoon butter Melt to baste and aid in browning during searing; adds a subtle richness and helps carry flavors while preventing sticking in the skillet.
- 1 tablespoon olive oil Heat to provide a high smoke point fat for searing; combines with butter for a balanced flavor and helps achieve a golden exterior on the chicken.
- 1/4 cup chicken broth Deglaze the pan to lift browned bits and build a flavorful base for the sauce; adds moisture and concentrates savory notes before adding salsa.
- 1 (14.5 ounce) jar salsa your favorite kind Spoon over the cooked chicken to create the primary sauce component, contributing acidity, sweetness, and spice; forms the signature flavor profile and keeps the dish moist.
- 1 cup shredded Mexican cheese blend Sprinkle over the finished skillet to add melty, gooey richness and a creamy, tangy finish; helps bind the salsa to the chicken and adds visual appeal.
- Fresh cilantro, chopped to taste (optional) Garnish as desired to add a fresh, bright herbal note and a pop of color; enhances aroma and lightens the overall flavor when sprinkled before serving.
Instructions
- Preheat the oven to 400 F and move the rack to the middle position.: When the oven reaches temperature you will notice a steady hum and warmth filling the space, which ensures even finishing heat for the skillet. This mid oven placement lets the top heat penetrate the cheese without burning it, and preheating avoids extended oven times that dry the chicken . A common mistake is skipping preheat, which causes uneven cooking and soggy cheese. If your oven runs hot, watch closely the first time to avoid overbrowning.
- Cut the chicken in half lengthwise so you have 4 thinner cutlets. Sprinkle the chicken pieces with the garlic powder, chili powder, and salt & pepper, then coat them in flour.: You will feel the difference as you slice through, creating thinner pieces that take less time to cook and brown more evenly. The dry rub of powder and salt seasons the meat through and the light flour helps form a crisp exterior and helps the sauce cling later. If you do not pat the chicken dry first, the flour will clump and prevent proper browning. Avoid oversalting, especially when your salsa has salt already.
- Add the butter and oil to an oven-safe skillet over medium-high heat. Once the pan is hot, sear the chicken for 3-4 minutes/side until lightly golden. Take the chicken out of the pan and set it aside.: As the fats shimmer you will smell a toasty richness, and when the chicken hits the pan it should sizzle audibly. That sizzle signals effective Maillard reaction that creates complex flavors and a golden crust. When flipping you should see a golden color, not a pale surface, which means you waited long enough to let the crust form. A common issue is crowding the pan, which drops the temperature and causes steaming instead of searing; work in batches if necessary.
- Add the chicken broth to the pan and scrape up any browned bits. Stir in the salsa.: Deglazing lifts concentrated flavor from the pan, producing an aromatic liquid that will blend with the salsa into a cohesive sauce. You will notice small dark bits dissolve and the aroma deepen as the pan releases those caramelized notes. Stirring helps incorporate those flavors evenly. A pitfall is adding too much liquid, which can thin the sauce; use just enough to loosen the fond and marry it to the salsa.
- Add the chicken back into the pan and let the sauce start to bubble. Spoon some of the salsa over the chicken and sprinkle the cheese over top.: As the sauce begins to bubble gently, it will cling to the chicken and warm through the pieces. Spoon the sauce so each piece gets a glossy coating, then scatter the cheese to form a melty blanket that will brown attractively. The bubbling tells you moisture is evaporating and flavors are concentrating, which is crucial for a balanced finish. A mistake is adding cold cheese too early in a very cool pan; it will simply sit rather than melt. Make sure the sauce is warm before adding cheese.
- Place the skillet in the oven and let it cook for 5-7 minutes (chicken will cook through completely and the cheese will melt). Optional: broil it for a couple minutes (watch it carefully).: broil it for a couple minutes watch it carefully. : In the oven the heat finishes cooking the chicken through while the cheese becomes velvety and slightly golden. You will see the edges of the cheese bubble and perhaps brown, and the sauce will settle into a glossy finish. Use an instant read thermometer if uncertain, aiming for 165 F at the thickest part. Avoid leaving it unattended under the broiler since cheese can go from golden to burnt in moments.
- Serve with fresh chopped cilantro if desired. Season with extra salt & pepper as needed.: The final garnish brightens the dish and adds a fresh contrast to the warmed salsa and cheese. I like to sprinkle cilantro right before serving so the herb retains its color and aroma. Taste a small bite to adjust salt and pepper, because salsa saltiness can vary. Overlooking this final seasoning is common, which can leave the dish tasting flat; a quick taste test remedies that.
Notes
- Choose the right skillet: An oven safe cast iron or stainless steel pan distributes heat evenly and helps develop a deep sear on the chicken. If you do not have one, transfer contents to a baking dish before finishing in the oven.
- Control moisture: Pat chicken dry to prevent the flour from clumping and to promote browning. Excess moisture leads to steaming instead of a crisp surface.
- Adjust spice level: Select mild or hot salsa depending on the heat you enjoy, and balance with extra cheese or a touch more chicken broth if the salsa feels intense.
- Watch broiling closely: If you broil for color, it takes only a minute or two to go from golden to burnt, so stand nearby and keep the oven door slightly ajar when your broiler allows it.
- Use a thermometer: An instant read thermometer removes doubt about doneness, ensuring the chicken hits 165 F without overcooking.
- Fresh herbs last minute: Add the cilantro after the dish comes out of the oven to preserve its bright flavor and color, which enhances the finished plate.