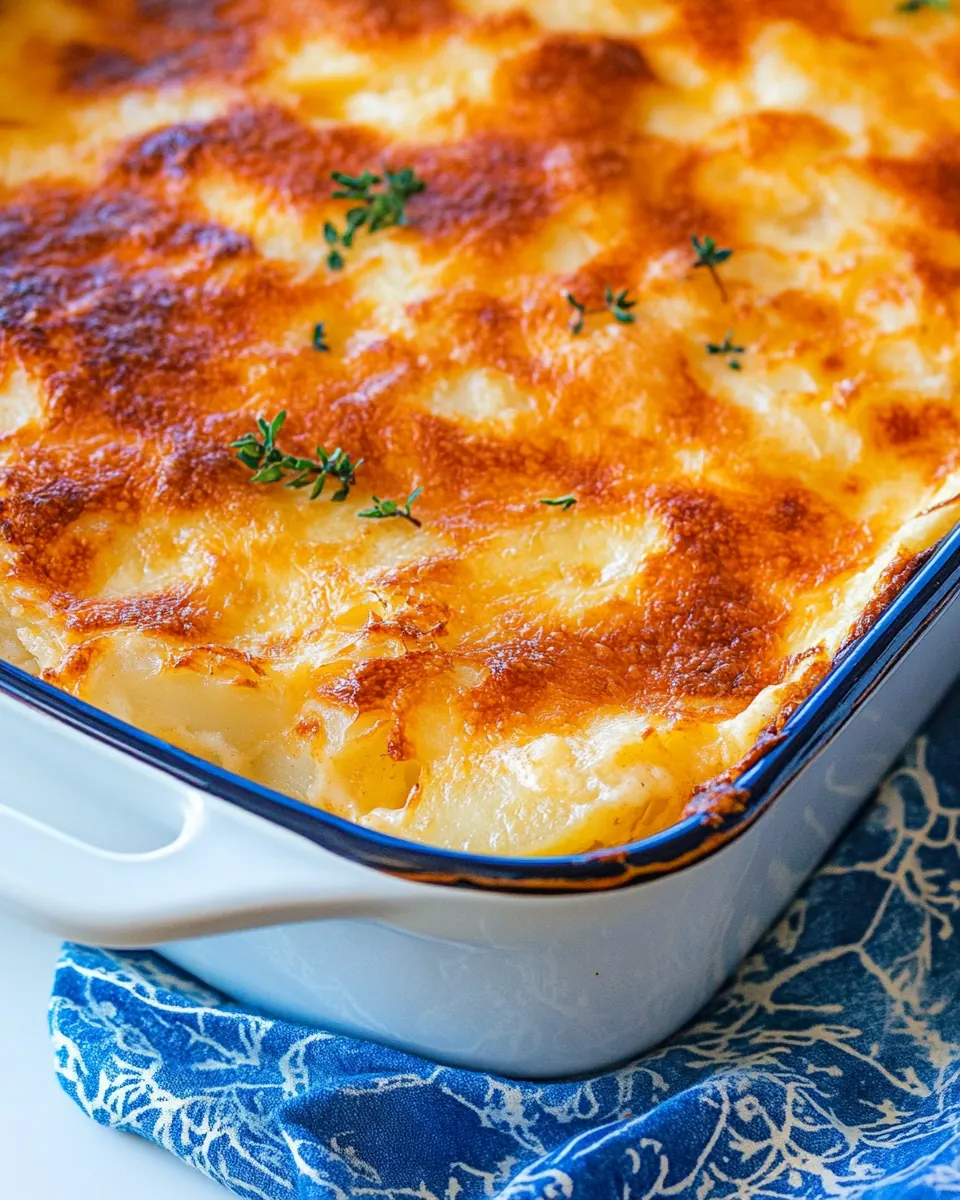
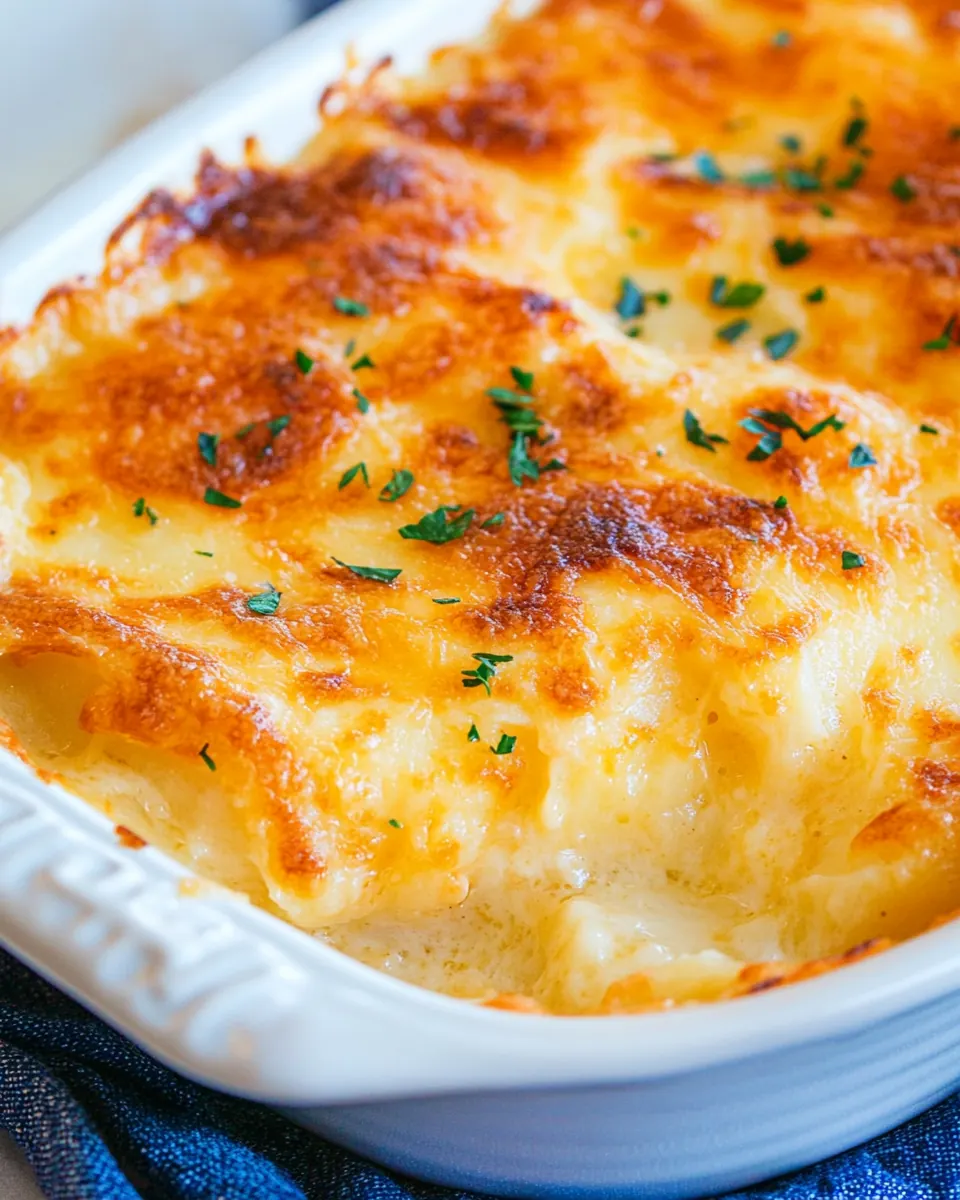
Scalloped Potatoes
Scalloped Potatoes is the kind of dish I reach for when I want warm nostalgia on a fork and the oven filling the kitchen with a cozy, familiar smell.
Years ago I learned this version from a neighbor who carried a casserole to every potluck, and each time I watched plates empty faster than conversation. I love how the layers of thinly sliced potatoes soak in a creamy, cheesy sauce and turn tender at the edges, creating little pockets of comfort. When I make Scalloped Potatoes now, I think about that first winter evening when my hands were cold from carrying groceries and the first bite felt like an instant hug. The simplicity of the ingredients, and the way they transform with heat, is what keeps me coming back.
There is an easy rhythm to the preparation that I enjoy, a calm sequence of slicing, stirring, layering, and waiting. While the oven does most of the work, the routine of assembling the dish is almost meditative, and I find myself remembering conversations and family stories while the sauce thickens on the stove. Serving Scalloped Potatoes always invites lingering at the table, because the texture and the molten cheese coax everyone into savoring each bite. That connection between straightforward technique and deeply comforting results is exactly why this recipe is one of my staples.
Recipe Snapshot
1 hr 10 mins
10 mins
60 mins
Medium
350 kcal
American
Gluten-Free, Low FODMAP
Side Dishes
8X8 Baking Dish, Mandoline Slicer
What We Adore About This Scalloped Potatoes
Classic Comfort
I adore how Scalloped Potatoes channels pure comfort. The combination of tender potatoes and a creamy cheese sauce feels timeless, and I often make it when I want a familiar, soothing meal. The texture, from pillowy centers to slightly crisped edges, hits all the right notes.
Simple Ingredients, Big Impact
This recipe uses pantry-friendly items like milk, butter, flour, and cheddar cheese. I love that you can assemble a memorable dish without exotic items. The chemistry between the roux and milk creates a luscious sauce that clings to the potatoes, ensuring each forkful is satisfying.
Make Ahead Friendly
I often prepare Scalloped Potatoes in advance, which makes entertaining low stress. Layering the casserole and refrigerating it until the oven is warm saves time, and the flavors develop even more after a short rest. Reheating yields nearly identical texture, so it is great for holidays or busy weeknights.
Versatile with Pairings
This dish pairs beautifully with roasted vegetables, a crisp salad, or a simple protein. Because the sauce is rich and creamy, you can balance it with bright, acidic sides. I enjoy how adaptable it is for different menus and occasions, whether a casual family dinner or a special gathering.
Comfort That Travels Well
The casserole is portable and holds up during transport, so I bring it to potlucks and family dinners without worry. The top gets a little golden and takes on appealing color, which makes the presentation feel festive even when the recipe is straightforward.
What Goes Into Scalloped Potatoes
The philosophy here is modest and intentional: each ingredient plays a clear role in texture and flavor. The potatoes provide the structure and starch, the butter and flour build the roux that thickens the sauce, and the milk carries creaminess. The cheddar cheese brings savory depth and a melty finish, while salt and a hint of cayenne pepper lift the profile so the dish never feels one dimensional.
- 4 cups thinly sliced potatoes, (Yukon Gold or Russet; about 2 pounds give or take): Thinly slice potatoes to provide the starchy base and tender layered texture for the casserole; Yukon Gold offers creaminess while Russet yields a fluffier bite. Layer evenly to ensure consistent cooking and absorb the sauce flavors throughout. Use approximately 2 pounds to achieve the intended yield and thickness of scalloped potatoes.
- 3 tablespoons butter: Melt butter to create a rich, velvety fat that forms the roux and adds savory depth to the sauce. Cook gently with flour to remove raw taste and to help the sauce thicken and cling to the potato slices. Use the specified amount to balance richness without overwhelming the dish.
- 3 tablespoons flour: Whisk flour into melted butter to form a roux that thickens the milk into a smooth, creamy sauce. Cook briefly to eliminate a raw flour flavor, then gradually add milk to achieve a lump-free béchamel-like consistency. Measure carefully so the sauce coats the potatoes without becoming gluey.
- 1 1/2 cups milk: Warm milk to provide the liquid body and creamy mouthfeel of the sauce that binds the layers together. Add slowly into the roux while whisking to ensure a silky texture and uniform thickness. Choose whole or low-fat milk according to desired richness but maintain the specified volume for proper consistency.
- 1 teaspoon salt: Season with salt to enhance and balance the flavors of the potatoes and cheese, bringing out savory notes throughout the dish. Add incrementally and taste the sauce before baking to avoid over-salting, especially since cheese contributes additional saltiness. Use the teaspoon as a guideline for a well-seasoned final result.
- 1 dash cayenne pepper: Sprinkle cayenne pepper sparingly to introduce a subtle warmth and gentle heat that brightens the creamy sauce without overpowering it. Adjust quantity very slightly to complement the cheese and potatoes, taking care that the spice remains a background accent. Use the single dash to maintain a delicate balance of flavor.
- 1 1/2 cups grated sharp cheddar cheese, divided: Grate sharp cheddar cheese to contribute bold, tangy flavor and melty richness that forms a cohesive, golden topping and pockets of savory goodness between layers. Reserve half for stirring into the sauce and half for sprinkling on top to achieve both gooeyness and a browned crust. Use the specified amount for a pronounced cheddar character.
- paprika: Dust with paprika to impart a mild smoky-sweet color and subtle flavor to the finished dish while enhancing visual appeal. Sprinkle over the top before or after baking for a warm, inviting finish and slight aromatic lift. Use lightly to complement but not dominate the cheddar topping.
Making Scalloped Potatoes
This is a hands on but forgiving bake, and the steps are comforting once you get the rhythm. I like to have my potatoes sliced and all my ingredients prepped before I heat the pan, because the sauce comes together quickly. Below I expand each instruction into detailed guidance so you can feel confident at every stage.
- Preheat oven to 350 degrees.: You will notice a warm anticipation in the kitchen as the oven climbs to 350 degrees , a stable moderate temperature that encourages even cooking throughout the casserole. The oven should be fully up to temperature before you put the dish in, because a cold oven can lengthen cook time and alter texture. One common mistake is tightening the timeline while the oven is still coming up, which leads to undercooked centers, so wait for the indicator light or give it a few extra minutes.
- In a small sauce pan, melt butter and stir in flour.: As the butter melts in the small sauce pan , it will begin to foam gently and release a toasted aroma, which signals it is ready. Stirring in the flour immediately creates a smooth roux; the texture should be paste like and cohesive. You'll want to cook this mixture for about a minute so the raw flour taste cooks out, and stirring constantly prevents scorching. If the roux darkens too much, your sauce may take on a nutty but slightly burnt note, so reduce the heat if you see color change.
- Whisk in the milk and season with salt and cayenne.: When the milk is added, do it gradually while whisking to coax a velvety, lump free sauce. The mixture will loosen and steam gently, and you should notice a smooth, glossy consistency forming. Add the salt and a dash of cayenne pepper to build flavor, remembering that the cheddar cheese will later contribute saltiness. A typical error is pouring the milk too fast, which creates lumps; to fix that, strain the sauce through a fine mesh or whisk vigorously over low heat.
- Cook sauce on low until smooth and boiling, stirring occasionally with a whisk.: As you simmer the sauce gently, it will thicken and coat the back of a spoon, giving off a comforting steam and a light dairy aroma. Keep the heat low so the sauce thickens slowly and remains silky rather than grainy. Stirring with a whisk helps break up any small clumps and ensures uniform texture. Avoid rapid rolling boils, which can curdle the sauce; if it starts to seize, remove from heat and whisk in a splash of milk to smooth it out.
- Reduce heat and stir in 1 cup of the cheddar cheese.: Lowering the heat protects the sauce from separating when you add the cheddar cheese . As the cheese melts, it will turn the sauce glossy and give off a savory, tangy scent. Stir slowly until the cheese is fully incorporated and the sauce becomes thick and indulgent. A common misstep is adding cold cheese or too much at once, which can cause clumping; allow the cheese to come to room temperature if possible and add it gradually.
- Place a half of the sliced potatoes in a lightly greased 1.5 quart baking dish (8×8 or 9×9 will work).: The moment you layer the first half of the thinly sliced potatoes into the greased baking dish, you will notice the neat, overlapping pattern that helps them cook evenly. Arrange the slices so there are no large gaps, which ensures every piece will be coated and cooked through. Use an 8 by 8 or 9 by 9 pan to maintain the intended depth; using a much larger pan thins the layers and can dry the casserole out. A mistake to avoid is stacking slices too thickly in one spot, which leads to uneven doneness.
- Pour half of cheese sauce over potatoes.: When you pour half of the glossy cheese sauce over the first potato layer, it will seep into the crevices and begin to soften the edges, creating those tender pockets that define the dish. The sound is a gentle pour and the visual cue is sauce pooled and brushed across the top. Distribute it evenly so the sauce reaches between slices; using a spoon to coax it into gaps helps. If you pour too quickly and flood one side, gently tilt the pan to even it out.
- Repeat with second layer of potatoes and cheese sauce.: Adding the second layer repeats the comforting ritual, and you will see the casserole build in height as the layers stack. The top layer should be arranged neatly so the sauce can coat each slice; this is when the structural balance of the casserole is set. One common problem is misalignment that leaves some slices exposed, which can crisp prematurely; take an extra moment to adjust the slices for even coverage.
- Sprinkle the remaining 1/2 cup of cheddar cheese on top.: The final scatter of cheddar cheese will create a melty, golden crust as it bakes. The cheese on top browns and bubbles, offering a textural contrast to the soft interior. Watch for even coverage so the top develops uniform color. A pitfall here is using pre shredded cheese with anti caking agents that can melt differently; freshly grated cheese usually yields a superior melt.
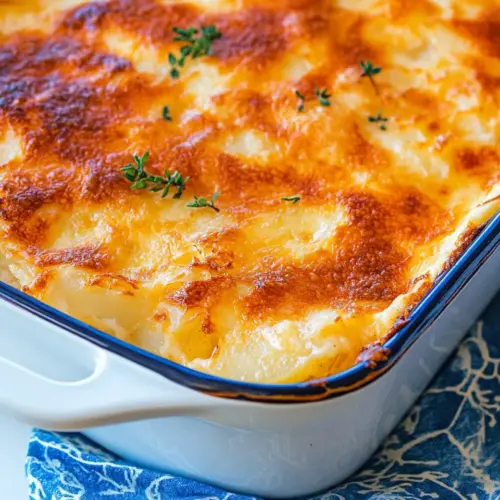
- Top with some paprika for color.: A light dusting of paprika adds an inviting color and a whisper of sweet peppery flavor. It does not change the texture, but it elevates appearance so the casserole looks finished and festive. Avoid heavy application, which can impart an unnecessary bitter note; a gentle sprinkle is sufficient.
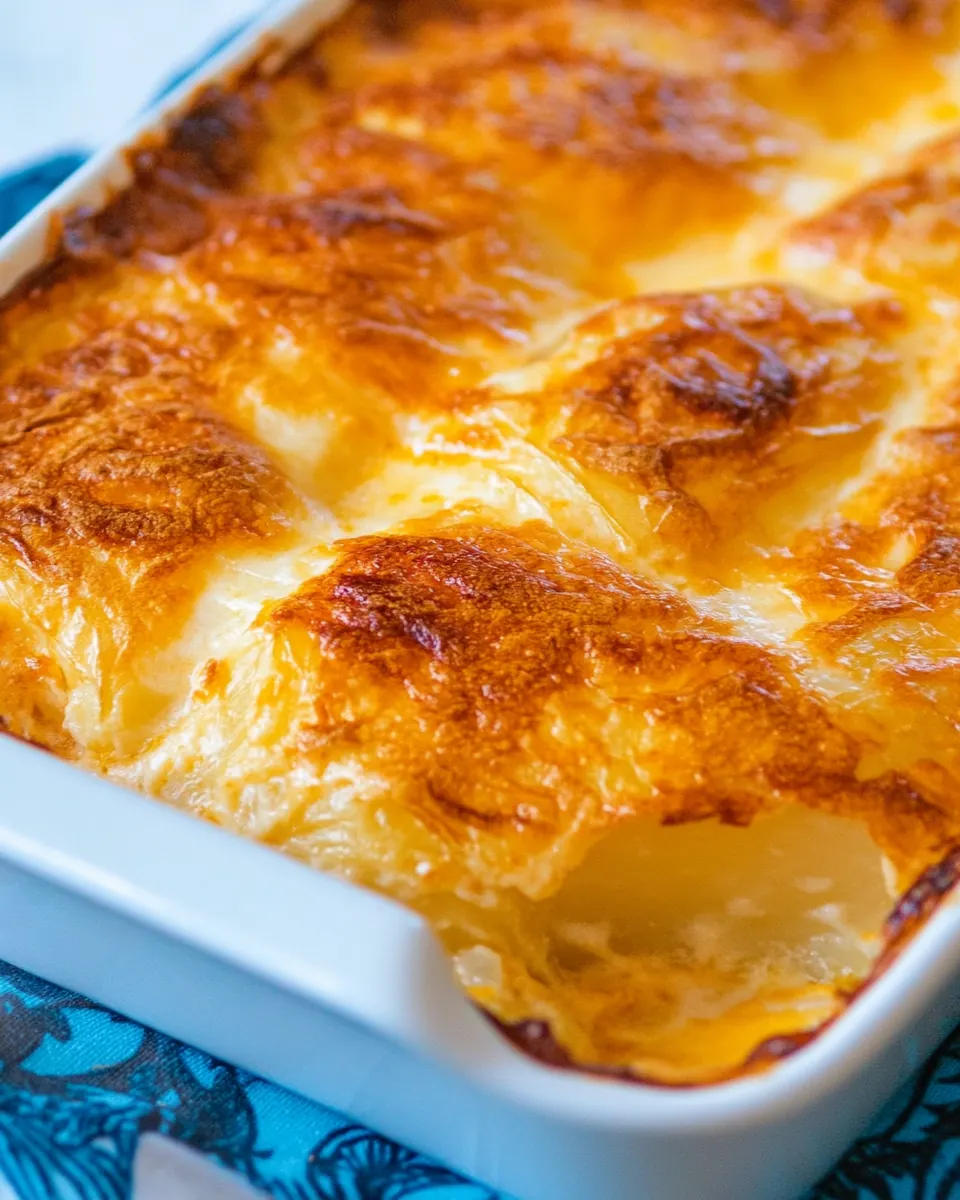
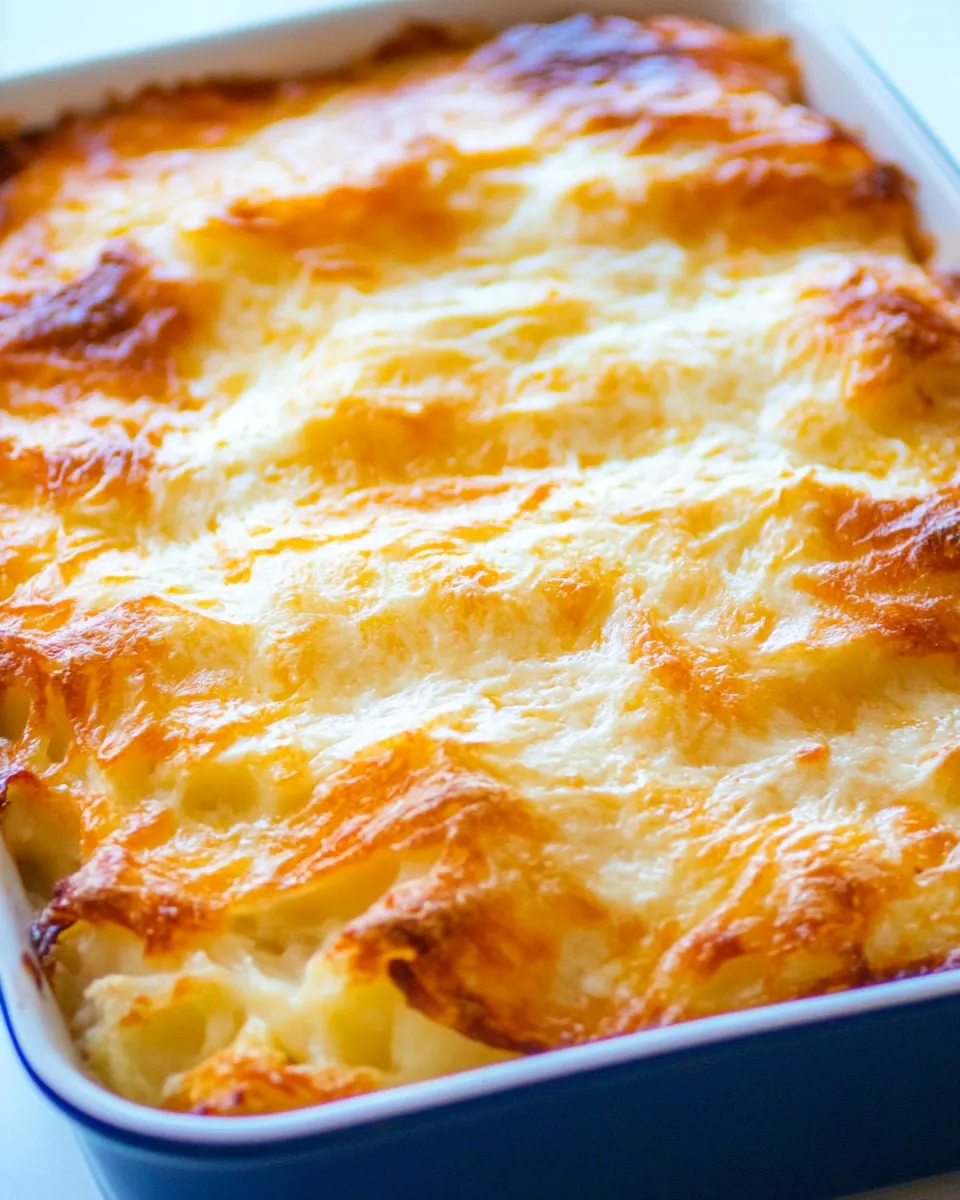
- Bake uncovered for about 1 hour at 350°F and when cheese is golden brown.: As the casserole bakes uncovered, the kitchen will fill with a rich, dairy aroma and the edges of the potatoes will begin to show tiny browned bits where starch caramelizes. The top should turn a warm golden brown and the sauce should bubble around the sides, indicating the interior is cooked. A thermometer inserted in the center should read hot and the potatoes should be tender when pierced with a knife. The common error is covering the dish, which traps steam and prevents the top from browning, so bake uncovered for that desirable finish.
Making Adjustments
I like to tweak small details to suit the occasion, while keeping the core method intact. Below are focused tips that help you adapt texture, flavor, and timing without straying from the straightforward charm of the recipe.
- Cheese Choice Use a sharp cheddar cheese for a pronounced tang, or a milder cheese for subtler richness; remember that sharper cheese adds more salt, so adjust the salt accordingly.
- Potato Type Yukon Gold gives a creamier interior while Russet yields a slightly fluffier bite; either works, but consistency in slicing is more important than the variety.
- Make Ahead Assemble the casserole up to the baking step and refrigerate for a few hours; bring it back to room temperature for about 20 minutes before baking to ensure even cooking.
- Texture Control For creamier results, slice potatoes thinner and add an extra splash of milk; for firmer layers, keep slices slightly thicker and avoid adding excess liquid.
- Top Browning If you want a crunchier top, broil for a minute or two at the end, watching carefully because it can go from golden to burnt quickly.
What to Serve With Scalloped Potatoes
This casserole is versatile at the table, and pairing it thoughtfully elevates the meal. Think about balancing the rich, creamy character of the dish with brighter, textural contrasts. Below are serving ideas, seasons, and storage thoughts to help you plan the full plate.
- Simple Greens A crisp green salad with a tangy vinaigrette cuts through the richness and offers refreshing contrast, making it a reliable side for weeknight dinners or holiday spreads.
- Roasted Vegetables Oven roasted root vegetables or green beans provide earthy flavors and a slightly caramelized texture that pairs well with the creamy casserole.
- Proteins Serve alongside roasted or grilled proteins for a complete meal. The creamy potatoes complement roasted chicken or beef, and the combination works well for family dinners and special occasions.
- Occasions This dish is great for family gatherings, holiday tables, and potlucks because it can be made ahead and travels well; its comforting profile suits colder months like fall and winter beautifully.
- Storage Refrigerate leftovers in an airtight container for up to four days. Reheat in a moderate oven until warmed through to preserve texture, rather than microwaving which can make the layers soggy.
- Seasonal Pairings In fall, pair with roasted squash and a crisp apple salad for seasonal balance; in spring, a bright cucumber salad provides a lighter counterpoint.
- Serving Style Serve portions straight from the baking dish for a homey presentation, or slice and plate for a more formal feel. Let the casserole rest for a few minutes before slicing so portions hold together.
FAQ
Conclusion
Scalloped Potatoes stands out because it transforms humble ingredients into a warmly satisfying casserole with creamy sauce and a golden, cheesy top. Give it a try the next time you want a comforting side that is both familiar and impressive, whether for a weeknight or a special meal. It invites conversation and seconds, and the hands on assembly paired with hands off baking makes it an easy, rewarding dish to share with family and friends.
Scalloped Potatoes
Equipment
- 8x8 baking dish
- Mandoline Slicer
Ingredients
- 4 cups thinly sliced potatoes, (Yukon Gold or Russet; about 2 pounds give or take) Thinly slice potatoes to provide the starchy base and tender layered texture for the casserole; Yukon Gold offers creaminess while Russet yields a fluffier bite. Layer evenly to ensure consistent cooking and absorb the sauce flavors throughout. Use approximately 2 pounds to achieve the intended yield and thickness of scalloped potatoes.
- 3 tablespoons butter Melt butter to create a rich, velvety fat that forms the roux and adds savory depth to the sauce. Cook gently with flour to remove raw taste and to help the sauce thicken and cling to the potato slices. Use the specified amount to balance richness without overwhelming the dish.
- 3 tablespoons flour Whisk flour into melted butter to form a roux that thickens the milk into a smooth, creamy sauce. Cook briefly to eliminate a raw flour flavor, then gradually add milk to achieve a lump-free béchamel-like consistency. Measure carefully so the sauce coats the potatoes without becoming gluey.
- 1 1/2 cups milk Warm milk to provide the liquid body and creamy mouthfeel of the sauce that binds the layers together. Add slowly into the roux while whisking to ensure a silky texture and uniform thickness. Choose whole or low-fat milk according to desired richness but maintain the specified volume for proper consistency.
- 1 teaspoon salt Season with salt to enhance and balance the flavors of the potatoes and cheese, bringing out savory notes throughout the dish. Add incrementally and taste the sauce before baking to avoid over-salting, especially since cheese contributes additional saltiness. Use the teaspoon as a guideline for a well-seasoned final result.
- 1 dash cayenne pepper Sprinkle cayenne pepper sparingly to introduce a subtle warmth and gentle heat that brightens the creamy sauce without overpowering it. Adjust quantity very slightly to complement the cheese and potatoes, taking care that the spice remains a background accent. Use the single dash to maintain a delicate balance of flavor.
- 1 1/2 cups grated sharp cheddar cheese, divided Grate sharp cheddar cheese to contribute bold, tangy flavor and melty richness that forms a cohesive, golden topping and pockets of savory goodness between layers. Reserve half for stirring into the sauce and half for sprinkling on top to achieve both gooeyness and a browned crust. Use the specified amount for a pronounced cheddar character.
- paprika Dust with paprika to impart a mild smoky-sweet color and subtle flavor to the finished dish while enhancing visual appeal. Sprinkle over the top before or after baking for a warm, inviting finish and slight aromatic lift. Use lightly to complement but not dominate the cheddar topping.
Instructions
- Preheat oven to 350 degrees.: You will notice a warm anticipation in the kitchen as the oven climbs to 350 degrees , a stable moderate temperature that encourages even cooking throughout the casserole. The oven should be fully up to temperature before you put the dish in, because a cold oven can lengthen cook time and alter texture. One common mistake is tightening the timeline while the oven is still coming up, which leads to undercooked centers, so wait for the indicator light or give it a few extra minutes.
- In a small sauce pan, melt butter and stir in flour.: As the butter melts in the small sauce pan , it will begin to foam gently and release a toasted aroma, which signals it is ready. Stirring in the flour immediately creates a smooth roux; the texture should be paste like and cohesive. You'll want to cook this mixture for about a minute so the raw flour taste cooks out, and stirring constantly prevents scorching. If the roux darkens too much, your sauce may take on a nutty but slightly burnt note, so reduce the heat if you see color change.
- Whisk in the milk and season with salt and cayenne.: When the milk is added, do it gradually while whisking to coax a velvety, lump free sauce. The mixture will loosen and steam gently, and you should notice a smooth, glossy consistency forming. Add the salt and a dash of cayenne pepper to build flavor, remembering that the cheddar cheese will later contribute saltiness. A typical error is pouring the milk too fast, which creates lumps; to fix that, strain the sauce through a fine mesh or whisk vigorously over low heat.
- Cook sauce on low until smooth and boiling, stirring occasionally with a whisk.: As you simmer the sauce gently, it will thicken and coat the back of a spoon, giving off a comforting steam and a light dairy aroma. Keep the heat low so the sauce thickens slowly and remains silky rather than grainy. Stirring with a whisk helps break up any small clumps and ensures uniform texture. Avoid rapid rolling boils, which can curdle the sauce; if it starts to seize, remove from heat and whisk in a splash of milk to smooth it out.
- Reduce heat and stir in 1 cup of the cheddar cheese.: Lowering the heat protects the sauce from separating when you add the cheddar cheese . As the cheese melts, it will turn the sauce glossy and give off a savory, tangy scent. Stir slowly until the cheese is fully incorporated and the sauce becomes thick and indulgent. A common misstep is adding cold cheese or too much at once, which can cause clumping; allow the cheese to come to room temperature if possible and add it gradually.
- Place a half of the sliced potatoes in a lightly greased 1.5 quart baking dish (8×8 or 9×9 will work).: The moment you layer the first half of the thinly sliced potatoes into the greased baking dish, you will notice the neat, overlapping pattern that helps them cook evenly. Arrange the slices so there are no large gaps, which ensures every piece will be coated and cooked through. Use an 8 by 8 or 9 by 9 pan to maintain the intended depth; using a much larger pan thins the layers and can dry the casserole out. A mistake to avoid is stacking slices too thickly in one spot, which leads to uneven doneness.
- Pour half of cheese sauce over potatoes.: When you pour half of the glossy cheese sauce over the first potato layer, it will seep into the crevices and begin to soften the edges, creating those tender pockets that define the dish. The sound is a gentle pour and the visual cue is sauce pooled and brushed across the top. Distribute it evenly so the sauce reaches between slices; using a spoon to coax it into gaps helps. If you pour too quickly and flood one side, gently tilt the pan to even it out.
- Repeat with second layer of potatoes and cheese sauce.: Adding the second layer repeats the comforting ritual, and you will see the casserole build in height as the layers stack. The top layer should be arranged neatly so the sauce can coat each slice; this is when the structural balance of the casserole is set. One common problem is misalignment that leaves some slices exposed, which can crisp prematurely; take an extra moment to adjust the slices for even coverage.
- Sprinkle the remaining 1/2 cup of cheddar cheese on top.: The final scatter of cheddar cheese will create a melty, golden crust as it bakes. The cheese on top browns and bubbles, offering a textural contrast to the soft interior. Watch for even coverage so the top develops uniform color. A pitfall here is using pre shredded cheese with anti caking agents that can melt differently; freshly grated cheese usually yields a superior melt.
- Top with some paprika for color.: A light dusting of paprika adds an inviting color and a whisper of sweet peppery flavor. It does not change the texture, but it elevates appearance so the casserole looks finished and festive. Avoid heavy application, which can impart an unnecessary bitter note; a gentle sprinkle is sufficient.
- Bake uncovered for about 1 hour at 350°F and when cheese is golden brown.: As the casserole bakes uncovered, the kitchen will fill with a rich, dairy aroma and the edges of the potatoes will begin to show tiny browned bits where starch caramelizes. The top should turn a warm golden brown and the sauce should bubble around the sides, indicating the interior is cooked. A thermometer inserted in the center should read hot and the potatoes should be tender when pierced with a knife. The common error is covering the dish, which traps steam and prevents the top from browning, so bake uncovered for that desirable finish.
Notes
- Cheese Choice Use a sharp cheddar cheese for a pronounced tang, or a milder cheese for subtler richness; remember that sharper cheese adds more salt, so adjust the salt accordingly.
- Potato Type Yukon Gold gives a creamier interior while Russet yields a slightly fluffier bite; either works, but consistency in slicing is more important than the variety.
- Make Ahead Assemble the casserole up to the baking step and refrigerate for a few hours; bring it back to room temperature for about 20 minutes before baking to ensure even cooking.
- Texture Control For creamier results, slice potatoes thinner and add an extra splash of milk; for firmer layers, keep slices slightly thicker and avoid adding excess liquid.
- Top Browning If you want a crunchier top, broil for a minute or two at the end, watching carefully because it can go from golden to burnt quickly.