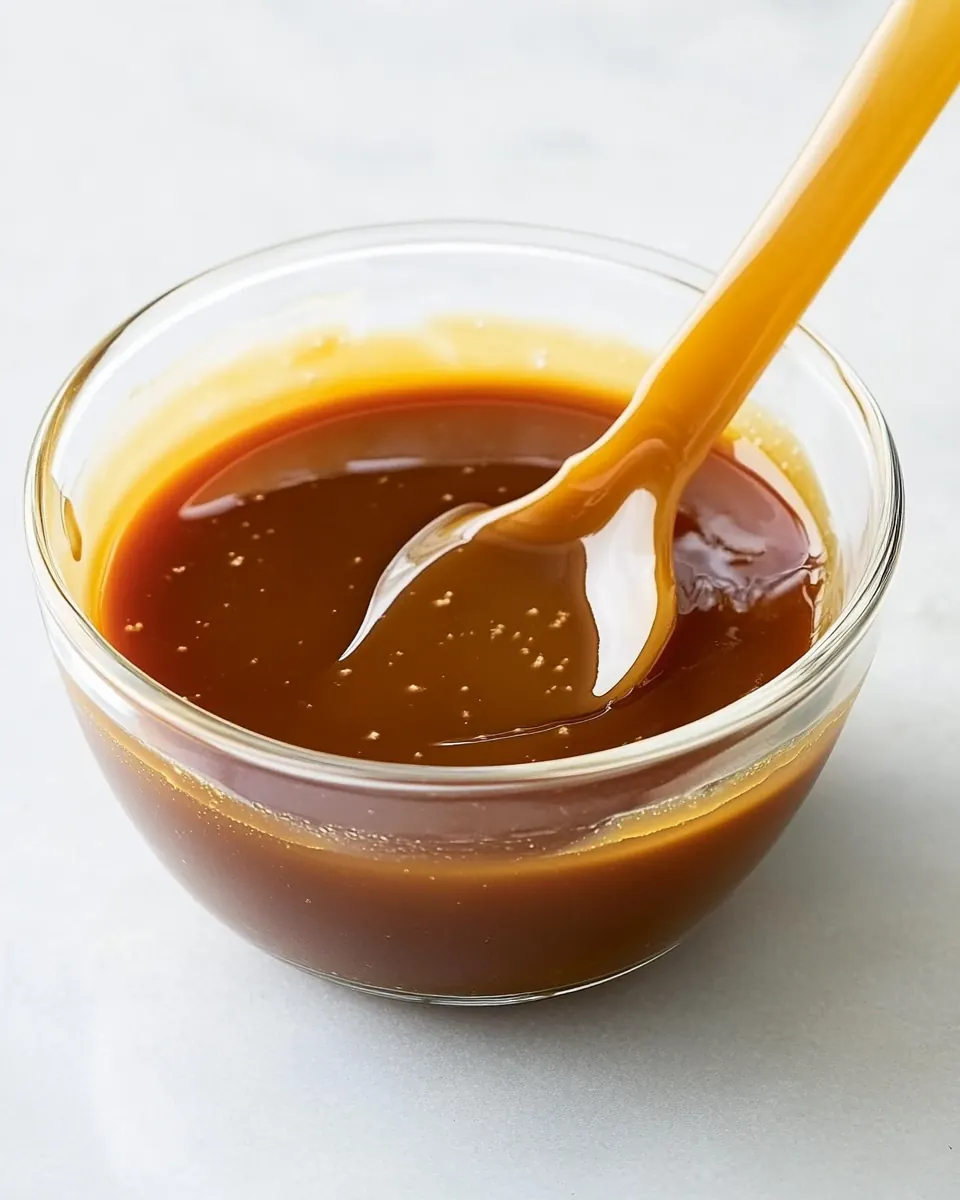
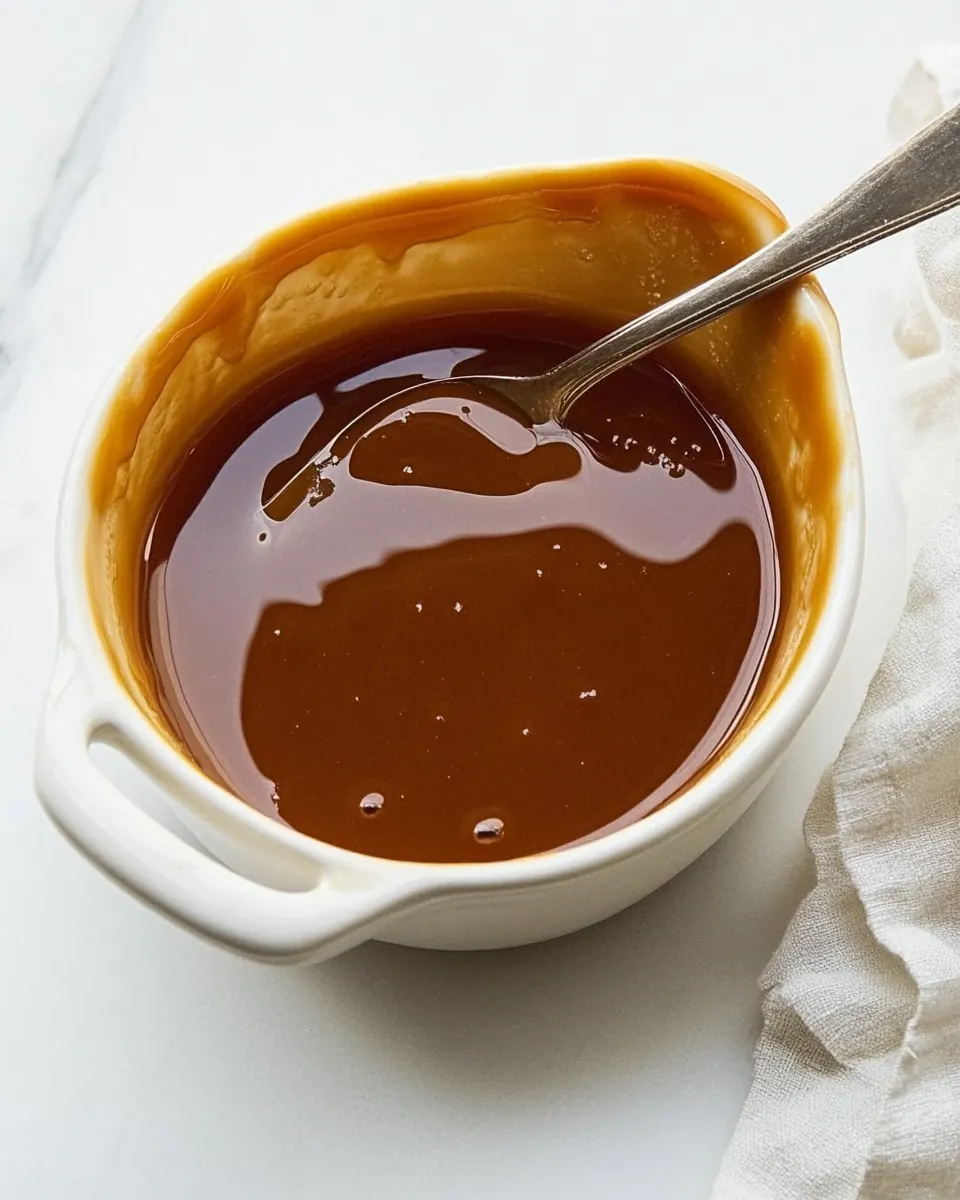
Salted Caramel Sauce
Salted Caramel Sauce is one of those timeless, small pleasures I reach for when I want to elevate a simple dessert into something memorable.
I first fell for Salted Caramel Sauce on a rainy evening when I was trying to repair a burnt batch of cookies by drizzling something irresistible over them. The warm, sticky sauce turned those charred edges into a cozy treat, and I still remember the way the kitchen smelled, sweet and slightly toasty. Ever since, I keep the components on hand, because few things rescue a dessert with as much grace.
Over the years I learned small tricks that make a big difference when making Salted Caramel Sauce, like warming the heavy whipping cream ahead so it does not seize the caramel, and adding the Maldon sea salt at the end so the flavor pops. I love that this sauce is forgiving, and that each batch carries the trace of the moment it was made, whether it was a quick fix after dinner or a deliberate weekend project. I often tell friends this is one of the easiest ways to make any dessert feel homemade and special.
Recipe Snapshot
25 mins
10 mins
15 mins
Easy
200 kcal
American
Gluten-Free, Low FODMAP
Desserts
Small saucepan, Medium saucepan, Whisk, Candy thermometer
What We Adore About This Salted Caramel Sauce
Deep, layered flavor
I adore how Salted Caramel Sauce balances sweet and savory notes. The caramelization of the granulated sugar brings warm, nutty aromas, while the Maldon sea salt sharpens the finish. I find that this contrast is what turns a simple topping into a multi dimensional flavor experience that keeps people reaching back for more.
Versatility on the table
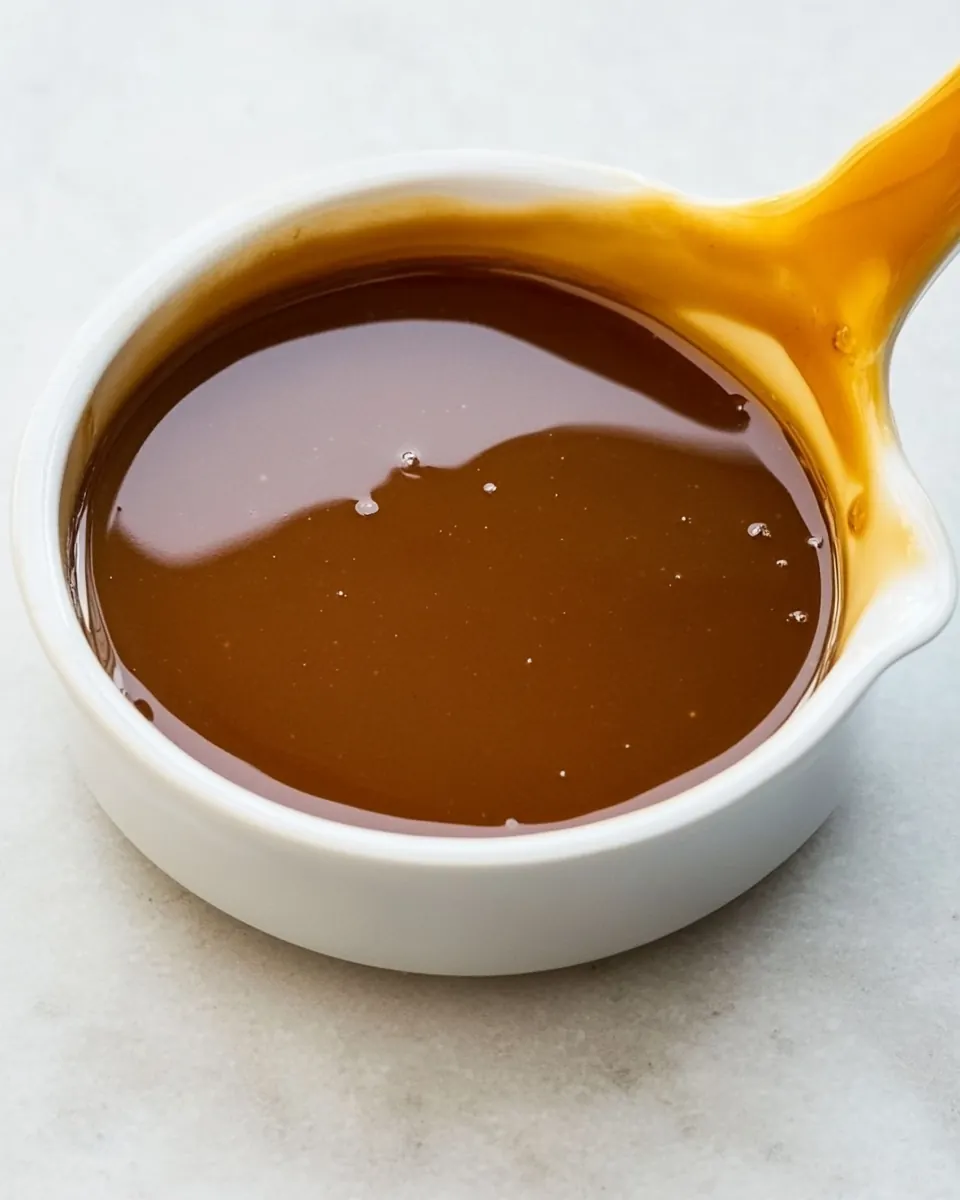
We use this sauce on everything from ice cream to fruit, and it even transforms plain vanilla preparations into something luxurious. Because the texture is smooth and pourable after cooling, it is great for drizzling, dipping, or folding into creams, which makes it one of my kitchen staples for entertaining.
Simple ingredient list, big payoff
I love recipes that respect the ingredient. With just granulated sugar, unsalted butter, heavy whipping cream, and a touch of vanilla extract and Maldon sea salt, you get something complex tasting. That minimalism lets the quality of each component shine, so I always recommend using the best butter and real vanilla you have.
Great for gifting and leftovers
Because it stores well in the refrigerator, I often make extra jars of Salted Caramel Sauce to give away. It carries well, and recipients appreciate a homemade treat. I also find the sauce ages nicely, mellowing while staying spoonable, which is perfect if you want to prepare ahead for gatherings.
Controlled technique, reliable results
The method looks dramatic, but once you know the signs the process becomes reliable. Watching sugar go from wet sand to light amber, feeling the change in the pan, and smelling that toasty fragrance are sensory cues I trust. For me, those cues are as satisfying as the final taste.
Ingredients to Make Salted Caramel Sauce
The ingredients for this sauce are intentionally few and purposeful. They work together to create a silky, balanced topping: the granulated sugar builds the caramel backbone, the unsalted butter adds richness and mouthfeel, the heavy whipping cream loosens and smooths the texture, and the Maldon sea salt sharpens the finish. The vanilla extract rounds the flavor and ties everything together.
- 1/2 cup (120 grams) heavy whipping cream, room temperature: Provide richness and a smooth mouthfeel when incorporated into hot caramel, helping to create a creamy, pourable sauce; add at room temperature to prevent seizing and blend slowly for a glossy texture.
- 1 teaspoon (3 grams) Maldon sea salt: Enhance and balance the sweetness with bright, flaky mineral notes that cut through the caramelized sugar; sprinkle gradually and taste to achieve the desired salty-sweet contrast.
- 1 cup (200 grams) granulated sugar: Caramelize into a deep amber syrup when heated with water, forming the sweet backbone of the sauce; monitor color closely to avoid burning and stir only when necessary during boiling.
- 4 tablespoons (60 grams) water, divided: Hydrate and dissolve the sugar initially to encourage even caramelization and control the cooking speed; divide usage to help prevent crystallization and to deglaze the pan safely.
- 6 tablespoons (84 grams) unsalted butter, softened and cubed: Contribute a rich, buttery flavor and silky body to the sauce while softening the caramel’s intensity; add cubed and softened to the hot sugar carefully and whisk until fully incorporated.
- 2 teaspoons (8 grams) vanilla extract: Round out the flavor with warm, fragrant notes that deepen the overall profile and enhance the perception of sweetness; stir in toward the end of cooking to preserve aroma.
How to Cook Salted Caramel Sauce
Making Salted Caramel Sauce is an exercise in attention and sensory observation more than speed. Follow the steps patiently, and you will be rewarded with a glossy sauce that smells warm and toasty. Keep a whisk handy, and prepare your containers before you begin because the process moves quickly once the sugar starts to color.
- In a small saucepan, heat cream and salt over very low heat. Simmer until salt is dissolved. Remove from heat, and set aside.: The moment you warm the heavy whipping cream and Maldon sea salt , you will notice a gentle steam rising and a faint milk scent, signaling the cream is nearing temperature. This low heat prevents scalding while ensuring the cream is warm enough to integrate smoothly with hot caramel later. Why this matters, the hot cream tempers the caramel and avoids crystallization. A common mistake is letting the cream simmer too aggressively, which creates foam and may alter texture, so keep the heat very low and stir occasionally.
- In a medium saucepan, heat sugar and 3 tablespoons (45 grams) water over high heat, being careful not to splash sides of pan. (It should be the consistency of wet sand.) Use remaining 1 tablespoon (15 grams) water to brush down sides of pan, and stir to help sugar dissolve. (Do not stir once it starts to boil.) Cook until desired light amber color is reached and a candy thermometer registers 330°F (166°C). Remove from heat; slowly add warm cream mixture, whisking to combine. Add butter, a few pieces at a time, whisking until combined. Stir in vanilla. Let cool completely.: As the mixture barely simmers, watch for tiny movements at the surface and a glossy sheen, which indicate the salt is dissolving into the heavy whipping cream . The dissolved salt will distribute evenly, ensuring consistent seasoning in the finished sauce. Stir gently with a spoon so the salt does not settle. Avoid boiling, which can concentrate the cream and change the way it reacts with the caramel.
- Remove from heat, and set aside: Once the Maldon sea salt has dissolved, take the pan off the burner and set it aside, still warm. The residual heat will keep it at a steady temperature. This pause lets you focus on the sugar stage without rushing, and it prevents the cream from overheating when combined with the caramel. One slip is to forget to keep it warm, which can cause the caramel to seize when added.
- In a medium saucepan, heat sugar and 3 tablespoons (45 grams) water over high heat, being careful not to splash sides of pan: When the granulated sugar and the majority of the water are heating, you will see the sugar dissolve into a syrup, then begin to steam and deepen in color. The pan may hiss softly, and a sweet, toasty scent will develop. This high heat encourages even caramelization. Avoid stirring at this stage, as agitation can cause sugar crystals to form on the sides. A frequent problem is splashing, which can crystalize the sugar; use a steady hand and moderate the heat if it spurts.
- (It should be the consistency of wet sand.): The initial syrup will look grainy like wet sand , and that texture means the sugar has hydrated but not yet fully melted. At this point the surface will ripple and tiny steam pockets may pop. Understanding this visual cue helps you time the transition to smooth caramel. Rushing ahead can result in uneven coloring, so be patient and watch closely.
- Use remaining 1 tablespoon (15 grams) water to brush down sides of pan, and stir to help sugar dissolve: Gently brushing the pan sides with the reserved water washes any stray sugar crystals back into the syrup, preventing recrystallization. You will see those grains dissolve into the glossy syrup, a reassuring visual signal. This technique keeps the surface clean so the caramelization proceeds evenly. Do not splash excess water into the bubbling sugar, as sudden temperature shifts can cause sputtering.
- (Do not stir once it starts to boil.): When the mixture begins to boil, resist stirring. The boil will create motion that encourages even color change. Stirring can introduce crystals and make the final sauce grainy. Instead, gently swirl the pan if you need to even the heat. One mistake is over stirring, so stand by and observe rather than agitate.
- Cook until desired light amber color is reached and a candy thermometer registers 330°F (166°C): As the syrup progresses you will notice it shift from clear to pale gold, then to a warm, light amber hue, and the aroma will deepen to a toasted, caramel note. The thermometer at 330°F (166°C) is a reliable checkpoint for a light caramel that is not bitter. Timing by color is intuitive, but a thermometer avoids guesswork. Be careful not to let it pass into dark amber, which yields a more bitter taste.
- Remove from heat; slowly add warm cream mixture, whisking to combine: Off the heat, pour the warm heavy whipping cream mixture in a slow, steady stream while whisking. Expect a brief bubbling and steam as the hot caramel meets the warm cream, accompanied by a rich, toasty scent. This addition transforms the caramel into a glossy sauce and controls temperature so the sauce stays smooth. A common error is adding cold cream, which can cause the caramel to seize into lumps, so ensure the cream is warm before combining.
- Add butter, a few pieces at a time, whisking until combined: Adding the unsalted butter in small pieces allows it to melt evenly into the sauce, creating a velvety texture and a rich, rounded mouthfeel. You will see the sauce become shinier and thicker as the butter incorporates. This technique prevents separation and helps the sauce set to the right consistency. Adding all the butter at once or using cold butter may cause uneven emulsification, so add gradually and whisk continuously.
- Stir in vanilla: Once the sauce is harmonious and glossy, stir in the vanilla extract off the heat to preserve its aroma. The scent will bloom immediately, adding a warm, floral lift to the deep caramel notes. This small addition rounds and balances the sweetness. Avoid stirring the vanilla over high heat, which can weaken its fragrance.
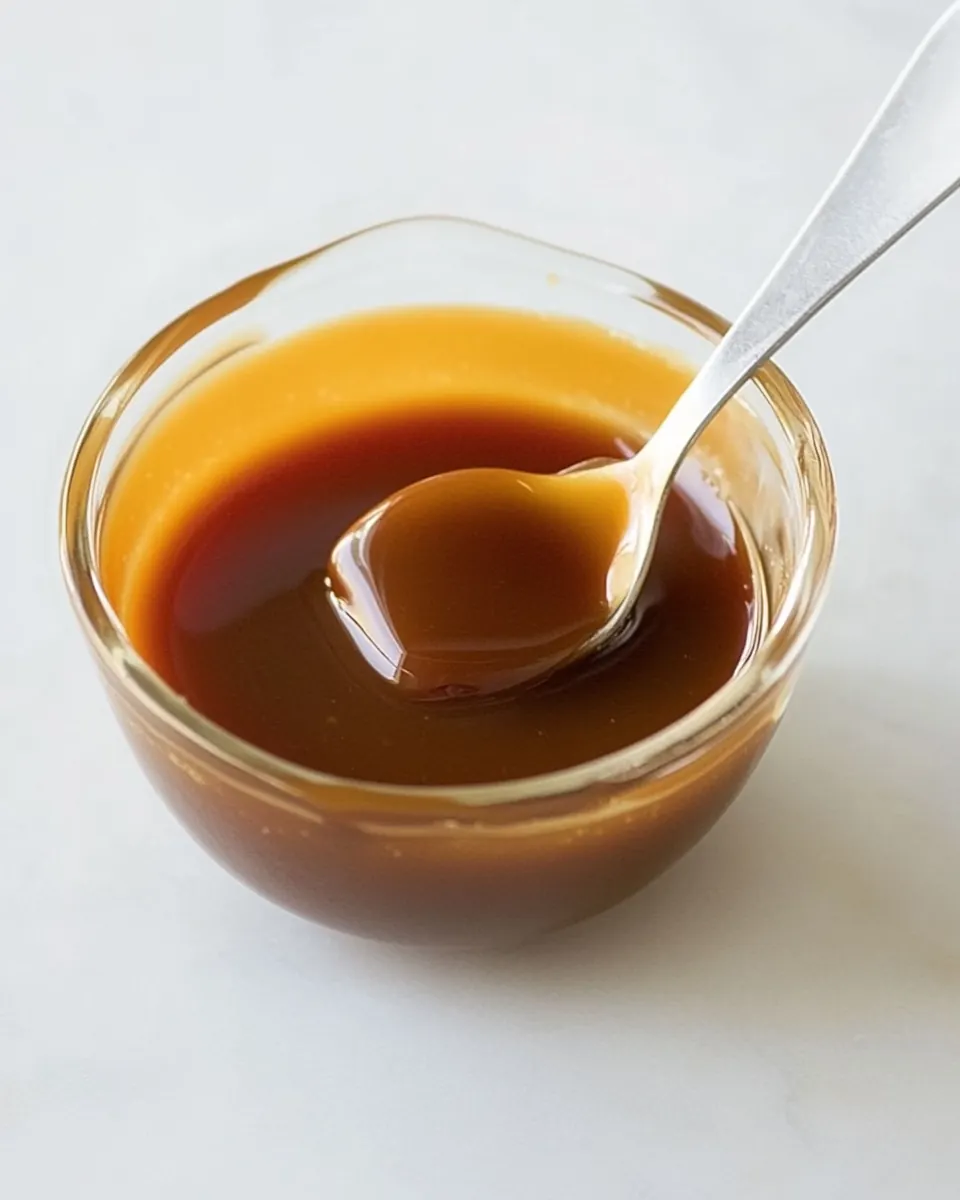
- Let cool completely: Allow the sauce to reach room temperature and thicken slightly before transferring it to a jar. As it cools the viscosity increases and the flavors settle into balance, revealing aromatic depth and a smooth texture. Refrigerate if storing for later. A mistake to watch for is sealing the jar while the sauce is still hot, which can create condensation and dilute the texture; cool fully before closing.
Expert Tips about Salted Caramel Sauce
These tips are drawn from repeated batches and small adjustments that make the process reliably successful. I include sensory cues and practical notes so you can make Salted Caramel Sauce with confidence.
- Warm the cream first This reduces the shock when hot caramel meets cream, preventing the sauce from seizing into grainy bits. Keep the cream at a gentle warm temperature rather than boiling.
- Choose quality butter Higher fat content in the unsalted butter creates a creamier mouthfeel and a more luxurious final texture. Cut into small cubes so it incorporates quickly.
- Measure water accurately The initial water helps the granulated sugar dissolve evenly, and the reserved tablespoon is for washing down the pan sides. This small step helps avoid unwanted crystals.
- Use a candy thermometer Relying on temperature as well as color gives consistent results, especially if your stove runs hot or cool. Aim for 330°F (166°C) for a light amber caramel.
- Finish with flaky salt Sprinkling Maldon sea salt at the end retains the texture of the flakes and highlights the caramel’s sweetness rather than making it uniformly salty.
Side Dish Ideas for Salted Caramel Sauce
Salted Caramel Sauce adapts to many serving contexts, from casual desserts to special occasions. Here are detailed pairing ideas and serving suggestions to help you make the most of a jar of sauce. Use these to inspire presentations, storage choices, and seasonal menus.
- Ice cream drizzle Warm the sauce slightly and spoon it over scoops of ice cream for an indulgent finish. This is an effortless party trick that everyone enjoys.
- Fruit pairing Use the sauce as a dip for sliced apples or pears, creating a contrast between fresh acidity and sweet caramel. It works well for snack platters or dessert boards.
- Cake filling Layer a thin spread between cake layers to add moistness and depth. The sauce complements butter based cakes or sponge cakes beautifully.
- Breakfast accompaniment Drizzle over pancakes, waffles, or French toast for a weekend brunch treat. A little goes a long way to elevate morning favorites.
- Gift jars Pour cooled sauce into small jars, label them, and include serving suggestions. These make thoughtful homemade gifts for holidays or special occasions.
- Storage tips Keep refrigerated in a sealed jar for up to two weeks, and reheat gently before serving. For longer storage, freeze in small portions and thaw in the refrigerator overnight.
- Seasonal use This sauce is welcome year round, and is particularly cozy for fall and winter gatherings when warm, caramelized flavors feel right at home.
FAQ
Conclusion
This Salted Caramel Sauce stands out for its deep toasted flavor and silky texture. It’s a simple recipe that yields a big payoff, turning everyday desserts into special treats. Try it on ice cream, fruit, or pancakes to see how a few quality ingredients transform a dish. Make a batch, savor it, and share jars with friends to spread the joy.
Salted Caramel Sauce
Equipment
- Small Saucepan
- Medium Saucepan
- Whisk
- Candy thermometer
Ingredients
- 1/2 cup (120 grams) heavy whipping cream, room temperature Provide richness and a smooth mouthfeel when incorporated into hot caramel, helping to create a creamy, pourable sauce; add at room temperature to prevent seizing and blend slowly for a glossy texture.
- 1 teaspoon (3 grams) Maldon sea salt Enhance and balance the sweetness with bright, flaky mineral notes that cut through the caramelized sugar; sprinkle gradually and taste to achieve the desired salty-sweet contrast.
- 1 cup (200 grams) granulated sugar Caramelize into a deep amber syrup when heated with water, forming the sweet backbone of the sauce; monitor color closely to avoid burning and stir only when necessary during boiling.
- 4 tablespoons (60 grams) water, divided Hydrate and dissolve the sugar initially to encourage even caramelization and control the cooking speed; divide usage to help prevent crystallization and to deglaze the pan safely.
- 6 tablespoons (84 grams) unsalted butter, softened and cubed Contribute a rich, buttery flavor and silky body to the sauce while softening the caramel’s intensity; add cubed and softened to the hot sugar carefully and whisk until fully incorporated.
- 2 teaspoons (8 grams) vanilla extract Round out the flavor with warm, fragrant notes that deepen the overall profile and enhance the perception of sweetness; stir in toward the end of cooking to preserve aroma.
Instructions
- In a small saucepan, heat cream and salt over very low heat. Simmer until salt is dissolved. Remove from heat, and set aside.: The moment you warm the heavy whipping cream and Maldon sea salt , you will notice a gentle steam rising and a faint milk scent, signaling the cream is nearing temperature. This low heat prevents scalding while ensuring the cream is warm enough to integrate smoothly with hot caramel later. Why this matters, the hot cream tempers the caramel and avoids crystallization. A common mistake is letting the cream simmer too aggressively, which creates foam and may alter texture, so keep the heat very low and stir occasionally.
- In a medium saucepan, heat sugar and 3 tablespoons (45 grams) water over high heat, being careful not to splash sides of pan. (It should be the consistency of wet sand.) Use remaining 1 tablespoon (15 grams) water to brush down sides of pan, and stir to help sugar dissolve. (Do not stir once it starts to boil.) Cook until desired light amber color is reached and a candy thermometer registers 330°F (166°C). Remove from heat; slowly add warm cream mixture, whisking to combine. Add butter, a few pieces at a time, whisking until combined. Stir in vanilla. Let cool completely.: As the mixture barely simmers, watch for tiny movements at the surface and a glossy sheen, which indicate the salt is dissolving into the heavy whipping cream . The dissolved salt will distribute evenly, ensuring consistent seasoning in the finished sauce. Stir gently with a spoon so the salt does not settle. Avoid boiling, which can concentrate the cream and change the way it reacts with the caramel.
- Remove from heat, and set aside: Once the Maldon sea salt has dissolved, take the pan off the burner and set it aside, still warm. The residual heat will keep it at a steady temperature. This pause lets you focus on the sugar stage without rushing, and it prevents the cream from overheating when combined with the caramel. One slip is to forget to keep it warm, which can cause the caramel to seize when added.
- In a medium saucepan, heat sugar and 3 tablespoons (45 grams) water over high heat, being careful not to splash sides of pan: When the granulated sugar and the majority of the water are heating, you will see the sugar dissolve into a syrup, then begin to steam and deepen in color. The pan may hiss softly, and a sweet, toasty scent will develop. This high heat encourages even caramelization. Avoid stirring at this stage, as agitation can cause sugar crystals to form on the sides. A frequent problem is splashing, which can crystalize the sugar; use a steady hand and moderate the heat if it spurts.
- (It should be the consistency of wet sand.): The initial syrup will look grainy like wet sand , and that texture means the sugar has hydrated but not yet fully melted. At this point the surface will ripple and tiny steam pockets may pop. Understanding this visual cue helps you time the transition to smooth caramel. Rushing ahead can result in uneven coloring, so be patient and watch closely.
- Use remaining 1 tablespoon (15 grams) water to brush down sides of pan, and stir to help sugar dissolve: Gently brushing the pan sides with the reserved water washes any stray sugar crystals back into the syrup, preventing recrystallization. You will see those grains dissolve into the glossy syrup, a reassuring visual signal. This technique keeps the surface clean so the caramelization proceeds evenly. Do not splash excess water into the bubbling sugar, as sudden temperature shifts can cause sputtering.
- (Do not stir once it starts to boil.): When the mixture begins to boil, resist stirring. The boil will create motion that encourages even color change. Stirring can introduce crystals and make the final sauce grainy. Instead, gently swirl the pan if you need to even the heat. One mistake is over stirring, so stand by and observe rather than agitate.
- Cook until desired light amber color is reached and a candy thermometer registers 330°F (166°C): As the syrup progresses you will notice it shift from clear to pale gold, then to a warm, light amber hue, and the aroma will deepen to a toasted, caramel note. The thermometer at 330°F (166°C) is a reliable checkpoint for a light caramel that is not bitter. Timing by color is intuitive, but a thermometer avoids guesswork. Be careful not to let it pass into dark amber, which yields a more bitter taste.
- Remove from heat; slowly add warm cream mixture, whisking to combine: Off the heat, pour the warm heavy whipping cream mixture in a slow, steady stream while whisking. Expect a brief bubbling and steam as the hot caramel meets the warm cream, accompanied by a rich, toasty scent. This addition transforms the caramel into a glossy sauce and controls temperature so the sauce stays smooth. A common error is adding cold cream, which can cause the caramel to seize into lumps, so ensure the cream is warm before combining.
- Add butter, a few pieces at a time, whisking until combined: Adding the unsalted butter in small pieces allows it to melt evenly into the sauce, creating a velvety texture and a rich, rounded mouthfeel. You will see the sauce become shinier and thicker as the butter incorporates. This technique prevents separation and helps the sauce set to the right consistency. Adding all the butter at once or using cold butter may cause uneven emulsification, so add gradually and whisk continuously.
- Stir in vanilla: Once the sauce is harmonious and glossy, stir in the vanilla extract off the heat to preserve its aroma. The scent will bloom immediately, adding a warm, floral lift to the deep caramel notes. This small addition rounds and balances the sweetness. Avoid stirring the vanilla over high heat, which can weaken its fragrance.
- Let cool completely: Allow the sauce to reach room temperature and thicken slightly before transferring it to a jar. As it cools the viscosity increases and the flavors settle into balance, revealing aromatic depth and a smooth texture. Refrigerate if storing for later. A mistake to watch for is sealing the jar while the sauce is still hot, which can create condensation and dilute the texture; cool fully before closing.
Notes
- Warm the cream first This reduces the shock when hot caramel meets cream, preventing the sauce from seizing into grainy bits. Keep the cream at a gentle warm temperature rather than boiling.
- Choose quality butter Higher fat content in the unsalted butter creates a creamier mouthfeel and a more luxurious final texture. Cut into small cubes so it incorporates quickly.
- Measure water accurately The initial water helps the granulated sugar dissolve evenly, and the reserved tablespoon is for washing down the pan sides. This small step helps avoid unwanted crystals.
- Use a candy thermometer Relying on temperature as well as color gives consistent results, especially if your stove runs hot or cool. Aim for 330°F (166°C) for a light amber caramel.
- Finish with flaky salt Sprinkling Maldon sea salt at the end retains the texture of the flakes and highlights the caramel’s sweetness rather than making it uniformly salty.