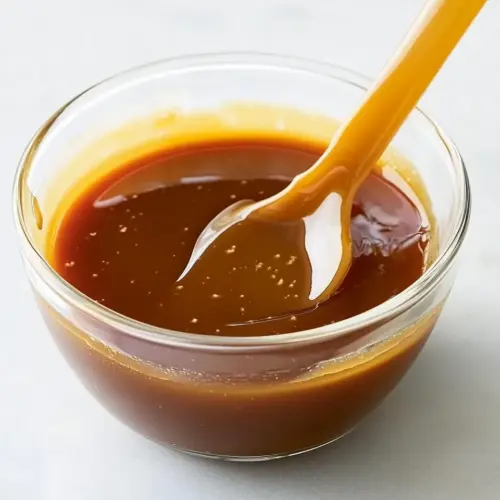
Salted Caramel Sauce
Salted Caramel Sauce is a creamy, silky topping with deep toasted sugar notes and a bright finish from flaky salt. This easy to make sauce yields a rich, pourable texture perfect for ice cream, cakes, and fruit. With minimal ingredients and simple technique, it’s a fast way to add gourmet flavor to desserts, making it a must try for home cooks.
Equipment
- Small Saucepan
- Medium Saucepan
- Whisk
- Candy thermometer
Ingredients
- 1/2 cup (120 grams) heavy whipping cream, room temperature Provide richness and a smooth mouthfeel when incorporated into hot caramel, helping to create a creamy, pourable sauce; add at room temperature to prevent seizing and blend slowly for a glossy texture.
- 1 teaspoon (3 grams) Maldon sea salt Enhance and balance the sweetness with bright, flaky mineral notes that cut through the caramelized sugar; sprinkle gradually and taste to achieve the desired salty-sweet contrast.
- 1 cup (200 grams) granulated sugar Caramelize into a deep amber syrup when heated with water, forming the sweet backbone of the sauce; monitor color closely to avoid burning and stir only when necessary during boiling.
- 4 tablespoons (60 grams) water, divided Hydrate and dissolve the sugar initially to encourage even caramelization and control the cooking speed; divide usage to help prevent crystallization and to deglaze the pan safely.
- 6 tablespoons (84 grams) unsalted butter, softened and cubed Contribute a rich, buttery flavor and silky body to the sauce while softening the caramel’s intensity; add cubed and softened to the hot sugar carefully and whisk until fully incorporated.
- 2 teaspoons (8 grams) vanilla extract Round out the flavor with warm, fragrant notes that deepen the overall profile and enhance the perception of sweetness; stir in toward the end of cooking to preserve aroma.
Instructions
- In a small saucepan, heat cream and salt over very low heat. Simmer until salt is dissolved. Remove from heat, and set aside.: The moment you warm the heavy whipping cream and Maldon sea salt , you will notice a gentle steam rising and a faint milk scent, signaling the cream is nearing temperature. This low heat prevents scalding while ensuring the cream is warm enough to integrate smoothly with hot caramel later. Why this matters, the hot cream tempers the caramel and avoids crystallization. A common mistake is letting the cream simmer too aggressively, which creates foam and may alter texture, so keep the heat very low and stir occasionally.
- In a medium saucepan, heat sugar and 3 tablespoons (45 grams) water over high heat, being careful not to splash sides of pan. (It should be the consistency of wet sand.) Use remaining 1 tablespoon (15 grams) water to brush down sides of pan, and stir to help sugar dissolve. (Do not stir once it starts to boil.) Cook until desired light amber color is reached and a candy thermometer registers 330°F (166°C). Remove from heat; slowly add warm cream mixture, whisking to combine. Add butter, a few pieces at a time, whisking until combined. Stir in vanilla. Let cool completely.: As the mixture barely simmers, watch for tiny movements at the surface and a glossy sheen, which indicate the salt is dissolving into the heavy whipping cream . The dissolved salt will distribute evenly, ensuring consistent seasoning in the finished sauce. Stir gently with a spoon so the salt does not settle. Avoid boiling, which can concentrate the cream and change the way it reacts with the caramel.
- Remove from heat, and set aside: Once the Maldon sea salt has dissolved, take the pan off the burner and set it aside, still warm. The residual heat will keep it at a steady temperature. This pause lets you focus on the sugar stage without rushing, and it prevents the cream from overheating when combined with the caramel. One slip is to forget to keep it warm, which can cause the caramel to seize when added.
- In a medium saucepan, heat sugar and 3 tablespoons (45 grams) water over high heat, being careful not to splash sides of pan: When the granulated sugar and the majority of the water are heating, you will see the sugar dissolve into a syrup, then begin to steam and deepen in color. The pan may hiss softly, and a sweet, toasty scent will develop. This high heat encourages even caramelization. Avoid stirring at this stage, as agitation can cause sugar crystals to form on the sides. A frequent problem is splashing, which can crystalize the sugar; use a steady hand and moderate the heat if it spurts.
- (It should be the consistency of wet sand.): The initial syrup will look grainy like wet sand , and that texture means the sugar has hydrated but not yet fully melted. At this point the surface will ripple and tiny steam pockets may pop. Understanding this visual cue helps you time the transition to smooth caramel. Rushing ahead can result in uneven coloring, so be patient and watch closely.
- Use remaining 1 tablespoon (15 grams) water to brush down sides of pan, and stir to help sugar dissolve: Gently brushing the pan sides with the reserved water washes any stray sugar crystals back into the syrup, preventing recrystallization. You will see those grains dissolve into the glossy syrup, a reassuring visual signal. This technique keeps the surface clean so the caramelization proceeds evenly. Do not splash excess water into the bubbling sugar, as sudden temperature shifts can cause sputtering.
- (Do not stir once it starts to boil.): When the mixture begins to boil, resist stirring. The boil will create motion that encourages even color change. Stirring can introduce crystals and make the final sauce grainy. Instead, gently swirl the pan if you need to even the heat. One mistake is over stirring, so stand by and observe rather than agitate.
- Cook until desired light amber color is reached and a candy thermometer registers 330°F (166°C): As the syrup progresses you will notice it shift from clear to pale gold, then to a warm, light amber hue, and the aroma will deepen to a toasted, caramel note. The thermometer at 330°F (166°C) is a reliable checkpoint for a light caramel that is not bitter. Timing by color is intuitive, but a thermometer avoids guesswork. Be careful not to let it pass into dark amber, which yields a more bitter taste.
- Remove from heat; slowly add warm cream mixture, whisking to combine: Off the heat, pour the warm heavy whipping cream mixture in a slow, steady stream while whisking. Expect a brief bubbling and steam as the hot caramel meets the warm cream, accompanied by a rich, toasty scent. This addition transforms the caramel into a glossy sauce and controls temperature so the sauce stays smooth. A common error is adding cold cream, which can cause the caramel to seize into lumps, so ensure the cream is warm before combining.
- Add butter, a few pieces at a time, whisking until combined: Adding the unsalted butter in small pieces allows it to melt evenly into the sauce, creating a velvety texture and a rich, rounded mouthfeel. You will see the sauce become shinier and thicker as the butter incorporates. This technique prevents separation and helps the sauce set to the right consistency. Adding all the butter at once or using cold butter may cause uneven emulsification, so add gradually and whisk continuously.
- Stir in vanilla: Once the sauce is harmonious and glossy, stir in the vanilla extract off the heat to preserve its aroma. The scent will bloom immediately, adding a warm, floral lift to the deep caramel notes. This small addition rounds and balances the sweetness. Avoid stirring the vanilla over high heat, which can weaken its fragrance.
- Let cool completely: Allow the sauce to reach room temperature and thicken slightly before transferring it to a jar. As it cools the viscosity increases and the flavors settle into balance, revealing aromatic depth and a smooth texture. Refrigerate if storing for later. A mistake to watch for is sealing the jar while the sauce is still hot, which can create condensation and dilute the texture; cool fully before closing.
Notes
- Warm the cream first This reduces the shock when hot caramel meets cream, preventing the sauce from seizing into grainy bits. Keep the cream at a gentle warm temperature rather than boiling.
- Choose quality butter Higher fat content in the unsalted butter creates a creamier mouthfeel and a more luxurious final texture. Cut into small cubes so it incorporates quickly.
- Measure water accurately The initial water helps the granulated sugar dissolve evenly, and the reserved tablespoon is for washing down the pan sides. This small step helps avoid unwanted crystals.
- Use a candy thermometer Relying on temperature as well as color gives consistent results, especially if your stove runs hot or cool. Aim for 330°F (166°C) for a light amber caramel.
- Finish with flaky salt Sprinkling Maldon sea salt at the end retains the texture of the flakes and highlights the caramel’s sweetness rather than making it uniformly salty.