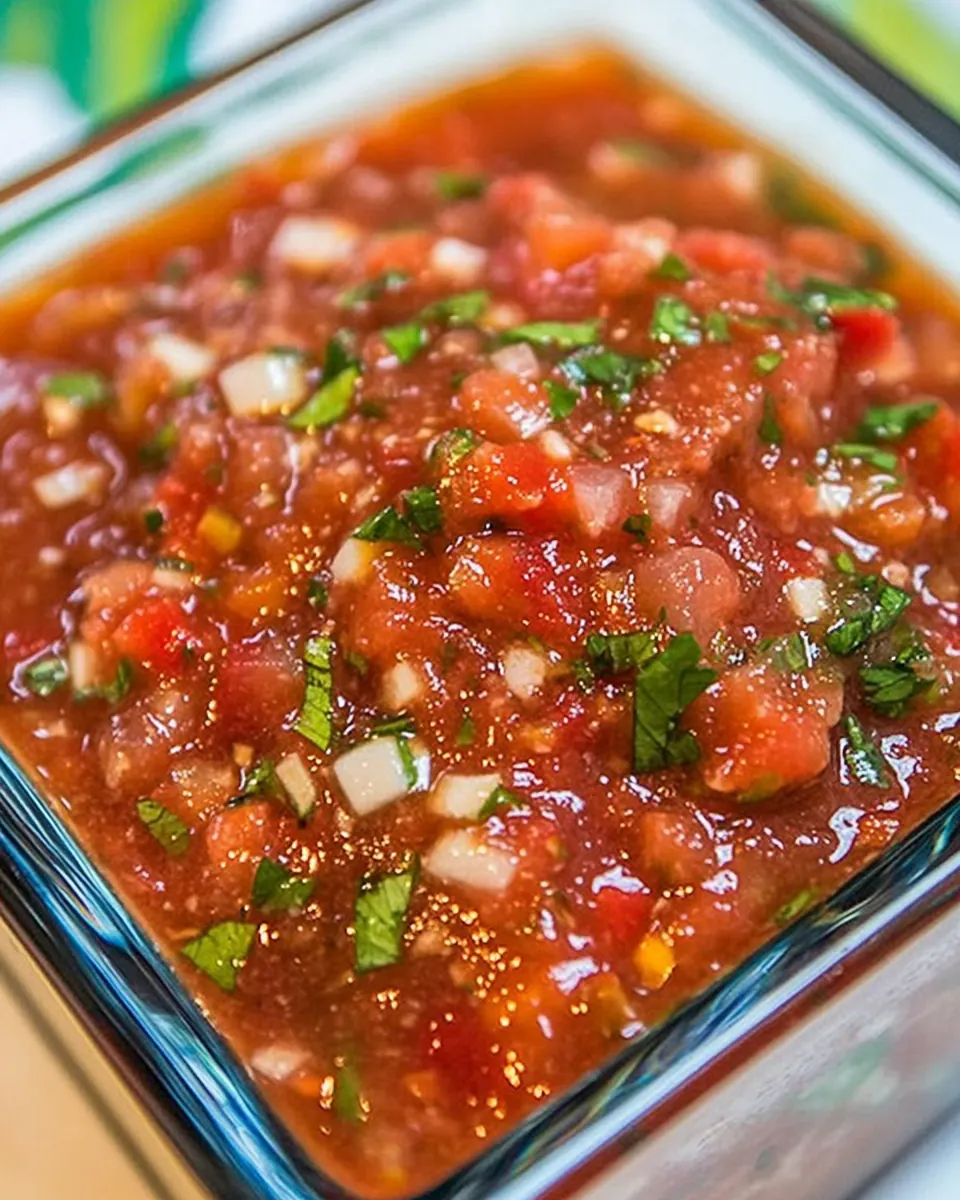
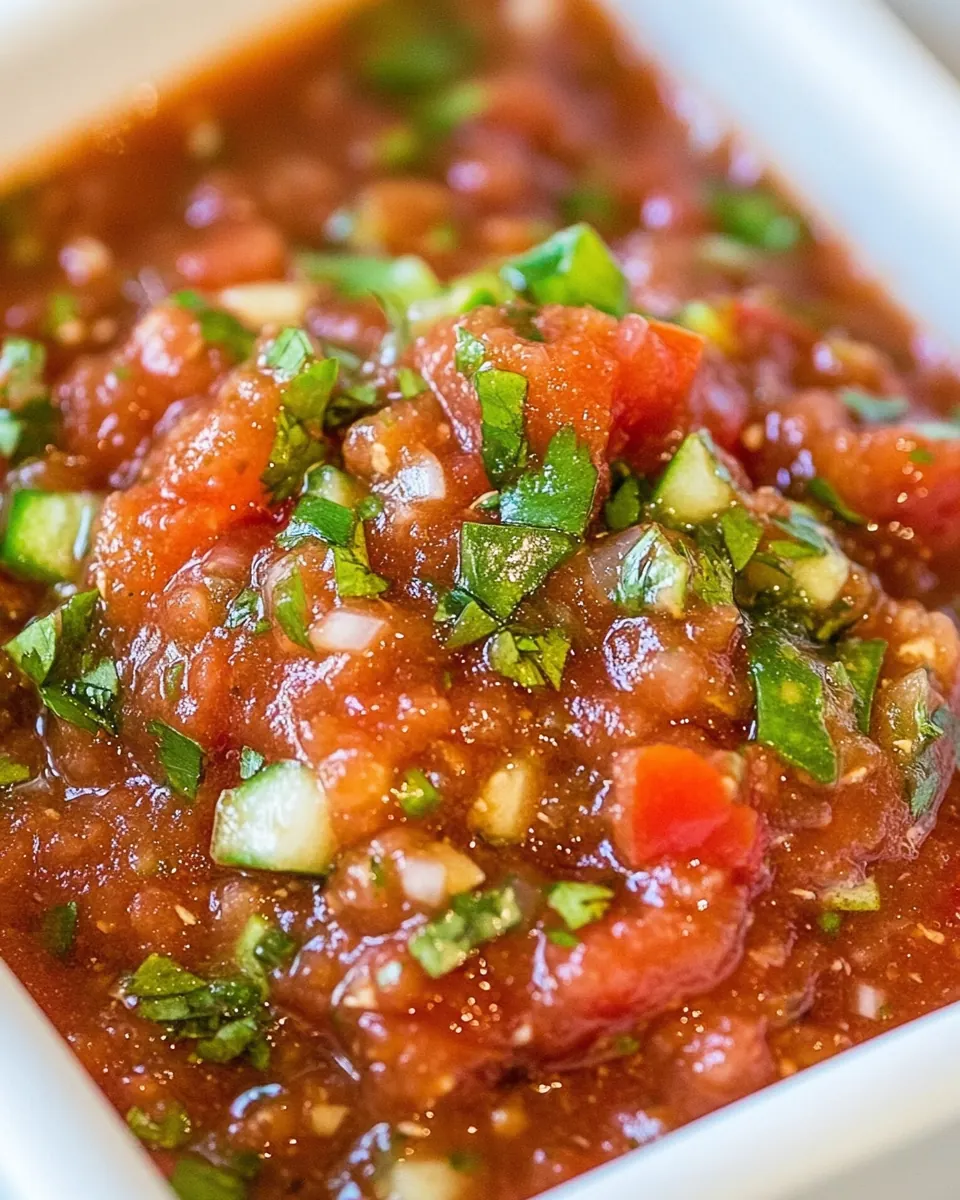
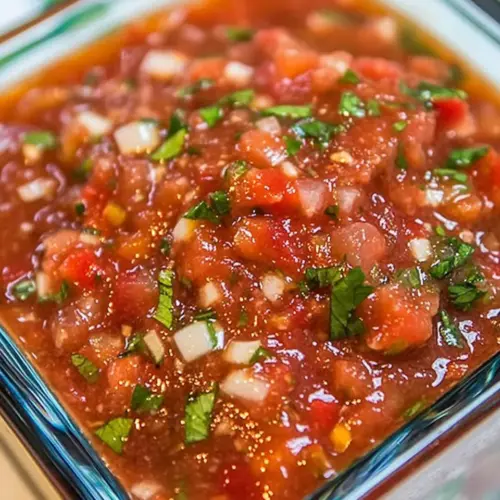
Restaurant Style Blender Salsa
Restaurant Style Blender Salsa is the kind of recipe I reach for when I want a bowl of vibrant, bold flavor that still feels effortless. The first time I made this salsa I was racing the clock before guests arrived, and the blender saved me like a tiny kitchen superhero. I remember pushing the pulse button, watching the tomatoes collapse into a rosy, saucy swirl while bright flecks of cilantro spun around like confetti.
That evening I learned how forgiving this recipe is. You can tweak the heat by adjusting the jalapeno count, or soften the acidity with a touch of sugar, and every small change nudges the personality of the salsa. I loved how the raw onion and garlic lent a crunchy, pungent backbone, while the lime juice kept everything lively. Friends kept coming back to the bowl, dipping chips with that happy, noisy rhythm that tells you a recipe is a keeper.
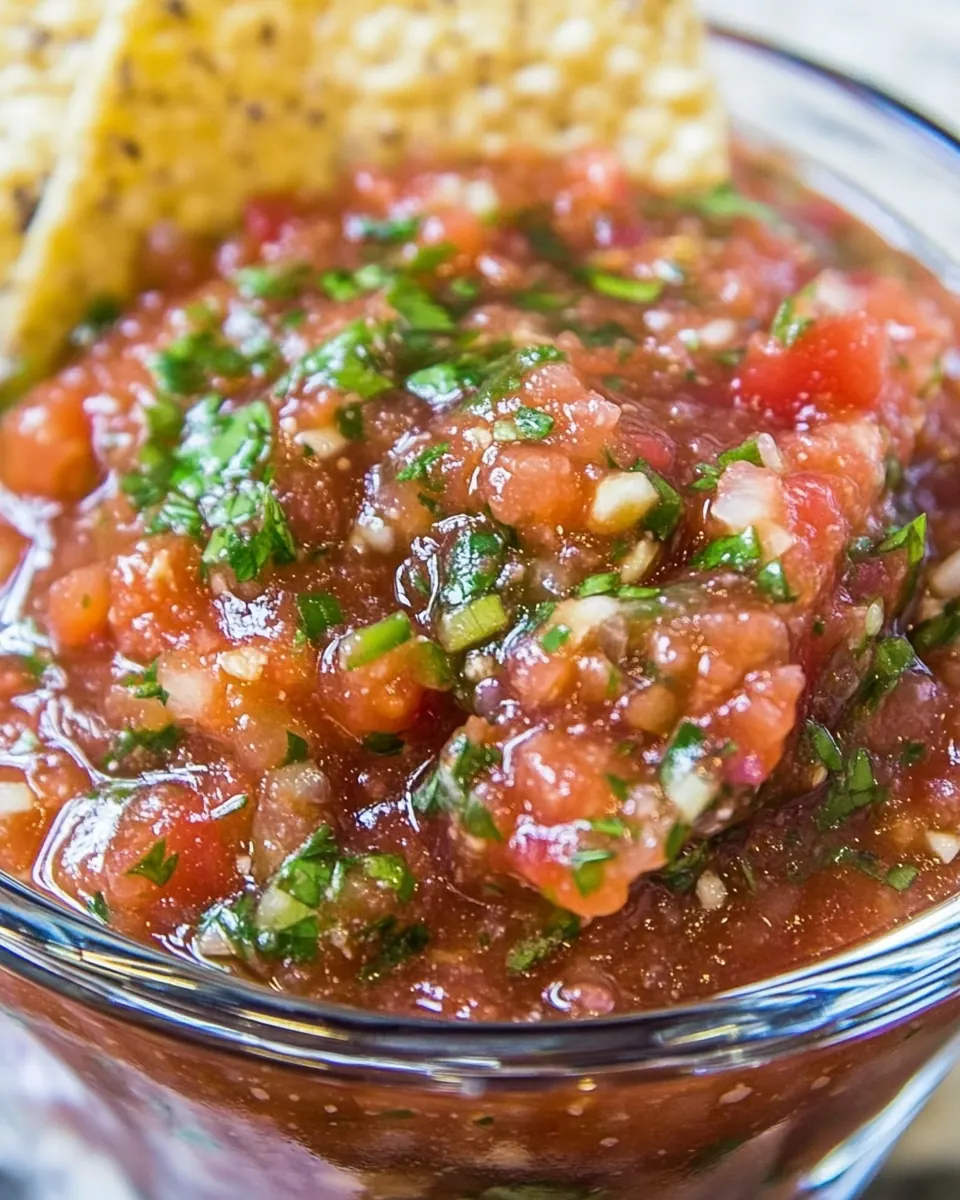
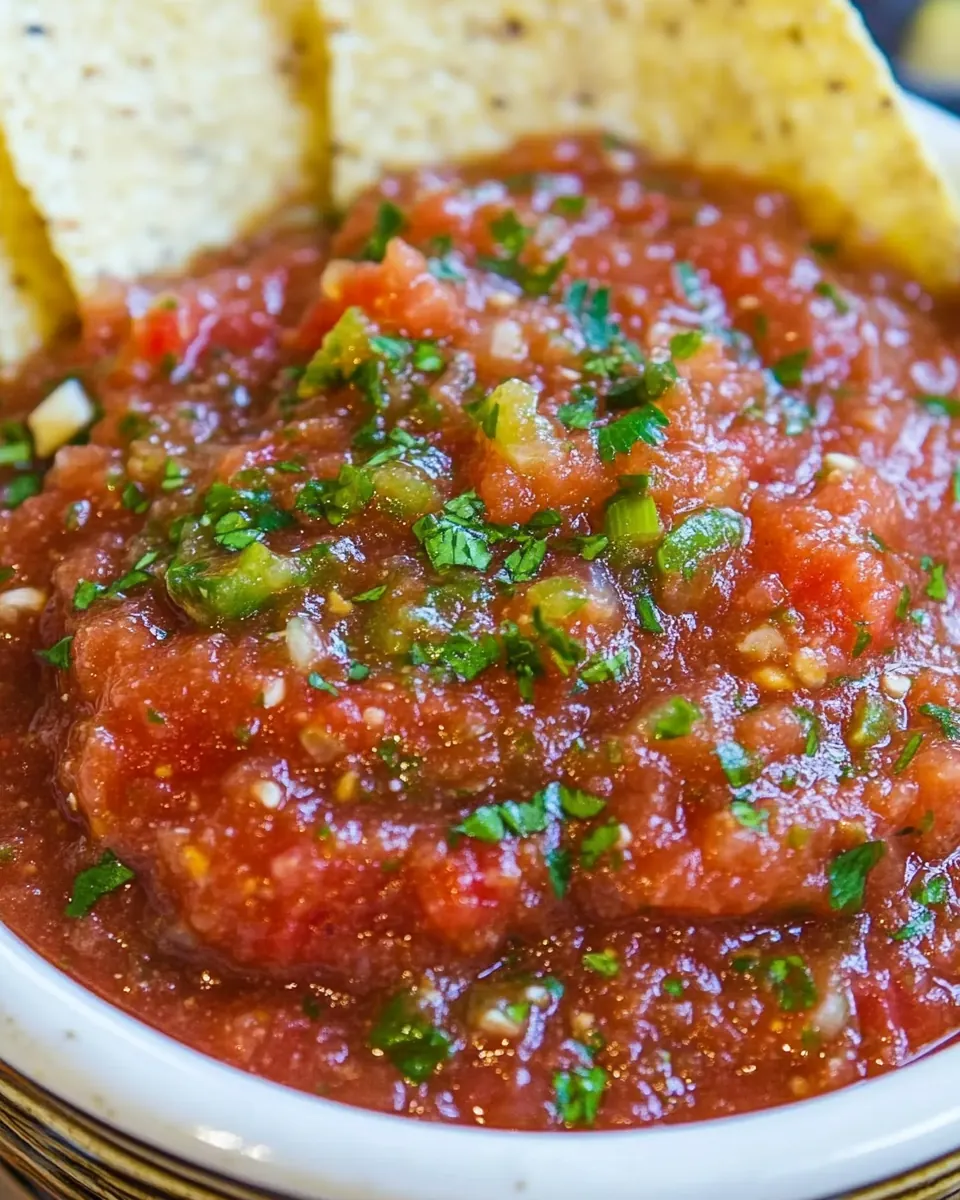
Over time I started adapting it for different occasions. For backyard parties I stir in corn and black beans to make it heartier, and I store a jar in the fridge to let the flavors mellow overnight when I want a deeper, rounder salsa. This is one of those recipes I always keep in my back pocket because it is quick, adaptable, and reliably crowd pleasing. It feels both fresh and familiar, like something you might order at a favorite local spot, only simpler and made with your touch.
Recipe Snapshot
2 mins
2 mins
Easy
50 kcal
Mexican
Vegan, Gluten-Free
Appetizers
Blender or Food Processor
Why This Restaurant Style Blender Salsa Works
Bright, Fresh Flavor
I love how Restaurant Style Blender Salsa captures the bright, fresh snap of raw tomatoes and lime juice. The acidity wakes up your palate, and the herbal lift from cilantro makes it taste like summer in a bowl. When I serve this, people remark on how lively it feels, and that immediate brightness is why I return to it again and again.
Speed Without Compromise
Blending is the secret here, because it lets you reach restaurant texture in minutes. I can get a smooth yet textured salsa in under five minutes, which is perfect when guests arrive unexpectedly. Using a blender or food processor gives you consistency, and I appreciate having that quick win on hectic nights.
Customizable Heat and Texture
I adore recipes that adapt to mood and crowd, and this one does exactly that. You control the heat with jalapeno count and whether you remove seeds. I often tweak the sugar or salt to balance acidity, and sometimes I fold in corn and black beans for a chunky, heartier mix. That flexibility keeps the recipe useful for snacks, meals, and parties.
Fridge Magic
One of the reasons this recipe stands out is how the flavors evolve. Refrigerating the salsa for a day softens the edges and helps the flavors marry, creating a deeper, more layered profile. I like to make a batch ahead of time when I know I want something that tastes like it has had time to become its best self.
Frugal and Pantry Friendly
This recipe leans on canned tomatoes and simple staples, so it is easy on the wallet and easy to throw together from pantry odds and ends. That makes it ideal when you need a quick appetizer or a last minute addition to a meal, and I love having something reliable I know will please a crowd.
What You’ll Need for Restaurant Style Blender Salsa
The philosophy behind these ingredients is simple freshness with a pantry heart. Canned tomatoes bring consistent tomato flavor and body, while raw aromatics like onion and garlic add bite. Jalapeno controls the heat, lime juice brightens, and small touches like cumin and a pinch of sugar round the edges. Together they form a balanced salsa that is bold, tunable, and approachable.
- 28 ounces canned tomatoes, including juice (I used these whole, peeled plum tomatoes): Provide a juicy, acidic base that balances flavors and adds body; include the juice for extra liquid and tanginess common to restaurant-style salsa.
- 1 small yellow onion, peeled and roughly chopped: Add a sweet-sharp aromatic layer and textural contrast when roughly chopped; mellow the bite by blending it into the salsa for a rounded flavor.
- 1 or 2 jalapeno peppers, de-stemmed and roughly chopped: Contribute heat and bright, vegetal notes; remove seeds for milder heat or include them for more spice before blending.
- 3 cloves garlic, peeled and finely chopped: Impart pungent depth and savory umami; finely chopping helps distribute garlic evenly so its flavor melds into the salsa without large raw chunks.
- 1 1/2 teaspoons ground cumin, or to taste: Introduce warm, earthy undertones that complement the tomatoes and peppers; adjust quantity to enhance complexity without overpowering bright flavors.
- 1 1/2 teaspoons salt, or to taste (remember some brands of tomatoes and chips are much saltier than others): Season and amplify all components while balancing acidity and sweetness; taste and modify since canned tomatoes and chips vary in saltiness.
- 1/4 to 1 teaspoon granulated sugar, and to taste (optional): Balance acidity and reduce sharpness if needed; add sparingly to preserve the bright tomato and lime flavors while softening bitterness.
- 1 tbsp or 2 handfuls cilantro leaves, discard stems (I prefer 2, or about half of a 1 small bunch): Contribute fresh, citrusy-herbaceous brightness and a green aroma; discard stems to avoid bitterness and use leaves for a cleaner, vibrant finish.
- 3 tbsp lime juice: Provide bright acidity and zesty lift to amplify the salsa’s freshness; fresh-squeezed lime juice brightens and balances the tomatoes and spices.
- 3/4 cup corn (optional): Add sweet, crunchy bursts and a summery note when used; include as optional for texture contrast and color in the finished salsa.
- 3/4 cup canned black beans, drained and rinsed (optional): Introduce creamy texture and hearty bite when included; drain and rinse to control sodium and prevent a gummy consistency in the salsa.
- corn tortilla chips, for serving: Offer a crunchy scoop option and salty counterpoint for serving; supply a traditional vehicle for tasting and presenting the salsa.
Cooking Method for Restaurant Style Blender Salsa
Working with this salsa is straightforward and forgiving, which is part of its charm. You will blitz ingredients, taste, then tweak until it sings. Below I expand each direction into rich, sensory steps so you know what to expect at every turn.
- Add all ingredients (except optional corn and beans) to the canister of a blender or food processor in the order listed. Pulse or blend on high power until texture is as smooth as desired. If you have a very strong blender, you probably don’t need to pre-chop the ingredients before adding them to the blender, but I do just to make sure I don’t get large random, accidentally unblended chunks of any one ingredient.: The smell when the can is opened is bright and tomato forward, and as you layer in onion , garlic , and jalapeno , a pungent, aromatic board of flavors builds in the canister. Placing tomatoes first helps create a liquid base that lubricates blades, and adding aromatics on top encourages even chopping. A visual cue is seeing the ingredients nestle together before blending. One reason this order works is that denser items sink slightly while liquids and softer flesh coat them, making for uniform processing. Troubleshooting, if you toss everything in a random order and your blender is weaker, you may end up with unblended chunks, so always check blade access and add liquids early to prevent dry pockets.
- Taste the salsa and based on personal preference tweak as necessary.: As the blades begin to spin you will hear a steady hum, and the mixture will transform, moving from distinct pieces to a homogenous swirl. For a restaurant style finish you want a texture that is smooth but still has tiny flecks, so pulse first to control the breakdown, then blend briefly for body. The visual cue is consistent color and no large identifiable pieces. The why is simple, smoother salsa clings better to chips and distributes flavors more evenly. Watch out for overblending which can heat the mixture slightly and mute fresh notes; use short bursts and check between pulses.
- Optionally stir in the corn and black beans.: When the blender is powerful the machine will pulverize whole tomatoes and peppers without pre-chopping, creating a silky texture. I still chop roughly to ensure predictability and to avoid getting that occasional large, unprocessed chunk of onion or garlic . You can tell it is working well when the sound is even and there are no sudden thumps. The reason I prefer rough chopping is consistency, and it reduces the risk of uneven results. A common error is overcrowding the canister, which can trap items under the blades and cause uneven processing, so give the blender some space.
- Transfer to airtight container and serve immediately with chips. However, I prefer to refrigerate salsa for 1 day prior to serving because I prefer chilled salsa and because the flavors marry, mellow, and the flavor improves on the second and third day. Salsa will likely keep up to 1 week airtight in the fridge; however, we’ve always eaten a batch within 3 days.: The first taste is a bright, acidic strike from the tomatoes and lime juice , followed by the aromatic warmth of garlic and the peppery heat of jalapeno . This tasting moment is where you decide whether to adjust salt, add a touch of sugar to soften acidity, or include more cumin for earthiness. The why is that salsa is all about balance, and small adjustments make a big difference. If the salsa tastes flat, it usually needs more salt or lime; if it is too acidic, a pinch of sugar can even things out. Avoid the mistake of adding large amounts of seasoning at once, because you cannot remove it; add increments and taste between each addition.
- Optionally stir in the corn and black beans: Adding corn and black beans changes the texture profile from saucy to chunky and adds sweet and creamy contrasts. Gently folding them in preserves their integrity, giving you bursts of sweet kernels and tender beans against the smoother tomato base. The mouthfeel becomes more varied, which is especially nice if you are serving chips as a main snack. One common mistake is blending these ingredients, which will lose their texture, so fold them in by hand shortly before serving.
- Transfer to airtight container and serve immediately with chips: When you spoon the salsa into a bowl you will notice an inviting glossy surface and vibrant color. Serving immediately gives the brightest raw flavors and the most assertive heat. If you plan to refrigerate, the flavors will mellow and integrate, so the character shifts toward a harmonious profile. A good practice is to use an airtight container to protect freshness and to prevent the salsa from absorbing other fridge smells. Don’t leave it at room temperature for too long if it contains added ingredients like beans, as that can increase spoilage risk.
- However, I prefer to refrigerate salsa for 1 day prior to serving because I prefer chilled salsa and because the flavors marry, mellow, and the flavor improves on the second and third day: Chilling softens sharper edges and allows the lime juice and cumin to integrate fully with the tomatoes and aromatics, producing a rounder, deeper profile. The sensory change is subtle but noticeable, with ethanol and volatile aromatics calming down behind a unified flavor. This resting time is why many pro kitchens make salsas a day ahead. Mistakes to avoid include over-storing in a container that allows air exchange, which can dry edges and alter texture.
- Salsa will likely keep up to 1 week airtight in the fridge; however, we’ve always eaten a batch within 3 days: Over time the fresh herbal notes will fade and the texture may thin slightly as the tomato juices settle. Use smell and a quick taste check before serving after several days; if it seems off, discard it. For longest life make sure any serving utensils are clean and dry to avoid contaminating the container. A common pitfall is double-dipping with a chip which can introduce bacteria and shorten shelf life, so always use a clean spoon or utensil when serving leftovers.
Tips for Success
A few simple practices will lift this salsa from good to unforgettable. Below I expand practical tips that I use every time to ensure consistent results, whether I am whipping up a quick snack or prepping for a party.
- Start with good canned tomatoes, because their sweetness and acidity are the base of the salsa; whole peeled plum tomatoes often give the most balanced flavor.
- Adjust heat gradually, remove seeds from jalapeno to lower spice, and add more in small increments after tasting so you do not overshoot your desired heat.
- Taste and season in stages, add salt and lime juice a little at a time, because these elements dramatically change the perception of flavor.
- Pulse to control texture, brief pulses will break ingredients down while preserving small flecks for that restaurant style mouthfeel.
- Chill for deeper flavor, refrigerating for at least a few hours allows the ingredients to marry and mellows harsh edges for a more integrated profile.
- Fold in chunky add ins last, if using corn or black beans, stir them in by hand so they retain their texture and color.
- Use clean utensils, always serve with a clean spoon to avoid contamination and extend fridge life up to a week.
Perfect Pairings for Restaurant Style Blender Salsa
This salsa works across many meals and gatherings, from casual snacking to lively feasts. Below are serving ideas, storage tips, and occasions where this salsa shines. Use the suggestions to plan a full spread or keep it simple with chips.
- Classic chip and dip, serve with sturdy corn tortilla chips for parties or game nights, letting guests scoop generous bites without the bowl tipping over.
- As a topping for grilled vegetables, spoon chilled salsa over warm roasted or charred veggies to add bright acidity and contrast to savory char marks.
- For casual lunches, partner the salsa with tacos, quesadillas, or bowls as a fresh finishing sauce that lifts richer elements.
- Party appetizer, make a double batch and place it in shallow bowls around the table for grazing, pairing with sliced vegetables for a lighter option.
- Ramadan and fasting meals, this salsa provides a refreshing, hydrating component that pairs well with heartier mains for iftar spreads.
- Storage tips, keep in an airtight container in the fridge and consume within one week, or preferably three days for peak flavor; freeze is not recommended as texture degrades.
- Seasonal pairing, this salsa feels at home in summer when tomatoes and corn are at their peak, though canned tomatoes keep it viable year round.
FAQ
Conclusion
This salsa stands out for its easy preparation and vibrant, customizable flavor. I love how quickly a blender can turn pantry staples into something that tastes like it belongs at a restaurant, and how flexible the recipe is for different spice levels and textures. Try making a batch tonight, tweak the heat to your liking, and see how letting it rest overnight deepens the taste. It is a simple pleasure that reliably brings people to the table.
Restaurant Style Blender Salsa
Equipment
- Blender or food processor
Ingredients
- 28 ounces canned tomatoes, including juice (I used these whole, peeled plum tomatoes) Provide a juicy, acidic base that balances flavors and adds body; include the juice for extra liquid and tanginess common to restaurant-style salsa.
- 1 small yellow onion, peeled and roughly chopped Add a sweet-sharp aromatic layer and textural contrast when roughly chopped; mellow the bite by blending it into the salsa for a rounded flavor.
- 1 or 2 jalapeno peppers, de-stemmed and roughly chopped Contribute heat and bright, vegetal notes; remove seeds for milder heat or include them for more spice before blending.
- 3 cloves garlic, peeled and finely chopped Impart pungent depth and savory umami; finely chopping helps distribute garlic evenly so its flavor melds into the salsa without large raw chunks.
- 1 1/2 teaspoons ground cumin, or to taste Introduce warm, earthy undertones that complement the tomatoes and peppers; adjust quantity to enhance complexity without overpowering bright flavors.
- 1 1/2 teaspoons salt, or to taste (remember some brands of tomatoes and chips are much saltier than others) Season and amplify all components while balancing acidity and sweetness; taste and modify since canned tomatoes and chips vary in saltiness.
- 1/4 to 1 teaspoon granulated sugar, optional and to taste Balance acidity and reduce sharpness if needed; add sparingly to preserve the bright tomato and lime flavors while softening bitterness.
- 1 tbsp or 2 handfuls cilantro leaves, discard stems (I prefer 2, or about half of a 1 small bunch) Contribute fresh, citrusy-herbaceous brightness and a green aroma; discard stems to avoid bitterness and use leaves for a cleaner, vibrant finish.
- 3 tbsp lime juice Provide bright acidity and zesty lift to amplify the salsa’s freshness; fresh-squeezed lime juice brightens and balances the tomatoes and spices.
- 3/4 cup corn, optional Add sweet, crunchy bursts and a summery note when used; include as optional for texture contrast and color in the finished salsa.
- 3/4 cup canned black beans, drained and rinsed, optional Introduce creamy texture and hearty bite when included; drain and rinse to control sodium and prevent a gummy consistency in the salsa.
- corn tortilla chips, for serving Offer a crunchy scoop option and salty counterpoint for serving; supply a traditional vehicle for tasting and presenting the salsa.
Instructions
- Add all ingredients (except optional corn and beans) to the canister of a blender or food processor in the order listed. Pulse or blend on high power until texture is as smooth as desired. If you have a very strong blender, you probably don’t need to pre-chop the ingredients before adding them to the blender, but I do just to make sure I don’t get large random, accidentally unblended chunks of any one ingredient.: The smell when the can is opened is bright and tomato forward, and as you layer in onion , garlic , and jalapeno , a pungent, aromatic board of flavors builds in the canister. Placing tomatoes first helps create a liquid base that lubricates blades, and adding aromatics on top encourages even chopping. A visual cue is seeing the ingredients nestle together before blending. One reason this order works is that denser items sink slightly while liquids and softer flesh coat them, making for uniform processing. Troubleshooting, if you toss everything in a random order and your blender is weaker, you may end up with unblended chunks, so always check blade access and add liquids early to prevent dry pockets.
- Taste the salsa and based on personal preference tweak as necessary.: As the blades begin to spin you will hear a steady hum, and the mixture will transform, moving from distinct pieces to a homogenous swirl. For a restaurant style finish you want a texture that is smooth but still has tiny flecks, so pulse first to control the breakdown, then blend briefly for body. The visual cue is consistent color and no large identifiable pieces. The why is simple, smoother salsa clings better to chips and distributes flavors more evenly. Watch out for overblending which can heat the mixture slightly and mute fresh notes; use short bursts and check between pulses.
- Optionally stir in the corn and black beans.: When the blender is powerful the machine will pulverize whole tomatoes and peppers without pre-chopping, creating a silky texture. I still chop roughly to ensure predictability and to avoid getting that occasional large, unprocessed chunk of onion or garlic . You can tell it is working well when the sound is even and there are no sudden thumps. The reason I prefer rough chopping is consistency, and it reduces the risk of uneven results. A common error is overcrowding the canister, which can trap items under the blades and cause uneven processing, so give the blender some space.
- Transfer to airtight container and serve immediately with chips. However, I prefer to refrigerate salsa for 1 day prior to serving because I prefer chilled salsa and because the flavors marry, mellow, and the flavor improves on the second and third day. Salsa will likely keep up to 1 week airtight in the fridge; however, we’ve always eaten a batch within 3 days.: The first taste is a bright, acidic strike from the tomatoes and lime juice , followed by the aromatic warmth of garlic and the peppery heat of jalapeno . This tasting moment is where you decide whether to adjust salt, add a touch of sugar to soften acidity, or include more cumin for earthiness. The why is that salsa is all about balance, and small adjustments make a big difference. If the salsa tastes flat, it usually needs more salt or lime; if it is too acidic, a pinch of sugar can even things out. Avoid the mistake of adding large amounts of seasoning at once, because you cannot remove it; add increments and taste between each addition.
- Optionally stir in the corn and black beans: Adding corn and black beans changes the texture profile from saucy to chunky and adds sweet and creamy contrasts. Gently folding them in preserves their integrity, giving you bursts of sweet kernels and tender beans against the smoother tomato base. The mouthfeel becomes more varied, which is especially nice if you are serving chips as a main snack. One common mistake is blending these ingredients, which will lose their texture, so fold them in by hand shortly before serving.
- Transfer to airtight container and serve immediately with chips: When you spoon the salsa into a bowl you will notice an inviting glossy surface and vibrant color. Serving immediately gives the brightest raw flavors and the most assertive heat. If you plan to refrigerate, the flavors will mellow and integrate, so the character shifts toward a harmonious profile. A good practice is to use an airtight container to protect freshness and to prevent the salsa from absorbing other fridge smells. Don’t leave it at room temperature for too long if it contains added ingredients like beans, as that can increase spoilage risk.
- However, I prefer to refrigerate salsa for 1 day prior to serving because I prefer chilled salsa and because the flavors marry, mellow, and the flavor improves on the second and third day: Chilling softens sharper edges and allows the lime juice and cumin to integrate fully with the tomatoes and aromatics, producing a rounder, deeper profile. The sensory change is subtle but noticeable, with ethanol and volatile aromatics calming down behind a unified flavor. This resting time is why many pro kitchens make salsas a day ahead. Mistakes to avoid include over-storing in a container that allows air exchange, which can dry edges and alter texture.
- Salsa will likely keep up to 1 week airtight in the fridge; however, we’ve always eaten a batch within 3 days: Over time the fresh herbal notes will fade and the texture may thin slightly as the tomato juices settle. Use smell and a quick taste check before serving after several days; if it seems off, discard it. For longest life make sure any serving utensils are clean and dry to avoid contaminating the container. A common pitfall is double-dipping with a chip which can introduce bacteria and shorten shelf life, so always use a clean spoon or utensil when serving leftovers.
Notes
- Start with good canned tomatoes, because their sweetness and acidity are the base of the salsa; whole peeled plum tomatoes often give the most balanced flavor.
- Adjust heat gradually, remove seeds from jalapeno to lower spice, and add more in small increments after tasting so you do not overshoot your desired heat.
- Taste and season in stages, add salt and lime juice a little at a time, because these elements dramatically change the perception of flavor.
- Pulse to control texture, brief pulses will break ingredients down while preserving small flecks for that restaurant style mouthfeel.
- Chill for deeper flavor, refrigerating for at least a few hours allows the ingredients to marry and mellows harsh edges for a more integrated profile.
- Fold in chunky add ins last, if using corn or black beans, stir them in by hand so they retain their texture and color.
- Use clean utensils, always serve with a clean spoon to avoid contamination and extend fridge life up to a week.