Reindeer Cookies
Reindeer Cookies were the first festive treat I ever baked with my little cousin, and that first batch still smells like holiday magic to me. I remember the flour dust on our noses and how proud we felt pressing pretzel ears into warm cookies, then crowning them with a shiny red candy nose. That memory is why I keep this recipe in heavy rotation every winter, it’s playful, hands on, and perfect for making memories as much as for feeding a crowd.
Each time I make Reindeer Cookies I find a new tiny pleasure, whether it is the crackle when you break a pretzel ear, the slow melt of a Rolo into a warm cookie, or the childhood grin that appears when someone spots the candy eyes. This recipe is forgiving, which is great when kids are involved, and the dough chills beautifully so you can bake a few trays at a time. I often set out a little assembly station and let everyone customize their reindeers, which turns baking into a social ritual.
Over the years I tweaked small things to keep the texture soft and pillowy while still holding shape enough for decorating. I love how the combination of unsalted butter and vegetable shortening produces tall, tender cookies, and the creamy peanut butter gives a nutty backbone that pairs so well with the salty pretzel ears and the sweet Rolo nose. If you are looking for a holiday project that doubles as dessert and decoration, you will enjoy rolling up your sleeves for these. They are also a great make ahead cookie once you know the timing.
Recipe Snapshot
20 mins
10 mins
10 mins
Medium
150 kcal
American
Gluten-Free, Low FODMAP
Desserts
cut and serve turner
What Sets This Reindeer Cookies Apart
They are irresistibly nostalgic
I keep a mental shelf of recipes that instantly transport me back to childhood, and Reindeer Cookies live on that shelf. The combination of crunchy pretzel ears and a soft, peanut buttery cookie creates a texture contrast I adore. When I bring a plate to a holiday gathering, people smile before they taste them, which is half the joy.
Perfect for family baking sessions
This recipe is built for an assembly line. I’ve set up stations for scooping dough, pressing pretzels, and securing candies, and the whole process becomes a shared ritual. I like that the dough can be chilled, so you can prep in advance and enjoy the decorating moment without rushing.
Great balance of sweet and salty
The cookie base is rich with creamy peanut butter and a touch of granulated sugar plus light brown sugar for depth. Against that, the salted pretzels and the caramel of a Rolo deliver contrast, making each bite interesting rather than cloying. I find that balance keeps people coming back for more.
Simple pantry ingredients, big seasonal impact
Most of the ingredients are staples, and you likely have them on hand during the holidays. That accessibility is why I reach for this recipe when I want something that feels special but is still simple to pull together. The decorating is where the fun happens, and you do not need fancy tools to make them look adorable.
Flexible and forgiving
Between chilling the dough and the straightforward assembly, these cookies forgive small mistakes. If your dough is too soft, a short chill fixes it. If a pretzel shifts in the oven, you can nudge it after baking while the Rolo is still warm. Those forgiving moments let the baker breathe, which I truly appreciate during busy holiday days.
Ingredient List for Reindeer Cookies
These ingredients work together in harmony to build texture, flavor, and charm. The key players are the fats, which create a tender crumb, the peanut butter that anchors flavor, and the candies and pretzels that transform a simple cookie into a festive centerpiece. Each item has a clear role, so even though the list looks long, every component earns its place.
- 1/4 cup unsalted butter (57 g): Creamy and cold, helps create a tender, rich cookie base when creamed with sugars; contributes flavor and moistness while aiding spread during baking.
- 1/4 cup vegetable shortening (50 g): Solid and stable at room temperature, provides structure and helps cookies hold shape; adds flakiness and contributes to a tender crumb when combined with butter.
- 1/2 cup creamy peanut butter (130 g): Smooth and fatty, binds dry ingredients while imparting peanut flavor; contributes to chewiness and enhances overall richness in each bite.
- 1/2 cup granulated sugar (100 g): Fine and crystalline, adds sweetness and promotes browning through caramelization; helps incorporate air when creamed with fats for a lighter texture.
- 1/2 cup light brown sugar, packed (110 g): Moist and flavorful, brings deep caramel notes and additional sweetness while contributing moisture; balances textures and enhances chewiness in the cookies.
- 1/2 teaspoon vanilla extract (2.5 ml): Fragrant and liquid, imparts aromatic sweetness that rounds out flavors; small amount enhances overall flavor complexity without affecting texture.
- 2 eggs, large: Large and versatile, provide structure and leavening through fat and proteins; help bind ingredients, add moisture, and contribute to the cookie's tenderness.
- 1 3/4 cups all-purpose flour (219 g): Powdery and starchy, forms the bulk of the dough and gives structure through gluten formation; determines texture and thickness depending on mixing and handling.
- 1 teaspoon baking soda (5 g): Fine and reactive, produces carbon dioxide when activated to create lift and spread; helps create a lighter, slightly airy texture in the cookie crumb.
- 1/4 teaspoon salt: Granular and mineral, balances sweetness and enhances flavor depth; strengthens dough slightly and controls the chemical leavening reaction.
- 36 mini pretzel twists: Crunchy and salty, used as antlers to create a decorative and textural contrast; provides a savory snap that complements sweet elements.
- 18 rolo candies: Soft caramel-coated chocolate, melts slightly when warmed to form a glossy candy center and acts as the nose for the reindeer decoration.
- 18 red m&m candies: Colorful and crunchy, used as the iconic red nose decoration and provides a sweet, crisp contrast to the soft cookie.
- 36 candy eyes, or mini chocolate chips: Small and edible, provide eye details or chocolate flavor if mini chips are used; add whimsy and small bursts of chocolate or visual appeal.
- 1 small tube decorating frosting: Piped and sweet, used to attach small candies and add facial details; offers precise decorative accents and helps secure pieces in place.
How to Make Reindeer Cookies
These step by step directions will walk you through from creaming the fats to decorating the final cookie. I like to read through all the steps first, then set out the ingredients and tools so the process flows smoothly. Keep a cooling rack and your candies nearby so you can work quickly once the cookies come out of the oven.
- In a mixing bowl, cream together butter, shortening, peanut butter, 1/2 cup granulated sugar, and brown sugar until light and fluffy, about 2 minutes.: You will notice the mixture lighten in color and become aerated, which creates tiny pockets of air that help the cookies rise slightly and develop a tender crumb. The aroma at this stage is rich and slightly caramelized from the brown sugar mingling with the peanut butter , and you should hear a faint buzz from the mixer as it works the fats into a smooth, glossy texture. If the fats are too cold, the mixture will look lumpy and will not incorporate air, producing dense cookies, so allow the unsalted butter and vegetable shortening to soften beforehand. A common pitfall is overcreaming, which can make the dough too soft and cause excessive spreading in the oven, so stop once the mixture is light and fluffy.
- Add eggs, mixing after each addition. Mix in the vanilla.: When you add the eggs , the batter will become silkier and slightly more fluid, and the mixer will sound smoother. Adding eggs one at a time ensures they emulsify properly, which stabilizes the dough and gives a uniform structure. The scent of vanilla extract lifts the deeper notes from the brown sugar and peanut butter . If you add cold eggs straight from the fridge, the fats can seize and the mixture may appear curdled, so bring eggs to room temperature or add them slowly while mixing. Avoid high speed once the eggs are incorporated, because that can over-aerate and weaken the dough.
- In a separate bowl, whisk together flour, baking soda, and salt.: Whisking distributes the baking soda and salt evenly through the all purpose flour , so the cookies rise uniformly and the seasoning is balanced. You will see the dry mix lighten in color and form a homogenous powder, which makes folding into the wet ingredients predictable. If the flour contains lumps, break them up now to avoid pockets that do not hydrate, as those would create uneven texture. A common oversight is not measuring flour correctly, which leads to overly dry dough, so spoon and level for accuracy.
- Stir dry ingredients into the wet ingredients and mix gently to combine. Don't over-mix. The dough will be very soft. Refrigerate for at least 30 minutes, or up to 3 days.: At this stage you will feel the dough transform from sticky batter to a cohesive, very soft mass. The surface will be slightly tacky, and the scent will be warm and nutty. Chilling firms the dough, allowing the fats to solidify and making the cookies easier to shape, which also controls spread during baking. Overmixing here develops gluten in the all purpose flour , resulting in tougher cookies, so fold just until no streaks of flour remain. If the dough seems too loose to form, a brief chill will make it manageable; if you skip chilling, expect more spreading in the oven.
- Preheat oven to 375 degrees F.: Heating the oven to the right temperature ensures the exterior sets quickly while the interior stays soft, creating that desirable contrast. You should smell a faint warm, dry air from the preheated oven when you open it, and the heat helps the Rolo melt properly when placed on a freshly baked cookie. An oven running cool can lead to pale cookies that do not set, while too hot an oven will brown them too quickly, so use an oven thermometer if your oven is uncertain.
- Line a cookie sheet with parchment paper.: The parchment provides a nonstick surface and helps cookies bake evenly across their bottom, preventing hot spots and making cleanup easier. You will notice the parchment retains a slight warm scent from the oven but nothing overpowering. Avoid greasing the sheet in addition to using parchment, as extra fat can cause additional spreading. If you skip parchment, rotate the sheet halfway through baking to avoid uneven browning.
- Scoop dough into large balls and roll them into an oval shape. Place on prepared baking sheet. Bake for 9-12 minutes, until set and no longer glossy looking.: As the cookies bake, they will puff slightly and the edges will set first, creating a gentle ridge while the centers remain soft. Watch for the glossy sheen to disappear and for the bottoms to take on a hint of golden color, which indicates doneness without overbaking. You will hear a faint crackle as moisture leaves the cookie and see tiny steam vents on the surface. A common mistake is underbaking for a soft center that will collapse, so err on the side of fully set but not browned, and rotate the pan if your oven heats unevenly.
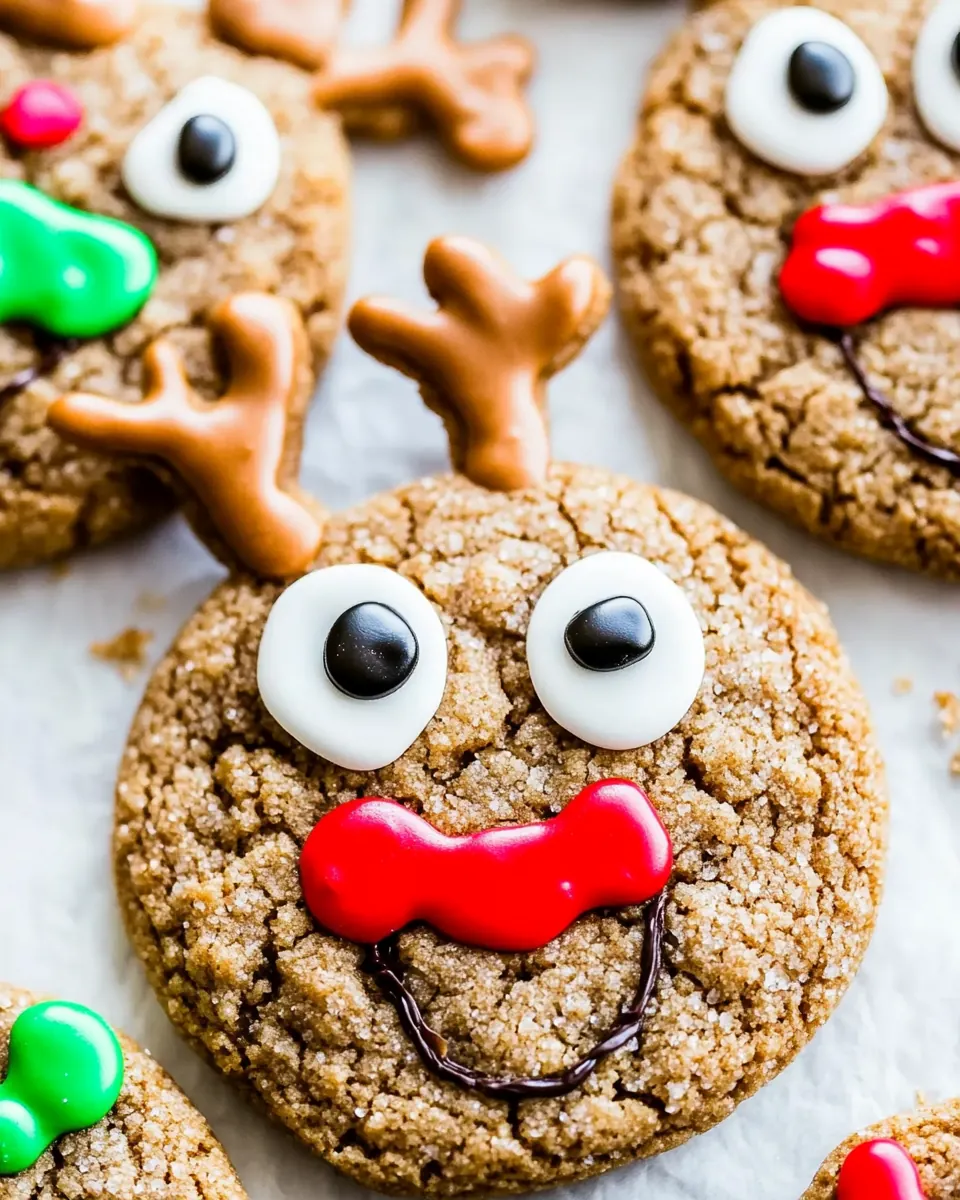
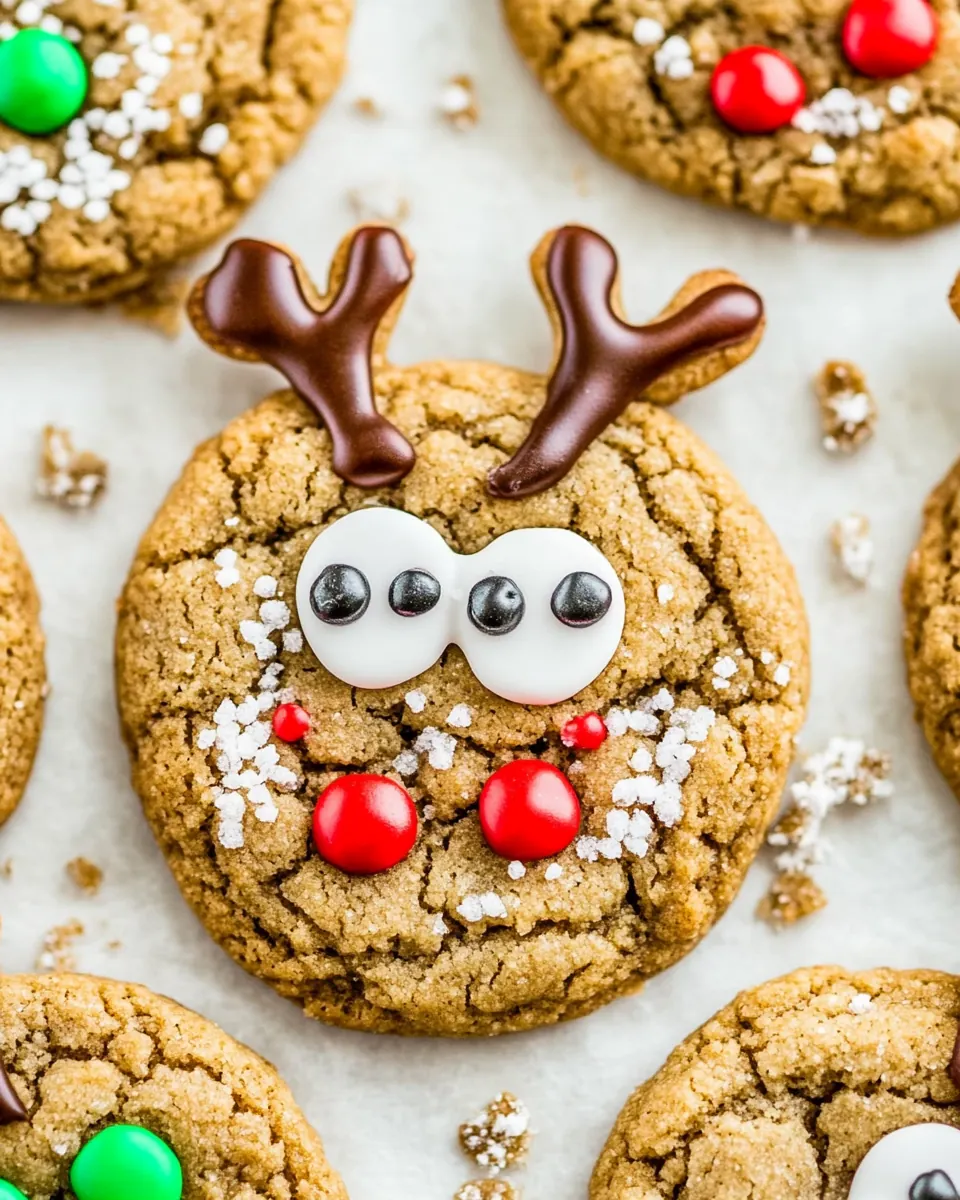
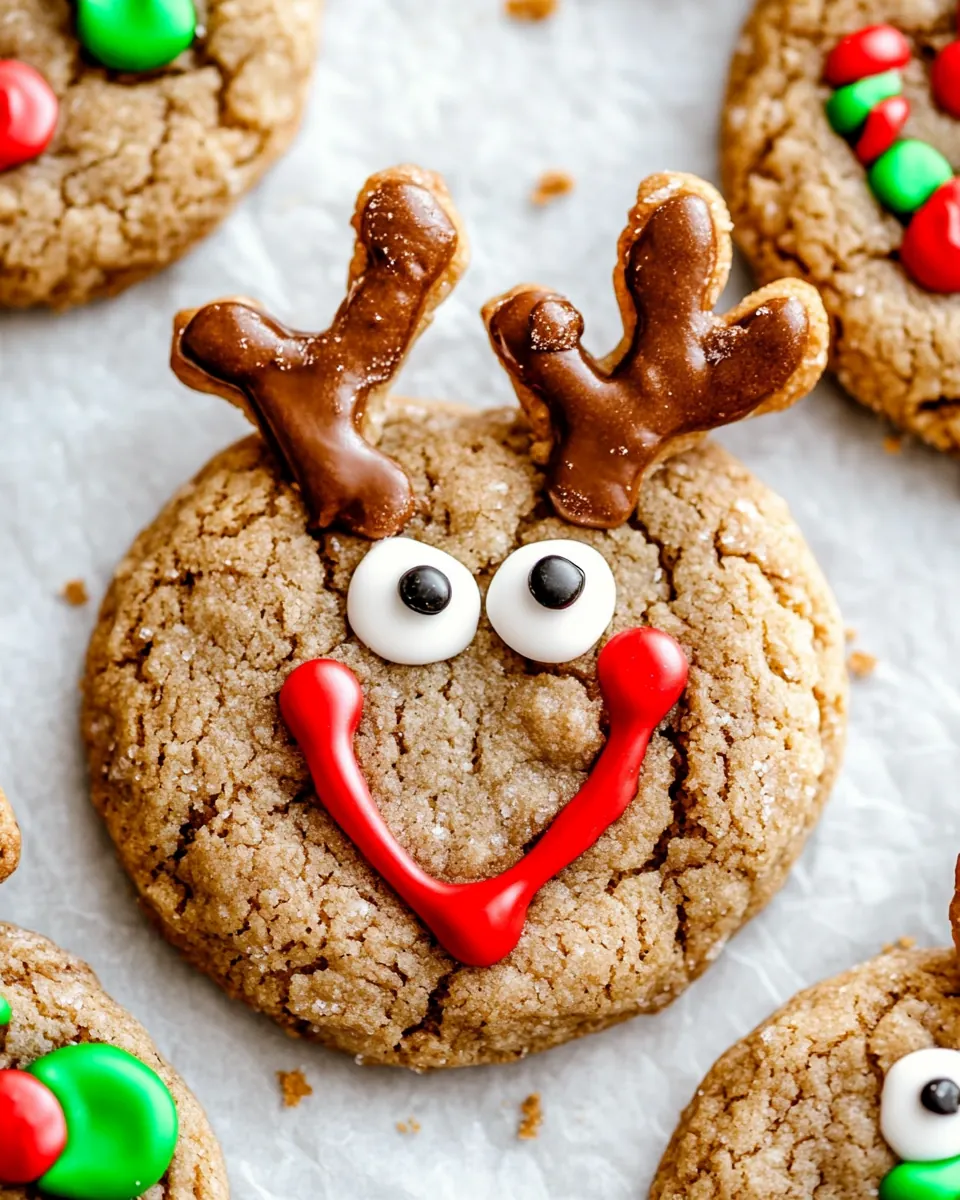
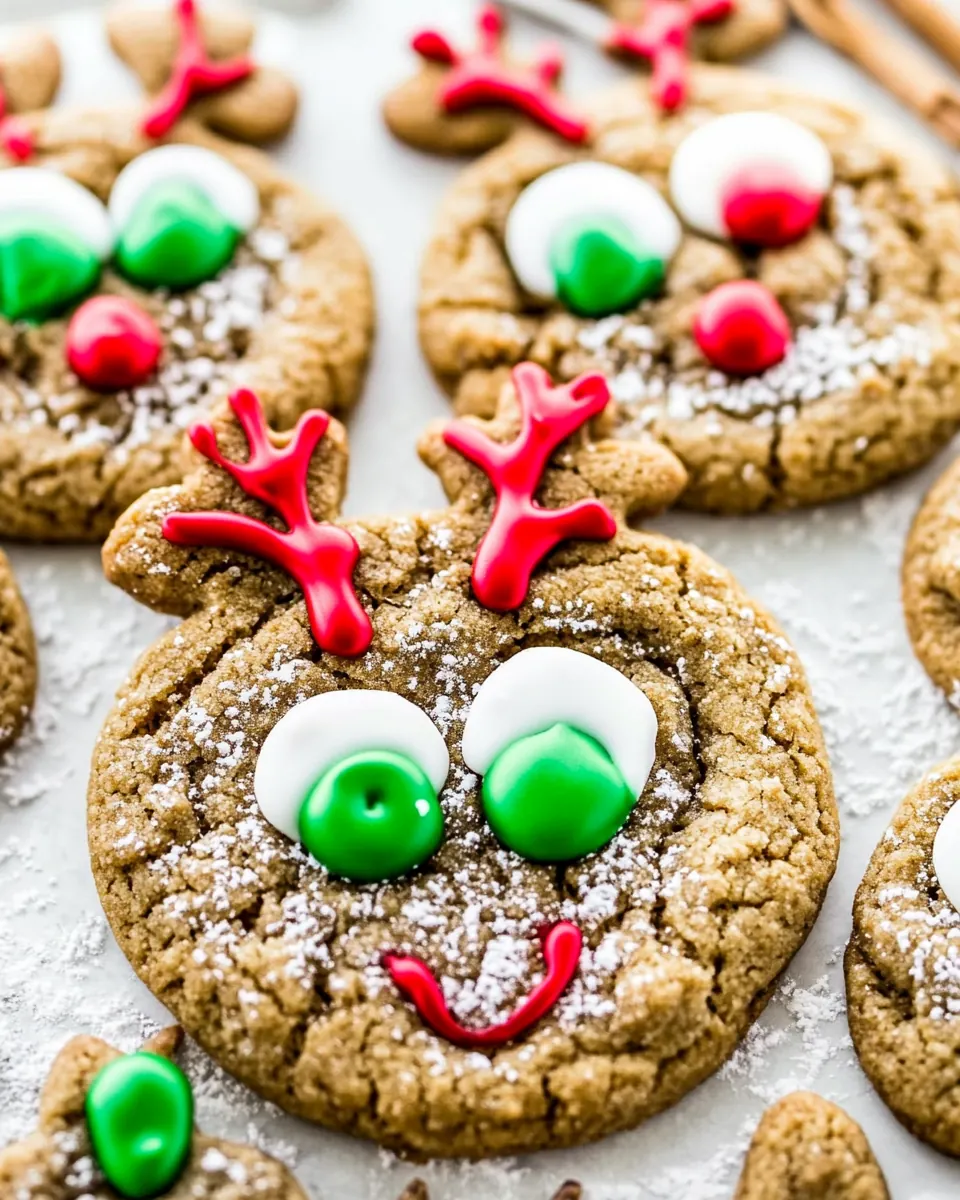
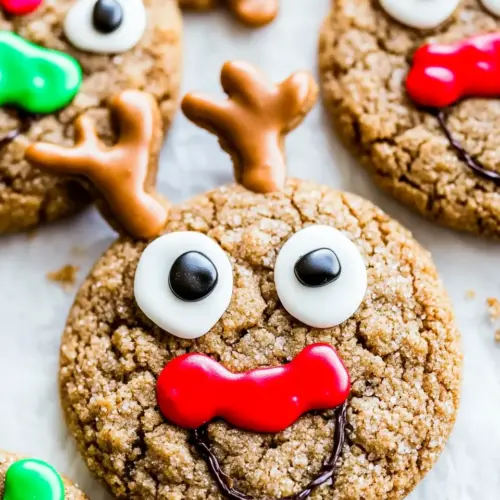
- Remove from oven. Press pretzels into the top of the cookie, for the ears. Press a rolo into the center, for the nose. Add two candy eyes, or chocolate chips for the eyes. Place a dot of frosting in the center of the rolo to secure a red m&m candy on top, for the nose. Allow to cool on baking sheet, then transfer to cooling rack.: Right after the cookies come out you will see the surface sheen gone and the centers slightly domed, which is the perfect time to press in the decorations as the Rolo will soften and adhere. The contrast between the hot cookie and the melting caramel creates a warm, sticky bond that secures the nose. Adding a dot of decorating frosting anchors the red m m candies so they do not roll off later. If you wait too long and the Rolo cools, the candy will not stick, so work quickly but carefully. Transfer to a cooling rack once the cookies have set enough to move without distorting, and let them cool completely so the caramel firms and the pretzels stay crisp.
Recipe Variations about Reindeer Cookies
These variations let you adapt the recipe for texture, speed, or dietary needs while keeping the festive spirit. Below are practical, tested ideas to tweak flavors, decorations, and workflow.
- Swap shortening impact Use only unsalted butter if you prefer a purer butter flavor, though the cookies may be slightly less tall than with shortening.
- Make ahead strategy Chill shaped dough balls on a tray, then freeze them; bake from frozen adding a minute or two to the bake time, for fresh cookies on demand.
- Decorating station setup Arrange bowls of mini pretzel twists, Rolo candies, candy eyes, and red m m candies so guests can personalize their own reindeers efficiently.
- Firmer cookie option Chill the dough longer before baking to reduce spread when you want a more defined oval shape for decorations.
- Storage tip Layer baked cookies with parchment between layers in an airtight container to prevent sticking and maintain crisp pretzels.
Serve This Reindeer Cookies With
These cookies are playful centerpieces for holiday gatherings, cookie exchanges, and children s parties. They pair well with simple beverages and can be served as part of a dessert platter. Below I outline serving ideas, occasions, and storage in detail so you can present them beautifully and practically.
- Holiday gatherings Serve a platter of Reindeer Cookies at Christmas parties, alongside other bite size treats to offer variety and color on the dessert table.
- Children s baking parties Set up an assembly line so children can decorate their own reindeers as an activity and take home a box of handmade cookies.
- Cookie exchanges Package the cookies in clear boxes with ribbon; they travel well for short distances if the candies are secured with a dot of decorating frosting.
- Seasonal pairings Present with warm mugs of hot cocoa or a simple milk carafe; the salty pretzel and sweet chocolate pair wonderfully with a creamy drink.
- Storage and Make Ahead Store baked cookies in an airtight container at room temperature for 2 to 3 days. For longer storage, freeze cooled cookies in an airtight container for up to 3 months, and thaw at room temperature before serving.
FAQ
Conclusion
These Reindeer Cookies stand out for their playful presentation and the satisfying contrast between soft, peanut buttery cookie and crunchy pretzel ears. They are easy to make, family friendly, and perfect for holiday gatherings or cookie swaps. I encourage you to give them a try, set up a decorating station, and let friends or family personalize their own reindeers. Baking them becomes part of the celebration, and the smiles they create are well worth the effort.
Reindeer Cookies
Equipment
- cut and serve turner
Ingredients
- 1/4 cup unsalted butter (57 g) Creamy and cold, helps create a tender, rich cookie base when creamed with sugars; contributes flavor and moistness while aiding spread during baking.
- 1/4 cup vegetable shortening (50 g) Solid and stable at room temperature, provides structure and helps cookies hold shape; adds flakiness and contributes to a tender crumb when combined with butter.
- 1/2 cup creamy peanut butter (130 g) Smooth and fatty, binds dry ingredients while imparting peanut flavor; contributes to chewiness and enhances overall richness in each bite.
- 1/2 cup granulated sugar (100 g) Fine and crystalline, adds sweetness and promotes browning through caramelization; helps incorporate air when creamed with fats for a lighter texture.
- 1/2 cup light brown sugar, packed (110 g) Moist and flavorful, brings deep caramel notes and additional sweetness while contributing moisture; balances textures and enhances chewiness in the cookies.
- 1/2 teaspoon vanilla extract (2.5 ml) Fragrant and liquid, imparts aromatic sweetness that rounds out flavors; small amount enhances overall flavor complexity without affecting texture.
- 2 eggs, large Large and versatile, provide structure and leavening through fat and proteins; help bind ingredients, add moisture, and contribute to the cookie's tenderness.
- 1 3/4 cups all-purpose flour (219 g) Powdery and starchy, forms the bulk of the dough and gives structure through gluten formation; determines texture and thickness depending on mixing and handling.
- 1 teaspoon baking soda (5 g) Fine and reactive, produces carbon dioxide when activated to create lift and spread; helps create a lighter, slightly airy texture in the cookie crumb.
- 1/4 teaspoon salt Granular and mineral, balances sweetness and enhances flavor depth; strengthens dough slightly and controls the chemical leavening reaction.
- 36 mini pretzel twists Crunchy and salty, used as antlers to create a decorative and textural contrast; provides a savory snap that complements sweet elements.
- 18 rolo candies Soft caramel-coated chocolate, melts slightly when warmed to form a glossy candy center and acts as the nose for the reindeer decoration.
- 18 red m&m candies Colorful and crunchy, used as the iconic red nose decoration and provides a sweet, crisp contrast to the soft cookie.
- 36 candy eyes, or mini chocolate chips Small and edible, provide eye details or chocolate flavor if mini chips are used; add whimsy and small bursts of chocolate or visual appeal.
- 1 small tube decorating frosting Piped and sweet, used to attach small candies and add facial details; offers precise decorative accents and helps secure pieces in place.
Instructions
- In a mixing bowl, cream together butter, shortening, peanut butter, 1/2 cup granulated sugar, and brown sugar until light and fluffy, about 2 minutes.: You will notice the mixture lighten in color and become aerated, which creates tiny pockets of air that help the cookies rise slightly and develop a tender crumb. The aroma at this stage is rich and slightly caramelized from the brown sugar mingling with the peanut butter , and you should hear a faint buzz from the mixer as it works the fats into a smooth, glossy texture. If the fats are too cold, the mixture will look lumpy and will not incorporate air, producing dense cookies, so allow the unsalted butter and vegetable shortening to soften beforehand. A common pitfall is overcreaming, which can make the dough too soft and cause excessive spreading in the oven, so stop once the mixture is light and fluffy.
- Add eggs, mixing after each addition. Mix in the vanilla.: When you add the eggs , the batter will become silkier and slightly more fluid, and the mixer will sound smoother. Adding eggs one at a time ensures they emulsify properly, which stabilizes the dough and gives a uniform structure. The scent of vanilla extract lifts the deeper notes from the brown sugar and peanut butter . If you add cold eggs straight from the fridge, the fats can seize and the mixture may appear curdled, so bring eggs to room temperature or add them slowly while mixing. Avoid high speed once the eggs are incorporated, because that can over-aerate and weaken the dough.
- In a separate bowl, whisk together flour, baking soda, and salt.: Whisking distributes the baking soda and salt evenly through the all purpose flour , so the cookies rise uniformly and the seasoning is balanced. You will see the dry mix lighten in color and form a homogenous powder, which makes folding into the wet ingredients predictable. If the flour contains lumps, break them up now to avoid pockets that do not hydrate, as those would create uneven texture. A common oversight is not measuring flour correctly, which leads to overly dry dough, so spoon and level for accuracy.
- Stir dry ingredients into the wet ingredients and mix gently to combine. Don't over-mix. The dough will be very soft. Refrigerate for at least 30 minutes, or up to 3 days.: At this stage you will feel the dough transform from sticky batter to a cohesive, very soft mass. The surface will be slightly tacky, and the scent will be warm and nutty. Chilling firms the dough, allowing the fats to solidify and making the cookies easier to shape, which also controls spread during baking. Overmixing here develops gluten in the all purpose flour , resulting in tougher cookies, so fold just until no streaks of flour remain. If the dough seems too loose to form, a brief chill will make it manageable; if you skip chilling, expect more spreading in the oven.
- Preheat oven to 375 degrees F.: Heating the oven to the right temperature ensures the exterior sets quickly while the interior stays soft, creating that desirable contrast. You should smell a faint warm, dry air from the preheated oven when you open it, and the heat helps the Rolo melt properly when placed on a freshly baked cookie. An oven running cool can lead to pale cookies that do not set, while too hot an oven will brown them too quickly, so use an oven thermometer if your oven is uncertain.
- Line a cookie sheet with parchment paper.: The parchment provides a nonstick surface and helps cookies bake evenly across their bottom, preventing hot spots and making cleanup easier. You will notice the parchment retains a slight warm scent from the oven but nothing overpowering. Avoid greasing the sheet in addition to using parchment, as extra fat can cause additional spreading. If you skip parchment, rotate the sheet halfway through baking to avoid uneven browning.
- Scoop dough into large balls and roll them into an oval shape. Place on prepared baking sheet. Bake for 9-12 minutes, until set and no longer glossy looking.: As the cookies bake, they will puff slightly and the edges will set first, creating a gentle ridge while the centers remain soft. Watch for the glossy sheen to disappear and for the bottoms to take on a hint of golden color, which indicates doneness without overbaking. You will hear a faint crackle as moisture leaves the cookie and see tiny steam vents on the surface. A common mistake is underbaking for a soft center that will collapse, so err on the side of fully set but not browned, and rotate the pan if your oven heats unevenly.
- Remove from oven. Press pretzels into the top of the cookie, for the ears. Press a rolo into the center, for the nose. Add two candy eyes, or chocolate chips for the eyes. Place a dot of frosting in the center of the rolo to secure a red m&m candy on top, for the nose. Allow to cool on baking sheet, then transfer to cooling rack.: Right after the cookies come out you will see the surface sheen gone and the centers slightly domed, which is the perfect time to press in the decorations as the Rolo will soften and adhere. The contrast between the hot cookie and the melting caramel creates a warm, sticky bond that secures the nose. Adding a dot of decorating frosting anchors the red m m candies so they do not roll off later. If you wait too long and the Rolo cools, the candy will not stick, so work quickly but carefully. Transfer to a cooling rack once the cookies have set enough to move without distorting, and let them cool completely so the caramel firms and the pretzels stay crisp.
Notes
- Swap shortening impact Use only unsalted butter if you prefer a purer butter flavor, though the cookies may be slightly less tall than with shortening.
- Make ahead strategy Chill shaped dough balls on a tray, then freeze them; bake from frozen adding a minute or two to the bake time, for fresh cookies on demand.
- Decorating station setup Arrange bowls of mini pretzel twists, Rolo candies, candy eyes, and red m m candies so guests can personalize their own reindeers efficiently.
- Firmer cookie option Chill the dough longer before baking to reduce spread when you want a more defined oval shape for decorations.
- Storage tip Layer baked cookies with parchment between layers in an airtight container to prevent sticking and maintain crisp pretzels.