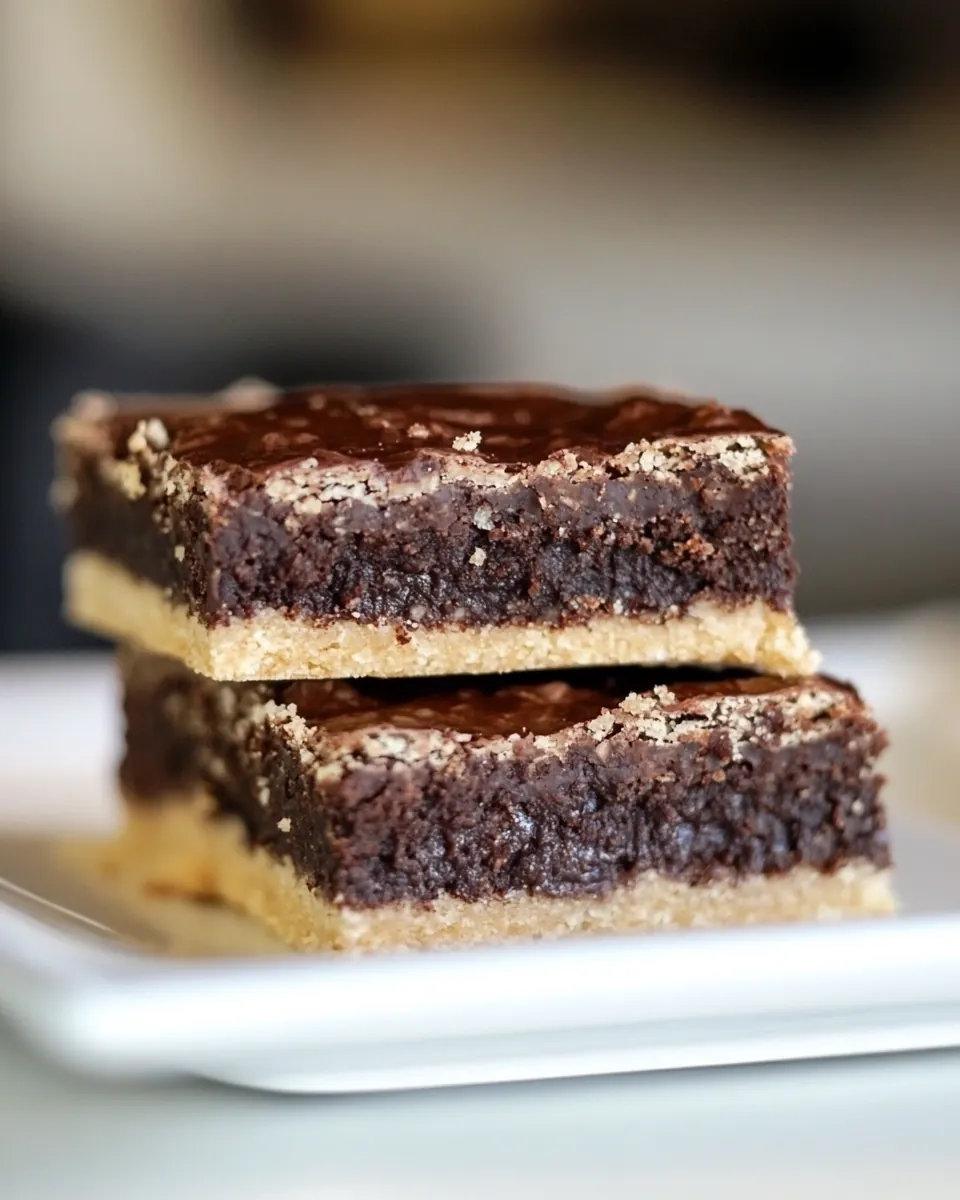
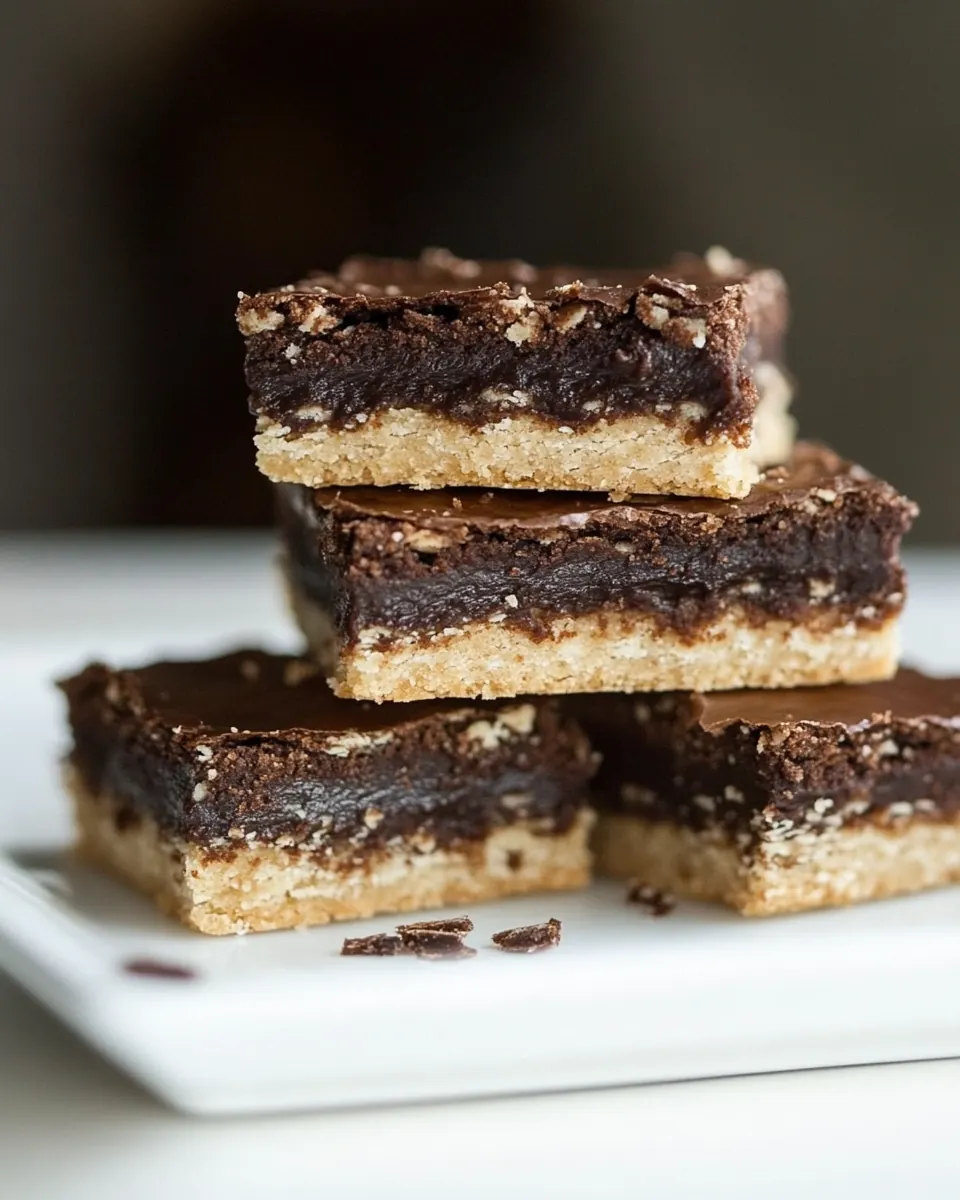
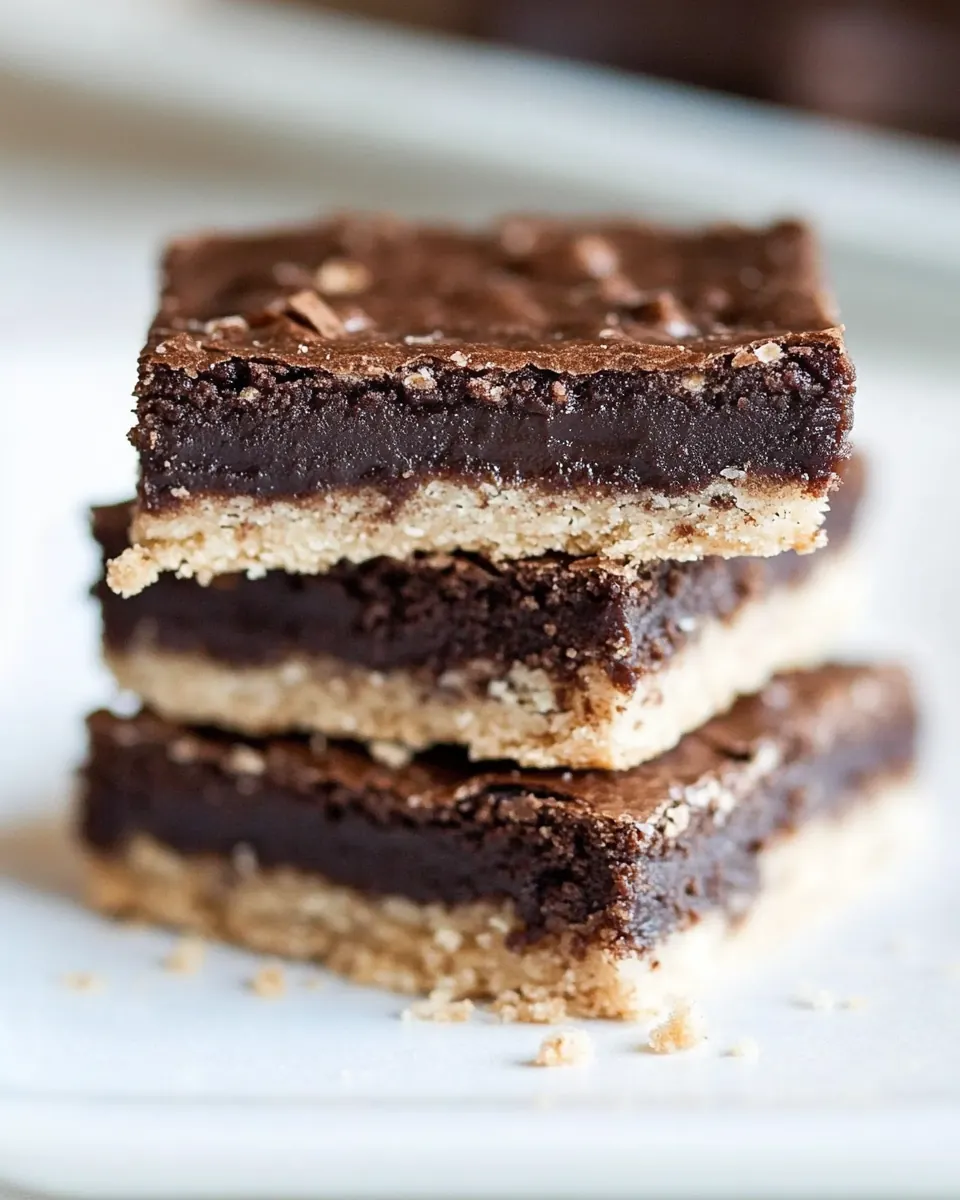
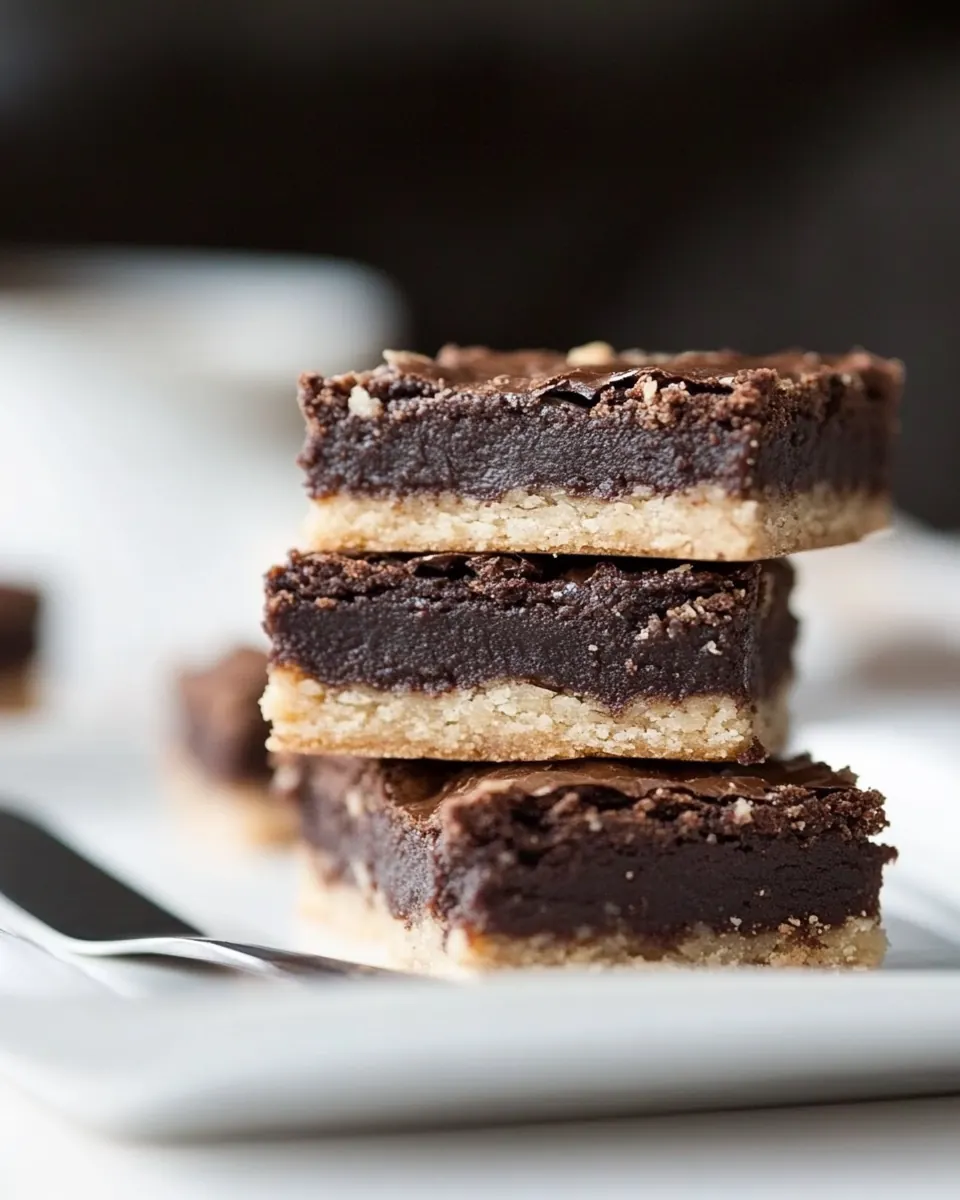
Espresso Shortbread Brownie Bars
Espresso Shortbread Brownie Bars began as a late night experiment the first time I craved something both sturdy and deeply chocolatey, with a coffee kick to keep conversations going. I grabbed a few pantry staples, let curiosity steer me, and ended up with bars that are crisp at the base, fudgy above, and unmistakably caffeinated. That first batch disappeared before I had a chance to take a picture, and ever since I keep the ingredients on hand for impromptu baking sessions when friends drop by.
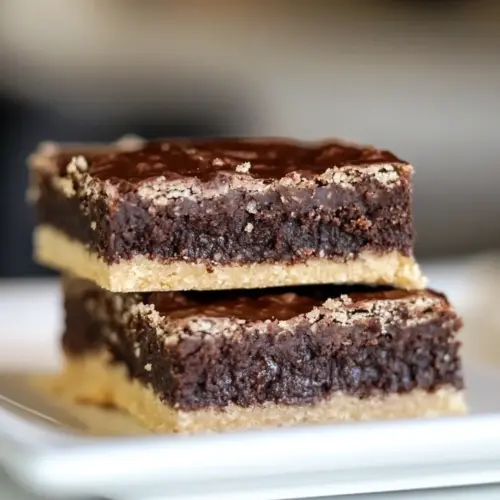
Some recipes demand precision, others reward improvisation, and these bars land between the two. I love that the shortbread crust holds its shape while the brownie layer puddles into a glossy, crackled top as it cools. There is a comfort to pressing the crumbly dough into the pan, and a small satisfaction in sinking a knife through the cooled slab to reveal tidy squares. When I serve them, people always comment on the contrast of textures, and the espresso note elevates the chocolate without overwhelming it.
Over time I refined the method so the crust does not sag and the brownie keeps that chewy center. I usually make them ahead, letting the bars rest until completely cool, which improves slicing and keeps the edges neat. If you enjoy bold chocolate and a hint of coffee, these bars are the kind of treat that turns a simple afternoon into a memorable one. They travel well too, making them my go to for potlucks and picnics.
Recipe Snapshot
1 hr 15 mins
10 mins
65 mins
Medium
250 kcal
American
Gluten-Free, Low FODMAP
Desserts
Food processor, 9-by-13-inch metal baking pan, Fork, Medium bowl, Large saucepan, Spatula
Why This Espresso Shortbread Brownie Bars Stands Out
Layered texture that feels intentional
I adore how the shortbread crust provides a tender, sandy base beneath a dense brownie top. The contrast is where the magic is, you get a buttery, crumbly bite followed by a fudgy, slightly gooey moment. That interplay keeps every square interesting, and I often hear guests describing them as both cookie and cake like.
Bold espresso flavor without bitterness
Using espresso powder brightens the chocolate, giving it depth and lift. I prefer powdered espresso here because it dissolves evenly into the dough and batter, integrating the coffee note so it complements the chocolate instead of competing. This makes the bars taste more grown up, and perfect with a glass of milk or strong coffee.
Reliable, make ahead crowd pleaser
These bars hold up well at room temperature and travel without turning into a mess. I often make a pan the night before, which lets the textures set and the flavors meld. That makes them a stress free option for gatherings when I need a dessert that performs without last minute fuss.
Simple pantry ingredients, impressive results
The ingredient list reads like a typical pantry raid: butter, flour, sugar, chocolate, and a few leavening staples. I love recipes that turn everyday items into something special, and this one does that with elegance. You do not need fancy equipment, just attention to technique, and the payoff feels luxurious.
Flexible and forgiving
I’ve tweaked the balance over the years and found the bars are tolerant of small variations, whether you swap cocoa brands or slightly vary the bake time for your desired texture. That leeway makes them a great recipe to teach to friends who are building confidence in the kitchen.
Ingredients Required for Espresso Shortbread Brownie Bars
These ingredients work together to create a structured base and a rich, fudgy top. The shortbread components provide butter rich flakiness while the brownie mix brings cocoa, melted chocolate, and sugar for chew and shine. Salt and a touch of baking powder balance and lift, and the espresso powder sharpens chocolate flavors. Each player has a clear role, ensuring a stable crust and an indulgent brownie layer that set up beautifully as they cool.
- 10 tablespoons unsalted butter softened: Soften to spreadable consistency and provide a rich, tender base for the shortbread layer, contributing butterfat that enhances flakiness and flavor when creamed with sugar.
- 1 1/2 cups all-purpose flour: Stabilize the shortbread structure and create tender crumb by supplying gluten and bulk; measure precisely to ensure correct texture and prevent toughness.
- 1/4 cup granulated sugar: Sweeten and tenderize the shortbread; granulated sugar helps create a delicate crisp edge through caramelization during baking.
- 1 tablespoon espresso powder: Impart concentrated coffee flavor and deepen the chocolate–espresso profile; dissolve into liquids or butter to evenly distribute aromatic bitterness.
- 1/2 teaspoon kosher salt: Season and enhance overall flavor balance while highlighting the chocolate and coffee notes; use measured salt to brighten sweetness without overpowering.
- 1 1/2 cups all-purpose flour: Provide additional bulk and structure for the brownie layer, contributing to the batter’s viscosity and helping develop the desired cakey-chewy texture when combined with leavening.
- 2 tablespoons unsweetened cocoa: Add intense chocolate flavor and deepen color while contributing slight dryness that must be balanced with fats and liquids for a fudgy brownie texture.
- 1 teaspoon kosher salt: Season and boost the chocolate’s richness for the brownie layer; kosher salt enhances sweetness and rounds out flavors when dissolved into the batter.
- 1/2 teaspoon baking powder: Leaven lightly to give the brownie layer a bit of lift and prevent it from becoming overly dense; activates during baking to create a tender crumb.
- 14 tablespoons unsalted butter: Melt into the brownie batter to provide moisture, richness, and a glossy mouthfeel; butter also helps carry and round chocolate and espresso flavors.
- 4 ounces unsweetened chocolate chopped: Melt to contribute deep, pure cocoa solids and intense chocolate flavor; unsweetened chocolate also affects the final texture and ganache-like quality of the brownie.
- 2 cups granulated sugar: Sweeten the brownie layer and balance bitter chocolate notes; granulated sugar also contributes to structure and a slightly crisp top when baked.
- 1 tablespoon pure vanilla extract: Add aromatic complexity and enhance perceived sweetness and depth; vanilla rounds flavors and helps meld chocolate and espresso into a cohesive profile.
- 3 large eggs: Incorporate structure and moisture as well as emulsifying proteins that help bind ingredients; eggs also contribute to rise, tenderness, and a fudgy interior when baked.
Cooking Instructions for Espresso Shortbread Brownie Bars
This recipe unfolds in clear stages: make the shortbread crust, prepare the brownie batter, combine, then bake and cool. Pay attention to temperatures and timing so each layer sets as intended. I find the tactile cues are as important as the clock, which is why I describe what to look and listen for in every step.
- Make the shortbread crust: Preheat the oven to 350°F. In a food processor, combine the butter with the flour, sugar, ground espresso and salt; pulse until coarse crumbs form. Press the crumbs into a 9-by-13-inch metal baking pan to form a crust; prick all over with a fork. Freeze for 5 minutes, until firm. Bake in the lower third of the oven for 30 minutes, until the crust is lightly browned and cooked through.: Preheat the oven to 350°F. : You will notice the warm air and slight hum as the oven reaches temperature, which ensures even baking. The crust benefits from an oven that is fully up to heat so the edges begin to set quickly, preventing spread. A common mistake is placing the pan in a not fully preheated oven which can make the crust unevenly baked, producing a soggy center. If your oven runs hot or cool, use an oven thermometer to confirm accuracy.
- Meanwhile, prepare the brownie layer: In a medium bowl, whisk the flour with the cocoa, salt and baking powder. In a large saucepan, melt the butter with the chocolate over low heat.: The sound of pulses will change as the mixture transforms into coarse crumbs, and you should see pea sized bits of butter coated in flour. This texture is important because it melts and binds during the short freeze and bake, giving that sandy, tender feel. Overprocessing creates a paste which yields a tough crust, so pulse in short bursts and scrape the bowl as needed to ensure even distribution.
- Remove the saucepan from the heat and stir in the sugar and vanilla, then stir in the eggs. Add the dry ingredients and stir until the brownie batter is smooth.: Pressing evenly ensures a uniform base, and you should feel the crumbs compact under gentle pressure into a cohesive sheet. Pricking with a fork lets steam escape while baking so the crust does not blister. A typical pitfall is pressing too thin in spots which can lead to fragile edges, so aim for an even thickness across the pan.
- Pour the brownie batter over the shortbread crust, smoothing the surface. Bake for 30 minutes, until the brownie top is dry and lightly cracked around the edges; the center will still be a bit soft.: A brief chill firms the crust so it holds shape during the first bake, and you will feel the pan cool to the touch. This step also helps the shortbread keep its crumbly integrity while the brownie layer is added. Skipping the chill risks the crust collapsing or mixing with the batter when poured over.
- Let cool completely before cutting into bars.: As it bakes you will see the edges take on light color and the surface feel set to the touch, not doughy. Baking on the lower rack promotes even bottom browning. A frequent error is opening the oven repeatedly which drops temperature and can prevent proper setting, so check visually near the end of the bake instead of early and often.
- Meanwhile, prepare the brownie layer: In a medium bowl, whisk the flour with the cocoa, salt and baking powder. : Whisking aerates these dry ingredients slightly and blends them for consistent distribution in the batter, so you will see a uniform, dark powder. This step prevents lumps of cocoa or pockets of baking powder that could cause uneven rise or flavor. Avoid sifting directly over the melted chocolate which might cool it; keep components separate until combined.
- In a large saucepan, melt the butter with the chocolate over low heat.: Melt gently and stir until glossy and smooth, watching for a faint sheen and the scent of warm cocoa and butter . Low heat prevents scorching the chocolate , which would give a bitter taste and grainy texture. Stir continuously and remove at the first sign of complete melting to preserve the emulsion quality.
- Remove the saucepan from the heat and stir in the sugar and vanilla, then stir in the eggs.: Off the heat, the mixture will steam slightly and the sugar will begin to dissolve into the warm chocolate mixture, creating a satiny consistency. Adding the eggs off heat ensures they incorporate smoothly without cooking into ribbons. A common mistake is adding eggs while the pan is too hot, which can scramble them, so allow the temperature to drop for a minute before stirring them in.
- Add the dry ingredients and stir until the brownie batter is smooth.: When you incorporate the flour mixture, you should see the batter become thick and homogeneous, with a glossy surface from the melted chocolate . Mixing until smooth is important for uniform texture, but overmixing can build gluten and lead to a cakier result. Stir just until the last streaks disappear for the ideal fudgy consistency.
- Pour the brownie batter over the shortbread crust, smoothing the surface.: Pour steadily and use a spatula to distribute the batter to the corners so every part gets an even layer. The batter should settle with a shiny top and pour not too thin, not too thick. If the batter is pulled or clumpy, it often indicates uneven mixing; spread gently to avoid creating air pockets that can alter the bake.
- Bake for 30 minutes, until the brownie top is dry and lightly cracked around the edges; the center will still be a bit soft.: As the bars bake you will notice the surface develop delicate fissures and the aroma of chocolate will intensify, signaling proper setting. The center remaining slightly soft is intentional, it will firm as the bars cool. Overbaking will yield a dry, crumbly texture, so remove when the top looks set but not completely stiff.
- Let cool completely before cutting into bars.: Cooling allows the layers to set and the juices to redistribute, leading to clean slices and a balanced texture. You will notice the glossy top dull slightly and the interior become sliceable without squishing. Cutting while warm is tempting but causes the bars to crumble and lose structure, so patience yields the best presentation.
Recipe Variations about Espresso Shortbread Brownie Bars
These suggestions help you tailor the bars without changing the core method. Small swaps or timing tweaks can shift the final texture and flavor in pleasing ways, so pick the approach that fits your mood and occasion.
- Boost the espresso: Increase the espresso powder slightly for a more pronounced coffee note, but do this sparingly to avoid bitterness.
- Adjust fudginess: Bake a few minutes less for an even gooier center, or a bit longer for a firmer, more brownie like texture.
- Chocolate swap: Use a different unsweetened chocolate brand to vary the cocoa butter content and flavor profile, which subtly changes mouthfeel.
- Presentation tip: Chill the pan briefly before slicing to get perfectly neat squares and reduce crumbling when you cut.
- Storage method: Keep the bars in an airtight container at room temperature for up to five days as noted, layering with parchment to prevent sticking between pieces.
What to Serve Alongside Espresso Shortbread Brownie Bars
These bars are flexible company, pairing well with drinks and simple accompaniments. Serve them casually with beverages or dress them up for dessert with a small scoop of something cold. Here are ideas for occasions and pairings to make the most of their texture and flavor.
- Afternoon tea pairing: Serve with strong coffee or a black tea to echo the espresso note and balance sweetness.
- Potluck friendly: Bring the bars to gatherings where they can sit at room temperature, no reheating needed, making them easy to share.
- Simple dessert plate: Top a square with a small scoop of plain ice cream for contrast between warm and cool, creamy and crumbly.
- Occasion idea: Suitable for casual dinners and holiday baking trays where a rich, compact bar is appreciated by many guests.
- Storage guidance: Keep in an airtight container at room temperature for up to five days, using parchment between layers to avoid sticking and preserve the shortbread texture.
- Seasonal touch: These bars travel well through the year and are especially welcome at cooler gatherings when the chocolate and espresso feel cozy.
FAQ
Conclusion
These bars stand out for their harmonious contrast of a buttery shortbread base and a rich, espresso brightened brownie top, delivering both texture and bold flavor in every square. Give them a try when you want a dessert that feels special but is straightforward to make, especially for gatherings or gift giving. I hope you enjoy baking them as much as I do, and that they become a reliable favorite for sharing with friends and family.
Espresso Shortbread Brownie Bars
Equipment
- Food Processor
- 9-by-13-inch metal baking pan
- Fork
- Medium Bowl
- Large saucepan
- Spatula
Ingredients
- 10 tablespoons unsalted butter softened Soften to spreadable consistency and provide a rich, tender base for the shortbread layer, contributing butterfat that enhances flakiness and flavor when creamed with sugar.
- 1 1/2 cups all-purpose flour Stabilize the shortbread structure and create tender crumb by supplying gluten and bulk; measure precisely to ensure correct texture and prevent toughness.
- 1/4 cup granulated sugar Sweeten and tenderize the shortbread; granulated sugar helps create a delicate crisp edge through caramelization during baking.
- 1 tablespoon espresso powder Impart concentrated coffee flavor and deepen the chocolate-espresso profile; dissolve into liquids or butter to evenly distribute aromatic bitterness.
- 1/2 teaspoon kosher salt Season and enhance overall flavor balance while highlighting the chocolate and coffee notes; use measured salt to brighten sweetness without overpowering.
- 1 1/2 cups all-purpose flour Provide additional bulk and structure for the brownie layer, contributing to the batter’s viscosity and helping develop the desired cakey-chewy texture when combined with leavening.
- 2 tablespoons unsweetened cocoa Add intense chocolate flavor and deepen color while contributing slight dryness that must be balanced with fats and liquids for a fudgy brownie texture.
- 1 teaspoon kosher salt Season and boost the chocolate’s richness for the brownie layer; kosher salt enhances sweetness and rounds out flavors when dissolved into the batter.
- 1/2 teaspoon baking powder Leaven lightly to give the brownie layer a bit of lift and prevent it from becoming overly dense; activates during baking to create a tender crumb.
- 14 tablespoons unsalted butter Melt into the brownie batter to provide moisture, richness, and a glossy mouthfeel; butter also helps carry and round chocolate and espresso flavors.
- 4 ounces unsweetened chocolate chopped Melt to contribute deep, pure cocoa solids and intense chocolate flavor; unsweetened chocolate also affects the final texture and ganache-like quality of the brownie.
- 2 cups granulated sugar Sweeten the brownie layer and balance bitter chocolate notes; granulated sugar also contributes to structure and a slightly crisp top when baked.
- 1 tablespoon pure vanilla extract Add aromatic complexity and enhance perceived sweetness and depth; vanilla rounds flavors and helps meld chocolate and espresso into a cohesive profile.
- 3 large eggs Incorporate structure and moisture as well as emulsifying proteins that help bind ingredients; eggs also contribute to rise, tenderness, and a fudgy interior when baked.
Instructions
- Make the shortbread crust: Preheat the oven to 350°F. In a food processor, combine the butter with the flour, sugar, ground espresso and salt; pulse until coarse crumbs form. Press the crumbs into a 9-by-13-inch metal baking pan to form a crust; prick all over with a fork. Freeze for 5 minutes, until firm. Bake in the lower third of the oven for 30 minutes, until the crust is lightly browned and cooked through.: Preheat the oven to 350°F. : You will notice the warm air and slight hum as the oven reaches temperature, which ensures even baking. The crust benefits from an oven that is fully up to heat so the edges begin to set quickly, preventing spread. A common mistake is placing the pan in a not fully preheated oven which can make the crust unevenly baked, producing a soggy center. If your oven runs hot or cool, use an oven thermometer to confirm accuracy.
- Meanwhile, prepare the brownie layer: In a medium bowl, whisk the flour with the cocoa, salt and baking powder. In a large saucepan, melt the butter with the chocolate over low heat.: The sound of pulses will change as the mixture transforms into coarse crumbs, and you should see pea sized bits of butter coated in flour. This texture is important because it melts and binds during the short freeze and bake, giving that sandy, tender feel. Overprocessing creates a paste which yields a tough crust, so pulse in short bursts and scrape the bowl as needed to ensure even distribution.
- Remove the saucepan from the heat and stir in the sugar and vanilla, then stir in the eggs. Add the dry ingredients and stir until the brownie batter is smooth.: Pressing evenly ensures a uniform base, and you should feel the crumbs compact under gentle pressure into a cohesive sheet. Pricking with a fork lets steam escape while baking so the crust does not blister. A typical pitfall is pressing too thin in spots which can lead to fragile edges, so aim for an even thickness across the pan.
- Pour the brownie batter over the shortbread crust, smoothing the surface. Bake for 30 minutes, until the brownie top is dry and lightly cracked around the edges; the center will still be a bit soft.: A brief chill firms the crust so it holds shape during the first bake, and you will feel the pan cool to the touch. This step also helps the shortbread keep its crumbly integrity while the brownie layer is added. Skipping the chill risks the crust collapsing or mixing with the batter when poured over.
- Let cool completely before cutting into bars.: As it bakes you will see the edges take on light color and the surface feel set to the touch, not doughy. Baking on the lower rack promotes even bottom browning. A frequent error is opening the oven repeatedly which drops temperature and can prevent proper setting, so check visually near the end of the bake instead of early and often.
- Meanwhile, prepare the brownie layer: In a medium bowl, whisk the flour with the cocoa, salt and baking powder. : Whisking aerates these dry ingredients slightly and blends them for consistent distribution in the batter, so you will see a uniform, dark powder. This step prevents lumps of cocoa or pockets of baking powder that could cause uneven rise or flavor. Avoid sifting directly over the melted chocolate which might cool it; keep components separate until combined.
- In a large saucepan, melt the butter with the chocolate over low heat.: Melt gently and stir until glossy and smooth, watching for a faint sheen and the scent of warm cocoa and butter . Low heat prevents scorching the chocolate , which would give a bitter taste and grainy texture. Stir continuously and remove at the first sign of complete melting to preserve the emulsion quality.
- Remove the saucepan from the heat and stir in the sugar and vanilla, then stir in the eggs.: Off the heat, the mixture will steam slightly and the sugar will begin to dissolve into the warm chocolate mixture, creating a satiny consistency. Adding the eggs off heat ensures they incorporate smoothly without cooking into ribbons. A common mistake is adding eggs while the pan is too hot, which can scramble them, so allow the temperature to drop for a minute before stirring them in.
- Add the dry ingredients and stir until the brownie batter is smooth.: When you incorporate the flour mixture, you should see the batter become thick and homogeneous, with a glossy surface from the melted chocolate . Mixing until smooth is important for uniform texture, but overmixing can build gluten and lead to a cakier result. Stir just until the last streaks disappear for the ideal fudgy consistency.
- Pour the brownie batter over the shortbread crust, smoothing the surface.: Pour steadily and use a spatula to distribute the batter to the corners so every part gets an even layer. The batter should settle with a shiny top and pour not too thin, not too thick. If the batter is pulled or clumpy, it often indicates uneven mixing; spread gently to avoid creating air pockets that can alter the bake.
- Bake for 30 minutes, until the brownie top is dry and lightly cracked around the edges; the center will still be a bit soft.: As the bars bake you will notice the surface develop delicate fissures and the aroma of chocolate will intensify, signaling proper setting. The center remaining slightly soft is intentional, it will firm as the bars cool. Overbaking will yield a dry, crumbly texture, so remove when the top looks set but not completely stiff.
- Let cool completely before cutting into bars.: Cooling allows the layers to set and the juices to redistribute, leading to clean slices and a balanced texture. You will notice the glossy top dull slightly and the interior become sliceable without squishing. Cutting while warm is tempting but causes the bars to crumble and lose structure, so patience yields the best presentation.
Notes
- Boost the espresso: Increase the espresso powder slightly for a more pronounced coffee note, but do this sparingly to avoid bitterness.
- Adjust fudginess: Bake a few minutes less for an even gooier center, or a bit longer for a firmer, more brownie like texture.
- Chocolate swap: Use a different unsweetened chocolate brand to vary the cocoa butter content and flavor profile, which subtly changes mouthfeel.
- Presentation tip: Chill the pan briefly before slicing to get perfectly neat squares and reduce crumbling when you cut.
- Storage method: Keep the bars in an airtight container at room temperature for up to five days as noted, layering with parchment to prevent sticking between pieces.