Pumpkin Pie
Pumpkin Pie is the kind of dessert that takes me right back to a sunlit kitchen table in late October when the air turns crisp and the scent of spices starts to follow you around. I remember the first time I rolled out a pie crust that actually behaved, how the flour dusted my sleeves and the simple ritual of pressing the dough into the pan felt like homemade magic. That moment taught me that a great Pumpkin Pie is more about patience than perfection, and that the best pies are the ones you bake with a story in mind.
Another memory that sticks is the hush that falls over a room when the pie comes out of the oven, the tips of the crust browned just so, the filling gently trembling in the center. I love how a slice of Pumpkin Pie can hold so many textures, from the velvety filling to the crisp edge of the crust. Over the years I’ve refined small details, like brushing the crust with egg white for a tender bottom, and those tiny choices add up to a reliably wonderful pie I want to share with you.
Recipe Snapshot
1 hr 30 mins
20 mins
70 mins
Medium
320 kcal
American
Gluten-Free, Low FODMAP
Desserts
Oven, 9 inch pie plate, Mixing bowl, Whisk, Rolling pin, Fine mesh sieve
Why This Pumpkin Pie Stands Out
Classic Comfort
I adore this Pumpkin Pie because it channels deep fall flavors without being fussy. The combination of canned pumpkin and warm spices creates a filling that is creamy and nostalgic, the kind that makes guests close their eyes for a beat and smile. I often serve it when family drops by, and I can tell you it travels well from kitchen to table.
Dependable Technique
What I appreciate most is how the method is forgiving. Rolling out a single disc of dough to a quarter inch and chilling it gives you control, and the two stage bake with a high start temperature then a lower finish builds a beautifully set filling with a golden rim. I teach this to friends because it reduces stress on baking day, and I always point out the visual cue of a slightly jiggly center as the sign of success.
Simple, Honest Ingredients
There are no gimmicks here, just pantry staples like eggs, heavy cream, and pumpkin puree. That simplicity makes the pie accessible for busy cooks, while each element plays a clear role, from structure to silkiness. I love recommending this version to bakers who want high impact with minimal shopping.
Built For Sharing
This Pumpkin Pie serves about eight, which is perfect for gatherings. It keeps well in the fridge, and the flavors actually settle and marry overnight, so you can bake ahead and still serve a pie that tastes fresh. I often make it a day early and let it rest, and the texture improves in my experience.
Visual and Textural Rewards
Finally, the pie is a joy to present. The glossy top and fluted crust draw compliments before anyone takes their first forkful. I enjoy the little rituals around serving it, from slicing to plating, because each step adds to the experience and makes dessert feel special.
Ingredients Overview for Pumpkin Pie
The magic of this Pumpkin Pie rests on harmony among a few key players. The pumpkin puree brings dense, earthy sweetness, while the eggs provide structure so the filling slices cleanly. Heavy cream adds luxury and silken texture, and the blend of cinnamon, nutmeg, and ginger delivers the warm, layered spice profile we expect. The granulated sugar balances the pumpkin, and a pinch of kosher salt sharpens the flavors. Together, these ingredients yield a custardy pie that feels both traditional and comforting.
- 1 unbaked 9" pie crust: Provides a crisp, flaky vessel to hold the filling and bake evenly; press into a pie plate and dock if desired. Keeps the custard contained while browning at the edges and supports slices when serving, offering texture contrast to the smooth filling.
- 3 large eggs, with 1 egg divided: Adds structure and richness to the custard; use two whole eggs for binding and one divided egg for brushing the crust or adding a silkier texture. Contributes to set and stability when baked, helping the pie firm up while providing a glossy finish if egg wash is applied.
- 1 1/4 cups heavy cream: Enriches the custard with creaminess and fat, producing a smooth, indulgent mouthfeel and aiding in a tender set when baked. Balances sweetness and spices while preventing curdling at moderate oven temperatures; can be gently warmed with spices for fuller flavor integration.
- 1 cup granulated sugar: Sweetens the filling and helps with caramelization and browning during baking; dissolves into the custard for even sweetness. Controls overall taste profile and works with spices to highlight pumpkin flavor while impacting texture by slightly thinning the mixture at higher amounts.
- 15 ounces canned pure pumpkin puree: Supplies the primary pumpkin flavor and moisture, creating the characteristic color and taste of the pie; use pure pumpkin for best texture. Provides body and fiber to the custard, absorbing some liquid and integrating with eggs and cream to form a smooth, uniform filling when blended thoroughly.
- 1 teaspoon ground cinnamon: Adds warm, aromatic sweetness and depth; sprinkle into the filling to accentuate autumnal flavors and complement pumpkin. Works synergistically with nutmeg and ginger to create the classic pumpkin spice profile and can be adjusted slightly to personal taste.
- 1 teaspoon ground nutmeg: Contributes a sweet, slightly nutty warmth with aromatic intensity; incorporate into the mix to layer spice complexity. Balances cinnamon and ginger while adding subtle piquancy that enhances the pumpkin's natural sweetness without overpowering the custard.
- 3/4 teaspoon ground ginger: Brings bright, peppery warmth and a zesty bite; include in the spice blend to sharpen and enliven the overall flavor. Helps cut through richness from the cream and eggs, providing a lively counterpoint that prevents the filling from tasting flat.
- 3/4 teaspoon kosher salt: Enhances and balances flavors by moderating sweetness and pulling out spice notes; dissolve evenly into the mixture for consistent seasoning. A small amount supports overall taste harmony, ensuring the filling tastes rounded and preventing it from being cloying.
Pumpkin Pie Instructions
These directions guide you through building a structured, gently spiced custard and a crisp, attractive crust. Read them once to get the flow, then follow step by step for the best results. I like to have everything measured out before I start, so the assembly feels calm and steady.
- Preheat the oven to 425°F.: Feel the warmth building in your kitchen as the oven climbs to 425°F , a crucial moment that sets the stage for a strong initial oven spring in the filling. The high heat encourages the exterior of the custard to set rapidly, which helps lock in creaminess while the interior finishes slowly. You'll notice a gentle sense of anticipation in the air as the oven hums, and light will reflect off racks and pans. A common mistake is skipping preheating, which can lead to uneven bake and a runnier center, so always wait until the set temperature is reached.
- Roll out one disc of dough to 1/4" thickness. Fit the dough into a 9" pie plate, flute the edges, and refrigerate until you are ready to fill it.: As you roll the dough to a quarter inch, the tactile feedback makes a big difference, the surface smoothing under the pin while faint cracks suggest the need for a quick patch. Press the dough gently into a 9 inch pie plate so the edges meet the rim cleanly, then create fluted edges for a classic look. Chilling the crust chills the fat, which helps the crust stay tender and flaky while baking. If you skip chilling, the crust may shrink or become tough, so give it the rest it needs in the fridge for a more dependable bake.
- In a large bowl, lightly whisk 3 egg yolks and 2 egg whites. Reserve the additional egg white in another small bowl and set aside. To the whisked eggs, add the cream, sugar, pumpkin, cinnamon, nutmeg, ginger, and salt. Whisk well to combine.: When you whisk the eggs , aim for cohesion not foam, combining yolks and whites until slightly uniform and satiny. Adding heavy cream , granulated sugar , and pumpkin puree transforms the mixture into a thick, smooth custard that smells bright with cinnamon and nutmeg . The aroma will deepen as you whisk, and the batter should look glossy and homogeneous. Avoid over aerating the mixture as trapped air can cause bubbles and cracks during baking. If the mixture seems lumpy, a few extra steady strokes will smooth it without beating it airy.
- Remove the pie crust from the refrigerator. Whisk the reserved egg white with a fork and brush the bottom of the pie crust with the egg white. Fill the pie crust with the pumpkin filling and carefully move it to the oven.: Brushing the chilled crust bottom with the reserved egg white creates a thin seal that helps prevent a soggy underside, and you will notice the crust taking on a subtle sheen. Pour the filling in with a steady hand so it settles evenly, and give the pie a gentle shake to level the surface if necessary. The shallow pool of batter should glisten under light before it hits the heat. One pitfall is overfilling, which can lead to spillage, so leave a little room for the filling to ripple as it bakes.
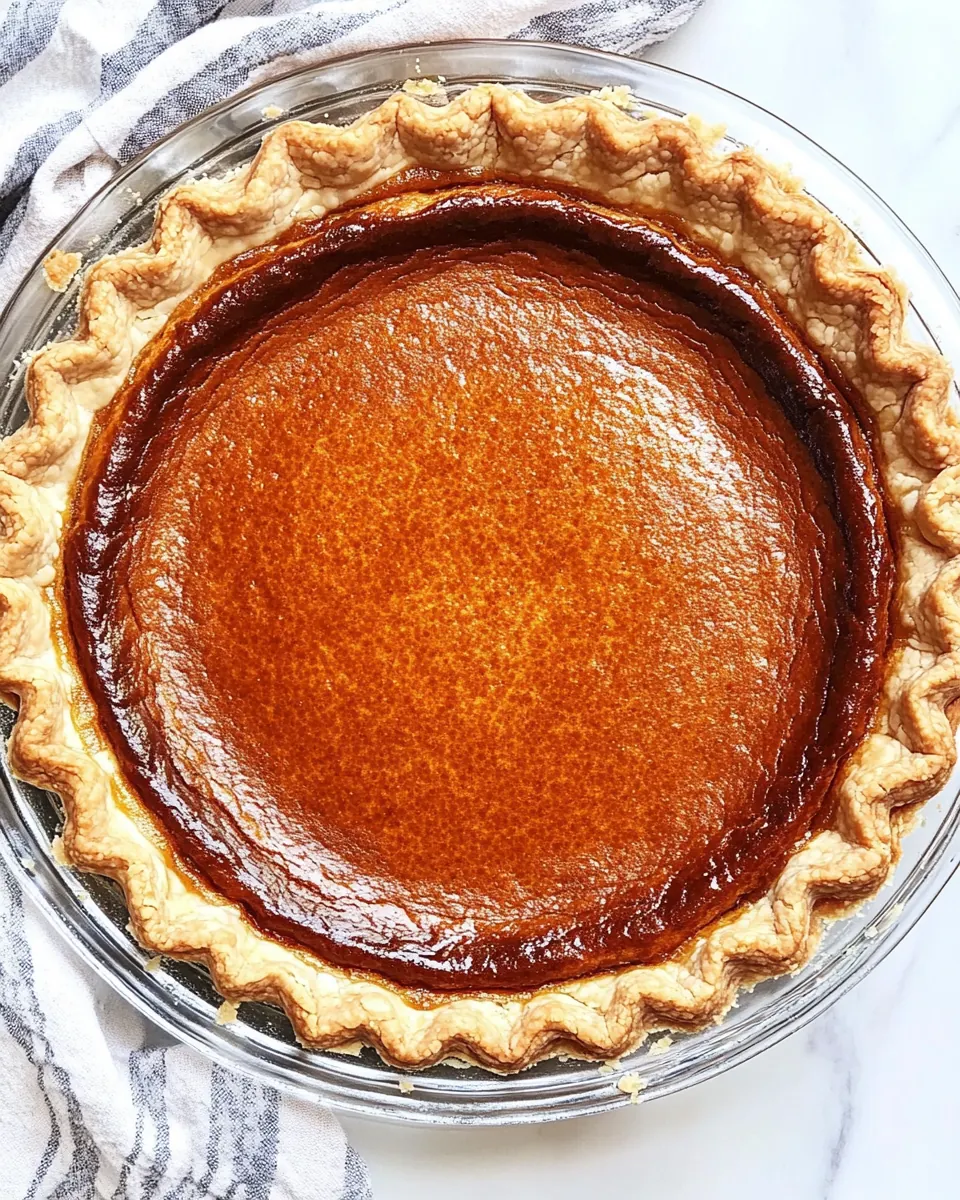
- Bake at 425°F for 15 minutes, then reduce the heat to 350°F and bake for 30 more minutes. Check the crust and lightly tent with pieces of foil or a pie crust shield if it's browning too much, and cook for 15 more minutes. The filling should still be slightly jiggly in the center and will set as it cools.: The first 15 minutes at 425°F give the filling a quick set while creating a clean edge, and when you reduce to 350°F the custard will continue to cook through more gently. The smell in the kitchen will deepen to warm spice and caramel notes, and the crust should reach a golden hue. Watch the center, it should wobble like gelatin when nudged, which is your cue that the residual heat will finish the job. If the rim is getting too dark, tent it with foil to prevent burning. A frequent mistake is overbaking until the center is firm, which yields a dry texture rather than the ideal custardy feel.
- Allow to cool for 2 hours or overnight before serving. Refrigerate for up to 4 days.: Cooling is when the pie completes its transformation, the filling tightening into a sliceable custard while the flavors deepen and harmonize. When you let the pie rest for two hours or longer, it loses the excess steam and gains a velvety mouthfeel that makes each bite sing. The top may form a subtle sheen as it cools, and if you slice it too soon the pieces may not hold their shape. Common error to avoid: placing the pie in the refrigerator while it is piping hot can cause condensation and a softer crust, so bring it closer to room temperature before chilling if you plan to refrigerate immediately.
Making Adjustments
Small adjustments can make this Pumpkin Pie fit your pantry and preferences without changing the core technique. Below are practical tips I use when I want a slightly different texture, spice level, or appearance. Each tip highlights the main idea first, then explains why it matters and how to avoid common pitfalls.
- Prefer a silkier filling – Use a full cup and a quarter of heavy cream as written and strain the custard through a fine mesh sieve before pouring, this removes any stringy bits and creates an ultra smooth texture, but avoid pressing solids through which can overthin the custard.
- Protect the crust – Tent the pie with foil after the first forty five minutes if the edge is browning too quickly, this prevents dark edges while the center finishes setting, however do not wrap too tightly which can trap steam and soften the crust.
- Make ahead with confidence – Bake the pie a day in advance and refrigerate uncovered until the next day for cleaner slices, the flavors meld overnight and the texture improves, just be sure to cover loosely once fully cooled to avoid drying out.
- Adjust spice intensity – If you want a subtler spice profile, reduce each of the spices by about a quarter and taste a small warmed spoonful before baking, be mindful that spices bloom in the oven so slightly under spicing before baking is safer than over spicing.
- Swap crust types – If you prefer a sturdier base, use a pressed graham cracker crust fitted into the pan, it offers a sweet crunch contrast to the creamy filling, yet beware that a crumb crust can be more delicate when slicing and may need firmer pressure when cutting.
Serving Suggestions
This section covers how I like to present and pair Pumpkin Pie, including storage and occasions where it shines. Serving a great pie is as much about timing and pairings as it is about the bake itself.
- Classic fork and plate – Serve slices at room temperature after cooling, this highlights the custard texture and lets the spices express themselves fully, while chilled slices will be firmer for neat plating.
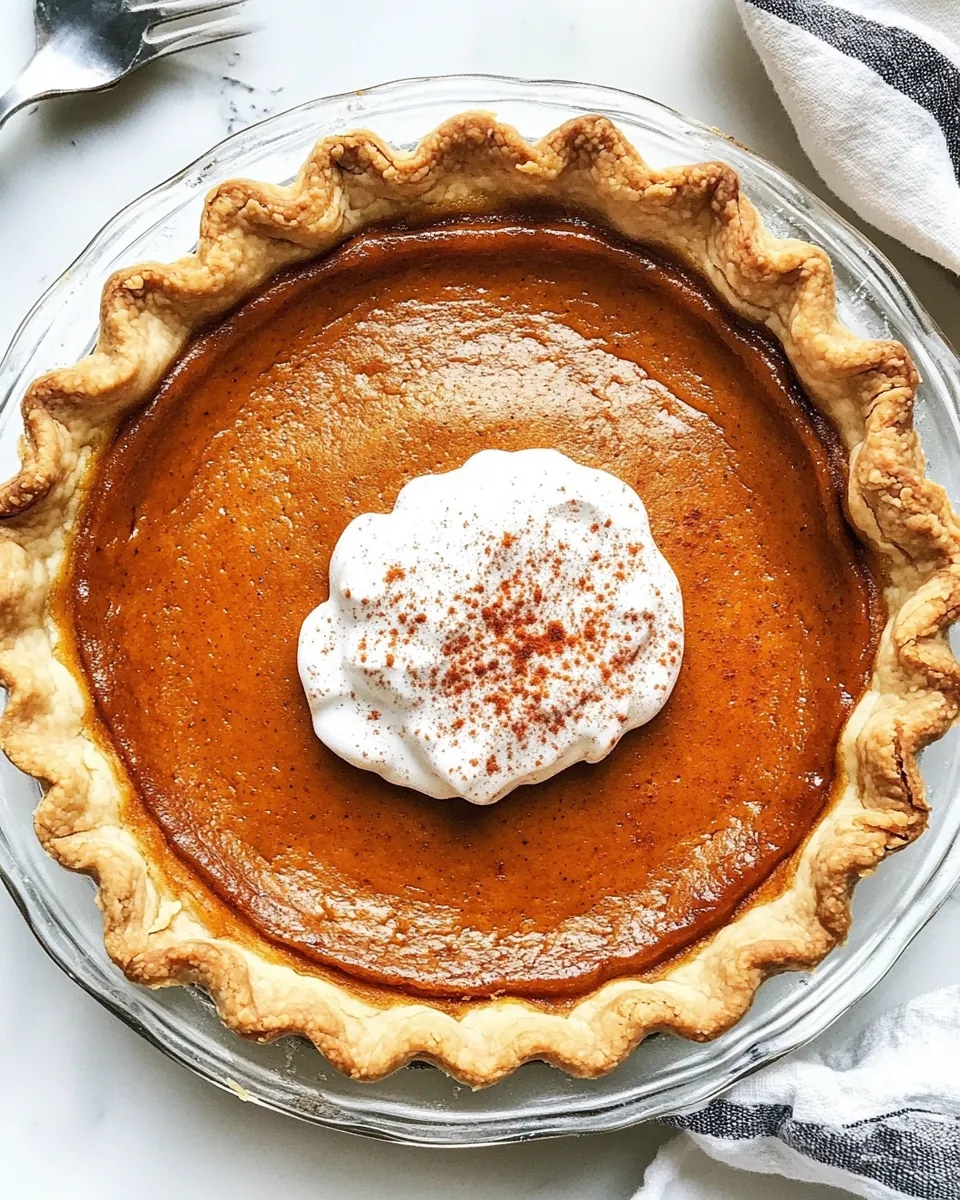
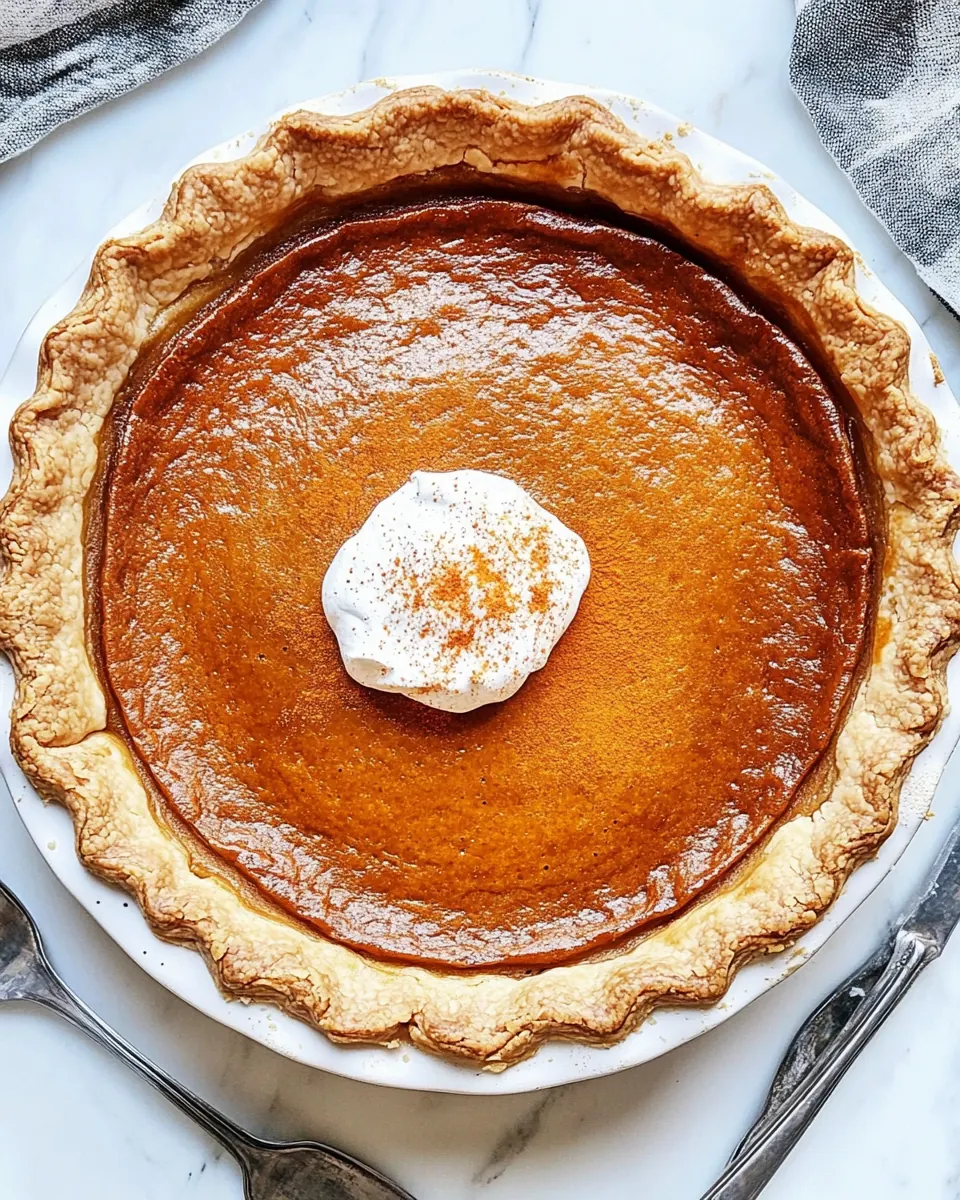
- Whipped cream finish – A cloud of lightly sweetened whipped cream complements the pie without overpowering it, add it just before serving to keep it airy and avoid sogginess on the slice.
- Holiday centerpiece – Offer this pie for Thanksgiving or fall dinners as a traditional dessert option, it pairs well with savory mains and can be prepped ahead of the main event to reduce last minute stress.
- Storage for leftovers – Refrigerate slices in an airtight container for up to four days, chilling tightens the custard and preserves flavor, but allow slices to rest to room temperature before serving for best texture.
- Seasonal pairings – Pair slices with a sharp cheese board or simple coffee service for a cozy autumn afternoon, the pie stands up to bold flavors but also shines on its own.
FAQ
Conclusion
This Pumpkin Pie stands out for its classic balance of creamy custard and warm spices that evoke cozy fall gatherings. I encourage you to give it a try, whether you are baking for a holiday table or a quiet weekend treat. The straightforward ingredients and forgiving technique mean you can focus on sharing the pie and the memories it will create, rather than stressing over perfection. Enjoy the process, and know that a reliable pumpkin pie like this one will earn compliments and perhaps become a recurring favorite.
Pumpkin Pie
Equipment
- Oven
- 9-inch pie plate
- Mixing Bowl
- Whisk
- Rolling Pin
- Fine mesh sieve
Ingredients
- 1 unbaked 9" pie crust Provides a crisp, flaky vessel to hold the filling and bake evenly; press into a pie plate and dock if desired. Keeps the custard contained while browning at the edges and supports slices when serving, offering texture contrast to the smooth filling.
- 3 large eggs, with 1 egg divided Adds structure and richness to the custard; use two whole eggs for binding and one divided egg for brushing the crust or adding a silkier texture. Contributes to set and stability when baked, helping the pie firm up while providing a glossy finish if egg wash is applied.
- 1 1/4 cups heavy cream Enriches the custard with creaminess and fat, producing a smooth, indulgent mouthfeel and aiding in a tender set when baked. Balances sweetness and spices while preventing curdling at moderate oven temperatures; can be gently warmed with spices for fuller flavor integration.
- 1 cup granulated sugar Sweetens the filling and helps with caramelization and browning during baking; dissolves into the custard for even sweetness. Controls overall taste profile and works with spices to highlight pumpkin flavor while impacting texture by slightly thinning the mixture at higher amounts.
- 15 ounces canned pure pumpkin puree Supplies the primary pumpkin flavor and moisture, creating the characteristic color and taste of the pie; use pure pumpkin for best texture. Provides body and fiber to the custard, absorbing some liquid and integrating with eggs and cream to form a smooth, uniform filling when blended thoroughly.
- 1 teaspoon ground cinnamon Adds warm, aromatic sweetness and depth; sprinkle into the filling to accentuate autumnal flavors and complement pumpkin. Works synergistically with nutmeg and ginger to create the classic pumpkin spice profile and can be adjusted slightly to personal taste.
- 1 teaspoon ground nutmeg Contributes a sweet, slightly nutty warmth with aromatic intensity; incorporate into the mix to layer spice complexity. Balances cinnamon and ginger while adding subtle piquancy that enhances the pumpkin's natural sweetness without overpowering the custard.
- 3/4 teaspoon ground ginger Brings bright, peppery warmth and a zesty bite; include in the spice blend to sharpen and enliven the overall flavor. Helps cut through richness from the cream and eggs, providing a lively counterpoint that prevents the filling from tasting flat.
- 3/4 teaspoon kosher salt Enhances and balances flavors by moderating sweetness and pulling out spice notes; dissolve evenly into the mixture for consistent seasoning. A small amount supports overall taste harmony, ensuring the filling tastes rounded and preventing it from being cloying.
Instructions
- Preheat the oven to 425°F.: Feel the warmth building in your kitchen as the oven climbs to 425°F , a crucial moment that sets the stage for a strong initial oven spring in the filling. The high heat encourages the exterior of the custard to set rapidly, which helps lock in creaminess while the interior finishes slowly. You'll notice a gentle sense of anticipation in the air as the oven hums, and light will reflect off racks and pans. A common mistake is skipping preheating, which can lead to uneven bake and a runnier center, so always wait until the set temperature is reached.
- Roll out one disc of dough to 1/4" thickness. Fit the dough into a 9" pie plate, flute the edges, and refrigerate until you are ready to fill it.: As you roll the dough to a quarter inch, the tactile feedback makes a big difference, the surface smoothing under the pin while faint cracks suggest the need for a quick patch. Press the dough gently into a 9 inch pie plate so the edges meet the rim cleanly, then create fluted edges for a classic look. Chilling the crust chills the fat, which helps the crust stay tender and flaky while baking. If you skip chilling, the crust may shrink or become tough, so give it the rest it needs in the fridge for a more dependable bake.
- In a large bowl, lightly whisk 3 egg yolks and 2 egg whites. Reserve the additional egg white in another small bowl and set aside. To the whisked eggs, add the cream, sugar, pumpkin, cinnamon, nutmeg, ginger, and salt. Whisk well to combine.: When you whisk the eggs , aim for cohesion not foam, combining yolks and whites until slightly uniform and satiny. Adding heavy cream , granulated sugar , and pumpkin puree transforms the mixture into a thick, smooth custard that smells bright with cinnamon and nutmeg . The aroma will deepen as you whisk, and the batter should look glossy and homogeneous. Avoid over aerating the mixture as trapped air can cause bubbles and cracks during baking. If the mixture seems lumpy, a few extra steady strokes will smooth it without beating it airy.
- Remove the pie crust from the refrigerator. Whisk the reserved egg white with a fork and brush the bottom of the pie crust with the egg white. Fill the pie crust with the pumpkin filling and carefully move it to the oven.: Brushing the chilled crust bottom with the reserved egg white creates a thin seal that helps prevent a soggy underside, and you will notice the crust taking on a subtle sheen. Pour the filling in with a steady hand so it settles evenly, and give the pie a gentle shake to level the surface if necessary. The shallow pool of batter should glisten under light before it hits the heat. One pitfall is overfilling, which can lead to spillage, so leave a little room for the filling to ripple as it bakes.
- Bake at 425°F for 15 minutes, then reduce the heat to 350°F and bake for 30 more minutes. Check the crust and lightly tent with pieces of foil or a pie crust shield if it's browning too much, and cook for 15 more minutes. The filling should still be slightly jiggly in the center and will set as it cools.: The first 15 minutes at 425°F give the filling a quick set while creating a clean edge, and when you reduce to 350°F the custard will continue to cook through more gently. The smell in the kitchen will deepen to warm spice and caramel notes, and the crust should reach a golden hue. Watch the center, it should wobble like gelatin when nudged, which is your cue that the residual heat will finish the job. If the rim is getting too dark, tent it with foil to prevent burning. A frequent mistake is overbaking until the center is firm, which yields a dry texture rather than the ideal custardy feel.
- Allow to cool for 2 hours or overnight before serving. Refrigerate for up to 4 days.: Cooling is when the pie completes its transformation, the filling tightening into a sliceable custard while the flavors deepen and harmonize. When you let the pie rest for two hours or longer, it loses the excess steam and gains a velvety mouthfeel that makes each bite sing. The top may form a subtle sheen as it cools, and if you slice it too soon the pieces may not hold their shape. Common error to avoid: placing the pie in the refrigerator while it is piping hot can cause condensation and a softer crust, so bring it closer to room temperature before chilling if you plan to refrigerate immediately.
Notes
- Prefer a silkier filling - Use a full cup and a quarter of heavy cream as written and strain the custard through a fine mesh sieve before pouring, this removes any stringy bits and creates an ultra smooth texture, but avoid pressing solids through which can overthin the custard.
- Protect the crust - Tent the pie with foil after the first forty five minutes if the edge is browning too quickly, this prevents dark edges while the center finishes setting, however do not wrap too tightly which can trap steam and soften the crust.
- Make ahead with confidence - Bake the pie a day in advance and refrigerate uncovered until the next day for cleaner slices, the flavors meld overnight and the texture improves, just be sure to cover loosely once fully cooled to avoid drying out.
- Adjust spice intensity - If you want a subtler spice profile, reduce each of the spices by about a quarter and taste a small warmed spoonful before baking, be mindful that spices bloom in the oven so slightly under spicing before baking is safer than over spicing.
- Swap crust types - If you prefer a sturdier base, use a pressed graham cracker crust fitted into the pan, it offers a sweet crunch contrast to the creamy filling, yet beware that a crumb crust can be more delicate when slicing and may need firmer pressure when cutting.