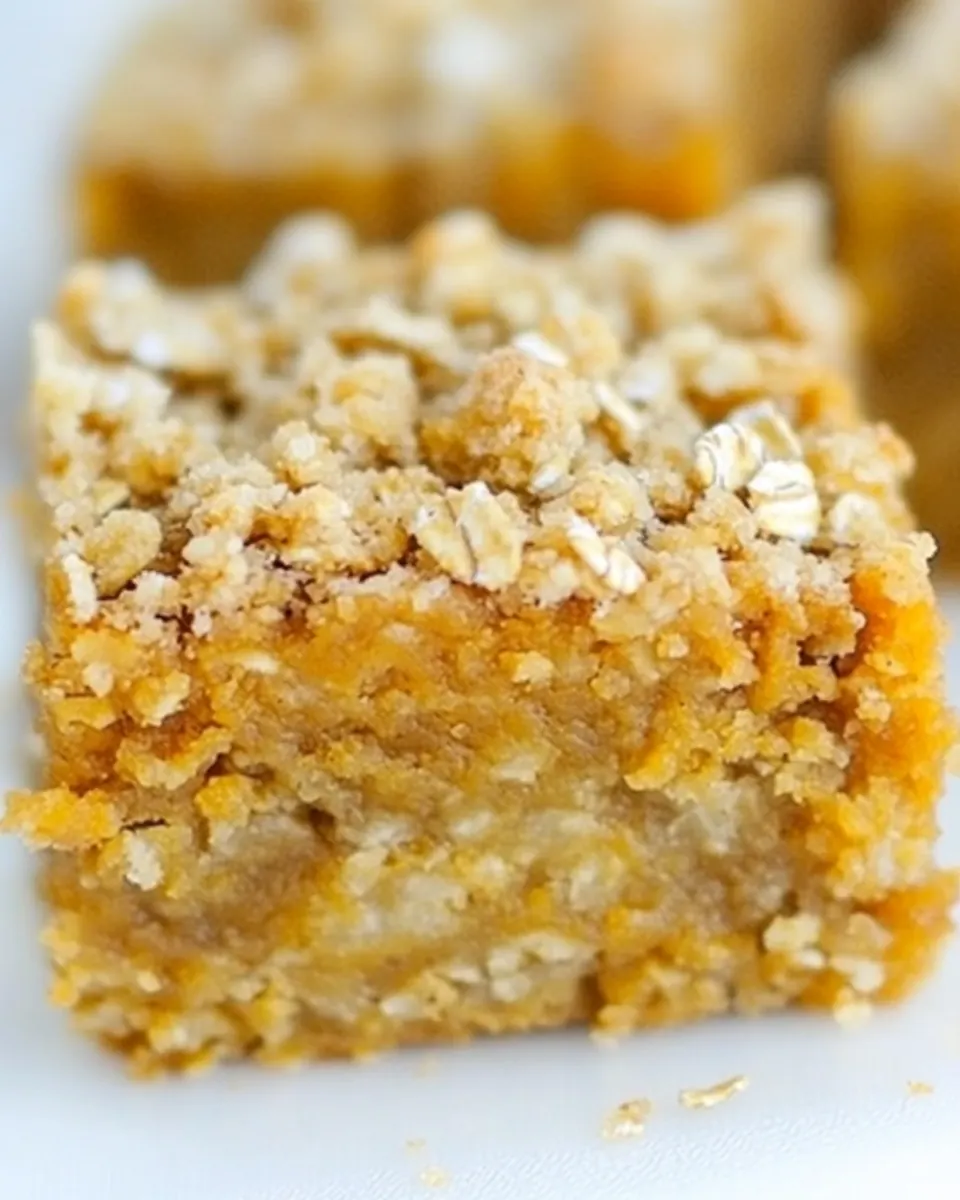
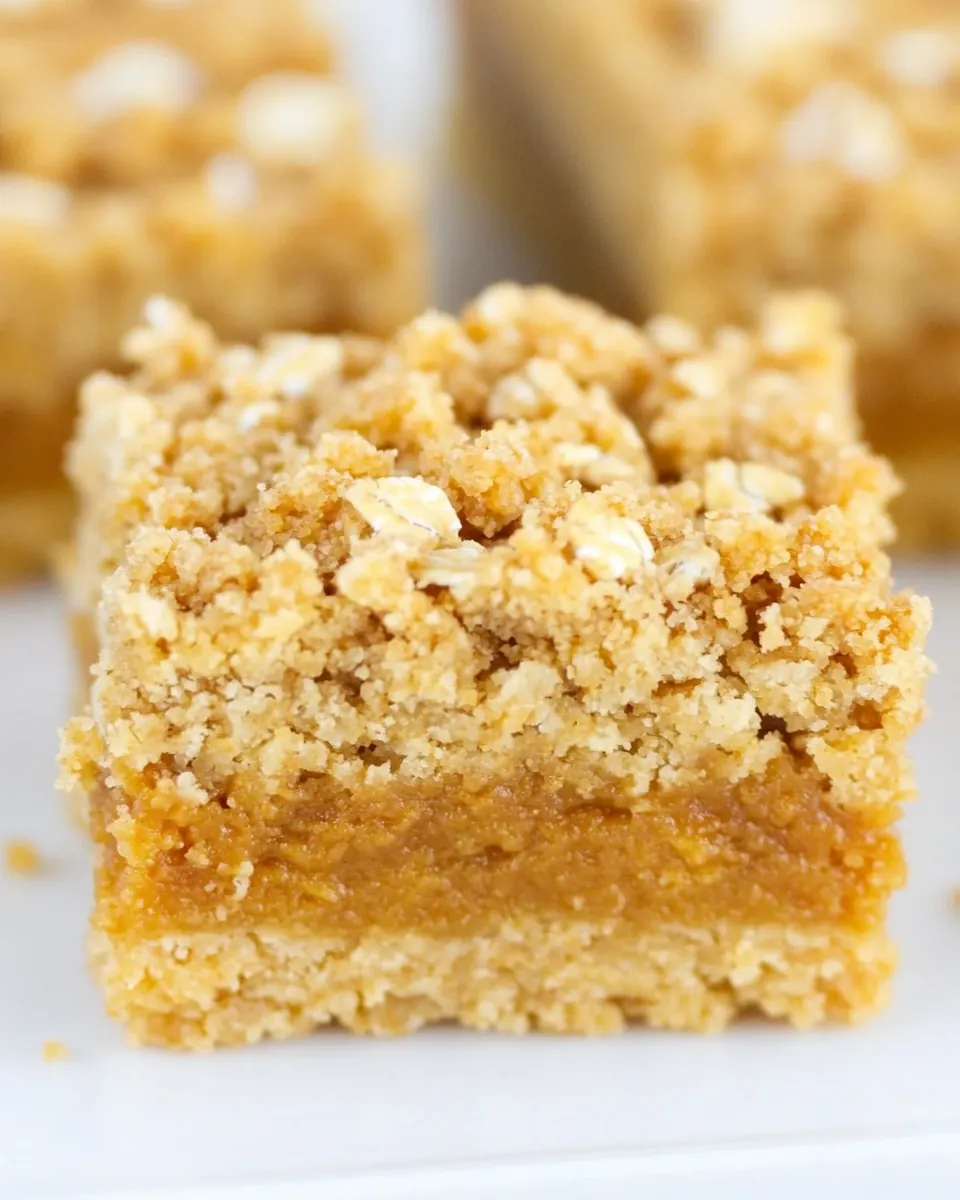
Pumpkin Pie Oatmeal Crumb Bars
Pumpkin Pie Oatmeal Crumb Bars have become my go to treat when I want something that tastes like autumn wrapped up in a handheld square. The first time I made these, I was juggling a sleepy toddler, a too full schedule, and a craving for pumpkin pie that did not include a fork. I wanted a simple bar that captured the warm spices and creamy pumpkin filling, but also offered a crunchy, oat studded crumb that held together on the first bite.
That batch turned into a ritual for weekend afternoons, when the light through the kitchen window looks golden and I need a baking project that rewards patience. I learned to trust the rhythm of mixing the crumb, pressing half into the pan, and letting the pumpkin filling settle while the oven does its work. Each element matters, and that balance is what keeps me coming back.
Over time I picked up little habits, like chilling the bars for a couple of hours so the filling sets cleanly, and pinching the crumb topping into irregular, rustic bits so every square has a mix of crisp and tender textures. Friends always ask for the recipe, and I find myself describing not just the steps, but how the aroma of cinnamon and nutmeg fills the kitchen as the bars bake. This is comfort baking at its friendliest, offering sticky, spiced pumpkin tucked under an oat streusel that holds up for lunches, potlucks, and the occasional midnight snack.
Recipe Snapshot
1 hr 5 mins
15 mins
50 mins
Medium
220 kcal
American
Gluten-Free, Low FODMAP
Desserts
8 inch square baking pan, Parchment paper, Mixing bowls, Whisk
The Charm of This Pumpkin Pie Oatmeal Crumb Bars
Classic autumn flavors with less fuss
I love that Pumpkin Pie Oatmeal Crumb Bars deliver the essence of pumpkin pie without the delicate pie crust drama. The filling is creamy and spiced, and because it rests inside an oat crumb, it stays intact when you slice it. For me, that ease is a big reason to make these whenever I want seasonal flavor with a simple process.
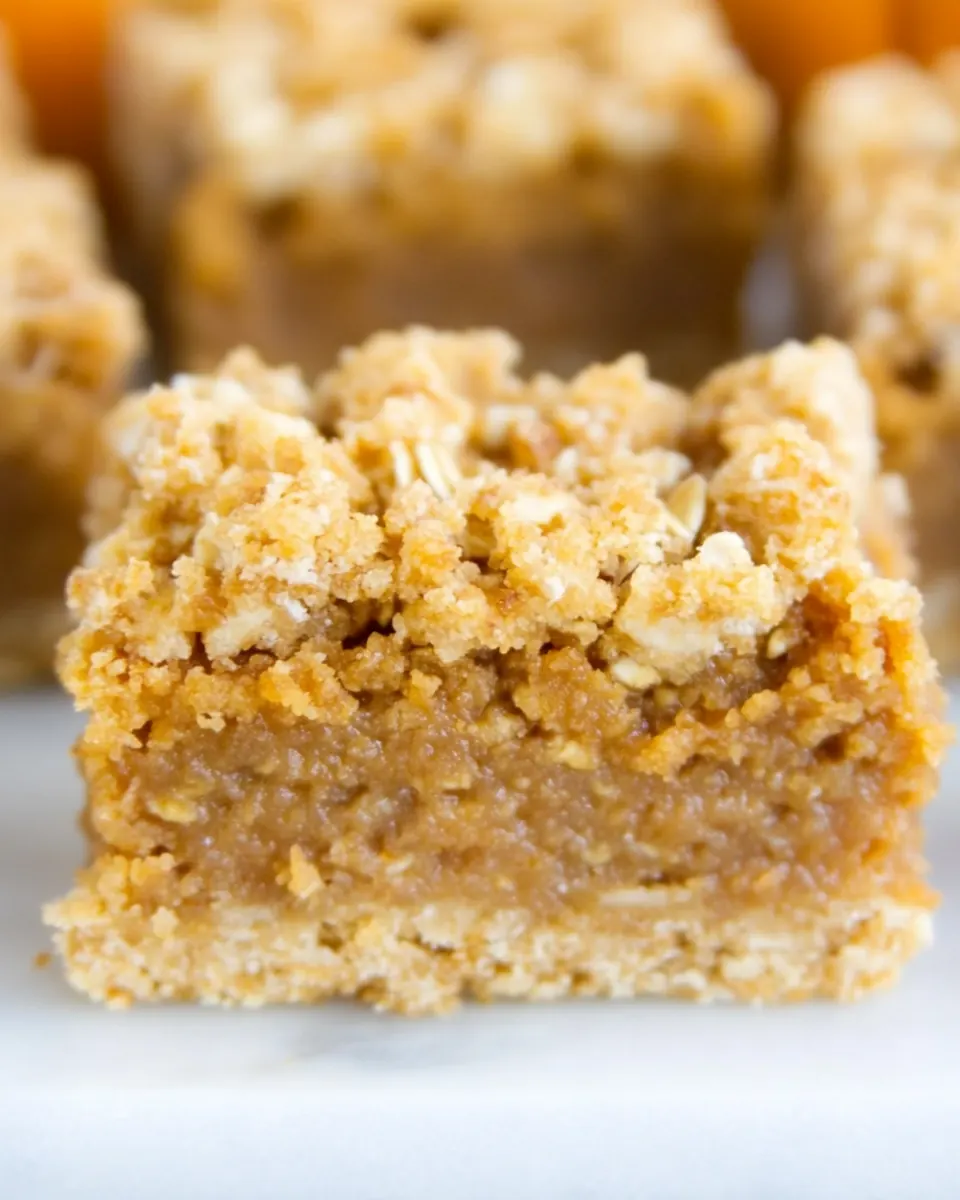
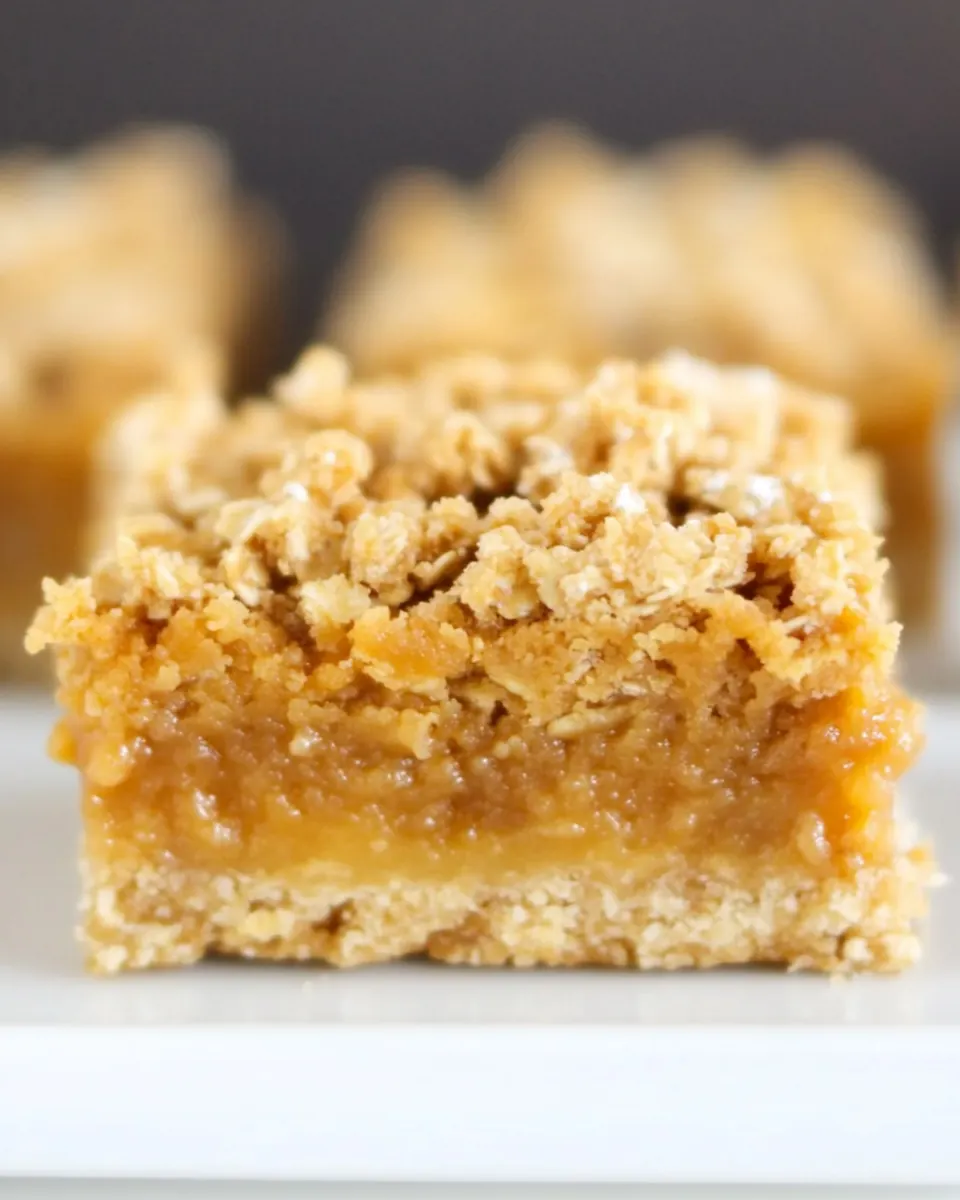
Texture contrast that keeps you reaching for more
The interplay between the soft, custardy pumpkin filling and the crunchy, buttery oat crumb is irresistible. I often say that the crumb is the hero, because it adds whole grain chew and a toasty note that complements the warm spices. You get a little crisp, a little tender, and plenty of cozy mouthfeel.
Make ahead friendly
These bars chill beautifully, which is a huge bonus for planning. I often bake them a day ahead, letting the filling set in the refrigerator so slices are clean and portable. That convenience makes them a top pick for gatherings, when you want dessert ready to serve without last minute stress.
Kid friendly and portable
Because each piece holds together, they travel well. I remember packing them into lunchboxes and handing them out at carpool, watching hands reach for the crumbly edges. They feel like a treat, but they are sturdy enough to bring along to fall festivals or office parties.
Flexible and forgiving
I appreciate recipes that tolerate small missteps, and these do. Slightly overbake the crust and it still tastes great, and a little extra spice can be adjusted next time. That forgiving nature makes them approachable for confident home bakers and people who are just starting to experiment with seasonal desserts.
What to Gather for Pumpkin Pie Oatmeal Crumb Bars
These ingredients come together to create a balance of creamy filling and crunchy crumb. The oats and flour form a nutty, textured base, while the sugars and melted butter bind everything into a golden streusel. The pumpkin filling relies on eggs and evaporated milk to achieve a custardy mouthfeel, while the warm spices provide that unmistakable autumn identity.
- 1 1/4 cup (156.25 g) all-purpose flour: Provide structure and tender crumb while supplying gluten for binding; measure accurately by spooning and leveling into the cup. Combine with oats and leavening to form the crumb base and help absorb moisture from the butter and sugars for a cohesive dough.
- 1 1/4 cup (101.25 g) quick oats: Add hearty texture and chew while contributing whole-grain flavor; use quick oats for a finer consistency that blends into crumb bars. Pair with flour and butter to create the oat-forward streusel and provide a pleasant bite in every bar.
- 1/2 teaspoon (0.5 teaspoon) baking soda: Lightly leaven the crumb mixture to prevent density and help create a tender, slightly aerated texture; dissolve evenly into the dry mix. React with acidic components or heat to generate small bubbles that keep the crust from becoming overly compact.
- 1/2 teaspoon (0.5 teaspoon) salt: Enhance overall flavor balance and strengthen gluten network slightly; distribute evenly through dry ingredients. Control salt level to brighten sweet components and round out both crust and pumpkin filling flavors without overpowering.
- 1/2 cup (100 g) granulated sugar: Sweeten and aid in caramelization of the crumb layer while contributing to the crisp edge; cream with butter for even distribution. Granulated sugar also absorbs moisture to help set the streusel and offers clean sweetness to the base.
- 1/2 cup (110 g) light brown sugar: Contribute moistness, deeper caramel notes, and chew to the crumb when creamed with butter; lightly packed for accurate measurement. Brown sugar’s molasses content enhances color and flavor complexity in the streusel and complements pumpkin spices.
- 3/4 cup (170.25 g) unsalted butter, melted and cooled slightly: Bind and enrich both crumb and filling while providing tender richness; melt and cool slightly before mixing to prevent cooking eggs. Butter delivers flavor, moisture, and helps achieve a crisp, golden streusel and a smooth, rich filling consistency.
- 1 teaspoon vanilla extract: Provide warm, rounded aroma and enhance overall sweetness perception; add during mixing to distribute flavor evenly. Vanilla deepens the dessert’s profile and accentuates the caramel and spice notes in both crust and filling.
- 1/4 cup (50 g) granulated sugar: Contribute additional sweetness and help balance the pumpkin filling’s spices; dissolve into wet ingredients for even sweetness. Granulated sugar helps stabilize the filling and supports slight caramelization at the edges during baking.
- 1/4 cup (55 g) light brown sugar: Add moisture, deepen flavor, and bring subtle molasses richness to the filling; measure by lightly packing for accuracy. Light brown sugar complements cinnamon and nutmeg, enhancing the autumnal spice character of the pumpkin layer.
- 1 teaspoon ground cinnamon: Provide warm, aromatic spice that defines pumpkin pie flavor; blend thoroughly into the wet mixture for even distribution. Cinnamon ties together sugars and pumpkin, adding familiar depth and a comforting scent to the bars.
- 1/2 teaspoon (0.5 teaspoon) ground nutmeg: Impart warm, slightly sweet and nutty notes that enhance the pumpkin profile; use sparingly and mix evenly. Nutmeg adds complexity and supports other spices, making the filling taste more rounded and traditional.
- 1/4 teaspoon (0.25 teaspoon) ground ginger: Offer bright, peppery spice that lifts the pumpkin filling; incorporate carefully to avoid overpowering other spices. Ginger contributes a subtle zing that balances sweetness and enriches the overall spice blend.
- 1 pinch ground cloves: Introduce a pungent, warm depth in very small amounts to the spice mix; grind fresh if possible for best aroma. Cloves provide an intense background note that enhances the spice complexity without dominating when used as a pinch.
- 1/4 teaspoon (0.25 teaspoon) salt: Balance flavors and control sweetness by rounding out the spice and sugar components; evenly blend into the filling mixture. Salt enhances aromatic compounds and helps the pumpkin and sugar flavors pop while harmonizing the layers.
- 1 egg: Contribute structure and richness to the filling while helping to set it during baking; beat gently before adding into the mixture. Whole egg provides emulsification and stability, ensuring a smooth, cohesive pumpkin layer.
- 1 egg yolk: Increase richness and silkiness of the filling while concentrating fat content for a creamier texture; add with the egg for consistent emulsion. Egg yolk also improves mouthfeel and aids in binding the custard-like filling.
- 1/2 teaspoon (0.5 teaspoon) vanilla extract: Add a touch of flavor and aroma while complementing vanilla used in the crust; mix into the wet ingredients for even distribution. Vanilla enhances the overall sweetness and ties together the spices and pumpkin in the filling.
- 1 1/4 cup (306.25 g) canned pumpkin: Provide moisture, concentrated pumpkin flavor, and structure to the filling while contributing natural sweetness; use canned pumpkin puree for consistent texture. Pumpkin supplies body and characteristic flavor, forming the core of the pie-like layer.
- 1/3 cup (85.33 ml) evaporated milk: Thin and enrich the pumpkin filling slightly while contributing a creamy mouthfeel and aiding in smooth baking; stir in gradually to reach desired consistency. Evaporated milk adds dairy richness without excess water, helping the filling set properly.
Recipe Steps for Pumpkin Pie Oatmeal Crumb Bars
I like to think of the process as two short projects that meet in the oven, so I always line my pan first and then work on the crumb and filling in parallel. This keeps the kitchen moving and ensures the crust gets a head start in the heat. Below you’ll find the cleaned step labels followed by detailed, sensory rich guidance so you know exactly what to watch for.
- Make the Oatmeal Crumb: Preheat oven to 350 degrees F and adjust oven racks to center and upper-middle positions. Line an 8-inch square baking pan with parchment paper, allowing excess to hang over the sides; set aside.: As you preheat the oven to 350 degrees F , notice the immediate change in the kitchen air as warmth builds, a signal that the crumb will brown nicely. When you whisk the all purpose flour , quick oats , baking soda and salt , you should smell the dry grains and see a uniform pale mixture, which means the leavening is evenly distributed. Adding the granulated sugar and light brown sugar dissolves the clumps and delivers a sandy texture, perfect for absorbing melted butter . Once the butter and vanilla extract join the bowl, the mixture will darken and clump together slightly, and you can hear a faint clink of oats against the bowl as you stir. Pressing half of this mixture into the prepared pan should produce a compact, even layer that gives a muted thud when tapped. Bake on the center rack for 15 minutes until the crust looks set and edges take on a light golden color. Why it matters, the partial bake stabilizes the base so the filling does not make it soggy. Common mistake to avoid, do not skip lining the pan or the bars will stick and tear when removed.
- In a medium mixing bowl, whisk together the flour, oats, baking soda and salt to combine. Add both the granulated sugar and brown sugar and mix until no clumps remain. Add the melted butter and vanilla extract, then stir with a fork until the mixture is evenly moistened. Press half of the mixture into the prepared pan and bake on the center rack for 15 minutes.: While the crust bakes, whisk the granulated sugar , light brown sugar , ground cinnamon , ground nutmeg , ground ginger , ground cloves and salt , inhaling the fragrant spice blend that should smell warm and slightly peppery. When you add the egg , egg yolk and vanilla , the mixture should become glossy and homogeneous, which indicates proper emulsification. Stirring in the pumpkin will thicken the mixture, then the evaporated milk will loosen it into a silky custard. The filling should be smooth and pourable; if it feels grainy, whisk until uniform. Why it matters, a well combined filling sets evenly and yields a creamy interior rather than curdled bits. Troubleshooting tip, if your filling is too watery, check you used canned pumpkin and not pumpkin pie filling which is sweeter and wetter.
- Make the Pumpkin Pie Filling: Meanwhile, in another medium bowl, whisk together the granulated sugar, brown sugar, cinnamon, nutmeg, ginger, cloves and salt. Add the egg, egg yolk and vanilla and whisk until well blended. Finally, whisk in the pumpkin, and then the evaporated milk until the mixture is smooth and thoroughly combined.: Once the bottom crust has finished baking and feels firm to the touch, pour the pumpkin mixture over it so you hear a soft glug as the custard spreads across the hot base. The contrast of hot crust and cool filling may create a slight steam rise, releasing the spices into the air in a way that smells comforting and festive. Return the pan to the center rack for 15 minutes; this initial bake helps the filling begin to set without the top browning too soon. Why it matters, giving the filling a head start prevents the crumb topping from sinking into an unset custard. A common error to avoid is pouring a hot filling onto an underbaked crust, which can lead to soggy results.
- When the crust has finished baking, pour the pumpkin pie filling over the bottom crust and return it to the center rack of the oven for 15 minutes. Remove it from the oven, pinch the remaining oatmeal crumb mixture into small pieces and sprinkle over the top of the pumpkin pie filling. Return the pan to the oven, placing it on the upper-middle rack, and bake for an additional 20 to 25 minutes, until it is golden on top and the center only jiggles slightly.: After the pumpkin filling has had its first bake, remove the pan and pinch the remaining oatmeal crumb mixture into small, irregular pieces before sprinkling them across the surface. The pinched pieces create pockets of crunch and allow steam to escape during the final bake, so you should see islands of golden crumble atop the glossy filling. Returning the pan to the upper middle rack for the final bake helps the top brown gently while the center finishes setting. Why it matters, uneven pieces promote textural interest in every bite, and placing the pan on the upper middle rack encourages toasty color without overcooking the base. Mistake to watch for, avoid overpressing the crumb on top, which can smother the filling and prevent proper set.
- Remove from the oven and allow to cool to room temperature, at least 1 to 2 hours. Then, transfer the pan to the refrigerator and chill for at least 2 hours. Cut into squares and serve. Leftovers can be stored in an airtight container in the refrigerator for up to 5 days.: Bake for an additional 20 to 25 minutes, watching for a golden top and a center that still jiggles slightly when nudged, like a slow moving ripple. You will hear a quiet sigh from the oven as moisture evaporates and the sugar begins to caramelize, and the aroma of caramelized butter and spice becomes more pronounced. The edges should pull slightly away from the parchment, signaling readiness, while the center retains a tender wobble that assures a creamy interior once chilled. Why it matters, removing them at this point prevents a dry, crumbly filling while ensuring structural set after chilling. A common pitfall, baking until completely firm yields a cakier texture, so pull them while the center still has slight movement.
- Cool and Chill Before Cutting: After removing the pan from the oven, allow the bars to cool to room temperature for at least 1 to 2 hours so the filling relaxes and internal steam dissipates, then transfer to the refrigerator and chill for at least 2 hours for clean slices. As they cool, the scent will mellow and the filling will transform from glossy to a sliceable custard, and the crumb will firm up into a pleasant contrast. Why it matters, chilling is the secret to neat squares and a balanced texture. Troubleshooting note, cutting too early will produce sloppy slices and a filling that oozes out when served.
- Slice and Store: Use the parchment overhang to lift the bars from the pan, then slice into squares with a sharp knife wiped between cuts for the cleanest edges; expect some crumbs to fall, which is part of their rustic charm. Store leftovers in an airtight container in the refrigerator for up to 5 days, and note they will keep perfuming the fridge with warm spices. Why it matters, proper storage preserves texture and flavor while preventing the crumb from softening. A frequent mistake is leaving them at room temperature too long, which shortens shelf life and can make the topping soggy.
Variations to Try
These variations let you customize texture and spice profile while keeping the heart of the recipe intact. Pick one to try next time, and remember to adjust baking times slightly if you alter moisture or thickness.
- Brown Butter Crumb Swap the melted butter for brown butter: brown the butter first to add nutty depth, cool it slightly, then proceed; expect more toasted aroma and richer flavor in the crumb.
- Extra Oat Crunch Increase the ratio of quick oats by a quarter cup: this makes the topping heartier and chewier, though you may need to press the base a bit more firmly so it holds together.
- Spice Boost Add an extra pinch of ground cloves or a dash more ground ginger: if you love a more pronounced spice profile, adjust by small increments and taste your batter for balance before baking.
- Mini Bar Version Use a 9 inch square pan for thinner bars and shorter bake time: monitor carefully as the thinner slab will set faster and may brown sooner, reducing final bake by a few minutes.
- Make Ahead and Freeze Freeze cooled, uncut bars for up to 2 months: wrap tightly and thaw in the refrigerator overnight before slicing for travel friendly portions.
Best Served With
These bars are versatile and travel friendly, perfect for daytime gatherings and cozy evenings. Serve them slightly chilled or at cool room temperature, and think about simple accompaniments that highlight the warm spices and creamy filling.
- With coffee or tea, these bars are lovely for breakfast or an afternoon pick me up; the bittersweet notes of coffee complement the pumpkin spices.
- For potlucks, bring them chilled and cut into uniform squares so guests can easily grab one; they travel well and hold shape.
- Lunchbox treat, pack a single bar with a napkin for a portable dessert that does not require refrigeration for short trips; keep longer storage in a cooler.
- Holiday gatherings, these are tailor made for Thanksgiving spreads as an easy, sliceable alternative to whole pies that still delivers that traditional flavor.
- Storage tips, keep in an airtight container in the refrigerator for up to 5 days, or freeze individual squares for quick thawing when you want a ready sweet bite.
FAQ
Conclusion
These bars shine because they capture the warm spices and creamy pumpkin filling of a classic pie while offering the convenience and texture of an oat crumb. You can rely on their make ahead friendly nature for gatherings, and they slice into neat, portable squares that everyone will reach for. Give them a try this season, and enjoy how a simple set of pantry ingredients transform into a comforting, shareable dessert that feels both nostalgic and effortless.

Pumpkin Pie Oatmeal Crumb Bars
Equipment
- 8-inch square baking pan
- Parchment Paper
- Mixing Bowls
- Whisk
Ingredients
- 1 1/4 cup (156.25 g) all-purpose flour Provide structure and tender crumb while supplying gluten for binding; measure accurately by spooning and leveling into the cup. Combine with oats and leavening to form the crumb base and help absorb moisture from the butter and sugars for a cohesive dough.
- 1 1/4 cup (101.25 g) quick oats Add hearty texture and chew while contributing whole-grain flavor; use quick oats for a finer consistency that blends into crumb bars. Pair with flour and butter to create the oat-forward streusel and provide a pleasant bite in every bar.
- 1/2 teaspoon (0.5 teaspoon) baking soda Lightly leaven the crumb mixture to prevent density and help create a tender, slightly aerated texture; dissolve evenly into the dry mix. React with acidic components or heat to generate small bubbles that keep the crust from becoming overly compact.
- 1/2 teaspoon (0.5 teaspoon) salt Enhance overall flavor balance and strengthen gluten network slightly; distribute evenly through dry ingredients. Control salt level to brighten sweet components and round out both crust and pumpkin filling flavors without overpowering.
- 1/2 cup (100 g) granulated sugar Sweeten and aid in caramelization of the crumb layer while contributing to the crisp edge; cream with butter for even distribution. Granulated sugar also absorbs moisture to help set the streusel and offers clean sweetness to the base.
- 1/2 cup (110 g) light brown sugar Contribute moistness, deeper caramel notes, and chew to the crumb when creamed with butter; lightly packed for accurate measurement. Brown sugar’s molasses content enhances color and flavor complexity in the streusel and complements pumpkin spices.
- 3/4 cup (170.25 g) unsalted butter, melted and cooled slightly Bind and enrich both crumb and filling while providing tender richness; melt and cool slightly before mixing to prevent cooking eggs. Butter delivers flavor, moisture, and helps achieve a crisp, golden streusel and a smooth, rich filling consistency.
- 1 teaspoon vanilla extract Provide warm, rounded aroma and enhance overall sweetness perception; add during mixing to distribute flavor evenly. Vanilla deepens the dessert’s profile and accentuates the caramel and spice notes in both crust and filling.
- 1/4 cup (50 g) granulated sugar Contribute additional sweetness and help balance the pumpkin filling’s spices; dissolve into wet ingredients for even sweetness. Granulated sugar helps stabilize the filling and supports slight caramelization at the edges during baking.
- 1/4 cup (55 g) light brown sugar Add moisture, deepen flavor, and bring subtle molasses richness to the filling; measure by lightly packing for accuracy. Light brown sugar complements cinnamon and nutmeg, enhancing the autumnal spice character of the pumpkin layer.
- 1 teaspoon ground cinnamon Provide warm, aromatic spice that defines pumpkin pie flavor; blend thoroughly into the wet mixture for even distribution. Cinnamon ties together sugars and pumpkin, adding familiar depth and a comforting scent to the bars.
- 1/2 teaspoon (0.5 teaspoon) ground nutmeg Impart warm, slightly sweet and nutty notes that enhance the pumpkin profile; use sparingly and mix evenly. Nutmeg adds complexity and supports other spices, making the filling taste more rounded and traditional.
- 1/4 teaspoon (0.25 teaspoon) ground ginger Offer bright, peppery spice that lifts the pumpkin filling; incorporate carefully to avoid overpowering other spices. Ginger contributes a subtle zing that balances sweetness and enriches the overall spice blend.
- 1 pinch ground cloves Introduce a pungent, warm depth in very small amounts to the spice mix; grind fresh if possible for best aroma. Cloves provide an intense background note that enhances the spice complexity without dominating when used as a pinch.
- 1/4 teaspoon (0.25 teaspoon) salt Balance flavors and control sweetness by rounding out the spice and sugar components; evenly blend into the filling mixture. Salt enhances aromatic compounds and helps the pumpkin and sugar flavors pop while harmonizing the layers.
- 1 egg Contribute structure and richness to the filling while helping to set it during baking; beat gently before adding into the mixture. Whole egg provides emulsification and stability, ensuring a smooth, cohesive pumpkin layer.
- 1 egg yolk Increase richness and silkiness of the filling while concentrating fat content for a creamier texture; add with the egg for consistent emulsion. Egg yolk also improves mouthfeel and aids in binding the custard-like filling.
- 1/2 teaspoon (0.5 teaspoon) vanilla extract Add a touch of flavor and aroma while complementing vanilla used in the crust; mix into the wet ingredients for even distribution. Vanilla enhances the overall sweetness and ties together the spices and pumpkin in the filling.
- 1 1/4 cup (306.25 g) canned pumpkin Provide moisture, concentrated pumpkin flavor, and structure to the filling while contributing natural sweetness; use canned pumpkin puree for consistent texture. Pumpkin supplies body and characteristic flavor, forming the core of the pie-like layer.
- 1/3 cup (85.33 ml) evaporated milk Thin and enrich the pumpkin filling slightly while contributing a creamy mouthfeel and aiding in smooth baking; stir in gradually to reach desired consistency. Evaporated milk adds dairy richness without excess water, helping the filling set properly.
Instructions
- Make the Oatmeal Crumb: Preheat oven to 350 degrees F and adjust oven racks to center and upper-middle positions. Line an 8-inch square baking pan with parchment paper, allowing excess to hang over the sides; set aside.: As you preheat the oven to 350 degrees F , notice the immediate change in the kitchen air as warmth builds, a signal that the crumb will brown nicely. When you whisk the all purpose flour , quick oats , baking soda and salt , you should smell the dry grains and see a uniform pale mixture, which means the leavening is evenly distributed. Adding the granulated sugar and light brown sugar dissolves the clumps and delivers a sandy texture, perfect for absorbing melted butter . Once the butter and vanilla extract join the bowl, the mixture will darken and clump together slightly, and you can hear a faint clink of oats against the bowl as you stir. Pressing half of this mixture into the prepared pan should produce a compact, even layer that gives a muted thud when tapped. Bake on the center rack for 15 minutes until the crust looks set and edges take on a light golden color. Why it matters, the partial bake stabilizes the base so the filling does not make it soggy. Common mistake to avoid, do not skip lining the pan or the bars will stick and tear when removed.
- In a medium mixing bowl, whisk together the flour, oats, baking soda and salt to combine. Add both the granulated sugar and brown sugar and mix until no clumps remain. Add the melted butter and vanilla extract, then stir with a fork until the mixture is evenly moistened. Press half of the mixture into the prepared pan and bake on the center rack for 15 minutes.: While the crust bakes, whisk the granulated sugar , light brown sugar , ground cinnamon , ground nutmeg , ground ginger , ground cloves and salt , inhaling the fragrant spice blend that should smell warm and slightly peppery. When you add the egg , egg yolk and vanilla , the mixture should become glossy and homogeneous, which indicates proper emulsification. Stirring in the pumpkin will thicken the mixture, then the evaporated milk will loosen it into a silky custard. The filling should be smooth and pourable; if it feels grainy, whisk until uniform. Why it matters, a well combined filling sets evenly and yields a creamy interior rather than curdled bits. Troubleshooting tip, if your filling is too watery, check you used canned pumpkin and not pumpkin pie filling which is sweeter and wetter.
- Make the Pumpkin Pie Filling: Meanwhile, in another medium bowl, whisk together the granulated sugar, brown sugar, cinnamon, nutmeg, ginger, cloves and salt. Add the egg, egg yolk and vanilla and whisk until well blended. Finally, whisk in the pumpkin, and then the evaporated milk until the mixture is smooth and thoroughly combined.: Once the bottom crust has finished baking and feels firm to the touch, pour the pumpkin mixture over it so you hear a soft glug as the custard spreads across the hot base. The contrast of hot crust and cool filling may create a slight steam rise, releasing the spices into the air in a way that smells comforting and festive. Return the pan to the center rack for 15 minutes; this initial bake helps the filling begin to set without the top browning too soon. Why it matters, giving the filling a head start prevents the crumb topping from sinking into an unset custard. A common error to avoid is pouring a hot filling onto an underbaked crust, which can lead to soggy results.
- When the crust has finished baking, pour the pumpkin pie filling over the bottom crust and return it to the center rack of the oven for 15 minutes. Remove it from the oven, pinch the remaining oatmeal crumb mixture into small pieces and sprinkle over the top of the pumpkin pie filling. Return the pan to the oven, placing it on the upper-middle rack, and bake for an additional 20 to 25 minutes, until it is golden on top and the center only jiggles slightly.: After the pumpkin filling has had its first bake, remove the pan and pinch the remaining oatmeal crumb mixture into small, irregular pieces before sprinkling them across the surface. The pinched pieces create pockets of crunch and allow steam to escape during the final bake, so you should see islands of golden crumble atop the glossy filling. Returning the pan to the upper middle rack for the final bake helps the top brown gently while the center finishes setting. Why it matters, uneven pieces promote textural interest in every bite, and placing the pan on the upper middle rack encourages toasty color without overcooking the base. Mistake to watch for, avoid overpressing the crumb on top, which can smother the filling and prevent proper set.
- Remove from the oven and allow to cool to room temperature, at least 1 to 2 hours. Then, transfer the pan to the refrigerator and chill for at least 2 hours. Cut into squares and serve. Leftovers can be stored in an airtight container in the refrigerator for up to 5 days.: Bake for an additional 20 to 25 minutes, watching for a golden top and a center that still jiggles slightly when nudged, like a slow moving ripple. You will hear a quiet sigh from the oven as moisture evaporates and the sugar begins to caramelize, and the aroma of caramelized butter and spice becomes more pronounced. The edges should pull slightly away from the parchment, signaling readiness, while the center retains a tender wobble that assures a creamy interior once chilled. Why it matters, removing them at this point prevents a dry, crumbly filling while ensuring structural set after chilling. A common pitfall, baking until completely firm yields a cakier texture, so pull them while the center still has slight movement.
- Cool and Chill Before Cutting: After removing the pan from the oven, allow the bars to cool to room temperature for at least 1 to 2 hours so the filling relaxes and internal steam dissipates, then transfer to the refrigerator and chill for at least 2 hours for clean slices. As they cool, the scent will mellow and the filling will transform from glossy to a sliceable custard, and the crumb will firm up into a pleasant contrast. Why it matters, chilling is the secret to neat squares and a balanced texture. Troubleshooting note, cutting too early will produce sloppy slices and a filling that oozes out when served.
- Slice and Store: Use the parchment overhang to lift the bars from the pan, then slice into squares with a sharp knife wiped between cuts for the cleanest edges; expect some crumbs to fall, which is part of their rustic charm. Store leftovers in an airtight container in the refrigerator for up to 5 days, and note they will keep perfuming the fridge with warm spices. Why it matters, proper storage preserves texture and flavor while preventing the crumb from softening. A frequent mistake is leaving them at room temperature too long, which shortens shelf life and can make the topping soggy.
Notes
- Brown Butter Crumb Swap the melted butter for brown butter: brown the butter first to add nutty depth, cool it slightly, then proceed; expect more toasted aroma and richer flavor in the crumb.
- Extra Oat Crunch Increase the ratio of quick oats by a quarter cup: this makes the topping heartier and chewier, though you may need to press the base a bit more firmly so it holds together.
- Spice Boost Add an extra pinch of ground cloves or a dash more ground ginger: if you love a more pronounced spice profile, adjust by small increments and taste your batter for balance before baking.
- Mini Bar Version Use a 9 inch square pan for thinner bars and shorter bake time: monitor carefully as the thinner slab will set faster and may brown sooner, reducing final bake by a few minutes.
- Make Ahead and Freeze Freeze cooled, uncut bars for up to 2 months: wrap tightly and thaw in the refrigerator overnight before slicing for travel friendly portions.