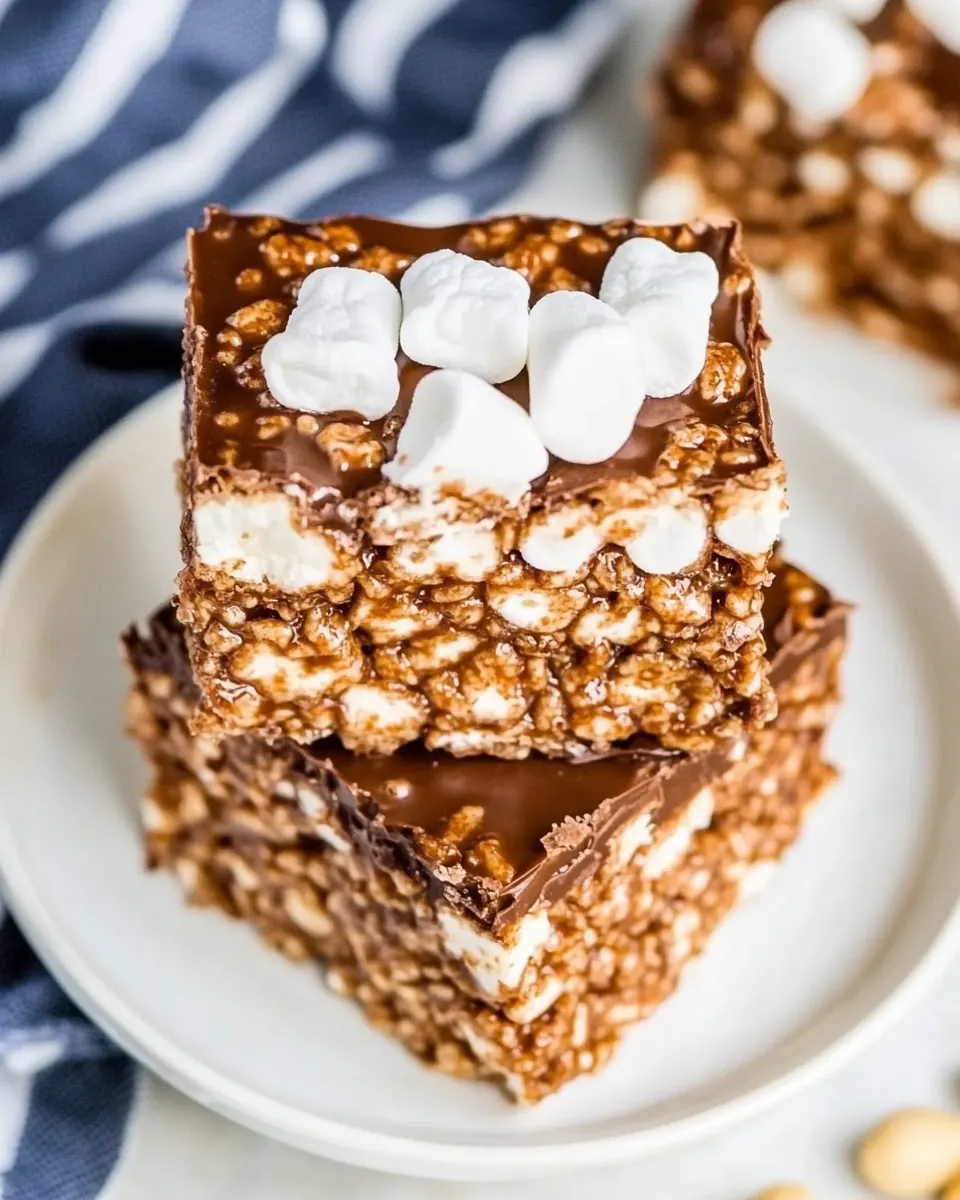
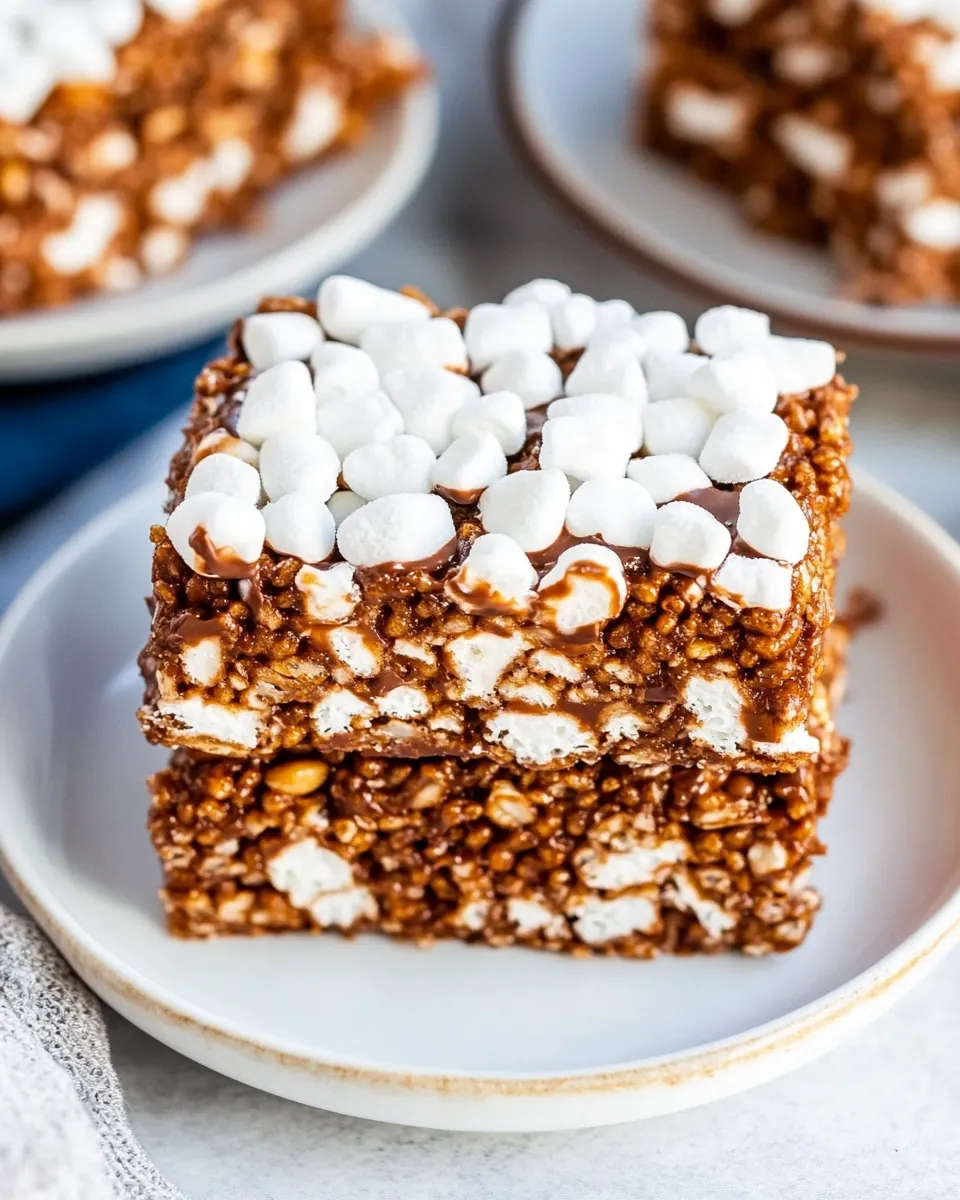
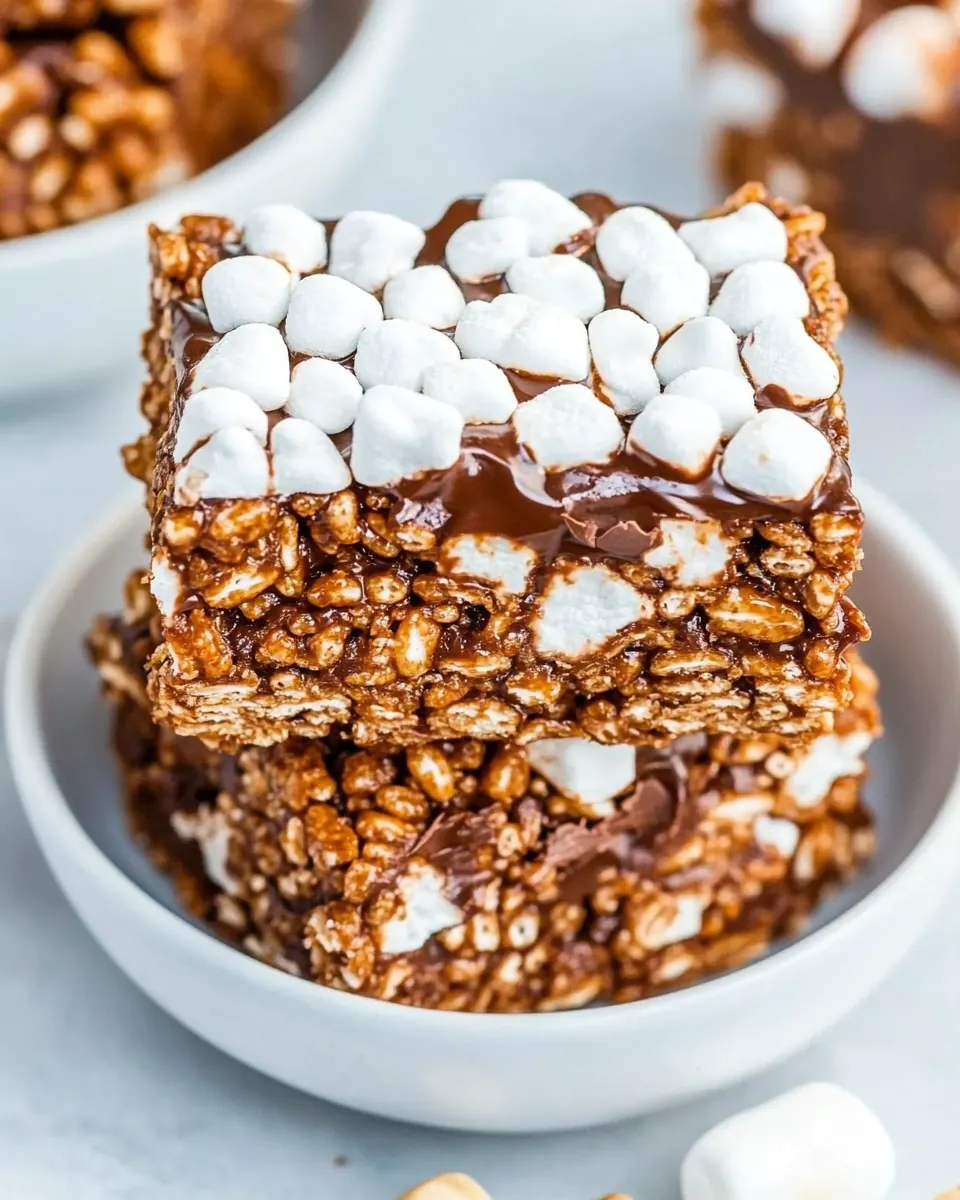
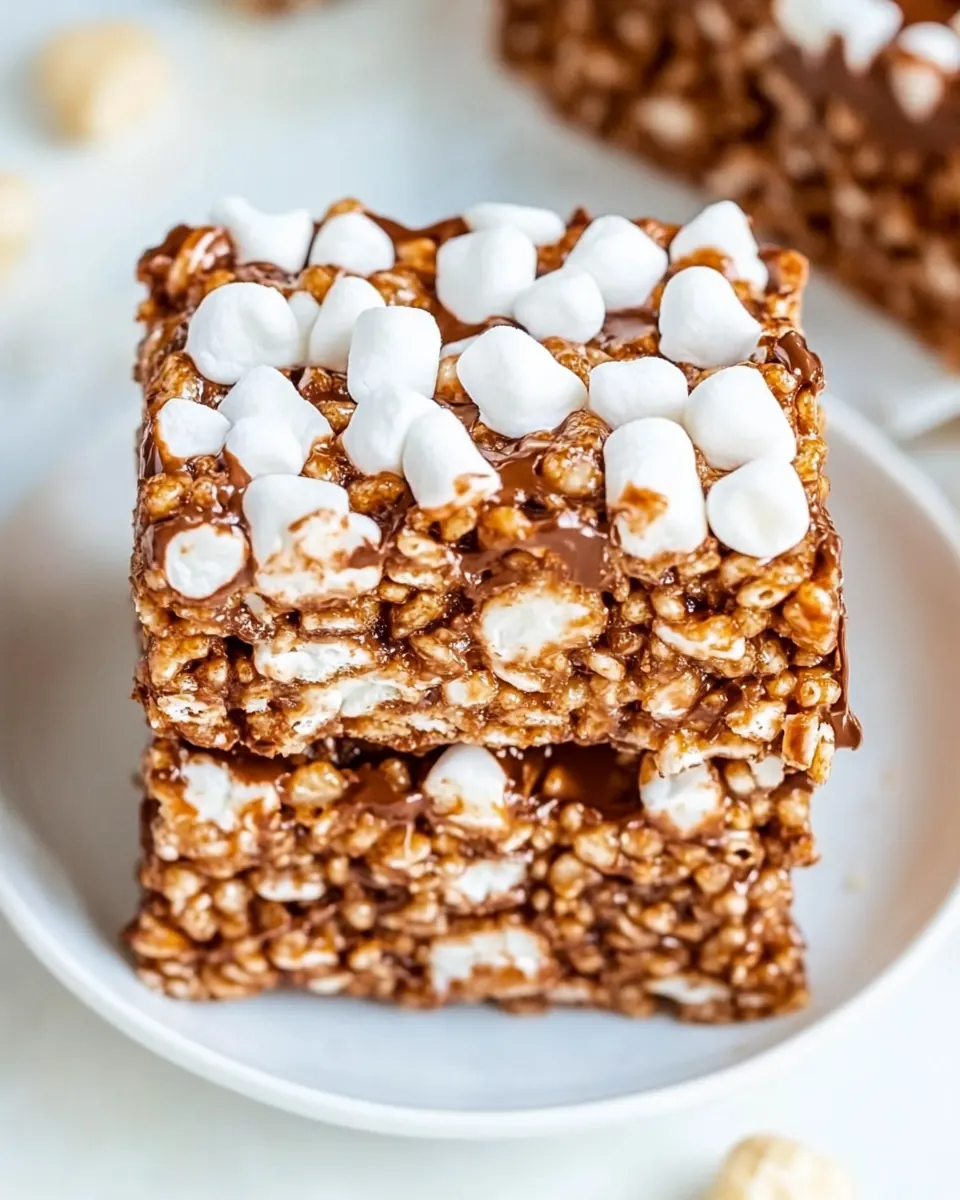
Extra Marshmallow Chocolate Peanut Butter Rice Krispies Bars
Extra Marshmallow Chocolate Peanut Butter Rice Krispies Bars is one of those recipes I reach for when I want to make a big, joyful pan of treats that disappears before the cookie sheet cools down. I remember the first time I made these, hands sticky and kitchen smelling like a candy shop, my neighbor pressed her face to the doorway and asked for a piece before I even cut the first square. That afternoon felt like a small celebration, full of the crackle of cereal and the warm, nutty aroma of melted peanut butter and chocolate.
Over the years I have tweaked this bar to maximize gooey pockets of sweetness while keeping the crisp texture that makes Rice Krispies so irresistible. I like to think of the bars as a successful balancing act, where melted butter and the right amount of marshmallow glue everything together, while a final fold-in of extra mini marshmallows gives surprise bursts of chew. Friends have called them over the top, my kids call them magic, and I call them a perfect bake-sale staple.
Recipe Snapshot
25 mins
10 mins
15 mins
Easy
150 kcal
American
Gluten-Free, Low FODMAP
Desserts
Large pot, Sturdy wooden spoon, 12 x 17 inch pan, Mixing bowl
What We Adore About This Extra Marshmallow Chocolate Peanut Butter Rice Krispies Bars
1. Incredible texture contrast
I love how Extra Marshmallow Chocolate Peanut Butter Rice Krispies Bars combines crisp and chew. The Rice Krispies cereal stays bright and crunchy, while pockets of melted marshmallows and ribbons of peanut butter create soft, chewy pockets. That contrast keeps every bite interesting and prevents the bars from becoming one-note.
2. Truly nostalgic flavor
These bars taste like childhood celebrations, but with an adult nod from the rich chocolate chips and creamy peanut butter. I find the semi sweet chocolate adds depth so the sweetness is balanced rather than cloying. Whenever I make them, someone mentions a memory from their own youth, which I adore.
3. Built for a crowd
I often double or triple this recipe for neighborhood parties because a 12 inch by 17 inch pan yields many squares. The formula scales predictably, so you can feed a crowd without fretting over texture changes. The bars hold up well for transport, and they slice cleanly once cooled.
4. Simple, reliable technique
The method here uses familiar stovetop melting and folding, which I find forgiving. With a sturdy wooden spoon and steady heat control, you can avoid scorching and end up with a glossy, thick binder that glues the cereal perfectly. I appreciate how the technique boosts confidence for newer bakers.
5. Versatile finishing touches
Sprinkling extra mini marshmallows into the mix gives delightful chewy pockets scattered through each bar. I like that the recipe encourages small choices that affect the final texture and appearance, so you can tailor chew versus crunch by how vigorously you fold in the cereal and marshmallows.
Ingredients Overview for Extra Marshmallow Chocolate Peanut Butter Rice Krispies Bars
These ingredients are straightforward and each plays a clear role. The butter and melted chocolate chips create a glossy, rich base, while the bulk of structure comes from the Rice Krispies cereal. The marshmallows act as the binder that keeps the bars cohesive and gooey, and the peanut butter adds depth and a nutty counterpoint to the sweet components. Together they make a harmonious, nostalgic bar.
- 1 cup unsalted butter: Melted to provide a rich, silky base that binds the bars together and adds a buttery flavor; helps the chocolate melt smoothly and creates a tender texture when cooled. Use unsalted butter to control overall saltiness so flavors remain balanced and can be adjusted separately if needed.
- 24 ounces semi-sweet chocolate chips – here’s my favorite!: Melted to contribute deep chocolate flavor and glossy coating that sets firm around the cereal and marshmallows; semi–sweet chips balance sweetness with cocoa intensity. Choose high-quality chips for better melting and smoother texture in the finished bars.
- 50 ounces mini marshmallows divided: Folded in to add light, airy sweetness and chewy pockets throughout the bars; dividing the marshmallows allows some to be melted for binding while reserving some for texture and visual appeal. Use mini marshmallows for even distribution and quicker melting during assembly.
- 1/2 cup creamy peanut butter not natural peanut butter: Stirred in to lend creamy, nutty richness and help bind the cereal pieces together; creamy peanut butter adds cohesive texture and a savory contrast to the sweet chocolate and marshmallows. Avoid natural peanut butter if you need a smoother consistency and more predictable binding properties.
- 12 cups Rice Krispies cereal: Tossed with the melted components to create the bulk and crispy crunch of the bars; Rice Krispies provide structure and absorb the flavored coating without becoming soggy. Measure carefully to ensure proper proportions so the mixture holds shape when pressed into the pan.
Extra Marshmallow Chocolate Peanut Butter Rice Krispies Bars Instructions
These directions ask for quick, confident work once the hot binder is ready. I always have my Rice Krispies cereal and reserved mini marshmallows within arm’s reach because timing affects texture. Read each step before you begin and prep your pan and tools so the process flows smoothly.
- Lightly spray a 12" x 17" pan with nonstick spray and set aside. Unwrap the butter and reserve the paper wrappers for pressing the final mixture into the pan. The wrappers provide a great nonstick means for pressing in that super sticky mixture. Measure out the cereal into a large bowl and set aside.: The moment you sense the binder reach a glossy thickness, visual cues become crucial, and having a prepared pan saves time and stress. The sprayed surface helps release the bars later, and using the reserved buttery wrappers to press the mixture gives a smooth finish without sticking. One common mistake is waiting to prep the pan until after the mixture is ready, which forces rushed pressing and uneven edges, so set it up first.
- In a very large pot (I use a large soup pot) over medium heat, melt butter, chocolate chips, 40 ounces (four 10-ounce bags) of the marshmallows, and peanut butter. Stir almost continuously with a sturdy wooden spoon, scraping the bottom of the pot to make sure the mixture isn’t scorching. The mixture will be very thick. When just about completely combined, remove pot from heat and stir vigorously to finish combining.: That simple wrapper trick prevents sticking and avoids adding more fat directly to the bars, preserving texture. When I press mixtures into pans, the paper keeps my hands cleaner and gives a firm, flat surface to smooth the top. A trap to avoid is tossing the wrappers, then trying to press with fingers, which results in sticky hands and uneven compression.
- Now you want to move quickly in these last steps because as this thick mixture cools, it gets harder to fold. Have your cereal and remaining marshmallows ready to go! That wooden spoon is going to give you a good workout! Quickly fold in the cereal until completely mixed throughout. Then sprinkle the remaining 10 ounces of marshmallows over the top and quickly fold them in. Aim to keep the marshmallows intact, so there are extra-marshmallow bites scattered throughout the bars.: Seeing the measured Rice Krispies cereal in a roomy bowl prevents spills and allows you to fold quickly. The sound of gently scooping the cereal is light and airy, a good contrast to the heavy, thick binder you will soon add. A mistake is using a bowl that's too small, which makes folding messy and invites crushing the cereal, producing denser bars.
- Transfer mixture to prepared pan and use the buttery side of the reserved butter wrappers to press the mixture evenly into the pan. Let cool completely and then cut into squares.: Sensory cues here are key, as the mixture will become shiny and slightly thick; you should see the chocolate fully melted and the marshmallows mostly dissolved. Stir almost continuously with a sturdy wooden spoon to prevent scorching, and watch for small steam wisps that signal gentle heat. The why matters because consistent stirring yields a smooth binder that coats the Rice Krispies cereal evenly; if you let the bottom scorch, the flavor will be bitter and the texture compromised.
- Stir almost continuously with a sturdy wooden spoon, scraping the bottom of the pot to make sure the mixture isn’t scorching: The scraping motion keeps the temperature uniform and avoids hot spots that burn the chocolate. You will feel the mixture thicken under the spoon, and small glossy ribbons of chocolate will cling to the wood when it is ready to remove from heat. A frequent mistake is using a thin metal spoon which can overheat in the pot and transfer heat unevenly; pick a sturdy wooden spoon for more control.
- The mixture will be very thick: As the binder reaches the correct viscosity, it will resist the spoon and sound denser when stirred; this signals it's time to remove from heat soon. Removing the pot at the right moment prevents the marshmallows from becoming gritty, and vigorous stirring off heat will finish the blending. If you keep it on heat too long, the marshmallow structure can break down and the texture might become too firm once cooled.
- When just about completely combined, remove pot from heat and stir vigorously to finish combining: Off heat stirring ensures a uniform, glossy texture without additional thermal breakdown. You will see the last streaks of unmelted chocolate disappear, leaving a cohesive mass that smells like toasted cocoa and warm peanut butter . A trap to avoid is under stirring, which leaves candy lumps, or over stirring while still on heat, which can make the mixture grainy.
- Now you want to move quickly in these last steps because as this thick mixture cools, it gets harder to fold: The mixture changes viscosity fast as it cools, so ready hands are essential. You should notice the binder slowing down within minutes, so have your bowl of Rice Krispies cereal and reserved mini marshmallows in place. Delaying here often leads to uneven coverage and clumped cereal.
- Have your cereal and remaining marshmallows ready to go: Being organized reduces stress and ensures the warm binder spreads and envelopes the cereal before it firms. The sound of cereal folding into the binder should be crisp, and the surface should look glossy as you work. A common error is adding too much cereal at once which cools the binder prematurely and yields dry pockets.
- Quickly fold in the cereal until completely mixed throughout: Folding should be swift and deliberate to keep the Rice Krispies cereal airy and coated rather than crushed. You want to see even distribution with no dry streaks, and the mixture should hold together when lifted. One mistake is stirring aggressively in circles, which crushes the cereal and compromises the signature snap.
- Then sprinkle the remaining 10 ounces of marshmallows over the top and quickly fold them in: The last-minute marshmallows create soft pockets, so fold gently to keep them intact; aim to maintain a mix of melted binder and intact mini marshmallows . Those intact bits give chew contrast and visual interest. Folding too vigorously will dissolve them, losing the extra-marshmallow effect.
- Aim to keep the marshmallows intact, so there are extra-marshmallow bites scattered throughout the bars: The goal is random pockets of chew across the pan, which feels celebratory when you bite in. The sight of marshmallow pockets peeking through is a good indicator you folded correctly. Avoid waiting too long because the marshmallows will not meld properly if the binder is too cool.
- Transfer mixture to prepared pan and use the buttery side of the reserved butter wrappers to press the mixture evenly into the pan: Pressing with the wrapper gives a smooth finish and prevents sticking without compressing the cereal too densely. You will feel resistance as the surface evens out and the bars settle into shape. Pressing too hard compacts the bars and makes them dense, so apply firm but gentle pressure.
- Let cool completely and then cut into squares: Cooling allows the binder to set so you get clean cuts and stable bars. The aroma shifts from intensely warm to a settled chocolate and peanut butter perfume as the pan cools. Cutting while still warm will result in gooey, misshapen squares, so patience yields better presentation and texture.
Make It Your Own
I like to think of these suggestions as friendly nudges to personalize texture and flavor. Small choices, like how aggressively you fold or how much final marshmallow you add, will change the chew and appearance of the bars. Here are practical ways to customize the recipe while keeping the core technique intact.
- Swap peanut intensity: Use a creamy, stable peanut butter to maintain structure and avoid runny texture; stirring the peanut butter in off heat helps it blend smoothly without separating.
- Chocolate distribution: You can use chopped semi sweet chocolate chips for pockets of deeper chocolate, folding gently so some pieces remain slightly intact for texture contrast.
- Marshmallow placement: Reserve at least 10 ounces of mini marshmallows to fold in at the end so you get visible chewy pockets, and avoid melting them completely into the binder.
- Pan packing: Press the mixture evenly with the buttery wrapper to avoid sticking, but do not over compress the Rice Krispies cereal so the bars remain light and crispy.
- Serving size control: Cutting the cooled pan into smaller squares increases portion count, which is useful for parties, while larger squares feel more indulgent for family servings.
Serving Suggestions
These bars are inherently shareable, so consider the occasion and portioning when serving. They work well at casual gatherings, school events, and festive holidays when you want a nostalgic sweet treat. Below are ideas for presentation, storage, and pairing that will help you serve them with confidence.
- Party platter presentation: Arrange cooled squares on a large platter in rows, leaving small gaps for easy grabbing; garnish with a dusting of cocoa or a few extra mini marshmallows for a playful look.
- Gift-ready packaging: Stack squares with parchment between layers inside a decorative box for bake sale or neighbor gifts, securing with a ribbon and a handwritten note.
- Occasion pairing: Serve these bars at birthday parties, potlucks, and family gatherings where easy handheld treats are best; their crowd pleasing nature makes them a party favorite.
- Storage tips: Store in an airtight container at room temperature for up to three days, or refrigerate to extend freshness; separate layers with parchment to avoid sticking.
- Seasonal serving: These are great year round, and they travel well to outdoor summer picnics as long as temperatures are not too hot, since the melted chocolate can soften in heat.
FAQ
Conclusion
These bars shine because they balance crisp cereal, gooey marshmallow pockets, creamy peanut butter, and rich chocolate into one upbeat, shareable traybake. I encourage you to give them a try, especially when you need a crowd pleasing dessert or a sweet treat for a special gathering. The technique is straightforward, the results are reliably loved, and the memories you make while baking and sharing them are the sweetest part.
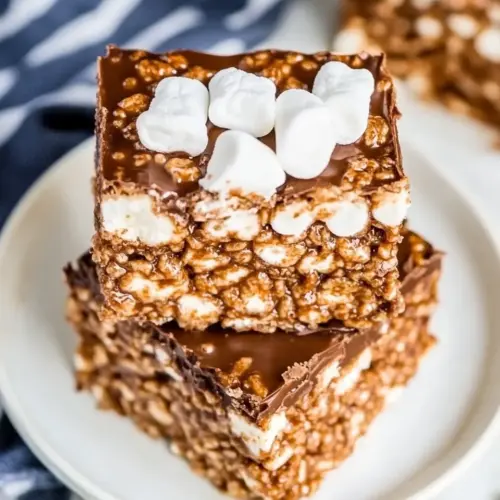
Extra Marshmallow Chocolate Peanut Butter Rice Krispies Bars
Equipment
- Large Pot
- Sturdy wooden spoon
- 12 x 17 inch pan
- Mixing Bowl
Ingredients
- 1 cup unsalted butter Melted to provide a rich, silky base that binds the bars together and adds a buttery flavor; helps the chocolate melt smoothly and creates a tender texture when cooled. Use unsalted butter to control overall saltiness so flavors remain balanced and can be adjusted separately if needed.
- 24 ounces semi-sweet chocolate chips – here’s my favorite! Melted to contribute deep chocolate flavor and glossy coating that sets firm around the cereal and marshmallows; semi-sweet chips balance sweetness with cocoa intensity. Choose high-quality chips for better melting and smoother texture in the finished bars.
- 50 ounces mini marshmallows divided Folded in to add light, airy sweetness and chewy pockets throughout the bars; dividing the marshmallows allows some to be melted for binding while reserving some for texture and visual appeal. Use mini marshmallows for even distribution and quicker melting during assembly.
- 1/2 cup creamy peanut butter not natural peanut butter Stirred in to lend creamy, nutty richness and help bind the cereal pieces together; creamy peanut butter adds cohesive texture and a savory contrast to the sweet chocolate and marshmallows. Avoid natural peanut butter if you need a smoother consistency and more predictable binding properties.
- 12 cups Rice Krispies cereal Tossed with the melted components to create the bulk and crispy crunch of the bars; Rice Krispies provide structure and absorb the flavored coating without becoming soggy. Measure carefully to ensure proper proportions so the mixture holds shape when pressed into the pan.
Instructions
- Lightly spray a 12" x 17" pan with nonstick spray and set aside. Unwrap the butter and reserve the paper wrappers for pressing the final mixture into the pan. The wrappers provide a great nonstick means for pressing in that super sticky mixture. Measure out the cereal into a large bowl and set aside.: The moment you sense the binder reach a glossy thickness, visual cues become crucial, and having a prepared pan saves time and stress. The sprayed surface helps release the bars later, and using the reserved buttery wrappers to press the mixture gives a smooth finish without sticking. One common mistake is waiting to prep the pan until after the mixture is ready, which forces rushed pressing and uneven edges, so set it up first.
- In a very large pot (I use a large soup pot) over medium heat, melt butter, chocolate chips, 40 ounces (four 10-ounce bags) of the marshmallows, and peanut butter. Stir almost continuously with a sturdy wooden spoon, scraping the bottom of the pot to make sure the mixture isn’t scorching. The mixture will be very thick. When just about completely combined, remove pot from heat and stir vigorously to finish combining.: That simple wrapper trick prevents sticking and avoids adding more fat directly to the bars, preserving texture. When I press mixtures into pans, the paper keeps my hands cleaner and gives a firm, flat surface to smooth the top. A trap to avoid is tossing the wrappers, then trying to press with fingers, which results in sticky hands and uneven compression.
- Now you want to move quickly in these last steps because as this thick mixture cools, it gets harder to fold. Have your cereal and remaining marshmallows ready to go! That wooden spoon is going to give you a good workout! Quickly fold in the cereal until completely mixed throughout. Then sprinkle the remaining 10 ounces of marshmallows over the top and quickly fold them in. Aim to keep the marshmallows intact, so there are extra-marshmallow bites scattered throughout the bars.: Seeing the measured Rice Krispies cereal in a roomy bowl prevents spills and allows you to fold quickly. The sound of gently scooping the cereal is light and airy, a good contrast to the heavy, thick binder you will soon add. A mistake is using a bowl that's too small, which makes folding messy and invites crushing the cereal, producing denser bars.
- Transfer mixture to prepared pan and use the buttery side of the reserved butter wrappers to press the mixture evenly into the pan. Let cool completely and then cut into squares.: Sensory cues here are key, as the mixture will become shiny and slightly thick; you should see the chocolate fully melted and the marshmallows mostly dissolved. Stir almost continuously with a sturdy wooden spoon to prevent scorching, and watch for small steam wisps that signal gentle heat. The why matters because consistent stirring yields a smooth binder that coats the Rice Krispies cereal evenly; if you let the bottom scorch, the flavor will be bitter and the texture compromised.
- Stir almost continuously with a sturdy wooden spoon, scraping the bottom of the pot to make sure the mixture isn’t scorching: The scraping motion keeps the temperature uniform and avoids hot spots that burn the chocolate. You will feel the mixture thicken under the spoon, and small glossy ribbons of chocolate will cling to the wood when it is ready to remove from heat. A frequent mistake is using a thin metal spoon which can overheat in the pot and transfer heat unevenly; pick a sturdy wooden spoon for more control.
- The mixture will be very thick: As the binder reaches the correct viscosity, it will resist the spoon and sound denser when stirred; this signals it's time to remove from heat soon. Removing the pot at the right moment prevents the marshmallows from becoming gritty, and vigorous stirring off heat will finish the blending. If you keep it on heat too long, the marshmallow structure can break down and the texture might become too firm once cooled.
- When just about completely combined, remove pot from heat and stir vigorously to finish combining: Off heat stirring ensures a uniform, glossy texture without additional thermal breakdown. You will see the last streaks of unmelted chocolate disappear, leaving a cohesive mass that smells like toasted cocoa and warm peanut butter . A trap to avoid is under stirring, which leaves candy lumps, or over stirring while still on heat, which can make the mixture grainy.
- Now you want to move quickly in these last steps because as this thick mixture cools, it gets harder to fold: The mixture changes viscosity fast as it cools, so ready hands are essential. You should notice the binder slowing down within minutes, so have your bowl of Rice Krispies cereal and reserved mini marshmallows in place. Delaying here often leads to uneven coverage and clumped cereal.
- Have your cereal and remaining marshmallows ready to go: Being organized reduces stress and ensures the warm binder spreads and envelopes the cereal before it firms. The sound of cereal folding into the binder should be crisp, and the surface should look glossy as you work. A common error is adding too much cereal at once which cools the binder prematurely and yields dry pockets.
- Quickly fold in the cereal until completely mixed throughout: Folding should be swift and deliberate to keep the Rice Krispies cereal airy and coated rather than crushed. You want to see even distribution with no dry streaks, and the mixture should hold together when lifted. One mistake is stirring aggressively in circles, which crushes the cereal and compromises the signature snap.
- Then sprinkle the remaining 10 ounces of marshmallows over the top and quickly fold them in: The last-minute marshmallows create soft pockets, so fold gently to keep them intact; aim to maintain a mix of melted binder and intact mini marshmallows . Those intact bits give chew contrast and visual interest. Folding too vigorously will dissolve them, losing the extra-marshmallow effect.
- Aim to keep the marshmallows intact, so there are extra-marshmallow bites scattered throughout the bars: The goal is random pockets of chew across the pan, which feels celebratory when you bite in. The sight of marshmallow pockets peeking through is a good indicator you folded correctly. Avoid waiting too long because the marshmallows will not meld properly if the binder is too cool.
- Transfer mixture to prepared pan and use the buttery side of the reserved butter wrappers to press the mixture evenly into the pan: Pressing with the wrapper gives a smooth finish and prevents sticking without compressing the cereal too densely. You will feel resistance as the surface evens out and the bars settle into shape. Pressing too hard compacts the bars and makes them dense, so apply firm but gentle pressure.
- Let cool completely and then cut into squares: Cooling allows the binder to set so you get clean cuts and stable bars. The aroma shifts from intensely warm to a settled chocolate and peanut butter perfume as the pan cools. Cutting while still warm will result in gooey, misshapen squares, so patience yields better presentation and texture.
Notes
- Swap peanut intensity: Use a creamy, stable peanut butter to maintain structure and avoid runny texture; stirring the peanut butter in off heat helps it blend smoothly without separating.
- Chocolate distribution: You can use chopped semi sweet chocolate chips for pockets of deeper chocolate, folding gently so some pieces remain slightly intact for texture contrast.
- Marshmallow placement: Reserve at least 10 ounces of mini marshmallows to fold in at the end so you get visible chewy pockets, and avoid melting them completely into the binder.
- Pan packing: Press the mixture evenly with the buttery wrapper to avoid sticking, but do not over compress the Rice Krispies cereal so the bars remain light and crispy.
- Serving size control: Cutting the cooled pan into smaller squares increases portion count, which is useful for parties, while larger squares feel more indulgent for family servings.