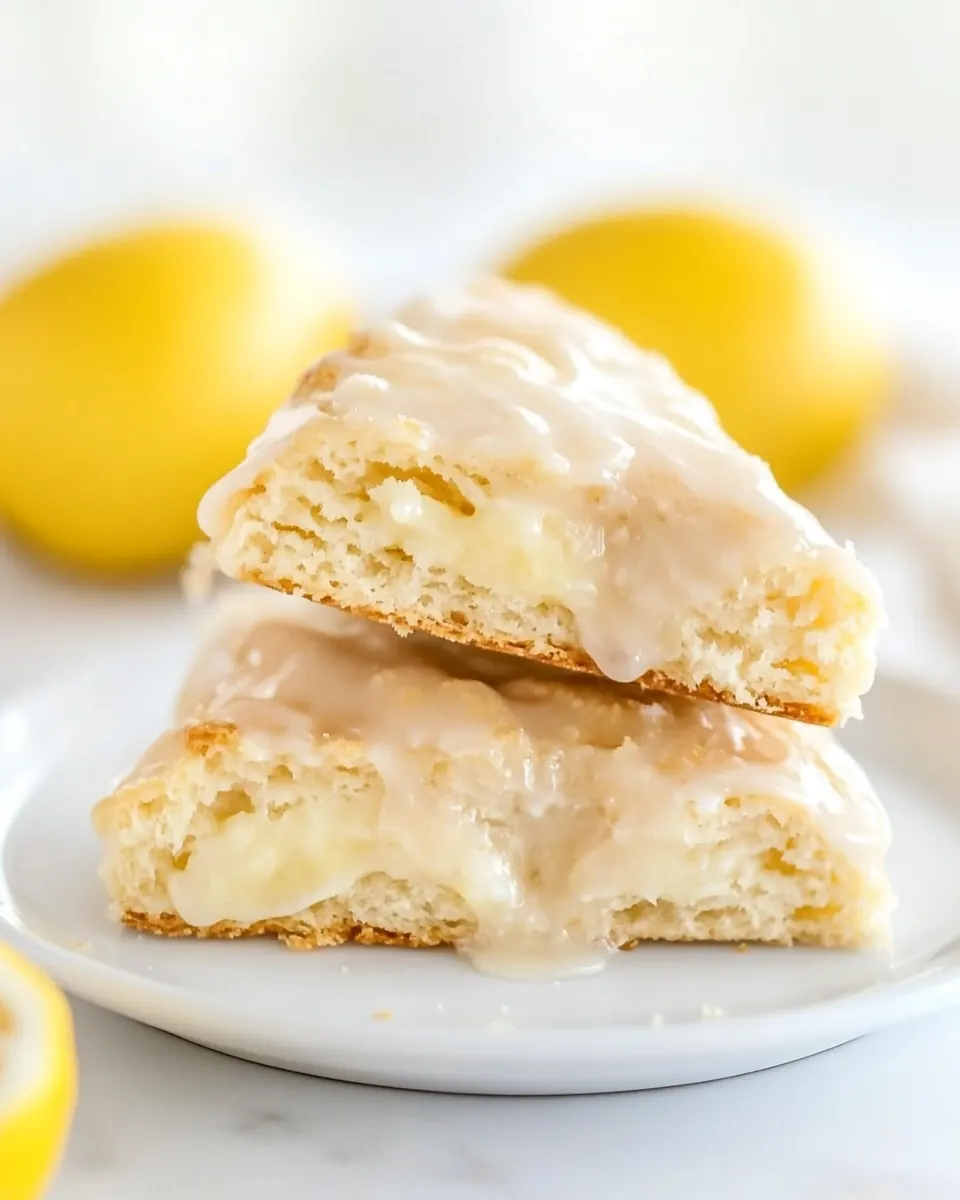
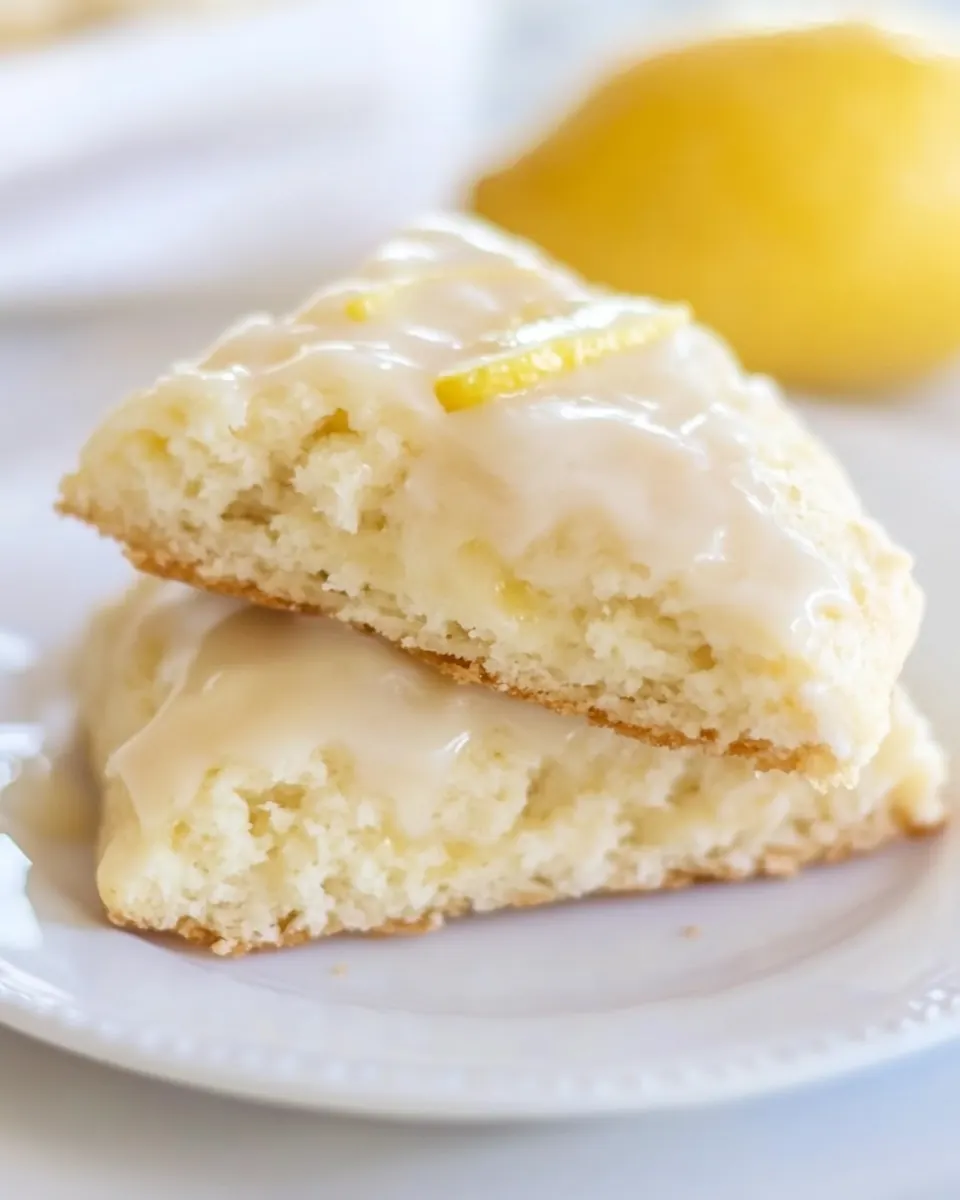
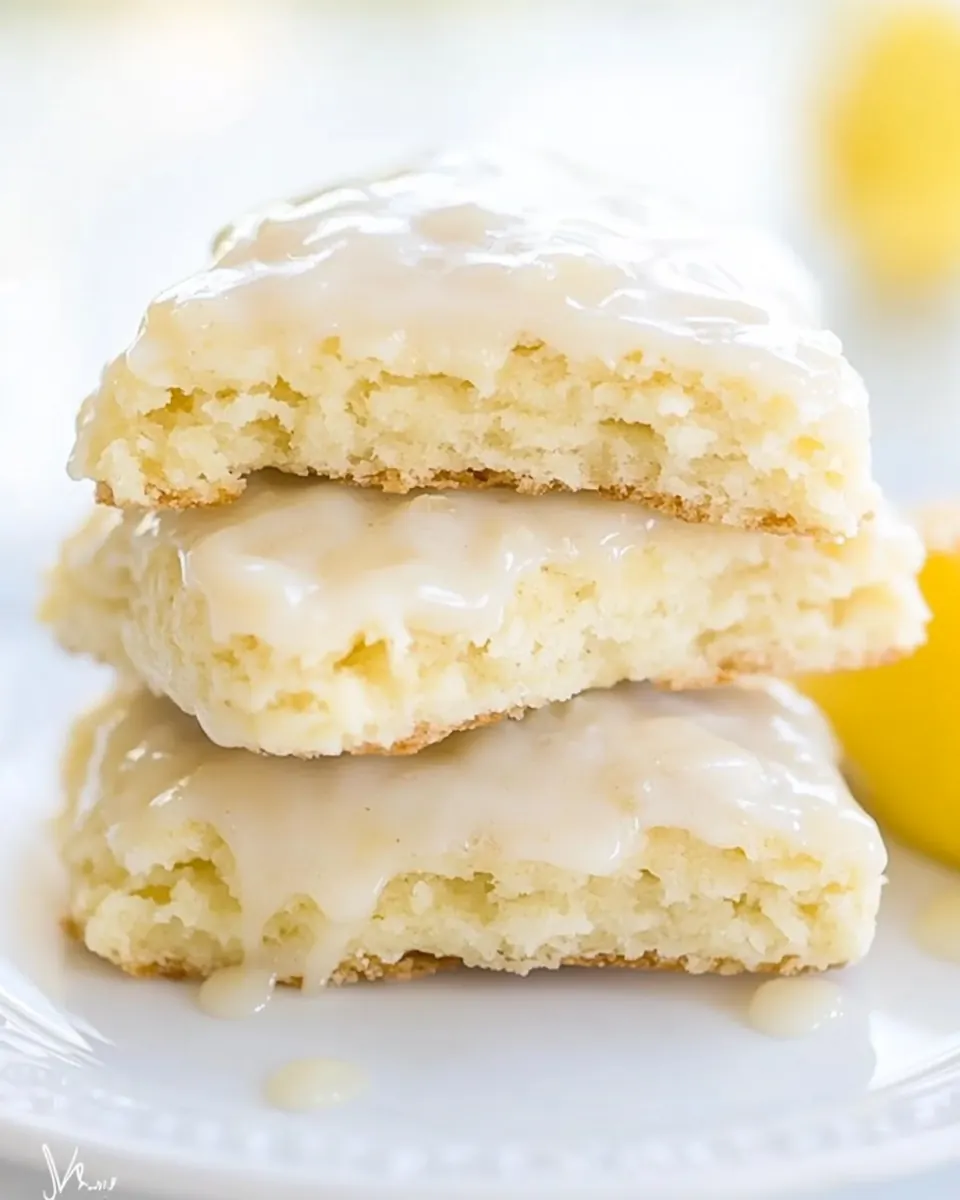
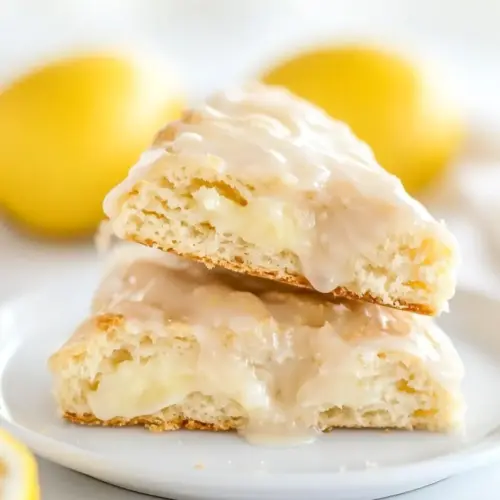
Glazed Lemon Scones
Glazed Lemon Scones came into my life on a rainy spring afternoon when I needed something bright and honest to lift my mood. I remember pulling a worn recipe card from the drawer, fingers still damp from the rain, and deciding to make a batch that felt both comforting and a little cheeky. The tang of lemon and the tender crumb of the dough felt like sunshine in pastry form, and I kept thinking how nice it would be to share them with a neighbor or tuck one into a lunchbox.
From the very first mix of flour and zested lemon, the kitchen filled with a citrus perfume that made me pause and smile. I like that these scones are not overly sweet, which lets the citrus and buttery notes sing. As I grated frozen unsalted butter into the dry mix, I recalled how my grandmother insisted on keeping the butter cold so the scones would be flaky, not greasy. That small trick has become a ritual for me.
When the dough comes together and you pat it into a circle, there’s a satisfying tactile moment as it changes from sticky to coherent under your hands. Baking them until the edges turn golden and the centers feel set is a small reward. Finally, dipping the warm scones into the glossy lemon glaze and watching it set gives a tiny celebratory pause, the kind of moment I want to savor with a cup of tea and good company.
Recipe Snapshot
31 mins
15 mins
16 mins
Medium
250 kcal
American
Gluten-Free, Low FODMAP
Breakfast
Box Grater, Nordic Ware Aluminum Half Sheet Pans, Pre-Cut Parchment Paper Baking Sheets
Why This Glazed Lemon Scones Hits Different
Bright, Balanced Flavor
I adore how Glazed Lemon Scones balance sweet and tart. The combination of zesty lemon and moderate sugar means these scones taste lively without overwhelming your palate. When I take a bite there is an immediate citrus hit from the zest of 3 medium lemons, followed by a gentle sweetness from the glaze that ties everything together.
Flaky, Tender Texture
One reason I keep this recipe in my regular rotation is the texture. Cold, grated unsalted butter folded into the flour creates pockets of steam as the scones bake, giving a flaky lift. I love the little layers you can see when you break one open, and the tender interior from the sour cream keeps each bite moist.
Quick and Approachable
This recipe moves fast, which is perfect for spontaneous baking sessions. From grating butter to the oven preheated on the lower-middle rack, the process feels brisk but not rushed. It’s the kind of recipe I reach for when friends call and say they are dropping by, because you can have warm scones in under an hour.
Versatile for Occasions
I find Glazed Lemon Scones fit many moments, from a casual weekend breakfast to a light dessert after dinner. The glaze gives a pretty finish that looks special without extra fuss. I’ve served these at book club and for small holiday mornings, and they always disappear first.
Simple Ingredients, Big Impact
What wins me over is how common pantry items become something memorable. With all-purpose flour, a touch of powdered sugar for the glaze, and fresh lemon, the flavor is immediate and honest. There’s a satisfying clarity to the taste that feels like a good recipe should.
Glazed Lemon Scones Ingredients

These ingredients are straightforward and purposeful, chosen to create a scone that is crisp on the exterior and tender inside. The key players are the flour and cold butter for structure and flakiness, the lemon components for bright flavor, and the sour cream and egg for richness and moisture. Every item has a role in achieving the texture and balance I love.
- 1/3 cup granulated sugar: Sweeten the dough and create light caramelization on the scone exterior; helps balance lemon tartness and enhances browning during baking. Measure precisely to maintain proper texture and prevent overly sweet scones.
- zest of 3 medium lemons: Provide intense citrus oils and bright aroma when finely grated; zest contributes concentrated lemon flavor without adding extra acidity. Use only the colored outer peel and avoid the bitter white pith for best results.
- 2 cups all-purpose flour: Form the structural base of the scones, giving body and crumb when mixed with leaveners and fats. Sift or whisk to remove lumps and ensure even distribution with other dry ingredients.
- 1 teaspoon baking powder: Leaven the dough by producing gas when heated, helping scones rise and become tender; often used with baking soda for balanced lift. Ensure it is fresh for reliable rising and even texture.
- 1/4 teaspoon baking soda: React with acidic components to produce additional lift and tenderize the crumb; balances baking powder so the scones rise properly. Use the exact small amount to avoid metallic or soapy flavors.
- 1/2 teaspoon salt: Enhance overall flavor by rounding and balancing sweetness and acidity while slightly strengthening gluten structure. Keep measurements modest to avoid altering dough consistency.
- 8 tablespoons unsalted butter frozen: Contribute cold fat that creates flaky layers and tender pockets when grated or cut into the flour; frozen state helps maintain separation of fat and flour. Work quickly to keep butter cold until baking for optimal flakiness.
- 1/2 cup sour cream: Add moisture and a subtle tang that tenderizes the scone crumb and reacts with leaveners for lift; contributes richness without overpowering lemon flavor. Fold gently to preserve air and prevent overworking the dough.
- 2 tablespoons freshly squeezed lemon juice: Provide fresh acidity that brightens flavor and activates baking soda for additional leavening; supplies true lemon character beyond zest. Use freshly squeezed juice for the best aromatic and acidic qualities.
- 1 large egg: Bind ingredients together, add richness and contribute to structure and tenderness through coagulation during baking. Beat gently before incorporating to distribute evenly without overmixing.
- 1 teaspoon pure vanilla extract: Impart warm, sweet aromatic notes that deepen overall flavor and complement lemon; a small amount enhances perception of sweetness. Stir in with wet ingredients for uniform distribution.
- 3 tablespoons unsalted butter melted: Add moisture and a glossy finish when brushed or incorporated; melted butter enriches texture and flavor of the scone surface or glaze. Use warm melted butter to combine smoothly with other glaze components.
- 1 cup powdered sugar: Sweeten and create a smooth, opaque glaze that hardens slightly when cooled; dissolves easily into liquids to form a pourable icing. Sift if necessary to remove lumps for a silky finish on scones.
- 1/2 teaspoon pure vanilla extract: Provide a subtle warm aromatic accent in the glaze that rounds out the lemon brightness and enhances perceived sweetness. Use pure vanilla for the cleanest flavor profile in icings and glazes.
- 2 tablespoons freshly squeezed lemon juice: Deliver concentrated tartness and fresh lemon flavor to the glaze, balancing powdered sugar and adding a glossy, zesty finish. Adjust amount to achieve the desired glaze consistency and tang.
How to Prepare Glazed Lemon Scones
These instructions take you step by step with sensory cues so you can feel confident at every turn. I’ll walk you through the oven setup, mixing, shaping, baking, cooling, and glazing. Get ready to experience the texture changes and smells that signal success.
- Adjust oven rack to lower-middle position and preheat oven to 400°F. Line a baking sheet with parchment paper.: You will notice the oven warming and a steady hum as it comes up to 400°F , that steady heat creates even browning on the bottoms and edges. Placing the rack in the lower middle position encourages a gentle rise while avoiding overly dark tops, and the parchment paper prevents sticking and promotes an easy release. A common mistake is skipping the preheat, which yields uneven bake and dense centers, so always wait until the oven reaches temperature before sliding the tray in.
- In a medium bowl, combine sugar and lemon zest; mix with your fingertips until the sugar is moistened and fragrant. Add in the flour, baking powder, baking soda and salt and mix until combined.: As you rub the zest of 3 medium lemons into the granulated sugar , inhale the citrus oils that release, a bright aroma that tells you the flavor is developing. When you fold in the flour , baking powder , baking soda , and salt , the dry mixture should look uniform and slightly grainy. This even distribution ensures consistent rise and flavor in each scone. Avoid overworking at this stage, since overmixing can activate gluten and make the final scones tough.
- Grate butter into flour mixture on the large holes of a box grater; use your fingers to work in the butter until the mixture resembles coarse crumbs.: Grating the frozen unsalted butter creates tiny, cold pieces that remain distinct in the dough, and when baked they steam and form flaky layers. As you rub the butter into the dry mix, aim for pea sized bits and a crumbly texture that still has some visible butter. If the butter warms too much and becomes greasy, the dough will lose lift, so work briskly and keep your hands cool. A frequent error is using softened butter, which yields dense, greasy scones rather than flaky ones.
- In a small bowl, whisk the sour cream, lemon juice, egg and vanilla until smooth.: Whisking the sour cream , lemon juice , egg , and vanilla extract creates a glossy, slightly thick batter that will hydrate the dry ingredients. The mixture should look homogeneous, and you may see tiny air bubbles form from whisking, which help lightness. This wet mix balances richness and acidity, aiding tender crumb formation. If the wet ingredients are too cold or too warm it can affect integration, so aim for a cool room temperature blend to combine smoothly.
- Using a fork, stir sour cream mixture into flour mixture until large dough clumps form. Use your hands to press the dough against the bowl into a ball. The dough will be sticky first, but as you press, the dough will come together.: At this phase you will feel a change from loose crumbs to cohesive, tacky dough. Start with a fork to gently bring things together, then switch to your hands to press and gather into a ball. The tactile feedback is key, you should feel stickiness that resolves as the sour cream hydrates the flour . If the dough feels dry, you may have mismeasured the flour ; resist adding extra liquid, instead press firmly to unify. Overworking the dough here can toughen it, so be deliberate and gentle when forming the ball.
- Place on a lightly floured surface and pat into a 7-inch circle about 3/4-inch thick. Use a sharp knife to cut into 8 triangles. Place on prepared baking sheet, about 1 inch apart. Bake until golden, about 15 to 16 minutes. Cool for 10 minutes and prepare the glaze.: Patting the dough into a 7 inch circle gives uniform pieces that bake consistently, and the 3/4 inch thickness ensures a tender center without underbaking. As you cut the triangles, you may feel slight resistance where the butter pockets are, and the surface will have a faint dusting from the flour . Arrange them roughly 1 inch apart so edges brown but do not fuse. During baking you will notice a warm, citrus aroma and edges turning golden; this visual cue indicates they are ready. A frequent misstep is making the circle too thin, which yields dry scones, so keep that 3/4 inch thickness for best results.
- In a medium bowl, prepare the glaze by mixing together the melted butter, powdered sugar, vanilla and lemon juice. Whisk until smooth. Dip the top of the scones into the glaze and allow the glaze to harden.: As you whisk the melted unsalted butter with powdered sugar , vanilla , and additional lemon juice , you will see a glossy emulsion form that thins to a dippable consistency. Dip the warm but not piping hot scones into the glaze so it adheres and sets with a delicate sheen. The glaze should harden to a slight snap, creating a pleasant contrast to the tender crumb. Avoid making the glaze too thin or dipping when the scones are steaming hot, or the glaze may slide off; let them cool about 10 minutes first.
How to Switch It Up
I like having options when I bake, because small tweaks can transform a familiar scone into something new. Below are practical switches that keep the same technique while offering variety in texture and flavor. Each tip highlights the first phrase for quick scanning.
- Swap citrus accents by incorporating orange zest instead of some of the lemon zest for a warmer citrus profile.
- Add mix ins like a handful of chopped nuts or dried fruit folded into the dough for texture, but add sparingly to avoid weighing down the scones.
- Adjust glaze thickness by adding more powdered sugar for a thicker coat or more lemon juice to thin it for a translucent finish.
- Serve warm versus room temperature to change the eating experience, warm scones highlight buttery notes while cooled ones present a firmer glaze snap.
- Double zest for intensity if you prefer a punchier citrus flavor, but balance with glaze sweetness so it does not become too tart.
Accompaniments for Glazed Lemon Scones
These scones pair beautifully with a few simple choices and can be adapted to many occasions. Below are serving ideas, storage notes, and seasonal pairings to help you present them thoughtfully.
- Morning gatherings serve the scones with bowls of jam and a thick, creamy spread, letting guests choose their preference while the scones remain the star.
- Afternoon tea
- Light dessert
- Storage tip keep scones in an airtight container at room temperature for up to two days, reheating briefly in a low oven if you prefer them warm.
- Seasonal pairing highlight fresh berries and a lightly sweetened yogurt in warmer months to complement the citrus notes of the scones.
FAQ
Conclusion
These Glazed Lemon Scones stand out for their bright citrus flavor and tender, flaky texture, making them an irresistible treat for mornings or casual gatherings. I encourage you to try them soon because the technique is straightforward and the result feels delightfully indulgent without being fussy. Enjoy the warm aroma as they bake, and savor the satisfying contrast of glossy glaze and soft crumb when you take that first bite.
Glazed Lemon Scones
Equipment
- Box grater
- Nordic Ware Aluminum Half Sheet Pans
- Pre-Cut Parchment Paper Baking Sheets
Ingredients
- 1/3 cup granulated sugar Sweeten the dough and create light caramelization on the scone exterior; helps balance lemon tartness and enhances browning during baking. Measure precisely to maintain proper texture and prevent overly sweet scones.
- zest of 3 medium lemons Provide intense citrus oils and bright aroma when finely grated; zest contributes concentrated lemon flavor without adding extra acidity. Use only the colored outer peel and avoid the bitter white pith for best results.
- 2 cups all-purpose flour Form the structural base of the scones, giving body and crumb when mixed with leaveners and fats. Sift or whisk to remove lumps and ensure even distribution with other dry ingredients.
- 1 teaspoon baking powder Leaven the dough by producing gas when heated, helping scones rise and become tender; often used with baking soda for balanced lift. Ensure it is fresh for reliable rising and even texture.
- 1/4 teaspoon baking soda React with acidic components to produce additional lift and tenderize the crumb; balances baking powder so the scones rise properly. Use the exact small amount to avoid metallic or soapy flavors.
- 1/2 teaspoon salt Enhance overall flavor by rounding and balancing sweetness and acidity while slightly strengthening gluten structure. Keep measurements modest to avoid altering dough consistency.
- 8 tablespoons unsalted butter frozen Contribute cold fat that creates flaky layers and tender pockets when grated or cut into the flour; frozen state helps maintain separation of fat and flour. Work quickly to keep butter cold until baking for optimal flakiness.
- 1/2 cup sour cream Add moisture and a subtle tang that tenderizes the scone crumb and reacts with leaveners for lift; contributes richness without overpowering lemon flavor. Fold gently to preserve air and prevent overworking the dough.
- 2 tablespoons freshly squeezed lemon juice Provide fresh acidity that brightens flavor and activates baking soda for additional leavening; supplies true lemon character beyond zest. Use freshly squeezed juice for the best aromatic and acidic qualities.
- 1 large egg Bind ingredients together, add richness and contribute to structure and tenderness through coagulation during baking. Beat gently before incorporating to distribute evenly without overmixing.
- 1 teaspoon pure vanilla extract Impart warm, sweet aromatic notes that deepen overall flavor and complement lemon; a small amount enhances perception of sweetness. Stir in with wet ingredients for uniform distribution.
- 3 tablespoons unsalted butter melted Add moisture and a glossy finish when brushed or incorporated; melted butter enriches texture and flavor of the scone surface or glaze. Use warm melted butter to combine smoothly with other glaze components.
- 1 cup powdered sugar Sweeten and create a smooth, opaque glaze that hardens slightly when cooled; dissolves easily into liquids to form a pourable icing. Sift if necessary to remove lumps for a silky finish on scones.
- 1/2 teaspoon pure vanilla extract Provide a subtle warm aromatic accent in the glaze that rounds out the lemon brightness and enhances perceived sweetness. Use pure vanilla for the cleanest flavor profile in icings and glazes.
- 2 tablespoons freshly squeezed lemon juice Deliver concentrated tartness and fresh lemon flavor to the glaze, balancing powdered sugar and adding a glossy, zesty finish. Adjust amount to achieve the desired glaze consistency and tang.
Instructions
- Adjust oven rack to lower-middle position and preheat oven to 400°F. Line a baking sheet with parchment paper.: You will notice the oven warming and a steady hum as it comes up to 400°F , that steady heat creates even browning on the bottoms and edges. Placing the rack in the lower middle position encourages a gentle rise while avoiding overly dark tops, and the parchment paper prevents sticking and promotes an easy release. A common mistake is skipping the preheat, which yields uneven bake and dense centers, so always wait until the oven reaches temperature before sliding the tray in.
- In a medium bowl, combine sugar and lemon zest; mix with your fingertips until the sugar is moistened and fragrant. Add in the flour, baking powder, baking soda and salt and mix until combined.: As you rub the zest of 3 medium lemons into the granulated sugar , inhale the citrus oils that release, a bright aroma that tells you the flavor is developing. When you fold in the flour , baking powder , baking soda , and salt , the dry mixture should look uniform and slightly grainy. This even distribution ensures consistent rise and flavor in each scone. Avoid overworking at this stage, since overmixing can activate gluten and make the final scones tough.
- Grate butter into flour mixture on the large holes of a box grater; use your fingers to work in the butter until the mixture resembles coarse crumbs.: Grating the frozen unsalted butter creates tiny, cold pieces that remain distinct in the dough, and when baked they steam and form flaky layers. As you rub the butter into the dry mix, aim for pea sized bits and a crumbly texture that still has some visible butter. If the butter warms too much and becomes greasy, the dough will lose lift, so work briskly and keep your hands cool. A frequent error is using softened butter, which yields dense, greasy scones rather than flaky ones.
- In a small bowl, whisk the sour cream, lemon juice, egg and vanilla until smooth.: Whisking the sour cream , lemon juice , egg , and vanilla extract creates a glossy, slightly thick batter that will hydrate the dry ingredients. The mixture should look homogeneous, and you may see tiny air bubbles form from whisking, which help lightness. This wet mix balances richness and acidity, aiding tender crumb formation. If the wet ingredients are too cold or too warm it can affect integration, so aim for a cool room temperature blend to combine smoothly.
- Using a fork, stir sour cream mixture into flour mixture until large dough clumps form. Use your hands to press the dough against the bowl into a ball. The dough will be sticky first, but as you press, the dough will come together.: At this phase you will feel a change from loose crumbs to cohesive, tacky dough. Start with a fork to gently bring things together, then switch to your hands to press and gather into a ball. The tactile feedback is key, you should feel stickiness that resolves as the sour cream hydrates the flour . If the dough feels dry, you may have mismeasured the flour ; resist adding extra liquid, instead press firmly to unify. Overworking the dough here can toughen it, so be deliberate and gentle when forming the ball.
- Place on a lightly floured surface and pat into a 7-inch circle about 3/4-inch thick. Use a sharp knife to cut into 8 triangles. Place on prepared baking sheet, about 1 inch apart. Bake until golden, about 15 to 16 minutes. Cool for 10 minutes and prepare the glaze.: Patting the dough into a 7 inch circle gives uniform pieces that bake consistently, and the 3/4 inch thickness ensures a tender center without underbaking. As you cut the triangles, you may feel slight resistance where the butter pockets are, and the surface will have a faint dusting from the flour . Arrange them roughly 1 inch apart so edges brown but do not fuse. During baking you will notice a warm, citrus aroma and edges turning golden; this visual cue indicates they are ready. A frequent misstep is making the circle too thin, which yields dry scones, so keep that 3/4 inch thickness for best results.
- In a medium bowl, prepare the glaze by mixing together the melted butter, powdered sugar, vanilla and lemon juice. Whisk until smooth. Dip the top of the scones into the glaze and allow the glaze to harden.: As you whisk the melted unsalted butter with powdered sugar , vanilla , and additional lemon juice , you will see a glossy emulsion form that thins to a dippable consistency. Dip the warm but not piping hot scones into the glaze so it adheres and sets with a delicate sheen. The glaze should harden to a slight snap, creating a pleasant contrast to the tender crumb. Avoid making the glaze too thin or dipping when the scones are steaming hot, or the glaze may slide off; let them cool about 10 minutes first.
Notes
- Swap citrus accents by incorporating orange zest instead of some of the lemon zest for a warmer citrus profile.
- Add mix ins like a handful of chopped nuts or dried fruit folded into the dough for texture, but add sparingly to avoid weighing down the scones.
- Adjust glaze thickness by adding more powdered sugar for a thicker coat or more lemon juice to thin it for a translucent finish.
- Serve warm versus room temperature to change the eating experience, warm scones highlight buttery notes while cooled ones present a firmer glaze snap.
- Double zest for intensity if you prefer a punchier citrus flavor, but balance with glaze sweetness so it does not become too tart.