Easy Baked Sweet Potatoes
Easy Baked Sweet Potatoes are one of those simple comforts I turn to when I want wholesome, honest food that still feels a little special. The first time I roasted a tray of these, the house filled with a warm, earthy perfume and I found myself wandering back to the oven every few minutes, just to check on the little puffed skins. I like how this recipe feels both humble and celebratory, a pantry-friendly option that elevates weeknight meals and also sits pretty on a holiday table.
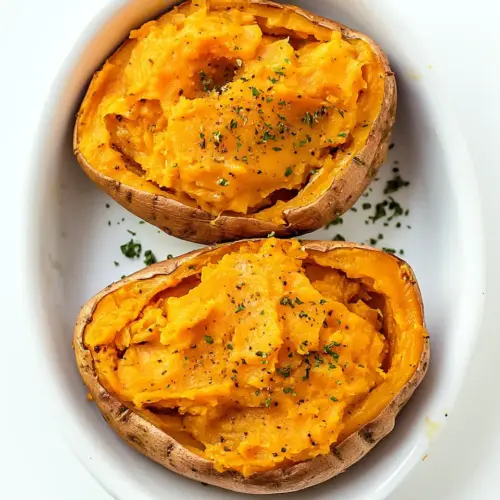
When I make Easy Baked Sweet Potatoes I often think about texture, not just flavor. I love the contrast between the slightly crisped, dimpled skin and the steaming, creamy interior that practically melts when you pierce it. Over the years I learned small habits that change the result, like patting the sweet potato dry before roasting and not crowding the pan. Those tiny moves make a big difference in how even the bake will be.
Recipe Snapshot
55 mins
5 mins
50 mins
Medium
180 kcal
American
Gluten-Free, Low FODMAP
Side Dishes
Baking sheet, Parchment paper or foil, Fork, Microwave safe dish, Air fryer
Why You’ll Love This Easy Baked Sweet Potatoes
They are effortlessly reliable
I keep coming back to Easy Baked Sweet Potatoes because they are forgiving. I can pop them in the oven and come back twenty minutes later with dinner nearly done. The sweet potato holds up well to different timings and still delivers a tender, caramelized interior.
Versatility at its best
I use these for lunches, sides, and even quick dinners. You can keep them plain, split them open and add a smear of butter, or top them with other pantry finds. Their natural sweetness pairs with savory and tangy elements, so they play well with many menus.
Nutrition that feels good
One reason I love this recipe is that sweet potato brings fiber, beta carotene, and complex carbs. This makes the dish feel nourishing after a long day, and it fills you without weighing you down.
Simple technique, consistent results
The method is straightforward, so even cooks who are new to roasting can get great outcomes. From pricking the skins to arranging space between tubers, each small step helps produce evenly cooked, fluffy centers and slightly puckered skins.
Minimal equipment and cleanup
Because you only need a baking sheet and some parchment or foil, this recipe is low fuss. I often bake a few extra and refrigerate them for later, which saves time and keeps weeknight dinners stress free.
Main Ingredients for Easy Baked Sweet Potatoes
These ingredients are intentionally few and focused. The philosophy here is restraint, letting the star ingredient shine while small accents enhance texture and flavor. The key players create balance: the starchy, sweet body of the sweet potato, a touch of butter for creaminess and mouthfeel, and a pinch of kosher salt to lift the natural sugars. Together they deliver a straightforward, soulful dish.
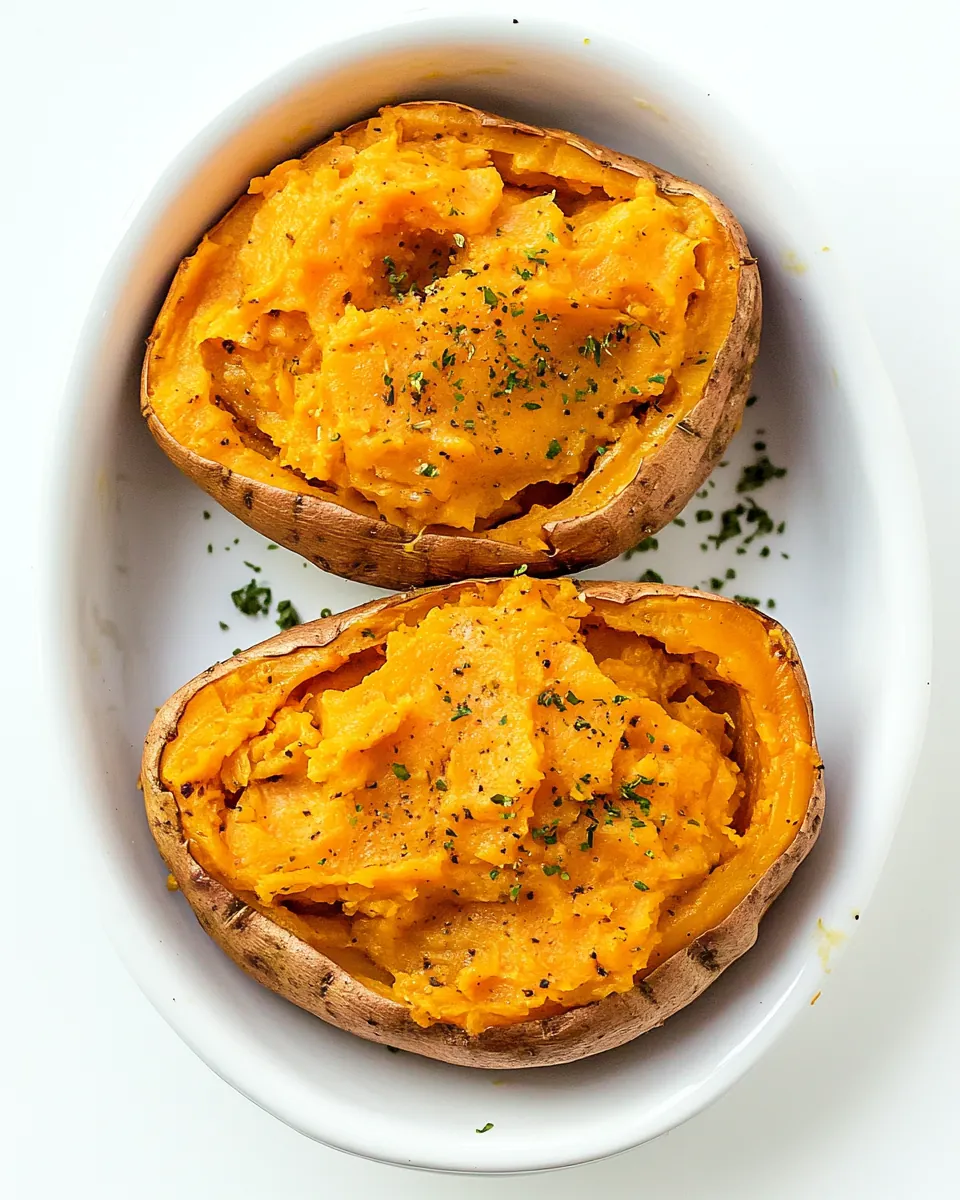
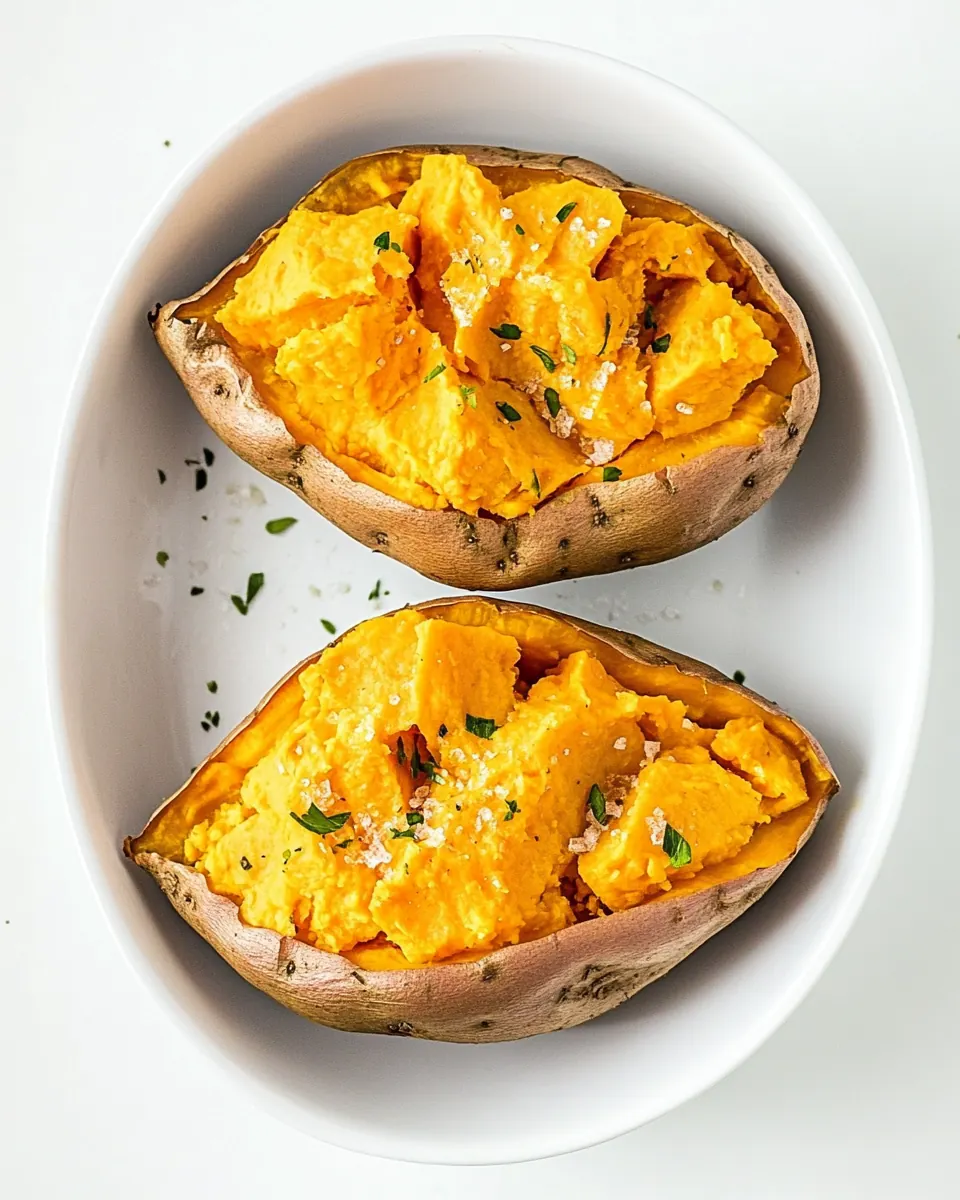
- sweet potato: Roasted to tender sweetness and caramelized edges, provides the dish’s primary flavor and hearty texture. Offers natural sugars that concentrate during baking, creating a rich, cozy profile. Serves as the main vehicle for toppings and balances savory elements in the final plate.
- butter: Melted into warm flesh to add creamy richness and a silky mouthfeel to each bite. Enhances mouth-coating texture and helps carry and elevate other flavors in the potato. Can be adjusted for richness level or replaced with alternatives for dietary preferences.
- kosher salt: Sprinkled lightly to enhance and balance the sweet notes while bringing out savory depth. Helps amplify natural flavors and prevent the dish from tasting flat by providing necessary seasoning. Used sparingly to avoid overpowering the sweet profile.
Preparation Steps for Easy Baked Sweet Potatoes
These steps walk you through multiple proven methods to bake or roast your tubers, whether you prefer a straightforward oven bake or a faster air fryer or microwave route. Read through so you know what sensory cues to watch for, and pick the technique that fits your schedule and equipment.
- Preheat oven to 400º F. Line baking sheet with parchment paper or foil for easy cleanup.: The kitchen should fill with a toasty warmth as the oven approaches temperature, an important cue that sets the stage for even cooking. Preheating ensures the outer skin begins to dry and crisp right away, which helps create that delicate contrast between skin and interior. If you skip full preheating the potatoes may take longer and brown unevenly, so wait until the oven reaches the set temperature before inserting the pan. Watch for the soundless change, the oven light often looks different when the element cycles to maintain 400º F.
- Scrub sweet potatoes until clean. Pat dry with paper towels. Prick with a fork or the tip of a sharp paring knife over the top of the potato to allow steam to escape as the potatoes bake.: The smell of warm paper and the low hum of the oven are small comforts, and lining the sheet keeps things tidy. Lining also prevents sticky drips from burning onto the pan, which can create off aromas as sugars caramelize. If you skip this step you might face a stubborn cleanup and scorched spots on the pan; using foil or parchment makes the whole process smoother and safer when handling hot tubers.
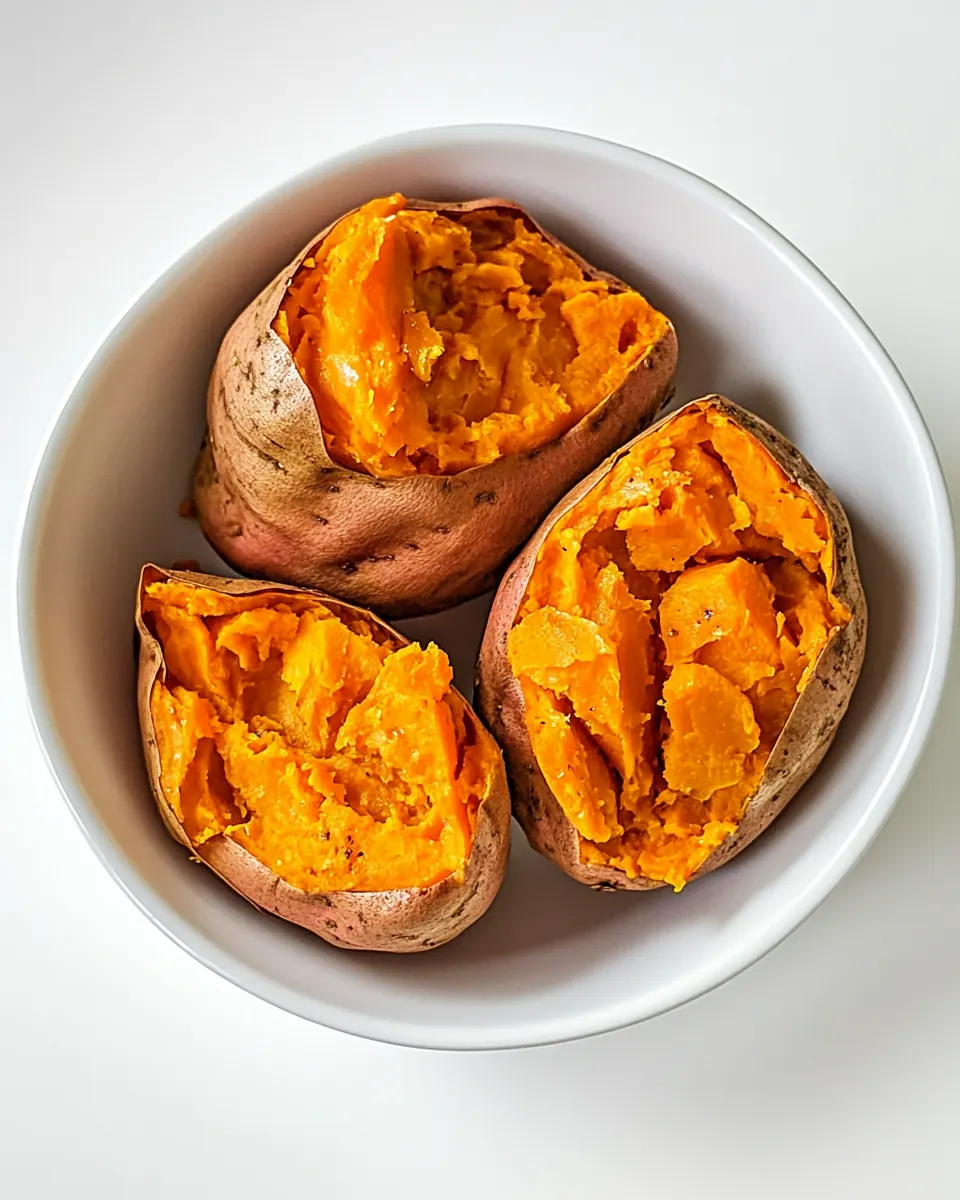
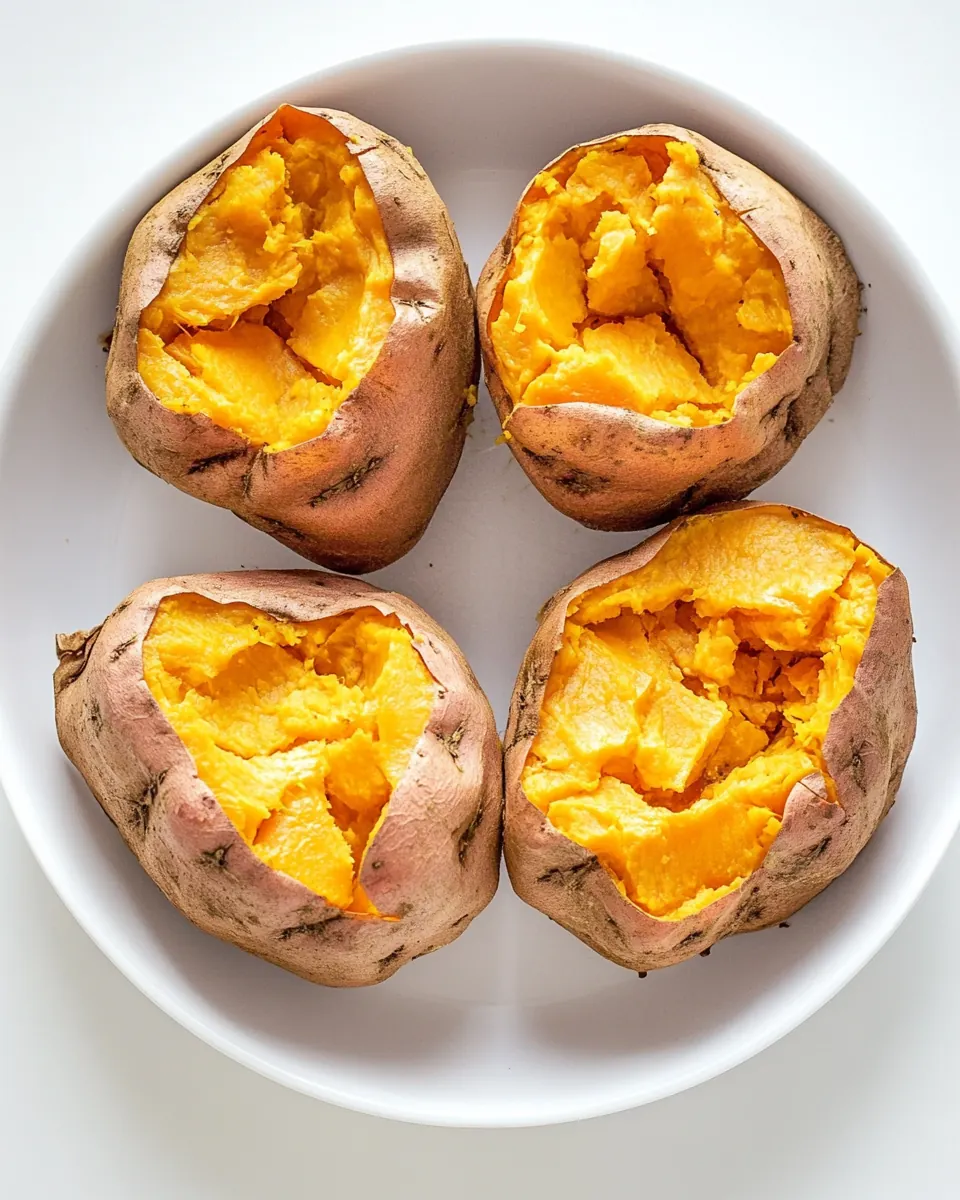
- Arrange the sweet potatoes on baking sheet, making sure not to allow them to touch. Cook until fragrant, the skins have puffed and are dimpled, and a fork is easily inserted through the center of the sweet potatoes, about 50 to 55 minutes.: When you scrub them you will feel the rough skin transform from dusty to smooth, and patting dry helps the skin crisp. Pricking releases steam pockets so they do not burst, which preserves texture and prevents a sudden split that can leak starchy juices. A frequent error is not drying well enough, which yields soggy skins; also be careful when pricking not to pierce too deeply which can release too much moisture and yield a drier interior.
- Preheat oven to 400º F. Line baking sheet with parchment paper or foil for easy cleanup. Drizzle with olive oil.: As the oven works you will notice a sweet, roasted aroma filling the air, and the skins will start to pucker and puff slightly. That visual change tells you sugars are concentrating and the interior is softening. Test with a fork inserted at the thickest part; it should slide in with little resistance. A common slip is crowding the pan, which traps steam and prevents proper caramelization, so leave space for hot air to circulate.
- Scrub sweet potatoes until clean. Pat dry with paper towels. Slice the sweet potato in half lengthwise.: The light sheen of oil on the skin helps it brown and crisp while adding a savory note to the finished surface. As it heats the oil will sound faintly and smell fruity, indicating it is contributing to the Maillard reaction on the skin. If you use too much oil the skin can become greasy rather than crisp, so a thin coat is best; apply it evenly with a brush or your hands for full coverage.
- Arrange the sweet potatoes on baking sheet flesh side down, making sure to slide the flesh of the potato through the olive oil to coat. Do not allow them to touch. Cook until fragrant, the skins have puffed and are dimpled, and a fork is easily inserted through the center of the sweet potatoes, about 30 minutes.: Slicing reveals the steaming interior and unleashes a rush of fragrant, sweet steam; the visual of the bright orange flesh is gratifying. When baked halves are placed flesh side down they will brown slightly and develop concentrated caramelized edges. Cutting before baking changes timing and texture, so account for a shorter cook if you slice first. Be careful of hot steam when cutting a baked tuber, and let it rest slightly if it feels extremely hot.
- Preheat to 400º F. Line the air fryer pan with parchment paper or foil for easy cleanup.: Laying them flesh side down encourages some direct caramelization of the exposed edge and gives you crispy, slightly charred rims. You will hear a quieter oven as there is less evaporation when the cut side meets the pan, but smell remains an excellent guide. Overcrowding is again a risk, which can make the cut sides steam rather than roast, so leave a little room on the sheet.
- Scrub sweet potatoes until clean. Pat dry with paper towels. Prick with a fork or the tip of a sharp paring knife over the top of the potato to allow steam to escape as the potatoes bake.: When using an alternative appliance like an air fryer you still want consistent heat to form the right exterior texture. Preheating the air fryer chamber helps the skins puff and the insides cook through without long waiting times. Skipping preheat makes the basket take longer to reach that searing moment, and can produce an uneven finish with a tough skin.
- Arrange the sweet potatoes on baking sheet, making sure not to allow them to touch. Cook until fragrant, the skins have puffed and are dimpled, and a fork is easily inserted through the center of the sweet potatoes, about 30 to 40 minutes.: The snug basket concentrates heat and can create hot spots, so lining the pan protects the drawer and cuts cleanup time. You may notice a faster roasting aroma in an air fryer due to the concentrated convection, so monitor timing carefully. Avoid blocking air vents with foil or paper, as that can reduce circulation and impact results.
- Scrub sweet potatoes until clean. Pat dry with paper towels. Prick with a fork or the tip of a sharp paring knife over the top of the potato to allow steam to escape as the potatoes bake.: In a more intense convection environment the skins will puff sooner and the interior will finish faster, often in the 30 to 40 minute window depending on size. The visual of slightly puckered skins and the ease of a fork test remain the best cues. A mistake some cooks make is assuming air fryer times will be identical to oven times; adjust and check early to avoid overcooking.
- Arrange the sweet potatoes on a microwave-safe dish lined with parchment paper for easy cleanup. Cook on High setting until fragrant, the skins have puffed and dimpled, and a fork is easily inserted through the center of the sweet potato. A general timeframe for cooking time is included in the recipe post.: The microwave creates steam quickly, so the potato will soften in a fraction of the time and release a warm, sweet aroma. Look for subtle swelling of the skin and test with a fork; microwaves vary widely so check at short intervals to avoid a rubbery texture. A frequent error is microwaving too long which can dry the flesh or yield an unevenly cooked center, so pause early and test.
Recipe Tips about Easy Baked Sweet Potatoes
I wrote these practical tips from many hands on sessions; they aim to reduce guesswork and boost flavor. Read them and pick the ones that match your appliance and schedule.
- Pick uniform sizes Choose sweet potatoes that are similar in diameter to ensure even cooking times across the pan.
- Dry thoroughly After rinsing, pat each sweet potato dry so the skin crisps instead of steaming in the oven.
- Light oil coat Apply a thin layer of oil to the skins if you want a crisper exterior and a more caramelized finish.
- Prick for safety Use a fork or paring knife to create small vents so steam escapes and the tuber does not burst during baking.
- Rotate the pan Halfway through baking, rotate the sheet for more even browning if your oven has hot spots.
- Store properly Cool baked tubers before refrigerating in an airtight container for three to five days, then reheat gently.
Serving Ideas for Easy Baked Sweet Potatoes
These serving suggestions and pairings make the most of the sweet potato texture and flavor, from weeknight dinners to seasonal gatherings. Below are many ways to present and preserve these tubers for different occasions.
- Simple buttered Split a warm sweet potato, add a pat of butter, and sprinkle a little kosher salt for an effortless side dish that complements roasted proteins and green vegetables.
- Make-ahead meal prep Bake multiple sweet potatoes on the weekend, refrigerate in airtight containers, and reheat in the oven or air fryer for quick lunches.
- Holiday side Serve a platter of whole sweet potatoes with a small bowl of butter and a shaker of kosher salt for guests to dress their own—works well for fall or holiday spreads.
- Comfort dinner Top a split hot sweet potato with warmed savory toppings or melted butter for a cozy solo meal that feels indulgent without fuss.
- Storage tips Cool fully before wrapping in foil or placing in containers; refrigerate for three to five days or freeze wrapped for up to six months, then thaw overnight and reheat.
- Seasonal pairings In fall, pair the sweet potato with roasted root vegetables and crisp salads to balance sweetness with bright, acidic notes for fuller plates.
FAQ
Conclusion
What makes this recipe special is its simplicity and reliable, comforting results. I love that Easy Baked Sweet Potatoes deliver creamy, naturally sweet interiors and a lightly puckered skin with very little effort. Try baking a few at once and you will have versatile components for lunches, sides, and quick dinners throughout the week. Give them a go and notice how small technique choices transform a humble tuber into something quietly memorable.
Easy Baked Sweet Potatoes
Equipment
- Baking Sheet
- Parchment paper or foil
- Fork
- Microwave safe dish
- Air Fryer
Ingredients
- sweet potato Roasted to tender sweetness and caramelized edges, provides the dish’s primary flavor and hearty texture. Offers natural sugars that concentrate during baking, creating a rich, cozy profile. Serves as the main vehicle for toppings and balances savory elements in the final plate.
- butter Melted into warm flesh to add creamy richness and a silky mouthfeel to each bite. Enhances mouth-coating texture and helps carry and elevate other flavors in the potato. Can be adjusted for richness level or replaced with alternatives for dietary preferences.
- kosher salt Sprinkled lightly to enhance and balance the sweet notes while bringing out savory depth. Helps amplify natural flavors and prevent the dish from tasting flat by providing necessary seasoning. Used sparingly to avoid overpowering the sweet profile.
Instructions
- Preheat oven to 400º F. Line baking sheet with parchment paper or foil for easy cleanup.: The kitchen should fill with a toasty warmth as the oven approaches temperature, an important cue that sets the stage for even cooking. Preheating ensures the outer skin begins to dry and crisp right away, which helps create that delicate contrast between skin and interior. If you skip full preheating the potatoes may take longer and brown unevenly, so wait until the oven reaches the set temperature before inserting the pan. Watch for the soundless change, the oven light often looks different when the element cycles to maintain 400º F.
- Scrub sweet potatoes until clean. Pat dry with paper towels. Prick with a fork or the tip of a sharp paring knife over the top of the potato to allow steam to escape as the potatoes bake.: The smell of warm paper and the low hum of the oven are small comforts, and lining the sheet keeps things tidy. Lining also prevents sticky drips from burning onto the pan, which can create off aromas as sugars caramelize. If you skip this step you might face a stubborn cleanup and scorched spots on the pan; using foil or parchment makes the whole process smoother and safer when handling hot tubers.
- Arrange the sweet potatoes on baking sheet, making sure not to allow them to touch. Cook until fragrant, the skins have puffed and are dimpled, and a fork is easily inserted through the center of the sweet potatoes, about 50 to 55 minutes.: When you scrub them you will feel the rough skin transform from dusty to smooth, and patting dry helps the skin crisp. Pricking releases steam pockets so they do not burst, which preserves texture and prevents a sudden split that can leak starchy juices. A frequent error is not drying well enough, which yields soggy skins; also be careful when pricking not to pierce too deeply which can release too much moisture and yield a drier interior.
- Preheat oven to 400º F. Line baking sheet with parchment paper or foil for easy cleanup. Drizzle with olive oil.: As the oven works you will notice a sweet, roasted aroma filling the air, and the skins will start to pucker and puff slightly. That visual change tells you sugars are concentrating and the interior is softening. Test with a fork inserted at the thickest part; it should slide in with little resistance. A common slip is crowding the pan, which traps steam and prevents proper caramelization, so leave space for hot air to circulate.
- Scrub sweet potatoes until clean. Pat dry with paper towels. Slice the sweet potato in half lengthwise.: The light sheen of oil on the skin helps it brown and crisp while adding a savory note to the finished surface. As it heats the oil will sound faintly and smell fruity, indicating it is contributing to the Maillard reaction on the skin. If you use too much oil the skin can become greasy rather than crisp, so a thin coat is best; apply it evenly with a brush or your hands for full coverage.
- Arrange the sweet potatoes on baking sheet flesh side down, making sure to slide the flesh of the potato through the olive oil to coat. Do not allow them to touch. Cook until fragrant, the skins have puffed and are dimpled, and a fork is easily inserted through the center of the sweet potatoes, about 30 minutes.: Slicing reveals the steaming interior and unleashes a rush of fragrant, sweet steam; the visual of the bright orange flesh is gratifying. When baked halves are placed flesh side down they will brown slightly and develop concentrated caramelized edges. Cutting before baking changes timing and texture, so account for a shorter cook if you slice first. Be careful of hot steam when cutting a baked tuber, and let it rest slightly if it feels extremely hot.
- Preheat to 400º F. Line the air fryer pan with parchment paper or foil for easy cleanup.: Laying them flesh side down encourages some direct caramelization of the exposed edge and gives you crispy, slightly charred rims. You will hear a quieter oven as there is less evaporation when the cut side meets the pan, but smell remains an excellent guide. Overcrowding is again a risk, which can make the cut sides steam rather than roast, so leave a little room on the sheet.
- Scrub sweet potatoes until clean. Pat dry with paper towels. Prick with a fork or the tip of a sharp paring knife over the top of the potato to allow steam to escape as the potatoes bake.: When using an alternative appliance like an air fryer you still want consistent heat to form the right exterior texture. Preheating the air fryer chamber helps the skins puff and the insides cook through without long waiting times. Skipping preheat makes the basket take longer to reach that searing moment, and can produce an uneven finish with a tough skin.
- Arrange the sweet potatoes on baking sheet, making sure not to allow them to touch. Cook until fragrant, the skins have puffed and are dimpled, and a fork is easily inserted through the center of the sweet potatoes, about 30 to 40 minutes.: The snug basket concentrates heat and can create hot spots, so lining the pan protects the drawer and cuts cleanup time. You may notice a faster roasting aroma in an air fryer due to the concentrated convection, so monitor timing carefully. Avoid blocking air vents with foil or paper, as that can reduce circulation and impact results.
- Scrub sweet potatoes until clean. Pat dry with paper towels. Prick with a fork or the tip of a sharp paring knife over the top of the potato to allow steam to escape as the potatoes bake.: In a more intense convection environment the skins will puff sooner and the interior will finish faster, often in the 30 to 40 minute window depending on size. The visual of slightly puckered skins and the ease of a fork test remain the best cues. A mistake some cooks make is assuming air fryer times will be identical to oven times; adjust and check early to avoid overcooking.
- Arrange the sweet potatoes on a microwave-safe dish lined with parchment paper for easy cleanup. Cook on High setting until fragrant, the skins have puffed and dimpled, and a fork is easily inserted through the center of the sweet potato. A general timeframe for cooking time is included in the recipe post.: The microwave creates steam quickly, so the potato will soften in a fraction of the time and release a warm, sweet aroma. Look for subtle swelling of the skin and test with a fork; microwaves vary widely so check at short intervals to avoid a rubbery texture. A frequent error is microwaving too long which can dry the flesh or yield an unevenly cooked center, so pause early and test.
Notes
- Pick uniform sizes Choose sweet potatoes that are similar in diameter to ensure even cooking times across the pan.
- Dry thoroughly After rinsing, pat each sweet potato dry so the skin crisps instead of steaming in the oven.
- Light oil coat Apply a thin layer of oil to the skins if you want a crisper exterior and a more caramelized finish.
- Prick for safety Use a fork or paring knife to create small vents so steam escapes and the tuber does not burst during baking.
- Rotate the pan Halfway through baking, rotate the sheet for more even browning if your oven has hot spots.
- Store properly Cool baked tubers before refrigerating in an airtight container for three to five days, then reheat gently.