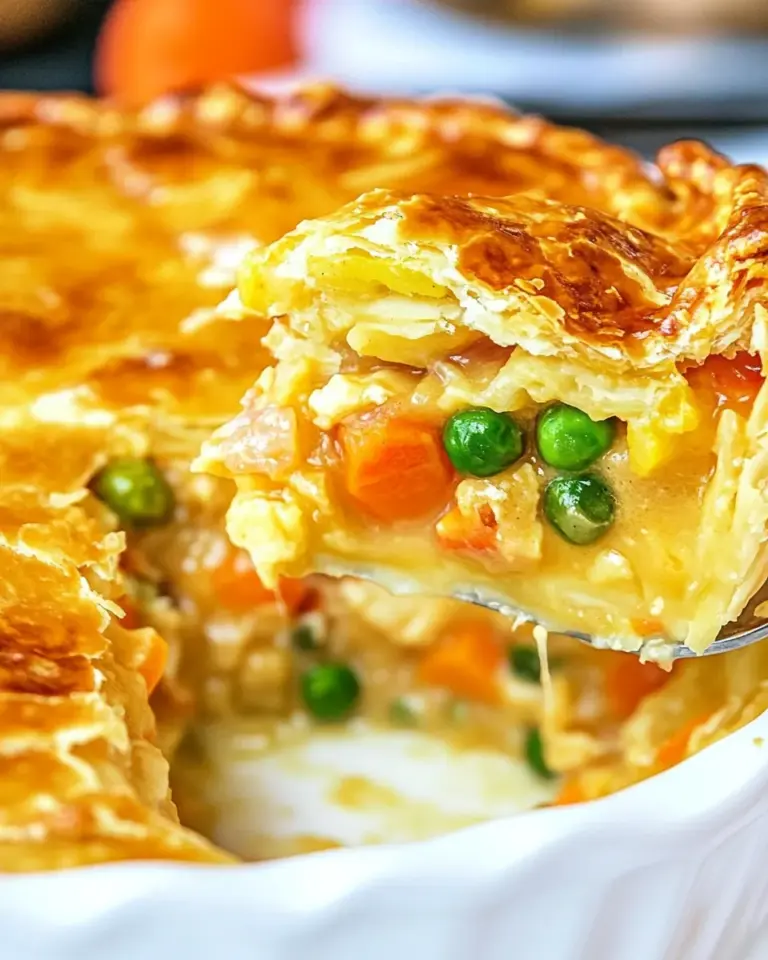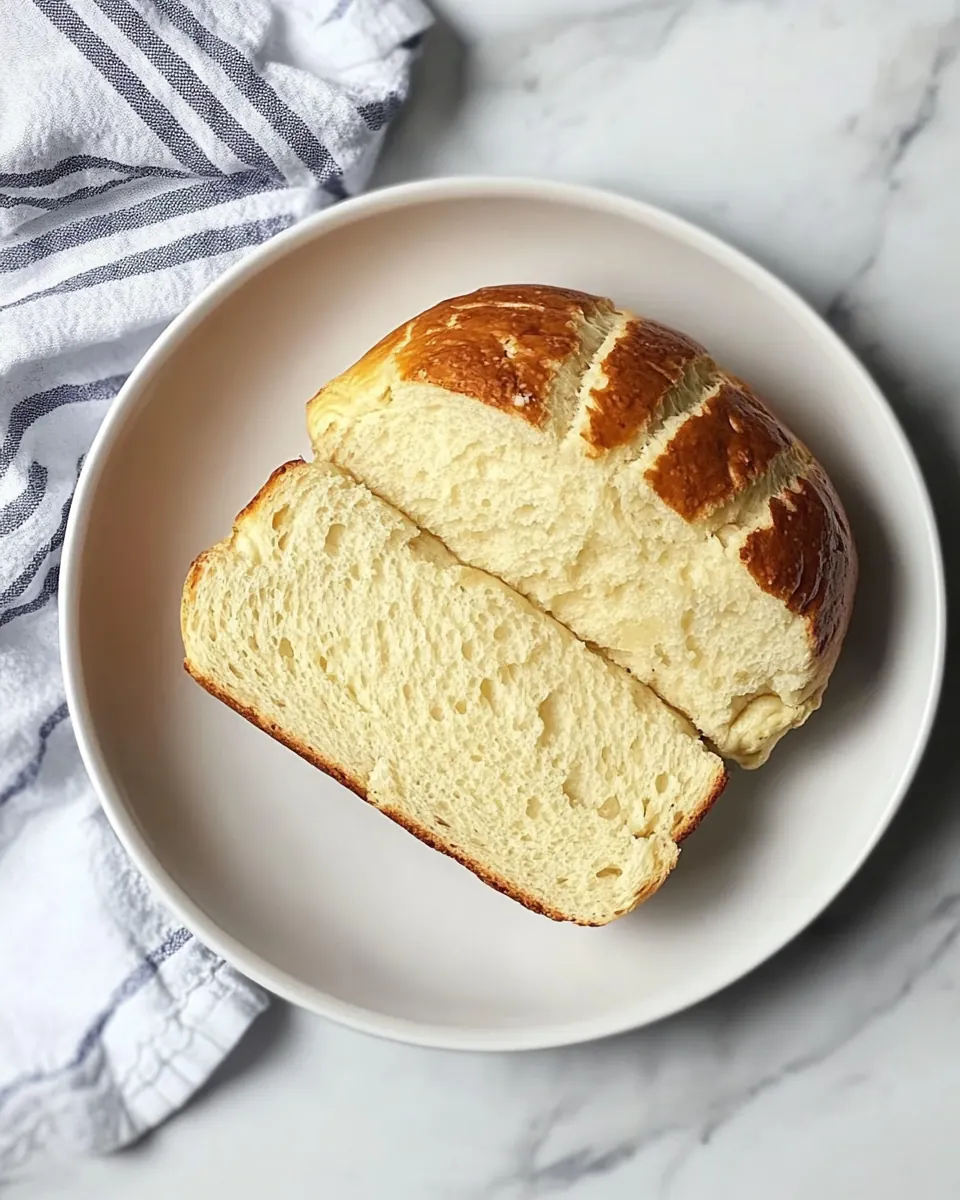
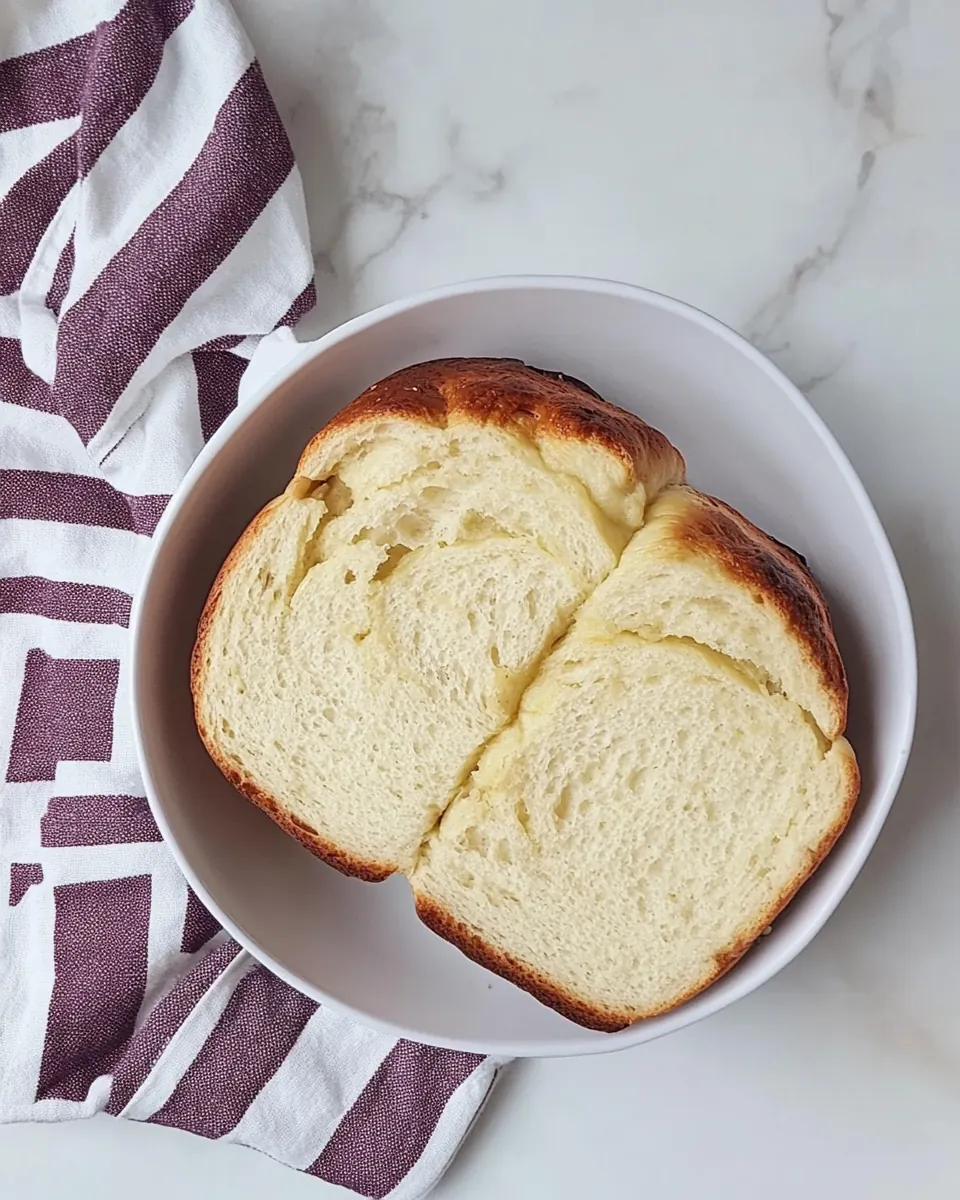
Potato Bread
Potato Bread is the kind of loaf I reach for when I want something comforting, slightly sweet, and deeply satisfying straight from the oven.
My earliest memory with Potato Bread was a rainy afternoon in my grandmother’s kitchen, where the air was thick with warm, yeasty aroma and the wooden table was dusted with flour. I sat on a stool, watching as she mashed the soft, steaming potatoes with a fork, her hands moving confidently while she chatted about small, ordinary things. There was a rhythm to her work that felt soothing, and when the first slice came off the cooling loaf, the crust crackled and the inside was tender and pillowy. That first bite was buttery, with a subtle sweetness that made everything feel a little better.
Over the years I’ve adapted her approach, learning when to add a touch more flour and when to let the dough rest a little longer. I love how Potato Bread bridges rustic and everyday; it is hearty enough for sandwiches and soft enough for breakfast toast. Sometimes I make it for friends who need a gentle pick me up, and other times I bake two loaves because it disappears faster than I expect. There is something humble and celebratory about mixing simple pantry staples like yeast, milk, and butter to produce this loaf, and that balance of texture and flavor is why I keep returning to it.
Recipe Snapshot
2 hr 40 mins
120 mins
40 mins
Hard
180 kcal
American
Gluten-Free, Low FODMAP
Dinner
Large pot, Mixing bowl, 9×5 loaf pan, Measuring cups
Why This Potato Bread Is a Winner
Comforting Texture
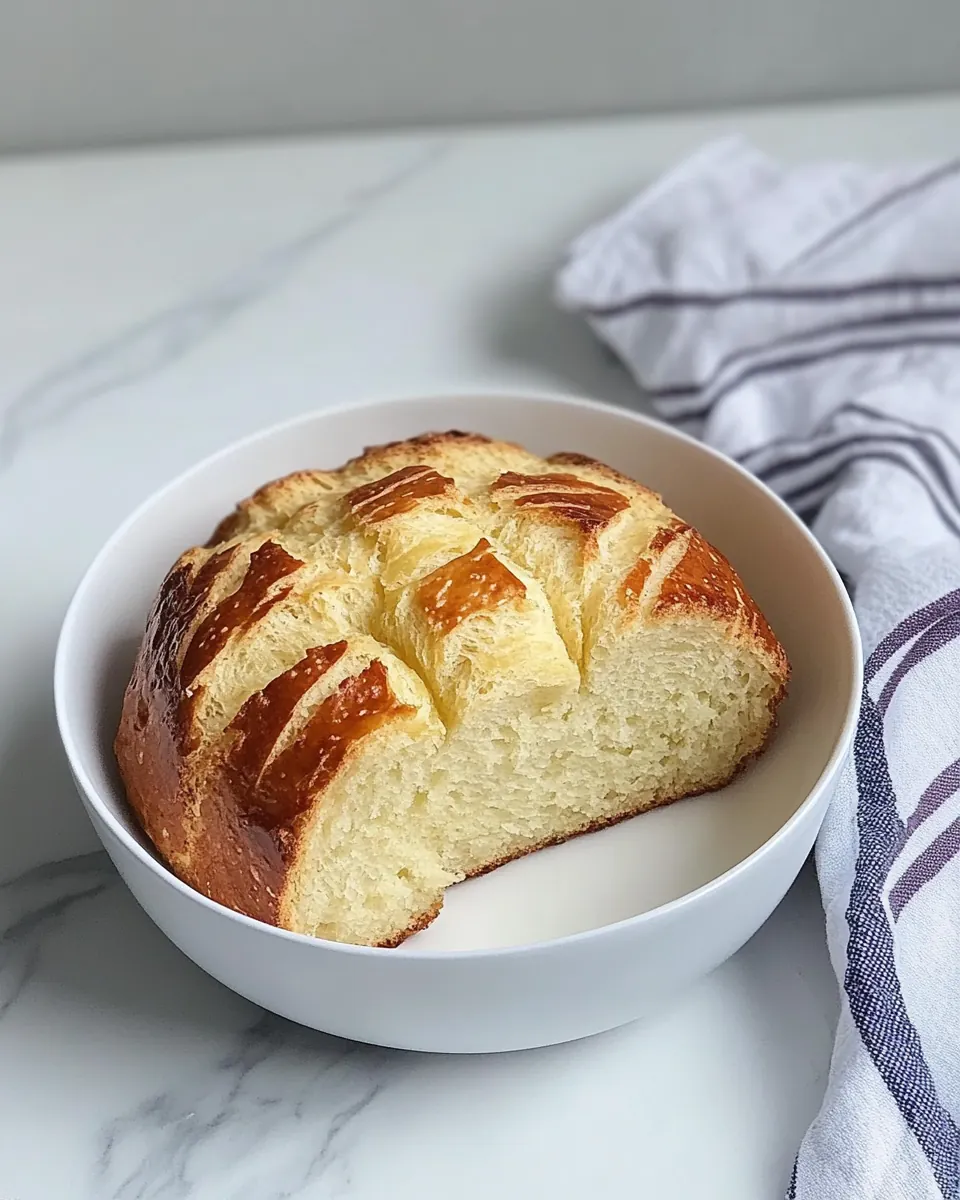
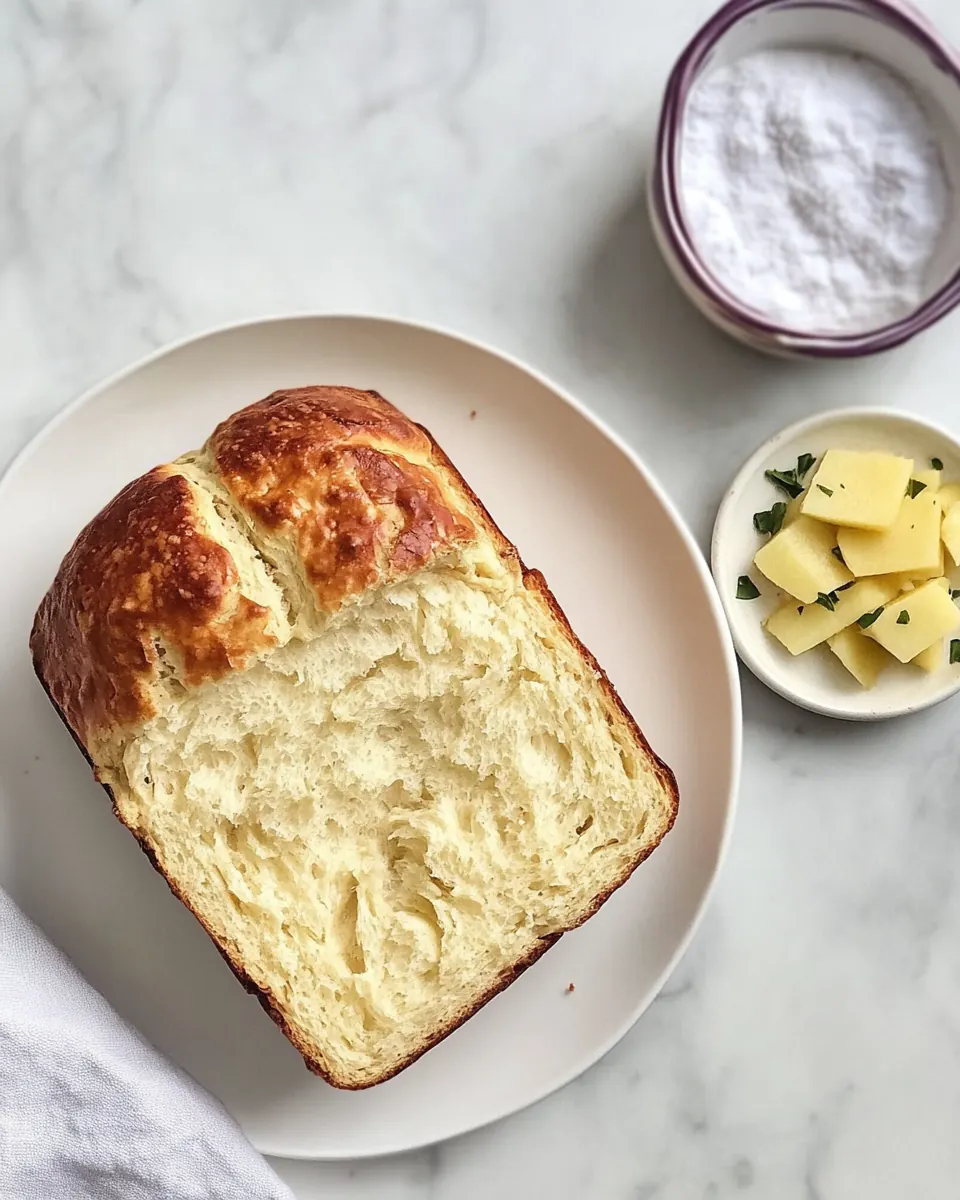
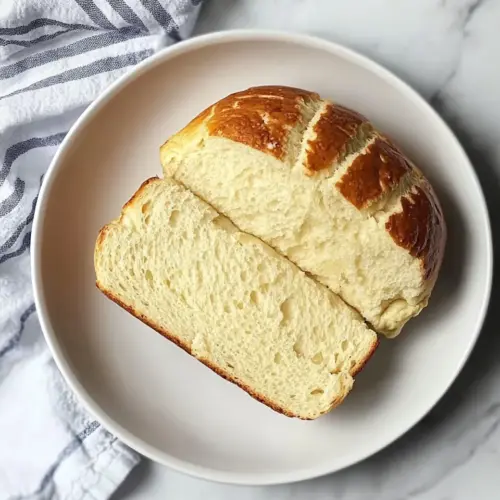
The crumb of Potato Bread is tender and slightly moist, thanks to the mashed potatoes. I love this texture because it holds up well under spreads without being dense, and it gives a softer mouthfeel than plain white loaves. When you press a finger into a cooled slice, you should feel a gentle spring back, a tactile clue that the starches and gluten are in balance.
Flexible Uses
I often reach for Potato Bread for everything from simple toast to elevated sandwiches. The subtle sweetness from the small amount of sugar and the richness of melted butter make it versatile, so you can serve it at breakfast, pack it for a picnic, or use it for a cozy weeknight dinner sandwich. I find myself swapping it in whenever I want a more tender bite than regular sandwich bread.
Reliable Shelf Life
Because of the potatoes, the loaf stays softer longer than many breads. I like to keep one loaf wrapped on the counter for a couple of days and freeze extras for later. This practical benefit means less waste and a ready-made treat on mornings when I am rushed.
Simple, Nourishing Ingredients
The ingredient list reads like pantry staples, and that is exactly why I love making Potato Bread on a lazy weekend. The combination of bread flour, yeast, milk, and butter creates a dependable framework, while the potatoes add body and subtle flavor. I appreciate recipes that respect basic techniques, because they reward patience with consistent results.
Great for Bakers of All Levels
I often recommend Potato Bread to friends who are nervous about baking. The dough is forgiving, the steps are straightforward, and the sensory cues are clear. With a little attention to feel and look, you can achieve a golden loaf that makes you proud every time.
Ingredients to Make Potato Bread
These ingredients come together to create a loaf that is both soft and substantial. The mashed potatoes contribute moisture and tender crumb, while the bread flour provides structure. The yeast and sugar foster a lively rise, and the melted butter and milk enrich the dough so each slice feels indulgent yet simple.
- 2 medium russet potatoes peeled and diced: Boiled and mashed to add moisture and a tender crumb, peeled and diced before cooking to ensure even softness; russet potatoes contribute subtle starchiness that keeps the loaf moist and helps extend freshness for several days.
- 1/2 cup warm water 110°F: Heated gently to about 110°F to activate yeast and dissolve sugar, warm water helps hydrate the dough and control fermentation speed; measured temperature preserves yeast viability without killing it.
- 1/2 cup warm milk 110°F: Warmed to 110°F to keep dough temperature consistent and enrich flavor, warm milk adds fat and proteins that tenderize the crumb and improve crust color during baking.
- 2 1/4 teaspoons active dry yeast: Activated by combining with warm liquid and sugar, active dry yeast leavens the dough by producing carbon dioxide; proper proofing time develops flavor and structure in the bread.
- 4 teaspoons granulated sugar: Dissolved in warm liquid to feed the yeast and encourage fermentation, granulated sugar also contributes mild sweetness and helps with crust browning during baking.
- 4 tablespoons unsalted butter melted: Melted and incorporated to tenderize the dough, unsalted butter provides richness, improves mouthfeel, and helps produce a softer crust and finer crumb.
- 1 1/4 teaspoons kosher salt: Dissolved into the dough to balance flavor and strengthen gluten structure, kosher salt controls yeast activity and enhances overall taste while improving dough handling.
- 4 to 4 1/4 cups bread flour: Measured and added gradually to build dough structure, bread flour provides higher protein content for strong gluten development, yielding a chewy texture and good rise.
- butter for brushing (optional): Melted and brushed over the hot loaf to add sheen and extra richness, optional butter enhances flavor and softens the crust for a more tender eating experience.
Preparation Steps for Potato Bread
Below I walk you through the process with a conversational, sensory approach. Take your time to notice cues like aroma and texture, because they will tell you when the dough is ready. I find that engaging with the dough makes baking feel like a small, satisfying ritual.
- Boil the diced potatoes until fork tender. Drain and mash until smooth.: The steaming potatoes will give off a warm, earthy smell and a faint wheaty scent as their starches break down. You'll hear a gentle simmer while they cook, and the surface will look pillowy when pierced easily with a fork. After draining, mash thoroughly so no lumps remain, producing a silky texture that will integrate into the dough without creating irregular pockets. This step matters because smooth mashed potatoes distribute moisture evenly, preventing dense spots in your loaf. Common mistakes include undercooking the potatoes, which leaves hard bits, or leaving them too wet, which can make the dough overly sticky.
- Mix warm water, milk, yeast, and sugar in a bowl. Let sit until frothy.: The bowl will slowly warm with the mixture, and after several minutes a foamy cap should develop, smelling faintly of bread and sweet fermentation. That aroma is a good indicator your yeast is alive and ready. Allowing it to rest ensures consistent rising later on, which improves texture. If no froth appears within the expected time, the yeast may be inactive, which is the main error to watch for, so discard and start anew with fresh yeast .
- In a large bowl, combine mashed potatoes, yeast mixture, melted butter, salt, and two cups of flour.: The bowl will look glossy as the butter and mashed potatoes mingle with the foamy yeast. As you fold in two cups of bread flour , the mixture will transition from loose to a shaggy mass. This initial combination hydrates the flour and allows the salt to blend without interfering with yeast activity. You want an even distribution so the dough develops uniformly. Avoid adding all the flour at once, which can create dry clumps and make kneading harder later on.
- Gradually add two more cups of flour and knead to form a smooth, elastic dough. If needed, add more flour, a little at a time, until it is no longer sticky.: As you knead, you will feel the dough change from sticky to silky and springy, and it will emit a faint yeasty scent. Proper kneading develops the gluten network, which traps gas and creates airy crumb. You should be able to stretch a small piece thin without tearing immediately, showing good elasticity. A common pitfall is overflouring; add only small amounts, because too dry a dough yields a tight crumb. Conversely, under-kneading leaves a slack dough that will not rise well.
- Place dough in a greased bowl, cover, and let rise until doubled, about an hour.: The dough will quiet down as it rests, and its surface may show tiny bubbles and a rounded profile when fully risen. The room will smell subtly of fermentation, warm and toasty. Letting it double develops flavor and structure, creating that characteristic airy interior. Don't rush it by using too much heat, which can create uneven holes or undesirable flavors. A frequent mistake is not covering the bowl adequately, which can form a skin on the dough and impede rise.
- Punch down the dough, shape into a loaf, and let rise in a greased 9×5-inch loaf pan until puffy, at least 30 minutes.: When you punch down, you will hear a soft sigh as gas escapes, and the dough will feel slightly cooler to the touch. Shaping compresses the dough into a uniform form, which promotes even crumb. Once in the loaf pan, it should look noticeably puffed and jiggly when ready to bake. This secondary rise is crucial for oven spring and final texture. A mistake to avoid is shaping too tight, which can create tunnels instead of even holes.
- Bake at 375°F until golden brown, about 35-40 minutes. Optionally, after baking, brush with butter for a glossy finish.: As the loaf bakes, the kitchen will fill with a warm, toasty aroma and you may hear faint crackles as the crust forms. The top should turn a deep golden brown, and an instant read thermometer inserted into the center should read around 190°F to 200°F for a fully baked loaf. Brushing with butter after baking adds shine and softens the crust, enhancing both look and flavor. The most common error here is underbaking, which leaves a gummy center, so resist pulling the loaf early even if the top looks done.
Change It Up
If you want to vary your approach, these ideas will help you adapt Potato Bread while keeping the essence of the recipe intact. Small changes can shift texture, flavor, or presentation without complicating the process.
- Slightly increase hydration to create a more open crumb, but be cautious because too much moisture will make shaping difficult.
- Let the dough rise longer in a cool spot overnight for more developed flavor from slow fermentation.
- Use different potatoes like Yukon Gold for a subtle buttery flavor and a slightly denser crumb compared to russets.
- Brush with butter immediately after baking for a softer crust and deeper sheen that improves presentation.
- Freeze slices individually for quick breakfasts, toast directly from frozen for convenience without losing texture.
Side Dish Ideas for Potato Bread
Potato Bread shines as a companion to many meals and occasions. Below are serving ideas, storage tips, and pairings to make the most of your loaves. Think about the meal tone you want to set, whether casual or slightly formal, and let the bread support that mood.
- For breakfast serve toasted slices with soft butter and a drizzle of honey, a simple morning pleasure that highlights the loafs tender crumb.
- For sandwiches use thick slices for hearty daytime sandwiches, where the soft crumb supports fillings without falling apart.
- For dinner offer warm rounds alongside soups or stews where the loaf soaks up broth and adds a comforting element to the bowl.
- For gatherings slice into small squares for a bread basket, and let guests help themselves to spreads or toppings.
- Storage tips wrap cooled loaves tightly and store at room temperature for two to three days, or freeze slices for up to three months for longer convenience.
- Seasonal pairing in cooler months, pair with roasted vegetables and warm soups for a cozy menu; in milder seasons, use the loaf for picnics and light sandwiches.
FAQ
Conclusion
Potato Bread stands out because of its tender, moist crumb and approachable method, combining pantry staples into something comforting and versatile. Give it a try this weekend if you want a loaf that feels both rustic and reliably soft, perfect for toast or sandwiches. Baking this bread is a small, rewarding ritual that yields warm slices to share and savor, and I hope it becomes one of your go to recipes for cozy meals.
Potato Bread
Equipment
- Large Pot
- Mixing Bowl
- 9×5 Loaf Pan
- Measuring Cups
Ingredients
- 2 medium russet potatoes peeled and diced Boiled and mashed to add moisture and a tender crumb, peeled and diced before cooking to ensure even softness; russet potatoes contribute subtle starchiness that keeps the loaf moist and helps extend freshness for several days.
- 1/2 cup warm water 110°F Heated gently to about 110°F to activate yeast and dissolve sugar, warm water helps hydrate the dough and control fermentation speed; measured temperature preserves yeast viability without killing it.
- 1/2 cup warm milk 110°F Warmed to 110°F to keep dough temperature consistent and enrich flavor, warm milk adds fat and proteins that tenderize the crumb and improve crust color during baking.
- 2 1/4 teaspoons active dry yeast Activated by combining with warm liquid and sugar, active dry yeast leavens the dough by producing carbon dioxide; proper proofing time develops flavor and structure in the bread.
- 4 teaspoons granulated sugar Dissolved in warm liquid to feed the yeast and encourage fermentation, granulated sugar also contributes mild sweetness and helps with crust browning during baking.
- 4 tablespoons unsalted butter melted Melted and incorporated to tenderize the dough, unsalted butter provides richness, improves mouthfeel, and helps produce a softer crust and finer crumb.
- 1 1/4 teaspoons kosher salt Dissolved into the dough to balance flavor and strengthen gluten structure, kosher salt controls yeast activity and enhances overall taste while improving dough handling.
- 4 to 4 1/4 cups bread flour Measured and added gradually to build dough structure, bread flour provides higher protein content for strong gluten development, yielding a chewy texture and good rise.
- Optional: butter for brushing Melted and brushed over the hot loaf to add sheen and extra richness, optional butter enhances flavor and softens the crust for a more tender eating experience.
Instructions
- Boil the diced potatoes until fork tender. Drain and mash until smooth.: The steaming potatoes will give off a warm, earthy smell and a faint wheaty scent as their starches break down. You'll hear a gentle simmer while they cook, and the surface will look pillowy when pierced easily with a fork. After draining, mash thoroughly so no lumps remain, producing a silky texture that will integrate into the dough without creating irregular pockets. This step matters because smooth mashed potatoes distribute moisture evenly, preventing dense spots in your loaf. Common mistakes include undercooking the potatoes, which leaves hard bits, or leaving them too wet, which can make the dough overly sticky.
- Mix warm water, milk, yeast, and sugar in a bowl. Let sit until frothy.: The bowl will slowly warm with the mixture, and after several minutes a foamy cap should develop, smelling faintly of bread and sweet fermentation. That aroma is a good indicator your yeast is alive and ready. Allowing it to rest ensures consistent rising later on, which improves texture. If no froth appears within the expected time, the yeast may be inactive, which is the main error to watch for, so discard and start anew with fresh yeast .
- In a large bowl, combine mashed potatoes, yeast mixture, melted butter, salt, and two cups of flour.: The bowl will look glossy as the butter and mashed potatoes mingle with the foamy yeast. As you fold in two cups of bread flour , the mixture will transition from loose to a shaggy mass. This initial combination hydrates the flour and allows the salt to blend without interfering with yeast activity. You want an even distribution so the dough develops uniformly. Avoid adding all the flour at once, which can create dry clumps and make kneading harder later on.
- Gradually add two more cups of flour and knead to form a smooth, elastic dough. If needed, add more flour, a little at a time, until it is no longer sticky.: As you knead, you will feel the dough change from sticky to silky and springy, and it will emit a faint yeasty scent. Proper kneading develops the gluten network, which traps gas and creates airy crumb. You should be able to stretch a small piece thin without tearing immediately, showing good elasticity. A common pitfall is overflouring; add only small amounts, because too dry a dough yields a tight crumb. Conversely, under-kneading leaves a slack dough that will not rise well.
- Place dough in a greased bowl, cover, and let rise until doubled, about an hour.: The dough will quiet down as it rests, and its surface may show tiny bubbles and a rounded profile when fully risen. The room will smell subtly of fermentation, warm and toasty. Letting it double develops flavor and structure, creating that characteristic airy interior. Don't rush it by using too much heat, which can create uneven holes or undesirable flavors. A frequent mistake is not covering the bowl adequately, which can form a skin on the dough and impede rise.
- Punch down the dough, shape into a loaf, and let rise in a greased 9×5-inch loaf pan until puffy, at least 30 minutes.: When you punch down, you will hear a soft sigh as gas escapes, and the dough will feel slightly cooler to the touch. Shaping compresses the dough into a uniform form, which promotes even crumb. Once in the loaf pan, it should look noticeably puffed and jiggly when ready to bake. This secondary rise is crucial for oven spring and final texture. A mistake to avoid is shaping too tight, which can create tunnels instead of even holes.
- Bake at 375°F until golden brown, about 35-40 minutes. Optionally, after baking, brush with butter for a glossy finish.: As the loaf bakes, the kitchen will fill with a warm, toasty aroma and you may hear faint crackles as the crust forms. The top should turn a deep golden brown, and an instant read thermometer inserted into the center should read around 190°F to 200°F for a fully baked loaf. Brushing with butter after baking adds shine and softens the crust, enhancing both look and flavor. The most common error here is underbaking, which leaves a gummy center, so resist pulling the loaf early even if the top looks done.
Notes
- Slightly increase hydration to create a more open crumb, but be cautious because too much moisture will make shaping difficult.
- Let the dough rise longer in a cool spot overnight for more developed flavor from slow fermentation.
- Use different potatoes like Yukon Gold for a subtle buttery flavor and a slightly denser crumb compared to russets.
- Brush with butter immediately after baking for a softer crust and deeper sheen that improves presentation.
- Freeze slices individually for quick breakfasts, toast directly from frozen for convenience without losing texture.