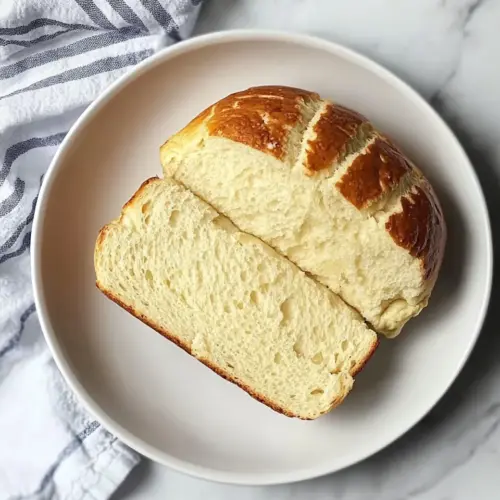
Potato Bread
Potato Bread offers a tender, slightly sweet loaf with a soft, pillowy crumb and golden crust. The mashed potatoes keep slices moist, while bread flour and yeast create a reliable rise, making it an easy weeknight or weekend bake. Perfect for toast, sandwiches, or as a comforting accompaniment, this loaf rewards patience with consistently delicious results.
Equipment
- Large Pot
- Mixing Bowl
- 9×5 Loaf Pan
- Measuring Cups
Ingredients
- 2 medium russet potatoes peeled and diced Boiled and mashed to add moisture and a tender crumb, peeled and diced before cooking to ensure even softness; russet potatoes contribute subtle starchiness that keeps the loaf moist and helps extend freshness for several days.
- 1/2 cup warm water 110°F Heated gently to about 110°F to activate yeast and dissolve sugar, warm water helps hydrate the dough and control fermentation speed; measured temperature preserves yeast viability without killing it.
- 1/2 cup warm milk 110°F Warmed to 110°F to keep dough temperature consistent and enrich flavor, warm milk adds fat and proteins that tenderize the crumb and improve crust color during baking.
- 2 1/4 teaspoons active dry yeast Activated by combining with warm liquid and sugar, active dry yeast leavens the dough by producing carbon dioxide; proper proofing time develops flavor and structure in the bread.
- 4 teaspoons granulated sugar Dissolved in warm liquid to feed the yeast and encourage fermentation, granulated sugar also contributes mild sweetness and helps with crust browning during baking.
- 4 tablespoons unsalted butter melted Melted and incorporated to tenderize the dough, unsalted butter provides richness, improves mouthfeel, and helps produce a softer crust and finer crumb.
- 1 1/4 teaspoons kosher salt Dissolved into the dough to balance flavor and strengthen gluten structure, kosher salt controls yeast activity and enhances overall taste while improving dough handling.
- 4 to 4 1/4 cups bread flour Measured and added gradually to build dough structure, bread flour provides higher protein content for strong gluten development, yielding a chewy texture and good rise.
- Optional: butter for brushing Melted and brushed over the hot loaf to add sheen and extra richness, optional butter enhances flavor and softens the crust for a more tender eating experience.
Instructions
- Boil the diced potatoes until fork tender. Drain and mash until smooth.: The steaming potatoes will give off a warm, earthy smell and a faint wheaty scent as their starches break down. You'll hear a gentle simmer while they cook, and the surface will look pillowy when pierced easily with a fork. After draining, mash thoroughly so no lumps remain, producing a silky texture that will integrate into the dough without creating irregular pockets. This step matters because smooth mashed potatoes distribute moisture evenly, preventing dense spots in your loaf. Common mistakes include undercooking the potatoes, which leaves hard bits, or leaving them too wet, which can make the dough overly sticky.
- Mix warm water, milk, yeast, and sugar in a bowl. Let sit until frothy.: The bowl will slowly warm with the mixture, and after several minutes a foamy cap should develop, smelling faintly of bread and sweet fermentation. That aroma is a good indicator your yeast is alive and ready. Allowing it to rest ensures consistent rising later on, which improves texture. If no froth appears within the expected time, the yeast may be inactive, which is the main error to watch for, so discard and start anew with fresh yeast .
- In a large bowl, combine mashed potatoes, yeast mixture, melted butter, salt, and two cups of flour.: The bowl will look glossy as the butter and mashed potatoes mingle with the foamy yeast. As you fold in two cups of bread flour , the mixture will transition from loose to a shaggy mass. This initial combination hydrates the flour and allows the salt to blend without interfering with yeast activity. You want an even distribution so the dough develops uniformly. Avoid adding all the flour at once, which can create dry clumps and make kneading harder later on.
- Gradually add two more cups of flour and knead to form a smooth, elastic dough. If needed, add more flour, a little at a time, until it is no longer sticky.: As you knead, you will feel the dough change from sticky to silky and springy, and it will emit a faint yeasty scent. Proper kneading develops the gluten network, which traps gas and creates airy crumb. You should be able to stretch a small piece thin without tearing immediately, showing good elasticity. A common pitfall is overflouring; add only small amounts, because too dry a dough yields a tight crumb. Conversely, under-kneading leaves a slack dough that will not rise well.
- Place dough in a greased bowl, cover, and let rise until doubled, about an hour.: The dough will quiet down as it rests, and its surface may show tiny bubbles and a rounded profile when fully risen. The room will smell subtly of fermentation, warm and toasty. Letting it double develops flavor and structure, creating that characteristic airy interior. Don't rush it by using too much heat, which can create uneven holes or undesirable flavors. A frequent mistake is not covering the bowl adequately, which can form a skin on the dough and impede rise.
- Punch down the dough, shape into a loaf, and let rise in a greased 9×5-inch loaf pan until puffy, at least 30 minutes.: When you punch down, you will hear a soft sigh as gas escapes, and the dough will feel slightly cooler to the touch. Shaping compresses the dough into a uniform form, which promotes even crumb. Once in the loaf pan, it should look noticeably puffed and jiggly when ready to bake. This secondary rise is crucial for oven spring and final texture. A mistake to avoid is shaping too tight, which can create tunnels instead of even holes.
- Bake at 375°F until golden brown, about 35-40 minutes. Optionally, after baking, brush with butter for a glossy finish.: As the loaf bakes, the kitchen will fill with a warm, toasty aroma and you may hear faint crackles as the crust forms. The top should turn a deep golden brown, and an instant read thermometer inserted into the center should read around 190°F to 200°F for a fully baked loaf. Brushing with butter after baking adds shine and softens the crust, enhancing both look and flavor. The most common error here is underbaking, which leaves a gummy center, so resist pulling the loaf early even if the top looks done.
Notes
- Slightly increase hydration to create a more open crumb, but be cautious because too much moisture will make shaping difficult.
- Let the dough rise longer in a cool spot overnight for more developed flavor from slow fermentation.
- Use different potatoes like Yukon Gold for a subtle buttery flavor and a slightly denser crumb compared to russets.
- Brush with butter immediately after baking for a softer crust and deeper sheen that improves presentation.
- Freeze slices individually for quick breakfasts, toast directly from frozen for convenience without losing texture.