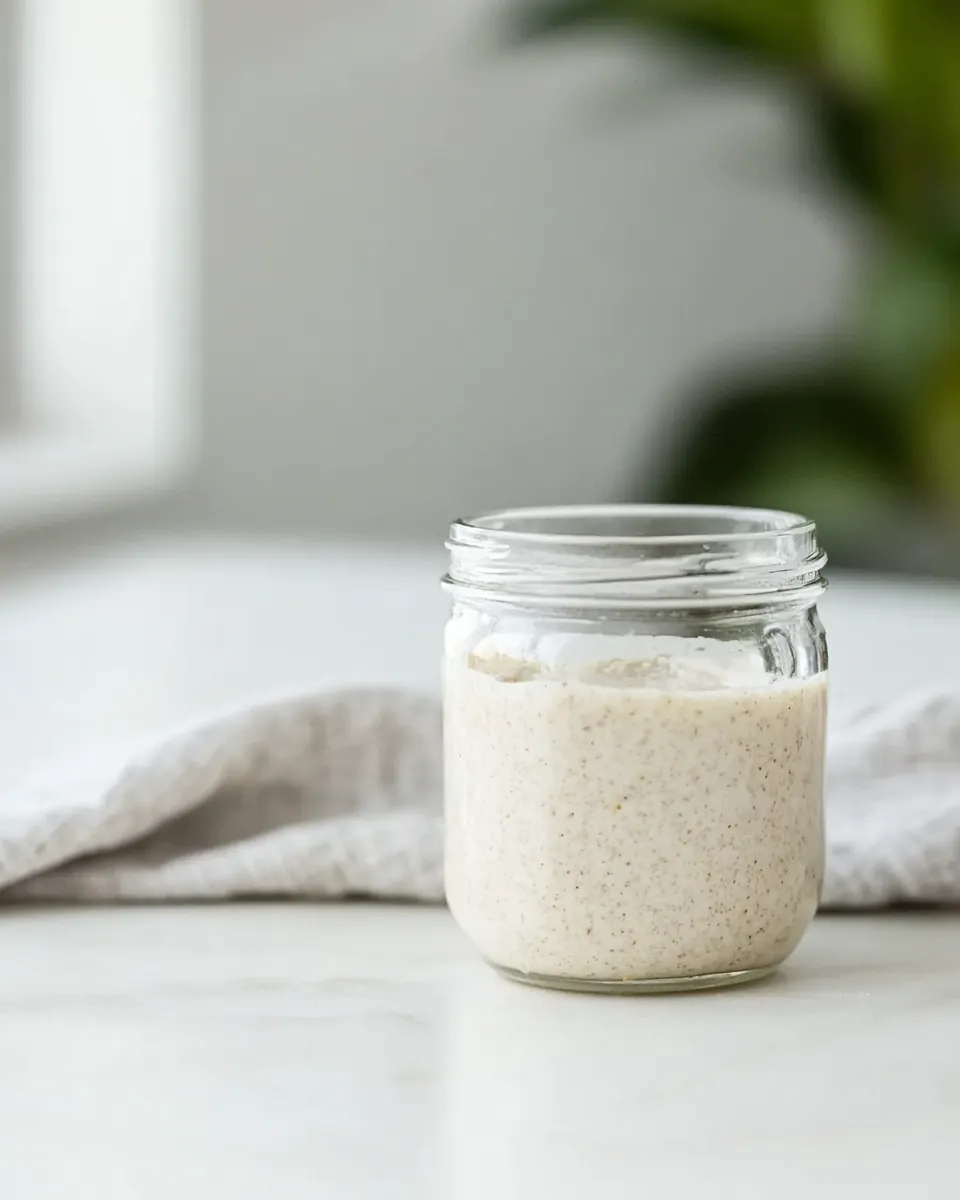
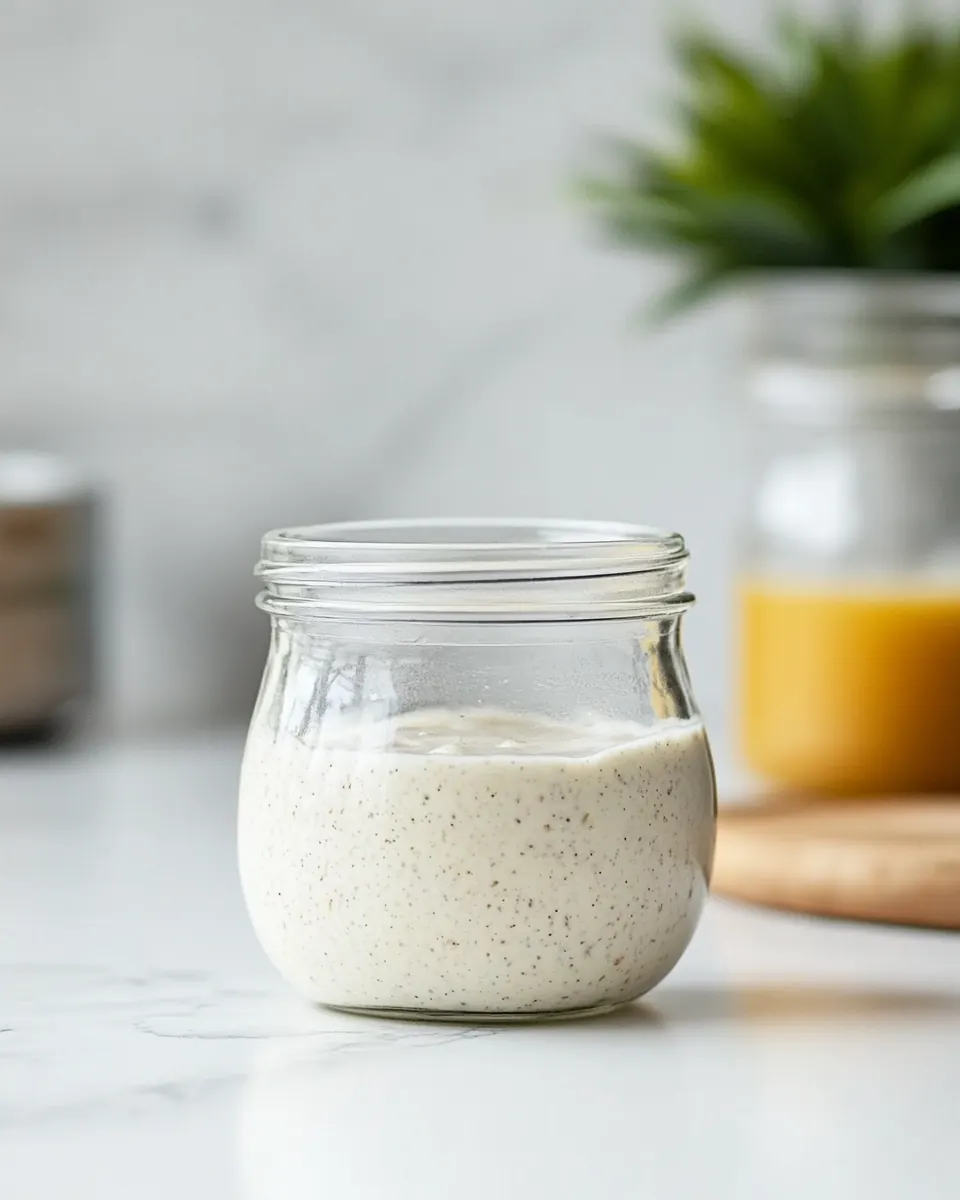
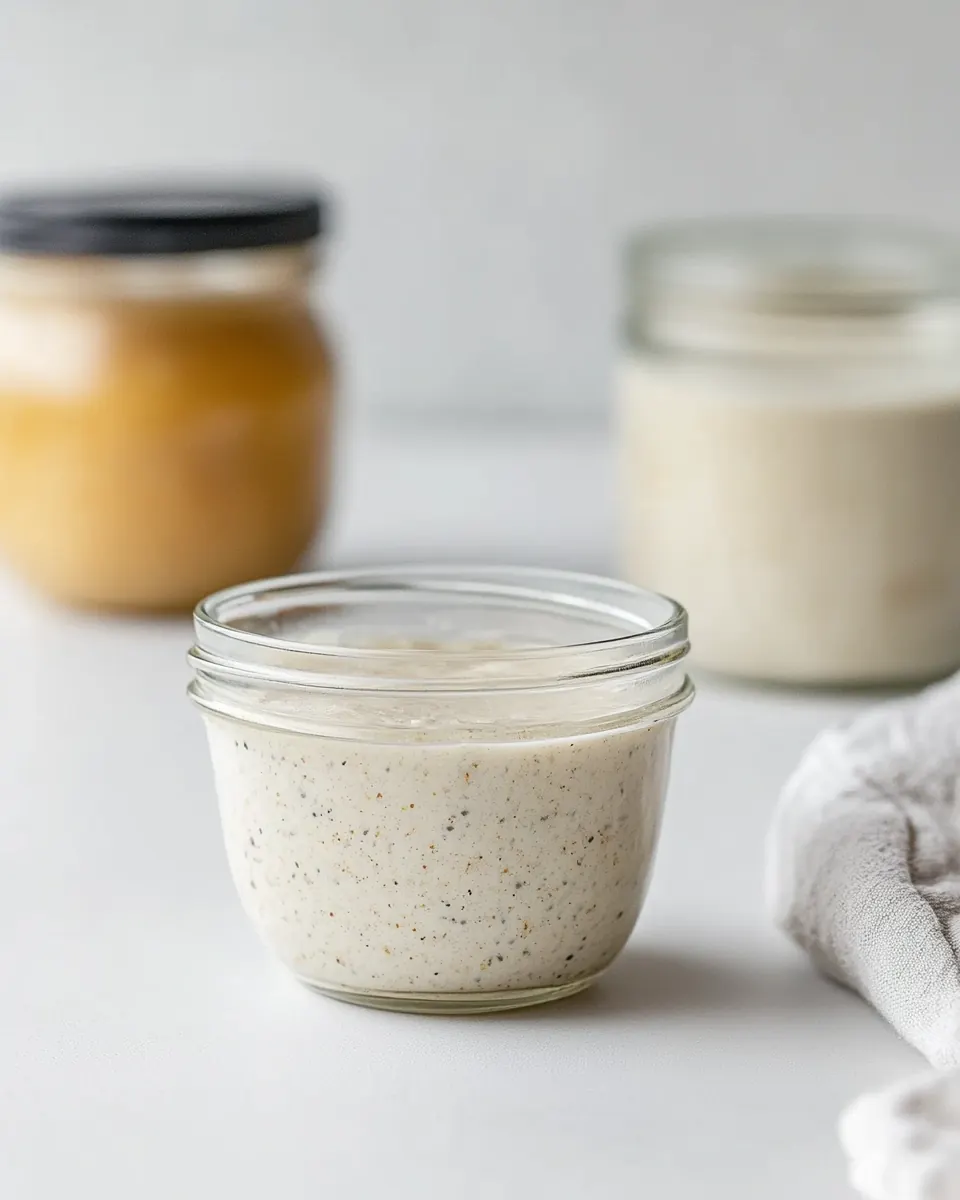
Pineapple Juice Sourdough Starter
Pineapple Juice Sourdough Starter began as one of those small kitchen experiments that turned into a habit for me, a ritual I look forward to before a weekend bake. I first tried using pineapple juice because I had a half opened bottle in the fridge and had read that its acidity helps create a friendly environment for the right microbes early on. What started as curiosity quickly became a lesson in patience and subtle sensory delights, as the starter slowly changed from a pale paste to a lively, bubbling culture.
There is something quietly satisfying about tending to a jar each day, noticing the tiny bubbles and the shift in aroma. I remember the first time I saw that initial rise, a soft dome that then fell back, promising more structure to come. Over the weeks I learned to listen to the starter, not by sound alone but by sight and feel, and that learning curve taught me more than any quick guide could. I love how simple ingredients like whole wheat flour and bread flour can nurture wild yeast into a dependable leavening partner.
Recipe Snapshot
6 mins
5 mins
1 mins
Medium
120 kcal
American
Vegan, Gluten-Free
Breakfast
Sterilized glass jar, Rubber band, Mixing bowl, Parchment paper
Why You Need This Pineapple Juice Sourdough Starter
Delicate acidity that helps jumpstart fermentation
I really appreciate that the Pineapple Juice Sourdough Starter uses pineapple juice early on. The acidity discourages unwanted bacteria, so the wild yeast can establish itself in a calmer environment. For me, that meant fewer false starts and less wasted flour, and the aroma during the first days is more pleasant than some methods I have tried.
Simple pantry ingredients, big results
We only need whole wheat flour, bread flour, and water, so building this starter never felt intimidating. I like that it leans on flours most home bakers already keep on hand, which makes it easy to begin right away. The flours bring depth of flavor and sugars that feed the yeasts, so the mixture evolves from bland paste to lively, tangy starter.
Flexible schedule for real life
One reason I return to this method is its forgiving timeline. The instructions allow for room temperature maintenance or refrigerated storage, which fits my unpredictable baking schedule. I can feed more frequently when I am baking a lot, or slow things down by refrigerating the jar when life gets busy, so the starter adapts to how I live.
Teaches you to read the starter
Working through the days teaches observation skills. I learned to look for bubbles, height change, and that reassuring yeasty scent. Those cues tell you when it is ready to bake, and that sensory feedback makes me more confident at the bench. It is an educational process that rewards patience with noticeably improved loaf structure over time.
Long term storage and resilience
I value that this starter can be dried for long term backup. Once your starter is mature, you can preserve it for months, which I have done before long trips. That resilience means the effort you invest up front pays off for years, and I love keeping a small jar of history on my shelf that keeps giving.
Ingredients to Make Pineapple Juice Sourdough Starter

These ingredients are intentionally minimal, chosen to coax wild yeast and friendly bacteria into a balanced ecosystem. The key players are the different flours that supply starches and sugars, the pineapple juice which provides initial acidity, and the spring water or purified water that hydrates the mix. Together they create a stable environment where fermentation can flourish and develop flavor over time.
- 3 tbsp whole wheat flour: Provide natural yeast and nutrients to kickstart fermentation; whole wheat flour contains more wild yeasts and enzymes than refined flour, helping create a more active starter and contributing to robust flavor development.
- 19 tablespoons bread flour, or more as needed: Supply bulk of fermentable starches for feeding the starter; bread flour’s higher protein content supports strong gluten structure in eventual doughs and provides consistent food for yeast and bacteria during maturation.
- 1/2 cup unsweetened pineapple juice: Acidify and supply simple sugars to favor beneficial bacteria while inhibiting unwanted microbes; unsweetened pineapple juice offers a stable, slightly acidic environment that encourages lactic acid bacteria to establish in the early stages of the starter.
- 9 tablespoons spring water, or more as needed, at room temperature: Adjust hydration and texture while providing mineral content for fermentation; spring water at room temperature hydrates the flours to form a workable starter consistency and supports yeast and bacterial activity without chlorine interference.
How to Cook Pineapple Juice Sourdough Starter
Making this starter is more like keeping a living routine than cooking in the traditional sense. I find the process soothing, but it does ask for attention and gentle adjustments as the culture evolves. Below, each step from the original directions is rewritten into detailed guidance so you can understand what to look for, why each action matters, and how to troubleshoot common issues.
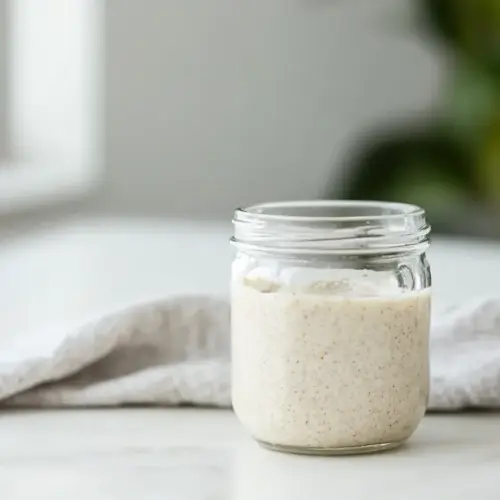
- On day 1, stir together 3 tablespoons whole wheat flour and 1/4 cup pineapple juice in a sterilized glass jar until it forms a thick paste. Cover with a towel, or with plastic wrap with small holes poked into the top, and let stand at room temperature for 48 hours. Stir this mixture every 12 hours.: You will notice a fragrant, slightly fruity aroma as you mix the whole wheat flour and pineapple juice , and the texture should be a cohesive, thick paste that holds together on a spoon. The visual cue to watch for is a smooth surface with no large dry pockets, which tells you everything is hydrated. This acidic start helps keep undesirable bacteria at bay, so take care that your jar is clean and free of residues. A common mistake is using too little liquid, which leaves dry flour at the bottom and creates uneven fermentation, so adjust by adding a teaspoon of water if needed to achieve a paste.
- On day 3, add 3 tablespoons bread flour and 1/4 cup unsweetened pineapple juice to the jar and mix well to combine with the previous mixture. Cover and let stand at room temperature for 48 hours. You will start to see some signs of fermentation by day 4 – small bubbles forming in the mixture and on the top and a pleasant yeasty smell. If you do not see any activity or if the mixture smells foul or sweet, you will need to throw the mixture out and start again at day 1.: During this rest, the mixture should be kept in a warm, draft free spot where temperatures are steady; you may hear no sound, but you should start to see tiny bubbles forming within 24 to 48 hours. The lack of robust bubbling at first is normal, because the acids from the pineapple juice slow some activity while favorable microbes settle in. Avoid sealing the jar airtight, or pressure can build and aromas will be trapped; a loose cover allows exchange while keeping dust out. If you smell something unusually foul, that is a sign to discard and restart, because that indicates unwanted bacteria took over.
- On day 5, add to the mixture 1/3 cup bread flour and 1/4 cup purified or spring water, at room temperature, and stir well. Cover and let stand for 24 hours. You should see the starter expand in the jar. A good way to track this is to use a rubber band – place it at the level of the freshly fed starter. You should see it rise over the rubber band as the starter becomes more active before it falls back to its starting height.: By stirring gently every half day you redistribute oxygen and food, which encourages even fermentation and helps you spot changes in texture and smell. Each stir will release a brief fruity scent followed by the developing yeasty notes that tell you fermentation is progressing. If you skip stirrings, pockets of inactivity can form and the starter will be slower to show signs of life, so set a reminder for yourself. Over stirring aggressively is another pitfall, as it can deflate tiny developing bubbles and slow the rise, so be gentle with your motion.
- On day 6 (and for days beyond that), discard all but 1/2 cup of starter. Add 1/2 cup bread flour and 1/3 cup purified or filtered water, at room temperature, and stir vigorously. Repeat this process every 12-24 hours depending on how hungry your starter is.: When you feed with bread flour and more pineapple juice , the starter receives fresh sugars and starches to nourish the yeast. Mix until you have a cohesive batter, then mark the level with a rubber band so you can monitor rise. Around day four you should begin to see more consistent bubbling and a pleasant, yeasty smell. Resist the urge to hurry the process by adding too much flour at once, as overfeeding can dilute the microbial population and prolong the development phase.
- A healthy starter can be kept at room temperature and fed 1-2 times daily while you are actively baking with it. If you want to delay feeds, or do not plan to bake often with your starter and do not want to waste the discard every day, you can store your starter in the refrigerator and feed weekly – every 7 days feed, as the instructions state for Day 6. When you are ready to use, you will want to keep your starter at room temperature and feed every 12 hours as in Day 6, or until very active, before baking. You can also dry your mature starter for longer storage, or as a back-up should something happen to your active starter. You will want a starter that is at least 3 months old before drying. On a sheet of baking parchment spread a very thin layer of starter that has been fed within 4-6 hours. Leave this out in a well ventilated space at room temperature for 48-72 hours, or until completely dry. You can also use a food dehydrator if you have one. Once dry, break the starter into pieces and store in a sterile glass jar or in a zip top bag in the freezer.: After this feed, leave the jar in a stable, temperate place, and check daily for height increase. The visual cue here is increased aeration and little domes of bubbles that indicate activity; the starter should smell mildly tangy and not offensive. If activity is absent or the mix smells overly sweet or rotten, that signals contamination so discard and start again. Do not move the jar around frequently, as jostling can break developing gas pockets and mask real growth.
- You can also dry your mature starter for longer storage, or as a back-up should something happen to your active starter. You will want a starter that is at least 3 months old before drying. On a sheet of baking parchment spread a very thin layer of starter that has been fed within 4-6 hours. Leave this out in a well ventilated space at room temperature for 48-72 hours, or until completely dry. You can also use a food dehydrator if you have one. Once dry, break the starter into pieces and store in a sterile glass jar or in a zip top bag in the freezer.: This feeding shifts the starter toward a more flour forward balance that improves strength. The stirred starter should appear thicker and begin to show larger bubbles rising to the surface, and you'll notice a transform in aroma toward a mild tang that is characteristic of a healthy culture. If the mixture remains flat after this feed, try using slightly warmer room temperature water to encourage yeast activity, but avoid hot water that can kill microbes. A common error is underfeeding, which results in sluggish or underperforming starter, so be consistent.
- Most recipes will call for at least 1 cup of active starter, so you will need to plan ahead for sourdough baking by building enough starter for your recipe with enough left for maintaining. 24-48 hours before baking measure 1/2 cup of active starter into a sterilized glass bowl. This should leave you with at least 1/4 cup of starter for maintaining your starter. If you are not left with 1/4 cup transfer starter from the bowl until you have 1/4 cup to feed and maintain. To the bowl add 1/2 cup bread flour and enough water to match the hydration level called for in your recipe. For 100% hydration use equal parts water to flour. For 50% hydration use 1 part flour to 1/2 part water, and so on. Feed every 12 hours or until you have the correct volume of starter for your recipe.: After this rest the starter should noticeably expand in the jar. Use your rubber band marker to see it rise above the band and then fall back to its starting height, which indicates it is cycling properly. This expansion is critical, because it shows gas production that provides lift in bread dough. If you do not observe this rise, evaluate water quality and feeding amounts, and consider a small boost of whole wheat or rye flour at the next feed to add accessible sugars.
- To the bowl add 1/2 cup bread flour and enough water to match the hydration level called for in your recipe. For 100% hydration use equal parts water to flour. For 50% hydration use 1 part flour to 1/2 part water, and so on. Feed every 12 hours or until you have the correct volume of starter for your recipe.: Discarding down to a consistent volume keeps the microbes well fed and prevents runaway acidity. When you remove extra starter you also maintain a manageable jar size and ensure each feed provides sufficient fresh food for the population. The discarded portion can be used in pancakes or thrown out; avoid letting the jar become too full which can cause overflow and mess. A mistake I see is not discarding enough, leading to a dense, underperforming culture that does not rise well.
- Starter is usually ready to use after it doubles in size after a feeding, but your starter will perform better the longer you keep it. Early breads you make may be dense and might need a little commercial yeast to get the right rise. The sour flavor will also develop with time, but feeding a little rye flour from time to time can help bump up the sour flavor. Generally, you will want to bake with your starter when it is hungry to ensure you develop enough Co 2 to provide lift, meaning you will want to use your starter 8-12 hours before baking.: Stirring vigorously incorporates air, hydrates the flour, and creates a uniform batter so the yeast can access nutrients evenly. The stirred texture should be smooth with small entrapped bubbles that develop into larger ones as the starter becomes active. If stirring leaves dry pockets, add a teaspoon of water and mix until homogeneous. Vigorous stirring also helps wake the microbes, but do not overdo it to the point of shredding the gluten structure in mature starters.
- Generally, you will want to bake with your starter when it is hungry to ensure you develop enough Co 2 to provide lift, meaning you will want to use your starter 8-12 hours before baking.: The feeding frequency adjusts to the starter's activity; when it doubles quickly you might feed every 12 hours, and when it is slower you can stretch to 24 hours. You will know the rhythm by watching the rise and fall pattern. Overfeeding too frequently can prevent flavor development, while underfeeding leads to hooch and weak performance, so aim for the window that matches your starter's vigor.
- If starter is sluggish or not bubbling– Try 1 feeding with 1/2 whole wheat or rye flour and 1/2 bread flour. The rye and whole wheat have additional starches and sugars, as well as wild yeasts, that your starter should love. If, after adding the booster you do not see any activity you can add 1 tablespoon of pineapple juice in place of water in the next feed. If neither addition kicks off activity your starter may be dead. Discard and start a new one. If starter has a layer of liquid on top– This liquid, called hooch, is a layer of thin clear or slightly cloudy liquid that forms on top of the starter that is underfed. It is made of alcohol given off as they yeast eats the starches and sugars in the flour. Feed your starter more often to avoid this. How do I know if my starter is hungry?– Does it become active right after feeding, double in volume, then collapse within 4 hours? You may need to feed more often. Another sign is if it develops a layer of hooch between feedings. My starter has mold, is it ok to use?– No. It is best to discard starter that has mold growing on top. My starter overflowed the jar!– First off, congratulations on the active and healthy starter! Scrape down the insides of the jar and transfer your starter to a larger glass container going forward! Do not use starter that has been on the outside of the jar or the counter. Discard this starter.: Keeping the starter at room temperature keeps it ready for frequent baking, yielding consistent rises in your doughs. Expect more maintenance time, but the payoff is an always ready culture. If life gets busy, transfer the jar to the refrigerator for weekly feeds to slow activity; just remember to bring it back to room temperature and feed more frequently ahead of baking to reactivate it fully.
- If starter has a layer of liquid on top– This liquid, called hooch, is a layer of thin clear or slightly cloudy liquid that forms on top of the starter that is underfed. It is made of alcohol given off as they yeast eats the starches and sugars in the flour. Feed your starter more often to avoid this.: Refrigeration slows activity and reduces the frequency of maintenance, which is great for occasional bakers. Before baking, plan to bring the starter back to room temperature and feed every 12 hours until it is vigorous and doubling reliably. A pitfall is attempting to bake straight from the fridge without adequate warm feeds, which yields underproofed bread, so always plan ahead.
- How do I know if my starter is hungry?– Does it become active right after feeding, double in volume, then collapse within 4 hours? You may need to feed more often. Another sign is if it develops a layer of hooch between feedings.: Drying gives you a stable backup you can revive later, and I recommend doing this only when the starter is mature and robust. Spread a thin layer on parchment and let it dry fully in a ventilated area, then break into pieces and freeze or store in a jar. If you rush the drying or do it with an immature starter it may not revive well, so be patient and use a healthy culture for this preservation.
- My starter has mold, is it ok to use?– No. It is best to discard starter that has mold growing on top.: Measure and adjust volumes a day or two before baking so you have the required active starter, and always keep a reserve amount so you can continue maintenance. Feeding strategies like increasing quantity before a bake day help build the volume needed. A common mistake is misjudging how much starter a recipe needs, so I always prepare a little extra the day before to avoid shortages.
- My starter overflowed the jar!– First off, congratulations on the active and healthy starter! Scrape down the insides of the jar and transfer your starter to a larger glass container going forward! Do not use starter that has been on the outside of the jar or the counter. Discard this starter.: This transfers a known amount into a workspace where you can feed to the desired hydration and volume for your recipe. Working in a bowl allows easy observation and accurate feeding ratios. If the starter does not show robust activity after a couple of feeds, you may need to continue regular feedings until bubble production and doubling are consistent, otherwise breads may be dense.
- To the bowl add 1/2 cup bread flour and enough water to match the hydration level called for in your recipe: Adjust the hydration precisely for the bake; for 100% hydration use equal weights, and for lower hydration scale accordingly. The correct hydration ensures the starter behaves predictably in dough and contributes to crumb structure. Inaccurate hydration here can skew dough handling and oven spring, so measure carefully.
- Feed every 12 hours or until you have the correct volume of starter for your recipe: Frequent feeds ramp activity and build volume, creating the energetic starter you need for strong oven spring. Watch for doubling within a feeding window as your success signal. Avoid rushing by adding too much flour in a single feed, which dilutes the microbial concentration and delays readiness.
- Starter is usually ready to use after it doubles in size after a feeding, but your starter will perform better the longer you keep it: The doubling is a visual indicator of sufficient gas production and fermentation strength, but age and consistent feeding build flavor complexity. Expect early loaves from a young starter to be denser, and be patient as sour notes and structure mature. Trying to bake with an immature starter often yields disappointing texture, so allow time for growth.
- If starter is sluggish or not bubbling– Try 1 feeding with 1/2 whole wheat or rye flour and 1/2 bread flour: This boost provides extra sugars and wild yeasts that often rekindle activity. If there is no improvement you can add a tablespoon of pineapple juice in the next feed for a gentle acidifying nudge. Persistent inactivity after these measures suggests starting over, since a truly dead starter will not recover and continued efforts waste flour and time.
- If starter has a layer of liquid on top– This liquid, called hooch, is a layer of thin clear or slightly cloudy liquid that forms on top of the starter that is underfed: Hooch indicates the starter needs more frequent feeds and is producing alcohol as a byproduct of starvation. Pouring off or stirring it back in is acceptable, but the best fix is a consistent feeding schedule so hooch does not recur. Ignoring hooch and letting it accumulate can lead to unpleasant odors and weak performance.
- How do I know if my starter is hungry?– Does it become active right after feeding, double in volume, then collapse within 4 hours?: These are classic signals that a starter is hungry and needs more frequent feedings to maintain peak performance. If you see rapid collapse, increase feed frequency or reduce the amount you keep between feeds. Failing to adjust will lead to flat, underpowered dough from your starter.
- My starter has mold, is it ok to use?– No: Mold is a contamination sign, and the safest course is to discard the starter and begin again. Mold can indicate airborne spores that have colonized the surface, and continuing to use a moldy starter risks food safety and poor fermentation. Always err on the side of caution when the surface shows colored fuzz or odd smells.
- My starter overflowed the jar!– First off, congratulations on the active and healthy starter!: Overflow means vigorous activity; scrape down the jar, transfer to a larger container, and avoid using any starter that escaped contact with the sterile interior. Going forward, choose a taller jar or reduce the amount you keep between feeds to prevent repeat overflows. Leaving an overflowing starter unchecked can create a messy cleanup and cross contaminate nearby surfaces.
Make It Your Own
This starter method is adaptable and forgiving, letting you tune feeding frequency and hydration to your schedule. Below are practical ways to personalize the process while keeping the culture healthy and reliable for baking.
- Adjust feeding cadence: If you bake frequently, feed every 12 hours to keep the starter vigorous. For occasional bakers, a weekly refrigerated feed is sufficient. Monitor rise times to find the right rhythm for your starter rather than forcing a fixed schedule.
- Vary hydration gently: Tweaking hydration influences texture and activity. A slightly thicker starter can be easier to manage, while a looser one may show bubbles sooner. Make small changes and observe results over several feeds before committing.
- Use alternative flours sparingly: Introducing rye or additional whole wheat can boost activity, but do so occasionally to avoid destabilizing your established balance. These flours add flavor and fermentable sugars that can perk up a sluggish starter.
- Reserve discard creatively: Save discard for pancakes or waffles so you are not wasting extra starter when maintaining daily feeds. This is a practical way to use what you remove while still keeping the main culture healthy.
- Dried backup: Once your starter is mature, create a dried reserve to protect against accidents. Dry thin layers fully, store airtight, and keep them in the freezer for long term security so you can revive if needed.
How to Serve Pineapple Juice Sourdough Starter
Serving a starter is really about using it to make breads and baked goods at their best. Below I outline occasions, pairings, and storage practices that help you get the most from your active culture.
- Everyday sourdough loaves: Use your active starter to bake crusty country loaves for breakfasts and lunches. These loaves pair beautifully with simple toppings like butter or soft cheeses and are an excellent base for open faced sandwiches.
- Special occasion breads: Reserve your most vigorous feedings for breads you plan to serve at gatherings, because the stronger starter delivers better oven spring and airy crumb for sharing at brunches or dinner parties.
- Occasions and timing: This starter works year round, so plan feeds ahead of holidays like Ramadan if you want fresh sourdough for iftar or suhoor. Bringing your starter to peak activity a day or two before ensures reliable rises for celebration baking.
- Storage tips: For regular bakers keep the starter at room temperature with daily feeds, and for occasional bakers refrigerate and feed weekly. When returning from refrigeration, allow at least two warm feeds to reactivate before baking.
- Seasonal pairings: In colder months, richer fillings like nut butters and roasted vegetables complement sourdough, while in warmer months lighter toppings such as fresh tomatoes and herbs showcase the bread‘s tanginess. Adjust your baking schedule to take advantage of seasonal produce.
- Serving style: Slice loaves on a serrated knife and serve warm to enhance the aroma. For a casual gathering, provide sliced bread with a selection of spreads and allow guests to build their own combinations.
FAQ
Conclusion
This Pineapple Juice Sourdough Starter stands out for its clever use of gentle acidity to create a friendly environment for yeast and lactic acid bacteria. It is approachable, requires only a few pantry staples, and teaches valuable bread baking instincts as you nurture the culture. Give it a try; with a little patience and consistent feedings you will build a resilient starter that rewards you with flavorful, well risen breads and the quiet satisfaction of maintaining a living pantry companion.
Pineapple Juice Sourdough Starter
Equipment
- Sterilized glass jar
- Rubber band
- Mixing Bowl
- Parchment Paper
Ingredients
- 3 tbsp whole wheat flour Provide natural yeast and nutrients to kickstart fermentation; whole wheat flour contains more wild yeasts and enzymes than refined flour, helping create a more active starter and contributing to robust flavor development.
- 19 tablespoons bread flour, or more as needed Supply bulk of fermentable starches for feeding the starter; bread flour’s higher protein content supports strong gluten structure in eventual doughs and provides consistent food for yeast and bacteria during maturation.
- 1/2 cup unsweetened pineapple juice Acidify and supply simple sugars to favor beneficial bacteria while inhibiting unwanted microbes; unsweetened pineapple juice offers a stable, slightly acidic environment that encourages lactic acid bacteria to establish in the early stages of the starter.
- 9 tablespoons spring water, or more as needed, at room temperature Adjust hydration and texture while providing mineral content for fermentation; spring water at room temperature hydrates the flours to form a workable starter consistency and supports yeast and bacterial activity without chlorine interference.
Instructions
- On day 1, stir together 3 tablespoons whole wheat flour and 1/4 cup pineapple juice in a sterilized glass jar until it forms a thick paste. Cover with a towel, or with plastic wrap with small holes poked into the top, and let stand at room temperature for 48 hours. Stir this mixture every 12 hours.: You will notice a fragrant, slightly fruity aroma as you mix the whole wheat flour and pineapple juice , and the texture should be a cohesive, thick paste that holds together on a spoon. The visual cue to watch for is a smooth surface with no large dry pockets, which tells you everything is hydrated. This acidic start helps keep undesirable bacteria at bay, so take care that your jar is clean and free of residues. A common mistake is using too little liquid, which leaves dry flour at the bottom and creates uneven fermentation, so adjust by adding a teaspoon of water if needed to achieve a paste.
- On day 3, add 3 tablespoons bread flour and 1/4 cup unsweetened pineapple juice to the jar and mix well to combine with the previous mixture. Cover and let stand at room temperature for 48 hours. You will start to see some signs of fermentation by day 4 – small bubbles forming in the mixture and on the top and a pleasant yeasty smell. If you do not see any activity or if the mixture smells foul or sweet, you will need to throw the mixture out and start again at day 1.: During this rest, the mixture should be kept in a warm, draft free spot where temperatures are steady; you may hear no sound, but you should start to see tiny bubbles forming within 24 to 48 hours. The lack of robust bubbling at first is normal, because the acids from the pineapple juice slow some activity while favorable microbes settle in. Avoid sealing the jar airtight, or pressure can build and aromas will be trapped; a loose cover allows exchange while keeping dust out. If you smell something unusually foul, that is a sign to discard and restart, because that indicates unwanted bacteria took over.
- On day 5, add to the mixture 1/3 cup bread flour and 1/4 cup purified or spring water, at room temperature, and stir well. Cover and let stand for 24 hours. You should see the starter expand in the jar. A good way to track this is to use a rubber band – place it at the level of the freshly fed starter. You should see it rise over the rubber band as the starter becomes more active before it falls back to its starting height.: By stirring gently every half day you redistribute oxygen and food, which encourages even fermentation and helps you spot changes in texture and smell. Each stir will release a brief fruity scent followed by the developing yeasty notes that tell you fermentation is progressing. If you skip stirrings, pockets of inactivity can form and the starter will be slower to show signs of life, so set a reminder for yourself. Over stirring aggressively is another pitfall, as it can deflate tiny developing bubbles and slow the rise, so be gentle with your motion.
- On day 6 (and for days beyond that), discard all but 1/2 cup of starter. Add 1/2 cup bread flour and 1/3 cup purified or filtered water, at room temperature, and stir vigorously. Repeat this process every 12-24 hours depending on how hungry your starter is.: When you feed with bread flour and more pineapple juice , the starter receives fresh sugars and starches to nourish the yeast. Mix until you have a cohesive batter, then mark the level with a rubber band so you can monitor rise. Around day four you should begin to see more consistent bubbling and a pleasant, yeasty smell. Resist the urge to hurry the process by adding too much flour at once, as overfeeding can dilute the microbial population and prolong the development phase.
- A healthy starter can be kept at room temperature and fed 1-2 times daily while you are actively baking with it. If you want to delay feeds, or do not plan to bake often with your starter and do not want to waste the discard every day, you can store your starter in the refrigerator and feed weekly – every 7 days feed, as the instructions state for Day 6. When you are ready to use, you will want to keep your starter at room temperature and feed every 12 hours as in Day 6, or until very active, before baking. You can also dry your mature starter for longer storage, or as a back-up should something happen to your active starter. You will want a starter that is at least 3 months old before drying. On a sheet of baking parchment spread a very thin layer of starter that has been fed within 4-6 hours. Leave this out in a well ventilated space at room temperature for 48-72 hours, or until completely dry. You can also use a food dehydrator if you have one. Once dry, break the starter into pieces and store in a sterile glass jar or in a zip top bag in the freezer.: After this feed, leave the jar in a stable, temperate place, and check daily for height increase. The visual cue here is increased aeration and little domes of bubbles that indicate activity; the starter should smell mildly tangy and not offensive. If activity is absent or the mix smells overly sweet or rotten, that signals contamination so discard and start again. Do not move the jar around frequently, as jostling can break developing gas pockets and mask real growth.
- You can also dry your mature starter for longer storage, or as a back-up should something happen to your active starter. You will want a starter that is at least 3 months old before drying. On a sheet of baking parchment spread a very thin layer of starter that has been fed within 4-6 hours. Leave this out in a well ventilated space at room temperature for 48-72 hours, or until completely dry. You can also use a food dehydrator if you have one. Once dry, break the starter into pieces and store in a sterile glass jar or in a zip top bag in the freezer.: This feeding shifts the starter toward a more flour forward balance that improves strength. The stirred starter should appear thicker and begin to show larger bubbles rising to the surface, and you'll notice a transform in aroma toward a mild tang that is characteristic of a healthy culture. If the mixture remains flat after this feed, try using slightly warmer room temperature water to encourage yeast activity, but avoid hot water that can kill microbes. A common error is underfeeding, which results in sluggish or underperforming starter, so be consistent.
- Most recipes will call for at least 1 cup of active starter, so you will need to plan ahead for sourdough baking by building enough starter for your recipe with enough left for maintaining. 24-48 hours before baking measure 1/2 cup of active starter into a sterilized glass bowl. This should leave you with at least 1/4 cup of starter for maintaining your starter. If you are not left with 1/4 cup transfer starter from the bowl until you have 1/4 cup to feed and maintain. To the bowl add 1/2 cup bread flour and enough water to match the hydration level called for in your recipe. For 100% hydration use equal parts water to flour. For 50% hydration use 1 part flour to 1/2 part water, and so on. Feed every 12 hours or until you have the correct volume of starter for your recipe.: After this rest the starter should noticeably expand in the jar. Use your rubber band marker to see it rise above the band and then fall back to its starting height, which indicates it is cycling properly. This expansion is critical, because it shows gas production that provides lift in bread dough. If you do not observe this rise, evaluate water quality and feeding amounts, and consider a small boost of whole wheat or rye flour at the next feed to add accessible sugars.
- To the bowl add 1/2 cup bread flour and enough water to match the hydration level called for in your recipe. For 100% hydration use equal parts water to flour. For 50% hydration use 1 part flour to 1/2 part water, and so on. Feed every 12 hours or until you have the correct volume of starter for your recipe.: Discarding down to a consistent volume keeps the microbes well fed and prevents runaway acidity. When you remove extra starter you also maintain a manageable jar size and ensure each feed provides sufficient fresh food for the population. The discarded portion can be used in pancakes or thrown out; avoid letting the jar become too full which can cause overflow and mess. A mistake I see is not discarding enough, leading to a dense, underperforming culture that does not rise well.
- Starter is usually ready to use after it doubles in size after a feeding, but your starter will perform better the longer you keep it. Early breads you make may be dense and might need a little commercial yeast to get the right rise. The sour flavor will also develop with time, but feeding a little rye flour from time to time can help bump up the sour flavor. Generally, you will want to bake with your starter when it is hungry to ensure you develop enough Co 2 to provide lift, meaning you will want to use your starter 8-12 hours before baking.: Stirring vigorously incorporates air, hydrates the flour, and creates a uniform batter so the yeast can access nutrients evenly. The stirred texture should be smooth with small entrapped bubbles that develop into larger ones as the starter becomes active. If stirring leaves dry pockets, add a teaspoon of water and mix until homogeneous. Vigorous stirring also helps wake the microbes, but do not overdo it to the point of shredding the gluten structure in mature starters.
- Generally, you will want to bake with your starter when it is hungry to ensure you develop enough Co 2 to provide lift, meaning you will want to use your starter 8-12 hours before baking.: The feeding frequency adjusts to the starter's activity; when it doubles quickly you might feed every 12 hours, and when it is slower you can stretch to 24 hours. You will know the rhythm by watching the rise and fall pattern. Overfeeding too frequently can prevent flavor development, while underfeeding leads to hooch and weak performance, so aim for the window that matches your starter's vigor.
- If starter is sluggish or not bubbling– Try 1 feeding with 1/2 whole wheat or rye flour and 1/2 bread flour. The rye and whole wheat have additional starches and sugars, as well as wild yeasts, that your starter should love. If, after adding the booster you do not see any activity you can add 1 tablespoon of pineapple juice in place of water in the next feed. If neither addition kicks off activity your starter may be dead. Discard and start a new one. If starter has a layer of liquid on top– This liquid, called hooch, is a layer of thin clear or slightly cloudy liquid that forms on top of the starter that is underfed. It is made of alcohol given off as they yeast eats the starches and sugars in the flour. Feed your starter more often to avoid this. How do I know if my starter is hungry?– Does it become active right after feeding, double in volume, then collapse within 4 hours? You may need to feed more often. Another sign is if it develops a layer of hooch between feedings. My starter has mold, is it ok to use?– No. It is best to discard starter that has mold growing on top. My starter overflowed the jar!– First off, congratulations on the active and healthy starter! Scrape down the insides of the jar and transfer your starter to a larger glass container going forward! Do not use starter that has been on the outside of the jar or the counter. Discard this starter.: Keeping the starter at room temperature keeps it ready for frequent baking, yielding consistent rises in your doughs. Expect more maintenance time, but the payoff is an always ready culture. If life gets busy, transfer the jar to the refrigerator for weekly feeds to slow activity; just remember to bring it back to room temperature and feed more frequently ahead of baking to reactivate it fully.
- If starter has a layer of liquid on top– This liquid, called hooch, is a layer of thin clear or slightly cloudy liquid that forms on top of the starter that is underfed. It is made of alcohol given off as they yeast eats the starches and sugars in the flour. Feed your starter more often to avoid this.: Refrigeration slows activity and reduces the frequency of maintenance, which is great for occasional bakers. Before baking, plan to bring the starter back to room temperature and feed every 12 hours until it is vigorous and doubling reliably. A pitfall is attempting to bake straight from the fridge without adequate warm feeds, which yields underproofed bread, so always plan ahead.
- How do I know if my starter is hungry?– Does it become active right after feeding, double in volume, then collapse within 4 hours? You may need to feed more often. Another sign is if it develops a layer of hooch between feedings.: Drying gives you a stable backup you can revive later, and I recommend doing this only when the starter is mature and robust. Spread a thin layer on parchment and let it dry fully in a ventilated area, then break into pieces and freeze or store in a jar. If you rush the drying or do it with an immature starter it may not revive well, so be patient and use a healthy culture for this preservation.
- My starter has mold, is it ok to use?– No. It is best to discard starter that has mold growing on top.: Measure and adjust volumes a day or two before baking so you have the required active starter, and always keep a reserve amount so you can continue maintenance. Feeding strategies like increasing quantity before a bake day help build the volume needed. A common mistake is misjudging how much starter a recipe needs, so I always prepare a little extra the day before to avoid shortages.
- My starter overflowed the jar!– First off, congratulations on the active and healthy starter! Scrape down the insides of the jar and transfer your starter to a larger glass container going forward! Do not use starter that has been on the outside of the jar or the counter. Discard this starter.: This transfers a known amount into a workspace where you can feed to the desired hydration and volume for your recipe. Working in a bowl allows easy observation and accurate feeding ratios. If the starter does not show robust activity after a couple of feeds, you may need to continue regular feedings until bubble production and doubling are consistent, otherwise breads may be dense.
- To the bowl add 1/2 cup bread flour and enough water to match the hydration level called for in your recipe: Adjust the hydration precisely for the bake; for 100% hydration use equal weights, and for lower hydration scale accordingly. The correct hydration ensures the starter behaves predictably in dough and contributes to crumb structure. Inaccurate hydration here can skew dough handling and oven spring, so measure carefully.
- Feed every 12 hours or until you have the correct volume of starter for your recipe: Frequent feeds ramp activity and build volume, creating the energetic starter you need for strong oven spring. Watch for doubling within a feeding window as your success signal. Avoid rushing by adding too much flour in a single feed, which dilutes the microbial concentration and delays readiness.
- Starter is usually ready to use after it doubles in size after a feeding, but your starter will perform better the longer you keep it: The doubling is a visual indicator of sufficient gas production and fermentation strength, but age and consistent feeding build flavor complexity. Expect early loaves from a young starter to be denser, and be patient as sour notes and structure mature. Trying to bake with an immature starter often yields disappointing texture, so allow time for growth.
- If starter is sluggish or not bubbling– Try 1 feeding with 1/2 whole wheat or rye flour and 1/2 bread flour: This boost provides extra sugars and wild yeasts that often rekindle activity. If there is no improvement you can add a tablespoon of pineapple juice in the next feed for a gentle acidifying nudge. Persistent inactivity after these measures suggests starting over, since a truly dead starter will not recover and continued efforts waste flour and time.
- If starter has a layer of liquid on top– This liquid, called hooch, is a layer of thin clear or slightly cloudy liquid that forms on top of the starter that is underfed: Hooch indicates the starter needs more frequent feeds and is producing alcohol as a byproduct of starvation. Pouring off or stirring it back in is acceptable, but the best fix is a consistent feeding schedule so hooch does not recur. Ignoring hooch and letting it accumulate can lead to unpleasant odors and weak performance.
- How do I know if my starter is hungry?– Does it become active right after feeding, double in volume, then collapse within 4 hours?: These are classic signals that a starter is hungry and needs more frequent feedings to maintain peak performance. If you see rapid collapse, increase feed frequency or reduce the amount you keep between feeds. Failing to adjust will lead to flat, underpowered dough from your starter.
- My starter has mold, is it ok to use?– No: Mold is a contamination sign, and the safest course is to discard the starter and begin again. Mold can indicate airborne spores that have colonized the surface, and continuing to use a moldy starter risks food safety and poor fermentation. Always err on the side of caution when the surface shows colored fuzz or odd smells.
- My starter overflowed the jar!– First off, congratulations on the active and healthy starter!: Overflow means vigorous activity; scrape down the jar, transfer to a larger container, and avoid using any starter that escaped contact with the sterile interior. Going forward, choose a taller jar or reduce the amount you keep between feeds to prevent repeat overflows. Leaving an overflowing starter unchecked can create a messy cleanup and cross contaminate nearby surfaces.
Notes
- Adjust feeding cadence: If you bake frequently, feed every 12 hours to keep the starter vigorous. For occasional bakers, a weekly refrigerated feed is sufficient. Monitor rise times to find the right rhythm for your starter rather than forcing a fixed schedule.
- Vary hydration gently: Tweaking hydration influences texture and activity. A slightly thicker starter can be easier to manage, while a looser one may show bubbles sooner. Make small changes and observe results over several feeds before committing.
- Use alternative flours sparingly: Introducing rye or additional whole wheat can boost activity, but do so occasionally to avoid destabilizing your established balance. These flours add flavor and fermentable sugars that can perk up a sluggish starter.
- Reserve discard creatively: Save discard for pancakes or waffles so you are not wasting extra starter when maintaining daily feeds. This is a practical way to use what you remove while still keeping the main culture healthy.
- Dried backup: Once your starter is mature, create a dried reserve to protect against accidents. Dry thin layers fully, store airtight, and keep them in the freezer for long term security so you can revive if needed.