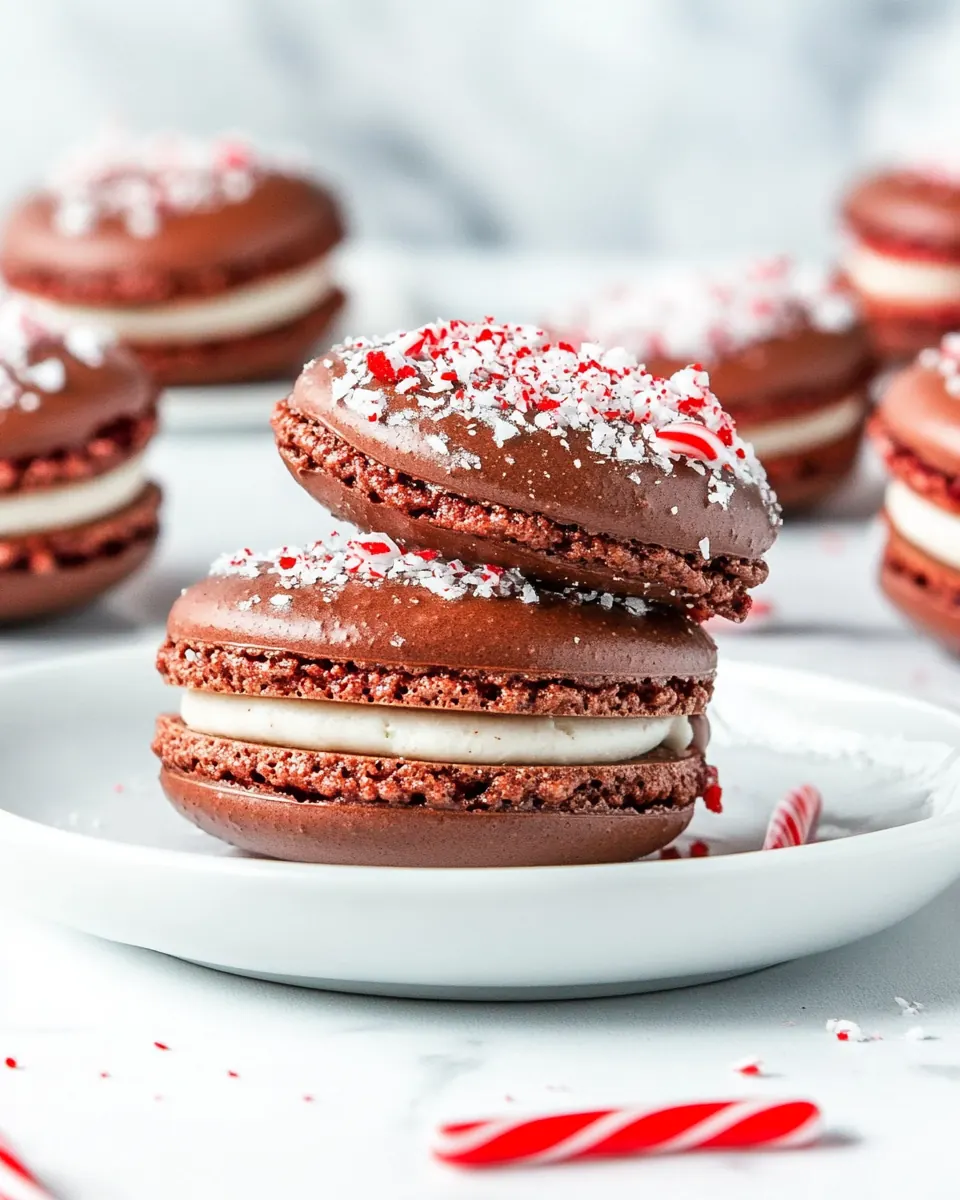
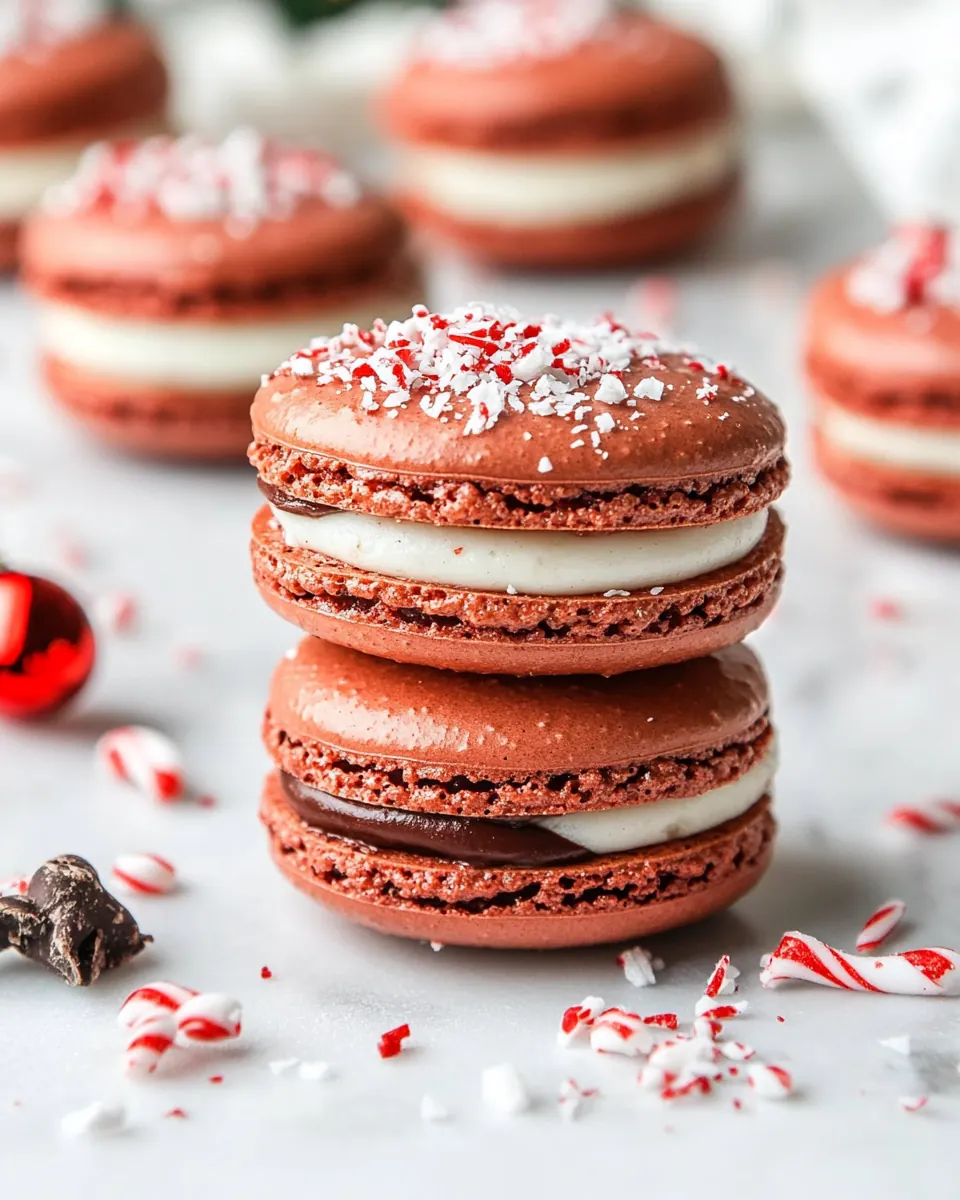
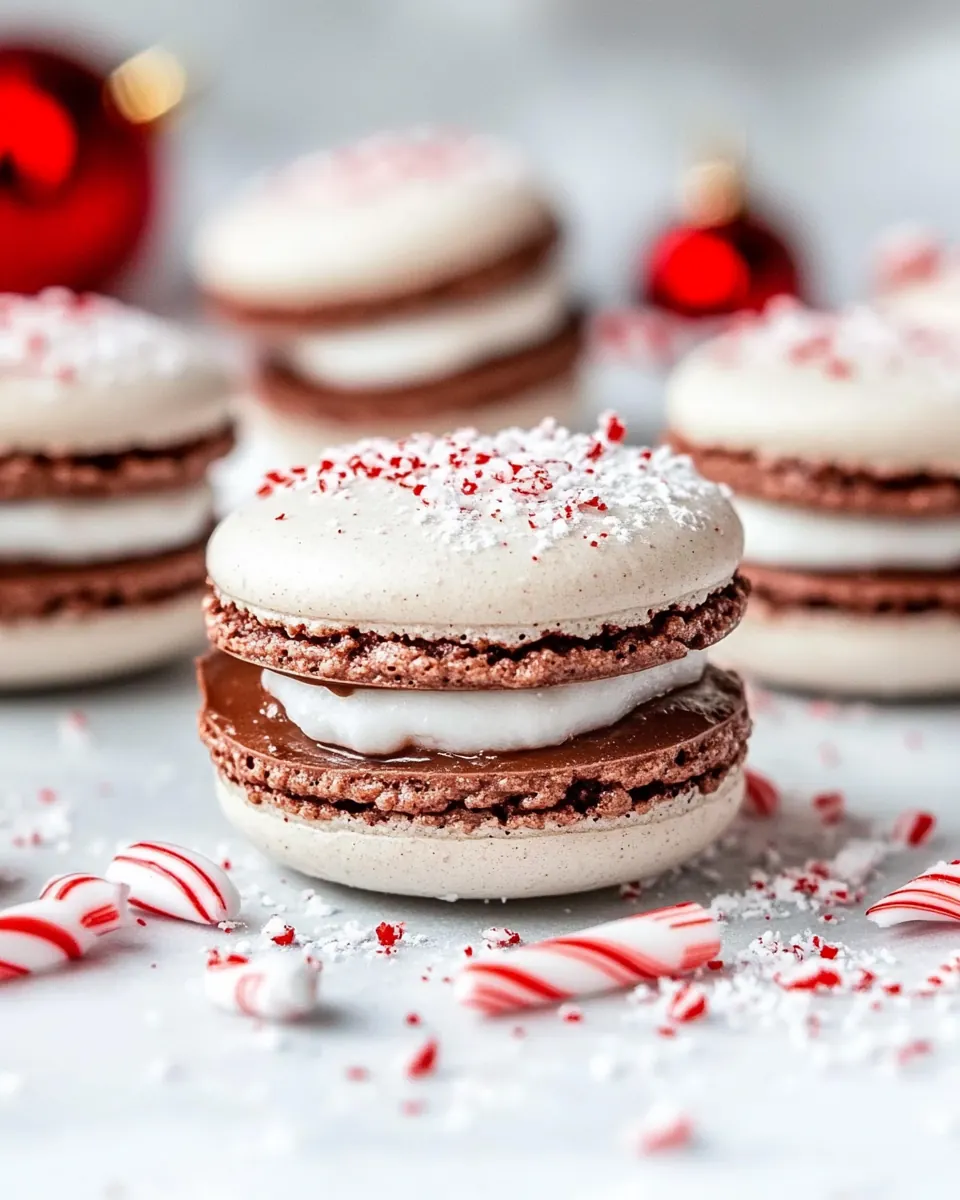
Peppermint Chocolate Macarons
Peppermint Chocolate Macarons have been my favorite holiday baking project for years, a little ritual I turn to when the house needs cheering and I want something special to gift friends. The first time I made these I was nervous about the temperamental meringue, but the payoff was worth it, a tray of delicate cookie sandwiches that snapped with a light shell and melted into a soft, chocolate peppermint center. Over time I learned small tricks that make the process less intimidating, and now I often find myself humming while I sift and fold.
There is something nostalgic about the scent that fills the kitchen as I bake Peppermint Chocolate Macarons, peppermint bright and cocoa rich, wafting through winter evening air. I remember the patience it took the first few times to let the shells rest properly, and how that patience rewarded me with smooth tops and pretty feet. Friends began to request them at holiday gatherings, and I started packaging them in little boxes tied with ribbon.
When I make Peppermint Chocolate Macarons for company I like to involve someone, even a child, to crush candy canes for the final flourish. That simple step turns each cookie into a tiny ornament. I also enjoy how methodical the process is, a sequence of tactile steps you can sink into, which makes it oddly meditative. Each batch teaches me something new, and I never stop tweaking tiny details to chase perfection.
Recipe Snapshot
2 hr 4 mins
90 mins
34 mins
Hard
120 kcal
French
Gluten-Free, Low FODMAP
Desserts
Stand mixer, Silicone Macaron Mat, Digital Scale, Oven Thermometer
What Sets This Peppermint Chocolate Macarons Apart
Classic holiday flavor pairing
I love how Peppermint Chocolate Macarons combine two iconic tastes, peppermint and chocolate. The contrast between the cool, minty filling and the deep, cocoa buttercream creates a balanced bite that feels festive but refined. I often tell guests the filling is the heart of the cookie, and it truly brings the whole sandwich together.
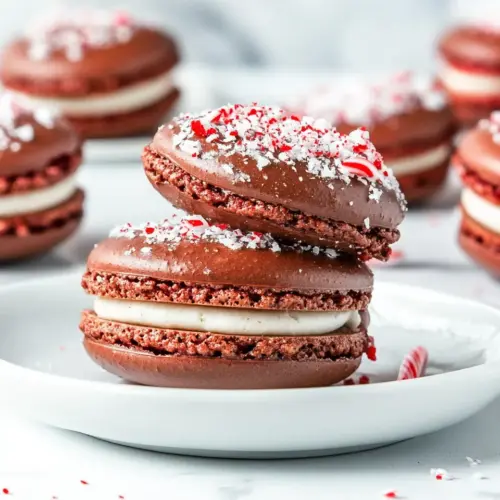
Delicate texture with big impact
These macarons deliver a crisp shell that gives way to a soft interior, and that contrast is what keeps me coming back. I enjoy watching the feet form in the oven, and the slight crispness that yields to a chewy center. When they are done right, each macaron feels like a tiny achievement.
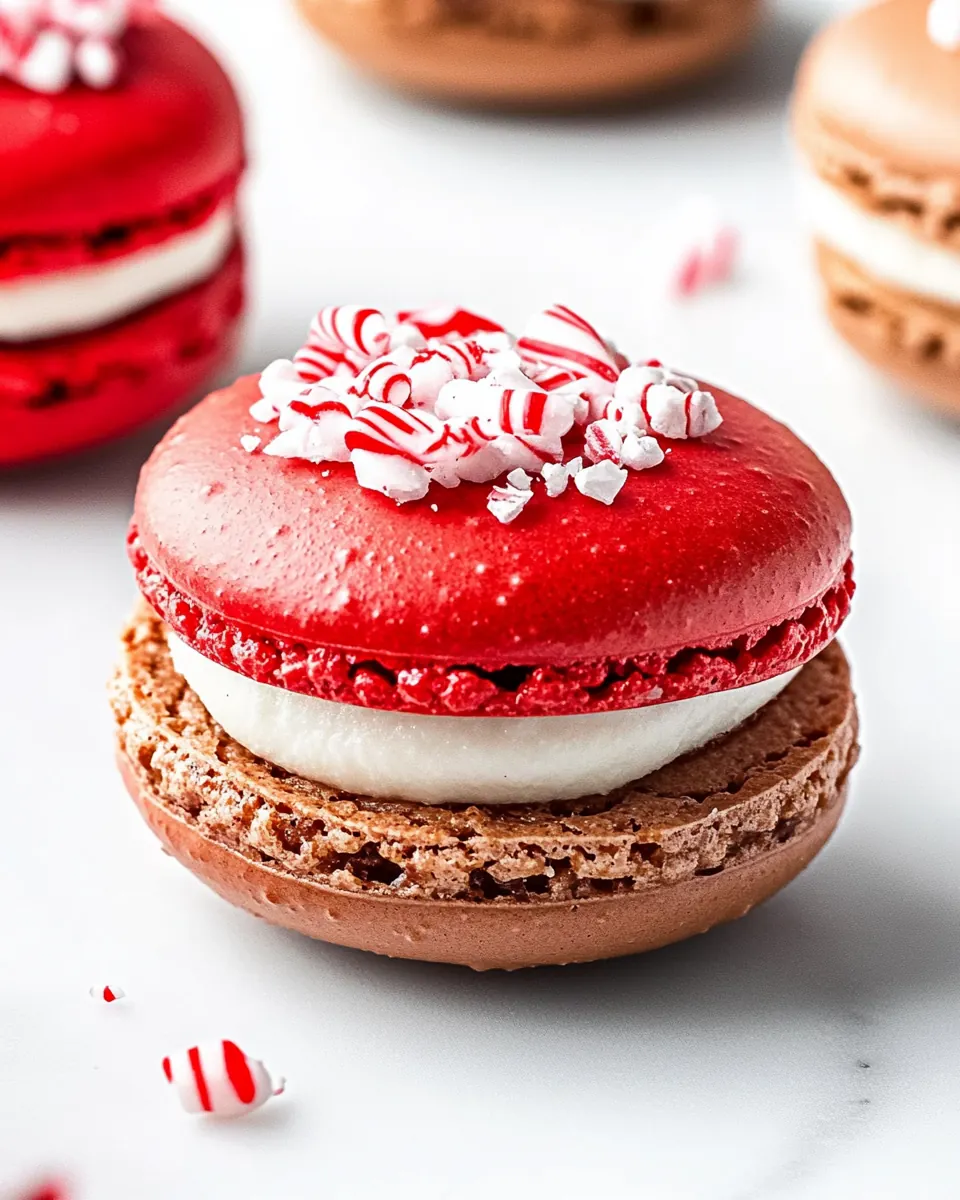
Visually striking and giftable
Adding crushed candy canes to the edges makes these cookies look like tiny holiday decorations. The red streaks in the shells and the white candy flecks create an elegant, seasonal presentation. I love packaging them in small boxes for friends, because they travel well and look gorgeous when stacked.
Technique driven, yet rewarding
I appreciate recipes that teach good technique, and Peppermint Chocolate Macarons do just that. Working the meringue, mastering the macaronage, and finding the right rest time are skills that translate to other meringue based bakes. Each step matters, and you feel your skill grow with every successful batch.
Flexible and customizable
While the recipe focuses on chocolate peppermint, you can vary the intensity of peppermint, or swap the cocoa ratio for a darker filling. I sometimes adjust the sweetness or the cream amount to tune the buttercream texture. That flexibility keeps the recipe interesting for me, and it lets you make it your own.
What to Buy for Peppermint Chocolate Macarons
These ingredients are all about precision and balance, forming two distinct parts: the delicate macaron shells and the rich chocolate peppermint buttercream. The dry elements provide structure and sweetness, while the whipped egg whites create lift and the buttercream brings flavor and moisture. When chosen and prepared carefully, these components cooperate to produce smooth tops, well formed feet, and a glossy filling that holds the sandwich together.
- 100 grams almond flour: Provide a fine nutty base and structure for the macaron shells, contributing moisture and a delicate almond flavor; sift finely to prevent gritty texture and ensure smooth batter. Maintain the specified weight for accurate macaron feet development and shell consistency during baking.
- 180 grams powdered sugar: Add sweetness and a light, powdery texture to the almond flour, helping to stabilize the dry mixture and create a smooth, cohesive batter; sift together with almond flour to remove lumps. Use the exact amount to balance sweetness without making the shells too soft.
- 3 large egg whites around 90 grams, room temperature: Whip into a stable meringue that gives lift, structure, and the characteristic chew of macarons; ensure eggs are at room temperature for optimal volume when whipped. Measure the approximate weight to keep consistency across batches and produce proper macaron feet.
- 1/4 teaspoon cream of tartar: Stabilize the whipped egg whites, promoting finer, more elastic meringue and preventing overbeating; add at the start of whipping to improve volume retention. Use the small specified amount to subtly strengthen the foam without altering flavor.
- 1/4 cup granulated sugar: Dissolve into the hot or whipped whites to create a glossy, stable meringue; control the sugar addition to achieve correct stiffness and sheen in the peaks. Use the granulated sugar precisely for meringue stability and proper shell rise.
- 1/2 teaspoon red gel food coloring: Tint the batter with concentrated color to achieve a festive peppermint-pink or red hue without affecting batter consistency; use a gel form to avoid adding extra liquid. Start with the specified small amount and adjust carefully to prevent overcoloring.
- 1/2 teaspoon peppermint extract: Impart a clear, cool peppermint flavor to both shells or filling if incorporated, enhancing the seasonal profile and complementing chocolate; add sparingly to avoid overpowering the almond notes. Use the measured amount to balance the overall flavor.
- 1/2 cup unsalted butter room temperature: Add creaminess, richness, and structure to the filling, providing a smooth mouthfeel and helping to bind powdered sugar and cocoa into a spreadable consistency. Ensure butter is at room temperature for easy creaming and even incorporation.
- 2 cups powdered sugar: Sweeten and thicken the buttercream filling while creating a smooth texture that pipes cleanly between shells; sift to avoid lumps and achieve a polished finish. Use the specified volume to reach the proper balance of sweetness and structure.
- 2 tablespoons unsweetened cocoa powder: Contribute deep chocolate flavor and a slightly dry powderiness that intensifies the filling; sift with powdered sugar to ensure even distribution and prevent clumping. Adjust the amount within the given measure to reach desired chocolate intensity without drying the filling.
- 1 to 2 tablespoons heavy whipping cream: Loosen the buttercream slightly and add silky richness, helping to achieve a spreadable, pipeable consistency; add gradually until the desired texture is reached. Use the specified range to fine-tune thickness without making the filling runny.
- 1 teaspoon peppermint extract: Add a secondary peppermint boost to the buttercream, reinforcing the candy-cane flavor and balancing the chocolate; incorporate carefully to avoid an overly medicinal taste. Use the teaspoon precisely to harmonize with the peppermint in the shells and candy decorations.
- 12 crushed candy canes for decoration: Provide crunchy, festive topping and a burst of peppermint flavor and color, adding texture contrast to the smooth macaron; crush to desired size for sprinkling or pressing onto filled shells. Use the specified number to decorate uniformly without overwhelming each cookie.
Step by Step Guide for Peppermint Chocolate Macarons
Rolling through the steps with calm focus makes macaron baking more enjoyable. Below I expand the original directions into detailed, sensory rich guidance so you know the signs of success at each phase. I share what to watch for, what it should smell like, and a common pitfall to avoid.
- Using a large sieve, sift the almond flour and powdered sugar together into a large bowl. Then sift the mixture a second time into another large bowl. Set aside.: The airiness of the sifted mixture is crucial, you should see a fine powder fall like soft snow into the bowl and the aroma will be subtly nutty and sweet. Sifting twice removes any stubborn lumps and ensures the dry mix is homogeneous, which prevents heavy spots in the batter that could make the shells crack during baking. You want both tools and patience here, as the texture directly influences how smooth the tops will be after baking. A common mistake is skimping on sifting, which leads to bumpy shells and uneven feet.
- In a large bowl, pour in the egg whites and cream of tartar. Beat the egg whites on medium-low speed until soft peaks form.: As you beat, watch the whites change from glossy liquid to opaque peaks, with a faint sweet egg scent. Soft peaks will gently curl over when you lift the whisk and the mixture will still shimmer, indicating it can incorporate sugar without collapsing. The cream of tartar stabilizes the foam and gives the whites a silkier feel. Overbeating here makes the whites grainy and dry, so stop at the right sheen to keep the meringue elastic for folding.
- Add the granulated sugar to the eggs. Continue beating until the mixture almost reaches stiff peaks.: Adding sugar gradually dissolves into the whites, smoothing the meringue and building strength, resulting in a glossy, satiny texture. You should hear a slight change in the mixer sound as the foam tightens and see the peaks hold more shape. If the sugar feels gritty between your fingers, beat a bit longer until it dissolves. Avoid adding the sugar too fast, as that can deflate the foam and prevent proper volume.
- Add the red gel food coloring and peppermint extract and beat until stiff peaks form, and you can tip the bowl upside down and nothing falls out.: The meringue will deepen to the chosen red, glossy and dense, and the peppermint will perfume the air with a cool note. Stiff peaks should stand upright without drooping, and the bowl inversion test confirms stability. This firmness is key so the shells keep their shape when piped. A frequent error is overcoloring or using liquid dye, which introduces excess moisture and weakens the meringue.
- Fold in a third of the dry ingredients to the egg white mixture with a spatula until completely mixed. Fold in the rest of the ingredients until the batter can run off the spatula forming a “figure-8” without breaking. Be careful not to overmix the batter or you will lose air bubbles from the egg whites.: The folding phase is all about feel, not speed; you should see the batter slowly fall in a ribbon and settle back, with a slightly glossy sheen. The figure eight test shows the right viscosity where the batter flows but still holds some tension. This balance ensures proper spreading and foot development in the oven. If you overmix, the batter becomes too loose and the shells will flatten and lack feet, while undermixing yields domed centers and cracks.
- Scoop the batter into a large piping bag fitted with a large round tip (I used a Wilton 2 A tip). Pipe 1 – 1 1/2 inch circles onto parchment-lined baking sheets, leaving about 1 – 2 inches between each macaron. You can also use a silicone macaron mat.: As you pipe, aim for even pressure so each circle matches the others in size, with a satiny surface that reflects light softly. You should hear the quiet whoosh of batter leaving the bag and see smooth rims form on each circle. Keeping consistent spacing prevents them from sticking together while baking. A mistake here is applying inconsistent pressure, which creates uneven sizes and baking times for different cookies.
- Tap the pan on the counter at least 5 times to release air bubbles to the top of the macarons. Use a toothpick to pop any bubbles on the surface.: Tapping helps trapped air escape, leaving a smoother top and preventing large air pockets that cause blisters during baking. After taps, inspect each cookie for small domes and gently pop them with a toothpick so the surface becomes clean and uniform. You will notice the batter settle a little, and the sound of tapping changes as air evacuates. Forgetting this step can leave unsightly bubbles and uneven feet.
- THIS IS IMPORTANT! Allow the macarons to rest in a dry area for 30 minutes to an hour until the tops of the macarons are no longer tacky to the touch.: Resting forms a thin skin that helps the shells rise evenly and develop feet, and you'll feel the tops go from tacky to dry under your fingertip. The air should be calm and dry; I sometimes set mine under the oven hood to encourage drying. If you skip or shorten resting, shells may crack or fail to develop proper feet, so patience pays off here.
- Preheat the oven to 315°F/157°C.: Preheating to the correct temperature ensures the macarons bake quickly enough to set their structure while forming feet, and the smell of warm air will shift from neutral to faintly toasty. An oven thermometer helps confirm accuracy because many ovens run hot or cold. If your oven is wrong, shells may brown too fast or not rise properly, so verify the temperature before baking.
- Bake the macarons, one cookie sheet at a time, for 17 minutes. The cookies should rise and form “feet” as they bake.: In the oven the macarons will go through a dramatic transformation, swelling slightly and producing delicate ruffled feet at their bases, while the tops stay smooth. You should see no wobble when you nudge the rack and the aroma is a light baked almond note. Baking one sheet at a time keeps air circulation uniform; overcrowding or multiple sheets can yield uneven heat and inconsistent feet.
- Let the macarons cool on the pan set on top of a cooling rack for 10 minutes. Then remove the pan, keeping the macarons on the parchment paper, and leave on the cooling rack until completely cool, at least 10 more minutes. The macarons should peel off of the parchment paper leaving little to no cookie residue on the parchment paper.: As they cool, the shells firm and the bottoms detach from the parchment with a satisfying gentle lift, revealing smooth undersides. You should wait until they are fully cool to avoid breaking the fragile shells. Rushing removal can cause sticking and cracked bottoms, so let the ambient air finish the job for a clean lift.
- In a large mixing bowl, cream the softened butter with a handheld mixer on medium speed. Gradually add the powdered sugar until it is well mixed with no lumps.: The butter should become airy and pale, and as powdered sugar is incorporated the mixture becomes thicker and sweeter, with a smooth, velvety texture. This step sets the stage for a lump free buttercream; if you notice graininess, keep beating until it disappears. Adding the sugar too quickly can make the mixture dusty and uneven.
- Add the cocoa powder, and mix until completely incorporated. Then add the peppermint extract and 1 tablespoon of heavy whipping cream. Mix well on medium speed. If the buttercream is still thick or clumpy, add in a second tablespoon of cream. Mix until the texture is smooth and creamy.: The bowl will fill with the warm, bittersweet scent of cocoa balanced by cool peppermint. Adding cream slowly lets you find the ideal piping consistency, and the second tablespoon is there to rescue an overly stiff frosting. Taste and texture matter here, since the buttercream must hold its shape while remaining soft on the palate. Over thinning creates a filling that seeps out of the sandwiches.
- Add the buttercream to a piping bag and pipe the buttercream on the flat side of half of the macaron cookies. Then place the other half of the macarons on top of the buttercream to form a macaron sandwich.: Piping creates neat, controlled dollops so each sandwich has an even amount of filling, and you should hear a soft plop as the buttercream meets the shell. Press the top shell gently to spread the filling to the edges without squeezing it out. Uneven piping can lead to squashed cookies or crowns of filling, so aim for consistent pressure and portion size.
- Roll the macarons in the crushed candy canes to coat the edges.: The crushed candy will cling to the buttercream rim, adding crunch and a burst of peppermint that complements the interior. You should feel little crunch under your teeth and see a festive rim of white and red specks. Work on a plate to catch stray pieces, and press gently so the candy adheres without cracking the shells. Using too large candy shards can nick the delicate shells, so aim for a fine crush.
Recipe Notes about Peppermint Chocolate Macarons
These notes collect the practical tricks I rely on when making Peppermint Chocolate Macarons. The tips will help you avoid common pitfalls and improve texture, appearance, and flavor consistency.
- Use Gel Food Coloring Liquid food coloring can add unwanted moisture and affect the meringue, so choose gel colors to maintain batter stability while achieving vivid hues.
- Be Sure to Let them Rest Let the piped shells sit until a skin forms, typically 30 minutes to an hour; this drying period is essential for smooth tops and strong feet during baking.
- Check the Oven Temperature Oven thermostats can be unreliable, so use an oven thermometer and give the oven extra time to fully reach the target temperature for consistent results.
- Don’t Open the Oven Avoid opening the oven while macarons bake, sudden air changes can cause collapse or cracking of the shells; wait until the last minute to check visually.
- Storing Store assembled macarons in an airtight container at room temperature for up to three days, refrigerate for up to seven days, or freeze for up to two months for extended freshness.
- Freezing Tips Freeze either assembled macarons or just shells after letting filled cookies rest at room temperature for eight to twelve hours, then thaw in the fridge before serving for the best texture.
How to Serve Peppermint Chocolate Macarons
Serving Peppermint Chocolate Macarons is an opportunity to highlight their festive appearance and delicate balance of flavors. I like to present them on a platter at holiday gatherings, and they make elegant gifts when boxed. Below are detailed serving ideas and practical storage notes to keep them tasting their best.
- Holiday dessert platter Arrange the macarons on a decorative platter with alternating colors for visual contrast, placing the ones with candy cane edges at the center to catch the eye.
- Gifting Place a dozen in small bakery boxes with tissue paper and a ribbon for charming holiday gifts, adding a small label that names the flavor and any storage instructions.
- Pairings Serve alongside a cup of strong coffee or a minty herbal tea so the beverage cuts the sweetness while echoing the peppermint notes in the macarons.
- Occasions These are perfect for holiday parties, cookie exchanges, and elegant afternoon teas where a small, refined sweet is appreciated.
- Plating For formal presentation, set each macaron on a doily or a small dessert plate, and add a sprinkle of crushed candy cane around the plate edge for a festive touch.
- Storage for events Keep the macarons refrigerated until thirty minutes before serving if the venue is warm, then bring to room temperature so their texture is at its best.
- Make ahead Bake shells and prepare buttercream in advance, then assemble the day before guests arrive so flavors meld and the cookies are ready to enjoy.
- Transport Use shallow boxes and layer with parchment to prevent shifting during travel, and keep the container cool to preserve texture and filling stability.
- Portioning Offer two to three macarons per guest as a small indulgent treat, since they are richly flavored and quite sweet.
- Seasonal display Incorporate sprigs of rosemary or small evergreen clippings around the serving tray for a natural, seasonal look that complements the candy cane garnish.
FAQ
Conclusion
Peppermint Chocolate Macarons stand out for their elegant presentation and the perfect harmony of mint and chocolate. They require attention to technique, but each careful step rewards you with delicate shells and a luscious peppermint cocoa filling that feels special. Give them a try during the holidays, and embrace the process as much as the result, because the ritual of sifting, folding, and piping is part of what makes these cookies so satisfying to create and share.
Peppermint Chocolate Macarons
Equipment
- Stand mixer
- Silicone Macaron Mat
- Digital Scale
- Oven thermometer
Ingredients
- 100 grams almond flour Provide a fine nutty base and structure for the macaron shells, contributing moisture and a delicate almond flavor; sift finely to prevent gritty texture and ensure smooth batter. Maintain the specified weight for accurate macaron feet development and shell consistency during baking.
- 180 grams powdered sugar Add sweetness and a light, powdery texture to the almond flour, helping to stabilize the dry mixture and create a smooth, cohesive batter; sift together with almond flour to remove lumps. Use the exact amount to balance sweetness without making the shells too soft.
- 3 large egg whites around 90 grams, room temperature Whip into a stable meringue that gives lift, structure, and the characteristic chew of macarons; ensure eggs are at room temperature for optimal volume when whipped. Measure the approximate weight to keep consistency across batches and produce proper macaron feet.
- 1/4 teaspoon cream of tartar Stabilize the whipped egg whites, promoting finer, more elastic meringue and preventing overbeating; add at the start of whipping to improve volume retention. Use the small specified amount to subtly strengthen the foam without altering flavor.
- 1/4 cup granulated sugar Dissolve into the hot or whipped whites to create a glossy, stable meringue; control the sugar addition to achieve correct stiffness and sheen in the peaks. Use the granulated sugar precisely for meringue stability and proper shell rise.
- 1/2 teaspoon red gel food coloring Tint the batter with concentrated color to achieve a festive peppermint-pink or red hue without affecting batter consistency; use a gel form to avoid adding extra liquid. Start with the specified small amount and adjust carefully to prevent overcoloring.
- 1/2 teaspoon peppermint extract Impart a clear, cool peppermint flavor to both shells or filling if incorporated, enhancing the seasonal profile and complementing chocolate; add sparingly to avoid overpowering the almond notes. Use the measured amount to balance the overall flavor.
- 1/2 cup unsalted butter room temperature Add creaminess, richness, and structure to the filling, providing a smooth mouthfeel and helping to bind powdered sugar and cocoa into a spreadable consistency. Ensure butter is at room temperature for easy creaming and even incorporation.
- 2 cups powdered sugar Sweeten and thicken the buttercream filling while creating a smooth texture that pipes cleanly between shells; sift to avoid lumps and achieve a polished finish. Use the specified volume to reach the proper balance of sweetness and structure.
- 2 tablespoons unsweetened cocoa powder Contribute deep chocolate flavor and a slightly dry powderiness that intensifies the filling; sift with powdered sugar to ensure even distribution and prevent clumping. Adjust the amount within the given measure to reach desired chocolate intensity without drying the filling.
- 1 to 2 tablespoons heavy whipping cream Loosen the buttercream slightly and add silky richness, helping to achieve a spreadable, pipeable consistency; add gradually until the desired texture is reached. Use the specified range to fine-tune thickness without making the filling runny.
- 1 teaspoon peppermint extract Add a secondary peppermint boost to the buttercream, reinforcing the candy-cane flavor and balancing the chocolate; incorporate carefully to avoid an overly medicinal taste. Use the teaspoon precisely to harmonize with the peppermint in the shells and candy decorations.
- 12 crushed candy canes for decoration Provide crunchy, festive topping and a burst of peppermint flavor and color, adding texture contrast to the smooth macaron; crush to desired size for sprinkling or pressing onto filled shells. Use the specified number to decorate uniformly without overwhelming each cookie.
Instructions
- Using a large sieve, sift the almond flour and powdered sugar together into a large bowl. Then sift the mixture a second time into another large bowl. Set aside.: The airiness of the sifted mixture is crucial, you should see a fine powder fall like soft snow into the bowl and the aroma will be subtly nutty and sweet. Sifting twice removes any stubborn lumps and ensures the dry mix is homogeneous, which prevents heavy spots in the batter that could make the shells crack during baking. You want both tools and patience here, as the texture directly influences how smooth the tops will be after baking. A common mistake is skimping on sifting, which leads to bumpy shells and uneven feet.
- In a large bowl, pour in the egg whites and cream of tartar. Beat the egg whites on medium-low speed until soft peaks form.: As you beat, watch the whites change from glossy liquid to opaque peaks, with a faint sweet egg scent. Soft peaks will gently curl over when you lift the whisk and the mixture will still shimmer, indicating it can incorporate sugar without collapsing. The cream of tartar stabilizes the foam and gives the whites a silkier feel. Overbeating here makes the whites grainy and dry, so stop at the right sheen to keep the meringue elastic for folding.
- Add the granulated sugar to the eggs. Continue beating until the mixture almost reaches stiff peaks.: Adding sugar gradually dissolves into the whites, smoothing the meringue and building strength, resulting in a glossy, satiny texture. You should hear a slight change in the mixer sound as the foam tightens and see the peaks hold more shape. If the sugar feels gritty between your fingers, beat a bit longer until it dissolves. Avoid adding the sugar too fast, as that can deflate the foam and prevent proper volume.
- Add the red gel food coloring and peppermint extract and beat until stiff peaks form, and you can tip the bowl upside down and nothing falls out.: The meringue will deepen to the chosen red, glossy and dense, and the peppermint will perfume the air with a cool note. Stiff peaks should stand upright without drooping, and the bowl inversion test confirms stability. This firmness is key so the shells keep their shape when piped. A frequent error is overcoloring or using liquid dye, which introduces excess moisture and weakens the meringue.
- Fold in a third of the dry ingredients to the egg white mixture with a spatula until completely mixed. Fold in the rest of the ingredients until the batter can run off the spatula forming a “figure-8” without breaking. Be careful not to overmix the batter or you will lose air bubbles from the egg whites.: The folding phase is all about feel, not speed; you should see the batter slowly fall in a ribbon and settle back, with a slightly glossy sheen. The figure eight test shows the right viscosity where the batter flows but still holds some tension. This balance ensures proper spreading and foot development in the oven. If you overmix, the batter becomes too loose and the shells will flatten and lack feet, while undermixing yields domed centers and cracks.
- Scoop the batter into a large piping bag fitted with a large round tip (I used a Wilton 2 A tip). Pipe 1 – 1 1/2 inch circles onto parchment-lined baking sheets, leaving about 1 – 2 inches between each macaron. You can also use a silicone macaron mat.: As you pipe, aim for even pressure so each circle matches the others in size, with a satiny surface that reflects light softly. You should hear the quiet whoosh of batter leaving the bag and see smooth rims form on each circle. Keeping consistent spacing prevents them from sticking together while baking. A mistake here is applying inconsistent pressure, which creates uneven sizes and baking times for different cookies.
- Tap the pan on the counter at least 5 times to release air bubbles to the top of the macarons. Use a toothpick to pop any bubbles on the surface.: Tapping helps trapped air escape, leaving a smoother top and preventing large air pockets that cause blisters during baking. After taps, inspect each cookie for small domes and gently pop them with a toothpick so the surface becomes clean and uniform. You will notice the batter settle a little, and the sound of tapping changes as air evacuates. Forgetting this step can leave unsightly bubbles and uneven feet.
- THIS IS IMPORTANT! Allow the macarons to rest in a dry area for 30 minutes to an hour until the tops of the macarons are no longer tacky to the touch.: Resting forms a thin skin that helps the shells rise evenly and develop feet, and you'll feel the tops go from tacky to dry under your fingertip. The air should be calm and dry; I sometimes set mine under the oven hood to encourage drying. If you skip or shorten resting, shells may crack or fail to develop proper feet, so patience pays off here.
- Preheat the oven to 315°F/157°C.: Preheating to the correct temperature ensures the macarons bake quickly enough to set their structure while forming feet, and the smell of warm air will shift from neutral to faintly toasty. An oven thermometer helps confirm accuracy because many ovens run hot or cold. If your oven is wrong, shells may brown too fast or not rise properly, so verify the temperature before baking.
- Bake the macarons, one cookie sheet at a time, for 17 minutes. The cookies should rise and form “feet” as they bake.: In the oven the macarons will go through a dramatic transformation, swelling slightly and producing delicate ruffled feet at their bases, while the tops stay smooth. You should see no wobble when you nudge the rack and the aroma is a light baked almond note. Baking one sheet at a time keeps air circulation uniform; overcrowding or multiple sheets can yield uneven heat and inconsistent feet.
- Let the macarons cool on the pan set on top of a cooling rack for 10 minutes. Then remove the pan, keeping the macarons on the parchment paper, and leave on the cooling rack until completely cool, at least 10 more minutes. The macarons should peel off of the parchment paper leaving little to no cookie residue on the parchment paper.: As they cool, the shells firm and the bottoms detach from the parchment with a satisfying gentle lift, revealing smooth undersides. You should wait until they are fully cool to avoid breaking the fragile shells. Rushing removal can cause sticking and cracked bottoms, so let the ambient air finish the job for a clean lift.
- In a large mixing bowl, cream the softened butter with a handheld mixer on medium speed. Gradually add the powdered sugar until it is well mixed with no lumps.: The butter should become airy and pale, and as powdered sugar is incorporated the mixture becomes thicker and sweeter, with a smooth, velvety texture. This step sets the stage for a lump free buttercream; if you notice graininess, keep beating until it disappears. Adding the sugar too quickly can make the mixture dusty and uneven.
- Add the cocoa powder, and mix until completely incorporated. Then add the peppermint extract and 1 tablespoon of heavy whipping cream. Mix well on medium speed. If the buttercream is still thick or clumpy, add in a second tablespoon of cream. Mix until the texture is smooth and creamy.: The bowl will fill with the warm, bittersweet scent of cocoa balanced by cool peppermint. Adding cream slowly lets you find the ideal piping consistency, and the second tablespoon is there to rescue an overly stiff frosting. Taste and texture matter here, since the buttercream must hold its shape while remaining soft on the palate. Over thinning creates a filling that seeps out of the sandwiches.
- Add the buttercream to a piping bag and pipe the buttercream on the flat side of half of the macaron cookies. Then place the other half of the macarons on top of the buttercream to form a macaron sandwich.: Piping creates neat, controlled dollops so each sandwich has an even amount of filling, and you should hear a soft plop as the buttercream meets the shell. Press the top shell gently to spread the filling to the edges without squeezing it out. Uneven piping can lead to squashed cookies or crowns of filling, so aim for consistent pressure and portion size.
- Roll the macarons in the crushed candy canes to coat the edges.: The crushed candy will cling to the buttercream rim, adding crunch and a burst of peppermint that complements the interior. You should feel little crunch under your teeth and see a festive rim of white and red specks. Work on a plate to catch stray pieces, and press gently so the candy adheres without cracking the shells. Using too large candy shards can nick the delicate shells, so aim for a fine crush.
Notes
- Use Gel Food Coloring Liquid food coloring can add unwanted moisture and affect the meringue, so choose gel colors to maintain batter stability while achieving vivid hues.
- Be Sure to Let them Rest Let the piped shells sit until a skin forms, typically 30 minutes to an hour; this drying period is essential for smooth tops and strong feet during baking.
- Check the Oven Temperature Oven thermostats can be unreliable, so use an oven thermometer and give the oven extra time to fully reach the target temperature for consistent results.
- Don’t Open the Oven Avoid opening the oven while macarons bake, sudden air changes can cause collapse or cracking of the shells; wait until the last minute to check visually.
- Storing Store assembled macarons in an airtight container at room temperature for up to three days, refrigerate for up to seven days, or freeze for up to two months for extended freshness.
- Freezing Tips Freeze either assembled macarons or just shells after letting filled cookies rest at room temperature for eight to twelve hours, then thaw in the fridge before serving for the best texture.