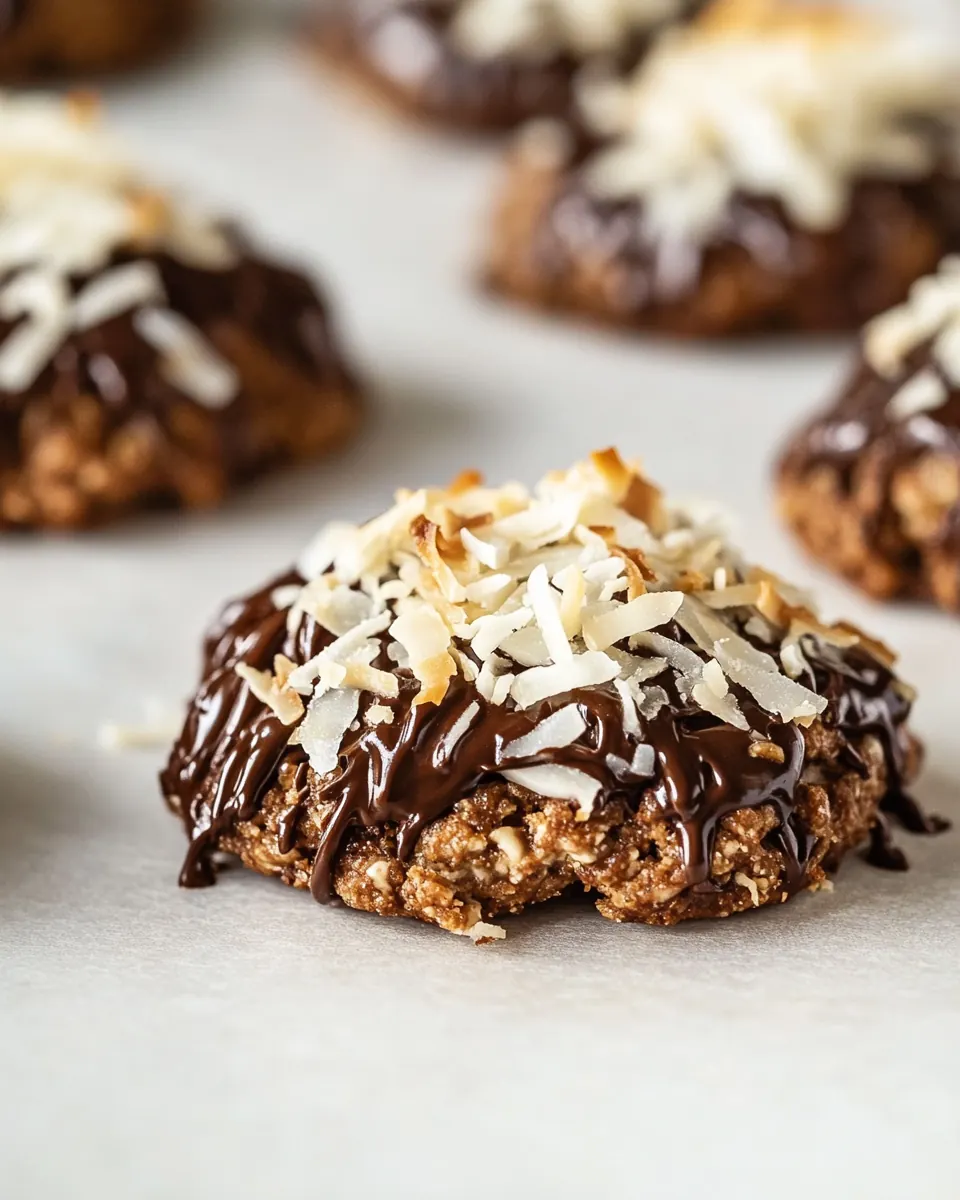
Chocolate Coconut Cookies
Chocolate Coconut Cookies are the kind of treat I reach for when I want something comforting yet a little bit adventurous.
I remember the first time I combined unsalted butter and cream cheese in cookie dough, curious about how the tang and richness would play together with shredded coconut flakes. I was making a batch for a neighborhood potluck and felt a little experimental. While the dough came together, the kitchen filled with the warm, sweet scent of brown sugar and toasted coconut, and I knew I had something special on my hands.
These cookies have the nostalgic chew of classic coconut cookies, and when you dip half into melted chocolate chips and finish them with toasted coconut shreds, they gain an elegant contrast of texture and flavor. My family argued over the first pan, and I learned to double the recipe for gatherings because they vanish fast. Over time I refined the method so the centers stay tender while the edges go just barely golden, which is my personal cookie sweet spot.
When I bake these, I like to set aside a few to taste as they cool, noticing how the all purpose flour structure supports the coconut without overpowering it, and how the hint of vanilla extract lifts the entire bite. If you are someone who loves a treat that is both simple and slightly luxurious, these cookies will become a dependable favorite.
Recipe Snapshot
25 mins
15 mins
10 mins
Medium
150 kcal
American
Gluten-Free, Low FODMAP
Desserts
Stand mixer, Mixing bowl, Rubber spatula, Baking sheet, Parchment paper, Measuring cups, Microwave or small saucepan
Why This Chocolate Coconut Cookies Is a Winner
Rich, Yet Light Texture
I love that Chocolate Coconut Cookies balance richness with a tender crumb. The combination of unsalted butter and cream cheese creates a silky mouthfeel while the shredded coconut flakes add chew. You get a satisfying bite that is never greasy, which keeps me coming back for more.
Family Friendly and Crowd Pleasing
When I bring out a tray of these, they disappear quickly. These cookies are easy to portion into even sizes, and because they are not overly sweet, they appeal to a wide range of palates. I often make them for potlucks or school events because they travel and store well.
Flexible Finishing Options
I often alternate between leaving them plain, dipping half in melted chocolate chips, or sprinkling toasted coconut shreds on top. That versatility means you can dress them up for special occasions, or keep things simple for everyday snacking. I enjoy experimenting with different coatings, and I never get tired of the classic chocolate dip.
Simple Ingredients, Big Flavor
The ingredient list is approachable, and each component has a job. Light brown sugar brings a caramel note, while a single large egg binds everything without weighing the cookies down. The result is a recipe I can make without a long shopping list, and I’m always reassured when good flavor comes from straightforward pantry items.
Reliable Technique
The method is forgiving yet precise enough that once you’ve practiced it a couple of times, you can consistently produce great batches. I appreciate that the steps are clear, so I can chat with guests while the dough chills or while the cookies bake, without worrying about complicated timing or fragile processes.
Ingredients for Chocolate Coconut Cookies
These ingredients read like a comforting shorthand for success. We rely on a creamy fat base, a soft binder, caramelized sugar notes, and shredded coconut for texture. The key players are the unsalted butter and cream cheese which create richness; the light brown sugar that adds depth; and the shredded coconut flakes which provide chew and fragrance. Together they produce cookies that are tender inside with a slightly crisp edge.
- 1/2 cup unsalted butter softened: Soften to spread easily and create a rich, tender base by incorporating fat that helps with moisture and structure in the dough; creaming with sugar aerates the mixture for lighter cookies.
- 1/2 cup cream cheese softened: Soften to blend smoothly with butter and add tangy richness that lightens texture and contributes to a creamy mouthfeel; helps stabilize the dough and balances sweetness.
- 1 cup light brown sugar packed: Pack to ensure accurate measurement and provide deep, caramel-like sweetness and moisture; helps with chewiness and contributes to a slightly fudgy crumb.
- 1 large egg: Whisk to bind ingredients and provide lift through structure from cooked proteins; adds moisture and helps set the cookies as they bake.
- 1 teaspoon vanilla extract: Add for aromatic sweetness that enhances the overall flavor profile and complements chocolate and coconut notes; helps round out the cookie’s taste.
- 1 teaspoon baking powder: Measure to leaven gently, offering light rise and a tender crumb without producing a cake-like texture; balances with eggs and creates slight spread.
- 1/2 teaspoon salt: Measure to season and enhance all flavors while controlling sweetness; also balances the richness of dairy and chocolate for a well-rounded cookie.
- 1 1/2 cups all-purpose flour: Sift or measure accurately to provide the bulk and structure of the cookies; forms the gluten network that gives chew and holds mix-ins together.
- 1 1/2 cups shredded sweetened coconut flakes: Fold in to distribute coconut’s chewy texture and sweet, tropical flavor throughout the dough; contributes to mouthfeel and visual appeal with toasted edges when baked.
- 1 cup chocolate chips melted, and 1/2 cup toasted coconut shreds (optional): Optional to melt chocolate chips for drizzling or dipping and toasting extra coconut for crunch and toasted flavor, enhancing both texture and presentation.
Making This Chocolate Coconut Cookies
These instructions are straightforward but rewarding, and I like to approach baking these like a small ritual. You will notice the kitchen aroma shift as each stage progresses, and paying attention to visual cues will help produce consistent cookies. Keep your tools ready and taste expectations tempered, because the dough and the finished cookie each have tell tale signs you can learn to trust.
- Preheat the oven to 350°F. Line several large baking sheets with parchment paper and set aside.: As the oven warms, the air in your kitchen will begin to feel slightly warmer and dry, which helps cookies bake evenly; a properly preheated oven ensures the all purpose flour sets at the right rate so centers stay tender while edges firm, and a common mistake is to place cookies into an oven that is not fully heated which can cause spreading and uneven texture.
- Set out an electric stand mixer. To the bowl add the softened butter, cream cheese, and brown sugar. Beat on high until light and fluffy, approximately 3 to 4 minutes.: The scent of clean parchment is faint but practical, preventing sticking and creating a smooth underside to the cookies, and using multiple sheets lets you rotate pans for even color, while one error is crowding the pan which leads to merged cookies and inconsistent baking.
- Scrape the bowl with a rubber spatula. Then turn the mixer on low and beat in the egg, vanilla extract, baking powder, and salt. Scrape the bowl again with a rubber spatula. Turn on low and beat in the flour, until just combined. Finally add in the shredded coconut. Once the dough looks smooth, turn off the mixer, as to not over mix the dough.: When you bring the mixer to life, the bowl will hum and the blade will glide, helping you achieve a light, airy blend of unsalted butter , cream cheese , and light brown sugar ; this aeration is what produces a delicate crumb, and a typical oversight is mixing on too high a speed initially which can overwork the fats and change texture.
- Roll the dough into 2 tablespoon balls and place them 2 inches apart on the cookie sheets. Use the palm of your hand to press the dough balls down into 1/2 inch disks.: As these ingredients come together, the mixture will turn paler and fluffier, a visual sign that air has been incorporated; this step matters because that trapped air helps the cookies rise and gives a soft bite, and people sometimes skip scraping the bowl which leaves unincorporated pockets of butter or sugar.
- Bake for 9 to 11 minutes until just barely gold and around the edges. Allow the cookies to cool on the baking sheets for at least 5 minutes before moving.: During beating you will notice the mix lighten in color and the sound shift to a gentler whir, indicating proper aeration; stopping too early yields dense cookies, while going excessively long can cause the fats to break down and produce a greasy texture.
- If dipping in chocolate, melt 1 cup of chocolate chips over low heat on the stovetop, or in the microwave in 30 second increments, stirring in between.: Running the spatula around the bowl will reunite any unmixed patches so the dough is homogeneous, which matters for even flavor and texture; neglecting this often leaves streaks of cream cheese that do not blend into the dough.
- Once the chocolate is smooth, dip half of each cookie in the chocolate. Wipe the excess chocolate off the bottom and place the cookie back on the parchment paper. Before the chocolate hardens, sprinkle it with toasted coconut.: You will hear the mixer slow and feel the batter thicken faintly as the large egg and leavening integrate; this combination provides lift and structure, and a common pitfall is adding cold egg which can cause the fat to seize and clump.
- Scrape the bowl again with a rubber spatula: This second scrape ensures the leavening and seasoning are evenly distributed so every cookie has a consistent rise and taste; skipping it can create cookies that brown unevenly or taste inconsistent.
- Turn on low and beat in the flour until just combined: At this stage the dough will thicken and lose some gloss, and you should stop as soon as the last streaks of all purpose flour vanish to avoid developing gluten which would make the cookies tough, while over mixing here is a frequent mistake that leads to dense results.
- Finally add in the shredded coconut: When the shredded coconut flakes fold in, the dough develops texture and a slightly coarse look, a sign the coconut is evenly distributed and will provide chew, and adding the coconut too early or overworking it can break down the flakes and reduce their pleasant bite.
- Once the dough looks smooth turn off the mixer as to not over mix the dough: A smooth, cohesive dough will feel slightly tacky but not wet; stopping here preserves the tender crumb achieved from careful mixing, and continuing to mix can cause gluten formation and a tougher cookie.
- Roll the dough into 2 tablespoon balls and place them 2 inches apart on the cookie sheets: Rolling into even portions produces uniform baking and when you place them with spacing the cookies get room to spread and brown at the edges; using uneven sizes leads to some cookies overbaking while others underbake.
- Use the palm of your hand to press the dough balls down into 1/2 inch disks: Flattening creates an even surface for consistent baking and a desirable thin profile; if you leave the balls too tall they may remain doughy inside, and pressing too thin will remove the pillowy center.
- Bake for 9 to 11 minutes until just barely gold around the edges: While baking you will notice the smell deepen and the edges picking up color, which signals they are ready; the goal is a barely golden rim with a soft center, and a common error is overbaking which yields a dry, brittle cookie.
- Allow the cookies to cool on the baking sheets for at least 5 minutes before moving: During this short rest the cookies finish setting and firm slightly, which prevents them from breaking when transferred, and moving them too soon can cause misshapen or collapsed cookies.
- If dipping in chocolate melt 1 cup of chocolate chips over low heat on the stovetop or in the microwave in 30 second increments stirring in between: Melted chocolate chips should become glossy and pourable, and stirring ensures even heat distribution to prevent scorching; overheating chocolate causes it to seize and become grainy.
- Once the chocolate is smooth dip half of each cookie in the chocolate: As you dip, the chocolate creates a shiny coating that contrasts with the matte coconut; wipe the excess off the bottom to avoid a messy base, and a mistake is dipping while the chocolate is still too hot which can melt the cookie surface.
- Wipe the excess chocolate off the bottom and place the cookie back on the parchment paper before the chocolate hardens sprinkle it with toasted coconut: The final sprinkle adds a toasty crunch and visual contrast while the chocolate is tacky enough to hold the shreds, and waiting too long means the coconut will not adhere properly.
Recipe Notes about Chocolate Coconut Cookies
These notes expand on small decisions that make a big difference. I take time explaining the how and why so your results are reliable. Below are my practical tips and clarifications based on many batches.
- Room temperature fats are crucial for smooth creaming; ensure the unsalted butter and cream cheese yield a slight indent when pressed so they incorporate without lumps.
- Accurate flour measuring improves texture; spoon the all purpose flour into the cup and level it to avoid dense, dry dough.
- Timing for toasting coconut is quick, two to three minutes on medium is often enough, and stay attentive because it can burn in moments.
- Chocolate dipping temperature matters; aim for a smooth pourable consistency and stir frequently to maintain gloss and prevent seizing.
- Spacing on the pan ensures even browning; give the cookies two inches of breathing room to control spread and edge formation.
What to Serve With Chocolate Coconut Cookies
These cookies are flexible and fit many occasions, from casual coffee breaks to festive gatherings. They pair well with warm beverages and can be part of a dessert spread. Below are detailed serving ideas, storage tips, and seasonal suggestions to help you present them beautifully.
- With coffee or tea serving them alongside a robust brew complements the sweet coconut and chocolate, making them perfect for a relaxed morning or an afternoon break.
- As part of a dessert platter include a variety of cookies and small pastries for parties, and these work well because they are sturdy and visually attractive with a chocolate-dipped edge.
- Gift packaging stack cooled cookies in parchment lined boxes for neighbor gifts or holiday exchanges; they travel well when wrapped in airtight containers with a layer of parchment between stacks.
- Occasion pairing they suit casual gatherings, potlucks, and festive celebrations like Eid or family reunions where portable hand held sweets are appreciated.
- Storage tips keep cooled cookies in an airtight container at room temperature for up to four days, or freeze in a single layer then transfer to a bag for up to three months for longer storage.
- Seasonal variations these cookies are evergreen, but you can emphasize toasted coconut for winter gatherings or keep them plain for lighter springtime treats.
FAQ
Conclusion
These Chocolate Coconut Cookies stand out because they pair tender, rich dough with chewy coconut and an optional chocolate finish that elevates every bite. They are satisfying yet simple, making them a dependable choice for both everyday treats and special gatherings. I encourage you to try them as written first to learn how the textures harmonize, then feel free to personalize the finish. Enjoy the process and take a moment to notice the toasty coconut aroma as they bake.
Chocolate Coconut Cookies
Equipment
- Stand mixer
- Mixing Bowl
- Rubber spatula
- Baking Sheet
- Parchment Paper
- Measuring Cups
- Microwave or small saucepan
Ingredients
- 1/2 cup unsalted butter softened Soften to spread easily and create a rich, tender base by incorporating fat that helps with moisture and structure in the dough; creaming with sugar aerates the mixture for lighter cookies.
- 1/2 cup cream cheese softened Soften to blend smoothly with butter and add tangy richness that lightens texture and contributes to a creamy mouthfeel; helps stabilize the dough and balances sweetness.
- 1 cup light brown sugar packed Pack to ensure accurate measurement and provide deep, caramel-like sweetness and moisture; helps with chewiness and contributes to a slightly fudgy crumb.
- 1 large egg Whisk to bind ingredients and provide lift through structure from cooked proteins; adds moisture and helps set the cookies as they bake.
- 1 teaspoon vanilla extract Add for aromatic sweetness that enhances the overall flavor profile and complements chocolate and coconut notes; helps round out the cookie’s taste.
- 1 teaspoon baking powder Measure to leaven gently, offering light rise and a tender crumb without producing a cake-like texture; balances with eggs and creates slight spread.
- 1/2 teaspoon salt Measure to season and enhance all flavors while controlling sweetness; also balances the richness of dairy and chocolate for a well-rounded cookie.
- 1 1/2 cups all-purpose flour Sift or measure accurately to provide the bulk and structure of the cookies; forms the gluten network that gives chew and holds mix-ins together.
- 1 1/2 cups shredded sweetened coconut flakes Fold in to distribute coconut’s chewy texture and sweet, tropical flavor throughout the dough; contributes to mouthfeel and visual appeal with toasted edges when baked.
- Optional: 1 cup chocolate chips melted, and 1/2 cup toasted coconut shreds Optional to melt chocolate chips for drizzling or dipping and toasting extra coconut for crunch and toasted flavor, enhancing both texture and presentation.
Instructions
- Preheat the oven to 350°F. Line several large baking sheets with parchment paper and set aside.: As the oven warms, the air in your kitchen will begin to feel slightly warmer and dry, which helps cookies bake evenly; a properly preheated oven ensures the all purpose flour sets at the right rate so centers stay tender while edges firm, and a common mistake is to place cookies into an oven that is not fully heated which can cause spreading and uneven texture.
- Set out an electric stand mixer. To the bowl add the softened butter, cream cheese, and brown sugar. Beat on high until light and fluffy, approximately 3 to 4 minutes.: The scent of clean parchment is faint but practical, preventing sticking and creating a smooth underside to the cookies, and using multiple sheets lets you rotate pans for even color, while one error is crowding the pan which leads to merged cookies and inconsistent baking.
- Scrape the bowl with a rubber spatula. Then turn the mixer on low and beat in the egg, vanilla extract, baking powder, and salt. Scrape the bowl again with a rubber spatula. Turn on low and beat in the flour, until just combined. Finally add in the shredded coconut. Once the dough looks smooth, turn off the mixer, as to not over mix the dough.: When you bring the mixer to life, the bowl will hum and the blade will glide, helping you achieve a light, airy blend of unsalted butter , cream cheese , and light brown sugar ; this aeration is what produces a delicate crumb, and a typical oversight is mixing on too high a speed initially which can overwork the fats and change texture.
- Roll the dough into 2 tablespoon balls and place them 2 inches apart on the cookie sheets. Use the palm of your hand to press the dough balls down into 1/2 inch disks.: As these ingredients come together, the mixture will turn paler and fluffier, a visual sign that air has been incorporated; this step matters because that trapped air helps the cookies rise and gives a soft bite, and people sometimes skip scraping the bowl which leaves unincorporated pockets of butter or sugar.
- Bake for 9 to 11 minutes until just barely gold and around the edges. Allow the cookies to cool on the baking sheets for at least 5 minutes before moving.: During beating you will notice the mix lighten in color and the sound shift to a gentler whir, indicating proper aeration; stopping too early yields dense cookies, while going excessively long can cause the fats to break down and produce a greasy texture.
- If dipping in chocolate, melt 1 cup of chocolate chips over low heat on the stovetop, or in the microwave in 30 second increments, stirring in between.: Running the spatula around the bowl will reunite any unmixed patches so the dough is homogeneous, which matters for even flavor and texture; neglecting this often leaves streaks of cream cheese that do not blend into the dough.
- Once the chocolate is smooth, dip half of each cookie in the chocolate. Wipe the excess chocolate off the bottom and place the cookie back on the parchment paper. Before the chocolate hardens, sprinkle it with toasted coconut.: You will hear the mixer slow and feel the batter thicken faintly as the large egg and leavening integrate; this combination provides lift and structure, and a common pitfall is adding cold egg which can cause the fat to seize and clump.
- Scrape the bowl again with a rubber spatula: This second scrape ensures the leavening and seasoning are evenly distributed so every cookie has a consistent rise and taste; skipping it can create cookies that brown unevenly or taste inconsistent.
- Turn on low and beat in the flour until just combined: At this stage the dough will thicken and lose some gloss, and you should stop as soon as the last streaks of all purpose flour vanish to avoid developing gluten which would make the cookies tough, while over mixing here is a frequent mistake that leads to dense results.
- Finally add in the shredded coconut: When the shredded coconut flakes fold in, the dough develops texture and a slightly coarse look, a sign the coconut is evenly distributed and will provide chew, and adding the coconut too early or overworking it can break down the flakes and reduce their pleasant bite.
- Once the dough looks smooth turn off the mixer as to not over mix the dough: A smooth, cohesive dough will feel slightly tacky but not wet; stopping here preserves the tender crumb achieved from careful mixing, and continuing to mix can cause gluten formation and a tougher cookie.
- Roll the dough into 2 tablespoon balls and place them 2 inches apart on the cookie sheets: Rolling into even portions produces uniform baking and when you place them with spacing the cookies get room to spread and brown at the edges; using uneven sizes leads to some cookies overbaking while others underbake.
- Use the palm of your hand to press the dough balls down into 1/2 inch disks: Flattening creates an even surface for consistent baking and a desirable thin profile; if you leave the balls too tall they may remain doughy inside, and pressing too thin will remove the pillowy center.
- Bake for 9 to 11 minutes until just barely gold around the edges: While baking you will notice the smell deepen and the edges picking up color, which signals they are ready; the goal is a barely golden rim with a soft center, and a common error is overbaking which yields a dry, brittle cookie.
- Allow the cookies to cool on the baking sheets for at least 5 minutes before moving: During this short rest the cookies finish setting and firm slightly, which prevents them from breaking when transferred, and moving them too soon can cause misshapen or collapsed cookies.
- If dipping in chocolate melt 1 cup of chocolate chips over low heat on the stovetop or in the microwave in 30 second increments stirring in between: Melted chocolate chips should become glossy and pourable, and stirring ensures even heat distribution to prevent scorching; overheating chocolate causes it to seize and become grainy.
- Once the chocolate is smooth dip half of each cookie in the chocolate: As you dip, the chocolate creates a shiny coating that contrasts with the matte coconut; wipe the excess off the bottom to avoid a messy base, and a mistake is dipping while the chocolate is still too hot which can melt the cookie surface.
- Wipe the excess chocolate off the bottom and place the cookie back on the parchment paper before the chocolate hardens sprinkle it with toasted coconut: The final sprinkle adds a toasty crunch and visual contrast while the chocolate is tacky enough to hold the shreds, and waiting too long means the coconut will not adhere properly.
Notes
- Room temperature fats are crucial for smooth creaming; ensure the unsalted butter and cream cheese yield a slight indent when pressed so they incorporate without lumps.
- Accurate flour measuring improves texture; spoon the all purpose flour into the cup and level it to avoid dense, dry dough.
- Timing for toasting coconut is quick, two to three minutes on medium is often enough, and stay attentive because it can burn in moments.
- Chocolate dipping temperature matters; aim for a smooth pourable consistency and stir frequently to maintain gloss and prevent seizing.
- Spacing on the pan ensures even browning; give the cookies two inches of breathing room to control spread and edge formation.