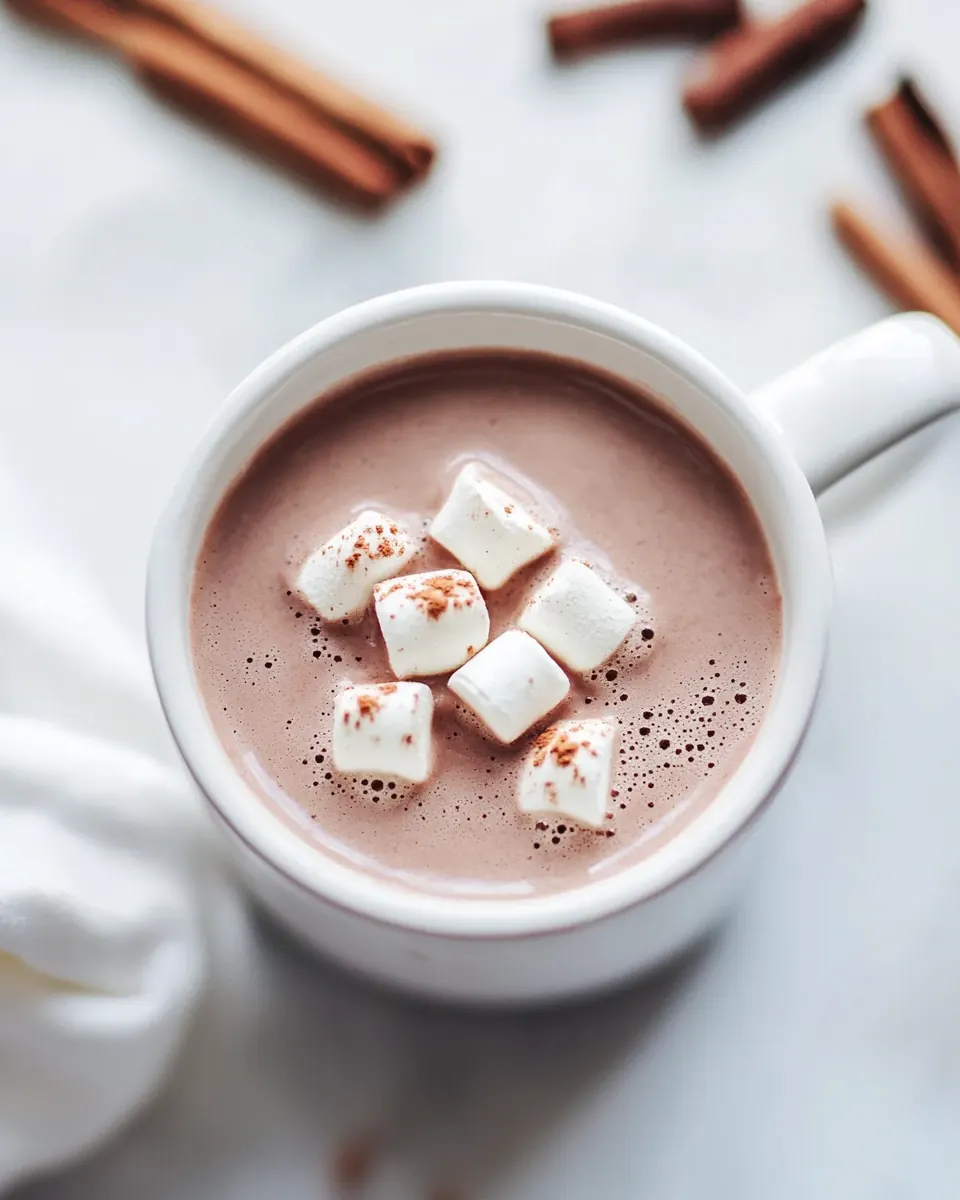
Mexican Hot Chocolate
Mexican Hot Chocolate is the kind of drink I reach for when the air turns crisp and I want something comforting that feels a little indulgent and a little bold at the same time.
There are evenings when I curl up on the couch with a scratched up cookbook and a blanket, and the scent of cinnamon and cocoa powder fills the room. I remember the first time I tasted this version, a friend poured a steaming mug and handed me a cinnamon stick. The first sip surprised me with warmth and gentle heat, and it lingered in a way that felt like a hug. Over the years I have tweaked the balance of spice and sweetness until it matched what I love, and that kind of tasting work is what makes me feel like a better cook.
What I appreciate most about Mexican Hot Chocolate is how approachable it is. With a few pantry staples and a medium pot, you can coax out deep, chocolatey notes and a subtle, aromatic warmth from spices that play quietly in the background. I like to make a double batch for company, because it’s one of those drinks that sparks conversation and slows people down. Sometimes I add a little extra cayenne for a cheeky heat, other times I keep it gentle so the whipped cream takes center stage.
When I serve this to friends, I always offer a cinnamon stick for stirring, since that tiny ritual makes the moment feel special. The mug becomes part of the memory. If you give it a try, think about how the whole milk and the type of cocoa powder shape the texture and color, and trust your tastebuds when you adjust the sweetness. Keep an eye on the pot so it warms up without boiling, because that’s the secret to a silky finish.
Recipe Snapshot
15 mins
10 mins
5 mins
Easy
250 kcal
Mexican
Gluten-Free, Low FODMAP
Desserts
Medium pot
Why This Mexican Hot Chocolate Shines
Rich, layered flavor
I love that Mexican Hot Chocolate delivers a deep chocolate profile without being one dimensional. The combination of Dutch process cocoa powder and a touch of ground cinnamon and nutmeg creates a multi layer experience, where each sip reveals another note. I find myself pausing to savor the aroma first, then letting the warmth settle in.
Fast and foolproof
One big appeal is how quick this comes together, yet it feels ceremonial. With a medium pot and about ten minutes of hands on time, you have something that tastes like you spent much longer crafting it. I value recipes that are forgiving, and this one is very forgiving when you whisk thoroughly to avoid lumps.
Customizable heat and sweetness
I appreciate being able to tune the spice level with cayenne pepper and the sweetness with granulated sugar. For guests who prefer mild drinks, I cut back on the cayenne and leave whipped cream optional. Other times I nudge the heat up for a more exciting finish. It’s a canvas that accommodates different palates.
Comfort with a little edge
This drink is comforting, but it also has a gentle kick that keeps it interesting. The tiny bit of salt brightens the chocolate, while the spices lift the overall profile. That balance between cozy and intriguing is why I keep this recipe in regular rotation when the weather cools down.
Great for sharing
Whether I’m serving it at a small gathering or making a quiet mug for one, Mexican Hot Chocolate brings people together. The garnishes, like a cinnamon stick or a dollop of whipped cream, make it feel festive without fuss. I like dishes that create memories, and this drink does exactly that.
What You’ll Need for Mexican Hot Chocolate

These ingredients are chosen to create a smooth, warmly spiced beverage. The core players are the cocoa powder for chocolate depth, the milk for creaminess, and the warm spices for aromatic lift. Each element supports texture, sweetness, or balance so the final cup is rich without being cloying.
- 1/4 cup Dutch process cocoa powder like Hershey’s Special Dark, see note 1: Provides a deep, roasted chocolate backbone and helps create a smooth, rich base for the drink; dissolves into milk when whisked over heat and contributes to the dark color and intense cocoa flavor.
- 1/3 cup granulated sugar add to sweetness preference, up to 1/2 cup: Adds sweetness and balances the bitterness of cocoa; can be adjusted to taste to control overall sweetness and mouthfeel of the hot chocolate.
- 1/2 teaspoon ground cinnamon: Impacts warm, aromatic spice notes and enhances chocolate’s natural flavors; pairs with cinnamon and nutmeg to create a classic Mexican hot chocolate profile.
- 1/2 teaspoon ground nutmeg: Contributes earthy, slightly sweet and nutty spice complexity that rounds out the spice blend; helps deepen the overall warmth and aromatic character.
- 1/8 teaspoon salt: Balances and amplifies flavors by enhancing sweetness and suppressing bitterness; tight pinch brightens the overall profile without becoming salty.
- 1/8 teaspoon cayenne pepper or to taste: Provides a gentle spicy heat that contrasts the sweetness and chocolate richness; quantity can be adjusted to achieve a subtle tingle or noticeable kick.
- 4 cups whole milk: Forms the creamy liquid base that carries and melds all flavors together; heating whole milk brings silkiness, body, and a luxurious texture to the beverage.
- 1 teaspoon vanilla extract (optional): Adds a delicate floral-vanilla aroma and subtle sweetness that elevates and rounds the chocolate flavor; stir in near the end to preserve fragrance.
- Whipped cream for serving: Adds a light, airy creaminess and extra indulgence when dolloped on top; melts into the hot chocolate for added richness and visual appeal.
- Cinnamon sticks , for serving (optional): Contributes aromatic garnish and a spiced sip when used as a stirrer; enhances presentation and reinforces cinnamon flavor if desired.
How to Cook Mexican Hot Chocolate

This recipe is straightforward and comforting. I like to follow the steps slowly so the texture becomes silky and the spices meld properly. Keep the heat moderate, whisk frequently, and pause to taste as you go.
- In a medium pot, mix together the cocoa powder, sugar, ground cinnamon, ground nutmeg, salt, and cayenne (see note 2).: You will notice a dry, fragrant spice blend when you mix these ingredients, with the cocoa powder giving off a deep chocolate aroma and the cinnamon and nutmeg adding a warm scent. Start by sifting or breaking up any clumps of cocoa powder with the back of a spoon so you get an even base. The reason for combining the dry elements first is that it helps distribute the spices evenly through the liquid later, preventing pockets of intense flavor. A common mistake is to add liquid too quickly, which leads to stubborn lumps of cocoa. If lumps form, whisk vigorously or add a few tablespoons of milk to smooth them out before proceeding.
- Place on stovetop, heating to medium. Gradually add a few tablespoons of milk to the mixture, whisking to create a smooth, lump-free paste. Continue adding the rest of the milk gradually. Gently heat the mixture to your preferred drinking temperature, making sure it doesn’t reach a boil.: As the pot warms, the aromas of chocolate and spice will become more pronounced, and you may hear a faint hiss as the bottom of the pot seeks temperature equilibrium. Use a medium setting to control the heat safely; this prevents rapid scorching. The goal here is to gently coax the flavors out, not to rush them. If you overheat, the milk can scald and develop a cooked taste, which is the most common error at this stage. Keep the pot moving with a whisk and stay attentive.
- Remove the pot from heat and, if using, stir in the vanilla extract.: When you add a little milk , you will see the dry mix transform into a glossy paste; this is the critical moment for texture. Whisk in small additions until the paste is silky and there are no dry pockets. The tactile cue is a silky, thick ribbon forming on the whisk, indicating proper dispersion. If you rush and pour all the milk in at once, lumps will form and the texture will be grainy. Slow incorporation avoids this and yields a smoother final drink.
- Serve hot, topped with whipped cream and a cinnamon stick for garnish, if desired. (Cocoa tends to settle over time, so it requires a good whisk before serving again.): As you pour the remaining milk slowly, the mixture will loosen and warm evenly. You should see swirls of chocolate in a pale tan liquid turning progressively richer in color. Stir continuously so temperature and flavor are consistent. The reason for gradual addition is to prevent shock to the mixture which can cause separation or uneven heating. A pitfall here is walking away during this step; uneven heating can result in a skin forming on the surface or localized scalding.
- Gently heat the mixture to your preferred drinking temperature, making sure it doesn’t reach a boil: Heat until the drink is steaming and small bubbles appear around the edges, but do not allow a rolling boil. The visual cue is gentle steam rising and tiny beads forming at the pot’s rim. Boiling can alter the milk’s proteins and create a flat, cooked flavor and a less pleasant texture. Keep whisking and lower the heat if the mixture starts to bubble too vigorously. A thermometer reading around 160 to 170 degrees Fahrenheit is a safe zone for a warm, comfortable drink.
- Remove the pot from heat and, if using, stir in the vanilla extract: Once off the burner, you will notice the release of the full combined aroma of chocolate and spice as the temperature steadies. Adding vanilla extract at the end preserves its bright, floral top notes that can fade under high heat. Stir gently to incorporate. One mistake is adding vanilla too early, which can diminish its delicate fragrance, so reserve it for after the heat is off.
- Serve hot, topped with whipped cream and a cinnamon stick for garnish, if desired: Pour the drink into warmed mugs so it stays hot longer, and crown each cup with a spoonful of whipped cream if you like. The contrast of cool cream and hot liquid creates a luxurious mouthfeel, while a cinnamon stick offers a fragrant stir. Before each reheat or second serving, whisk the pot because cocoa powder can settle, creating a thin layer at the bottom; vigorous whisking restores an even texture. A typical error here is overheating the reheated drink, which can dull flavors and change texture, so reheat gently.
Recipe Variations about Mexican Hot Chocolate
This section explores playful and practical variations that keep the spirit of Mexican Hot Chocolate intact while offering different textures, heat levels, and presentations. You can make small adjustments to suit dietary needs or to create a more decadent treat.
- Spiced Orange Twist Add a strip of orange zest while warming the drink, then remove before serving to give a bright citrus lift that plays beautifully with the cocoa powder.
- Dairy Swap Replace the whole milk with a plant based milk of your choice for a lighter or dairy free version, noting that texture and sweetness perception will shift slightly.
- Extra Creamy For a richer mouthfeel, stir in a splash of heavy cream at the end, which will add silkiness and weight without changing the spice profile much.
- Layered Sweetness Toasted marshmallow is not included in the ingredient list, so instead top with a dollop of whipped cream and a dusting of additional cocoa powder to create a layered presentation.
- Lower Sugar Reduce the granulated sugar and rely on the natural sweetness of the milk, adjusting to taste for a less sweet but still balanced cup.
What Goes Well With This Mexican Hot Chocolate
Mexican Hot Chocolate pairs well with baked goods and cozy occasions. It suits quiet mornings, afternoon breaks, and festive winter gatherings. Below are suggestions for pairings, serving styles, and storage ideas to enhance your experience.
- Classic cookies Shortbread or sugar cookies complement the warmth and provide a crisp, buttery contrast to the creamy drink.
- Spiced pastries Cinnamon rolls or cardamom buns mirror the spice notes and create a cohesive flavor profile for a comforting brunch spread.
- Seasonal occasions Serve during winter evenings, holiday gatherings, or Ramadan if enjoyed after evening meals, where the drink serves as a soothing, sweet finish.
- Presentation tips Use warmed mugs and finish with a spoonful of whipped cream and a cinnamon stick for a festive look that also enhances aroma while sipping.
- Storage and reheating Pour leftovers into an airtight container and refrigerate for up to four to five days. Reheat slowly on low heat, whisking to recombine any settled cocoa powder and preserving the silky texture.
- Serving sizes This recipe yields four beverages. For larger gatherings, double or triple the recipe and keep warm over low heat, stirring occasionally to maintain consistency.
FAQ
Conclusion
What makes this recipe special is its blend of rich chocolate and warm, aromatic spices, which together create a comforting drink with a gentle kick. I encourage you to try making Mexican Hot Chocolate on a cool evening, and to adjust the sweetness and heat until it sings for you. Whether you sip it quietly by yourself or share mugs with friends, it’s a simple, satisfying way to slow down and savor a thoughtfully crafted cup.
Mexican Hot Chocolate
Equipment
- Medium Pot
Ingredients
- 1/4 cup Dutch process cocoa powder like Hershey’s Special Dark, see note 1 Provides a deep, roasted chocolate backbone and helps create a smooth, rich base for the drink; dissolves into milk when whisked over heat and contributes to the dark color and intense cocoa flavor.
- 1/3 cup granulated sugar add to sweetness preference, up to 1/2 cup Adds sweetness and balances the bitterness of cocoa; can be adjusted to taste to control overall sweetness and mouthfeel of the hot chocolate.
- 1/2 teaspoon ground cinnamon Impacts warm, aromatic spice notes and enhances chocolate’s natural flavors; pairs with cinnamon and nutmeg to create a classic Mexican hot chocolate profile.
- 1/2 teaspoon ground nutmeg Contributes earthy, slightly sweet and nutty spice complexity that rounds out the spice blend; helps deepen the overall warmth and aromatic character.
- 1/8 teaspoon salt Balances and amplifies flavors by enhancing sweetness and suppressing bitterness; tight pinch brightens the overall profile without becoming salty.
- 1/8 teaspoon cayenne pepper or to taste Provides a gentle spicy heat that contrasts the sweetness and chocolate richness; quantity can be adjusted to achieve a subtle tingle or noticeable kick.
- 4 cups whole milk Forms the creamy liquid base that carries and melds all flavors together; heating whole milk brings silkiness, body, and a luxurious texture to the beverage.
- 1 teaspoon vanilla extract optional Adds a delicate floral-vanilla aroma and subtle sweetness that elevates and rounds the chocolate flavor; stir in near the end to preserve fragrance.
- Whipped cream for serving Adds a light, airy creaminess and extra indulgence when dolloped on top; melts into the hot chocolate for added richness and visual appeal.
- Cinnamon sticks optional, for serving Contributes aromatic garnish and a spiced sip when used as a stirrer; enhances presentation and reinforces cinnamon flavor if desired.
Instructions
- In a medium pot, mix together the cocoa powder, sugar, ground cinnamon, ground nutmeg, salt, and cayenne (see note 2).: You will notice a dry, fragrant spice blend when you mix these ingredients, with the cocoa powder giving off a deep chocolate aroma and the cinnamon and nutmeg adding a warm scent. Start by sifting or breaking up any clumps of cocoa powder with the back of a spoon so you get an even base. The reason for combining the dry elements first is that it helps distribute the spices evenly through the liquid later, preventing pockets of intense flavor. A common mistake is to add liquid too quickly, which leads to stubborn lumps of cocoa. If lumps form, whisk vigorously or add a few tablespoons of milk to smooth them out before proceeding.
- Place on stovetop, heating to medium. Gradually add a few tablespoons of milk to the mixture, whisking to create a smooth, lump-free paste. Continue adding the rest of the milk gradually. Gently heat the mixture to your preferred drinking temperature, making sure it doesn’t reach a boil.: As the pot warms, the aromas of chocolate and spice will become more pronounced, and you may hear a faint hiss as the bottom of the pot seeks temperature equilibrium. Use a medium setting to control the heat safely; this prevents rapid scorching. The goal here is to gently coax the flavors out, not to rush them. If you overheat, the milk can scald and develop a cooked taste, which is the most common error at this stage. Keep the pot moving with a whisk and stay attentive.
- Remove the pot from heat and, if using, stir in the vanilla extract.: When you add a little milk , you will see the dry mix transform into a glossy paste; this is the critical moment for texture. Whisk in small additions until the paste is silky and there are no dry pockets. The tactile cue is a silky, thick ribbon forming on the whisk, indicating proper dispersion. If you rush and pour all the milk in at once, lumps will form and the texture will be grainy. Slow incorporation avoids this and yields a smoother final drink.
- Serve hot, topped with whipped cream and a cinnamon stick for garnish, if desired. (Cocoa tends to settle over time, so it requires a good whisk before serving again.): As you pour the remaining milk slowly, the mixture will loosen and warm evenly. You should see swirls of chocolate in a pale tan liquid turning progressively richer in color. Stir continuously so temperature and flavor are consistent. The reason for gradual addition is to prevent shock to the mixture which can cause separation or uneven heating. A pitfall here is walking away during this step; uneven heating can result in a skin forming on the surface or localized scalding.
- Gently heat the mixture to your preferred drinking temperature, making sure it doesn’t reach a boil: Heat until the drink is steaming and small bubbles appear around the edges, but do not allow a rolling boil. The visual cue is gentle steam rising and tiny beads forming at the pot’s rim. Boiling can alter the milk’s proteins and create a flat, cooked flavor and a less pleasant texture. Keep whisking and lower the heat if the mixture starts to bubble too vigorously. A thermometer reading around 160 to 170 degrees Fahrenheit is a safe zone for a warm, comfortable drink.
- Remove the pot from heat and, if using, stir in the vanilla extract: Once off the burner, you will notice the release of the full combined aroma of chocolate and spice as the temperature steadies. Adding vanilla extract at the end preserves its bright, floral top notes that can fade under high heat. Stir gently to incorporate. One mistake is adding vanilla too early, which can diminish its delicate fragrance, so reserve it for after the heat is off.
- Serve hot, topped with whipped cream and a cinnamon stick for garnish, if desired: Pour the drink into warmed mugs so it stays hot longer, and crown each cup with a spoonful of whipped cream if you like. The contrast of cool cream and hot liquid creates a luxurious mouthfeel, while a cinnamon stick offers a fragrant stir. Before each reheat or second serving, whisk the pot because cocoa powder can settle, creating a thin layer at the bottom; vigorous whisking restores an even texture. A typical error here is overheating the reheated drink, which can dull flavors and change texture, so reheat gently.
Notes
- Spiced Orange Twist Add a strip of orange zest while warming the drink, then remove before serving to give a bright citrus lift that plays beautifully with the cocoa powder.
- Dairy Swap Replace the whole milk with a plant based milk of your choice for a lighter or dairy free version, noting that texture and sweetness perception will shift slightly.
- Extra Creamy For a richer mouthfeel, stir in a splash of heavy cream at the end, which will add silkiness and weight without changing the spice profile much.
- Layered Sweetness Toasted marshmallow is not included in the ingredient list, so instead top with a dollop of whipped cream and a dusting of additional cocoa powder to create a layered presentation.
- Lower Sugar Reduce the granulated sugar and rely on the natural sweetness of the milk, adjusting to taste for a less sweet but still balanced cup.