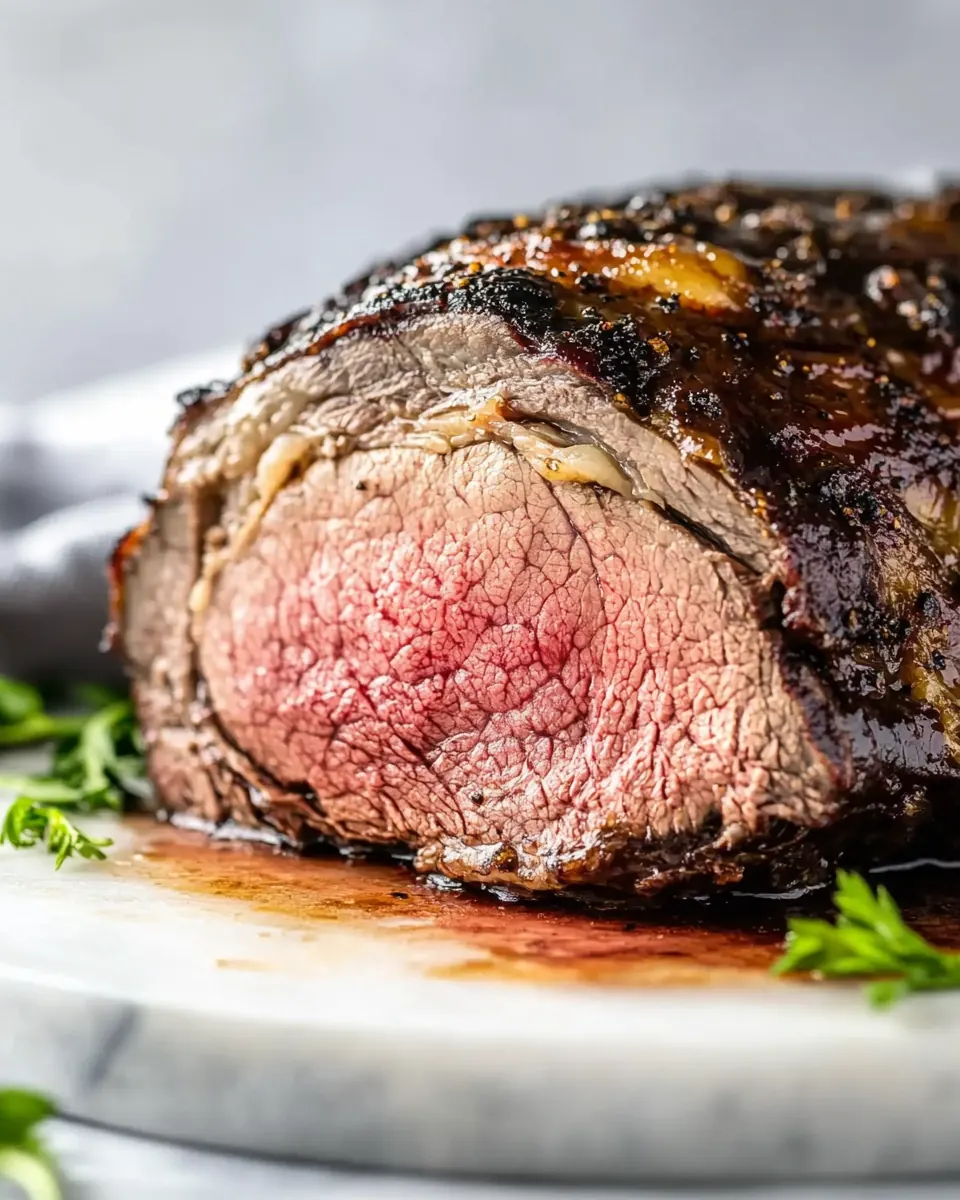
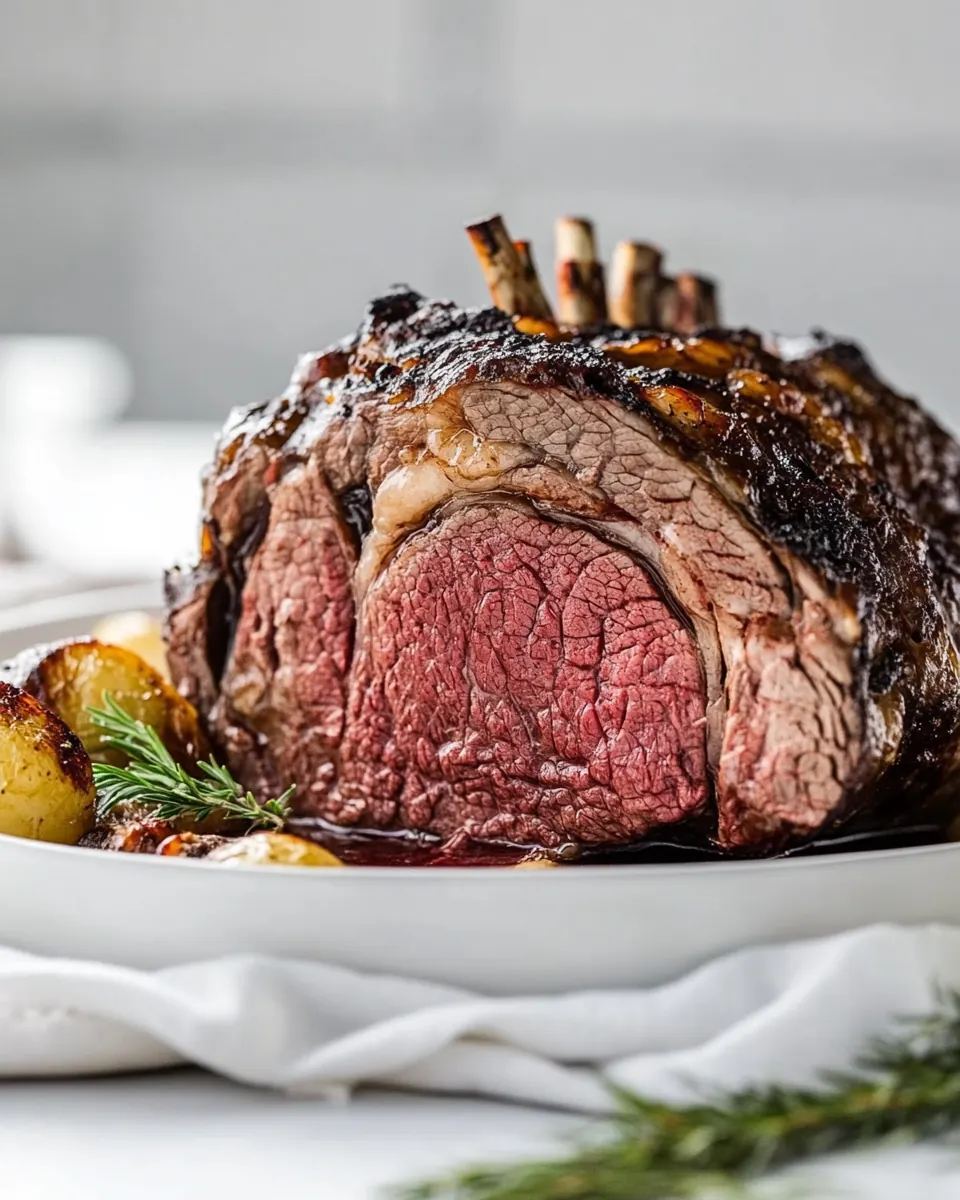
Slow Roasted Prime Rib
Slow Roasted Prime Rib has been my signature for holiday dinners and chilly winter Sundays for years, a roast that draws everyone to the table and slows conversation to a happy, comfortable hum.
I remember the first time I learned to coax perfect tenderness from a big piece of beef, how the farmhouse kitchen filled with the rich scent of roasted beef and warm fat, and how guests lingered over second helpings. Over time I developed rituals around the roast, little touches that made each bite sing. I love the ritual of trimming and salting ahead of time, the quiet satisfaction of a low and slow oven, and the final moment when the knife reveals rosy, juicy slices. The story of this roast is about patience, respect for good beef, and the confidence that comes from simple technique done well.
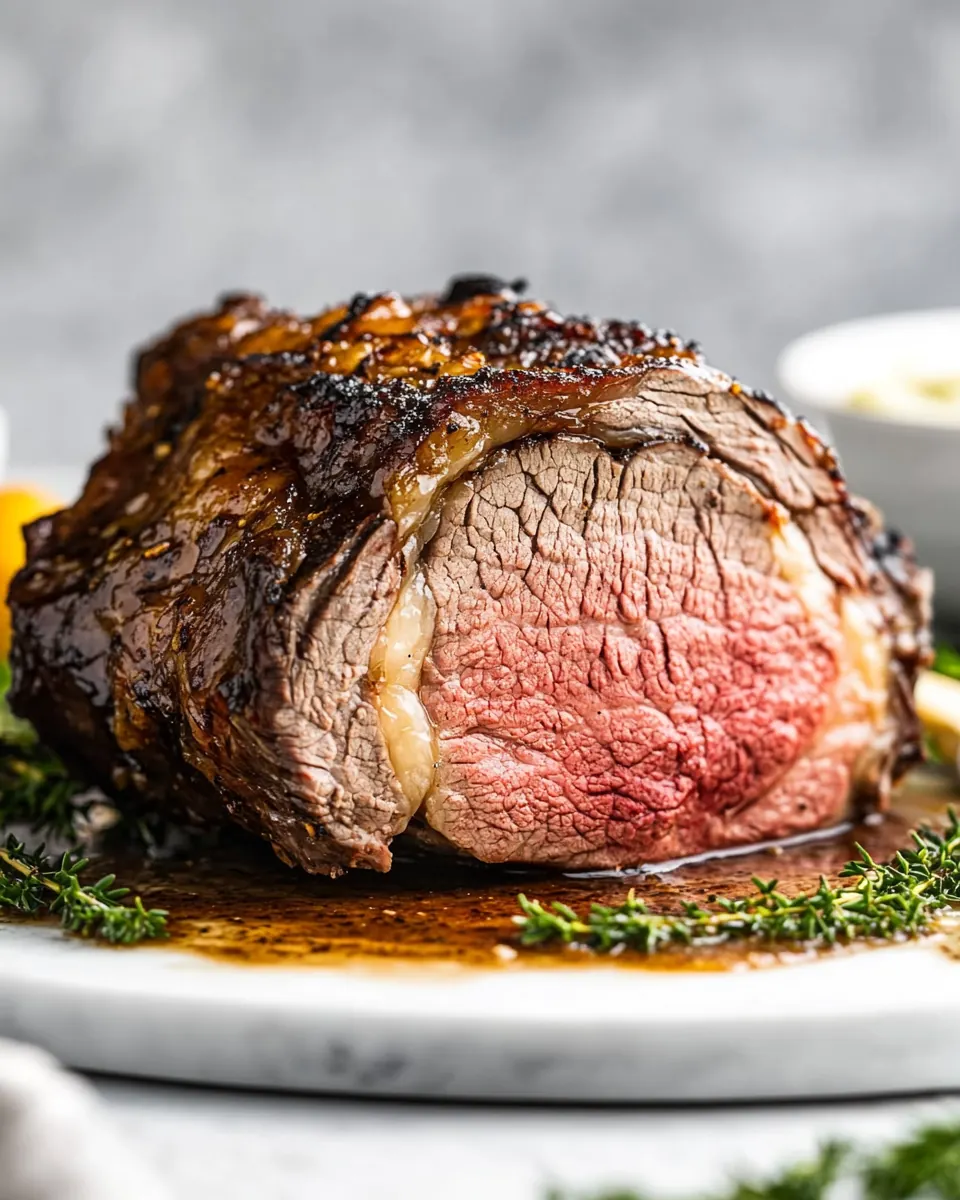
Serving Slow Roasted Prime Rib feels ceremonious yet comforting. I like to prepare it with minimal fuss, focusing on three things, the quality of the roast, a generous seasoning of Kosher salt, and a confident sear in hot oil before returning it to a low oven. Those steps create a crust, then an even, ruby center that stays tender. Guests always ask how long it took, and I tell them the truth, because it is part of the allure: this is a piece you plan for, not rush. When the roast finally comes to the table, everyone can taste the care.
Recipe Snapshot
28 hr
1440 mins
240 mins
Hard
350 kcal
American
Keto, Gluten-Free
Dinner
Skillet, Rack, Baking sheet, Instant read thermometer, Kitchen twine
The Beauty of This Slow Roasted Prime Rib
Deeply satisfying flavor from slow heat
I love how slow cooking at a low temperature lets the beef render and relax, producing a texture that is almost butter soft, while concentrating natural savory flavors. The result is a roast that tastes richer and more complex than a rushed high heat cook, and you can actually smell the difference as juices caramelize quietly over hours.
Control and predictability
One reason I keep returning to this method is consistency. When you roast slowly, the internal temperature climbs gently, giving you plenty of wiggle room to hit rare or medium rare without overshooting. I appreciate that predictability, especially when I am hosting, because it reduces stress at the last minute.
Spectacular presentation with little effort
Set on the table, a tied rib roast looks dramatic, yet the preparation is straightforward. A quick sear in hot oil builds a beautiful browned surface, and the resting phase quietly finishes the work. Guests get fine slices that look restaurant level, while you keep the process calm and manageable.
Make ahead friendly
I often salt and chill the roast a day in advance, which deepens flavor and firms the surface for a better sear. This hands off resting in the fridge gives me time to organize sides and relax before guests arrive, a small planning step that pays off hugely.
Minimal ingredients, maximum reward
With only a few key players like Kosher salt and canola oil, the natural flavor of the beef leads. I like recipes that let the main ingredient shine, and this roast proves that restraint can deliver an indulgent experience.
Everything You Need for Slow Roasted Prime Rib
The philosophy behind these ingredients is elegant simplicity. Trustworthy technique and a handful of ingredients let a well butchered roast sing. The key players are the Bone In Standing Rib Roast which brings deep beefy richness, Kosher salt which seasons and helps form a crust, and canola oil which enables a quick, fond-building sear. Together they create a roast with an impressive exterior and tender interior.
- 6 lb Bone In Standing Rib Roast: Season generously and tie the roast if needed to promote even cooking; carries the primary mass and flavor of the dish, providing rich marbling that renders slowly to baste the meat. Roast slowly at low temperature to break down connective tissue and achieve tender, juicy slices, while bone-in construction helps retain moisture and adds depth to the final presentation.
- Kosher salt: Season liberally to enhance the natural beef flavors and help form a savory crust during roasting; draws moisture to the surface to concentrate taste and aids in creating a well-browned exterior. Apply evenly before roasting and after resting to ensure balanced seasoning throughout the slices.
- 2 tbsp canola oil: Coat lightly to help oil adhere and promote even browning on the exterior; creates a thin barrier that encourages the formation of a flavorful crust at high heat. Use sparingly to avoid excess oil while ensuring surface seasoning sticks and heat transfers efficiently.
Recipe Directions for Slow Roasted Prime Rib
These directions follow a confident rhythm, from careful trimming to a slow oven finish. I walk you through sensory cues so you know how the roast should look and feel at each stage, and I share troubleshooting advice where things commonly go sideways.
- Separate roast from rib bones (you can ask your butcher do this).: The air around your workspace will smell faintly metallic as you ease the roast free, and you will feel the texture shift where meat meets bone, which helps the spine of the roast carve more cleanly later. This step matters because separating the roast enables even exposure to cold air in the fridge and better contact with a rack while roasting. If you ask your butcher to do this, be sure to request clean cuts to avoid ragged edges that tear during searing. One mistake to avoid is forcing a dull knife through the joint, which can shred connective tissue and make the roast harder to tie back together later.
- Trim fat cap but leave a layer of fat (you can also ask your butcher to do this). Use a knife to slice slits into the fat cap in a crosshatch pattern. Cut though the fat but not the meat. Season liberally with kosher salt all over the surface of the meat.: As you slice slits into the fat cap in a crosshatch pattern, the kitchen will fill with a savory, faintly sweet aroma from the fat. Leaving a thin layer of fat preserves moisture and protects the meat during slow cooking, while crosshatch slits allow rendered fat to baste the surface. This technique also encourages even browning when you sear. Be careful not to cut through into the meat, which would expose interior fibers and may lead to drier slices; a common error is removing the fat entirely, which reduces flavor and juiciness.
- Place roast back on the bones. Set roast on a sheet pan fitted with a rack in the fridge for at least 24 hours up to 3 days, uncovered.: Returning the roast to the bones and setting it on a rack in the fridge for at least 24 hours creates a dry surface that sears beautifully. The cool, dry air tightens the roast's exterior, which helps develop a crisp, flavorful crust later. Expect the smell to be clean and cool, not strong. A pitfall here is wrapping the roast; trapping moisture prevents the surface from drying and reduces browning potential, so keep it uncovered.
- Preheat oven to 225 F (if using a convection oven, use 200 F).: As the oven warms to 225 F , the room will remain quiet, and the slow ascending heat creates a gentle environment for collagen to relax without toughening proteins. This temperature is chosen for even doneness and a tender interior. If you have a convection oven, follow the guidance to use 200 F for similar results. Avoid cranking the oven higher to rush the process, which sacrifices that butter soft texture in favor of overcooked edges.
- Heat a large skillet with oil over medium high heat. Brown the sides and top of the roast. After browning, place roast back on to bones and tie together with kitchen twine. Season with pepper if desired.: Heating a large skillet with canola oil until it shimmers gives you that immediate, satisfying sizzle when the roast hits the pan, and you should see a deep, glossy brown form within a few minutes. Browning builds a layer of savory compounds and color, which enhances both flavor and appearance. After browning, tie the roast with kitchen twine to maintain shape. A common misstep is crowding the pan, which causes steaming instead of browning, so work in turns if the roast is large.
- Set on a rack fitted to a baking sheet and roast uncovered until internal temp registers 110 degrees – this should take about 3-4 hours. Turn off the oven. Let it sit in the oven uncovered until internal temp hits 115 for rare, 120 for medium rare. (temperature will continue to rise after removing from the oven). Broil if desired. After removing from the oven rest for 30 minutes loosely tented with foil.: Putting the roast on a rack lets air circulate, and as it bakes slowly you will notice a subtle sound of gentle bubbling at the surface where fat renders. Aim for an internal temperature of 110 degrees for the initial finish, which typically takes about three to four hours for the size listed. This stage is crucial because the low heat ensures even doneness and a rosy center. Avoid opening the oven too often, which slows the process and can cause temperature swings.
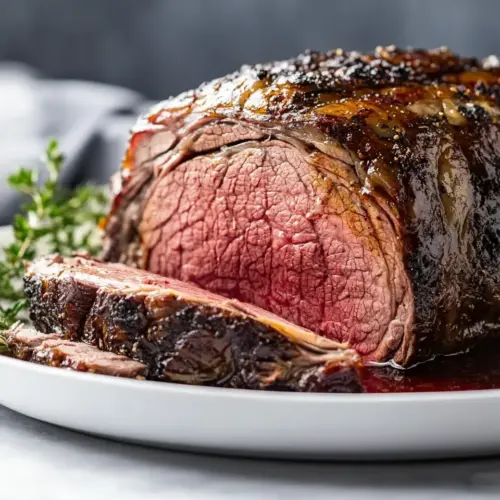
- After resting, remove roast from bones for easy carving. Slice the ribs and slice roast into 3/4 inch slices. Season slices with salt before serving.: With the oven off, the roast continues to climb in temperature slowly, and you will feel a calm sense of completion as residual heat brings the meat to the perfect level for rare or medium rare. The carryover ensures a tender, consistent interior. If you prefer, broil briefly to crisp the exterior, but watch closely, as broiling can darken quickly. A typical error is removing the roast immediately without resting, which leads to juices pooling on the cutting board and drier slices.
- Rest for 30 minutes loosely tented with foil: Resting is tactile and quiet, the roast cooling slightly while internal juices redistribute, so when you slice you will see cleaner, juicier pieces. Tent loosely to prevent sweating and to allow gentle cooling. This step matters because it yields slices that hold their juices instead of leaking on the plate. Avoid wrapping too tightly, which traps steam and softens the crust.
- Remove roast from bones for easy carving: After resting, separating the roast from the bones exposes a smooth surface that makes carving controlled and precise, and the scent at this point is deeply roasted beef with a hint of rendered fat. Carving against the grain into three quarter inch slices shows off the tender interior. A common mistake is slicing too thin or at an angle that produces ragged pieces, which affects both presentation and mouthfeel.
- Season slices with salt before serving: A final dusting of Kosher salt just before serving brightens flavors and adds a satisfying contrast to the rich meat, and the salt crystals deliver a pleasant burst as you bite. This finishing touch emphasizes the beefy notes and layers the seasoning. Avoid over-salting, which can overwhelm the natural flavor of the roast.
Recipe Tips about Slow Roasted Prime Rib
These tips highlight practical ways to elevate your roast while keeping the process manageable. Each item focuses on technique and timing to help guarantee success whether this is your first roast or your fifteenth.
- Choose quality beef Start with a well marbled Bone In Standing Rib Roast, as marbling translates to flavor and juiciness during slow roasting.
- Salt early Salting the roast at least twenty four hours ahead and refrigerating uncovered enhances flavor and creates a drier surface for superior browning.
- Monitor temperature Use an instant read thermometer and aim for the recommended internal temps rather than relying solely on time estimates.
- Let residual heat work Turning the oven off and allowing carryover cooking gives you control over final doneness and prevents overcooking.
- Sear with confidence Heat the skillet and oil until they shimmer so you get a powerful sizzle and a deep brown crust quickly without prolonged exposure to high heat.
Side Dish Ideas for Slow Roasted Prime Rib
When serving Slow Roasted Prime Rib, pick sides that can stand up to rich, beefy flavors and that complement the roast across textures and temperatures. Think creamy, bright, and crisp components to balance the plate. Below are ideas for occasions, storage, and seasonal pairings to help plan an elegant meal.
- Classic roasted vegetables Root vegetables roasted until caramelized offer sweet counterpoints, and they can be prepared ahead and finished while the roast rests.
- Creamy mashed potatoes Smooth mashed potatoes or a potato gratin bring a comforting, silky mouthfeel that pairs beautifully with beef juices and any jus you might serve.
- Fresh green salad A crisp salad with a bright vinaigrette refreshes the palate between rich bites and adds a textural contrast to the plate.
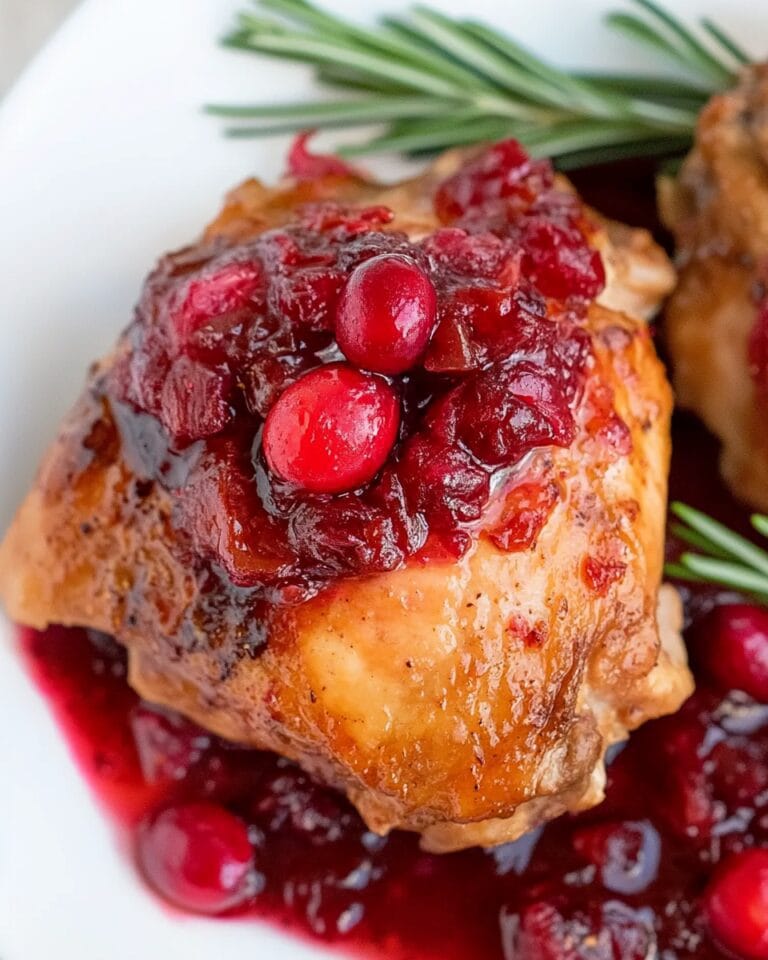
- Holiday centerpiece This roast is perfect for winter holidays and family dinners; serve with warm rolls and simple herb butter for a celebratory vibe.
- Storage tips Leftovers keep well when sliced and chilled promptly; store in an airtight container and reheat gently to avoid toughening the meat.
- Seasonal pairings In winter, pair with roasted root vegetables and braised greens; in cooler spring months, add a bright herb salad to lighten the menu.
FAQ
Conclusion
Slow Roasted Prime Rib stands out for its lush texture and deep beef flavor, created by a simple sequence of salting, searing, and slow roasting. Try it because the method rewards patience with consistently tender, beautifully colored slices that look and taste like a special occasion. Whether you are hosting a holiday or a satisfying winter dinner, this roast is an approachable centerpiece that allows the quality of the meat to shine. Take your time, trust the thermometer, and enjoy the slow, confident cooking process that brings people together around the table.
Slow Roasted Prime Rib
Equipment
- Skillet
- Rack
- Baking Sheet
- Instant read thermometer
- Kitchen twine
Ingredients
- 6 lb Bone In Standing Rib Roast Season generously and tie the roast if needed to promote even cooking; carries the primary mass and flavor of the dish, providing rich marbling that renders slowly to baste the meat. Roast slowly at low temperature to break down connective tissue and achieve tender, juicy slices, while bone-in construction helps retain moisture and adds depth to the final presentation.
- Kosher salt Season liberally to enhance the natural beef flavors and help form a savory crust during roasting; draws moisture to the surface to concentrate taste and aids in creating a well-browned exterior. Apply evenly before roasting and after resting to ensure balanced seasoning throughout the slices.
- 2 tbsp canola oil Coat lightly to help oil adhere and promote even browning on the exterior; creates a thin barrier that encourages the formation of a flavorful crust at high heat. Use sparingly to avoid excess oil while ensuring surface seasoning sticks and heat transfers efficiently.
Instructions
- Separate roast from rib bones (you can ask your butcher do this).: The air around your workspace will smell faintly metallic as you ease the roast free, and you will feel the texture shift where meat meets bone, which helps the spine of the roast carve more cleanly later. This step matters because separating the roast enables even exposure to cold air in the fridge and better contact with a rack while roasting. If you ask your butcher to do this, be sure to request clean cuts to avoid ragged edges that tear during searing. One mistake to avoid is forcing a dull knife through the joint, which can shred connective tissue and make the roast harder to tie back together later.
- Trim fat cap but leave a layer of fat (you can also ask your butcher to do this). Use a knife to slice slits into the fat cap in a crosshatch pattern. Cut though the fat but not the meat. Season liberally with kosher salt all over the surface of the meat.: As you slice slits into the fat cap in a crosshatch pattern, the kitchen will fill with a savory, faintly sweet aroma from the fat. Leaving a thin layer of fat preserves moisture and protects the meat during slow cooking, while crosshatch slits allow rendered fat to baste the surface. This technique also encourages even browning when you sear. Be careful not to cut through into the meat, which would expose interior fibers and may lead to drier slices; a common error is removing the fat entirely, which reduces flavor and juiciness.
- Place roast back on the bones. Set roast on a sheet pan fitted with a rack in the fridge for at least 24 hours up to 3 days, uncovered.: Returning the roast to the bones and setting it on a rack in the fridge for at least 24 hours creates a dry surface that sears beautifully. The cool, dry air tightens the roast's exterior, which helps develop a crisp, flavorful crust later. Expect the smell to be clean and cool, not strong. A pitfall here is wrapping the roast; trapping moisture prevents the surface from drying and reduces browning potential, so keep it uncovered.
- Preheat oven to 225 F (if using a convection oven, use 200 F).: As the oven warms to 225 F , the room will remain quiet, and the slow ascending heat creates a gentle environment for collagen to relax without toughening proteins. This temperature is chosen for even doneness and a tender interior. If you have a convection oven, follow the guidance to use 200 F for similar results. Avoid cranking the oven higher to rush the process, which sacrifices that butter soft texture in favor of overcooked edges.
- Heat a large skillet with oil over medium high heat. Brown the sides and top of the roast. After browning, place roast back on to bones and tie together with kitchen twine. Season with pepper if desired.: Heating a large skillet with canola oil until it shimmers gives you that immediate, satisfying sizzle when the roast hits the pan, and you should see a deep, glossy brown form within a few minutes. Browning builds a layer of savory compounds and color, which enhances both flavor and appearance. After browning, tie the roast with kitchen twine to maintain shape. A common misstep is crowding the pan, which causes steaming instead of browning, so work in turns if the roast is large.
- Set on a rack fitted to a baking sheet and roast uncovered until internal temp registers 110 degrees – this should take about 3-4 hours. Turn off the oven. Let it sit in the oven uncovered until internal temp hits 115 for rare, 120 for medium rare. (temperature will continue to rise after removing from the oven). Broil if desired. After removing from the oven rest for 30 minutes loosely tented with foil.: Putting the roast on a rack lets air circulate, and as it bakes slowly you will notice a subtle sound of gentle bubbling at the surface where fat renders. Aim for an internal temperature of 110 degrees for the initial finish, which typically takes about three to four hours for the size listed. This stage is crucial because the low heat ensures even doneness and a rosy center. Avoid opening the oven too often, which slows the process and can cause temperature swings.
- After resting, remove roast from bones for easy carving. Slice the ribs and slice roast into 3/4 inch slices. Season slices with salt before serving.: With the oven off, the roast continues to climb in temperature slowly, and you will feel a calm sense of completion as residual heat brings the meat to the perfect level for rare or medium rare. The carryover ensures a tender, consistent interior. If you prefer, broil briefly to crisp the exterior, but watch closely, as broiling can darken quickly. A typical error is removing the roast immediately without resting, which leads to juices pooling on the cutting board and drier slices.
- Rest for 30 minutes loosely tented with foil: Resting is tactile and quiet, the roast cooling slightly while internal juices redistribute, so when you slice you will see cleaner, juicier pieces. Tent loosely to prevent sweating and to allow gentle cooling. This step matters because it yields slices that hold their juices instead of leaking on the plate. Avoid wrapping too tightly, which traps steam and softens the crust.
- Remove roast from bones for easy carving: After resting, separating the roast from the bones exposes a smooth surface that makes carving controlled and precise, and the scent at this point is deeply roasted beef with a hint of rendered fat. Carving against the grain into three quarter inch slices shows off the tender interior. A common mistake is slicing too thin or at an angle that produces ragged pieces, which affects both presentation and mouthfeel.
- Season slices with salt before serving: A final dusting of Kosher salt just before serving brightens flavors and adds a satisfying contrast to the rich meat, and the salt crystals deliver a pleasant burst as you bite. This finishing touch emphasizes the beefy notes and layers the seasoning. Avoid over-salting, which can overwhelm the natural flavor of the roast.
Notes
- Choose quality beef Start with a well marbled Bone In Standing Rib Roast, as marbling translates to flavor and juiciness during slow roasting.
- Salt early Salting the roast at least twenty four hours ahead and refrigerating uncovered enhances flavor and creates a drier surface for superior browning.
- Monitor temperature Use an instant read thermometer and aim for the recommended internal temps rather than relying solely on time estimates.
- Let residual heat work Turning the oven off and allowing carryover cooking gives you control over final doneness and prevents overcooking.
- Sear with confidence Heat the skillet and oil until they shimmer so you get a powerful sizzle and a deep brown crust quickly without prolonged exposure to high heat.