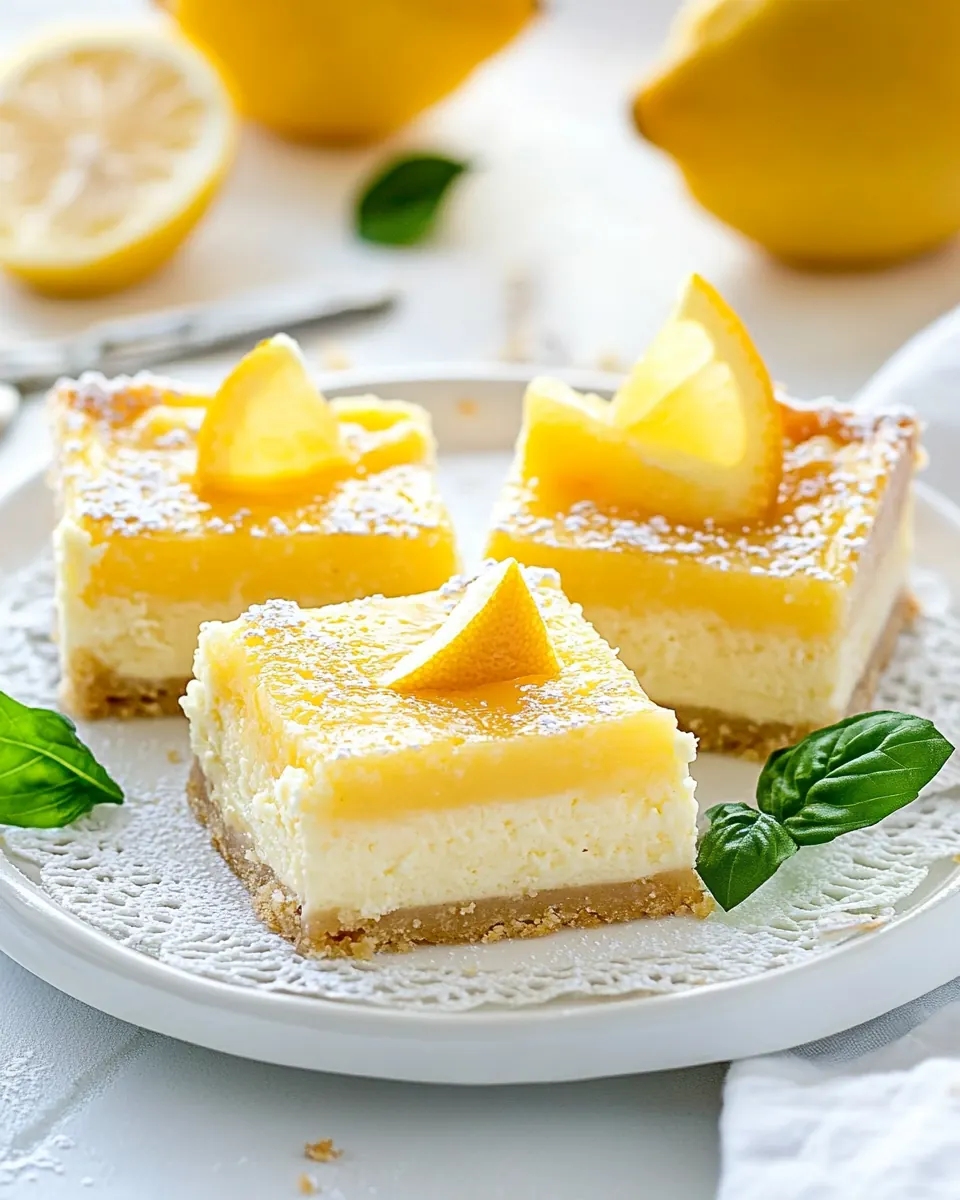
Lemon Cheesecake Bars
Lemon Cheesecake Bars came into my life on a gray spring afternoon when I needed something bright and comforting to lift everyone’s mood. I remember pulling a warm pan from the oven and how the kitchen filled with a gentle citrus perfume that made conversation slow down, because everyone wanted that first bite. I was baking for a small family gathering, and these bars felt like the perfect blend of casual and special, the sort of sweet you can wrap up and take along or set out on a coffee table and watch disappear.
Over the years I have tweaked the balance between the buttery base and the creamy filling to get a texture that holds together when cut, yet still yields a silky mouthfeel. I like how the lemon curd on top adds a lively pop without being overly tart, and how a simple slice can feel like a tiny celebration. When guests ask for the recipe, they usually mention the crust first, so I make sure to talk about pressing it firmly into the pan, because that makes all the difference when slicing neat bars. These moments of testing and sharing shaped the recipe into what it is now, and every time I make Lemon Cheesecake Bars I find a new reason to smile.
Recipe Snapshot
1 hr 35 mins
35 mins
60 mins
Medium
250 kcal
American
Gluten-Free, Low FODMAP
Desserts
9×13-inch Baking Pan, KitchenAid Artisan 5 Quart Stand Mixer, Parchment Paper, Keep Calm And Bake On Spatula
The Best Thing About This Lemon Cheesecake Bars
Bright Citrus Flavor
I love that Lemon Cheesecake Bars deliver a clear citrus note without overpowering the creamy center. The lemon zest and the lemon curd layer team up to give a lively tang that keeps the dessert from feeling too rich. I often find myself adjusting the zest depending on how bold I want the lemon to be, because small tweaks shift the whole flavor profile.
Creamy Yet Sliceable Texture
The texture is the reason I come back to this recipe. The cream cheese and sour cream combination yields a silky, smooth filling that still firms up enough to cut tidy bars. I learned to let the cheesecake cool fully before adding the curd, because that patience prevents the top layer from sliding and helps the final slices keep their shape.
Simple Ingredients, Big Impact
What appeals to me is how basic pantry staples transform into something that tastes elevated. All purpose flour, butter, and a few other pantry items become a crisp, shortbread like base, while the cream cheese mixture becomes luxuriously silky. I appreciate recipes that give a lot of culinary return for minimal complexity.
Make Ahead Friendly
I often make these ahead of time for events, because once chilled they travel well and the flavors meld. The bars actually taste better after a day in the fridge, when the lemon curd and cheesecake have settled together. This reliability makes them a go to when I need a dessert I can prepare in advance without worrying about last minute assembly.
Crowd Pleasing Presentation
Finally, I adore how elegant these bars look on a platter. They are easy to portion, share, and store. That practical polish is why I often bring them along to potlucks and weekend gatherings, confident they will be the first thing to disappear.
Ingredients You’ll Need for Lemon Cheesecake Bars
These components are purposeful collaborators. The crust ingredients build a sturdy, buttery base that contrasts the silky filling. The filling itself balances richness and brightness, while the lemon curd on top adds a glossy, zesty finish. I think of cream cheese as the centerpiece, and the rest as supporting players that either stabilize or amplify flavor.
- 1 cup all-purpose flour: Provide structure and body to the crust by combining with fats and sugars; sift and mix evenly to avoid lumps and ensure consistent texture. Work into the butter until a sandy crumb forms to create a tender, holding base for the bars.
- 1/4 cup cornstarch: Lighten and tenderize the crust by reducing gluten formation when mixed with flour; whisk in thoroughly to distribute evenly. Help produce a delicate, shortbread-like crumb that prevents toughness in the base.
- 1/4 cup granulated sugar: Sweeten the crust and balance flavors while assisting in slight caramelization during baking; measure and blend uniformly with dry ingredients. Help achieve a pleasant sweetness without overpowering the lemon and cream cheese layers.
- 1/2 cup butter (unsalted): Bind and enrich the crust by cutting cold butter into the dry mix until pea-sized pieces remain; melt slightly during baking to create flakiness and flavor. Use unsalted butter to control overall salt levels and enhance buttery richness.
- 1/2 teaspoons salt: Enhance flavor depth and balance sweetness by adding a small amount of salt to the crust; stir in with dry ingredients. Keep measurement precise to avoid over-salting which would detract from the delicate cheesecake filling.
- 2 tablespoon lemon zest (freshly grated): Brighten and intensify citrus aroma and flavor in the filling by zesting fresh lemons; fold into mixtures to release essential oils. Use freshly grated zest for the most vibrant lemon notes and avoid bitter pith.
- 24 ounce cream cheese (3 packages, softened): Provide the creamy, tangy body of the filling as the primary dairy component; soften to room temperature for smooth, lump-free batter. Beat thoroughly to incorporate air, ensuring a rich and velvety cheesecake texture.
- 3 large eggs: Incorporate structure and help set the filling by adding eggs one at a time; whisk gently to avoid overbeating. Eggs contribute to a custard-like consistency and help the filling hold when sliced.
- 1 cup granulated sugar: Sweeten the filling and balance the cream cheese tang; dissolve into the batter smoothly for even sweetness. Adjusting the amount precisely maintains the intended sweetness without masking lemon flavors.
- 1/2 cup sour cream: Add creaminess and a slight tang to finish the filling's texture; fold in gently after sugars and eggs are combined. Sour cream also contributes moisture and prevents the filling from becoming too dense or dry.
- 2 teaspoon vanilla extract: Enhance overall flavor complexity and provide a warm, rounded vanilla note; stir in after the base filling is smooth. Use pure vanilla extract for the cleanest flavor that complements lemon without competing.
- 1/4 teaspoon salt: Balance sweetness and amplify other flavors by adding a small, precise amount of salt to the filling; whisk in evenly. Salt helps to brighten the dairy and citrus notes and prevents the dessert from tasting flat.
- 1 1/2 cups lemon curd: Top and flavor the bars with a glossy, tart-sweet layer of lemon curd; spread evenly over cooled cheesecake for a vibrant finish. Use a smooth curd to add intense lemon flavor and an attractive presentation.
Putting Together Lemon Cheesecake Bars
These directions will walk you through building a stable base, creating a creamy filling, and finishing with glossy lemon curd. I like to move methodically, giving each layer space to set so the final bars slice cleanly. Keep the ingredients at the right temperatures and you will be rewarded with neat, delicious pieces.
- Prep: Preheat your oven to 350°F. Spray a 9×13-inch baking pan with cooking spray then line it with parchment paper, but with the parchment paper hanging off the sides to make it easy to lift out bars.: The room will fill with warmth and a faint lemon perfume as the oven comes to temperature, and you will feel ready when the pan is lined properly. Start by preheating your oven to 350°F , then prepare a 9×13 inch baking pan by spraying it lightly and lining it with parchment paper that overhangs the sides for easy removal. When the oven hums and the pan is ready, you gain both confidence and cleanliness in the kitchen. The parchment makes lifting the bars simple, and if you skip this step the crust can stick to the pan which makes slicing messy. A common mistake here is not leaving enough overhang, so be generous with the paper to avoid fussy extraction.
- Make Crust: Add all the crust ingredients to a food processor and pulse a few times until mixture resembles a dry coarse meal.: As you pulse the dry ingredients, a light, sandy texture will form under the blades, smelling faintly of butter and lemon oil. Place 1 cup all purpose flour , 1/4 cup cornstarch , 1/4 cup granulated sugar , 1/2 cup butter , 1/2 teaspoons salt , and 2 tablespoon lemon zest into a food processor and pulse until the mixture resembles a dry coarse meal. The aroma of lemon zest brightens the crumb and the butter gives it that shortbread richness. If you over-process, the mixture will become paste like, so pulse just until combined. A frequent error is adding too much moisture, which prevents the crust from firming properly during bake.
- Bake Crust: Transfer the crumb mixture to the prepared baking dish and press it down evenly into the bottom. Transfer the baking dish to the oven and bake for 15 minutes.: When you press the crumb into the pan, the tactile feedback will tell you if it is packed correctly, and you want an even, compact base that holds together. Transfer the crumb mixture to the prepared baking dish and press it down evenly into the bottom, applying steady pressure to create a uniform layer. Slide the pan into the oven and bake for 15 minutes until the surface looks set and the edges take on a light golden tint. The smell of warm butter will become more pronounced as the crust browns. If you underbake it, the bottom can be soft and difficult to slice, so ensure it is firm. Avoid pressing so hard that the crust becomes overly dense, which can detract from its tender bite.
- Make Cheesecake Layer: Using a hand mixer, mix the softened cream cheese until smooth. Add the eggs, sugar, sour cream, vanilla and salt, and continue to mix until the batter is well combined and smooth.: You will notice a silky sheen form as the cream cheese becomes smooth under your mixer, and that is the texture you want. Using a hand mixer, blend the softened 24 ounce cream cheese until smooth and lump free. Add 3 large eggs , 1 cup granulated sugar , 1/2 cup sour cream , 2 teaspoon vanilla extract , and 1/4 teaspoon salt , and continue mixing until the batter is well combined and velvety. The batter should be smooth and pourable, not airy. Over mixing after adding the eggs traps air which can cause cracks during baking, so mix just to incorporate. If you end up with small lumps, scrape the bowl and beat gently until smooth.
- Bake The Cheesecake: Pour the cheesecake batter over the baked crust and bake for 45 minutes or until the top of the cheesecake has browned slightly. Set the cheesecake aside until it fully cools down.: As the oven warms the batter, it will set from the edges inward, and you are aiming for a gentle wobble in the center when it is done. Pour the cheesecake batter over the pre baked crust and smooth the surface. Return the pan to the oven and bake for 45 minutes or until the top has browned slightly and the center no longer looks liquid, though it may still have a small tremble. The top should be pleasantly golden but not deeply cracked. Let the pan sit to cool down; rushing this step can cause the filling to crack or collapse. A common oversight is opening the oven door during baking, which can lead to temperature loss and affect the set.
- Add Lemon Curd: Pour the lemon curd over the cooled cheesecake and spread it evenly with a spatula. Refrigerate for at least 3 hours, or until the cheesecake and lemon curd layers set.: After the cheesecake has cooled and the surface is calm to the touch, the lemon curd will drape across it like a glossy blanket, offering a vivid citrus note. Pour 1 1/2 cups lemon curd over the cooled cheesecake and spread it evenly with a spatula so the top is smooth and shiny. Refrigerate the assembled bars for at least 3 hours so both layers firm and integrate. If you try to cut into the bars before they are fully chilled, the layers can smear and the slices will not hold their shape. Also, spreading curd on warm cheesecake can cause it to sink into the filling rather than sitting as a distinct layer.
- Cut & Serve: Carefully lift the cheesecake out of the pan and slice it into your desired size bars. I cut it 4 x 6, making 24 bars.: There is a satisfying click when your knife meets a clean, chilled edge, and that tells you the bars are ready to be portioned. Carefully lift the cheesecake from the pan using the parchment overhang and place it on a cutting board. Slice into bars in your desired size, noting that cutting a 4 by 6 grid yields 24 bars as I do. For neat slices, use a hot, sharp knife wiped between cuts. If you try to slice while the bars are still warm or without wiping the knife, you will get ragged edges and sticky crumbs, so chill thoroughly and clean the blade often.
Tips and Tricks about Lemon Cheesecake Bars

These tips will help you get consistent results and make serving easier. I include practical techniques I rely on when bringing these bars to gatherings, and I expand on the notes so you feel confident with timing, storage, and presentation.
- Switching crusts Instead of a shortbread style crust, you can use a graham cracker crust by crushing about 2 cups of graham crackers and combining with 1/2 cup melted butter and 1/4 cup granulated sugar, pressing firmly and baking for 8 to 10 minutes. This yields a slightly different texture and a classic pairing with cheesecake flavors. Be mindful that graham crusts can be crumblier, so press firmly and allow full chilling time before slicing.
- Parchment overhang Leave enough parchment paper over the sides of your baking dish to allow for easy removal later; I cut a strip that crosses both directions to create handles. This makes lifting the entire slab simple and helps you slice without scraping the pan. If you skip adequate overhang, digging the bars out can damage the edges.
- Control portion size How you cut your bars will determine the yield; cutting a 4 by 6 grid makes 24 bars as noted, while larger pieces will reduce the count. Use a ruler or measured marks for uniform slices if presentation matters for an event. Inconsistent slices can look messy on a platter, so plan your cuts ahead.
- Fridge storage Store these little bars in the fridge for up to 5 days in an airtight container to maintain texture and freshness. Layer with parchment between rows to prevent sticking and preserve the glossy top. Leaving them uncovered can dry out the curd and edges.
- Freezing method Freeze fully cooled bars on a tray uncovered until solid, then wrap each piece in plastic wrap and aluminum foil for long term storage up to 3 months. This flash freeze method stops condensation and prevents freezer burn. Thaw in the fridge overnight before serving for best texture.
Serve This Lemon Cheesecake Bars With
I like to offer serving suggestions that match occasions and storage needs, whether for a casual coffee gathering or a spring celebration. Below are practical pairings and notes on how to present and preserve the bars.
- Simple coffee pairing Serve the bars with a hot cup of coffee for a weekday brunch or relaxed afternoon, letting the bright lemon cut through the roast. Arrange on a small platter with a dusting of powdered sugar for a cozy presentation.
- Tea time spread Pair with herbal or green tea for a spring tea party, placing the bars alongside small sandwiches and fresh fruit to balance richness. The citrus notes pair particularly well with floral teas.
- Party platter Include these bars on a dessert board with bite sized fruit and nut clusters for a buffet style event; they travel well when chilled and are easy for guests to pick up. Keep chilled until serving to preserve the curd’s gloss.
- Seasonal occasions These bars shine in spring celebrations and holidays when citrus is in season, offering a refreshing conclusion to heavier meals. They are also excellent for potlucks since they can be made ahead and served cold.
- Storage for events If you are prepping ahead, store the bars in an airtight container in the refrigerator for up to 5 days, or freeze individual pieces for longer storage and thaw in the fridge overnight before serving. Proper wrapping prevents soggy edges and preserves the texture.
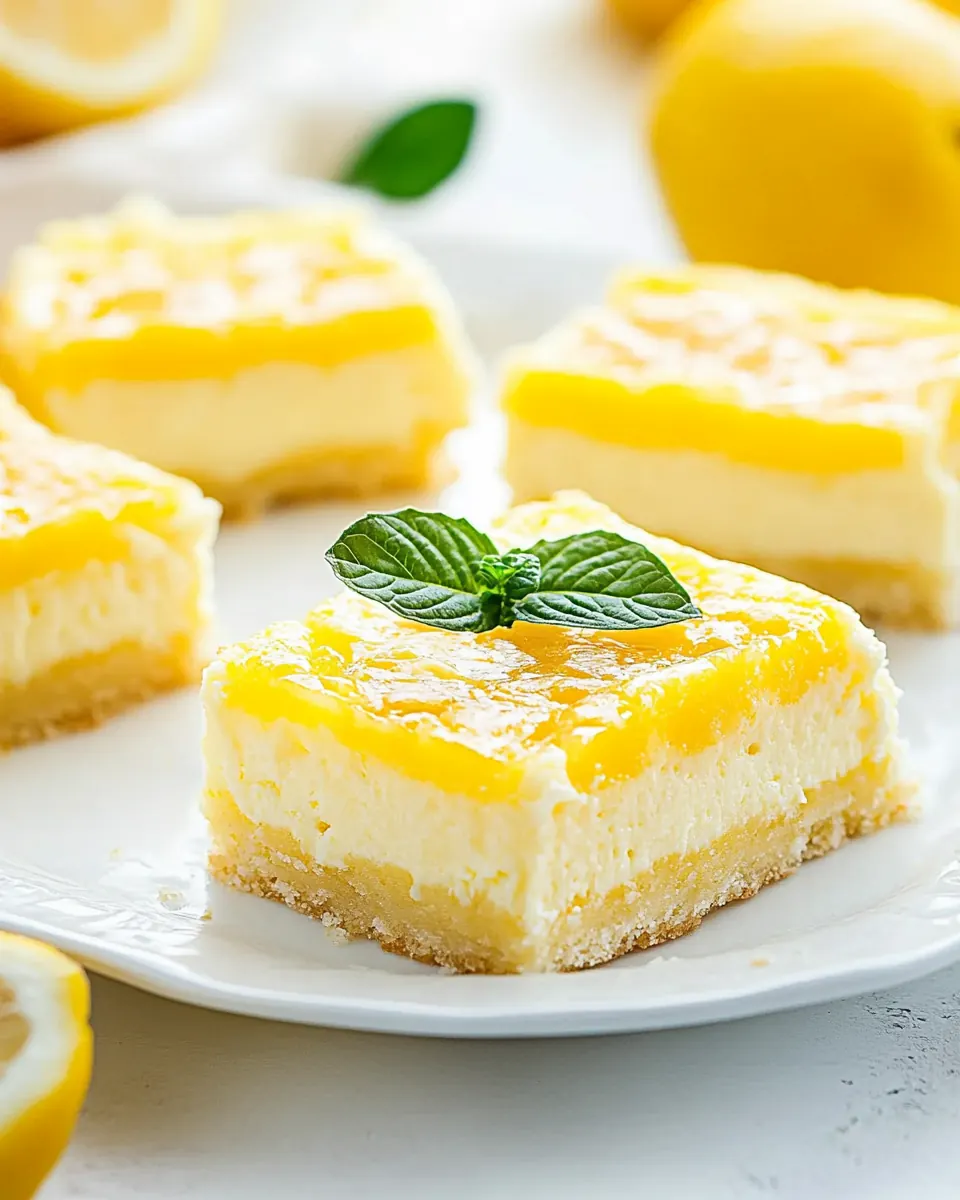
- Plating tips For a polished look, cut clean bars and place on decorative paper doilies or small dessert plates; garnish with a thin lemon twist if you want a refined touch without changing the flavor. Avoid heavy garnishes that compete with the lemon curd.
FAQ
Conclusion
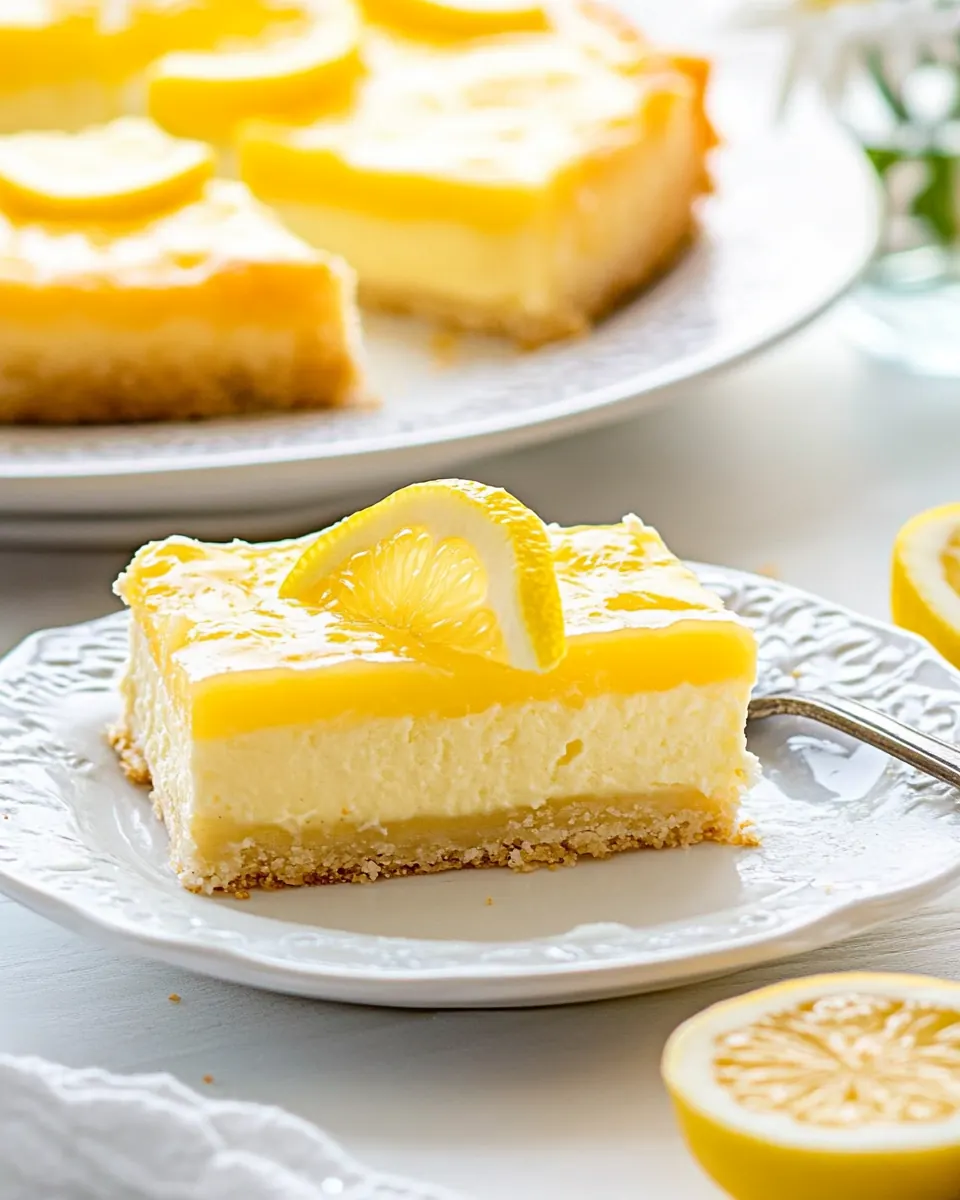
These Lemon Cheesecake Bars stand out because they pair a buttery shortbread like crust with a silky cheesecake layer and a vibrant lemon curd finish. Try them when you want a dessert that is easy to portion, make ahead, and impress without fuss. I hope you enjoy the balanced textures and bright flavor as much as I do, and that they become a reliable favorite for your gatherings and quiet afternoons alike.
Lemon Cheesecake Bars
Equipment
- 9x13-inch Baking Pan
- KitchenAid Artisan 5 Quart Stand Mixer
- Parchment Paper
- Keep Calm And Bake On Spatula
Ingredients
- 1 cup all-purpose flour Provide structure and body to the crust by combining with fats and sugars; sift and mix evenly to avoid lumps and ensure consistent texture. Work into the butter until a sandy crumb forms to create a tender, holding base for the bars.
- 1/4 cup cornstarch Lighten and tenderize the crust by reducing gluten formation when mixed with flour; whisk in thoroughly to distribute evenly. Help produce a delicate, shortbread-like crumb that prevents toughness in the base.
- 1/4 cup granulated sugar Sweeten the crust and balance flavors while assisting in slight caramelization during baking; measure and blend uniformly with dry ingredients. Help achieve a pleasant sweetness without overpowering the lemon and cream cheese layers.
- 1/2 cup butter (unsalted) Bind and enrich the crust by cutting cold butter into the dry mix until pea-sized pieces remain; melt slightly during baking to create flakiness and flavor. Use unsalted butter to control overall salt levels and enhance buttery richness.
- 1/2 teaspoons salt Enhance flavor depth and balance sweetness by adding a small amount of salt to the crust; stir in with dry ingredients. Keep measurement precise to avoid over-salting which would detract from the delicate cheesecake filling.
- 2 tablespoon lemon zest (freshly grated) Brighten and intensify citrus aroma and flavor in the filling by zesting fresh lemons; fold into mixtures to release essential oils. Use freshly grated zest for the most vibrant lemon notes and avoid bitter pith.
- 24 ounce cream cheese (3 packages, softened) Provide the creamy, tangy body of the filling as the primary dairy component; soften to room temperature for smooth, lump-free batter. Beat thoroughly to incorporate air, ensuring a rich and velvety cheesecake texture.
- 3 large eggs Incorporate structure and help set the filling by adding eggs one at a time; whisk gently to avoid overbeating. Eggs contribute to a custard-like consistency and help the filling hold when sliced.
- 1 cup granulated sugar Sweeten the filling and balance the cream cheese tang; dissolve into the batter smoothly for even sweetness. Adjusting the amount precisely maintains the intended sweetness without masking lemon flavors.
- 1/2 cup sour cream Add creaminess and a slight tang to finish the filling's texture; fold in gently after sugars and eggs are combined. Sour cream also contributes moisture and prevents the filling from becoming too dense or dry.
- 2 teaspoon vanilla extract Enhance overall flavor complexity and provide a warm, rounded vanilla note; stir in after the base filling is smooth. Use pure vanilla extract for the cleanest flavor that complements lemon without competing.
- 1/4 teaspoon salt Balance sweetness and amplify other flavors by adding a small, precise amount of salt to the filling; whisk in evenly. Salt helps to brighten the dairy and citrus notes and prevents the dessert from tasting flat.
- 1 1/2 cups lemon curd Top and flavor the bars with a glossy, tart-sweet layer of lemon curd; spread evenly over cooled cheesecake for a vibrant finish. Use a smooth curd to add intense lemon flavor and an attractive presentation.
Instructions
- Prep: Preheat your oven to 350°F. Spray a 9×13-inch baking pan with cooking spray then line it with parchment paper, but with the parchment paper hanging off the sides to make it easy to lift out bars.: The room will fill with warmth and a faint lemon perfume as the oven comes to temperature, and you will feel ready when the pan is lined properly. Start by preheating your oven to 350°F , then prepare a 9×13 inch baking pan by spraying it lightly and lining it with parchment paper that overhangs the sides for easy removal. When the oven hums and the pan is ready, you gain both confidence and cleanliness in the kitchen. The parchment makes lifting the bars simple, and if you skip this step the crust can stick to the pan which makes slicing messy. A common mistake here is not leaving enough overhang, so be generous with the paper to avoid fussy extraction.
- Make Crust: Add all the crust ingredients to a food processor and pulse a few times until mixture resembles a dry coarse meal.: As you pulse the dry ingredients, a light, sandy texture will form under the blades, smelling faintly of butter and lemon oil. Place 1 cup all purpose flour , 1/4 cup cornstarch , 1/4 cup granulated sugar , 1/2 cup butter , 1/2 teaspoons salt , and 2 tablespoon lemon zest into a food processor and pulse until the mixture resembles a dry coarse meal. The aroma of lemon zest brightens the crumb and the butter gives it that shortbread richness. If you over-process, the mixture will become paste like, so pulse just until combined. A frequent error is adding too much moisture, which prevents the crust from firming properly during bake.
- Bake Crust: Transfer the crumb mixture to the prepared baking dish and press it down evenly into the bottom. Transfer the baking dish to the oven and bake for 15 minutes.: When you press the crumb into the pan, the tactile feedback will tell you if it is packed correctly, and you want an even, compact base that holds together. Transfer the crumb mixture to the prepared baking dish and press it down evenly into the bottom, applying steady pressure to create a uniform layer. Slide the pan into the oven and bake for 15 minutes until the surface looks set and the edges take on a light golden tint. The smell of warm butter will become more pronounced as the crust browns. If you underbake it, the bottom can be soft and difficult to slice, so ensure it is firm. Avoid pressing so hard that the crust becomes overly dense, which can detract from its tender bite.
- Make Cheesecake Layer: Using a hand mixer, mix the softened cream cheese until smooth. Add the eggs, sugar, sour cream, vanilla and salt, and continue to mix until the batter is well combined and smooth.: You will notice a silky sheen form as the cream cheese becomes smooth under your mixer, and that is the texture you want. Using a hand mixer, blend the softened 24 ounce cream cheese until smooth and lump free. Add 3 large eggs , 1 cup granulated sugar , 1/2 cup sour cream , 2 teaspoon vanilla extract , and 1/4 teaspoon salt , and continue mixing until the batter is well combined and velvety. The batter should be smooth and pourable, not airy. Over mixing after adding the eggs traps air which can cause cracks during baking, so mix just to incorporate. If you end up with small lumps, scrape the bowl and beat gently until smooth.
- Bake The Cheesecake: Pour the cheesecake batter over the baked crust and bake for 45 minutes or until the top of the cheesecake has browned slightly. Set the cheesecake aside until it fully cools down.: As the oven warms the batter, it will set from the edges inward, and you are aiming for a gentle wobble in the center when it is done. Pour the cheesecake batter over the pre baked crust and smooth the surface. Return the pan to the oven and bake for 45 minutes or until the top has browned slightly and the center no longer looks liquid, though it may still have a small tremble. The top should be pleasantly golden but not deeply cracked. Let the pan sit to cool down; rushing this step can cause the filling to crack or collapse. A common oversight is opening the oven door during baking, which can lead to temperature loss and affect the set.
- Add Lemon Curd: Pour the lemon curd over the cooled cheesecake and spread it evenly with a spatula. Refrigerate for at least 3 hours, or until the cheesecake and lemon curd layers set.: After the cheesecake has cooled and the surface is calm to the touch, the lemon curd will drape across it like a glossy blanket, offering a vivid citrus note. Pour 1 1/2 cups lemon curd over the cooled cheesecake and spread it evenly with a spatula so the top is smooth and shiny. Refrigerate the assembled bars for at least 3 hours so both layers firm and integrate. If you try to cut into the bars before they are fully chilled, the layers can smear and the slices will not hold their shape. Also, spreading curd on warm cheesecake can cause it to sink into the filling rather than sitting as a distinct layer.
- Cut & Serve: Carefully lift the cheesecake out of the pan and slice it into your desired size bars. I cut it 4 x 6, making 24 bars.: There is a satisfying click when your knife meets a clean, chilled edge, and that tells you the bars are ready to be portioned. Carefully lift the cheesecake from the pan using the parchment overhang and place it on a cutting board. Slice into bars in your desired size, noting that cutting a 4 by 6 grid yields 24 bars as I do. For neat slices, use a hot, sharp knife wiped between cuts. If you try to slice while the bars are still warm or without wiping the knife, you will get ragged edges and sticky crumbs, so chill thoroughly and clean the blade often.
Notes
- Switching crusts Instead of a shortbread style crust, you can use a graham cracker crust by crushing about 2 cups of graham crackers and combining with 1/2 cup melted butter and 1/4 cup granulated sugar, pressing firmly and baking for 8 to 10 minutes. This yields a slightly different texture and a classic pairing with cheesecake flavors. Be mindful that graham crusts can be crumblier, so press firmly and allow full chilling time before slicing.
- Parchment overhang Leave enough parchment paper over the sides of your baking dish to allow for easy removal later; I cut a strip that crosses both directions to create handles. This makes lifting the entire slab simple and helps you slice without scraping the pan. If you skip adequate overhang, digging the bars out can damage the edges.
- Control portion size How you cut your bars will determine the yield; cutting a 4 by 6 grid makes 24 bars as noted, while larger pieces will reduce the count. Use a ruler or measured marks for uniform slices if presentation matters for an event. Inconsistent slices can look messy on a platter, so plan your cuts ahead.
- Fridge storage Store these little bars in the fridge for up to 5 days in an airtight container to maintain texture and freshness. Layer with parchment between rows to prevent sticking and preserve the glossy top. Leaving them uncovered can dry out the curd and edges.
- Freezing method Freeze fully cooled bars on a tray uncovered until solid, then wrap each piece in plastic wrap and aluminum foil for long term storage up to 3 months. This flash freeze method stops condensation and prevents freezer burn. Thaw in the fridge overnight before serving for best texture.