
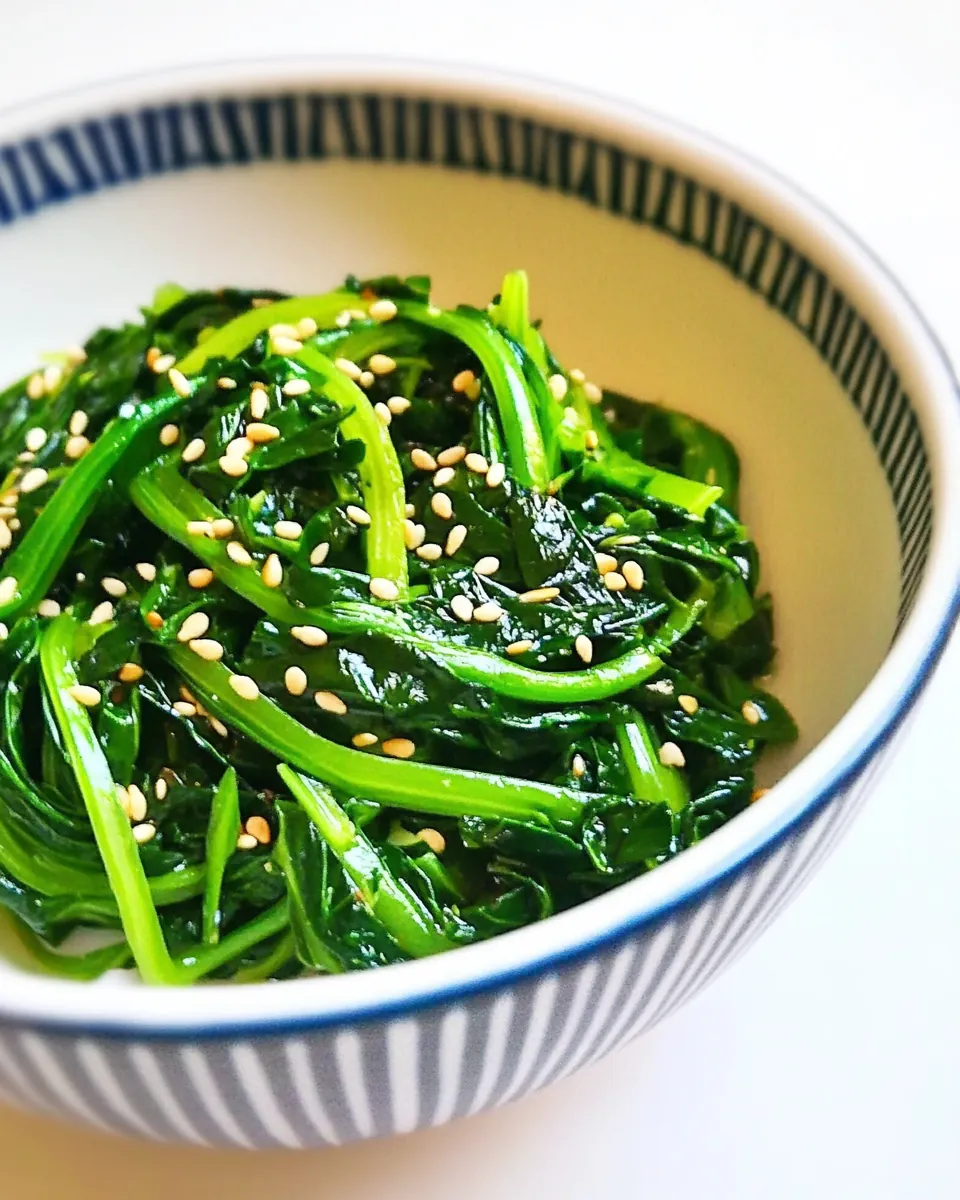
Korean Spinach Side Dish
Korean Spinach Side Dish started as a tiny ritual in my kitchen, a quick assembly that always makes weeknight meals feel thoughtful. I first learned it from a friend who brought a container to a potluck and vanished before anyone asked for the recipe, so I hovered near the bowl and memorized the balance of savory, nutty, and mildly spicy notes. Over time I adapted the amounts, swapped a few pantry items, and now this simple pile of spinach feels like a reliable friend when I want something fresh on the table.
There are moments when I crave something light but not bland, and Korean Spinach Side Dish answers that call. I keep toasted sesame oil and coconut aminos in my fridge, because they transform steamed greens into something layered and satisfying in under ten minutes. Each bite has a firm leafy texture softened just enough, a gentle garlic spark, and the background whisper of sesame seeds that makes you slow down. When I serve it, people often ask if there is a secret ingredient, and I smile because the secret is patience in squeezing out water and the tiny flick of toasted sesame.
Recipe Snapshot
15 mins
5 mins
10 mins
Easy
100 kcal
Korean
Vegan, Gluten-Free
Side Dishes
Large pot, Sieve or colander, Mixing bowl, Knife, Measuring spoons
What Makes This Korean Spinach Side Dish Special
1. Speed without sacrificing flavor
I love that Korean Spinach Side Dish arrives at the table in under 20 minutes. The quick blanch or microwave step keeps the leaves bright and tender, so you get vibrant color and a fresh texture without fuss. This is perfect when dinner needs a fast green component, and I often reach for it on busy weeknights.
2. Balanced seasoning that enhances, not masks
The combination of coconut aminos, toasted sesame oil, and a small garlic clove creates salty, nutty, and aromatic layers. I appreciate how each ingredient plays a supporting role, letting the subtle vegetal flavor of the spinach shine. We avoid overpowering sauces so the result feels light but complete.
3. Textural contrast matters
Crunch from the toasted sesame seeds against the soft, squeezed spinach makes every mouthful interesting. I often toast an extra pinch of seeds to sprinkle on top for a finishing crunch, and that little gesture elevates a basic side into something memorable.
4. Flexible and accessible
This dish uses pantry-friendly ingredients, so you can assemble it anytime. I find it a dependable component for a range of meals, from a casual bowl to a more composed dinner. The optional gochugaru or red pepper flakes let you dial in heat, which I sometimes do when serving heartier mains.
5. Keeps well and tastes better after chilling
Chilling for a short period helps the flavors meld. I usually make it a little ahead because the rest period lets the seasoning penetrate the leaves, resulting in a cohesive bite. Leftovers stay bright in the fridge for a few days, so it’s perfect for meal prep.
Ingredients You’ll Need for Korean Spinach Side Dish
These ingredients are simple, intentional, and designed to work together. The main player is the spinach, which provides a tender, leafy base. Aromatics like the green onion and garlic add freshness and bite, while coconut aminos and toasted sesame oil supply umami and toasted warmth. The salt brings balance, and toasted sesame seeds contribute texture. The optional gochugaru lets you introduce a controlled heat that complements rather than overwhelms.
- 1 bunch spinach, (about 10 ounces) washed, drained, and ends trimmed: Provide tender, leafy greens that form the base of the side dish; blanch briefly to retain bright color and delicate texture, then squeeze out excess water before seasoning to concentrate flavors.
- 1 green onion, thinly sliced: Add a mild allium note and fresh crunch when thinly sliced; stir into the seasoned spinach to lift the overall flavor and add visual contrast.
- 1 small garlic clove, minced: Contribute a sharp, aromatic bite that boosts savory depth; mince finely and mix sparingly to distribute the garlicky warmth without overpowering the delicate greens.
- 2 teaspoons coconut aminos: Offer a savory, slightly sweet and umami-rich alternative to soy sauce; drizzle and toss with the spinach to enhance overall savoriness while keeping the dish gluten-free.
- 1 teaspoon toasted sesame oil: Provide a nutty, toasted aroma that rounds out flavors; use sparingly to avoid greasiness while imparting traditional sesame character to the banchan.
- 1/2 teaspoon Diamond Crystal kosher salt: Season the dish to taste and help draw out moisture when used during pressing; use measured amounts to balance the natural flavors without over-salting.
- 1 teaspoon toasted sesame seeds: Add a final crunchy, toasty finish and visual appeal; sprinkle after seasoning to introduce subtle texture and reinforce the sesame flavor profile.
- 1/4 teaspoon gochugaru or red pepper flakes () (optional): Introduce gentle heat and a hint of smokiness when included; use sparingly to add complexity and mouthwatering warmth without overwhelming the other elements.
Putting Together Korean Spinach Side Dish
Putting this together is straightforward, but I like to treat each step as its own mini ritual. Take your time with the blanching and the squeezing, because those two actions determine texture. Once you mix the dressing, taste and adjust, then let the flavors rest for a bit before serving.
- If you’re cooking the spinach on the stovetop, bring a large covered pot of water to a boil over high heat. Add the spinach and cook, uncovered, for 30 seconds to 1 minute, or until the leaves are bright green and just cooked. Alternatively, you can microwave the spinach in an Anyday Large Deep Dish microwave glass bowl for about 2 minutes or until just cooked through.: You will hear the pot begin to roar as it nears a full boil, and once the water is active the leaves will go from dull to a brilliant green within seconds, which is the visual cue that they are nearly done. The reason for a rapid boil is that it sets the color and softens the fibers without turning them papery, and covering the pot shortens the waiting time. A common mistake is overcooking, which yields limp, flavorless greens, so watch closely and be ready with a sieve or slotted spoon to lift them out quickly. If your stove seems to take long to boil, use a lid to trap heat and get there faster. When you remove the spinach, the bright green and slightly glossy look means you stopped the process at the right moment.
- Transfer the cooked spinach to a sieve or colander in a bowl of ice water to stop the cooking process. (When I’m pressed for time, I skip the ice water part and just rinse the cooked spinach with cold water before squeezing out the excess liquid.): Listen for the faint hiss as the leaves hit the water, and note how quickly their volume collapses; that rapid change shows they are absorbing heat evenly. Cooking briefly preserves the tender bite, and retaining some structure keeps the final texture interesting when dressed. A problem people run into is leaving them too long, which causes a mushy mouthfeel and dull color; if unsure, start at 30 seconds and check one leaf. The short cook time also helps the garlic and green onion stand out once tossed in, because overcooked greens tend to need heavier seasoning.
- Take the spinach out of the ice water and squeeze out all the excess water.: In the microwave you will hear the leaves steam and see them wilt before your eyes, and this method is excellent when you need a quick route without heating a stove. The steam traps heat and cooks uniformly, but uneven microwaves can leave pockets of undercooked stems, so stir halfway through if your bowl allows. Avoid using high power for too long, as that can dry the leaves and make them rubbery, which is the mistake I used to make when rushing.
- Cut the pile of cooked spinach into thirds to make it easier to eat.: The ice bath shocks the leaves, instantly locking in color and halting softening, and you will notice the water becoming cloudy from released chlorophyll and starches which is normal. The drop in temperature firms the stems, ensuring the final texture is pleasant rather than mushy. Some people skip this step to save time, but skipping it can result in continued cooking from residual heat, so rinse with cold water if you omit the ice bath to simulate the effect. The sound of the water clinking with ice and the sudden chill under your hands are immediate confirmations that the cooling worked.
- In a large mixing bowl, combine the spinach with the green onion, garlic, coconut aminos, sesame oil, and salt. Mix well and taste a bite. Adjust for seasoning, if needed. Toss in the sesame seeds (and optional red pepper flakes) and stir everything together.: The cool rinse accomplishes much of the same effect as an ice bath, and you can feel the leaves cool as you run water through them, which is satisfying and practical. Squeezing under cold running water also helps remove surface starch and any lingering bitterness. A common slip is not cooling enough, which allows residual heat to continue softening the greens; ensure the leaves feel cool before proceeding. If you plan to chill the dish, a thorough cool down prevents condensation in storage containers.
- Cover and chill the spinach dish in the refrigerator for at least 5 to 10 minutes to let the flavors meld. Dig in!: This is tactile work, and you will notice how much moisture the greens hold after cooking; firm squeezing yields a compact pile that absorbs dressings properly instead of becoming watery. I gather the leaves and press with my hands or wrap them in a clean towel and twist, and the sound is a soft wringing as water releases. The why is simple, dressing dilution ruins texture, and a common mistake is under-squeezing, which makes the final dish soggy. Aim for leaves that are damp but not dripping; they should hold the seasoning rather than swimming in it.
- Cut the pile of cooked spinach into thirds to make it easier to eat: Visually you will see a tidy bundle become manageable portions, and cutting prevents long stems from dominating a forkful, improving the eating experience. Smaller pieces allow the dressing to cling to more surface area, improving flavor distribution. A frequent oversight is leaving large bundles that are awkward on the plate, so an even chop makes serving neater. Use a sharp knife or kitchen scissors and notice how cleanly the leaves separate when they are properly squeezed.
- In a large mixing bowl, combine the spinach with the green onion, garlic, coconut aminos, sesame oil, and salt: When you begin tossing, the aroma of garlic and toasted sesame oil will rise, and the visual of glossy leaves signals the dressing is coating the greens. Mixing in a large bowl prevents crushing, and folding motions help lift rather than mash the texture. The why is flavor balance, because uniform coating ensures each bite has the intended savory and nutty notes; a common mistake is using too small a bowl and turning the dish into a soggy mash. After tossing, taste and adjust the salt or coconut aminos to fine tune the seasoning.
- Mix well and taste a bite: Sensory checks are everything here, and a small spoonful will tell you if the dish needs more salt, a splash more coconut aminos , or a whisper of heat. You want a balance where the spinach is present but supported by the seasonings. People often add too much oil to cover imperfections, which merely masks flavors; instead, correct with measured seasonings. Adjustments should be small and deliberate, tasting after each tweak to avoid oversalting.
- Adjust for seasoning, if needed: A brief rest on seasoning will reveal if the flavors are integrated, and you may find a touch more salt or sesame oil improves harmony. The reason for incremental changes is that the cooling and chilling steps intensify perception of salt and fat differently, so add conservatively. A typical error is adding all at once, then finding the dish too sharp; remember you can always add but not remove, so proceed gradually. After final adjustments, the seasoning should feel rounded and steady on your palate.
- Toss in the sesame seeds (and optional red pepper flakes) and stir everything together: The visual of tiny seeds glinting on glossy leaves signals the finishing touch, and the faint crackle of sesame adds contrast when you bite. If you include gochugaru , sprinkle sparingly and mix to distribute the heat evenly; uneven clumps create hot pockets. Avoid skipping the seeds if you want texture, because without them the dish can feel too uniform in mouthfeel. Stir gently so the dressing remains intact and the leaves do not become mushy.
- Cover and chill the spinach dish in the refrigerator for at least 5 to 10 minutes to let the flavors meld: Cooling quiets the initial sharpness of the garlic and allows the coconut aminos and sesame oil to infuse the leaves, creating a cohesive taste. You may notice the aroma mellow and the texture settle, which is when the dish feels truly complete. Rushing to serve immediately can leave the flavors separate and blunt, so even a short chill improves harmony. If you refrigerate longer, bring it back to slightly less cold before serving so flavors are more pronounced.
- Dig in: The final reward is the combination of bright spinach , savory dressing, and nutty seeds; each bite should feel balanced and satisfying. Serve chilled or slightly cool, and enjoy the layered flavors that come together after your careful prep. A last mistake to avoid is reheating, which can flatten the texture and aroma; this dish is best enjoyed cool or at room temperature.
Ways to Adapt This Recipe
This dish is forgiving and adapts well to personal tastes. Below are practical ideas to tweak texture, heat level, and seasoning while preserving the character of Korean Spinach Side Dish.
- Swap coconut aminos sparingly: Use a light soy alternative if you prefer a more traditional salty profile, but adjust quantity because soy can be saltier than coconut aminos.
- Dial in heat with restraint: Add gochugaru a little at a time, tasting between additions so the spice enhances without dominating.
- Make it ahead: Prepare and chill for up to a day, the flavor continues to meld and the dish becomes more cohesive in the fridge.
- Adjust oil level: If you want a lighter finish, reduce the toasted sesame oil slightly and rely on sesame seeds for aroma.
- Increase aromatics: Add extra thinly sliced green onion for a brighter, fresher bite, especially if serving alongside rich mains.
- Keep it chilled for serving: This side tastes best cool or at room temperature, which makes it convenient for buffet style meals and picnics.
How to Serve Korean Spinach Side Dish
This dish is versatile and pairs well with many mains. Serve it chilled or at room temperature as a crisp complement that brings freshness and umami to the table. It works for casual dinners and more formal meals alike.
- Serve alongside rice bowls: The clean, savory notes of the spinach cut through rich proteins, making it an ideal green companion for bowls and bento style meals.
- Include in a spread: Add it to a collection of small sides for gatherings, where its bright color and mild taste offer balance among heavier dishes.
- Lunch accompaniment: Pack it chilled in an airtight container for a light side with sandwiches or grain salads, it stays fresh for a few days.
- Seasonal pairing: It works year round, but I particularly like it in spring when greens are abundant, adding an extra sense of freshness to the plate.
- Storage tips: Store in an airtight container for up to four days in the fridge, and avoid reheating to preserve texture and aroma.
- Occasions: Great for weeknight dinners, potlucks, and Ramadan if you want a simple, nourishing vegetable to round out the meal.
FAQ
Conclusion
This recipe shines because it turns humble spinach into a layered, flavorful side with minimal effort. Try it when you want a quick green that still feels composed and thoughtful, and let the toasted sesame aroma and light seasoning do the work. I hope you give it a go and find it becomes a staple in your rotation, brightening weeknight meals and gathering spreads alike with its simple, balanced character.
Korean Spinach Side Dish
Equipment
- Large Pot
- Sieve or colander
- Mixing Bowl
- Knife
- Measuring Spoons
Ingredients
- 1 bunch spinach, (about 10 ounces) washed, drained, and ends trimmed Provide tender, leafy greens that form the base of the side dish; blanch briefly to retain bright color and delicate texture, then squeeze out excess water before seasoning to concentrate flavors.
- 1 green onion, thinly sliced Add a mild allium note and fresh crunch when thinly sliced; stir into the seasoned spinach to lift the overall flavor and add visual contrast.
- 1 small garlic clove, minced Contribute a sharp, aromatic bite that boosts savory depth; mince finely and mix sparingly to distribute the garlicky warmth without overpowering the delicate greens.
- 2 teaspoons coconut aminos Offer a savory, slightly sweet and umami-rich alternative to soy sauce; drizzle and toss with the spinach to enhance overall savoriness while keeping the dish gluten-free.
- 1 teaspoon toasted sesame oil Provide a nutty, toasted aroma that rounds out flavors; use sparingly to avoid greasiness while imparting traditional sesame character to the banchan.
- 1/2 teaspoon Diamond Crystal kosher salt Season the dish to taste and help draw out moisture when used during pressing; use measured amounts to balance the natural flavors without over-salting.
- 1 teaspoon toasted sesame seeds Add a final crunchy, toasty finish and visual appeal; sprinkle after seasoning to introduce subtle texture and reinforce the sesame flavor profile.
- 1/4 teaspoon gochugaru or red pepper flakes (optional) Introduce gentle heat and a hint of smokiness when included; use sparingly to add complexity and mouthwatering warmth without overwhelming the other elements.
Instructions
- If you’re cooking the spinach on the stovetop, bring a large covered pot of water to a boil over high heat. Add the spinach and cook, uncovered, for 30 seconds to 1 minute, or until the leaves are bright green and just cooked. Alternatively, you can microwave the spinach in an Anyday Large Deep Dish microwave glass bowl for about 2 minutes or until just cooked through.: You will hear the pot begin to roar as it nears a full boil, and once the water is active the leaves will go from dull to a brilliant green within seconds, which is the visual cue that they are nearly done. The reason for a rapid boil is that it sets the color and softens the fibers without turning them papery, and covering the pot shortens the waiting time. A common mistake is overcooking, which yields limp, flavorless greens, so watch closely and be ready with a sieve or slotted spoon to lift them out quickly. If your stove seems to take long to boil, use a lid to trap heat and get there faster. When you remove the spinach, the bright green and slightly glossy look means you stopped the process at the right moment.
- Transfer the cooked spinach to a sieve or colander in a bowl of ice water to stop the cooking process. (When I’m pressed for time, I skip the ice water part and just rinse the cooked spinach with cold water before squeezing out the excess liquid.): Listen for the faint hiss as the leaves hit the water, and note how quickly their volume collapses; that rapid change shows they are absorbing heat evenly. Cooking briefly preserves the tender bite, and retaining some structure keeps the final texture interesting when dressed. A problem people run into is leaving them too long, which causes a mushy mouthfeel and dull color; if unsure, start at 30 seconds and check one leaf. The short cook time also helps the garlic and green onion stand out once tossed in, because overcooked greens tend to need heavier seasoning.
- Take the spinach out of the ice water and squeeze out all the excess water.: In the microwave you will hear the leaves steam and see them wilt before your eyes, and this method is excellent when you need a quick route without heating a stove. The steam traps heat and cooks uniformly, but uneven microwaves can leave pockets of undercooked stems, so stir halfway through if your bowl allows. Avoid using high power for too long, as that can dry the leaves and make them rubbery, which is the mistake I used to make when rushing.
- Cut the pile of cooked spinach into thirds to make it easier to eat.: The ice bath shocks the leaves, instantly locking in color and halting softening, and you will notice the water becoming cloudy from released chlorophyll and starches which is normal. The drop in temperature firms the stems, ensuring the final texture is pleasant rather than mushy. Some people skip this step to save time, but skipping it can result in continued cooking from residual heat, so rinse with cold water if you omit the ice bath to simulate the effect. The sound of the water clinking with ice and the sudden chill under your hands are immediate confirmations that the cooling worked.
- In a large mixing bowl, combine the spinach with the green onion, garlic, coconut aminos, sesame oil, and salt. Mix well and taste a bite. Adjust for seasoning, if needed. Toss in the sesame seeds (and optional red pepper flakes) and stir everything together.: The cool rinse accomplishes much of the same effect as an ice bath, and you can feel the leaves cool as you run water through them, which is satisfying and practical. Squeezing under cold running water also helps remove surface starch and any lingering bitterness. A common slip is not cooling enough, which allows residual heat to continue softening the greens; ensure the leaves feel cool before proceeding. If you plan to chill the dish, a thorough cool down prevents condensation in storage containers.
- Cover and chill the spinach dish in the refrigerator for at least 5 to 10 minutes to let the flavors meld. Dig in!: This is tactile work, and you will notice how much moisture the greens hold after cooking; firm squeezing yields a compact pile that absorbs dressings properly instead of becoming watery. I gather the leaves and press with my hands or wrap them in a clean towel and twist, and the sound is a soft wringing as water releases. The why is simple, dressing dilution ruins texture, and a common mistake is under-squeezing, which makes the final dish soggy. Aim for leaves that are damp but not dripping; they should hold the seasoning rather than swimming in it.
- Cut the pile of cooked spinach into thirds to make it easier to eat: Visually you will see a tidy bundle become manageable portions, and cutting prevents long stems from dominating a forkful, improving the eating experience. Smaller pieces allow the dressing to cling to more surface area, improving flavor distribution. A frequent oversight is leaving large bundles that are awkward on the plate, so an even chop makes serving neater. Use a sharp knife or kitchen scissors and notice how cleanly the leaves separate when they are properly squeezed.
- In a large mixing bowl, combine the spinach with the green onion, garlic, coconut aminos, sesame oil, and salt: When you begin tossing, the aroma of garlic and toasted sesame oil will rise, and the visual of glossy leaves signals the dressing is coating the greens. Mixing in a large bowl prevents crushing, and folding motions help lift rather than mash the texture. The why is flavor balance, because uniform coating ensures each bite has the intended savory and nutty notes; a common mistake is using too small a bowl and turning the dish into a soggy mash. After tossing, taste and adjust the salt or coconut aminos to fine tune the seasoning.
- Mix well and taste a bite: Sensory checks are everything here, and a small spoonful will tell you if the dish needs more salt, a splash more coconut aminos , or a whisper of heat. You want a balance where the spinach is present but supported by the seasonings. People often add too much oil to cover imperfections, which merely masks flavors; instead, correct with measured seasonings. Adjustments should be small and deliberate, tasting after each tweak to avoid oversalting.
- Adjust for seasoning, if needed: A brief rest on seasoning will reveal if the flavors are integrated, and you may find a touch more salt or sesame oil improves harmony. The reason for incremental changes is that the cooling and chilling steps intensify perception of salt and fat differently, so add conservatively. A typical error is adding all at once, then finding the dish too sharp; remember you can always add but not remove, so proceed gradually. After final adjustments, the seasoning should feel rounded and steady on your palate.
- Toss in the sesame seeds (and optional red pepper flakes) and stir everything together: The visual of tiny seeds glinting on glossy leaves signals the finishing touch, and the faint crackle of sesame adds contrast when you bite. If you include gochugaru , sprinkle sparingly and mix to distribute the heat evenly; uneven clumps create hot pockets. Avoid skipping the seeds if you want texture, because without them the dish can feel too uniform in mouthfeel. Stir gently so the dressing remains intact and the leaves do not become mushy.
- Cover and chill the spinach dish in the refrigerator for at least 5 to 10 minutes to let the flavors meld: Cooling quiets the initial sharpness of the garlic and allows the coconut aminos and sesame oil to infuse the leaves, creating a cohesive taste. You may notice the aroma mellow and the texture settle, which is when the dish feels truly complete. Rushing to serve immediately can leave the flavors separate and blunt, so even a short chill improves harmony. If you refrigerate longer, bring it back to slightly less cold before serving so flavors are more pronounced.
- Dig in: The final reward is the combination of bright spinach , savory dressing, and nutty seeds; each bite should feel balanced and satisfying. Serve chilled or slightly cool, and enjoy the layered flavors that come together after your careful prep. A last mistake to avoid is reheating, which can flatten the texture and aroma; this dish is best enjoyed cool or at room temperature.
Notes
- Swap coconut aminos sparingly: Use a light soy alternative if you prefer a more traditional salty profile, but adjust quantity because soy can be saltier than coconut aminos.
- Dial in heat with restraint: Add gochugaru a little at a time, tasting between additions so the spice enhances without dominating.
- Make it ahead: Prepare and chill for up to a day, the flavor continues to meld and the dish becomes more cohesive in the fridge.
- Adjust oil level: If you want a lighter finish, reduce the toasted sesame oil slightly and rely on sesame seeds for aroma.
- Increase aromatics: Add extra thinly sliced green onion for a brighter, fresher bite, especially if serving alongside rich mains.
- Keep it chilled for serving: This side tastes best cool or at room temperature, which makes it convenient for buffet style meals and picnics.