Protein Mug Cake
Protein Mug Cake is my go-to when I want a quick, satisfying treat that still feels a bit virtuous. The first time I made this, I was racing between meetings and wanted something warm, chocolatey, and single serving, and this recipe delivered exactly that. I remember the tiny celebration I had when the mug came out slightly domed, with a light chocolate scent that felt almost indulgent for the few calories it used.
Over the months I kept refining the mix of protein powder and coconut flour until the texture felt right to me, not too cakey, not too rubbery. I also learned how small tweaks, like a splash more milk or swapping a whole egg for whites, change the crumb in a meaningful way. Whenever a midnight sweet tooth strikes, or when I need a portable treat to toss in a bag, I reach for this recipe first because it is predictably simple and satisfying.
Recipe Snapshot
2 mins
1 mins
1 mins
Easy
200 kcal
American
Keto, Gluten-Free
Desserts
Microwave, Mug, Spoon
The Appeal of This Protein Mug Cake
Speed and convenience
I adore how quickly a Protein Mug Cake comes together. I can mix the dry ingredients in the mug, stir in the wet, and have a warm cake in roughly a minute. That speed is a lifesaver on busy mornings or when I want dessert without the commitment of baking a whole pan.
Controlled portions
One serving per mug means less temptation to overindulge. I like that it gives me a single perfect portion, so I can enjoy something sweet and still stay on track with my nutrition goals.
Flexible nutrition
This recipe adapts to many dietary goals. Using different protein powder types and adjusting the egg or milk lets me shift macros without compromising texture. I often tweak the protein type to change flavor and protein density, and it always responds well.
Texture variety
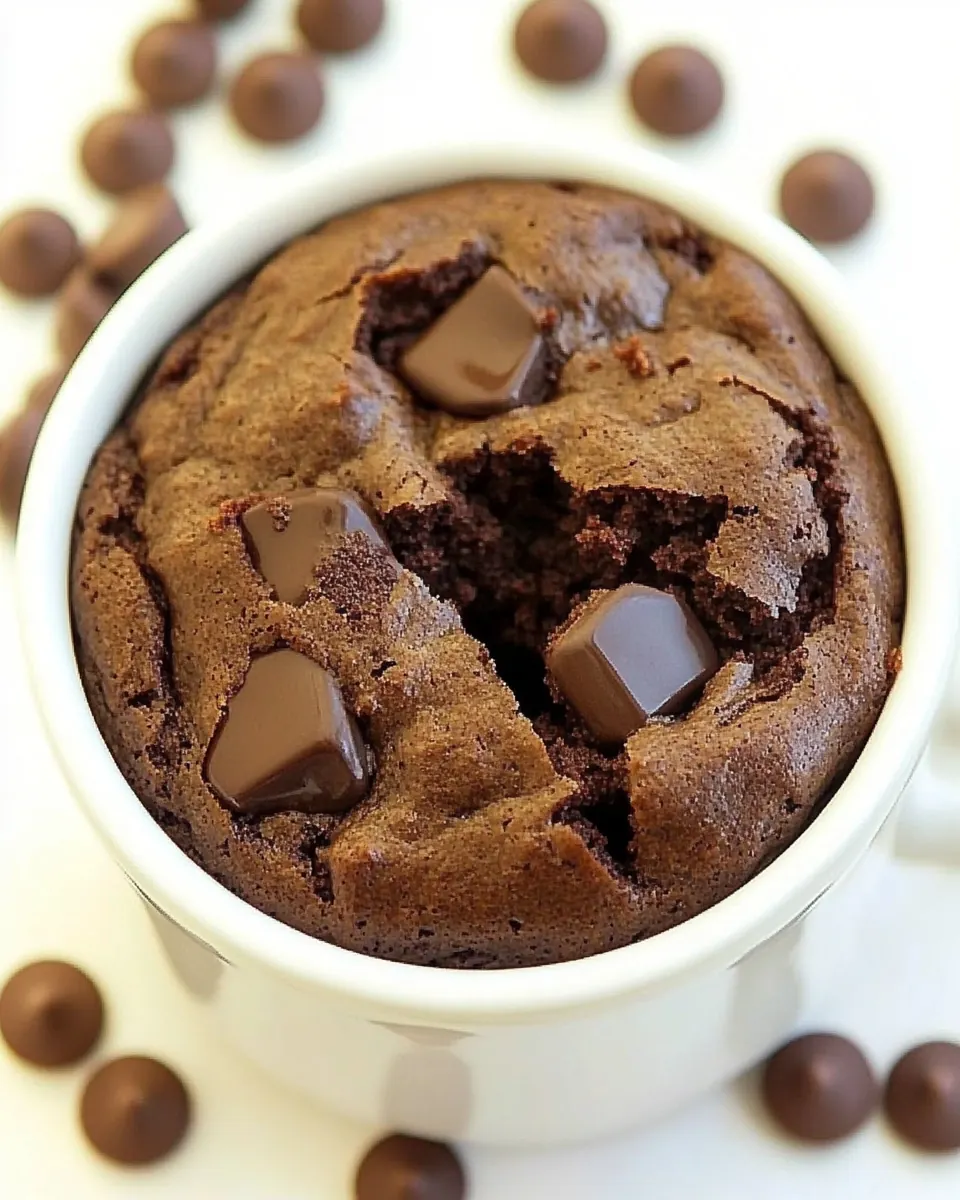
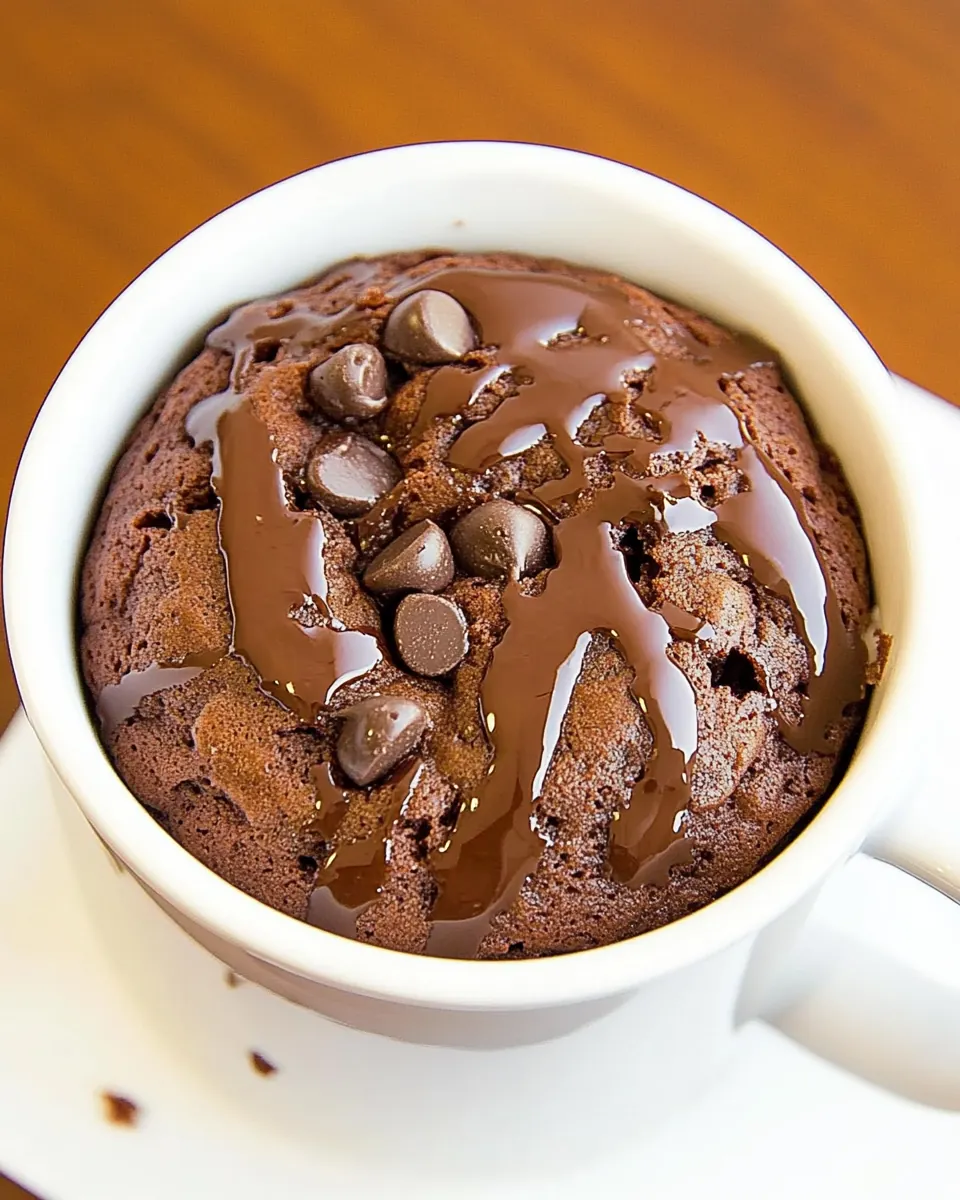
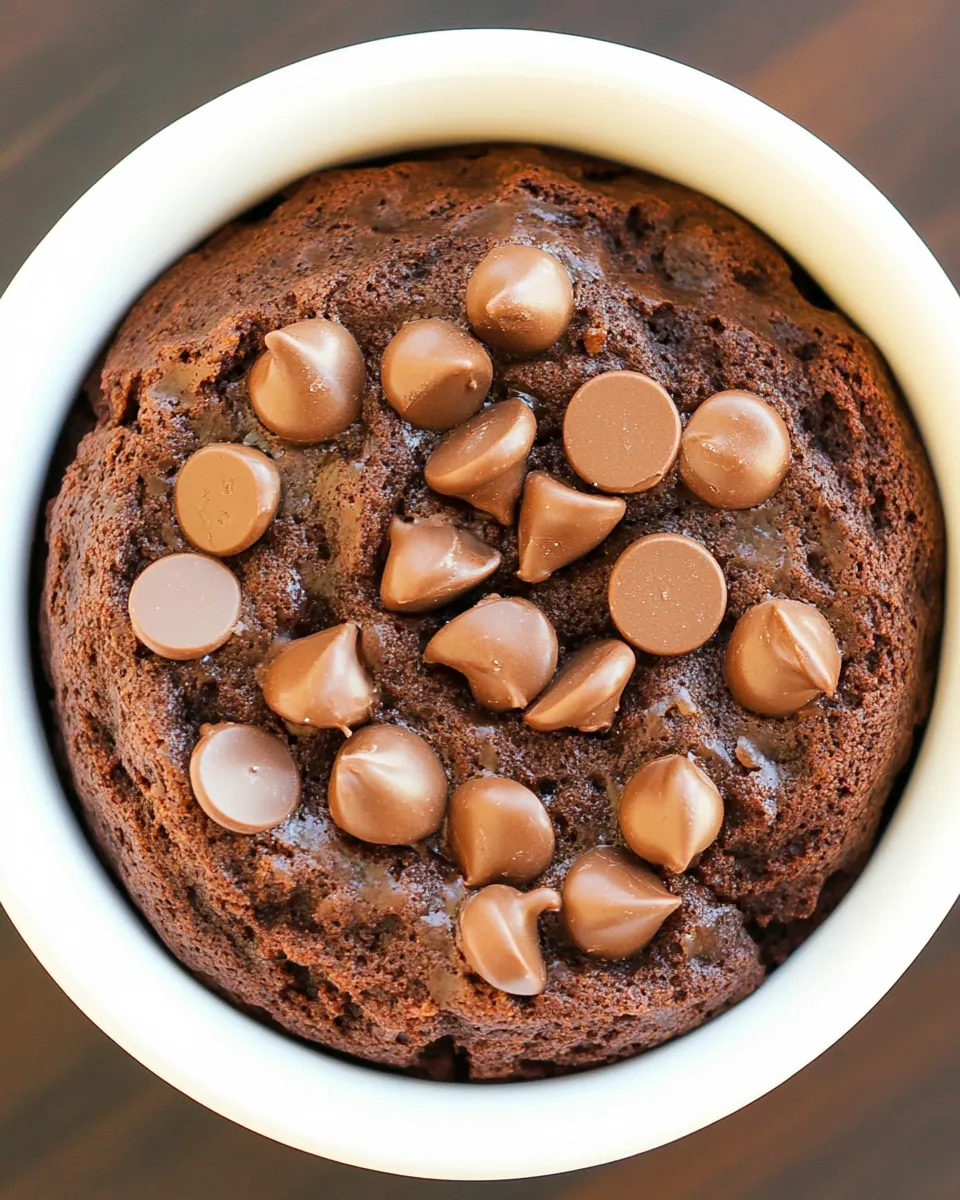
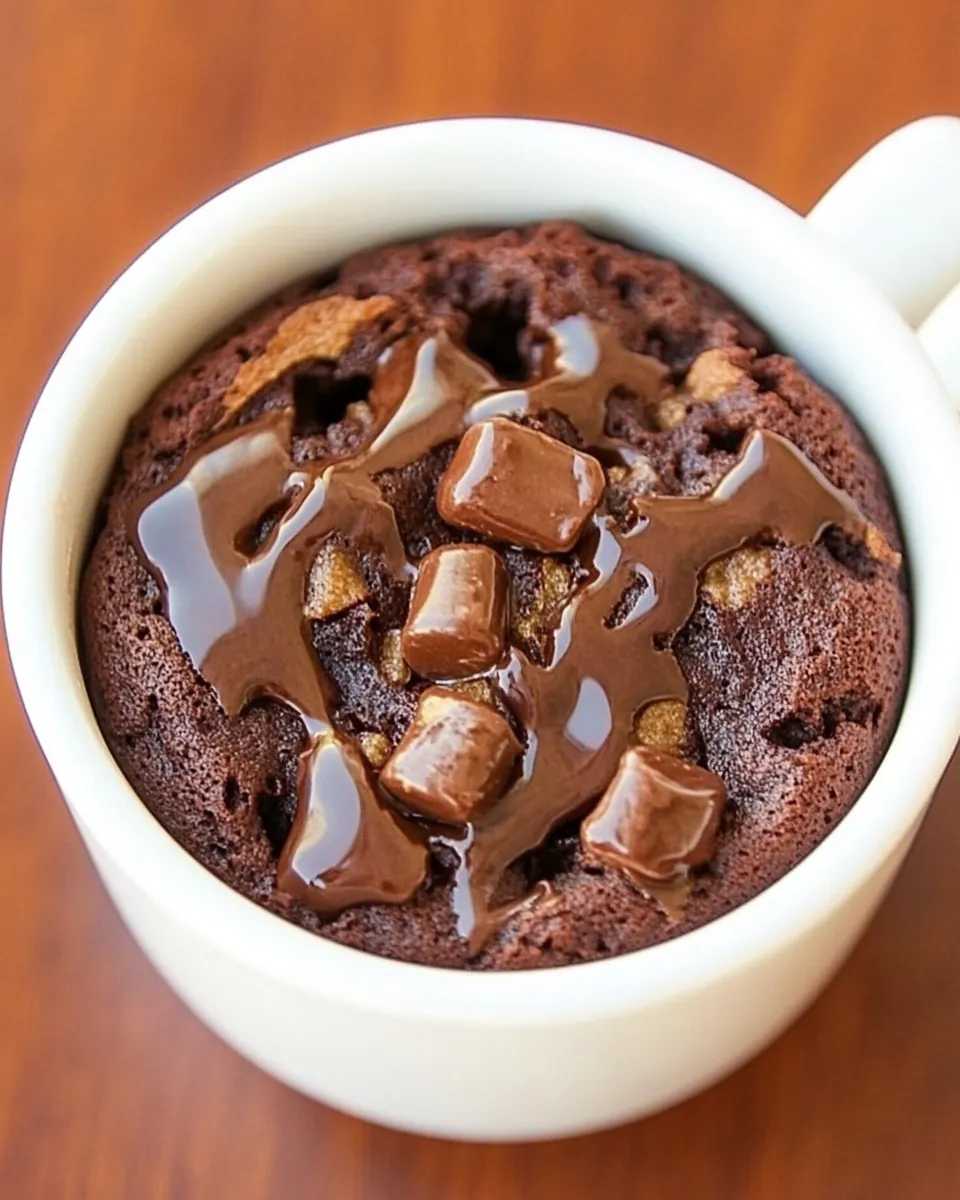
The cake can be fudgy or more muffin like depending on the cook time and ingredients. I love the little contrast when I add a few chocolate chips on top, they melt into pockets of gooey sweetness that elevate the whole experience.
Minimal cleanup
Everything is mixed and cooked in a single mug, which saves time washing dishes. For me, that simplicity is as satisfying as the cake itself, because there is no cleanup penalty for treating myself.
Ingredients You’ll Need for Protein Mug Cake
These ingredients come together to create a compact, protein forward cake that reads light yet flavorful. The key players are the protein powder for structure and nutrition, the coconut flour for subtle texture and absorbency, and the cocoa powder for deep chocolate flavor. Each item plays a role in balancing moisture, sweetness, and rise, so they work in harmony to produce a single serving treat that feels both indulgent and purposeful.
- 1/4 cup protein powder 32-34 grams: Adds concentrated protein and structure to the mug cake while contributing to texture and flavor; choose a neutral or chocolate-flavored protein to complement cocoa. Use the specified 32–34 grams to maintain macronutrient goals and avoid a dry cake by balancing with wet ingredients.
- 1 tablespoon coconut flour: Provides absorbent fiber and helps thicken the batter while keeping carbs low; coconut flour soaks up moisture quickly so accurate measurement is important. Use the tablespoon to prevent a dense outcome and ensure the cake remains tender by not substituting equal volume with other flours.
- 2 tablespoons granulated sweetener of choice: Sweetens the batter without adding sugar and helps with browning; granulated low-calorie sweeteners like erythritol or monk fruit work well for a low-calorie treat. Dissolve the sweetener into the wet ingredients for even sweetness and to avoid grainy texture.
- 1/2 teaspoon baking powder: Leavens the cake by creating small air pockets and promoting rise when combined with moisture and heat; baking powder is necessary for a light, mug-sized cake. Measure precisely to prevent an off flavor or overly rapid rise that could collapse.
- 1 1/2 tablespoons cocoa powder adjust to desired chocolate content: Contributes deep chocolate flavor and color while intensifying cocoa notes; adjust the amount to suit desired chocolate intensity. Sift or whisk in to avoid lumps and balance with the protein powder to prevent bitterness.
- 1 large egg or 3 egg whites, whisked: Binds ingredients together, provides moisture and richness, and aids in lift; using one whole egg adds fat and flavor while three egg whites reduce fat and calories but increase protein. Whisk thoroughly to incorporate air for a lighter crumb and ensure even cooking in the microwave or oven.
- 1/4 cup milk: Adds necessary liquid to hydrate dry ingredients and create a pourable batter; milk choice (dairy or plant-based) influences flavor, fat content, and texture. Add gradually and whisk until smooth to achieve the desired batter consistency.
- 1 tablespoon chocolate chips (optional): Enhances chocolate intensity and adds pockets of melted chocolate for texture and sweetness; use sparingly if keeping sugar content low. Fold in optional chips last so they remain distributed and create gooey bites after baking.
How to Assemble Protein Mug Cake
This is a super approachable recipe, perfect for last minute cravings. I’ll walk through each action with sensory cues and reasons so you can nail the texture and flavor every time.
- Grease a small cereal bowl or deep mug and set aside.: The inside surface should feel lightly slick to the touch, which prevents sticking and helps the cake pop out if you want to transfer it. I usually rub a thin film of oil or cooking spray along the sides and bottom, which glistens under the light. You may notice tiny streaks where the grease pools, that is normal. A common slip up is using too much oil, which can make the base oily; use a light coating and tap out any excess.
- In a large mug or microwave-safe cereal bowl, combine the protein powder, coconut flour, baking powder, granulated sweetener, and cocoa powder and mix well.: You will see a uniform dry mixture with no clumps of coconut flour or cocoa powder . The dry blend smells like straight chocolate with a protein undertone. Stirring evenly is critical so the little packets of baking powder are distributed, which ensures even rise. If you skip thorough mixing you might get bitter pockets of cocoa or a dense spot from unmixed powder.
- Add the whisked egg and milk into the dry mixture and mix until fully incorporated. Top with chocolate chips if desired.: As you add the liquid, the batter changes from a dusty mass to a glossy, slightly thick batter that coats the spoon. Run your spoon along the bottom to make sure no dry flecks remain. The batter should be pourable but not watery; if it looks too thin, a pinch more coconut flour will thicken it. A frequent error is underwhisking the egg , which can leave streaks of egg white that cook into rubbery bits, so whisk first and fold quickly.
- Microwave for 60 seconds and remove from microwave and enjoy immediately.: Expect a gentle dome to form and a warm chocolate aroma to fill your kitchen. The top should be set but still tender when you press lightly with a finger. If it jiggles like loose batter, it needs a few more seconds, but be cautious because microwaves vary. Overcooking will dry it out and create a spongey texture, so check at 50 to 60 seconds the first time so you can find the sweet spot for your microwave.
Customization Ideas
There are simple swaps that change the profile without derailing the method. Below are practical ideas to personalize texture, flavor, and nutrition. Each tip starts with a bold cue so you can scan quickly and adopt what fits your goals.
- Change the protein powder Try casein for creamier texture, pea protein for a plant based option, or a whey blend for a lighter crumb. Each will subtly alter moisture and mouthfeel, so adjust the milk slightly to balance.
- Adjust cocoa intensity Increase the amount of cocoa powder for deeper chocolate notes, but add a splash more milk to keep the batter moist if you do.
- Make it sweeter naturally Add a few mashed berries or a teaspoon of a fruit puree to bring natural sweetness while keeping the added sweetener minimal.
- Boost gooeyness Place a single chocolate chip or a small spoonful of nut butter in the center before microwaving for a melty core.
- Swap dairy Use almond or oat milk to keep it dairy free, noting that oat milk makes the cake a touch sweeter and silkier.
- Oven method Pour into a small ovenproof ramekin and bake at 350°F for 10 to 12 minutes for a more even bake and slightly firmer texture.
Serving Ideas for Protein Mug Cake
This little cake is versatile for many occasions, from a solo midnight treat to a quick post workout bite. Below are thoughtful ways to serve and enjoy it, including pairing ideas and storage tips.
- Breakfast boost Serve warm with a spoonful of yogurt on the side for a protein rich morning option that feels indulgent.
- Post workout Enjoy immediately after exercise to help with recovery, the mix of protein and carbs supports muscle repair.
- Snack time Pair with a piece of fruit for contrast, the fruit adds freshness to the warm, chocolatey cake.
- Casual dessert Top with a dusting of extra cocoa powder or a few extra chocolate chips for a satisfying finish without fuss.
- On the go Prepare the dry mix ahead and store in a small jar, then add wet ingredients and microwave when ready for a portable treat.
- Storage tip Leftovers are best eaten the same day; if you must keep it, refrigerate in an airtight container and warm briefly in the microwave to refresh.
FAQ
Conclusion
This Protein Mug Cake stands out for its speed, single serving simplicity, and adaptable nutrition profile. It delivers a warm, chocolate forward experience with minimal effort and cleanup, which is why I reach for it when time is short but cravings are loud. Give it a try the next time you want something quick and satisfying, and make little adjustments until it matches your ideal texture and sweetness. You may find it becomes a small ritual, the tiny cake that reliably lifts a busy moment.

Protein Mug Cake
Equipment
- Microwave
- Mug
- Spoon
Ingredients
- 1/4 cup protein powder 32-34 grams Adds concentrated protein and structure to the mug cake while contributing to texture and flavor; choose a neutral or chocolate-flavored protein to complement cocoa. Use the specified 32–34 grams to maintain macronutrient goals and avoid a dry cake by balancing with wet ingredients.
- 1 tablespoon coconut flour Provides absorbent fiber and helps thicken the batter while keeping carbs low; coconut flour soaks up moisture quickly so accurate measurement is important. Use the tablespoon to prevent a dense outcome and ensure the cake remains tender by not substituting equal volume with other flours.
- 2 tablespoons granulated sweetener of choice Sweetens the batter without adding sugar and helps with browning; granulated low-calorie sweeteners like erythritol or monk fruit work well for a low-calorie treat. Dissolve the sweetener into the wet ingredients for even sweetness and to avoid grainy texture.
- 1/2 teaspoon baking powder Leavens the cake by creating small air pockets and promoting rise when combined with moisture and heat; baking powder is necessary for a light, mug-sized cake. Measure precisely to prevent an off flavor or overly rapid rise that could collapse.
- 1 1/2 tablespoons cocoa powder adjust to desired chocolate content Contributes deep chocolate flavor and color while intensifying cocoa notes; adjust the amount to suit desired chocolate intensity. Sift or whisk in to avoid lumps and balance with the protein powder to prevent bitterness.
- 1 large egg or 3 egg whites, whisked Binds ingredients together, provides moisture and richness, and aids in lift; using one whole egg adds fat and flavor while three egg whites reduce fat and calories but increase protein. Whisk thoroughly to incorporate air for a lighter crumb and ensure even cooking in the microwave or oven.
- 1/4 cup milk Adds necessary liquid to hydrate dry ingredients and create a pourable batter; milk choice (dairy or plant-based) influences flavor, fat content, and texture. Add gradually and whisk until smooth to achieve the desired batter consistency.
- 1 tablespoon chocolate chips optional Enhances chocolate intensity and adds pockets of melted chocolate for texture and sweetness; use sparingly if keeping sugar content low. Fold in optional chips last so they remain distributed and create gooey bites after baking.
Instructions
- Grease a small cereal bowl or deep mug and set aside.: The inside surface should feel lightly slick to the touch, which prevents sticking and helps the cake pop out if you want to transfer it. I usually rub a thin film of oil or cooking spray along the sides and bottom, which glistens under the light. You may notice tiny streaks where the grease pools, that is normal. A common slip up is using too much oil, which can make the base oily; use a light coating and tap out any excess.
- In a large mug or microwave-safe cereal bowl, combine the protein powder, coconut flour, baking powder, granulated sweetener, and cocoa powder and mix well.: You will see a uniform dry mixture with no clumps of coconut flour or cocoa powder . The dry blend smells like straight chocolate with a protein undertone. Stirring evenly is critical so the little packets of baking powder are distributed, which ensures even rise. If you skip thorough mixing you might get bitter pockets of cocoa or a dense spot from unmixed powder.
- Add the whisked egg and milk into the dry mixture and mix until fully incorporated. Top with chocolate chips if desired.: As you add the liquid, the batter changes from a dusty mass to a glossy, slightly thick batter that coats the spoon. Run your spoon along the bottom to make sure no dry flecks remain. The batter should be pourable but not watery; if it looks too thin, a pinch more coconut flour will thicken it. A frequent error is underwhisking the egg , which can leave streaks of egg white that cook into rubbery bits, so whisk first and fold quickly.
- Microwave for 60 seconds and remove from microwave and enjoy immediately.: Expect a gentle dome to form and a warm chocolate aroma to fill your kitchen. The top should be set but still tender when you press lightly with a finger. If it jiggles like loose batter, it needs a few more seconds, but be cautious because microwaves vary. Overcooking will dry it out and create a spongey texture, so check at 50 to 60 seconds the first time so you can find the sweet spot for your microwave.
Notes
- Change the protein powder Try casein for creamier texture, pea protein for a plant based option, or a whey blend for a lighter crumb. Each will subtly alter moisture and mouthfeel, so adjust the milk slightly to balance.
- Adjust cocoa intensity Increase the amount of cocoa powder for deeper chocolate notes, but add a splash more milk to keep the batter moist if you do.
- Make it sweeter naturally Add a few mashed berries or a teaspoon of a fruit puree to bring natural sweetness while keeping the added sweetener minimal.
- Boost gooeyness Place a single chocolate chip or a small spoonful of nut butter in the center before microwaving for a melty core.
- Swap dairy Use almond or oat milk to keep it dairy free, noting that oat milk makes the cake a touch sweeter and silkier.
- Oven method Pour into a small ovenproof ramekin and bake at 350°F for 10 to 12 minutes for a more even bake and slightly firmer texture.