Instant Pot Chili
Instant Pot Chili has been my go to when I need something hearty, straightforward, and deeply comforting on a cold night. The first time I made this I was racing home after a long shift, craving something that smelled like home and filled the whole apartment with warmth. I tossed a few simple pantry staples into my Instant Pot, hit sauté, and the aroma of onion, garlic, and browned ground beef filled the kitchen within minutes. That evening taught me that a satisfying dinner does not have to be complicated to feel special.
Since then I reach for this pot whenever friends drop by unexpectedly or when the calendar is stacked and I want dinner sorted in a flash. I love how the pressure cooking concentrates flavors without babysitting a simmering pot for hours, and how leftovers transform into an even bolder version the next day. Every time I spoon a bowl, I remember that first night and how such modest ingredients can create so much comfort. You will notice how the texture of the beans and the thickness of the sauce change as it cools, giving you options for reheating or freezing. I also enjoy customizing the garnish lineup, because a little freshness on top brings the whole bowl alive.
Recipe Snapshot
30 mins
10 mins
20 mins
Easy
550 kcal
American
Gluten-Free, Keto
Dinner
Instant Pot, Wooden spoon
The Best Thing About This Instant Pot Chili
Big Flavor, Little Fuss
I adore Instant Pot Chili because it delivers deep, layered flavor long before you’d expect from a quick recipe. Using the pressure function lets the spices and tomatoes meld with the ground beef and beans, producing a rich, savory base in a fraction of the time of stove top simmering. For busy weeknights, that tradeoff of speed for depth is priceless.
Protein Packed and Filling
One of the joys for me is how satisfying a bowl feels. The combination of lean ground beef and red kidney beans gives a nice protein punch that keeps you full. I rely on this recipe when I need an easy weeknight dinner that tastes substantial, and it holds up well for meals across the week.
Flexible and Forgiving
I appreciate recipes that adapt to what I have on hand. This chili lets you tweak the level of sauciness or spice without ruining the dish. If you prefer a thicker texture, skip or reduce the broth, and the profile stays balanced because the acids from the tomatoes and the warmth from the spices remain steady throughout cooking. That forgiving nature makes it a reliable staple for different appetites.
Great for Make Ahead and Freezing
I often double the batch because Instant Pot Chili freezes beautifully. The flavors actually continue to develop after a day in the fridge, so leftovers often taste even better. This makes it a practical choice for meal prep, potlucks, or unexpected visitors when you want a stress free, crowd pleasing option.
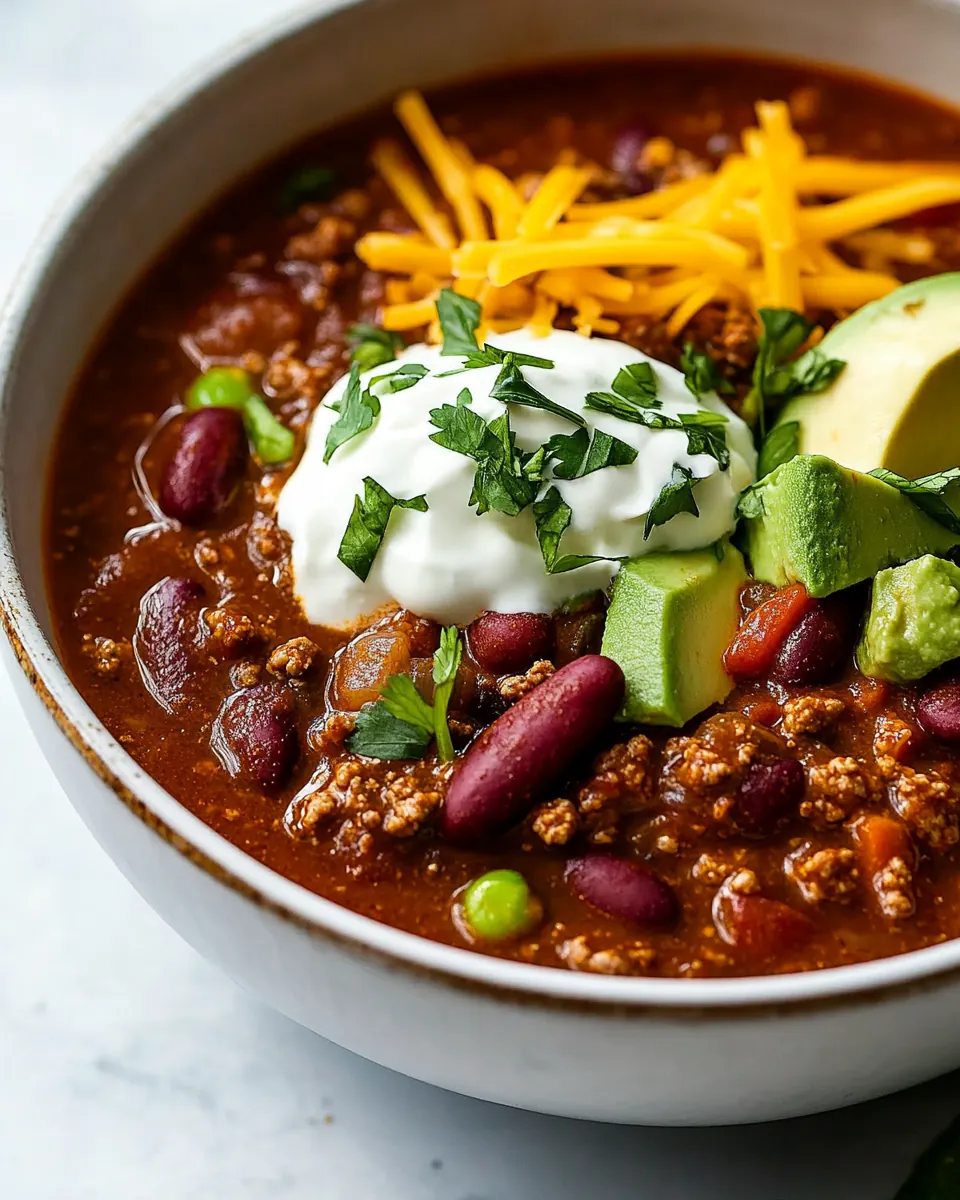
Customizable Toppings for Everyone
I love how the toppings let each person personalize their bowl. Fresh additions like diced avocado or chopped cilantro lift the richness, and crunchy tortilla strips add texture. Offering a few options means everyone can make their bowl their own, which I find makes meals feel more festive and connected.
Shopping List for Instant Pot Chili

These ingredients form a sturdy, harmonious cast. The tomatoes and tomato sauce provide acidity and body, the ground beef supplies savory richness, and the red kidney beans add texture and substance. Spices like chili powder, smoked paprika, and cumin are the supporting actors, bringing warmth and complexity. Together they create a balanced bowl that is hearty, warming, and flexible.
- 1/2 medium chopped onion: Sautéed until translucent and sweet to build the aromatic base for the chili, chopped onion adds depth and subtle natural sweetness. Cook slowly to soften its texture and release sugars that balance the tomato acidity and spices.
- 1 tablespoon olive oil: Heated to brown meat and soften aromatics, olive oil provides a medium for sautéing and contributes a mild fruity fat. Use sparingly to prevent greasiness while helping spices bloom and flavors meld.
- 2 pounds lean ground beef: Browned thoroughly to create rich savory character and hearty texture, lean ground beef supplies the protein backbone and meaty umami. Drain excess fat if necessary to keep the chili from becoming oily while retaining robust flavor.
- 3 cloves minced garlic: Minced and added early to fragrant sauté, garlic contributes pungent, savory notes that deepen the chili’s flavor profile. Brief cooking prevents bitterness while releasing aromatic oils that complement the onions and spices.
- 1 (28-ounce) can diced tomatoes use fire roasted ones for more flavor: Poured in with juices to supply body, acidity, and tomato flavor, diced tomatoes add texture and brightness to the chili; fire–roasted varieties contribute smoky depth. Their liquid helps create the sauce and balances the richness of the meat and spices.
- 1 (14-ounce) can tomato sauce: Stirred in to thicken and enrich the sauce, tomato sauce offers a smooth concentrated tomato backbone that binds ingredients. It enhances mouthfeel and intensifies tomato presence without adding large chunks.
- 1/2 cup beef broth: Poured in to adjust consistency and enhance savory taste, beef broth adds umami and dilutes intensity to achieve desired chili thickness. It also contributes layered meaty flavor that complements the ground beef.
- 2 (14-ounce) cans red kidney beans drained: Drained and added for hearty bite and protein, red kidney beans provide creamy texture and absorb surrounding flavors. Their starchiness helps thicken the chili and offers a satisfying contrast to the meat.
- 3 tablespoons chili powder: Sprinkled generously to define the chili’s signature warmth and complexity, chili powder blends heat and earthy notes that anchor the dish. Adjust quantity for desired spice level and to harmonize with other seasonings.
- 1 tablespoon smoked paprika: Measured to impart smoky depth and warm color, smoked paprika enhances overall flavor with subtle sweetness and a lingering smoke. Use it to reinforce the charred or fire–roasted tomato character without adding heat.
- 1 teaspoon ground cumin: Ground to add warm, slightly citrusy earthiness, cumin contributes a foundational savory note common to chili recipes. Toast lightly if desired to amplify its aroma before combining with other spices.
- 1 teaspoon cayenne pepper (optional): Added optionally to introduce pronounced heat, cayenne pepper intensifies spiciness and sharpness in the chili. Use cautiously to avoid overpowering other flavors, adjusting to personal heat tolerance.
- salt and pepper to taste: Seasoned to balance and amplify flavors, salt and pepper are used to heighten taste and adjust seasoning throughout cooking. Taste and add gradually to avoid over-salting, finishing at the end for best control.
- Garnish: avocado, scallions, sour cream, Tex-Mex cheese, cilantro, tortilla strips, etc. (optional): Used as optional finishing touches to add freshness, creaminess, crunch, and bright herbaceous notes, garnishes like avocado, scallions, sour cream, Tex-Mex cheese, cilantro, and tortilla strips provide texture contrast. Add just before serving to preserve their color and individual textures.
The Method for Instant Pot Chili
These steps are straightforward but worth savoring as you go. I like to move deliberately through the process because each stage builds flavor in its own way. Listen for the sizzle during sautéing and watch for color changes, they are reliable signals that the dish is developing properly.
- Add 1/2 medium chopped onion and 1 tablespoon olive oil to your Instant Pot and press the sauté button. Cook for 4-5 minutes.: You will hear a gentle sizzle as the olive oil warms and the onion hits the pan, releasing a sweet floral aroma that becomes richer as the pieces soften and edges turn pale gold. This softening is important because raw onion can taste sharp after pressure cooking, so giving it this head start mellows its flavor. A common mistake is turning the heat too high and letting the onion char quickly, which introduces bitterness. Keep the sauté setting steady and stir occasionally so the pieces cook evenly and develop a translucent sheen.
- Stir in 2 pounds lean ground beef and cook, stirring often and breaking it up with your spoon, until browned.: As the ground beef hits the hot surface you will notice an immediate change in sound, with a more vigorous sizzle and little pops as moisture escapes. Browning creates those savory Maillard notes that make the chili feel meaty and robust. Use a sturdy spoon to break the meat into small crumbles, and let it sit briefly between stirs so contact with the hot surface encourages browning rather than steaming. A common error is overcrowding the pan, which causes the meat to steam and become gray instead of developing those desirable browned bits. If you see lots of liquid pooling, tilt the pot and spoon some off, or increase the surface contact time to encourage evaporation.
- Stir in 3 cloves minced garlic, and then add 1 (28-ounce) can diced tomatoes, 1 (14-ounce) can tomato sauce, 1/2 cup beef broth, 2 (14-ounce) cans red kidney beans, 3 tablespoons chili powder, 1 tablespoon smoked paprika, 1 teaspoon ground cumin, 1 teaspoon cayenne pepper, and salt and pepper. Close the lid, ensure the valve is set on "sealing", press the "manual" button, and set the timer for 15 minutes.: The moment you add the garlic the air will fill with a warm, toasted aroma, but avoid letting it darken too long, as burnt garlic will taste acrid. Pouring in the canned tomatoes and tomato sauce introduces a bright acidity that balances the rich meat, while the beef broth loosens the mixture and helps the spices distribute. Stir so the spices coat the meat and beans, making sure there are no pockets of dry powder. A key benefit here is that the spices bloom into the liquid, releasing more nuanced flavors during pressure cooking. A common pitfall is under seasoning at this stage because you cannot taste much while it is raw; season modestly now and adjust after the pressure cooks and flavors concentrate.
- Once the countdown has finished, you can do a quick pressure release or let the pressure release naturally (this will build more flavor). Season with extra salt & pepper as needed and serve with desired toppings.: When you secure the lid and switch to sealing, the Instant Pot begins building pressure and you will soon notice a soft hum and rising warmth. This pressurized environment forces the flavors to meld quickly and extracts more depth from the canned tomatoes and spices. Setting a timed 15 minute cook lets the beans and meat absorb flavors without turning mushy, but avoid setting an overly long cook that will leave the texture too soft. A typical error is forgetting to set the valve to sealing, which prevents pressure from building and leads to inconsistent results. Double check the valve position before walking away.
- Once the countdown has finished, you can do a quick pressure release or let the pressure release naturally (this will build more flavor). Season with extra salt & pepper as needed and serve with desired toppings.: Releasing the pressure quickly gives a brigher, slightly fresher profile, while letting it release naturally concentrates flavors and slightly thickens the sauce as steam escapes. When you open the lid, take a deep breath and note the steam rich with tomato and spice aromas. Taste carefully and adjust with salt and pepper , because the true seasoning is revealed after pressure. A common mistake is adding too much salt before cooking; wait to finish seasoning at the end when you can judge the full flavor. Finally, garnish with your chosen toppings to add contrast in texture and temperature before serving.
Ways to Adapt This Recipe
This section offers practical ways to adapt Instant Pot Chili for texture, heat level, and make ahead needs. Each tip starts with a bold phrase to help you skim quickly, then explains how and why to make the change so you can customize with confidence.
- Reduce Saucy Texture — Omit or cut the beef broth, or use a smaller can of tomato sauce. This concentrates the solids and gives a chunkier, stew like chili. If you remove the broth entirely, taste at the end and add salt carefully because the liquid reduction can mute seasoning.
- Make It Spicier — Increase the amount of cayenne pepper or add a pinch of extra chili powder. Add increments gradually and taste after pressure release, because heat intensifies slightly as the flavors meld.
- Milder Version — Skip the cayenne pepper and use a milder chili powder. Offer hot sauce on the side so guests can customize their heat level without changing the whole pot.
- Thicker Texture After Cooking — Use the sauté function for a few minutes after pressure cooking to reduce and thicken. Stir frequently to avoid sticking, and watch the aroma as the sauce concentrates for an indicator of progress.
- Freeze for Later — Cool completely before transferring to airtight containers. This chili freezes well and reheats gently on the stovetop, adding a splash of water if it tightens too much while reheating.
- Adjust Garnishes — Serve a spread of small bowls with options like sliced avocado, chopped cilantro, and shredded Tex Mex cheese to let everyone personalize their bowl. Toppings add contrast and freshness that brighten the rich base.
Serving Suggestions
How you serve Instant Pot Chili can transform the meal. Whether you aim for a cozy family dinner, a casual gathering, or make ahead lunches, the presentation and accompaniments help define the experience. Below are thoughtful serving ideas and practical storage notes arranged as a list so you can pick what fits your occasion.
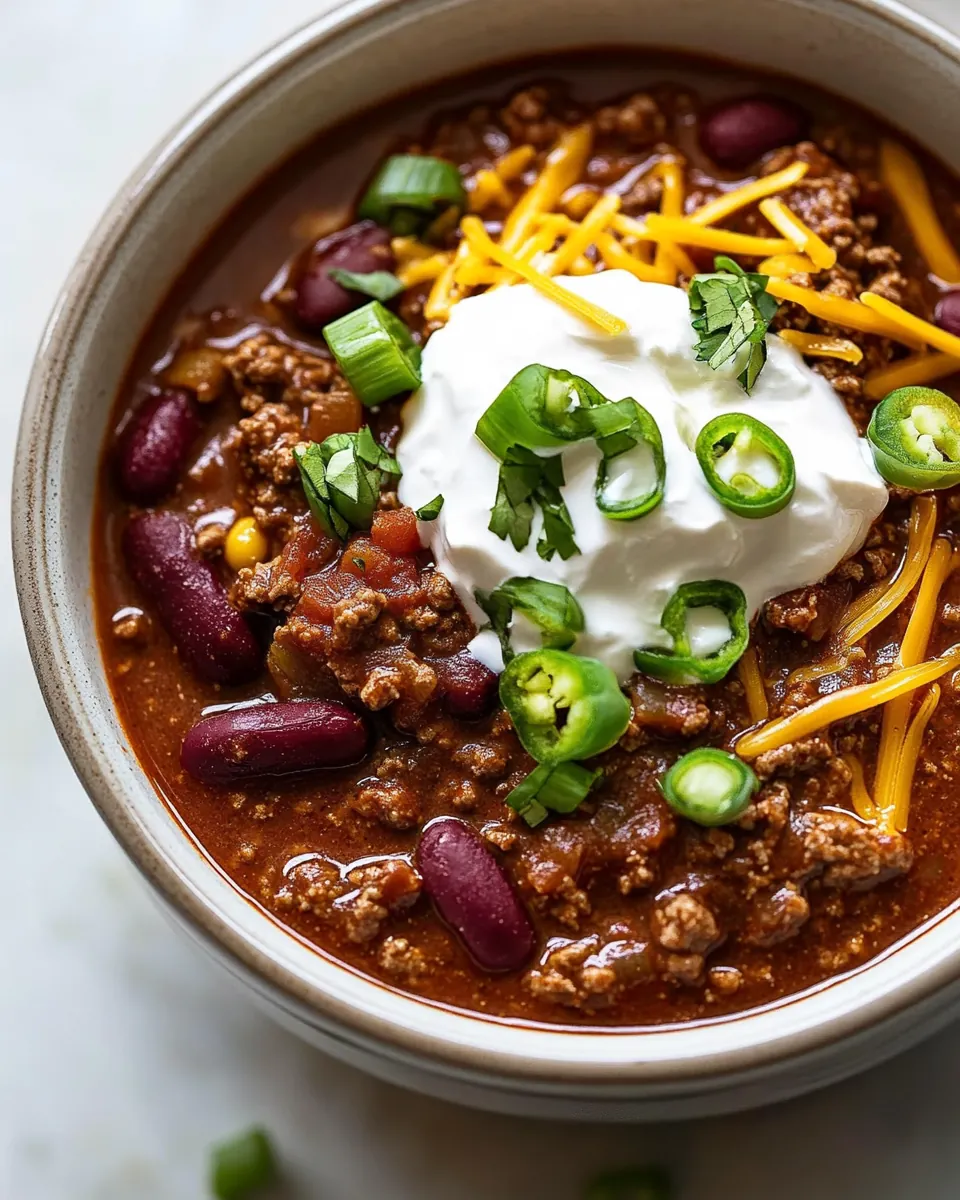
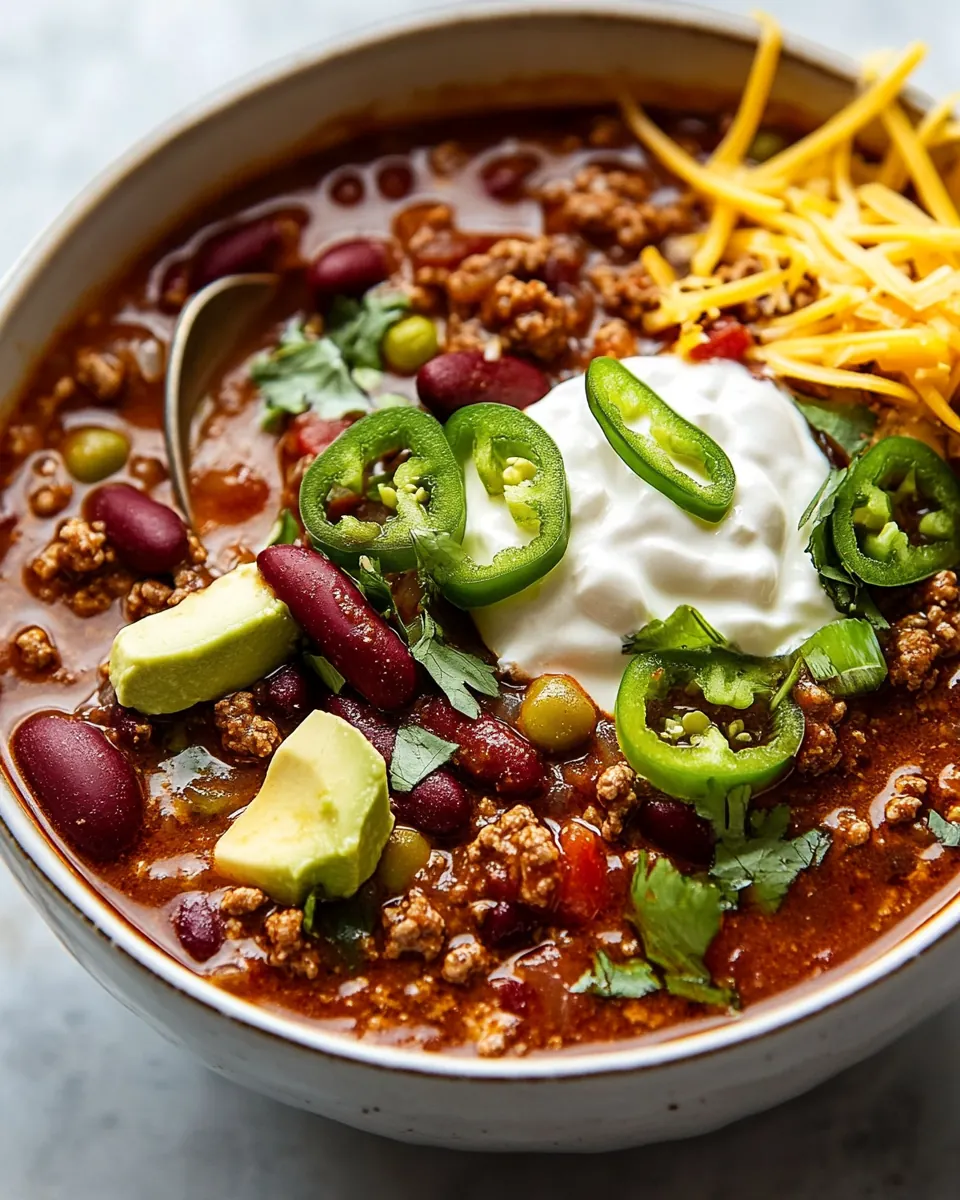
- Classic Bowl Service — Ladle the chili into deep bowls and top with chopped scallions, a dollop of sour cream, and a sprinkling of Tex Mex cheese. This creates a creamy, tangy contrast against the warm, spiced base.
- Loaded Chili Night — Offer an array of garnishes such as diced avocado, chopped cilantro, crushed tortilla strips, and lime wedges so guests can build their perfect bowl. This makes dinner interactive and festive for casual gatherings.
- Chili over Rice or Baked Potato — Serve the chili spooned over a bed of steamed rice or atop a split baked potato for a hearty, filling meal. The starch balances the acidity from the canned tomatoes and stretches the pot to feed more people.
- For Lunches and Meal Prep — Portion into airtight containers and refrigerate for up to four days, or freeze for up to three months. Reheat on low, adding a splash of water or broth if it becomes too thick. Label containers with the date for easy rotation.
- Occasions and Pairings — This chili shines on cold winter evenings, game day spreads, and informal potlucks. Pair with simple sides like tortilla chips or a crisp green salad to add brightness. For Ramadan evening meals, it can be a hearty option after breaking fast, served with fresh toppings to refresh the palate.
- Portioning Tips — For six servings as indicated, plan for moderate bowls if you have sides. If you want to stretch the pot, serve with rice or cornbread to make the meal go further while keeping it satisfying.
FAQ
Conclusion
This recipe’s strength lies in its ability to deliver deep, comforting flavor quickly with minimal fuss. I encourage you to give this version of Instant Pot Chili a try, whether for a busy weeknight, a make ahead meal, or a cozy gathering. It rewards a few simple steps with a bowl that feels like home, and the flexibility to personalize toppings makes it a reliable favorite for many occasions.

Instant Pot Chili
Equipment
- Instant Pot
- Wooden Spoon
Ingredients
- 1/2 medium chopped onion Sautéed until translucent and sweet to build the aromatic base for the chili, chopped onion adds depth and subtle natural sweetness. Cook slowly to soften its texture and release sugars that balance the tomato acidity and spices.
- 1 tablespoon olive oil Heated to brown meat and soften aromatics, olive oil provides a medium for sautéing and contributes a mild fruity fat. Use sparingly to prevent greasiness while helping spices bloom and flavors meld.
- 2 pounds lean ground beef Browned thoroughly to create rich savory character and hearty texture, lean ground beef supplies the protein backbone and meaty umami. Drain excess fat if necessary to keep the chili from becoming oily while retaining robust flavor.
- 3 cloves minced garlic Minced and added early to fragrant sauté, garlic contributes pungent, savory notes that deepen the chili’s flavor profile. Brief cooking prevents bitterness while releasing aromatic oils that complement the onions and spices.
- 1 (28-ounce) can diced tomatoes use fire roasted ones for more flavor Poured in with juices to supply body, acidity, and tomato flavor, diced tomatoes add texture and brightness to the chili; fire-roasted varieties contribute smoky depth. Their liquid helps create the sauce and balances the richness of the meat and spices.
- 1 (14-ounce) can tomato sauce Stirred in to thicken and enrich the sauce, tomato sauce offers a smooth concentrated tomato backbone that binds ingredients. It enhances mouthfeel and intensifies tomato presence without adding large chunks.
- 1/2 cup beef broth Poured in to adjust consistency and enhance savory taste, beef broth adds umami and dilutes intensity to achieve desired chili thickness. It also contributes layered meaty flavor that complements the ground beef.
- 2 (14-ounce) cans red kidney beans drained Drained and added for hearty bite and protein, red kidney beans provide creamy texture and absorb surrounding flavors. Their starchiness helps thicken the chili and offers a satisfying contrast to the meat.
- 3 tablespoons chili powder Sprinkled generously to define the chili’s signature warmth and complexity, chili powder blends heat and earthy notes that anchor the dish. Adjust quantity for desired spice level and to harmonize with other seasonings.
- 1 tablespoon smoked paprika Measured to impart smoky depth and warm color, smoked paprika enhances overall flavor with subtle sweetness and a lingering smoke. Use it to reinforce the charred or fire-roasted tomato character without adding heat.
- 1 teaspoon ground cumin Ground to add warm, slightly citrusy earthiness, cumin contributes a foundational savory note common to chili recipes. Toast lightly if desired to amplify its aroma before combining with other spices.
- 1 teaspoon cayenne pepper optional Added optionally to introduce pronounced heat, cayenne pepper intensifies spiciness and sharpness in the chili. Use cautiously to avoid overpowering other flavors, adjusting to personal heat tolerance.
- salt and pepper to taste Seasoned to balance and amplify flavors, salt and pepper are used to heighten taste and adjust seasoning throughout cooking. Taste and add gradually to avoid over-salting, finishing at the end for best control.
- Garnish: avocado, scallions, sour cream, Tex-Mex cheese, cilantro, tortilla strips, etc. optional Used as optional finishing touches to add freshness, creaminess, crunch, and bright herbaceous notes, garnishes like avocado, scallions, sour cream, Tex-Mex cheese, cilantro, and tortilla strips provide texture contrast. Add just before serving to preserve their color and individual textures.
Instructions
- Add 1/2 medium chopped onion and 1 tablespoon olive oil to your Instant Pot and press the sauté button. Cook for 4-5 minutes.: You will hear a gentle sizzle as the olive oil warms and the onion hits the pan, releasing a sweet floral aroma that becomes richer as the pieces soften and edges turn pale gold. This softening is important because raw onion can taste sharp after pressure cooking, so giving it this head start mellows its flavor. A common mistake is turning the heat too high and letting the onion char quickly, which introduces bitterness. Keep the sauté setting steady and stir occasionally so the pieces cook evenly and develop a translucent sheen.
- Stir in 2 pounds lean ground beef and cook, stirring often and breaking it up with your spoon, until browned.: As the ground beef hits the hot surface you will notice an immediate change in sound, with a more vigorous sizzle and little pops as moisture escapes. Browning creates those savory Maillard notes that make the chili feel meaty and robust. Use a sturdy spoon to break the meat into small crumbles, and let it sit briefly between stirs so contact with the hot surface encourages browning rather than steaming. A common error is overcrowding the pan, which causes the meat to steam and become gray instead of developing those desirable browned bits. If you see lots of liquid pooling, tilt the pot and spoon some off, or increase the surface contact time to encourage evaporation.
- Stir in 3 cloves minced garlic, and then add 1 (28-ounce) can diced tomatoes, 1 (14-ounce) can tomato sauce, 1/2 cup beef broth, 2 (14-ounce) cans red kidney beans, 3 tablespoons chili powder, 1 tablespoon smoked paprika, 1 teaspoon ground cumin, 1 teaspoon cayenne pepper, and salt and pepper. Close the lid, ensure the valve is set on "sealing", press the "manual" button, and set the timer for 15 minutes.: The moment you add the garlic the air will fill with a warm, toasted aroma, but avoid letting it darken too long, as burnt garlic will taste acrid. Pouring in the canned tomatoes and tomato sauce introduces a bright acidity that balances the rich meat, while the beef broth loosens the mixture and helps the spices distribute. Stir so the spices coat the meat and beans, making sure there are no pockets of dry powder. A key benefit here is that the spices bloom into the liquid, releasing more nuanced flavors during pressure cooking. A common pitfall is under seasoning at this stage because you cannot taste much while it is raw; season modestly now and adjust after the pressure cooks and flavors concentrate.
- Once the countdown has finished, you can do a quick pressure release or let the pressure release naturally (this will build more flavor). Season with extra salt & pepper as needed and serve with desired toppings.: When you secure the lid and switch to sealing, the Instant Pot begins building pressure and you will soon notice a soft hum and rising warmth. This pressurized environment forces the flavors to meld quickly and extracts more depth from the canned tomatoes and spices. Setting a timed 15 minute cook lets the beans and meat absorb flavors without turning mushy, but avoid setting an overly long cook that will leave the texture too soft. A typical error is forgetting to set the valve to sealing, which prevents pressure from building and leads to inconsistent results. Double check the valve position before walking away.
- Once the countdown has finished, you can do a quick pressure release or let the pressure release naturally (this will build more flavor). Season with extra salt & pepper as needed and serve with desired toppings.: Releasing the pressure quickly gives a brigher, slightly fresher profile, while letting it release naturally concentrates flavors and slightly thickens the sauce as steam escapes. When you open the lid, take a deep breath and note the steam rich with tomato and spice aromas. Taste carefully and adjust with salt and pepper , because the true seasoning is revealed after pressure. A common mistake is adding too much salt before cooking; wait to finish seasoning at the end when you can judge the full flavor. Finally, garnish with your chosen toppings to add contrast in texture and temperature before serving.
Notes
- Reduce Saucy Texture — Omit or cut the beef broth, or use a smaller can of tomato sauce. This concentrates the solids and gives a chunkier, stew like chili. If you remove the broth entirely, taste at the end and add salt carefully because the liquid reduction can mute seasoning.
- Make It Spicier — Increase the amount of cayenne pepper or add a pinch of extra chili powder. Add increments gradually and taste after pressure release, because heat intensifies slightly as the flavors meld.
- Milder Version — Skip the cayenne pepper and use a milder chili powder. Offer hot sauce on the side so guests can customize their heat level without changing the whole pot.
- Thicker Texture After Cooking — Use the sauté function for a few minutes after pressure cooking to reduce and thicken. Stir frequently to avoid sticking, and watch the aroma as the sauce concentrates for an indicator of progress.
- Freeze for Later — Cool completely before transferring to airtight containers. This chili freezes well and reheats gently on the stovetop, adding a splash of water if it tightens too much while reheating.
- Adjust Garnishes — Serve a spread of small bowls with options like sliced avocado, chopped cilantro, and shredded Tex Mex cheese to let everyone personalize their bowl. Toppings add contrast and freshness that brighten the rich base.