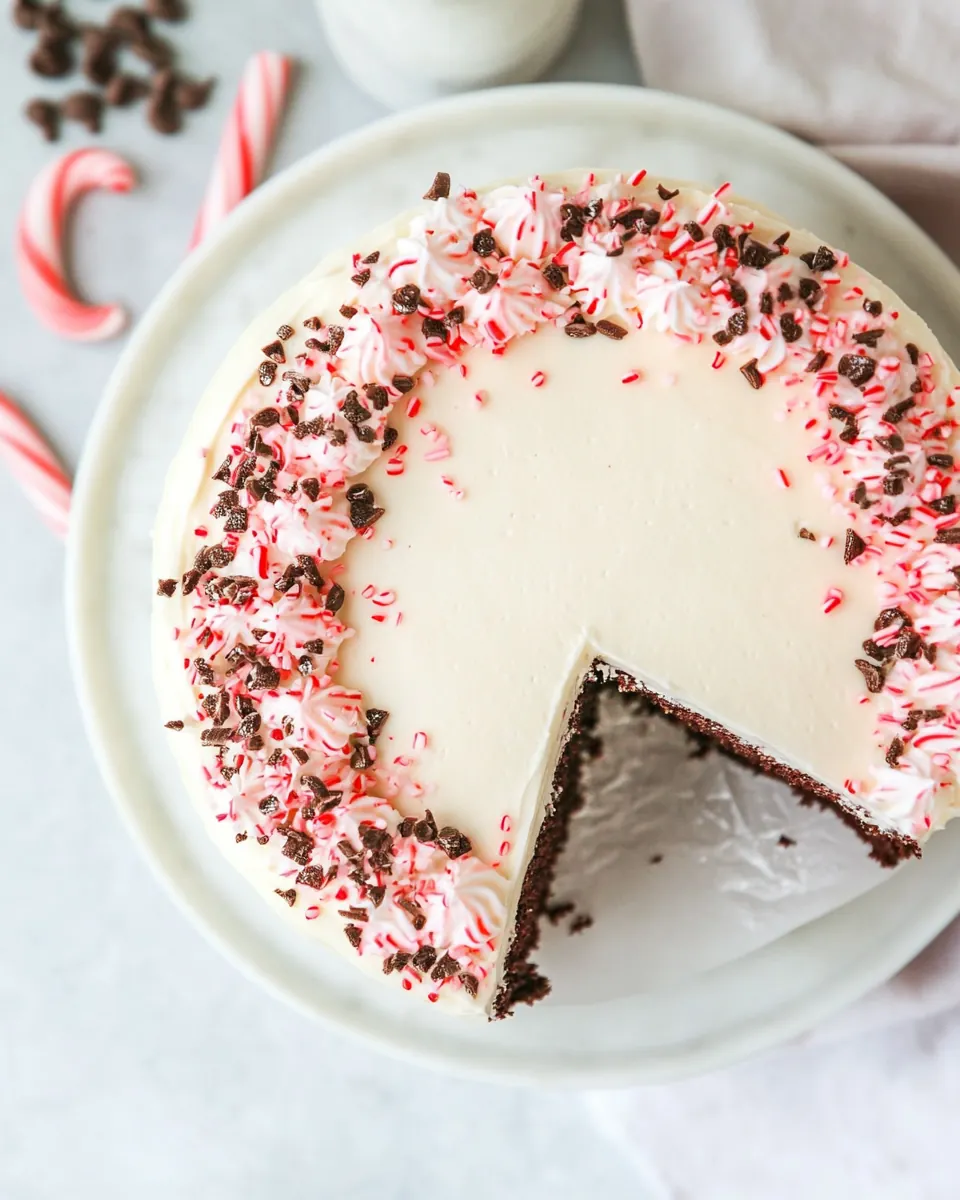
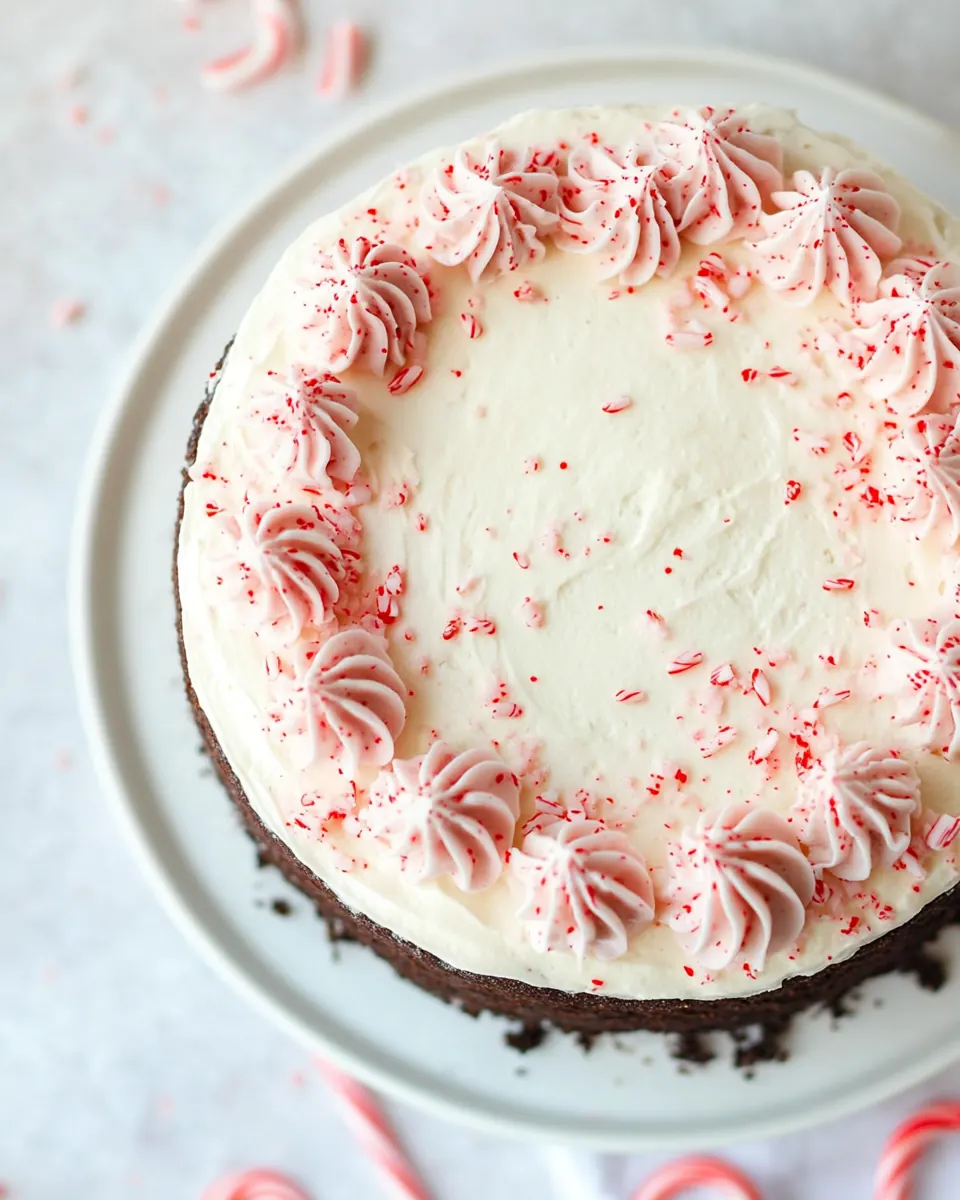
Chocolate Candy Cane Cake
Chocolate Candy Cane Cake is the kind of dessert that arrives at a gathering and instantly changes the mood, with chocolatey layers and a crisp peppermint finish that makes everyone smile. I remember the first time I baked it for a holiday party when I wanted something festive but not fussy, and the way the kitchen smelled of cocoa and peppermint made the whole evening feel cozy. From the moment I sliced into the cake, friends kept asking for the recipe, and that kind of reaction is why I keep this one in my repertoire.
Over the years I have tweaked small things, like how I fold the batter and how finely I crush the candy canes, and those little adjustments made a big difference in texture and presentation. I love that the recipe balances a deep, slightly bitter cocoa powder note with a bright peppermint snap, and the frosting sits silky and cool against the warm crumb. When you make Chocolate Candy Cane Cake, you get layers that are tender yet sturdy enough for stacking, and a frosting that is fluffy but not too sweet.
One holiday season I baked this cake in the late afternoon, wrapped the layers gently, and finished frosting it after dinner; serving it with hot coffee created a contrast I still talk about. I also appreciate that this recipe scales for two or three layers, so you can adapt it for a small family dinner or a larger celebration without losing its charm. If you enjoy both classic chocolate and a little festive flair, Chocolate Candy Cane Cake might become the recipe you reach for every winter.
Recipe Snapshot
1 hr 10 mins
40 mins
30 mins
Medium
500 kcal
American
Gluten-Free, Low FODMAP
Desserts
9″ round cake pans
The Charm of This Chocolate Candy Cane Cake
Bold seasonal flavor
I love how Chocolate Candy Cane Cake combines the deep richness of cocoa powder with peppermint, creating a distinct holiday profile that still feels grown up. The contrast between the chocolate layers and the crushed candy cane garnish creates a delightful interplay of flavors and textures that make each bite interesting.
Texture that stands up to frosting
One of the reasons I keep coming back to this recipe is the crumb. The cake layers stay tender yet strong enough to hold up under a generous layer of peppermint buttercream, so you get a moist slice that does not collapse or become soggy. That structural reliability matters when you want neat slices for guests.
Customizable presentation
I often change how I decorate based on the occasion. The crushed candy canes make a striking garnish, but you can also pipe rosettes or dollops of frosting to create a more formal look. The recipe is forgiving, so small variations in decoration still look intentional and pretty.
Techniques that deliver consistent results
The mixing and folding method, plus the order of adding wet and dry components, helps achieve a uniform batter that bakes evenly. I appreciate how straightforward the steps are, so even if you’re baking under time pressure, the process minimizes mistakes and gives repeatable outcomes.
Great for sharing
This cake makes a sizable amount, so it is ideal for gatherings. When I bring Chocolate Candy Cane Cake to holiday parties, it often becomes the centerpiece of the dessert table. It travels well, and the flavors seem to mature after a few hours, making it even better the next day.
What to Buy for Chocolate Candy Cane Cake
These ingredients work together to build a cake that is rich, tender, and festive. The dry components provide structure and chocolate flavor, the wet ingredients add moisture and lift, and the frosting ingredients create a peppermint finish that brightens every bite. Key players like all purpose flour, dutch processed cocoa powder, and salted butter set the foundation, while peppermint extract and crushed candy canes deliver the holiday character.
- 1 3/4 cups all purpose flour: Sifted to remove lumps and aerated to provide structure and tender crumb for the cake batter; blends with leaveners to create proper rise during baking.
- 3/4 cup dutch processed cocoa powder: Measured and sifted to add deep chocolate flavor and color; contributes to the cake’s cocoa intensity while absorbing moisture for balanced texture.
- 1 1/2 teaspoons baking powder: Whisked together with other dry ingredients to help the cake rise and produce a light, airy crumb by releasing carbon dioxide when heated.
- 1 teaspoon baking soda: Combined with baking powder to provide additional leavening and improve oven spring by reacting with acidic components in the batter.
- 1/2 teaspoons salt: Sprinkled into the dry mix to enhance overall flavor balance and strengthen gluten control; helps highlight other flavors in the cake.
- 1 1/2 cups buttermilk: Shaken and added for tenderizing the crumb with its acidity and fat content; reacts with baking soda to boost lift and adds moistness.
- 1 teaspoon vanilla extract: Stirred in for aromatic richness and to elevate the overall flavor profile with a warm, sweet vanilla note that complements chocolate.
- 1 teaspoon instant coffee granules such as Folgers () (optional): Dissolved or left as granules to amplify chocolate depth and round out bitterness; optional for enhancing complexity without altering texture.
- 3/4 cup vegetable oil or canola oil: Poured in to keep the cake moist and tender by providing fat that coats flour proteins, resulting in a softer crumb and richer mouthfeel.
- 2 cups granulated sugar: Beaten into the batter as the primary sweetener to caramelize slightly during baking and help with creaming for structure and moisture retention.
- 2 whole eggs: Beaten to incorporate air and provide structure; eggs also contribute to richness, emulsification, and setting of the cake once baked.
- 1 egg white: Added for extra protein and structure without extra fat; helps with binding and gives a slightly firmer texture to the finished cake.
- 1 1/2 cups salted butter softened (3 sticks, 3/4 lb): Softened and creamed to form the base of the frosting, providing flavor, richness, and a smooth, spreadable consistency when whipped with sugar.
- 1 1/2 pounds powdered sugar: Sifted into the butter to sweeten and thicken the frosting; creates a silky, stable consistency that holds peaks and smooths easily.
- 1/4 teaspoons salt: Sprinkled into the frosting mix to balance sweetness and enhance taste; small quantity helps season and intensify other flavors.
- 1 teaspoon vanilla extract: Mixed in to add a warm, sweet aroma and round out the frosting’s flavor profile with familiar vanilla notes that complement chocolate.
- 1 teaspoon peppermint extract: Added for a bright, cool peppermint flavor that defines the candy cane character and lifts the sweetness of the frosting with a refreshing note.
- 1/3 cup heavy cream or more, as needed: Poured in to adjust frosting consistency, making it spreadable and creamy; added gradually to reach the desired thickness and stability.
- 6 candy canes crushed (for garnish): Crushed and used as a finishing garnish to add crunchy texture and festive peppermint flavor on top of the frosted cake.
Directions for Chocolate Candy Cane Cake
These directions will guide you through making tender chocolate layers and a silky peppermint buttercream, then assembling a three layer cake that looks and tastes festive. Read each step before you begin so you understand the timing and can prepare the pans, ingredients, and tools in advance. Take your time with the frosting, because patience here yields a smooth finish and clean slices.
- Preheat oven to 350 degrees. Line three 8-inch round baking pans with parchment paper and/or spray well with nonstick cooking spray and set aside.: You will notice the oven warming and a faint metallic hum as the thermostat cycles, which sets the stage for even baking. Preheating ensures the cake starts rising immediately, giving you an even crumb and predictable bake time. A common mistake is putting batter into an oven that is not fully preheated, which leads to uneven rise and denser centers. If your oven runs hot or cold, use an oven thermometer to check, because 350 degrees is the target for reliable browning and structure.
- In a large bowl, whisk flour, cocoa powder, baking powder, baking soda and salt together to combine. Set aside. In a liquid measuring cup, stir buttermilk, vanilla and instant coffee granules (if using) together. Set aside.: The pans should feel smooth and ready to receive batter, and the parchment creates a clean release when you invert the layers. This step prevents tearing and preserves the cake edges for a neat assembly. One thing to avoid is skipping parchment when the pans are old or warped, since cakes can stick and break during removal. Press the paper into the pan so it sits flat, which helps the batter level evenly.
- In a separate large bowl, mix oil and sugar together until combined. Mix in eggs and egg white, one at a time, until mixture becomes lighter in color, about 90 seconds.: As you whisk, the powders begin to aerate, and you will see a uniform, dark mixture form that smells faintly of chocolate and earth. Proper mixing ensures even distribution of leaveners and prevents pockets of baking soda or cocoa. A frequent oversight is not sifting or whisking well, which can create pockets of dry ingredients and uneven texture. Take the time to whisk until the color is consistent and there are no visible streaks.
- Alternate adding in flour mixture with milk mixture, being sure to start and end with flour. Scrape the sides and mix again to ensure a smooth batter.: Letting the dry mix rest briefly gives you a chance to prepare your wet ingredients without haste, which helps maintain organization. This pause also prevents accidental overmixing later when combining wet and dry. A mistake here is rushing and trying to combine everything at once, which can result in lumps and inconsistent batter. Keep the dry bowl covered lightly if you step away to prevent dust contamination.
- Divide evenly between baking pans and smooth the top. Bake 22-30 minutes in the lower 2/3 rds of the oven. If you're using two cake pans instead of three, you will need to bake this cake 28-35 minutes. Cake will be done when a toothpick comes out clean or mostly clean with a few moist crumbs. Cool 15-20 minutes in cake pans before trying to invert on cooling racks. Once you can handle the warm pans with your bare hands, you can flip them out. Cool completely before frosting and decorating.: The buttermilk should look smooth and slightly opaque, and the coffee granules will dissolve quickly, adding a subtle depth to the chocolate. Mixing liquids ahead allows them to marry flavors and ensures even distribution when folded into the batter. If you add cold buttermilk straight from the fridge, it can briefly lower the batter temperature and change mixing behavior, so bringing ingredients closer to room temperature helps.
- See recipe notes for how much frosting you will need to make. In a large bowl, measure and add butter, powdered sugar, salt, vanilla and peppermint extract. Stir with beaters on low (or paddle attachment on stand mixer) to mix and break up the butter. It will still be very powdery and dry. Slowly add in the heavy cream. Once you notice the frosting start to come together stop adding the cream. You may need to add more than the amount listed. This is also normal. Increase mixer speed to medium to get rid of any lumps and create a smooth frosting. Scrape the sides and the bottom of the bowl and mix again to ensure a completely smooth frosting. Peppermint frosting will be done when it can hold its shape, but you can easily move a butter knife through it. If it's too thick, add more cream and mix. If you've added too much cream and the frosting is too soft, add more powdered sugar. If you notice there are a lot of air bubbles in your frosting, use a large wooden spoon to beat a lot of the air out of the frosting by hand.: Keeping the wet mixture ready helps you alternate additions smoothly and prevents overmixing the batter. It also keeps the process flowing so you can focus on texture rather than scrambling. Avoid leaving liquids uncovered near open flour to prevent contamination.
- Frost the cake by layering cake with frosting and crushed candy canes in between each of the three layers, then doing a crumb coating (a thin coating of peppermint frosting around the entire cake) and freezing for 15 minutes before adding the final layer of frosting. You will still see some of the chocolate cake edges because the cake is darker than the frosting, but this is totally normal. Nothing to worry about! Add crushed candy canes to the bottom half of the cake and top. Finish off with rosettes or dollops of frosting around the top. Cut into pieces and enjoy!: As you mix, you will notice the sugar slightly dissolve into the oil, producing a glossy sheen. This combination builds moisture and tenderness into the cake, and mixing until combined avoids grainy pockets in the final batter. A common error is under-mixing, which leaves sugar unevenly distributed and can affect rise. Stir until the texture looks cohesive and smooth.
- Mix in eggs and egg white, one at a time, until mixture becomes lighter in color, about 90 seconds.: As you beat the eggs in, the batter will gain air and pale slightly, adding volume that helps with rise and crumb. Proper incorporation creates a stable emulsion that binds oil and other ingredients. Overbeating after adding flour can cause toughness, so stop once the color lightens and the batter looks smooth. If the mixture curdles slightly, continue gently mixing and add the liquids gradually to recombine.
- Alternate adding in flour mixture with milk mixture, being sure to start and end with flour.: This alternation creates a balanced batter that avoids overworking gluten while ensuring even moisture. Start with a portion of the dry mix, then add some of the wet, repeating until all components are folded in. The batter should have a satiny sheen and pour in ribbons off the spatula. A typical mistake is dumping all liquids at once, which can lead to overmixing and a denser cake, so add in thirds and fold gently to maintain lift.
- Scrape the sides and mix again to ensure a smooth batter.: Use a spatula to bring any streaks of flour from the bowl bottom, checking for lumps and integrating them until the batter is uniform. Smooth batter yields even baking and consistent texture. Be cautious not to overmix during scraping, since excessive folding can develop gluten. Stop once you see a homogenous batter with no dry pockets.
- Divide evenly between baking pans and smooth the top.: When you spoon or pour batter into each pan, it should look glossy and even, and smoothing the top helps the layers bake level. Even distribution prevents one layer from being thicker and needing longer bake time. A common pitfall is eyeballing amounts, which creates uneven layers; use a kitchen scale or measuring cup to divide batter accurately.
- Bake 22 to 30 minutes in the lower 2/3 rds of the oven.: You will hear the oven hum and see the cakes rise and set, with edges pulling slightly from the pan when done. Baking in the lower oven section promotes even bottom heat and reliable structure. Test doneness with a toothpick, which should come out clean or with a few moist crumbs. Avoid opening the oven frequently to check, as temperature fluctuations can cause the layers to sink.
- If you're using two cake pans instead of three, you will need to bake this cake 28 to 35 minutes.: With thicker layers, the center takes longer to set, and the bake time increases accordingly. Look for consistent cues such as a springy center and a toothpick with a few moist crumbs. A mistake is removing pans too early; underbaked centers will collapse when cooled. If you notice excessive browning but underbaked centers, tent with foil and continue baking until done.
- Cake will be done when a toothpick comes out clean or mostly clean with a few moist crumbs.: This tactile test is reliable and tells you the interior structure is set while remaining moist. The cake surface should spring back slightly when touched. Avoid relying solely on color because oven variations affect browning; the toothpick test is the most consistent indicator.
- Cool 15 to 20 minutes in cake pans before trying to invert on cooling racks.: Allowing cakes to rest in the pan for this short window lets the crumb firm up so the layer releases cleanly without tearing. You'll feel the pan temperature lessen, which signals it's safe to handle. Flipping too soon can cause breaks, while waiting too long makes removing stuck layers harder. Use an offset spatula around the pan if edges cling.
- Once you can handle the warm pans with your bare hands, you can flip them out.: The layers should lift cleanly and release with a slight crackling sound as steam escapes, indicating they are intact. Handle with care to preserve edges for neat stacking. If the cake sticks, run a thin knife around the edge before flipping; forcing it will tear the layer.
- Cool completely before frosting and decorating.: The cake must be room temperature so the frosting does not melt or slip, and cooling allows crumb to set for cleaner assembly. Patience here prevents a runny result and ensures the frosting adheres properly. Rushing to frost warm layers is a common error that leads to sloppy appearance and sliding layers.
- See recipe notes for how much frosting you will need to make.: Measuring your frosting ahead guarantees you have enough for filling, crumb coating and the final layer, preventing mid assembly scrambling. The notes offer scaled quantities if you are making two layers rather than three. Running out of frosting mid assembly results in uneven coverage, so plan portions before starting.
- In a large bowl, measure and add butter, powdered sugar, salt, vanilla and peppermint extract.: When these ingredients come together, the powdered sugar may look dusty at first, but as you begin to mix the butter will incorporate the sugar and create a fluffy base. Combining extracts at this stage ensures even flavor distribution. Add the sugar gradually to avoid a cloud of powder and to give the butter time to emulsify.
- Stir with beaters on low (or paddle attachment on stand mixer) to mix and break up the butter.: The butter will soften and begin to blend with sugar, creating a coarse, dry mixture that will turn silky as liquid is added. Low speed prevents powdered sugar from flying everywhere and helps achieve an even texture. A typical mistake is whipping too fast initially, which causes a sugar dust cloud and uneven mixing.
- It will still be very powdery and dry.: At this stage, the frosting looks rough, and that is normal; the cream you add next brings it together. Recognizing this phase prevents premature panic. If you try to speed through by increasing speed, you risk incorporating air that creates bubbles in the finished frosting.
- Slowly add in the heavy cream.: As you pour in cream a little at a time, the frosting will transform into a smooth, spreadable consistency, and the bowl will pick up a glossy sheen. Adding slowly gives you control to reach a frosting that can hold its shape without being too stiff. If you add too much at once, the frosting may become too loose, requiring more powdered sugar to firm it again.
- Once you notice the frosting start to come together stop adding the cream.: Pay attention to texture, because a little goes a long way; the goal is a frosting that holds peaks but remains pipeable. Over thinning will leave you chasing thickness with more powdered sugar. If the frosting becomes too soft, chill briefly and then re-whip to restore structure.
- You may need to add more than the amount listed.: Depending on butter softness and humidity, you might adjust cream or powdered sugar to reach the right balance. I often add a splash more cream in humid climates to keep the frosting silky. Keep small increments on hand because big changes can derail the consistency.
- Increase mixer speed to medium to get rid of any lumps and create a smooth frosting.: This step helps aerate and refine texture, resulting in a light, velvety buttercream. Watch closely, because overbeating can incorporate too much air and produce bubbles. If you see too many air pockets, beat briefly by hand with a wooden spoon to deflate them.
- Scrape the sides and the bottom of the bowl and mix again to ensure a completely smooth frosting.: Using a spatula ensures no hidden pockets of powdered sugar remain, which prevents grainy spots on your cake. Thorough scraping gives an even, glossy finish. Neglecting this step can leave streaks of unmixed sugar that affect taste and mouthfeel.
- Peppermint frosting will be done when it can hold its shape, but you can easily move a butter knife through it.: The ideal frosting is stiff enough for piping, yet soft enough to spread smoothly; visually it looks satiny and will form gentle peaks. If it is too stiff, add a touch more cream; if too soft, add powdered sugar. A common issue is overwhipping, which can create air bubbles.
- If it's too thick, add more cream and mix.: Adding cream in small amounts restores spreadability and sheen, making the frosting easier to work with against the cake crumb. Temperature plays a role, so if your kitchen is cold you may need slightly more cream. Be cautious adding too much, because reversing a too-soft frosting requires more sugar and time.
- If you've added too much cream and the frosting is too soft, add more powdered sugar.: Adjusting balance is straightforward, but do it slowly to avoid making it overly sweet or grainy. The right texture returns with patience and small additions. One mistake is dumping lots of sugar at once, which can take the frosting from soft to chalky quickly.
- If you notice there are a lot of air bubbles in your frosting, use a large wooden spoon to beat a lot of the air out of the frosting by hand.: This manual technique deflates unwanted pockets and yields a denser, more stable buttercream that photographs well and slices cleanly. The spoon method is gentle and effective. Overhandling can warm the butter, so work quickly and then chill briefly if needed.
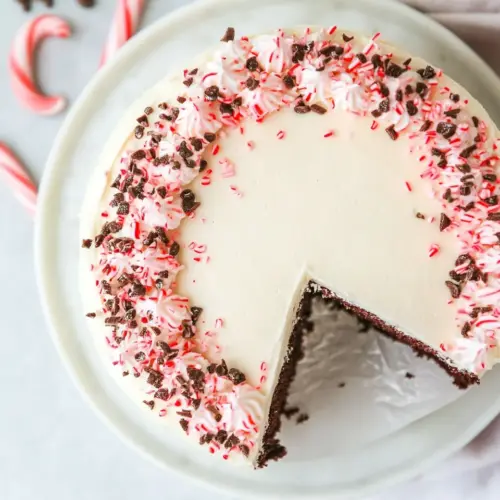
- Frost the cake by layering cake with frosting and crushed candy canes in between each of the three layers, then doing a crumb coating (a thin coating of peppermint frosting around the entire cake) and freezing for 15 minutes before adding the final layer of frosting.: As you assemble, press a small amount of frosting between layers to adhere them, and the crushed candy canes provide crunch contrast and visual appeal. The crumb coat traps loose crumbs and creates a smooth base for the final finish, and chilling helps the crumb coat set so the top layer goes on cleanly. Skipping the chill step often results in crumbs showing through the final frosting.
- You will still see some of the chocolate cake edges because the cake is darker than the frosting, but this is totally normal.: The contrast between the dark crumb and pale peppermint frosting creates a beautiful, rustic effect that many people love. If you prefer a fully opaque finish, apply a slightly thicker crumb coat. Trying to cover without a crumb coat often drags crumbs into the surface, making it harder to achieve a smooth finish.
- Nothing to worry about!: Small imperfections add character and tell the story of a homemade cake, and the taste will always outshine minor visual flaws. Embrace the handmade look or refine with additional piping if you want polished presentation. A big mistake is obsessing over perfection and losing enjoyment of the process.
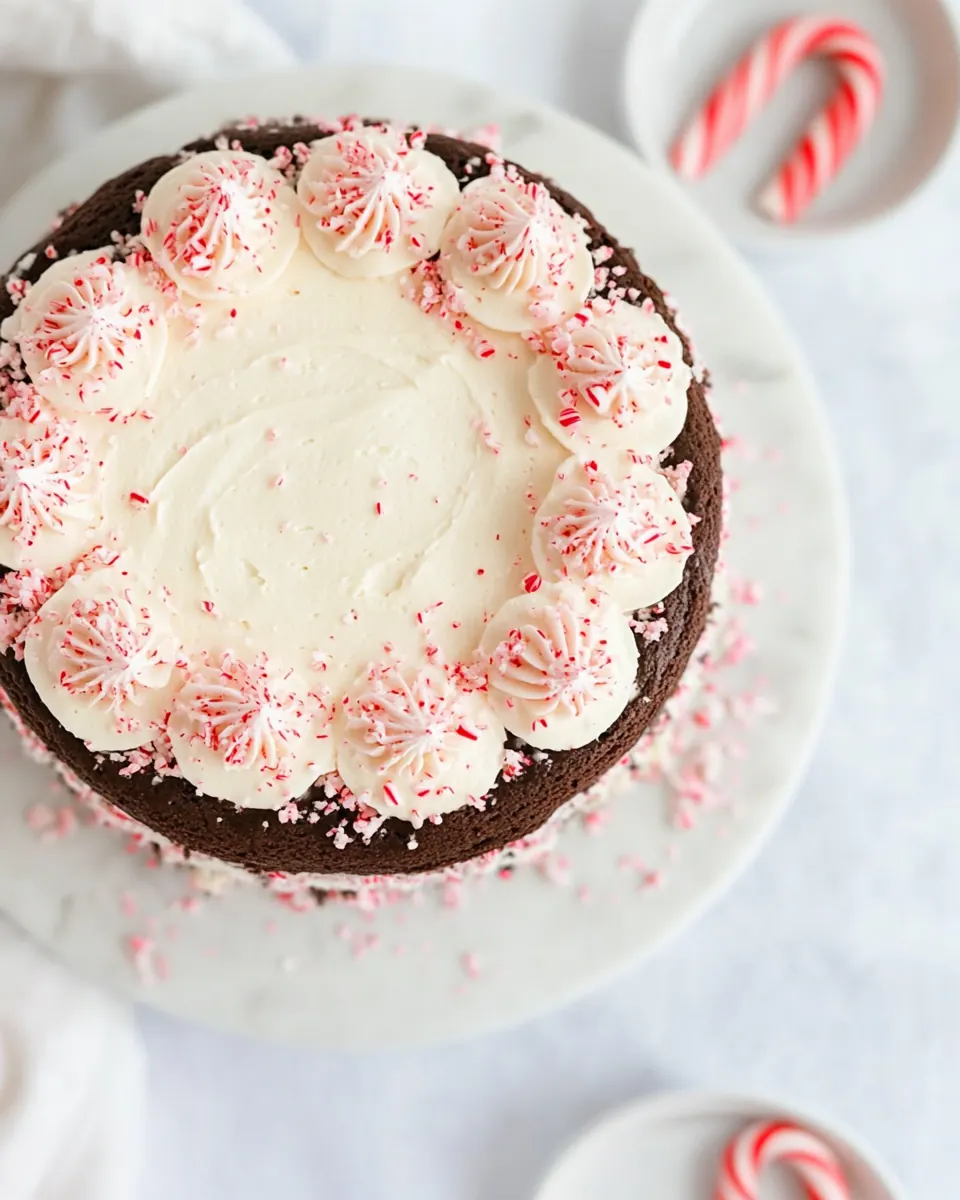
- Add crushed candy canes to the bottom half of the cake and top.: Press the crushed pieces gently into the frosting so they adhere, creating a festive band and a sparkly top. The crunch adds texture and a bright peppermint note in each bite. Be mindful of sharp edges from crushed candy when slicing, and tap off any very small shards to avoid an overly gritty mouthfeel.
- Finish off with rosettes or dollops of frosting around the top.: Use a piping tip or spoon to create decorative accents that frame the cake and make serving easy. These final touches elevate the presentation and give each slice a pretty garnish. If your frosting is too soft to hold shapes, chill briefly and try again to avoid sagging decorations.
- Cut into pieces and enjoy!: When you slice the cake, you should see distinct layers and a creamy ribbon of peppermint buttercream, with a refreshing snap from the crushed candy canes . Serve on a chilled plate for the best texture contrast. If slices become sticky at room temperature, a quick chill before serving helps them hold their shape.
How to Switch It Up

I like to offer variations that keep the core character of the cake but let you personalize texture, intensity, or presentation. Below are practical adjustments that maintain balance between chocolate and peppermint while giving you flexibility for different occasions and preferences.
- Scale the frosting: If you are making only two layers, use the reduced frosting quantities in the notes to avoid waste and ensure proper coverage without overwhelming the cake.
- Adjust peppermint intensity: Start with the listed amount of peppermint extract and add more in small increments if you want a brighter mint flavor, tasting as you go to avoid overpowering the cake.
- Swap the garnish texture: Use larger pieces of crushed candy canes for a pronounced crunch, or pulse finely for a snowy dusting effect on top of the frosting.
- Make it ahead: Bake the layers a day early and wrap them tightly; assemble and decorate the next day for stress free entertaining, the flavors often meld and improve overnight.
- Presentation choices: Pipe rosettes for a classic look, or keep a rustic finish and press a band of crushed candy canes around the base for a modern touch.
Perfect Pairings for Chocolate Candy Cane Cake
Serving this cake can be tailored to the moment, whether a casual family dessert or a holiday centerpiece. Consider complementary beverages and simple sides that echo the peppermint theme or contrast it for balance. Below are ideas for occasions, storage, and pairing that help you present the cake beautifully.
- Holiday gatherings: This cake shines at Christmas parties and winter celebrations, where its peppermint garnish and chocolate layers match the season’s flavors.
- After dinner dessert: Serve slices with a small scoop of plain whipped cream on the side to cut sweetness while keeping the festive notes intact.
- Tea time: Pair a modest slice with a warm cup of coffee or a simple black tea to balance the peppermint and cocoa.
- Make ahead and store: Wrap cooled layers tightly and refrigerate for up to two days before assembly, or freeze layers individually for up to one month. Frosted cake keeps well in the fridge for three to four days in an airtight container.
- Serving temperature: For best texture, serve slices at cool room temperature, about 20 to 30 minutes after removing from the fridge, which softens the buttercream slightly without melting it.
- Occasion styling: For a formal table, pipe evenly spaced rosettes and dot with larger candy cane pieces; for a casual buffet, a simple crushed candy band and rustic frosting look equally inviting.
FAQ
Conclusion
This cake’s combination of deep chocolate layers and bright peppermint frosting is what makes it special, offering contrast in both flavor and texture. If you enjoy desserts that feel festive yet approachable, try baking this one for your next winter gathering or holiday table. It’s a warm, friendly recipe that rewards a bit of patience with impressive results and lots of compliments.
Chocolate Candy Cane Cake
Equipment
- 9" round cake pans
Ingredients
- 1 3/4 cups all purpose flour Sifted to remove lumps and aerated to provide structure and tender crumb for the cake batter; blends with leaveners to create proper rise during baking.
- 3/4 cup dutch processed cocoa powder Measured and sifted to add deep chocolate flavor and color; contributes to the cake’s cocoa intensity while absorbing moisture for balanced texture.
- 1 1/2 teaspoons baking powder Whisked together with other dry ingredients to help the cake rise and produce a light, airy crumb by releasing carbon dioxide when heated.
- 1 teaspoon baking soda Combined with baking powder to provide additional leavening and improve oven spring by reacting with acidic components in the batter.
- 1/2 teaspoons salt Sprinkled into the dry mix to enhance overall flavor balance and strengthen gluten control; helps highlight other flavors in the cake.
- 1 1/2 cups buttermilk Shaken and added for tenderizing the crumb with its acidity and fat content; reacts with baking soda to boost lift and adds moistness.
- 1 teaspoon vanilla extract Stirred in for aromatic richness and to elevate the overall flavor profile with a warm, sweet vanilla note that complements chocolate.
- 1 teaspoon instant coffee granules such as Folgers (optional) Dissolved or left as granules to amplify chocolate depth and round out bitterness; optional for enhancing complexity without altering texture.
- 3/4 cup vegetable oil or canola oil Poured in to keep the cake moist and tender by providing fat that coats flour proteins, resulting in a softer crumb and richer mouthfeel.
- 2 cups granulated sugar Beaten into the batter as the primary sweetener to caramelize slightly during baking and help with creaming for structure and moisture retention.
- 2 whole eggs Beaten to incorporate air and provide structure; eggs also contribute to richness, emulsification, and setting of the cake once baked.
- 1 egg white Added for extra protein and structure without extra fat; helps with binding and gives a slightly firmer texture to the finished cake.
- 1 1/2 cups salted butter softened (3 sticks, 3/4 lb) Softened and creamed to form the base of the frosting, providing flavor, richness, and a smooth, spreadable consistency when whipped with sugar.
- 1 1/2 pounds powdered sugar Sifted into the butter to sweeten and thicken the frosting; creates a silky, stable consistency that holds peaks and smooths easily.
- 1/4 teaspoons salt Sprinkled into the frosting mix to balance sweetness and enhance taste; small quantity helps season and intensify other flavors.
- 1 teaspoon vanilla extract Mixed in to add a warm, sweet aroma and round out the frosting’s flavor profile with familiar vanilla notes that complement chocolate.
- 1 teaspoon peppermint extract Added for a bright, cool peppermint flavor that defines the candy cane character and lifts the sweetness of the frosting with a refreshing note.
- 1/3 cup heavy cream or more, as needed Poured in to adjust frosting consistency, making it spreadable and creamy; added gradually to reach the desired thickness and stability.
- 6 candy canes crushed (for garnish) Crushed and used as a finishing garnish to add crunchy texture and festive peppermint flavor on top of the frosted cake.
Instructions
- Preheat oven to 350 degrees. Line three 8-inch round baking pans with parchment paper and/or spray well with nonstick cooking spray and set aside.: You will notice the oven warming and a faint metallic hum as the thermostat cycles, which sets the stage for even baking. Preheating ensures the cake starts rising immediately, giving you an even crumb and predictable bake time. A common mistake is putting batter into an oven that is not fully preheated, which leads to uneven rise and denser centers. If your oven runs hot or cold, use an oven thermometer to check, because 350 degrees is the target for reliable browning and structure.
- In a large bowl, whisk flour, cocoa powder, baking powder, baking soda and salt together to combine. Set aside. In a liquid measuring cup, stir buttermilk, vanilla and instant coffee granules (if using) together. Set aside.: The pans should feel smooth and ready to receive batter, and the parchment creates a clean release when you invert the layers. This step prevents tearing and preserves the cake edges for a neat assembly. One thing to avoid is skipping parchment when the pans are old or warped, since cakes can stick and break during removal. Press the paper into the pan so it sits flat, which helps the batter level evenly.
- In a separate large bowl, mix oil and sugar together until combined. Mix in eggs and egg white, one at a time, until mixture becomes lighter in color, about 90 seconds.: As you whisk, the powders begin to aerate, and you will see a uniform, dark mixture form that smells faintly of chocolate and earth. Proper mixing ensures even distribution of leaveners and prevents pockets of baking soda or cocoa. A frequent oversight is not sifting or whisking well, which can create pockets of dry ingredients and uneven texture. Take the time to whisk until the color is consistent and there are no visible streaks.
- Alternate adding in flour mixture with milk mixture, being sure to start and end with flour. Scrape the sides and mix again to ensure a smooth batter.: Letting the dry mix rest briefly gives you a chance to prepare your wet ingredients without haste, which helps maintain organization. This pause also prevents accidental overmixing later when combining wet and dry. A mistake here is rushing and trying to combine everything at once, which can result in lumps and inconsistent batter. Keep the dry bowl covered lightly if you step away to prevent dust contamination.
- Divide evenly between baking pans and smooth the top. Bake 22-30 minutes in the lower 2/3 rds of the oven. If you're using two cake pans instead of three, you will need to bake this cake 28-35 minutes. Cake will be done when a toothpick comes out clean or mostly clean with a few moist crumbs. Cool 15-20 minutes in cake pans before trying to invert on cooling racks. Once you can handle the warm pans with your bare hands, you can flip them out. Cool completely before frosting and decorating.: The buttermilk should look smooth and slightly opaque, and the coffee granules will dissolve quickly, adding a subtle depth to the chocolate. Mixing liquids ahead allows them to marry flavors and ensures even distribution when folded into the batter. If you add cold buttermilk straight from the fridge, it can briefly lower the batter temperature and change mixing behavior, so bringing ingredients closer to room temperature helps.
- See recipe notes for how much frosting you will need to make. In a large bowl, measure and add butter, powdered sugar, salt, vanilla and peppermint extract. Stir with beaters on low (or paddle attachment on stand mixer) to mix and break up the butter. It will still be very powdery and dry. Slowly add in the heavy cream. Once you notice the frosting start to come together stop adding the cream. You may need to add more than the amount listed. This is also normal. Increase mixer speed to medium to get rid of any lumps and create a smooth frosting. Scrape the sides and the bottom of the bowl and mix again to ensure a completely smooth frosting. Peppermint frosting will be done when it can hold its shape, but you can easily move a butter knife through it. If it's too thick, add more cream and mix. If you've added too much cream and the frosting is too soft, add more powdered sugar. If you notice there are a lot of air bubbles in your frosting, use a large wooden spoon to beat a lot of the air out of the frosting by hand.: Keeping the wet mixture ready helps you alternate additions smoothly and prevents overmixing the batter. It also keeps the process flowing so you can focus on texture rather than scrambling. Avoid leaving liquids uncovered near open flour to prevent contamination.
- Frost the cake by layering cake with frosting and crushed candy canes in between each of the three layers, then doing a crumb coating (a thin coating of peppermint frosting around the entire cake) and freezing for 15 minutes before adding the final layer of frosting. You will still see some of the chocolate cake edges because the cake is darker than the frosting, but this is totally normal. Nothing to worry about! Add crushed candy canes to the bottom half of the cake and top. Finish off with rosettes or dollops of frosting around the top. Cut into pieces and enjoy!: As you mix, you will notice the sugar slightly dissolve into the oil, producing a glossy sheen. This combination builds moisture and tenderness into the cake, and mixing until combined avoids grainy pockets in the final batter. A common error is under-mixing, which leaves sugar unevenly distributed and can affect rise. Stir until the texture looks cohesive and smooth.
- Mix in eggs and egg white, one at a time, until mixture becomes lighter in color, about 90 seconds.: As you beat the eggs in, the batter will gain air and pale slightly, adding volume that helps with rise and crumb. Proper incorporation creates a stable emulsion that binds oil and other ingredients. Overbeating after adding flour can cause toughness, so stop once the color lightens and the batter looks smooth. If the mixture curdles slightly, continue gently mixing and add the liquids gradually to recombine.
- Alternate adding in flour mixture with milk mixture, being sure to start and end with flour.: This alternation creates a balanced batter that avoids overworking gluten while ensuring even moisture. Start with a portion of the dry mix, then add some of the wet, repeating until all components are folded in. The batter should have a satiny sheen and pour in ribbons off the spatula. A typical mistake is dumping all liquids at once, which can lead to overmixing and a denser cake, so add in thirds and fold gently to maintain lift.
- Scrape the sides and mix again to ensure a smooth batter.: Use a spatula to bring any streaks of flour from the bowl bottom, checking for lumps and integrating them until the batter is uniform. Smooth batter yields even baking and consistent texture. Be cautious not to overmix during scraping, since excessive folding can develop gluten. Stop once you see a homogenous batter with no dry pockets.
- Divide evenly between baking pans and smooth the top.: When you spoon or pour batter into each pan, it should look glossy and even, and smoothing the top helps the layers bake level. Even distribution prevents one layer from being thicker and needing longer bake time. A common pitfall is eyeballing amounts, which creates uneven layers; use a kitchen scale or measuring cup to divide batter accurately.
- Bake 22 to 30 minutes in the lower 2/3 rds of the oven.: You will hear the oven hum and see the cakes rise and set, with edges pulling slightly from the pan when done. Baking in the lower oven section promotes even bottom heat and reliable structure. Test doneness with a toothpick, which should come out clean or with a few moist crumbs. Avoid opening the oven frequently to check, as temperature fluctuations can cause the layers to sink.
- If you're using two cake pans instead of three, you will need to bake this cake 28 to 35 minutes.: With thicker layers, the center takes longer to set, and the bake time increases accordingly. Look for consistent cues such as a springy center and a toothpick with a few moist crumbs. A mistake is removing pans too early; underbaked centers will collapse when cooled. If you notice excessive browning but underbaked centers, tent with foil and continue baking until done.
- Cake will be done when a toothpick comes out clean or mostly clean with a few moist crumbs.: This tactile test is reliable and tells you the interior structure is set while remaining moist. The cake surface should spring back slightly when touched. Avoid relying solely on color because oven variations affect browning; the toothpick test is the most consistent indicator.
- Cool 15 to 20 minutes in cake pans before trying to invert on cooling racks.: Allowing cakes to rest in the pan for this short window lets the crumb firm up so the layer releases cleanly without tearing. You'll feel the pan temperature lessen, which signals it's safe to handle. Flipping too soon can cause breaks, while waiting too long makes removing stuck layers harder. Use an offset spatula around the pan if edges cling.
- Once you can handle the warm pans with your bare hands, you can flip them out.: The layers should lift cleanly and release with a slight crackling sound as steam escapes, indicating they are intact. Handle with care to preserve edges for neat stacking. If the cake sticks, run a thin knife around the edge before flipping; forcing it will tear the layer.
- Cool completely before frosting and decorating.: The cake must be room temperature so the frosting does not melt or slip, and cooling allows crumb to set for cleaner assembly. Patience here prevents a runny result and ensures the frosting adheres properly. Rushing to frost warm layers is a common error that leads to sloppy appearance and sliding layers.
- See recipe notes for how much frosting you will need to make.: Measuring your frosting ahead guarantees you have enough for filling, crumb coating and the final layer, preventing mid assembly scrambling. The notes offer scaled quantities if you are making two layers rather than three. Running out of frosting mid assembly results in uneven coverage, so plan portions before starting.
- In a large bowl, measure and add butter, powdered sugar, salt, vanilla and peppermint extract.: When these ingredients come together, the powdered sugar may look dusty at first, but as you begin to mix the butter will incorporate the sugar and create a fluffy base. Combining extracts at this stage ensures even flavor distribution. Add the sugar gradually to avoid a cloud of powder and to give the butter time to emulsify.
- Stir with beaters on low (or paddle attachment on stand mixer) to mix and break up the butter.: The butter will soften and begin to blend with sugar, creating a coarse, dry mixture that will turn silky as liquid is added. Low speed prevents powdered sugar from flying everywhere and helps achieve an even texture. A typical mistake is whipping too fast initially, which causes a sugar dust cloud and uneven mixing.
- It will still be very powdery and dry.: At this stage, the frosting looks rough, and that is normal; the cream you add next brings it together. Recognizing this phase prevents premature panic. If you try to speed through by increasing speed, you risk incorporating air that creates bubbles in the finished frosting.
- Slowly add in the heavy cream.: As you pour in cream a little at a time, the frosting will transform into a smooth, spreadable consistency, and the bowl will pick up a glossy sheen. Adding slowly gives you control to reach a frosting that can hold its shape without being too stiff. If you add too much at once, the frosting may become too loose, requiring more powdered sugar to firm it again.
- Once you notice the frosting start to come together stop adding the cream.: Pay attention to texture, because a little goes a long way; the goal is a frosting that holds peaks but remains pipeable. Over thinning will leave you chasing thickness with more powdered sugar. If the frosting becomes too soft, chill briefly and then re-whip to restore structure.
- You may need to add more than the amount listed.: Depending on butter softness and humidity, you might adjust cream or powdered sugar to reach the right balance. I often add a splash more cream in humid climates to keep the frosting silky. Keep small increments on hand because big changes can derail the consistency.
- Increase mixer speed to medium to get rid of any lumps and create a smooth frosting.: This step helps aerate and refine texture, resulting in a light, velvety buttercream. Watch closely, because overbeating can incorporate too much air and produce bubbles. If you see too many air pockets, beat briefly by hand with a wooden spoon to deflate them.
- Scrape the sides and the bottom of the bowl and mix again to ensure a completely smooth frosting.: Using a spatula ensures no hidden pockets of powdered sugar remain, which prevents grainy spots on your cake. Thorough scraping gives an even, glossy finish. Neglecting this step can leave streaks of unmixed sugar that affect taste and mouthfeel.
- Peppermint frosting will be done when it can hold its shape, but you can easily move a butter knife through it.: The ideal frosting is stiff enough for piping, yet soft enough to spread smoothly; visually it looks satiny and will form gentle peaks. If it is too stiff, add a touch more cream; if too soft, add powdered sugar. A common issue is overwhipping, which can create air bubbles.
- If it's too thick, add more cream and mix.: Adding cream in small amounts restores spreadability and sheen, making the frosting easier to work with against the cake crumb. Temperature plays a role, so if your kitchen is cold you may need slightly more cream. Be cautious adding too much, because reversing a too-soft frosting requires more sugar and time.
- If you've added too much cream and the frosting is too soft, add more powdered sugar.: Adjusting balance is straightforward, but do it slowly to avoid making it overly sweet or grainy. The right texture returns with patience and small additions. One mistake is dumping lots of sugar at once, which can take the frosting from soft to chalky quickly.
- If you notice there are a lot of air bubbles in your frosting, use a large wooden spoon to beat a lot of the air out of the frosting by hand.: This manual technique deflates unwanted pockets and yields a denser, more stable buttercream that photographs well and slices cleanly. The spoon method is gentle and effective. Overhandling can warm the butter, so work quickly and then chill briefly if needed.
- Frost the cake by layering cake with frosting and crushed candy canes in between each of the three layers, then doing a crumb coating (a thin coating of peppermint frosting around the entire cake) and freezing for 15 minutes before adding the final layer of frosting.: As you assemble, press a small amount of frosting between layers to adhere them, and the crushed candy canes provide crunch contrast and visual appeal. The crumb coat traps loose crumbs and creates a smooth base for the final finish, and chilling helps the crumb coat set so the top layer goes on cleanly. Skipping the chill step often results in crumbs showing through the final frosting.
- You will still see some of the chocolate cake edges because the cake is darker than the frosting, but this is totally normal.: The contrast between the dark crumb and pale peppermint frosting creates a beautiful, rustic effect that many people love. If you prefer a fully opaque finish, apply a slightly thicker crumb coat. Trying to cover without a crumb coat often drags crumbs into the surface, making it harder to achieve a smooth finish.
- Nothing to worry about!: Small imperfections add character and tell the story of a homemade cake, and the taste will always outshine minor visual flaws. Embrace the handmade look or refine with additional piping if you want polished presentation. A big mistake is obsessing over perfection and losing enjoyment of the process.
- Add crushed candy canes to the bottom half of the cake and top.: Press the crushed pieces gently into the frosting so they adhere, creating a festive band and a sparkly top. The crunch adds texture and a bright peppermint note in each bite. Be mindful of sharp edges from crushed candy when slicing, and tap off any very small shards to avoid an overly gritty mouthfeel.
- Finish off with rosettes or dollops of frosting around the top.: Use a piping tip or spoon to create decorative accents that frame the cake and make serving easy. These final touches elevate the presentation and give each slice a pretty garnish. If your frosting is too soft to hold shapes, chill briefly and try again to avoid sagging decorations.
- Cut into pieces and enjoy!: When you slice the cake, you should see distinct layers and a creamy ribbon of peppermint buttercream, with a refreshing snap from the crushed candy canes . Serve on a chilled plate for the best texture contrast. If slices become sticky at room temperature, a quick chill before serving helps them hold their shape.
Notes
- Scale the frosting: If you are making only two layers, use the reduced frosting quantities in the notes to avoid waste and ensure proper coverage without overwhelming the cake.
- Adjust peppermint intensity: Start with the listed amount of peppermint extract and add more in small increments if you want a brighter mint flavor, tasting as you go to avoid overpowering the cake.
- Swap the garnish texture: Use larger pieces of crushed candy canes for a pronounced crunch, or pulse finely for a snowy dusting effect on top of the frosting.
- Make it ahead: Bake the layers a day early and wrap them tightly; assemble and decorate the next day for stress free entertaining, the flavors often meld and improve overnight.
- Presentation choices: Pipe rosettes for a classic look, or keep a rustic finish and press a band of crushed candy canes around the base for a modern touch.