Instant Pot Chicken and Dumplings
Instant Pot Chicken and Dumplings has been my go to for cozy weeknights when I want comfort without fuss. The first time I made this dish I remember the house filling with a warm, herbaceous aroma as the chicken browned and the broth started to sing, and I felt like I had discovered a secret shortcut to Sunday dinner satisfaction. That memory hooked me, and ever since I reach for this recipe whenever I need something soothing and reliable.
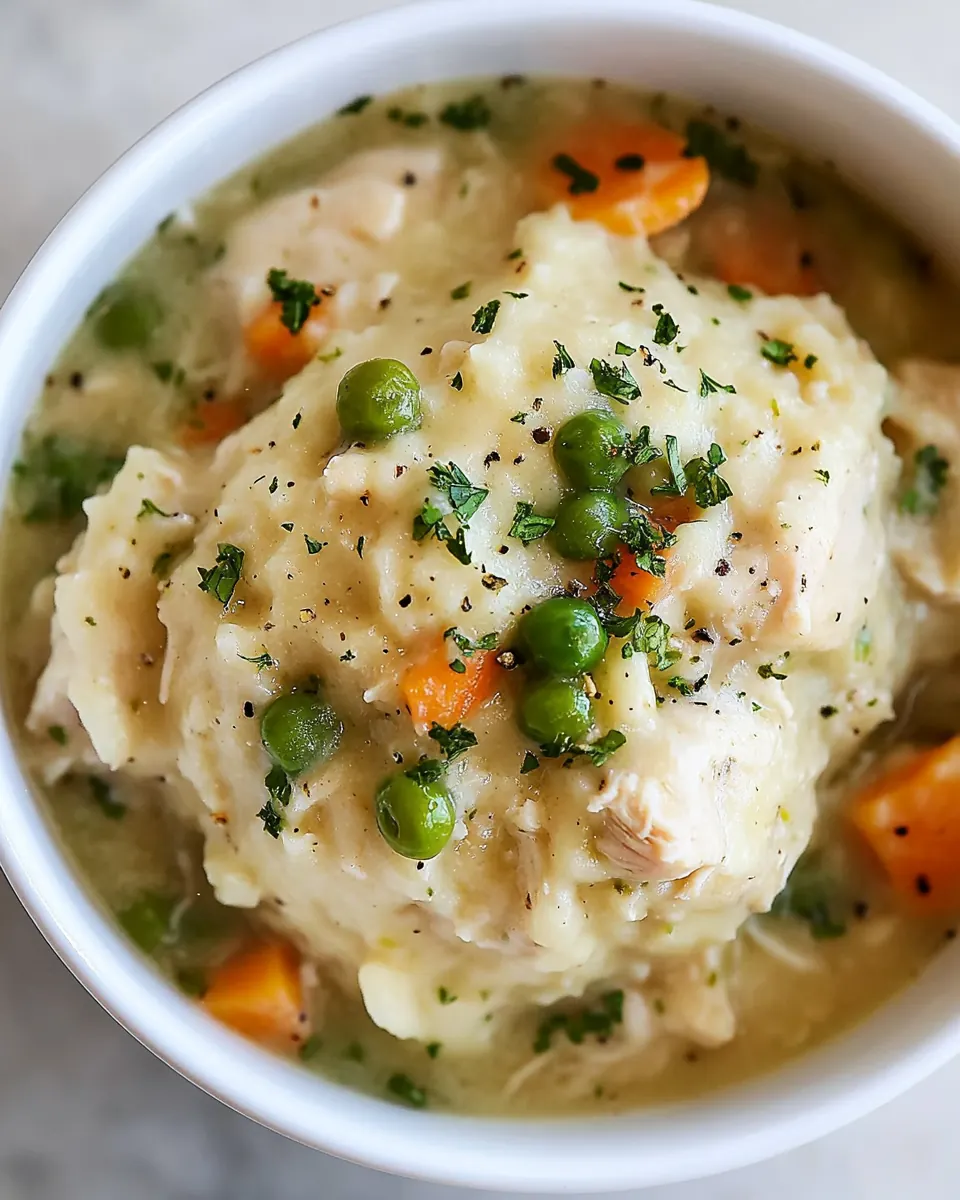
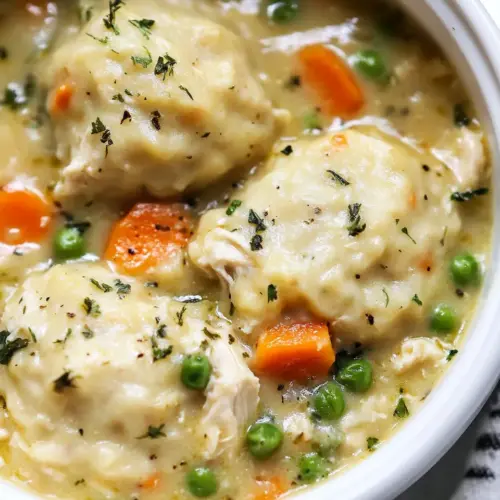
I love how the texture of the pillowy dumplings contrasts with tender shredded chicken, and how a little cream and sour cream lifts the broth into something lush without feeling heavy. I often serve it when friends drop by unexpectedly, because it stretches well and still tastes like I labored over it for hours. Over time I tweaked the aromatics and the dumpling batter until it sang for my family, and every change taught me a bit more about timing and balance.
Recipe Snapshot
40 mins
23 mins
17 mins
Medium
500 kcal
American
Gluten-Free, Low FODMAP
Dinner
Instant Pot, Wooden spoon, Mixing bowl, Small cookie scoop, Two forks
Why You Need This Instant Pot Chicken and Dumplings
Comfort that comes together fast
I adore that Instant Pot Chicken and Dumplings delivers real comfort in a fraction of the time traditional methods take. Using an electric pressure cooker concentrates flavor quickly, so the broth tastes rich and developed even though you spent less time standing at the stove. I find that this makes it a perfect weeknight hero, because you get that slow cooked warmth without the slow cooked wait.
Textural harmony
The marriage of tender shredded chicken and soft dumplings is what keeps me coming back. The dumplings provide a bouncy, doughy counterpoint to the silky broth and flaky meat. I like to call this recipe a study in contrasts, where each bite gives you creamy, starchy, and meaty components at once. That balance is what makes each spoonful feel complete.
Family friendly and forgiving
One of the reasons I trust this recipe is how forgiving it is. Dumpling batter can handle slight variations in moisture, and the pressure cooking step easily rescues tougher cuts of chicken. When life gets busy I appreciate a method that tolerates small mistakes, like a slightly overcooked onion or an unexpected substitute, without collapsing into something disappointing.
Flavor depth from simple pantry staples
I love recipes that rely on ingredients I usually have on hand. This dish uses straightforward staples like all purpose flour, dried herbs, and canned style chicken broth, yet it yields a broth that tastes layered and satisfying. A little butter and the right seasoning transform those basics into something memorable, which is why I often recommend this to new cooks who want big results from small effort.
Versatile for the season
Although I turn to Instant Pot Chicken and Dumplings most in cold months, it adapts to many occasions. It’s a cozy weeknight dinner, an easy meal for guests, and a comforting dish to bring to someone who needs care. The familiarity of its flavors makes it universally appealing, and that versatility keeps it in heavy rotation in my kitchen.
Everything You Need for Instant Pot Chicken and Dumplings
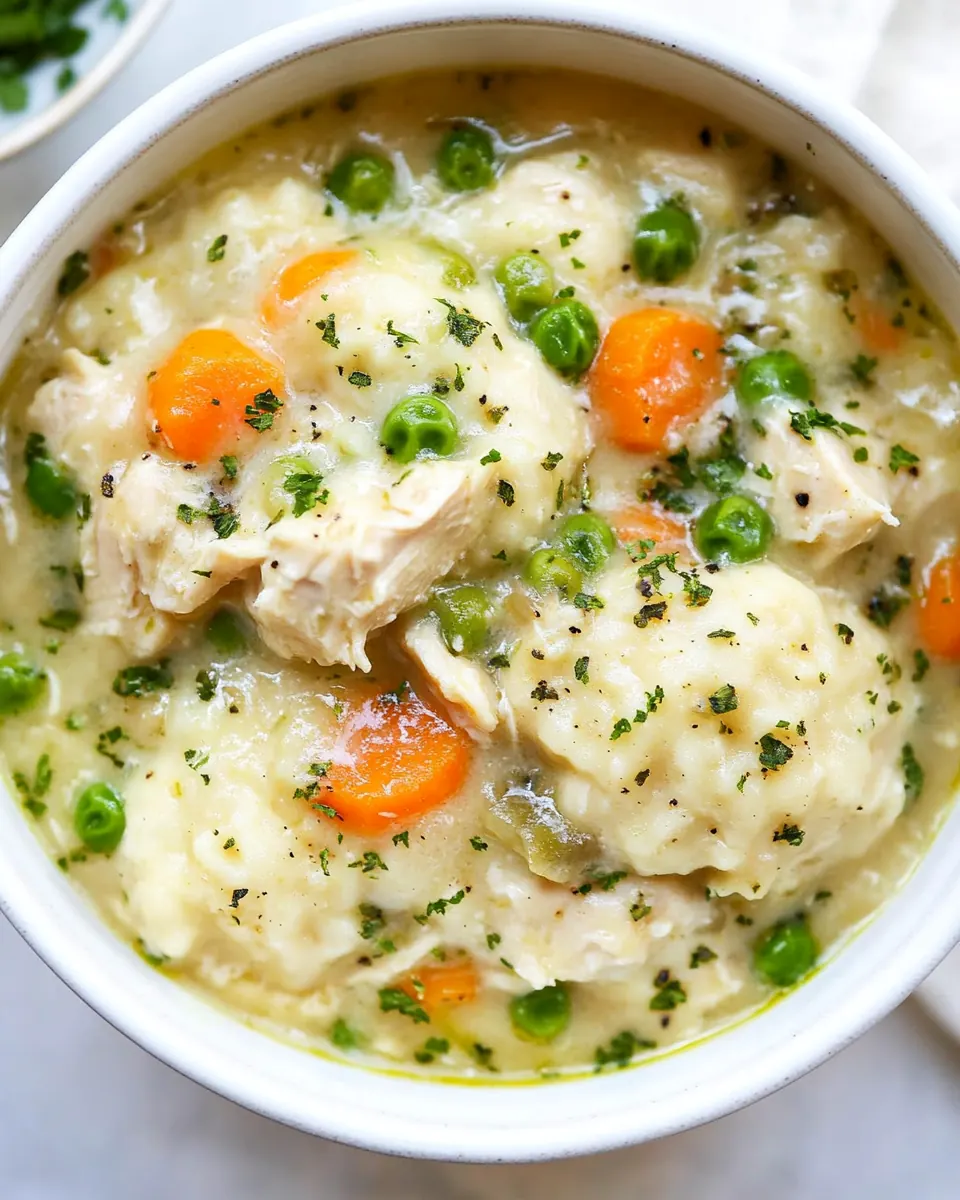
These ingredients work in concert to create a rich, comforting soup with tender meat and tender dumplings. The chicken provides savory depth, while the combination of aromatics and dried herbs builds flavor. Dairy elements like heavy cream and sour cream add silkiness, and the dumpling ingredients give you pillowy texture. Each player has a clear role, so you end up with a balanced, cozy bowl.
- 3 tablespoons olive oil: Heat and sauté other aromatics during initial cooking to develop a flavorful base and prevent sticking in the pot.
- 3 medium chicken breasts or chicken thighs: Provide a hearty protein center that becomes tender when pressure-cooked, adding substance and richness to the stew.
- 2 tablespoons butter unsalted: Melt early in the cooking process to add a silky mouthfeel and help brown aromatics for deeper flavor.
- 1 small yellow onion chopped: Release savory sweetness and aroma when softened, contributing texture and a savory backbone to the broth.
- 4 cloves garlic minced: Infuse bright, pungent flavor when minced and sautéed, enhancing overall savory complexity in the final dish.
- 1 cup shredded carrots: Contribute natural sweetness, color, and slight texture contrast while complementing the vegetables in the broth.
- 1 cup diced celery: Add aromatic crunch and savory depth when softened, balancing sweetness from carrots and richness from the broth.
- 1 tablespoon dried parsley: Provide an herby, fresh note that complements the poultry and vegetables and brightens the overall flavor profile.
- 1 teaspoon dried basil: Introduce a warm, slightly sweet herbaceous note that supports the parsley and enhances the stew’s aroma.
- 1/4 teaspoon pepper flakes: Add gentle heat and a subtle spicy kick to brighten the broth without overpowering other flavors.
- 1 teaspoon salt or to taste: Enhance and balance overall seasoning so the chicken and vegetables taste well-rounded and satisfying.
- 1/2 teaspoon ground black pepper or to taste: Season with a sharp, savory edge to lift flavors and accentuate the richness of the broth and cream.
- 1 cup frozen sweet peas: Bring pops of sweetness and color while contributing mild vegetal flavor and light texture contrast to dumplings.
- 32 oz chicken broth low sodium: Create a savory cooking liquid that extracts flavor from the chicken and vegetables and forms the base for the gravy.
- 1 cup heavy cream or light cream: Enrich the cooking liquid with creaminess and body, helping create a luxurious, silky sauce for the dumplings.
- 1/2 cup sour cream: Add tangy richness and creaminess to the sauce, contributing to a slightly tart, smooth finish in the stew.
- 1 cup all-purpose flour: Provide structure and binding for the dumpling dough, creating the bulk and chew of each dumpling.
- 1 tablespoon baking powder: Act as a leavening aid when combined with baking powder to help dumplings rise and become light and tender.
- 1/4 teaspoon salt: Season the dumpling dough to balance sweetness and enhance all other flavors without overpowering them.
- 2 tablespoons butter melted: Moisten the dry dough ingredients when combined with buttermilk, adding a buttery taste and aiding in mixing.
- 1/2 cup buttermilk: React with baking powder and buttermilk to tenderize the dumplings and enrich mouthfeel when melted into the batter.
- 1/4 cup cornstarch: Provide acidity and tenderizing properties to react with leavening agents, contributing to fluffy dumplings.
- 1/4 cup water: Thicken and stabilize pan juices into a glossy gravy by forming a slurry with water, creating a clingy sauce.
Making This Instant Pot Chicken and Dumplings
I walk into this stage wanting a calm, confident finish. The Instant Pot simplifies timing, but I still pay attention to sensory cues so nothing slips. Below are the cleaned steps from the recipe, expanded into rich guidance to help you succeed and enjoy every stage.
- Using a 6 qt or larger Instant Pot, select Saute mode and High.: The pot will give off a faint electrical hum and the display will tell you it is heating, which is your cue to proceed. You should notice a shimmer of heat on the inner surface, and if you hold your hand a safe distance above it you can feel the rising warmth. This initial high heat is crucial because it prepares the surface for proper browning, which creates fond that later dissolves into the broth to provide depth. A common mistake is skipping this preheat, which leads to poor browning and a less flavorful base. If your model takes longer to read HOT, be patient and wait until it signals, otherwise oil and butter can burn when added prematurely.
- Once it reads HOT, add the oil, add the chicken in one layer and cook on each side until browned, about 3-5 minutes per side. Transfer to a plate, cover with foil, and set aside.: When the olive oil hits the hot pot you will hear a brief sizzle, which tells you the surface is ready. Place the chicken pieces carefully so they do not crowd, you want a single layer for even contact. As each side browns you will see the surface take on golden to deep golden tones and the smell will turn savory and slightly sweet. That aroma is a sign the Maillard reaction is developing flavor. After browning, resting the chicken on a plate tented with foil traps juices so the meat stays moist when you shred it later. Avoid moving the pieces too soon, or you will tear the surface and lose the fond, and don't overcrowd or the chicken will steam instead of brown.
- Add butter, melt it and scrape well the bottom of the IP to remove any bits that are stuck.: As the butter melts you will see it foam briefly and then quiet down, releasing a nutty aroma that enhances the aromatics. Use a wooden spoon to drag up the browned bits stuck to the bottom, this deglazing step dissolves those concentrated flavors into the melting fat and prevents the burn warning later when you add liquid. The sound is subtle, a soft scraping, and the visual cue is a cleaner pot surface. A common error is not scraping thoroughly, which leaves stuck-on bits that can trigger a burn notice when liquid is introduced, so take your time here.
- Add diced onion and cook stirring for 1 minute, add minced garlic and cook stirring for another minute.: When you add the diced onion you will smell it release a sweet vegetal scent as it hits the hot butter . Stirring constantly for about a minute softens the edges and sweeps up residual fond. Adding the minced garlic after gives a bright, pungent burst that will mellow in seconds into a savory base. The sizzling should be lively but not violent; if the aromatics begin to brown too quickly lower the Saute intensity if your model allows or stir more frequently. Burning these will add bitterness rather than sweetness, so keep the motion steady.
- Add the carrots, celery, dried parsley, basil, pepper flakes, salt, and pepper. Stir and cook for 3-5 minutes.: As you toss in the shredded carrots and diced celery the mixture will take on more color and the scent will deepen with vegetal sweetness and herbaceous notes. The dried parsley and basil will begin to rehydrate and perfume the pan, while the pepper flakes add a background warmth. Stirring for several minutes softens the vegetables and melds flavors so the broth later takes on a cohesive profile. Avoid rushing this step; undercooked vegetables can yield harsher raw flavors and uneven texture in the finished soup.
- Add the frozen peas and broth. Give it a good stir and add back in the chicken.: When you pour in the low sodium chicken broth you will see steam rise and the pot will shift from sauteing to simmering energy. The frozen sweet peas will loosen their icy sheen and start to thaw, adding color immediately. Stirring releases any remaining browned bits into the liquid and helps distribute aromatics evenly. Nestle the browned chicken back into the pot so it sits submerged in the liquid; this positioning lets it pressure cook evenly. If you skip stirring you risk hot spots or trapped fond that can scorch during pressure build up.
- Cover and secure the lid, point the valve to seal. Cook on High Pressure for 7 minutes. When done pressure cooking, do a 10-minute Natural Pressure Release. Release manually the remaining pressure by doing a Quick Release.: You will hear the machine work as it comes to pressure, a faint building hum that eventually quiets once sealed. The 7 minutes at high pressure is enough to tenderize the chicken while keeping it moist. After the cook completes, the 10-minute Natural Pressure Release lets flavors settle and juices redistribute slowly, which keeps the meat succulent. The subsequent quick release expels the remaining steam, allowing you to open the lid safely. A pitfall is skipping the natural release entirely, which can dry out the meat or make liquids spurt; follow timing to protect texture and safety.
- Once cooked, take off the lid and select Saute on medium heat. Remove the chicken and add it to a plate. Use two forks to shred it.: Opening the lid you will be greeted by a steam cloud carrying deep, savory notes. Switching to Saute on medium reduces the simmer intensity and prepares the pot for finishing touches. Removing the chicken to shred keeps the dumpling batter from getting mixed with larger meat pieces and allows you to control the texture. Use two forks to gently pull the meat apart; you want flaky strands not mushy bits. Avoid shredding while the meat is too hot to handle safely, but also don’t wait too long, or the juices will stiffen and be harder to redistribute.
- Mix the Dumplings ingredients in a bowl until fully combined.: When you stir together the all purpose flour , baking powder , salt , melted butter , and buttermilk the batter should be slightly sticky and cohesive. The texture matters here because over mixing yields tough dumplings while under mixing causes uneven pockets of flour. You will notice a soft, biscuit like scent as the leavening distributes. Resist the urge to beat vigorously; gentle folding preserves air and yields tender dumplings. A frequent slip is adding too much liquid; aim for a scoopable consistency.
- Add the cream and sour cream to the pot and stir to combine. Add back the chicken.: Pouring in the heavy cream and sour cream mellows the broth and makes it luxuriously smooth. Stirring incorporates these dairy elements evenly so the soup develops a cohesive, silky mouthfeel. Return the shredded chicken so the meat rewarms and absorbs the creaminess. If the pot is at too high a boil when you add dairy it may separate, so keep the heat moderate and stir steadily for an even emulsion.
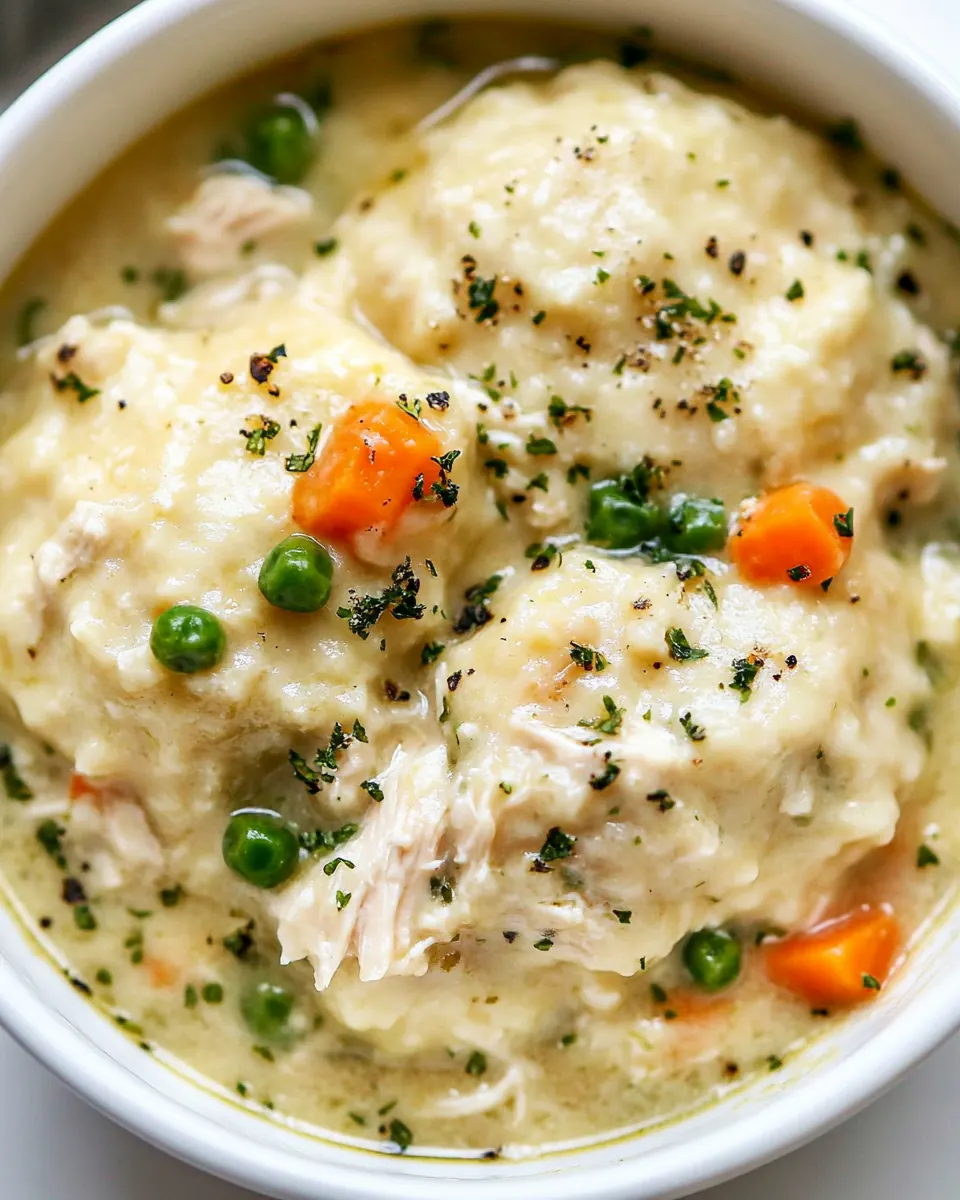
- Using a small cookie scoop, spoon the dumpling batter into the hot broth. The IP is still on Saute mode.: Dropping portions of batter into the simmering pot will produce a soft sizzle as the outer surface sets and the dumplings float. The scoop ensures uniform size for even cooking and that satisfying visual of little domes bobbing on the surface. Let each dollop land gently; overcrowding the surface can cause dumplings to merge into one irregular mass. An all too common mistake is stirring them immediately, which prevents the tops from forming a skin and ruins the tender interior structure.
- Let the dumplings simmer unmoved for about 5 minutes, after which stir gently, and simmer for another 7-10 minutes, or until cooked.: As the dumplings sit you will notice a faint steam and the tops begin to set, while the edges remain delicate. Letting them remain unmoved encourages an airy interior and a lightly tacky exterior. After approximately 5 minutes gently nudge them to ensure even cooking and then allow them to finish in a low simmer for another 7 to 10 minutes. The internal texture should be springy and cooked through without gummy centers. Avoid poking or vigorously stirring too early, which compresses them and makes them dense.
- Taste and adjust for salt and pepper.: This is the moment the flavors align, and you should taste the broth to gauge seasoning. The dairy and starches can mute salt, so a final adjustment is often necessary. Add small increments and taste in between to find balance. Over salting is hard to fix, so proceed cautiously and remember that warm soups often taste more seasoned than cooler samples.
- If the soup is too thin, in a small bowl combine water and cornstarch until fully dissolved and add the mixture to the pot. Simmer for 3-4 minutes, until thickened. If needed, repeat.: A cornstarch slurry will thicken the broth quickly, creating a glossy finish that clings to dumplings and chicken . Make sure the cornstarch is fully dissolved in cold water before adding to prevent lumps. After incorporating it simmer for a few minutes to cook off the starchy taste and achieve the desired body. Avoid dumping concentrated slurry right into a rolling boil, which can create uneven thickening or telltale pasty pockets.
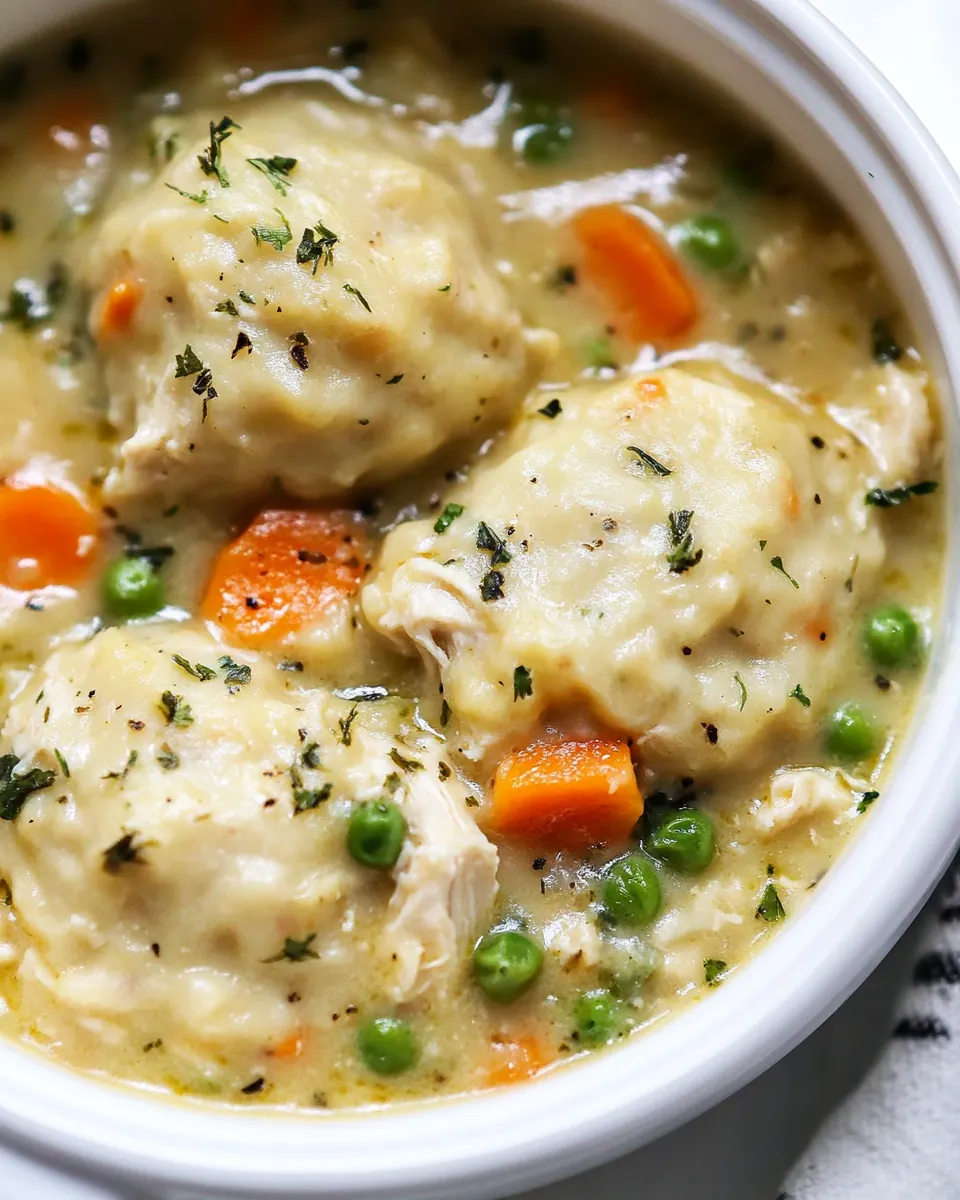
- Serve garnished with fresh parsley.: The final garnish of fresh parsley adds a bright herbal lift and a hint of color against the creamy broth. Sprinkle it just before serving so it retains a fresh visual and a slight fresh chew that contrasts the warm, soft textures below. This small detail rounds the dish and signals a finished bowl. Don’t overdo the garnish, a light scattering is enough to complete the plate.
Making Adjustments
This section gives practical ways to adapt the dish while preserving its core character. Below are focused tips that expand the recipe, address common concerns, and help you tailor it to your pantry and preferences.
- Ingredient swaps Use either chicken breasts or chicken thighs depending on your preference for lean or richer meat, noting that thighs yield more succulence while breasts shred into firmer strands.
- Temperature control Keep the Saute stage at medium to high only during the browning steps, then lower to medium when incorporating cream to prevent curdling and to maintain a silky broth.
- Dumpling texture Avoid overmixing the dumpling batter; fold gently until just combined to ensure they remain tender and light rather than dense and chewy.
- Thickening method Make a cold slurry with the specified cornstarch and water and add incrementally, simmering after each addition so you reach the desired thickness without overshooting.
- Flavor balance Taste before final seasoning because the combination of low sodium broth, dairy, and dumplings affects perceived saltiness; adjust gradually and re-taste after resting a minute.
Serving Ideas for Instant Pot Chicken and Dumplings
This dish shines when presented with simple accompaniments and thoughtful plating. Below are serving approaches, side suggestions, and storage notes to help you make this meal feel complete and adaptable to different occasions.
- Classic family dinner Serve bowls of hot Instant Pot Chicken and Dumplings with a light sprinkle of fresh parsley and extra cracked black pepper, making it the centerpiece of a cozy evening meal.
- Lunch gathering Offer small bowls alongside a crisp green salad for contrast, letting the creamy soup be the warm, filling option while the salad refreshes the palate.
- Comfort for someone in need Bring this as a reheatable, comforting dish when visiting someone recovering from illness; it travels well in a covered container and warms back with gentle reheating.
- Ramadan or seasonal serving Present it as a nourishing option to break fast during colder months, pairing with warm bread for dipping and a light fruit platter to finish the meal.
- Storage and leftovers Cool to room temperature and store in an airtight container in the refrigerator for up to 3 to 4 days. Reheat gently on the stove over low heat to avoid breaking the dairy, adding a splash of broth if it tightens up.
- Make ahead You can prepare the broth and cooked chicken in advance and refrigerate, then make the dumplings right before serving to preserve their fresh pillowy texture.
FAQ
Conclusion
This recipe shines because it delivers a deeply comforting bowl of tender chicken and pillowy dumplings with minimal fuss. I encourage you to give it a try on a chilly evening when you want something dependable, soothing, and crowd pleasing. The Instant Pot streamlines the process while preserving the rich flavors of slow cooking, making it a go to in my kitchen for both weeknight dinners and when I want to share warmth with friends.
Instant Pot Chicken and Dumplings
Equipment
- Instant Pot
- Wooden Spoon
- Mixing Bowl
- Small Cookie Scoop
- Two forks
Ingredients
- 3 tablespoons olive oil Heat and sauté other aromatics during initial cooking to develop a flavorful base and prevent sticking in the pot.
- 3 medium chicken breasts or chicken thighs Provide a hearty protein center that becomes tender when pressure-cooked, adding substance and richness to the stew.
- 2 tablespoons butter unsalted Melt early in the cooking process to add a silky mouthfeel and help brown aromatics for deeper flavor.
- 1 small yellow onion chopped Release savory sweetness and aroma when softened, contributing texture and a savory backbone to the broth.
- 4 cloves garlic minced Infuse bright, pungent flavor when minced and sautéed, enhancing overall savory complexity in the final dish.
- 1 cup shredded carrots Contribute natural sweetness, color, and slight texture contrast while complementing the vegetables in the broth.
- 1 cup diced celery Add aromatic crunch and savory depth when softened, balancing sweetness from carrots and richness from the broth.
- 1 tablespoon dried parsley Provide an herby, fresh note that complements the poultry and vegetables and brightens the overall flavor profile.
- 1 teaspoon dried basil Introduce a warm, slightly sweet herbaceous note that supports the parsley and enhances the stew’s aroma.
- 1/4 teaspoon pepper flakes Add gentle heat and a subtle spicy kick to brighten the broth without overpowering other flavors.
- 1 teaspoon salt or to taste Enhance and balance overall seasoning so the chicken and vegetables taste well-rounded and satisfying.
- 1/2 teaspoon ground black pepper or to taste Season with a sharp, savory edge to lift flavors and accentuate the richness of the broth and cream.
- 1 cup frozen sweet peas Bring pops of sweetness and color while contributing mild vegetal flavor and light texture contrast to dumplings.
- 32 oz chicken broth low sodium Create a savory cooking liquid that extracts flavor from the chicken and vegetables and forms the base for the gravy.
- 1 cup heavy cream or light cream Enrich the cooking liquid with creaminess and body, helping create a luxurious, silky sauce for the dumplings.
- 1/2 cup sour cream Add tangy richness and creaminess to the sauce, contributing to a slightly tart, smooth finish in the stew.
- 1 cup all-purpose flour Provide structure and binding for the dumpling dough, creating the bulk and chew of each dumpling.
- 1 tablespoon baking powder Act as a leavening aid when combined with baking powder to help dumplings rise and become light and tender.
- 1/4 teaspoon salt Season the dumpling dough to balance sweetness and enhance all other flavors without overpowering them.
- 2 tablespoons butter melted Moisten the dry dough ingredients when combined with buttermilk, adding a buttery taste and aiding in mixing.
- 1/2 cup buttermilk React with baking powder and buttermilk to tenderize the dumplings and enrich mouthfeel when melted into the batter.
- 1/4 cup cornstarch Provide acidity and tenderizing properties to react with leavening agents, contributing to fluffy dumplings.
- 1/4 cup water Thicken and stabilize pan juices into a glossy gravy by forming a slurry with water, creating a clingy sauce.
Instructions
- Using a 6 qt or larger Instant Pot, select Saute mode and High.: The pot will give off a faint electrical hum and the display will tell you it is heating, which is your cue to proceed. You should notice a shimmer of heat on the inner surface, and if you hold your hand a safe distance above it you can feel the rising warmth. This initial high heat is crucial because it prepares the surface for proper browning, which creates fond that later dissolves into the broth to provide depth. A common mistake is skipping this preheat, which leads to poor browning and a less flavorful base. If your model takes longer to read HOT, be patient and wait until it signals, otherwise oil and butter can burn when added prematurely.
- Once it reads HOT, add the oil, add the chicken in one layer and cook on each side until browned, about 3-5 minutes per side. Transfer to a plate, cover with foil, and set aside.: When the olive oil hits the hot pot you will hear a brief sizzle, which tells you the surface is ready. Place the chicken pieces carefully so they do not crowd, you want a single layer for even contact. As each side browns you will see the surface take on golden to deep golden tones and the smell will turn savory and slightly sweet. That aroma is a sign the Maillard reaction is developing flavor. After browning, resting the chicken on a plate tented with foil traps juices so the meat stays moist when you shred it later. Avoid moving the pieces too soon, or you will tear the surface and lose the fond, and don't overcrowd or the chicken will steam instead of brown.
- Add butter, melt it and scrape well the bottom of the IP to remove any bits that are stuck.: As the butter melts you will see it foam briefly and then quiet down, releasing a nutty aroma that enhances the aromatics. Use a wooden spoon to drag up the browned bits stuck to the bottom, this deglazing step dissolves those concentrated flavors into the melting fat and prevents the burn warning later when you add liquid. The sound is subtle, a soft scraping, and the visual cue is a cleaner pot surface. A common error is not scraping thoroughly, which leaves stuck-on bits that can trigger a burn notice when liquid is introduced, so take your time here.
- Add diced onion and cook stirring for 1 minute, add minced garlic and cook stirring for another minute.: When you add the diced onion you will smell it release a sweet vegetal scent as it hits the hot butter . Stirring constantly for about a minute softens the edges and sweeps up residual fond. Adding the minced garlic after gives a bright, pungent burst that will mellow in seconds into a savory base. The sizzling should be lively but not violent; if the aromatics begin to brown too quickly lower the Saute intensity if your model allows or stir more frequently. Burning these will add bitterness rather than sweetness, so keep the motion steady.
- Add the carrots, celery, dried parsley, basil, pepper flakes, salt, and pepper. Stir and cook for 3-5 minutes.: As you toss in the shredded carrots and diced celery the mixture will take on more color and the scent will deepen with vegetal sweetness and herbaceous notes. The dried parsley and basil will begin to rehydrate and perfume the pan, while the pepper flakes add a background warmth. Stirring for several minutes softens the vegetables and melds flavors so the broth later takes on a cohesive profile. Avoid rushing this step; undercooked vegetables can yield harsher raw flavors and uneven texture in the finished soup.
- Add the frozen peas and broth. Give it a good stir and add back in the chicken.: When you pour in the low sodium chicken broth you will see steam rise and the pot will shift from sauteing to simmering energy. The frozen sweet peas will loosen their icy sheen and start to thaw, adding color immediately. Stirring releases any remaining browned bits into the liquid and helps distribute aromatics evenly. Nestle the browned chicken back into the pot so it sits submerged in the liquid; this positioning lets it pressure cook evenly. If you skip stirring you risk hot spots or trapped fond that can scorch during pressure build up.
- Cover and secure the lid, point the valve to seal. Cook on High Pressure for 7 minutes. When done pressure cooking, do a 10-minute Natural Pressure Release. Release manually the remaining pressure by doing a Quick Release.: You will hear the machine work as it comes to pressure, a faint building hum that eventually quiets once sealed. The 7 minutes at high pressure is enough to tenderize the chicken while keeping it moist. After the cook completes, the 10-minute Natural Pressure Release lets flavors settle and juices redistribute slowly, which keeps the meat succulent. The subsequent quick release expels the remaining steam, allowing you to open the lid safely. A pitfall is skipping the natural release entirely, which can dry out the meat or make liquids spurt; follow timing to protect texture and safety.
- Once cooked, take off the lid and select Saute on medium heat. Remove the chicken and add it to a plate. Use two forks to shred it.: Opening the lid you will be greeted by a steam cloud carrying deep, savory notes. Switching to Saute on medium reduces the simmer intensity and prepares the pot for finishing touches. Removing the chicken to shred keeps the dumpling batter from getting mixed with larger meat pieces and allows you to control the texture. Use two forks to gently pull the meat apart; you want flaky strands not mushy bits. Avoid shredding while the meat is too hot to handle safely, but also don’t wait too long, or the juices will stiffen and be harder to redistribute.
- Mix the Dumplings ingredients in a bowl until fully combined.: When you stir together the all purpose flour , baking powder , salt , melted butter , and buttermilk the batter should be slightly sticky and cohesive. The texture matters here because over mixing yields tough dumplings while under mixing causes uneven pockets of flour. You will notice a soft, biscuit like scent as the leavening distributes. Resist the urge to beat vigorously; gentle folding preserves air and yields tender dumplings. A frequent slip is adding too much liquid; aim for a scoopable consistency.
- Add the cream and sour cream to the pot and stir to combine. Add back the chicken.: Pouring in the heavy cream and sour cream mellows the broth and makes it luxuriously smooth. Stirring incorporates these dairy elements evenly so the soup develops a cohesive, silky mouthfeel. Return the shredded chicken so the meat rewarms and absorbs the creaminess. If the pot is at too high a boil when you add dairy it may separate, so keep the heat moderate and stir steadily for an even emulsion.
- Using a small cookie scoop, spoon the dumpling batter into the hot broth. The IP is still on Saute mode.: Dropping portions of batter into the simmering pot will produce a soft sizzle as the outer surface sets and the dumplings float. The scoop ensures uniform size for even cooking and that satisfying visual of little domes bobbing on the surface. Let each dollop land gently; overcrowding the surface can cause dumplings to merge into one irregular mass. An all too common mistake is stirring them immediately, which prevents the tops from forming a skin and ruins the tender interior structure.
- Let the dumplings simmer unmoved for about 5 minutes, after which stir gently, and simmer for another 7-10 minutes, or until cooked.: As the dumplings sit you will notice a faint steam and the tops begin to set, while the edges remain delicate. Letting them remain unmoved encourages an airy interior and a lightly tacky exterior. After approximately 5 minutes gently nudge them to ensure even cooking and then allow them to finish in a low simmer for another 7 to 10 minutes. The internal texture should be springy and cooked through without gummy centers. Avoid poking or vigorously stirring too early, which compresses them and makes them dense.
- Taste and adjust for salt and pepper.: This is the moment the flavors align, and you should taste the broth to gauge seasoning. The dairy and starches can mute salt, so a final adjustment is often necessary. Add small increments and taste in between to find balance. Over salting is hard to fix, so proceed cautiously and remember that warm soups often taste more seasoned than cooler samples.
- If the soup is too thin, in a small bowl combine water and cornstarch until fully dissolved and add the mixture to the pot. Simmer for 3-4 minutes, until thickened. If needed, repeat.: A cornstarch slurry will thicken the broth quickly, creating a glossy finish that clings to dumplings and chicken . Make sure the cornstarch is fully dissolved in cold water before adding to prevent lumps. After incorporating it simmer for a few minutes to cook off the starchy taste and achieve the desired body. Avoid dumping concentrated slurry right into a rolling boil, which can create uneven thickening or telltale pasty pockets.
- Serve garnished with fresh parsley.: The final garnish of fresh parsley adds a bright herbal lift and a hint of color against the creamy broth. Sprinkle it just before serving so it retains a fresh visual and a slight fresh chew that contrasts the warm, soft textures below. This small detail rounds the dish and signals a finished bowl. Don’t overdo the garnish, a light scattering is enough to complete the plate.
Notes
- Ingredient swaps Use either chicken breasts or chicken thighs depending on your preference for lean or richer meat, noting that thighs yield more succulence while breasts shred into firmer strands.
- Temperature control Keep the Saute stage at medium to high only during the browning steps, then lower to medium when incorporating cream to prevent curdling and to maintain a silky broth.
- Dumpling texture Avoid overmixing the dumpling batter; fold gently until just combined to ensure they remain tender and light rather than dense and chewy.
- Thickening method Make a cold slurry with the specified cornstarch and water and add incrementally, simmering after each addition so you reach the desired thickness without overshooting.
- Flavor balance Taste before final seasoning because the combination of low sodium broth, dairy, and dumplings affects perceived saltiness; adjust gradually and re-taste after resting a minute.