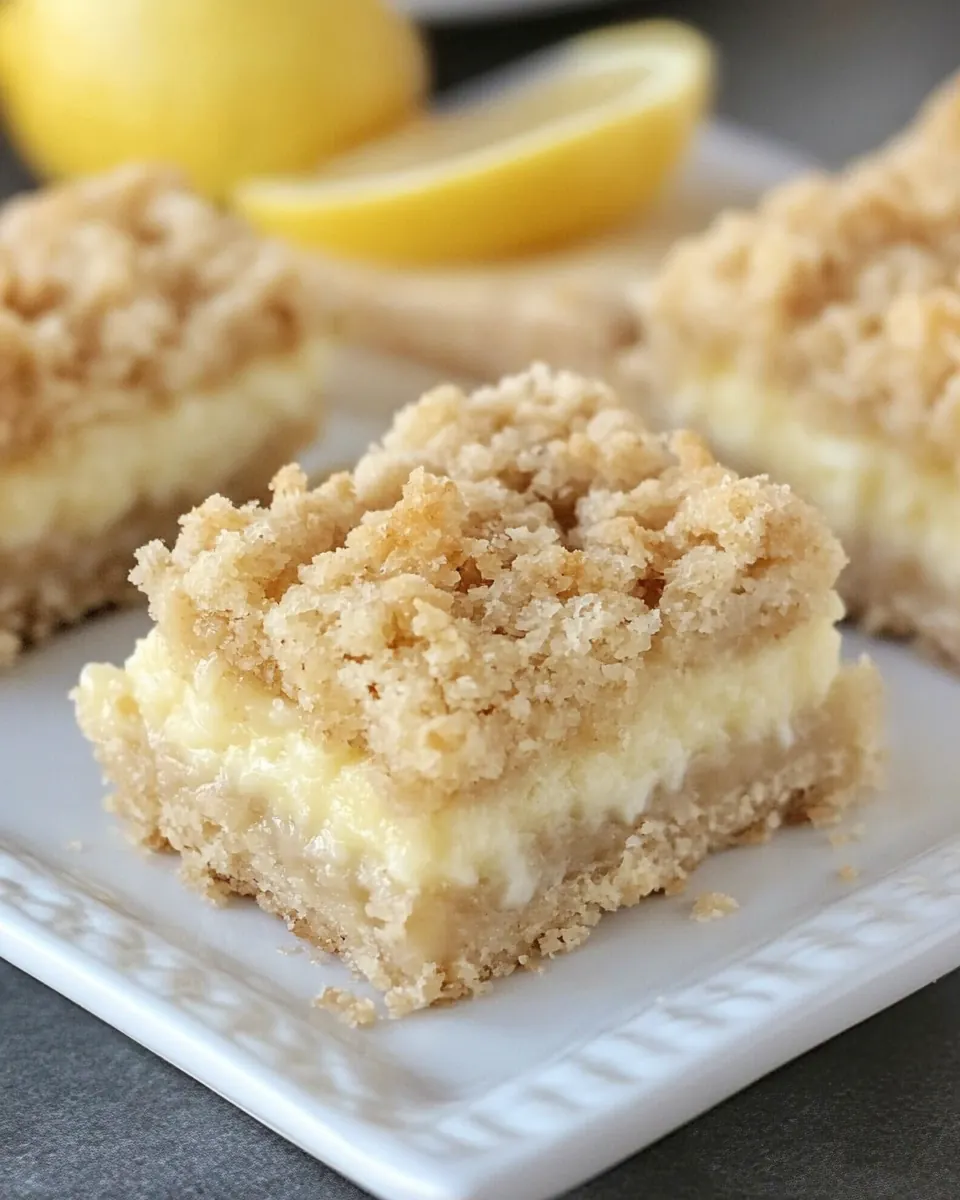
Lemon Crumb Bars
Lemon Crumb Bars are the kind of treat I find myself coming back to whenever I crave something bright yet comforting.
I first made Lemon Crumb Bars on a slow spring afternoon when friends dropped by unannounced, and I had only pantry staples to pull together a dessert. I remember zesting lemons while the sun warmed the kitchen window, the sharp citrus scent cutting through the sweet memories of the day. That batch taught me how simple ingredients like canned condensed milk, fresh lemon juice, and a crumbly oat crust can team up to create something that tastes like sunshine in a square. Over the years, I’ve tweaked the balance between tang and sweet so each bite sings without being cloying.
What I love most about Lemon Crumb Bars is how forgiving the recipe is. You can mix the crumbs by hand or with a mixer, and the bars still come out with that tender center and slightly crunchy top. I serve them chilled on a hot afternoon, and they disappear within minutes, the edges offering a pleasant chew while the center remains smooth and lemony. Friends have called them pantry magic, and I can’t argue with that. Each time I make them, I’m reminded of casual gatherings, impromptu tea times, and the small comforts good baking brings.
Recipe Snapshot
45 mins
20 mins
25 mins
Medium
200 kcal
American
Gluten-Free, Low FODMAP
Desserts
9 x 12 inch baking pan, Electric mixer, Mixing bowls, Whisk
Why This Lemon Crumb Bars Works
Bright citrus flavor that wakes the palate
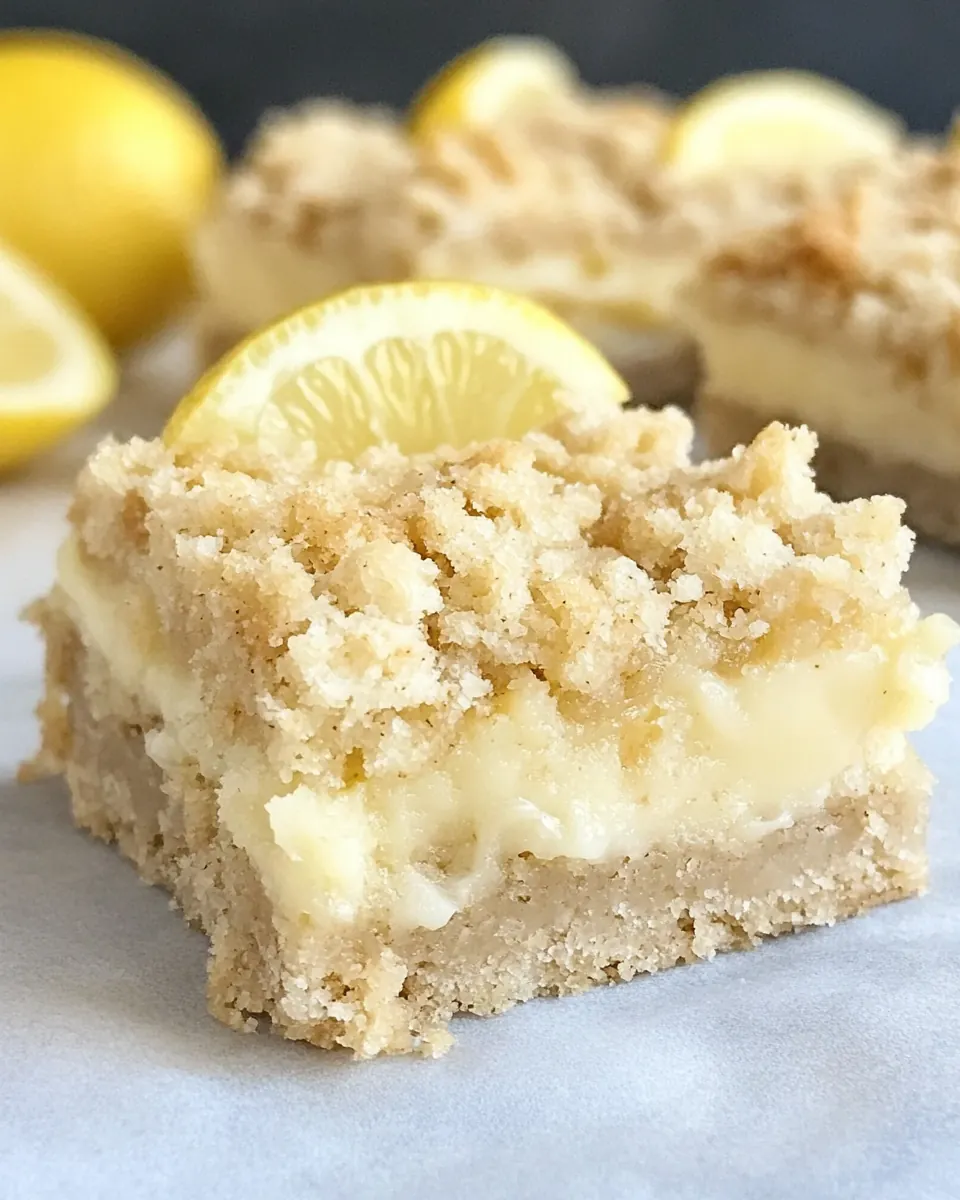
I love how Lemon Crumb Bars deliver immediate lemon perfume from the first bite, thanks to the combination of freshly squeezed lemon juice and freshly grated lemon zest. That acidic lift cuts through the sweetness of the sweetened condensed milk, keeping every square lively rather than cloying. When I serve these, guests always comment on the refreshing finish.
Texture contrast that keeps things interesting
The interplay between the crunchy, oat studded crumb and the silky lemon filling is what hooks me. The oats and the buttery crumbs become golden and slightly crisp at the edges, while the filling sets into a tender, spoonable consistency. I find the contrast makes each mouthful feel thoughtfully composed, not one note repeating itself.
Pantry friendly and approachable
Most of the ingredients in this recipe are staples, which means you can pull together Lemon Crumb Bars on short notice. The use of a 15 ounce can sweetened condensed milk is a game changer, adding creamy body without the need for complicated custard techniques. I appreciate recipes that let me cook with minimal fuss yet deliver maximum satisfaction.
Scales well for gatherings
I often double this when friends are coming over because the bars hold up well chilled and travel easily. They slice into neat squares, and the sturdiness from the crumb layer means they stack without smooshing. This reliability makes them my go to for potlucks and casual celebrations.
Simple techniques, dependable results
The method is straightforward, but the details matter. Pressing half the crumb mixture firmly into the pan creates a compact base that prevents sogginess, while leaving the top crumb loose ensures a pleasing crust after baking. These little steps are why the bars consistently come out with great texture and balance, and why I keep returning to the recipe.
Lemon Crumb Bars Ingredients
These ingredients work together with a clear purpose. The crumb components provide structure and crunch, while the condensed milk and lemon elements form a glossy, tart filling. The key players are the all purpose flour and oats that create a sturdy yet tender base, and the butter and dark brown sugar that caramelize for depth. I like to think of the list as a small team where each member has a distinct role.
- One 15-ounce can sweetened condensed milk: Provides rich, sweet creaminess and helps bind the lemon filling while adding a silky, caramel-like sweetness that balances tart lemon.
- 1/2 cup freshly squeezed lemon juice: Adds bright acidity and fresh citrus flavor that activates the condensed milk to create a tangy, custard-like filling for the bars.
- 1 teaspoon freshly grated lemon zest: Contributes concentrated lemon oil and aroma to intensify citrus notes; works with the juice to lift the filling and add freshness.
- 1 1/2 cups all purpose flour: Forms the structural base of the crust and crumb topping; provides gluten and bulk so the bars hold together when baked.
- 1 teaspoon baking powder: Leavens the mixture slightly to create a tender crumb in the crust and topping; helps produce lightness without overpowering structure.
- 1/2 teaspoons salt: Enhances flavor depth and balances sweetness; a small amount improves overall taste and brings out other ingredients' nuances.
- 2/3 cup butter, at room temperature: Adds moisture and richness to the crust and crumble; helps achieve a tender, buttery texture and aids in browning during baking.
- 1 cup packed dark brown sugar: Imparts deep molasses notes and moistness to the crumb, lending caramel-like complexity that complements the lemon filling.
- 1 cup oats: Provides rustic texture and chew in the crust and topping; contributes whole-grain flavor and helps absorb some moisture from the filling.
Cooking Method for Lemon Crumb Bars
This recipe is forgiving but benefits from mindful steps. I like to set up my bowls in an assembly line: one for the wet filling, one for dry ingredients, and one to combine the crumb. That rhythm keeps me focused and helps the process flow smoothly.
- Preheat the oven to 375°F. In a small bowl, whisk together the milk, juice and lemon zest. Set aside.: The moment you feel the warm kitchen air is key, you should notice a faint smell from the oven as it creeps toward temperature; a properly preheated oven ensures even baking and that the crumb top crisps while the filling sets. If you skip preheating, the bars may bake unevenly, resulting in underdone centers and overbrowned edges. A common mistake is putting the pan in too early, which yields an uneven texture.
- In another bowl, sift together the flour, baking powder and salt. In a third bowl, use an electric mixer to cream the butter and blend in the sugar. Add the oats and flour mixture and mix until crumbly. Spread half of the mixture in the bottom of a 9 x 12-inch greased baking pan. Pat the mixture firmly into the bottom of the pan. Spread the liquid mixture over the top and cover with the remaining crumb mixture.: The whisking releases aromatic oils from the zest and fully integrates the sweetened condensed milk with the lemon juice , creating a homogeneous, glossy filling. You should hear a soft whisking sound and see the mixture thicken slightly as air is incorporated; it will smell bright and sweet. Over mixing will not harm the mixture, but vigorously whisking for too long can introduce excess air, which may slightly change the set of the filling.
- Bake for 20 to 25 minutes or until the edges are browned. Cool in the pan at room temperature for 15 minutes.: Letting the filling rest briefly allows the flavors to meld and prevents the zest from clumping. The mixture will look cohesive and fragrant, and setting it aside also frees you to prepare the crumb layers. A typical error is leaving it uncovered near heat, which can warm it up and alter the texture; keep it at room temperature away from direct heat.
- Cut into 2-inch squares and chill in pan until firm. Remove squares from the pan when firm.: Sifting combines and aerates the all purpose flour with the leavening, ensuring an even distribution that prevents pockets of baking powder and promotes a tender crumb. You will see a lighter, lump free flour and smell a faint baked flour scent. Not sifting can cause dense spots in the crumb or uneven rising, leading to inconsistent texture.
- In a third bowl, use an electric mixer to cream the butter and blend in the sugar.: Creaming the butter with the dark brown sugar until light and fluffy incorporates air, helping the crumbs bind and bake to a tender texture. You should see the mixture become paler and slightly airy, and the sound of the mixer will change from heavy to lighter. Over beating can make the mixture too soft and greasy, which affects how the crumbs hold together when pressed.
- Add the oats and flour mixture and mix until crumbly.: Combining the dry mix with the creamed butter yields a coarse, sandy crumb studded with bits of oats . Visually, you want a mixture that holds together when pinched but falls apart easily; the aroma will become toasty and sweet. Mixing too long will develop gluten in the flour, producing a tougher crumb, so stop once you reach the crumbly texture.
- Spread half of the mixture in the bottom of a 9 x 12 inch greased baking pan.: Pressing half the crumb firmly helps create a compact base that supports the filling, and you should feel resistance under your fingers as the mixture compacts. The visual cue is an even, uniform layer without gaps. If you press too lightly, the base can crumble when slicing, and if you press too hard it may become overly dense.
- Pat the mixture firmly into the bottom of the pan.: Firm patting locks the crumbs together so they bake into a cohesive crust that will hold the filling without becoming soggy. The sound will be a muted thud as you work, and the surface should appear smooth and even. Uneven patting leads to thin spots that might become overly crisp or burn before the filling sets.
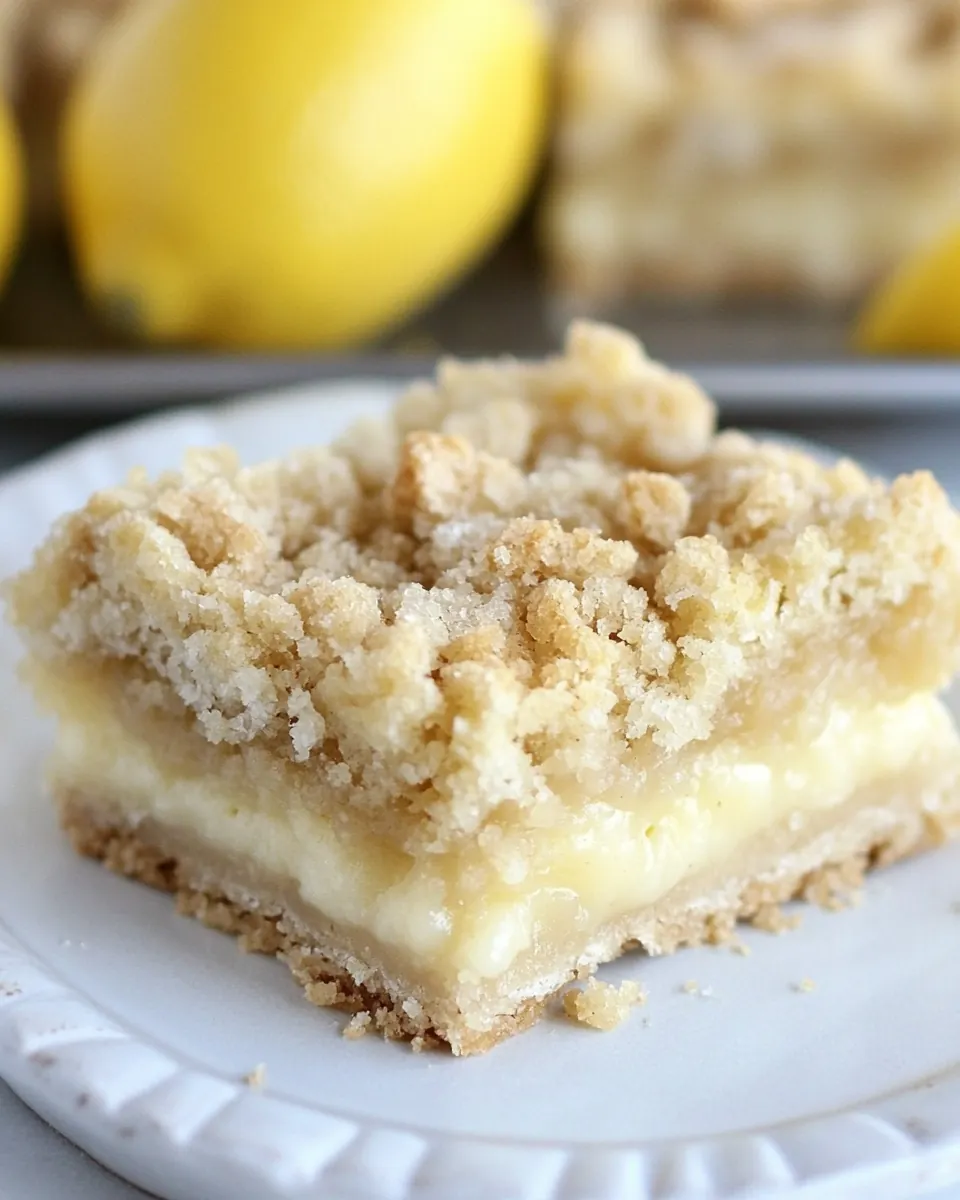
- Spread the liquid mixture over the top and cover with the remaining crumb mixture.: Pour the glossy lemon filling across the compacted base, watching it level into gentle waves, then scatter the remaining crumbs to create a rustic top layer. The filling should sit visibly beneath the top crumbs, and the contrast between glossy filling and dry crumbs is noticeable. A common pitfall is pressing the top crumbs too firmly, which will seal the filling in and prevent a pleasing textural contrast.
- Bake for 20 to 25 minutes or until the edges are browned.: As the pan bakes, you will notice the aroma shift toward caramel and citrus, and the top crumbs will develop golden spots. The edges will brown first, signaling doneness, and the center should be set but slightly jiggly. Baking too long will dry out the filling and make the bars crumbly, so aim for golden edges and a barely set center.
- Cool in the pan at room temperature for 15 minutes.: Allowing the bars to cool partially helps the filling firm up so the bars hold their shape when cut; you will feel the temperature drop and the center stabilize. This resting period also mellows the lemon intensity slightly, balancing the overall flavor. Cutting too soon is a frequent mistake, causing the filling to ooze and the bars to fall apart.
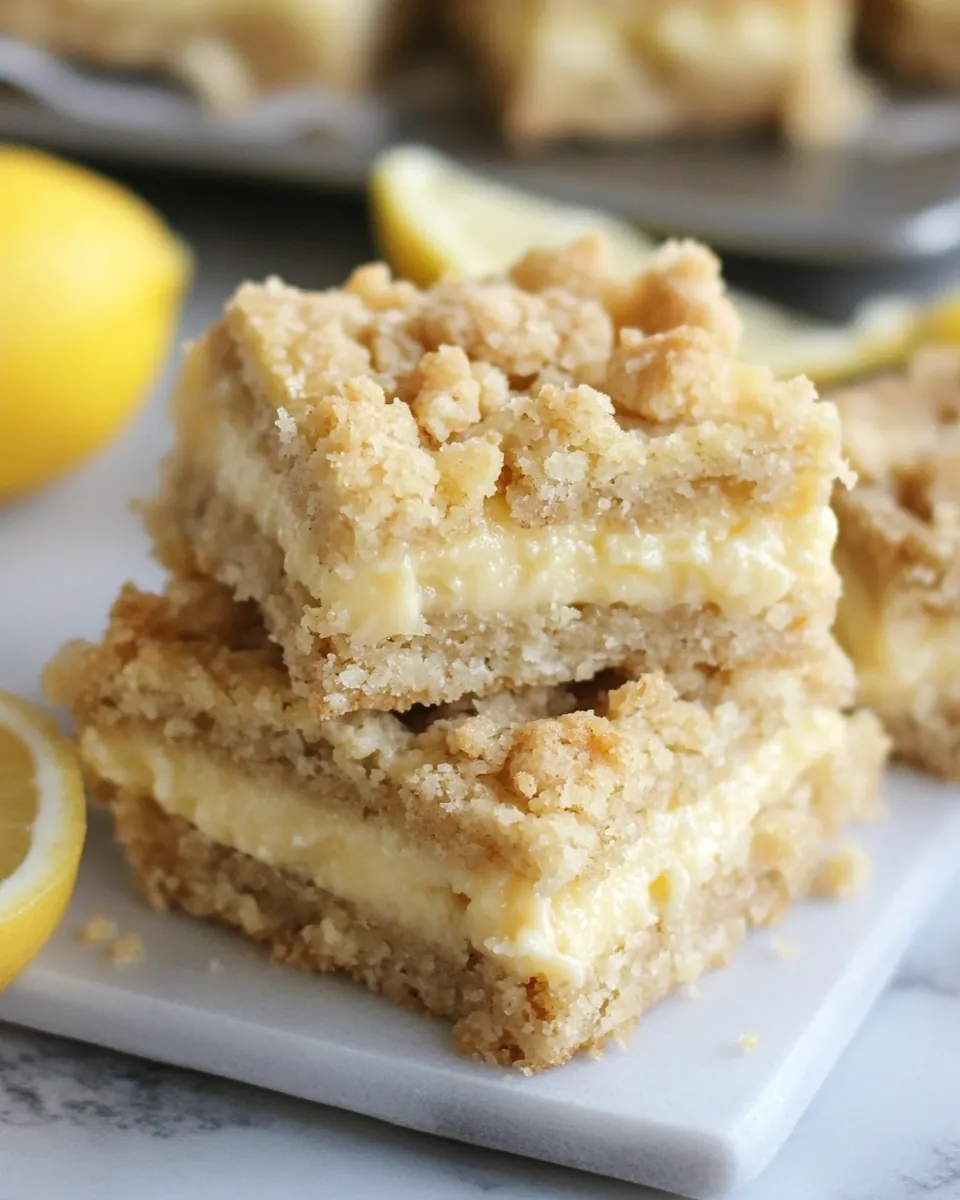
- Cut into 2 inch squares and chill in pan until firm.: Chilling sets the filling fully, making clean slicing easier and enhancing texture contrast between crumb and filling. You should hear a faint clink as you place the pan in the fridge and notice the aroma becoming less volatile. If you skip chilling, the squares may be too soft and may not hold their shape when removed.
- Remove squares from the pan when firm.: Once chilled, the squares will lift neatly and hold their structure, offering a satisfying combination of crisp edges and creamy center. Use a thin blade for clean cuts and you will appreciate the neat, layered appearance. Forcing squares out too early will break them, so patience is key.
Tips and Variations
I like to think of this section as my little toolbox for perfect bars. These tips amplify texture, flavor, and ease without changing the ingredients list. Try one or two depending on how much time you have, and you will notice the difference.
- Chill before cutting to ensure the filling has fully set, which makes slicing clean squares much easier and prevents messy edges.
- Measure flour properly by spooning into the cup and leveling off, which prevents a dry, dense crumb and helps maintain a tender texture.
- Use fresh lemons for both juice and zest; their aromatic oils and bright acidity are irreplaceable and keep the balance lively against the sweet filling.
- Grease the pan well or line it with parchment for easy removal so squares lift cleanly without breaking apart.
- Do not overbake, watch for golden edges and a slightly jiggly center to maintain a moist, tender filling rather than a dry one.
What to Serve Alongside Lemon Crumb Bars
These bars are versatile and pair beautifully with light accompaniments. I often serve them chilled with a simple beverage or alongside fresh fruit to complement their bright profile. For gatherings, presenting them on a platter with varied bites creates a pleasing contrast in texture and flavor.
- Serve chilled on a platter to highlight the creamy filling and crisp edges, making them easy to pick up at parties or casual get togethers.
- Pair with fresh berries such as raspberries or blueberries to add a natural sweetness and color contrast that complements the lemon notes.
- Offer with tea like a mild herbal or black tea, which balances the citrus without overpowering it, ideal for afternoon gatherings or dessert courses.
- Bring to potlucks in the pan and chill for transport, then slice onsite for neat presentation; they travel well and are crowd friendly.
- Store in an airtight container in the refrigerator for up to four days to maintain texture, and place parchment between layers to prevent sticking when stacking.
FAQ
Conclusion
Lemon Crumb Bars stand out for their bright citrus flavor paired with a crunchy, oat studded crust that makes every bite both refreshing and satisfying. Give these bars a try when you want a simple dessert that feels special without complicated steps, and watch how quickly they disappear at the table. They are forgiving, pantry friendly, and always welcome at casual gatherings or as a sweet finish to a homey meal.

Lemon Crumb Bars
Equipment
- 9 x 12 inch baking pan
- Electric Mixer
- Mixing Bowls
- Whisk
Ingredients
- One 15-ounce can sweetened condensed milk Provides rich, sweet creaminess and helps bind the lemon filling while adding a silky, caramel-like sweetness that balances tart lemon.
- 1/2 cup freshly squeezed lemon juice Adds bright acidity and fresh citrus flavor that activates the condensed milk to create a tangy, custard-like filling for the bars.
- 1 teaspoon freshly grated lemon zest Contributes concentrated lemon oil and aroma to intensify citrus notes; works with the juice to lift the filling and add freshness.
- 1 1/2 cups all purpose flour Forms the structural base of the crust and crumb topping; provides gluten and bulk so the bars hold together when baked.
- 1 teaspoon baking powder Leavens the mixture slightly to create a tender crumb in the crust and topping; helps produce lightness without overpowering structure.
- 1/2 teaspoons salt Enhances flavor depth and balances sweetness; a small amount improves overall taste and brings out other ingredients' nuances.
- 2/3 cup butter, at room temperature Adds moisture and richness to the crust and crumble; helps achieve a tender, buttery texture and aids in browning during baking.
- 1 cup packed dark brown sugar Imparts deep molasses notes and moistness to the crumb, lending caramel-like complexity that complements the lemon filling.
- 1 cup oats Provides rustic texture and chew in the crust and topping; contributes whole-grain flavor and helps absorb some moisture from the filling.
Instructions
- Preheat the oven to 375°F. In a small bowl, whisk together the milk, juice and lemon zest. Set aside.: The moment you feel the warm kitchen air is key, you should notice a faint smell from the oven as it creeps toward temperature; a properly preheated oven ensures even baking and that the crumb top crisps while the filling sets. If you skip preheating, the bars may bake unevenly, resulting in underdone centers and overbrowned edges. A common mistake is putting the pan in too early, which yields an uneven texture.
- In another bowl, sift together the flour, baking powder and salt. In a third bowl, use an electric mixer to cream the butter and blend in the sugar. Add the oats and flour mixture and mix until crumbly. Spread half of the mixture in the bottom of a 9 x 12-inch greased baking pan. Pat the mixture firmly into the bottom of the pan. Spread the liquid mixture over the top and cover with the remaining crumb mixture.: The whisking releases aromatic oils from the zest and fully integrates the sweetened condensed milk with the lemon juice , creating a homogeneous, glossy filling. You should hear a soft whisking sound and see the mixture thicken slightly as air is incorporated; it will smell bright and sweet. Over mixing will not harm the mixture, but vigorously whisking for too long can introduce excess air, which may slightly change the set of the filling.
- Bake for 20 to 25 minutes or until the edges are browned. Cool in the pan at room temperature for 15 minutes.: Letting the filling rest briefly allows the flavors to meld and prevents the zest from clumping. The mixture will look cohesive and fragrant, and setting it aside also frees you to prepare the crumb layers. A typical error is leaving it uncovered near heat, which can warm it up and alter the texture; keep it at room temperature away from direct heat.
- Cut into 2-inch squares and chill in pan until firm. Remove squares from the pan when firm.: Sifting combines and aerates the all purpose flour with the leavening, ensuring an even distribution that prevents pockets of baking powder and promotes a tender crumb. You will see a lighter, lump free flour and smell a faint baked flour scent. Not sifting can cause dense spots in the crumb or uneven rising, leading to inconsistent texture.
- In a third bowl, use an electric mixer to cream the butter and blend in the sugar.: Creaming the butter with the dark brown sugar until light and fluffy incorporates air, helping the crumbs bind and bake to a tender texture. You should see the mixture become paler and slightly airy, and the sound of the mixer will change from heavy to lighter. Over beating can make the mixture too soft and greasy, which affects how the crumbs hold together when pressed.
- Add the oats and flour mixture and mix until crumbly.: Combining the dry mix with the creamed butter yields a coarse, sandy crumb studded with bits of oats . Visually, you want a mixture that holds together when pinched but falls apart easily; the aroma will become toasty and sweet. Mixing too long will develop gluten in the flour, producing a tougher crumb, so stop once you reach the crumbly texture.
- Spread half of the mixture in the bottom of a 9 x 12 inch greased baking pan.: Pressing half the crumb firmly helps create a compact base that supports the filling, and you should feel resistance under your fingers as the mixture compacts. The visual cue is an even, uniform layer without gaps. If you press too lightly, the base can crumble when slicing, and if you press too hard it may become overly dense.
- Pat the mixture firmly into the bottom of the pan.: Firm patting locks the crumbs together so they bake into a cohesive crust that will hold the filling without becoming soggy. The sound will be a muted thud as you work, and the surface should appear smooth and even. Uneven patting leads to thin spots that might become overly crisp or burn before the filling sets.
- Spread the liquid mixture over the top and cover with the remaining crumb mixture.: Pour the glossy lemon filling across the compacted base, watching it level into gentle waves, then scatter the remaining crumbs to create a rustic top layer. The filling should sit visibly beneath the top crumbs, and the contrast between glossy filling and dry crumbs is noticeable. A common pitfall is pressing the top crumbs too firmly, which will seal the filling in and prevent a pleasing textural contrast.
- Bake for 20 to 25 minutes or until the edges are browned.: As the pan bakes, you will notice the aroma shift toward caramel and citrus, and the top crumbs will develop golden spots. The edges will brown first, signaling doneness, and the center should be set but slightly jiggly. Baking too long will dry out the filling and make the bars crumbly, so aim for golden edges and a barely set center.
- Cool in the pan at room temperature for 15 minutes.: Allowing the bars to cool partially helps the filling firm up so the bars hold their shape when cut; you will feel the temperature drop and the center stabilize. This resting period also mellows the lemon intensity slightly, balancing the overall flavor. Cutting too soon is a frequent mistake, causing the filling to ooze and the bars to fall apart.
- Cut into 2 inch squares and chill in pan until firm.: Chilling sets the filling fully, making clean slicing easier and enhancing texture contrast between crumb and filling. You should hear a faint clink as you place the pan in the fridge and notice the aroma becoming less volatile. If you skip chilling, the squares may be too soft and may not hold their shape when removed.
- Remove squares from the pan when firm.: Once chilled, the squares will lift neatly and hold their structure, offering a satisfying combination of crisp edges and creamy center. Use a thin blade for clean cuts and you will appreciate the neat, layered appearance. Forcing squares out too early will break them, so patience is key.
Notes
- Chill before cutting to ensure the filling has fully set, which makes slicing clean squares much easier and prevents messy edges.
- Measure flour properly by spooning into the cup and leveling off, which prevents a dry, dense crumb and helps maintain a tender texture.
- Use fresh lemons for both juice and zest; their aromatic oils and bright acidity are irreplaceable and keep the balance lively against the sweet filling.
- Grease the pan well or line it with parchment for easy removal so squares lift cleanly without breaking apart.
- Do not overbake, watch for golden edges and a slightly jiggly center to maintain a moist, tender filling rather than a dry one.