Party Roast Beef Sandwiches
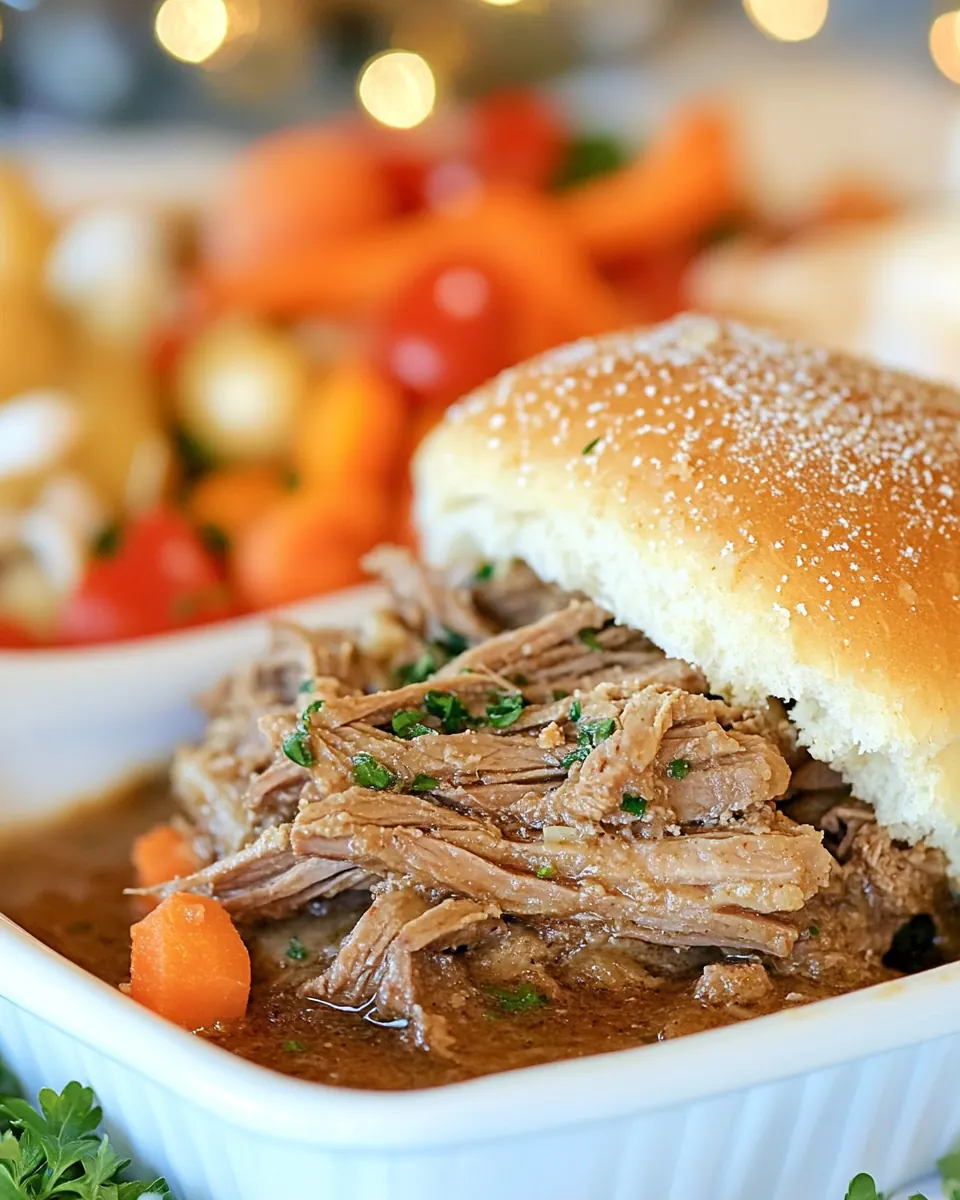
Party Roast Beef Sandwiches are the kind of handheld nostalgia I look for when guests arrive, because they combine comfort, salt, and a touch of sweetness in one bite. I remember making a pan of these for a college game night, juggling plates and cheering as everyone reached in at once. The rolls come away warm and tender, the roast beef stays juicy, and the buttery glaze soaks into the edges in the most satisfying way.
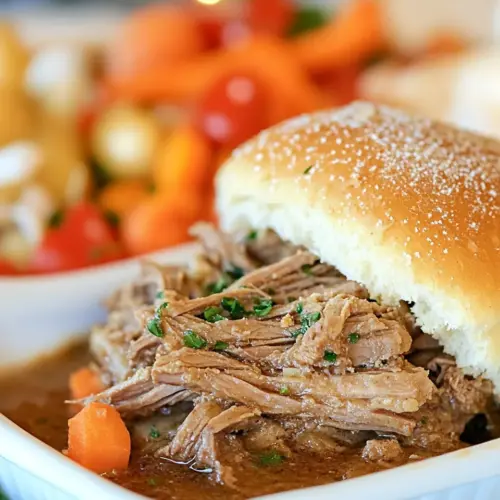
There is something about pulling apart a cluster of sliders straight from the oven that feels celebratory without fuss. Over the years I have learned little tricks that make each sandwich taste bright and layered, like a spoonful of creamy horseradish sauce tucked beneath the meat, and a scattering of poppy seeds on top to give just the right pop. When I serve these, conversation slows as people admire the caramelized tops, then speeds up again as plates empty.
Recipe Snapshot
30 mins
10 mins
20 mins
Easy
420 kcal
American
Gluten-Free, Low FODMAP
Dinner
9×13 pan, small saucepan
What Makes This Party Roast Beef Sandwiches Special
They are effortless to scale
I love that Party Roast Beef Sandwiches feed a crowd without turning the kitchen into a production line. You can double the quantities and use larger baking dishes, and the technique stays the same, so hosting feels much more relaxed.
Flavor is all in the glaze
The combination of butter, brown sugar, Worcestershire sauce, and a touch of creamy horseradish sauce gives an unforgettable savory sweet finish. I always taste the glaze as I stir it, adjusting the balance so the finished sandwiches are rich but not cloying.
Textural contrast keeps every bite interesting
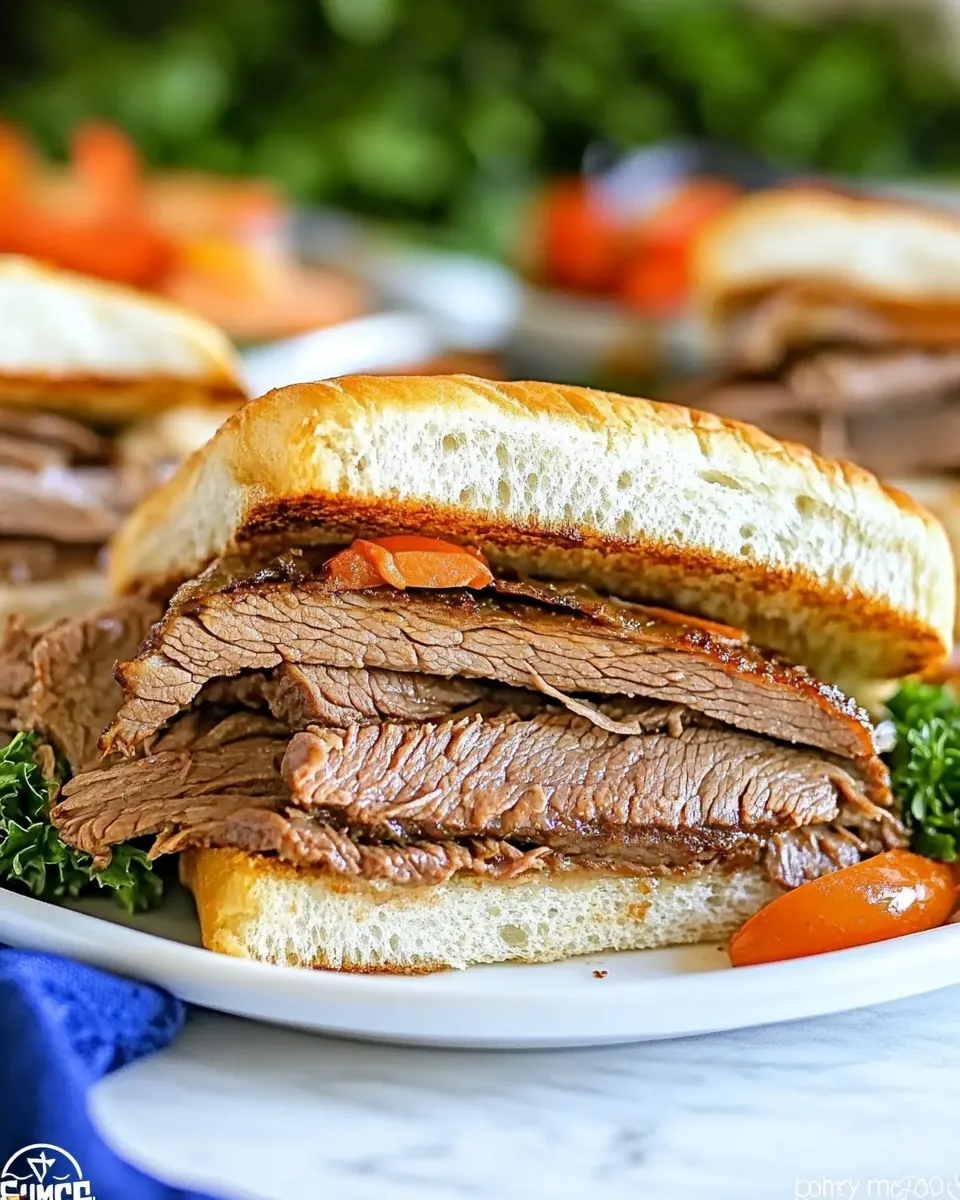
Soft King’s Hawaiian Rolls meet warm, slightly melted white American cheese and tender roast beef, while a crisp, golden top from the glaze adds crunch. That interplay is why people keep coming back for second helpings.
They work for many occasions
I have used this recipe for casual football gatherings, potlucks, and last minute family suppers. The sandwiches travel well, and reheating is forgiving, so they are a host’s reliable friend.
Minimal technique, maximum payoff
There is no fancy knife work or complicated timing, just a quick assembly and a short bake. That simplicity means even first time entertainers can produce something that feels elevated, and I find that incredibly satisfying.
Everything You Need for Party Roast Beef Sandwiches
These ingredients are chosen for harmony and speed. Soft dinner rolls cradle thinly sliced roast beef while a modest amount of creamy horseradish sauce offers a mild heat that brightens the meat. The glaze components create a glossy, slightly crunchy top that complements the melty white American cheese. Together, they balance sweet, savory, and sharp notes without requiring many pantry items.
- 1 (12-ct) package King's Hawaiian Rolls: Soft, slightly sweet Hawaiian rolls provide the sandwich vessel and a tender contrast to savory fillings; split horizontally and layered to hold roast beef and cheese while absorbing buttery glaze.
- 3/4 lb thinly sliced deli roast beef: Thinly sliced deli roast beef supplies the primary savory protein, offering rich, beefy flavor and tender texture; arrange evenly across rolls to ensure satisfying bite in every sandwich.
- 3 tbsp creamy horseradish sauce, divided: Sharp, creamy horseradish sauce adds a zesty, piquant kick and moistness to the sandwiches; divide and spread some inside for bright heat while reserving some for balancing the glaze.
- 8 slices white American cheese: Mild white American cheese melts smoothly, adding creamy, cohesive texture and mellow dairy flavor that binds the meat and roll together when warmed.
- 6 tbsp butter: Unsalted or lightly salted butter creates the base of the glossy glaze and helps brown the tops of the rolls; melt and mix with sugar and seasonings to impart richness and shine.
- 2 tbsp brown sugar: Brown sugar provides sweet depth and caramel notes to the butter glaze, balancing savory roast beef and adding a subtle molasses complexity when baked.
- 1 tbsp Worcestershire sauce: Umami-rich Worcestershire sauce contributes tangy, savory complexity and a subtle savory-sweet balance to the glaze, enhancing the overall depth of the sandwich flavor.
- 1 tbsp poppy seeds: Poppy seeds add a delicate nutty crunch and visual interest to the finished sandwiches; sprinkle on top of the glaze to complete the party-style presentation.
The Method for Party Roast Beef Sandwiches
These sandwiches come together with a short assembly and a single bake, making them wonderfully forgiving. Below I expand each instruction with sensory cues, the reason behind the technique, and troubleshooting tips so you can nail the bake every time.
- Preheat oven to 350ºF.: You will notice a warm, dry heat filling the oven as it reaches 350ºF , which is ideal for melting cheese and gently caramelizing the glaze without burning. Preheating ensures the bake time is consistent, so the tops brown evenly while the interiors heat through. A common mistake is placing the pan in a cold oven, which produces uneven melting and soggy rolls. If your oven runs hot, set it to 10 degrees lower and check early to avoid overbrowning.
- Split each dinner roll. Spread a small amount of creamy horseradish sauce on the bottom of each roll. Make a sandwich of the roast beef and cheese and the dinner rolls. Arrange the sandwiches in a 9×13 pan.: When you open the King's Hawaiian Rolls , you'll feel a pillowy interior that invites fillings. Splitting carefully keeps the bottoms intact so they can hold the roast beef and creamy horseradish sauce without tearing. This step matters because it creates a stable base and allows the glaze to soak into edges. Avoid slicing too thinly, which can make the top separate from the bottom as it bakes.
- In a small saucepan combine butter, brown sugar, 1 tbsp horseradish sauce, Worcestershire and poppy seeds. Bring to a boil and pour over sandwiches.: A thin smear of creamy horseradish sauce delivers a bright, slightly spicy note right at the center of each bite. You should taste a mild tang that contrasts nicely with the roast beef . If you apply too much, the sandwich can become overpowering and runny; too little and the flavor falls flat. Use a spoon to portion evenly so every slider has the same balance.
- Bake for 20-30 minutes, or until the tops are brown and crispy.: Layer thin slices of roast beef and a slice of white American cheese into each roll so the cheese can begin to soften against the warm meat. Visually, the cheese should wrap slightly around the meat edges, and when heated it will melt into a uniform, creamy layer. Press gently so layers stay compact; overstuffing may prevent the glaze from contacting the roll surface evenly.
- Arrange the sandwiches in a 9×13 pan.: Nestle the sliders close together in a 9×13 pan so they support one another as they bake, creating consistent steam and melting. The snug placement encourages the interiors to stay moist while the exposed tops brown. If you spread them too far apart, the edges will crisp too quickly and the centers may dry. Use a pan that allows even heat distribution for best results.
- In a small saucepan combine butter, brown sugar, 1 tbsp horseradish sauce, Worcestershire and poppy seeds.: As the butter melts, it will foam and carry the aroma of molasses from the brown sugar . Stirring melds flavors into a glossy glaze that tastes sweet, tangy, and savory all at once. This mixture matters because it creates the caramelized top that contrasts the soft roll. A common error is overheating, which can burn the sugar; keep the heat moderate and stir until everything is just combined.
- Bring to a boil and pour over sandwiches.: When the glaze reaches a gentle boil you will see tiny bubbles and a shiny surface; pouring it evenly will coat the tops and seep into the creases. The sound is a light sizzle as hot glaze meets cooler rolls. Pouring while slightly warm helps the glaze spread; if it is too hot and bubbling aggressively you risk scorching. If some spots look dry after pouring, spoon a little extra so all tops are covered.
- Bake for 20 to 30 minutes, or until the tops are brown and crispy.: During baking you will hear a subtle crackle as the glaze caramelizes and smell a warm, buttery sweetness that fills the kitchen. Look for golden to deep amber tops and slightly firm edges, and check that the cheese is melted and the centers are hot. The timing creates a contrast between a crisp exterior and a soft interior, which makes the sandwiches memorable. Avoid underbaking, which leaves the glaze gummy, and overbaking, which can dry out the roast beef . If the tops brown too quickly, tent with foil for the remaining time.
Recipe Notes about Party Roast Beef Sandwiches

These notes will help you get consistent results and make hosting easier. I include storage, reheating, and small tweaks that preserve texture and flavor when you need to scale or save leftovers.
- Storage: Store cooled, baked sliders in an airtight container in the refrigerator for up to three days, separating layers with parchment to prevent sticking.
- Reheating: Reheat in a 325 degree oven until warmed through, about 10 to 15 minutes, to maintain the crisp top and avoid soggy bread.
- Make ahead: Assemble in the pan, cover tightly, and refrigerate for a few hours before baking; add a couple of extra minutes to the bake time if chilled.
- Glaze adjustments: Taste the glaze before pouring, and if you prefer less heat, reduce the creamy horseradish sauce to 1 teaspoon and balance with a touch more butter.
- Cheese swap: If you want a slightly sharper profile, try using a different melting cheese in the same quantity, keeping in mind it will change the balance of flavors.
Side Dish Ideas for Party Roast Beef Sandwiches
These sandwiches work beautifully with simple sides that echo their comfort food roots. Below are thoughtful pairings for casual gatherings, weeknight suppers, and seasonal events, with storage and serving notes included.
- Classic coleslaw: A crisp, tangy coleslaw provides refreshing crunch and a palate cleansing contrast to the warm, buttery sliders, making it ideal for casual lunches.
- Potato chips or kettle chips: For a game day spread, crunchy chips add a salty, crispy element that complements the soft rolls and savory roast beef.
- Pickle platter: A selection of dill pickles and pickled vegetables offers bright acidity that cuts through the richness of the glaze and cheese.
- Simple green salad: A light salad dressed with lemon vinaigrette gives a fresh counterpoint, suitable for dinner occasions where you want balance on the plate.
- Late night or buffet style: Keep extra rolls and warmed meat on the side so guests can assemble their own to control portions and reheating preserves texture.
- Seasonal pairing: In fall serve with roasted root vegetable sides, while in warmer months pair with chilled pasta salad or picnic friendly sides.
- Storage tips: Leftovers keep well refrigerated for three days; reheat in the oven to retain top crispness rather than using the microwave which can soften the crust.
- Serving style: Present the pan whole for sharing, or pull sliders apart and arrange on a board for a more communal, informal feel.
- Occasions: Great for football gatherings, potlucks, family dinners, or anytime you need an easy, crowd pleasing finger food option.
- Make ahead advice: Assemble and cover in the baking dish, refrigerate, then add a few extra minutes to the bake time when ready to serve to ensure the center warms through.
FAQ
Conclusion
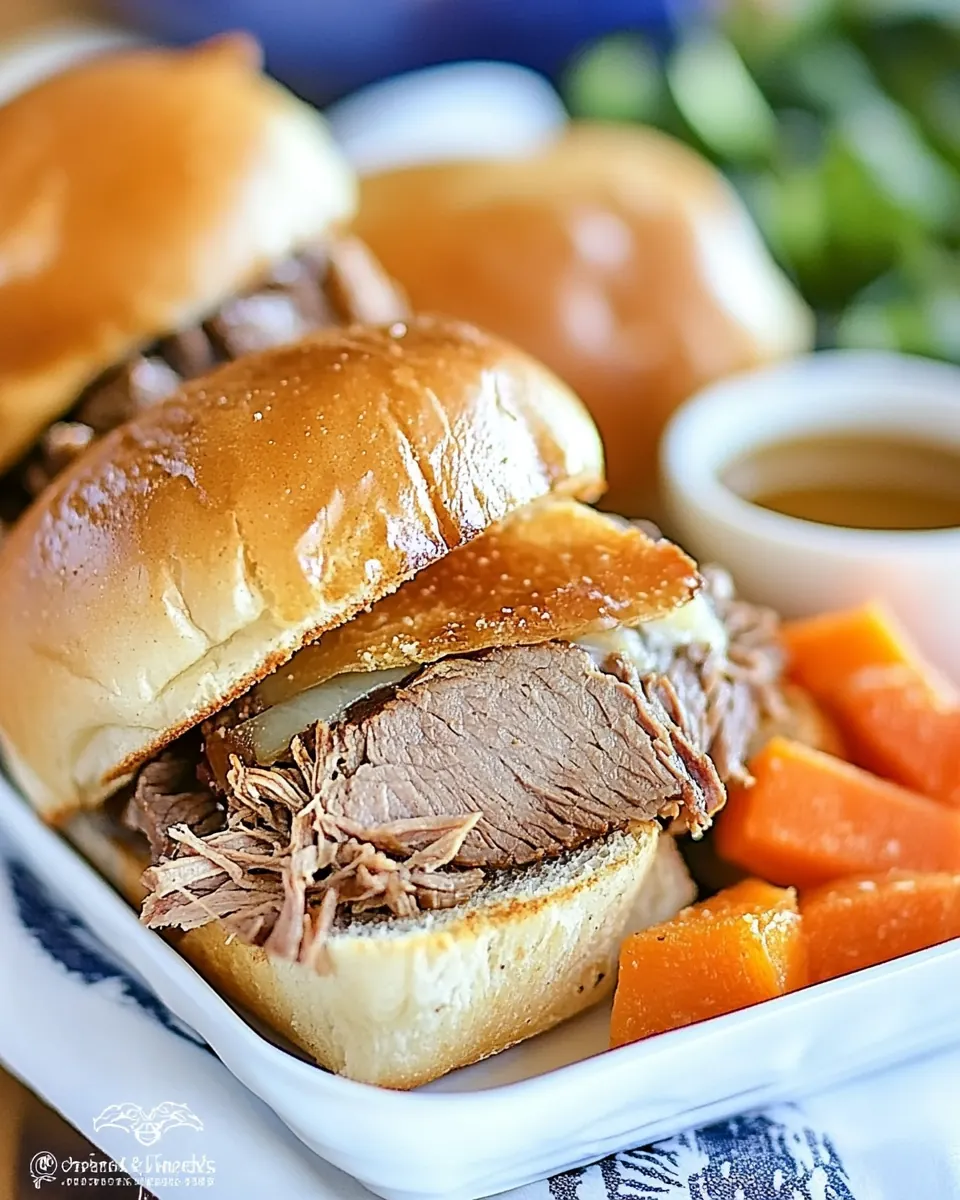
These Party Roast Beef Sandwiches shine because they blend tender roast beef, melty cheese, and a caramelized buttery glaze into handheld perfection. They are easy to assemble, scale, and serve, making them a dependable choice for gatherings big or small. Try this recipe the next time you need something crowd pleasing and comforting, and watch how quickly the pan empties as guests reach for just one more slider.
Party Roast Beef Sandwiches
Equipment
- 9x13 pan
- Small Saucepan
Ingredients
- 1 (12-ct) package King's Hawaiian Rolls Soft, slightly sweet Hawaiian rolls provide the sandwich vessel and a tender contrast to savory fillings; split horizontally and layered to hold roast beef and cheese while absorbing buttery glaze.
- 3/4 lb thinly sliced deli roast beef Thinly sliced deli roast beef supplies the primary savory protein, offering rich, beefy flavor and tender texture; arrange evenly across rolls to ensure satisfying bite in every sandwich.
- 3 tbsp creamy horseradish sauce, divided Sharp, creamy horseradish sauce adds a zesty, piquant kick and moistness to the sandwiches; divide and spread some inside for bright heat while reserving some for balancing the glaze.
- 8 slices white American cheese Mild white American cheese melts smoothly, adding creamy, cohesive texture and mellow dairy flavor that binds the meat and roll together when warmed.
- 6 tbsp butter Unsalted or lightly salted butter creates the base of the glossy glaze and helps brown the tops of the rolls; melt and mix with sugar and seasonings to impart richness and shine.
- 2 tbsp brown sugar Brown sugar provides sweet depth and caramel notes to the butter glaze, balancing savory roast beef and adding a subtle molasses complexity when baked.
- 1 tbsp Worcestershire sauce Umami-rich Worcestershire sauce contributes tangy, savory complexity and a subtle savory-sweet balance to the glaze, enhancing the overall depth of the sandwich flavor.
- 1 tbsp poppy seeds Poppy seeds add a delicate nutty crunch and visual interest to the finished sandwiches; sprinkle on top of the glaze to complete the party-style presentation.
Instructions
- Preheat oven to 350ºF.: You will notice a warm, dry heat filling the oven as it reaches 350ºF , which is ideal for melting cheese and gently caramelizing the glaze without burning. Preheating ensures the bake time is consistent, so the tops brown evenly while the interiors heat through. A common mistake is placing the pan in a cold oven, which produces uneven melting and soggy rolls. If your oven runs hot, set it to 10 degrees lower and check early to avoid overbrowning.
- Split each dinner roll. Spread a small amount of creamy horseradish sauce on the bottom of each roll. Make a sandwich of the roast beef and cheese and the dinner rolls. Arrange the sandwiches in a 9×13 pan.: When you open the King's Hawaiian Rolls , you'll feel a pillowy interior that invites fillings. Splitting carefully keeps the bottoms intact so they can hold the roast beef and creamy horseradish sauce without tearing. This step matters because it creates a stable base and allows the glaze to soak into edges. Avoid slicing too thinly, which can make the top separate from the bottom as it bakes.
- In a small saucepan combine butter, brown sugar, 1 tbsp horseradish sauce, Worcestershire and poppy seeds. Bring to a boil and pour over sandwiches.: A thin smear of creamy horseradish sauce delivers a bright, slightly spicy note right at the center of each bite. You should taste a mild tang that contrasts nicely with the roast beef . If you apply too much, the sandwich can become overpowering and runny; too little and the flavor falls flat. Use a spoon to portion evenly so every slider has the same balance.
- Bake for 20-30 minutes, or until the tops are brown and crispy.: Layer thin slices of roast beef and a slice of white American cheese into each roll so the cheese can begin to soften against the warm meat. Visually, the cheese should wrap slightly around the meat edges, and when heated it will melt into a uniform, creamy layer. Press gently so layers stay compact; overstuffing may prevent the glaze from contacting the roll surface evenly.
- Arrange the sandwiches in a 9×13 pan.: Nestle the sliders close together in a 9×13 pan so they support one another as they bake, creating consistent steam and melting. The snug placement encourages the interiors to stay moist while the exposed tops brown. If you spread them too far apart, the edges will crisp too quickly and the centers may dry. Use a pan that allows even heat distribution for best results.
- In a small saucepan combine butter, brown sugar, 1 tbsp horseradish sauce, Worcestershire and poppy seeds.: As the butter melts, it will foam and carry the aroma of molasses from the brown sugar . Stirring melds flavors into a glossy glaze that tastes sweet, tangy, and savory all at once. This mixture matters because it creates the caramelized top that contrasts the soft roll. A common error is overheating, which can burn the sugar; keep the heat moderate and stir until everything is just combined.
- Bring to a boil and pour over sandwiches.: When the glaze reaches a gentle boil you will see tiny bubbles and a shiny surface; pouring it evenly will coat the tops and seep into the creases. The sound is a light sizzle as hot glaze meets cooler rolls. Pouring while slightly warm helps the glaze spread; if it is too hot and bubbling aggressively you risk scorching. If some spots look dry after pouring, spoon a little extra so all tops are covered.
- Bake for 20 to 30 minutes, or until the tops are brown and crispy.: During baking you will hear a subtle crackle as the glaze caramelizes and smell a warm, buttery sweetness that fills the kitchen. Look for golden to deep amber tops and slightly firm edges, and check that the cheese is melted and the centers are hot. The timing creates a contrast between a crisp exterior and a soft interior, which makes the sandwiches memorable. Avoid underbaking, which leaves the glaze gummy, and overbaking, which can dry out the roast beef . If the tops brown too quickly, tent with foil for the remaining time.
Notes
- Storage: Store cooled, baked sliders in an airtight container in the refrigerator for up to three days, separating layers with parchment to prevent sticking.
- Reheating: Reheat in a 325 degree oven until warmed through, about 10 to 15 minutes, to maintain the crisp top and avoid soggy bread.
- Make ahead: Assemble in the pan, cover tightly, and refrigerate for a few hours before baking; add a couple of extra minutes to the bake time if chilled.
- Glaze adjustments: Taste the glaze before pouring, and if you prefer less heat, reduce the creamy horseradish sauce to 1 teaspoon and balance with a touch more butter.
- Cheese swap: If you want a slightly sharper profile, try using a different melting cheese in the same quantity, keeping in mind it will change the balance of flavors.