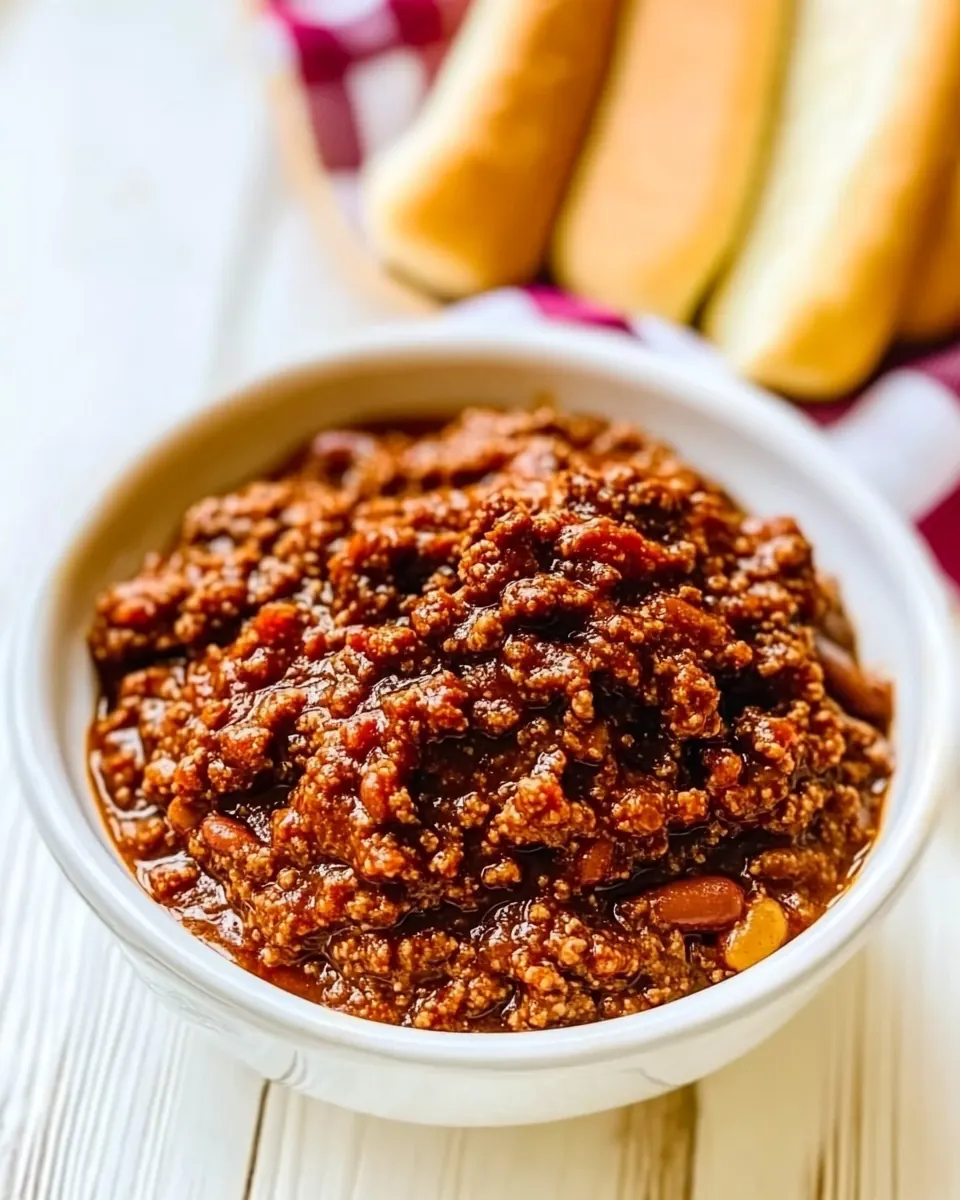
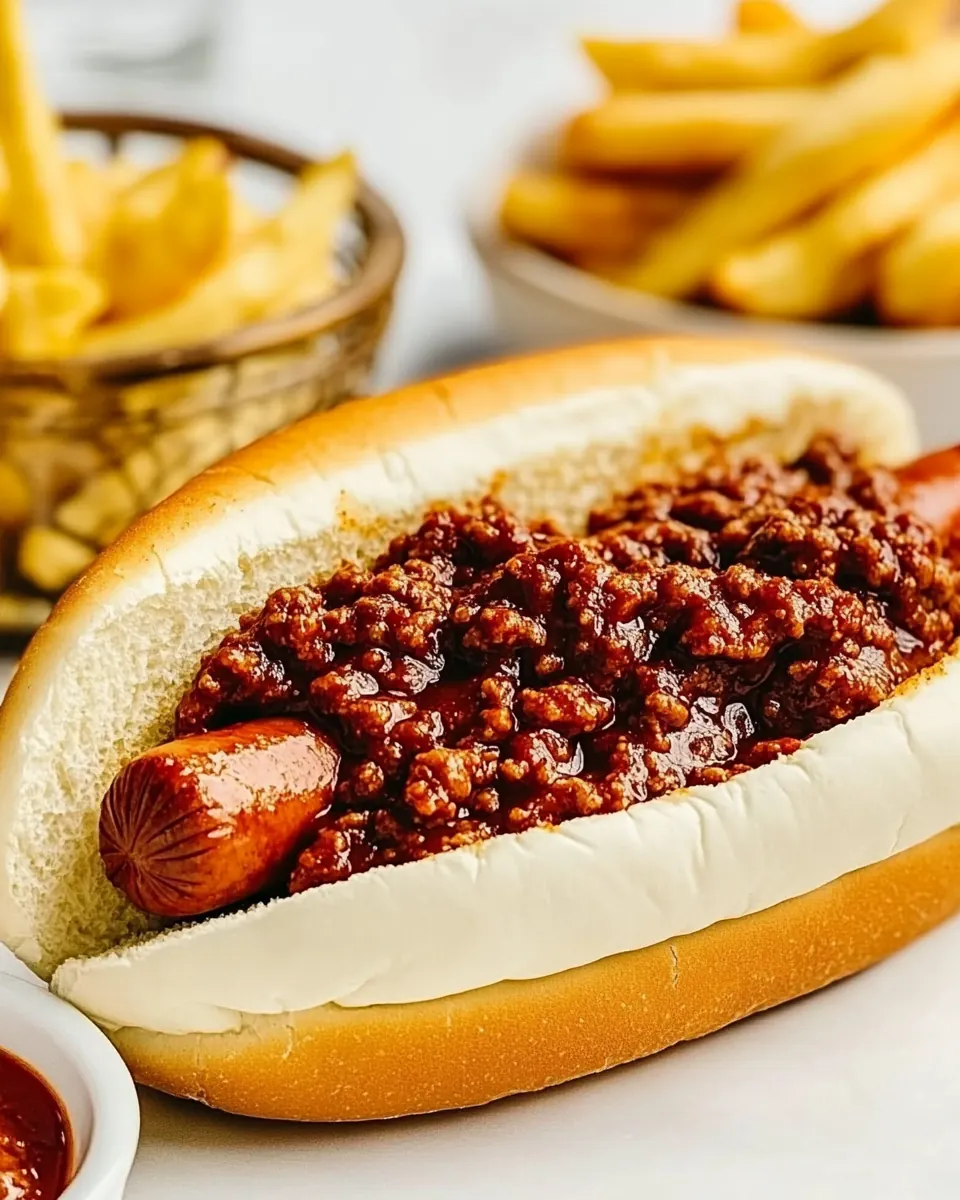
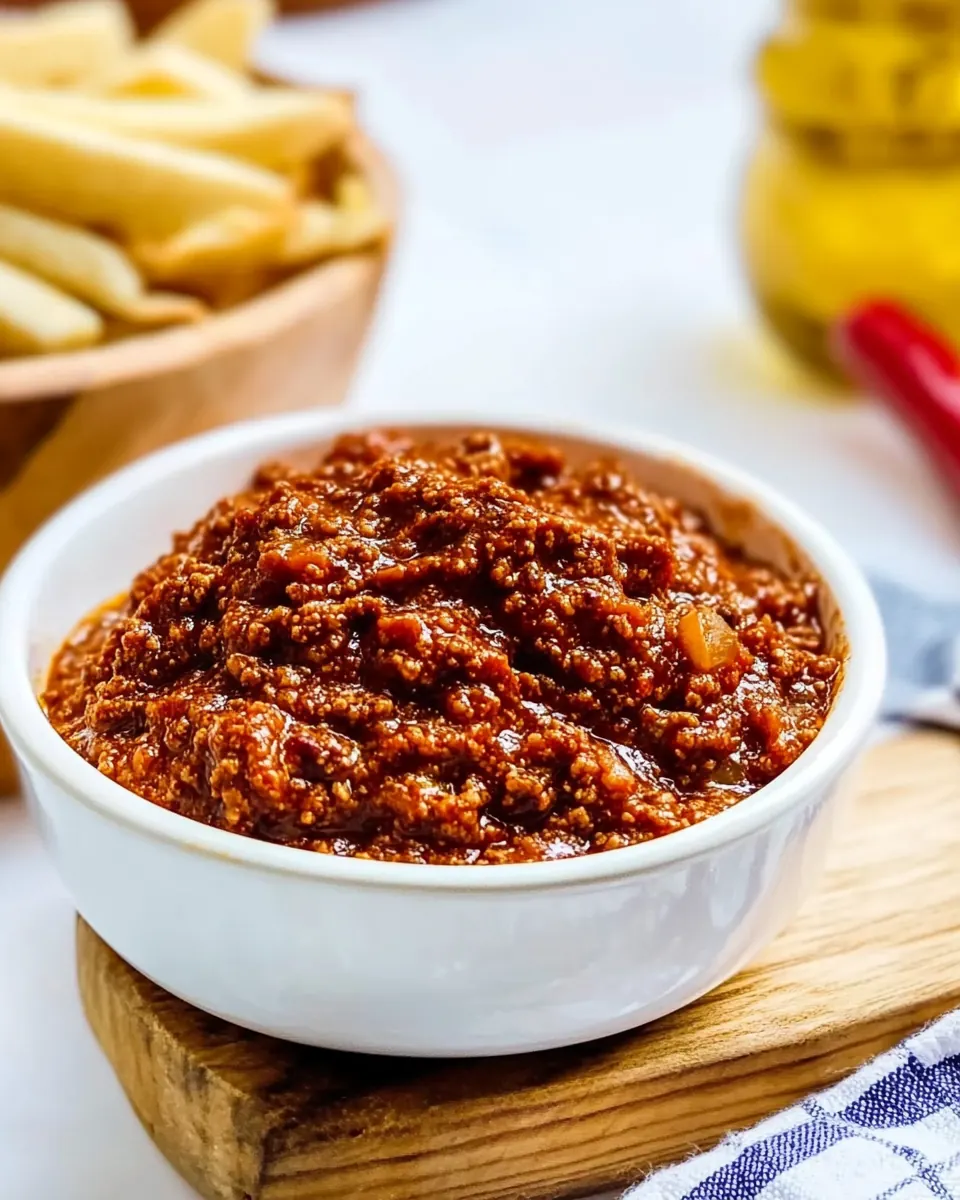
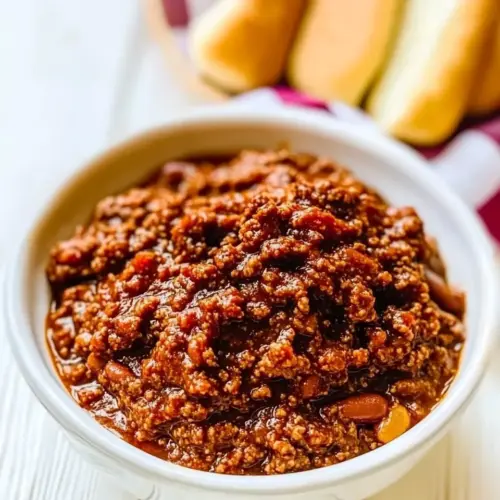
Hot Dog Chili Sauce
Hot Dog Chili Sauce is the kind of kitchen staple I reach for when a backyard evening turns spontaneous and guests arrive hungry.
I remember the first time I made this sauce, a rainy summer night had us digging through the pantry, and all I had was a pound of ground beef and a handful of spices. I started by heating a splash of oil in a skillet, and the scent of browning ground beef filled the kitchen, warm and comforting. As the mixture simmered and the flavors married, it turned into that thick, saucy condiment that takes a simple hot dog to something memorable. That night, we ended up with a plate of perfectly sauced dogs and a new family favorite.
Over time I learned little adjustments that change the texture and depth, like the right balance of ketchup and brown sugar to bring in sweetness and body, and cooking long enough for the water to evaporate so the sauce clings to buns instead of running off. I also appreciate how versatile this recipe is, whether I am feeding a crowd for game night or making a few sandwiches for a quick dinner. It stores well, and leftovers make incredible sloppy joes or a base for other dishes. Making Hot Dog Chili Sauce became a small ritual, something I return to when I want a fast, satisfying condiment that feels homemade and full of personality.
Recipe Snapshot
1 hr 40 mins
5 mins
95 mins
Medium
300 kcal
American
Gluten-Free, Keto
Dinner
Large skillet, Wooden spoon, Measuring spoons
Why This Hot Dog Chili Sauce Is a Winner
Comfort food nostalgia
I love how Hot Dog Chili Sauce instantly sparks memories of ballparks and backyard gatherings. The rich, meaty aroma and that slightly sweet, smoky tang bring comfort in the most direct way. It is an immediate mood lifter when you want to recreate an easy, casual meal that feels like home.
Simple pantry ingredients
One of the things I praise about this sauce is its accessibility. With basics like ketchup, brown sugar, and common spices, you rarely need a special trip to the store. I value recipes that reward small investments of time with big flavor returns, and this one fits that bill perfectly.
Built for texture
The long simmer until the water evaporates is what gives this sauce its signature cling. That concentrated texture is the difference between a condiment that soaks into the bun and one that stays put, delivering a perfect bite every time. I always enjoy that satisfying clump of sauce and meat on the fork.
Flexible and forgiving
I appreciate how forgiving this sauce is with spice adjustments and meat choices. You can nudge the heat up or down, swap in different brands of ketchup, or tweak sugar and Worcestershire to suit your palate. That makes it a reliable recipe when cooking for diverse tastes.
Great make ahead
This sauce improves slightly after resting in the fridge, which makes it a great candidate for prepping ahead of time. I often make a double batch so I have sauce ready for quick dinners or last minute gatherings, and it reheats beautifully.
Everything You Need for Hot Dog Chili Sauce
These ingredients are intentionally simple and complementary. The key players are the ground beef for body and mouthfeel, ketchup and brown sugar for sweetness and viscosity, and a thoughtful blend of spices for depth. Together they create a sauce that is savory, slightly sweet, and balanced, perfect for clinging to a bun or spooning over other dishes.
- 1 tablespoon oil: Heat oil to provide a nonstick surface and conduct heat, allowing other ingredients to brown evenly. Adds a slight richness and helps release flavors from spices and aromatics when sauteing.
- 1 lb ground beef: Brown ground beef thoroughly to build savory depth and develop Maillard flavors that form the base of the sauce. Break meat into small pieces while cooking so it absorbs seasonings and thickens the final texture.
- 2 tablespoons onion flakes: Rehydrate onion flakes by gently toasting or simmering to release sweet, savory notes that mimic fresh onion. Help distribute onion flavor evenly throughout the sauce without adding moisture from fresh produce.
- 1 tablespoon garlic powder: Provide concentrated garlic aroma and quick infusion when added to hot oil or liquid, offering savory pungency without chopping. Maintain shelf stability while contributing consistent garlicky warmth to the chili sauce.
- 2 1/2 teaspoons cumin: Bring warm, earthy, slightly citrusy undertones that anchor the chili profile and complement cumin-forward recipes. Enhance overall savory complexity and pair well with the beef and tomato components.
- 2 teaspoons smoked paprika: Introduce smoky, slightly sweet notes that mimic charcoal or wood smoke and add depth to the sauce's flavor profile. Balance the brightness of tomatoes and ketchup while supporting the savory meat base.
- 1 1/2 teaspoons paprika: Add mild, sweet pepper flavor to round out the smokier paprika, boosting color and a subtle peppery sweetness. Provide background warmth that blends seamlessly with other spices.
- 1/2 teaspoon salt: Season the sauce to bring out natural flavors and control taste balance by moderating sweetness and acidity. Help intensify savory elements and ensure the final product is palatable and well-rounded.
- 1/2 teaspoon black pepper: Contribute a sharp, aromatic bite that lifts flavors and adds subtle heat when combined with other spices. Aid in balancing richness from the meat and sugars for a more dynamic sauce.
- 1/2 teaspoon dried thyme: Impart a delicate herbal note with slightly minty and lemony tones, enhancing savory complexity without overpowering other spices. Blend with oregano and thyme to evoke traditional stew-like aromatics.
- 1/2 teaspoon dried oregano: Offer Mediterranean herbiness with a slightly bitter, earthy character that supports the meat and tomato flavors. Combine with thyme to create a rounded herbal backdrop for the chili sauce.
- 1/4 teaspoon cayenne pepper: Deliver concentrated heat and pungency to elevate the sauce's spice level with just a small amount. Provide a sharp, lingering warmth that complements the other chilies and seasonings.
- pinch red pepper flakes: Provide scattered bursts of heat and visual texture, intensifying spiciness selectively for those who prefer piquant notes. Allow diners to experience occasional hotter bites without overwhelming the whole sauce.
- 2 1/2 cups water: Add liquid to create the proper sauce consistency, allowing spices to bloom and ingredients to simmer together while integrating flavors. Control cooking time and final thickness through reduction and simmering.
- 1 cup ketchup: Contribute sweet-tangy tomato flavor, body, and color while acting as the primary tomato component in the sauce. Bind other ingredients together and offer familiar ketchup sweetness that balances spices and meat.
- 1/4 cup brown sugar: Introduce deep caramel sweetness and molasses notes that counterbalance acidity and add complexity to the sauce's flavor profile. Help create a glossy, slightly sticky texture and mellow the tomato tang.
- 1/4 cup Worcestershire sauce: Provide umami-rich, savory depth with tangy and slightly sweet characteristics that enhance meatiness and round out flavors. Act as a concentrated seasoning liquid that complements ketchup and brown sugar.
How to Assemble Hot Dog Chili Sauce
These directions focus on developing deep flavor through browning and patient reduction. Follow the steps in order so the sauce builds complexity and reaches the right thickness. Keep an eye on the pan and taste as you go, adjusting seasoning at the end.
- Pour the oil into a large skillet or frying pan and heat over medium heat.: You will notice the oil shimmer when it is hot enough, and that is the cue to move quickly. The warmth readies the surface for proper contact with the ground beef , helping it to brown instead of steam. Browning creates those savory, caramelized notes that define the sauce. One common mistake is overheating the oil until it smokes, which imparts a bitter taste, so keep the heat steady at medium.
- Add the ground/minced beef and cook for 6 minutes. Use a wooden spoon or spatula to break the meat apart as you brown it.: As the meat hits the hot oil, it should sizzle audibly, releasing meaty aromas. Use a wooden spoon to break it apart and ensure even contact with the hot pan so you get a consistent golden color. Proper browning intensifies savory flavors and creates fond on the pan that will dissolve into the sauce. Avoid crowding the pan, or the beef will steam and miss out on that signature color.
- Add the onion flakes, garlic powder, cumin, smoked paprika, paprika, salt, black pepper, dried thyme, dried oregano, cayenne pepper, and red pepper flakes. Stir well to coat the beef in the spices.: The tool helps you separate the meat into small pieces that will hold sauce better. You should hear a gentle sizzle and watch the beef change to an even, rich brown. Breaking the meat properly exposes more surface area for flavor development, which elevates the final texture. A common slip is stirring too often, which prevents the meat from forming browned bits.
- Add the water and stir until well combined with the spiced meat. Bring the mixture to a simmer, then reduce the heat to low and cook, uncovered, for 60-70 minutes or until all the water has evaporated.: When you sprinkle the spices and onion flakes into the hot skillet, the aroma will lift immediately; that is the spices blooming and releasing essential oils. This step layers flavor and infuses the meat so every bite is seasoned. Stir thoroughly so the spices coat the meat evenly rather than clumping. A frequent error is adding spices too late, which leaves them tasting raw and less integrated.
- Add the ketchup, brown sugar, and Worcestershire sauce.: You will see the meat take on a deeper color and the pan start to smell richly spiced. This melding is crucial because it ensures the heat from each spice interacts with the rendered fat, unlocking more complex notes. Keep stirring until the mixture looks uniform. If you skip thorough mixing, pockets of overly salty or bitter flavors can form.
- Simmer for 15-20 minutes, stirring frequently, until the sauce has thickened fully.: The water lifts the browned bits from the pan and becomes the medium in which flavor will concentrate. As it warms, you will smell the spices and meat integrating into a broth. Bringing this to a simmer then reducing the heat lets the flavors marry slowly. Rushing this stage with very high heat can cause uneven reduction and potential scorching.
- Bring the mixture to a simmer, then reduce the heat to low and cook, uncovered, for 60 to 70 minutes or until all the water has evaporated.: During this long simmer you will see the liquid gradually reduce and the sauce deepen in color, becoming thicker and more cohesive. The gentle bubbling rhythm signals that flavors are concentrating and the texture is transitioning from loose to clingy. Stir occasionally to prevent sticking, and watch the pan edges for signs of sticking which means your heat is too high. A typical mistake is skipping this patience; under-reduced sauce will be watery and not adhere to a bun.
- Add the ketchup, brown sugar, and Worcestershire sauce.: As you fold these into the concentrated meat, the sauce will instantly become richer and glossier, and a sweet tang will balance the savory base. The sweetness tames acidity and the Worcestershire introduces savory umami, making the profile rounder. Mix thoroughly so these binders distribute evenly. Not fully combining them can create uneven pockets of sweetness.
- Simmer for 15 to 20 minutes, stirring frequently, until the sauce has thickened fully.: At this final simmer you should hear a gentle simmer and see the sauce coat the back of a spoon, indicating the right viscosity. The aroma will be layered and slightly sweet with savory depth. Frequent stirring prevents the concentrated sugars from sticking and burning on the pan bottom. A common pitfall is turning the heat up to hurry reduction, which often results in scorching and a bitter aftertaste.
Helpful Hints
These tips are based on experience and aim to help you get consistent, delicious results every time. I expand on each note so you can avoid common pitfalls and maximize flavor.
- Choose the right beef Choose ground beef with about 15 percent fat for the best texture and flavor. The rendered fat helps the spices bloom and gives the sauce a satisfying mouthfeel. Leaner beef can make the finished sauce taste drier, so if you only have extra lean, consider a slightly shorter reduction time to retain moisture.
- Control the heat Maintain a steady medium to low simmer during reduction. Too high heat speeds evaporation but risks burning and uneven flavors. If you smell anything bitter, immediately lower the heat and stir to remove stuck bits from the pan surface.
- Bloom the spices Let the dried spices and onion flakes sit briefly in the warm pan with the meat so their oils release. This step magnifies aroma and deepens flavor. Avoid adding them to cold meat, as that will mute their impact.
- Measure the sweet balance Brown sugar adds depth, not just sweetness. If you prefer less sweetness, reduce the brown sugar slightly and taste after simmering to adjust. Remember, flavor concentrates during reduction, so small adjustments now become more pronounced later.
- Use a sturdy skillet A heavy bottom pan promotes even heat distribution and reduces the chance of hot spots that burn the sauce. Thin pans often lead to uneven cooking and more frequent stirring to prevent scorching.
- Watch the final thickness The sauce should cling to a spoon and not be runny. If it becomes too thick, add a splash of warm water and simmer briefly to loosen it. If too thin, keep simmering gently until you hit that clingy texture.
- Store and reheat gently Cool the sauce before refrigerating and reheat over low heat, stirring to restore texture. Rapid reheating can cause separation or concentrated scorching at the pan bottom.
Best Served With
This sauce is incredibly versatile and works for many occasions and side pairings. Below I outline serving ideas, storage notes, and occasions where it shines.
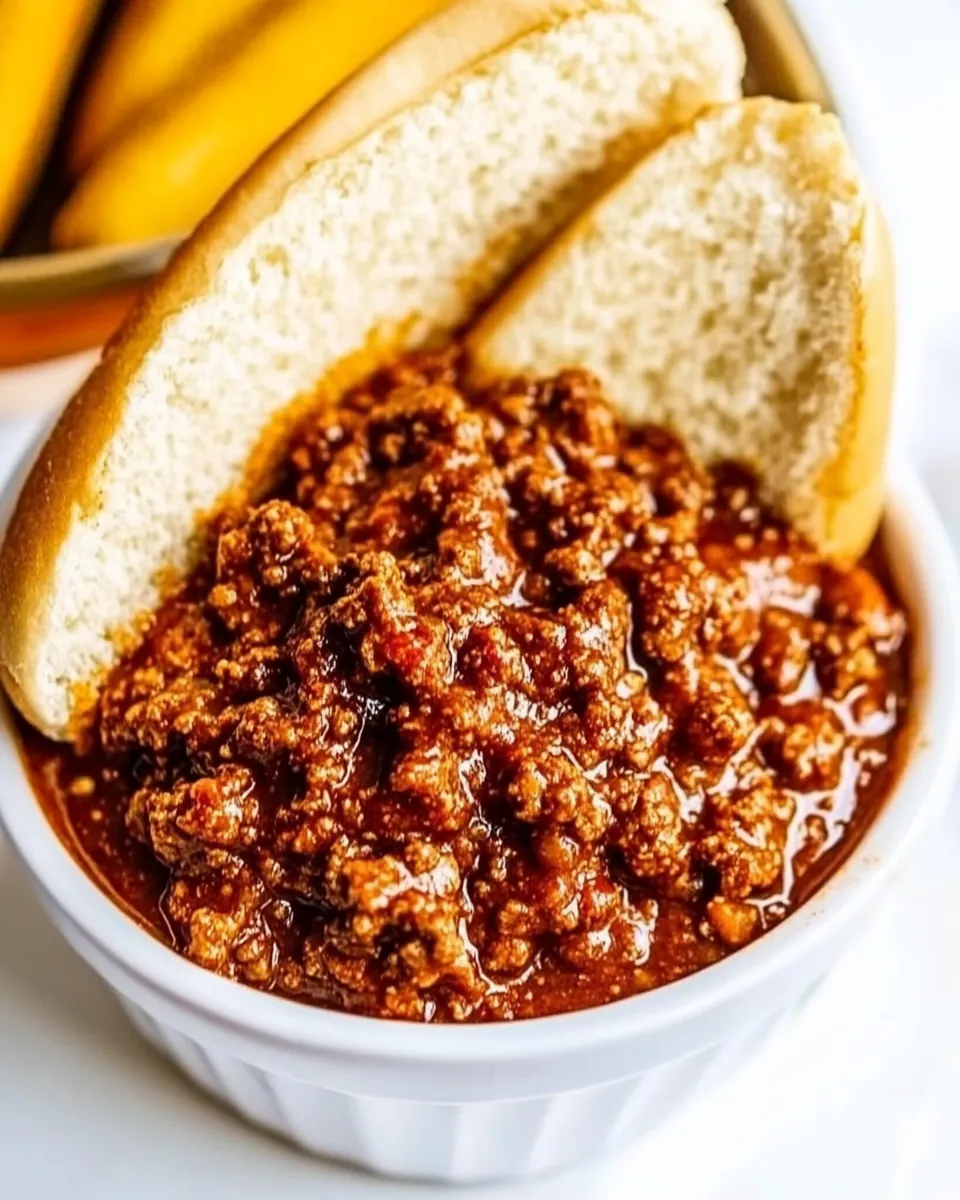
- Classic hot dogs Spoon the sauce generously over grilled or boiled hot dogs in soft buns for a traditional presentation. The sauce clings well and brings a savory, slightly sweet counterpoint to the bun.
- Sandwiches and sloppy joes Use the sauce as a filling for toasted rolls to make hearty sandwiches or sloppy joes. It is ideal for casual lunches or easy weeknight dinners when you need a filling, hands on meal.
- Game day and gatherings Keep a pot warm on the stove or in a slow cooker to serve at parties. It pairs perfectly with finger foods and makes feeding a crowd simple and satisfying. Offer condiments like chopped onions or shredded cheese alongside for customization.
- Storage tips Refrigerate cooled sauce in an airtight container for up to four days. For longer storage, freeze portions in freezer-safe containers for up to three months. Thaw overnight in the fridge and reheat gently to preserve texture.
- Seasonal pairings In summer, serve with grilled sausages and fresh buns for outdoor cookouts. In cooler months, consider spooning the sauce over baked potatoes or using it in warming casseroles for comfort food dinners.
- Occasion ideas Great for casual family dinners, tailgates, or holiday buffet tables where easy, crowd-pleasing options are needed. Its make ahead nature also makes it handy during busy festive seasons.
FAQ
Conclusion
What makes this recipe special is its ability to transform simple pantry staples into a richly flavored, clingy sauce that elevates everyday hot dogs and sandwiches. The long, patient reduction concentrates flavors and gives you that satisfying texture that stays on the bun. Give this sauce a try the next time you need an easy, crowd friendly condiment, and consider making a double batch so you always have a quick, flavorful option on hand. It is one of those recipes that reliably delivers comfort and nostalgia with minimal fuss, and I think you will find it becomes a go to in your rotation.
Hot Dog Chili Sauce
Equipment
- Large Skillet
- Wooden Spoon
- Measuring Spoons
Ingredients
- 1 tablespoon oil Heat oil to provide a nonstick surface and conduct heat, allowing other ingredients to brown evenly. Adds a slight richness and helps release flavors from spices and aromatics when sauteing.
- 1 lb ground beef Brown ground beef thoroughly to build savory depth and develop Maillard flavors that form the base of the sauce. Break meat into small pieces while cooking so it absorbs seasonings and thickens the final texture.
- 2 tablespoons onion flakes Rehydrate onion flakes by gently toasting or simmering to release sweet, savory notes that mimic fresh onion. Help distribute onion flavor evenly throughout the sauce without adding moisture from fresh produce.
- 1 tablespoon garlic powder Provide concentrated garlic aroma and quick infusion when added to hot oil or liquid, offering savory pungency without chopping. Maintain shelf stability while contributing consistent garlicky warmth to the chili sauce.
- 2 1/2 teaspoons cumin Bring warm, earthy, slightly citrusy undertones that anchor the chili profile and complement cumin-forward recipes. Enhance overall savory complexity and pair well with the beef and tomato components.
- 2 teaspoons smoked paprika Introduce smoky, slightly sweet notes that mimic charcoal or wood smoke and add depth to the sauce's flavor profile. Balance the brightness of tomatoes and ketchup while supporting the savory meat base.
- 1 1/2 teaspoons paprika Add mild, sweet pepper flavor to round out the smokier paprika, boosting color and a subtle peppery sweetness. Provide background warmth that blends seamlessly with other spices.
- 1/2 teaspoon salt Season the sauce to bring out natural flavors and control taste balance by moderating sweetness and acidity. Help intensify savory elements and ensure the final product is palatable and well-rounded.
- 1/2 teaspoon black pepper Contribute a sharp, aromatic bite that lifts flavors and adds subtle heat when combined with other spices. Aid in balancing richness from the meat and sugars for a more dynamic sauce.
- 1/2 teaspoon dried thyme Impart a delicate herbal note with slightly minty and lemony tones, enhancing savory complexity without overpowering other spices. Blend with oregano and thyme to evoke traditional stew-like aromatics.
- 1/2 teaspoon dried oregano Offer Mediterranean herbiness with a slightly bitter, earthy character that supports the meat and tomato flavors. Combine with thyme to create a rounded herbal backdrop for the chili sauce.
- 1/4 teaspoon cayenne pepper Deliver concentrated heat and pungency to elevate the sauce's spice level with just a small amount. Provide a sharp, lingering warmth that complements the other chilies and seasonings.
- pinch red pepper flakes Provide scattered bursts of heat and visual texture, intensifying spiciness selectively for those who prefer piquant notes. Allow diners to experience occasional hotter bites without overwhelming the whole sauce.
- 2 1/2 cups water Add liquid to create the proper sauce consistency, allowing spices to bloom and ingredients to simmer together while integrating flavors. Control cooking time and final thickness through reduction and simmering.
- 1 cup ketchup Contribute sweet-tangy tomato flavor, body, and color while acting as the primary tomato component in the sauce. Bind other ingredients together and offer familiar ketchup sweetness that balances spices and meat.
- 1/4 cup brown sugar Introduce deep caramel sweetness and molasses notes that counterbalance acidity and add complexity to the sauce's flavor profile. Help create a glossy, slightly sticky texture and mellow the tomato tang.
- 1/4 cup Worcestershire sauce Provide umami-rich, savory depth with tangy and slightly sweet characteristics that enhance meatiness and round out flavors. Act as a concentrated seasoning liquid that complements ketchup and brown sugar.
Instructions
- Pour the oil into a large skillet or frying pan and heat over medium heat.: You will notice the oil shimmer when it is hot enough, and that is the cue to move quickly. The warmth readies the surface for proper contact with the ground beef , helping it to brown instead of steam. Browning creates those savory, caramelized notes that define the sauce. One common mistake is overheating the oil until it smokes, which imparts a bitter taste, so keep the heat steady at medium.
- Add the ground/minced beef and cook for 6 minutes. Use a wooden spoon or spatula to break the meat apart as you brown it.: As the meat hits the hot oil, it should sizzle audibly, releasing meaty aromas. Use a wooden spoon to break it apart and ensure even contact with the hot pan so you get a consistent golden color. Proper browning intensifies savory flavors and creates fond on the pan that will dissolve into the sauce. Avoid crowding the pan, or the beef will steam and miss out on that signature color.
- Add the onion flakes, garlic powder, cumin, smoked paprika, paprika, salt, black pepper, dried thyme, dried oregano, cayenne pepper, and red pepper flakes. Stir well to coat the beef in the spices.: The tool helps you separate the meat into small pieces that will hold sauce better. You should hear a gentle sizzle and watch the beef change to an even, rich brown. Breaking the meat properly exposes more surface area for flavor development, which elevates the final texture. A common slip is stirring too often, which prevents the meat from forming browned bits.
- Add the water and stir until well combined with the spiced meat. Bring the mixture to a simmer, then reduce the heat to low and cook, uncovered, for 60-70 minutes or until all the water has evaporated.: When you sprinkle the spices and onion flakes into the hot skillet, the aroma will lift immediately; that is the spices blooming and releasing essential oils. This step layers flavor and infuses the meat so every bite is seasoned. Stir thoroughly so the spices coat the meat evenly rather than clumping. A frequent error is adding spices too late, which leaves them tasting raw and less integrated.
- Add the ketchup, brown sugar, and Worcestershire sauce.: You will see the meat take on a deeper color and the pan start to smell richly spiced. This melding is crucial because it ensures the heat from each spice interacts with the rendered fat, unlocking more complex notes. Keep stirring until the mixture looks uniform. If you skip thorough mixing, pockets of overly salty or bitter flavors can form.
- Simmer for 15-20 minutes, stirring frequently, until the sauce has thickened fully.: The water lifts the browned bits from the pan and becomes the medium in which flavor will concentrate. As it warms, you will smell the spices and meat integrating into a broth. Bringing this to a simmer then reducing the heat lets the flavors marry slowly. Rushing this stage with very high heat can cause uneven reduction and potential scorching.
- Bring the mixture to a simmer, then reduce the heat to low and cook, uncovered, for 60 to 70 minutes or until all the water has evaporated.: During this long simmer you will see the liquid gradually reduce and the sauce deepen in color, becoming thicker and more cohesive. The gentle bubbling rhythm signals that flavors are concentrating and the texture is transitioning from loose to clingy. Stir occasionally to prevent sticking, and watch the pan edges for signs of sticking which means your heat is too high. A typical mistake is skipping this patience; under-reduced sauce will be watery and not adhere to a bun.
- Add the ketchup, brown sugar, and Worcestershire sauce.: As you fold these into the concentrated meat, the sauce will instantly become richer and glossier, and a sweet tang will balance the savory base. The sweetness tames acidity and the Worcestershire introduces savory umami, making the profile rounder. Mix thoroughly so these binders distribute evenly. Not fully combining them can create uneven pockets of sweetness.
- Simmer for 15 to 20 minutes, stirring frequently, until the sauce has thickened fully.: At this final simmer you should hear a gentle simmer and see the sauce coat the back of a spoon, indicating the right viscosity. The aroma will be layered and slightly sweet with savory depth. Frequent stirring prevents the concentrated sugars from sticking and burning on the pan bottom. A common pitfall is turning the heat up to hurry reduction, which often results in scorching and a bitter aftertaste.
Notes
- Choose the right beef Choose ground beef with about 15 percent fat for the best texture and flavor. The rendered fat helps the spices bloom and gives the sauce a satisfying mouthfeel. Leaner beef can make the finished sauce taste drier, so if you only have extra lean, consider a slightly shorter reduction time to retain moisture.
- Control the heat Maintain a steady medium to low simmer during reduction. Too high heat speeds evaporation but risks burning and uneven flavors. If you smell anything bitter, immediately lower the heat and stir to remove stuck bits from the pan surface.
- Bloom the spices Let the dried spices and onion flakes sit briefly in the warm pan with the meat so their oils release. This step magnifies aroma and deepens flavor. Avoid adding them to cold meat, as that will mute their impact.
- Measure the sweet balance Brown sugar adds depth, not just sweetness. If you prefer less sweetness, reduce the brown sugar slightly and taste after simmering to adjust. Remember, flavor concentrates during reduction, so small adjustments now become more pronounced later.
- Use a sturdy skillet A heavy bottom pan promotes even heat distribution and reduces the chance of hot spots that burn the sauce. Thin pans often lead to uneven cooking and more frequent stirring to prevent scorching.
- Watch the final thickness The sauce should cling to a spoon and not be runny. If it becomes too thick, add a splash of warm water and simmer briefly to loosen it. If too thin, keep simmering gently until you hit that clingy texture.
- Store and reheat gently Cool the sauce before refrigerating and reheat over low heat, stirring to restore texture. Rapid reheating can cause separation or concentrated scorching at the pan bottom.