Homemade Spreadable Butter
Homemade Spreadable Butter is one of those small kitchen luxuries that changes how you think about bread, toast, and simple snacks.
I still remember the first time I whipped up this creamy blend on a sleepy Saturday morning, standing at my counter with a steaming mug of tea and a loaf of crusty bread. The process felt oddly soothing, the softening butter, the gentle hum of the food processor, and the bright, glossy ribbon of oil as it folded into the butter. That morning I learned how comforting it is to have a tub of spreadable butter in the fridge, ready to transform even the humblest slice into something comforting.
Over the years I’ve played with oils and salts, and this version, with its balance of avocado oil and unsalted butter, has become my go to when I want a fridge ready spread that stays scoopable. I keep a jar in the fridge for quick breakfasts, and another in the picnic basket for impromptu outdoor meals. It’s simple, reliable, and the texture makes everything from toast to steamed vegetables feel special.
Recipe Snapshot
1 hr 35 mins
5 mins
90 mins
Medium
100 kcal
American
Keto, Gluten-Free
Appetizers
Food Processor
Why You’ll Love This Homemade Spreadable Butter
Silky, spreadable texture every time
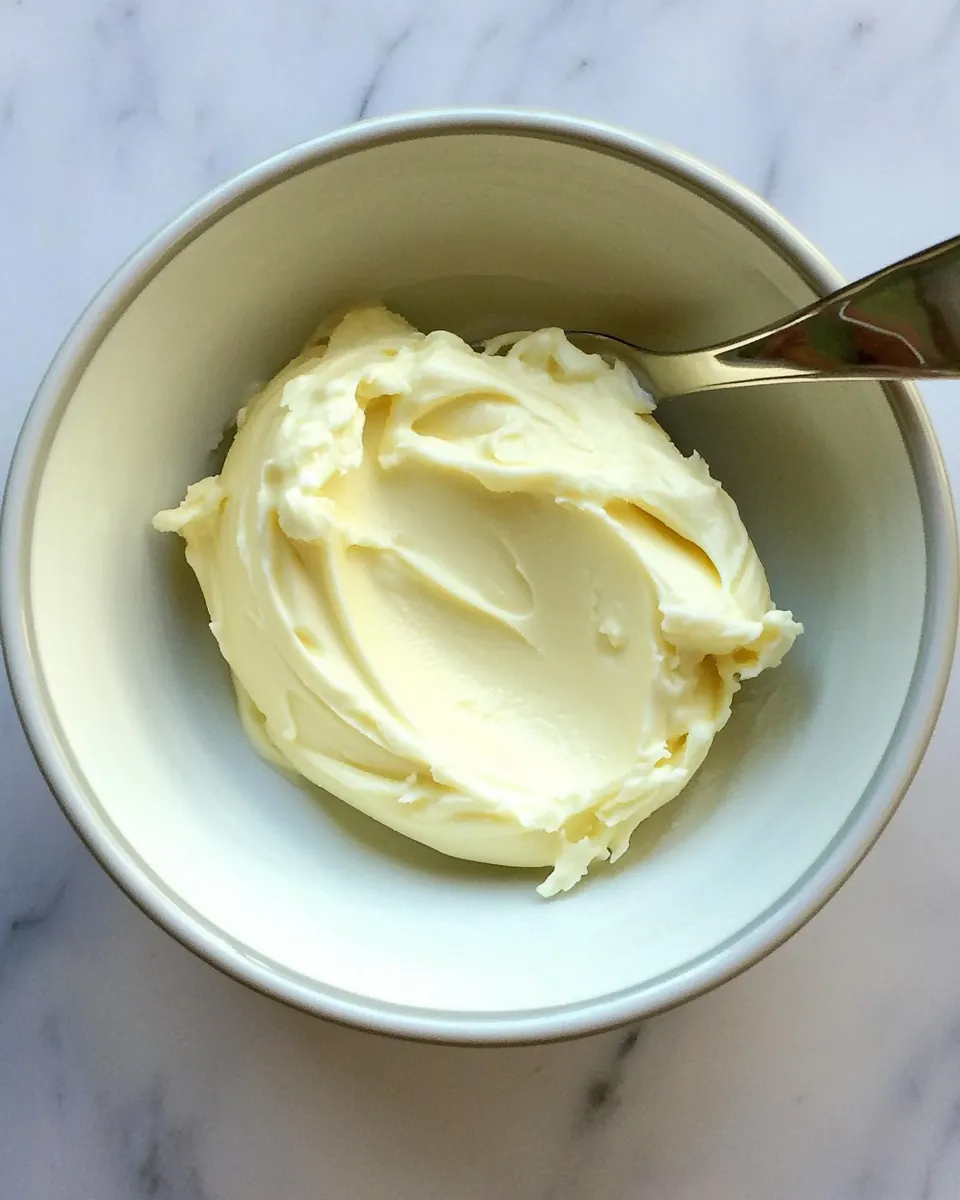
I love how Homemade Spreadable Butter solves the annoying fridge rock problem. By blending unsalted butter with avocado oil, the result keeps a scoopable softness straight from the refrigerator, so you get creamy mouthfeel without a soggy melt. The texture is smooth, glossy, and visually inviting, which makes everyday meals feel cared for.
Control over flavor and salt
Making this at home lets me control the seasoning and fat profile. The recipe calls for salt to taste, so I can keep it light for delicate dishes or a touch briny for heartier uses. Because I choose my butter, I can pick higher quality dairy, which noticeably brightens the overall flavor.
Versatility across meals
We use this Homemade Spreadable Butter on morning toast, warm rolls, and for finishing steamed vegetables. It also shines when tossed with warm pasta or melted into mashed potatoes, giving a silky mouthfeel. The consistency makes it wonderful for spreading, dolloping, and melting evenly.
Long fridge life and convenience
One of the practical wins is shelf life. Kept sealed in the refrigerator, this spread keeps well for weeks. I appreciate having something ready to go, especially on busy mornings when I want a satisfying bite without fuss. That dependable convenience keeps me coming back to this simple homemade staple.
Simple technique, big payoff
This recipe uses basic tools and minimal steps, yet delivers a gourmet touch to everyday food. The technique is forgiving, and small adjustments in oil amount or salt let you tailor the final result. I find the ease of making it yourself adds a satisfying sense of craft to my kitchen routine.
Everything You Need for Homemade Spreadable Butter
The philosophy behind these ingredients is straightforward: a few high quality components combine to create a creamy, stable spread. The unsalted butter provides rich dairy flavor and structure, the avocado oil keeps the texture soft and pliable straight from the fridge, and a pinch of salt brightens and balances the profile. Each element plays a specific role: fat, texture, and seasoning, yielding something versatile and reliably delicious.
- 1 cup unsalted butter (I prefer organic): Softens and provides the creamy base for the spreadable butter, contributing fat, body, and rich mouthfeel; chill slightly before blending to achieve a smooth emulsion when combined with oil and salt.
- 3/4 cup avocado oil (you may substitute a neutral-flavored or buttery-flavored olive oil): Adds lightness and fluidity to the butter, creating a spreadable texture and helping to suspend flavors; choose a neutral or buttery–flavored oil to complement without overpowering.
- 1/4 teaspoons ea salt, or to taste: Balances and enhances overall flavor, drawing out buttery and savory notes while allowing adjustment to personal taste; dissolve evenly into the softened butter for consistent seasoning.
Step by Step Guide for Homemade Spreadable Butter
This guide walks you through the method I use every time I make Homemade Spreadable Butter. Keep your tools nearby and work with the sensory cues described to get perfect consistency and flavor.
- Let the butter slowly come to room temperature. To speed this process, cut the butter into small chunks and separate them from each other. Do not try to speed things up in the microwave, even at half power… you’ll change the texture of the butter.: As you begin, you will notice the butter soften; it will yield under gentle pressure and the edges will lose their rigid shape. The softened butter smells fresh and slightly sweet, a sign that the fats are ready to blend. This gentle softening helps the butter emulsify with the oil rather than separating. Avoid rushing this by microwaving, because uneven warming creates grainy texture and can break the emulsion. A common mistake is trying to melt it, which leads to oily separation rather than a smooth spread.
- Place the room temperature butter into a food processor along with the oil and sea salt.: When you chop the butter into pieces you increase surface area so it warms evenly, which shortens wait time without overheating. The small chunks will feel cool but pliable, and your hands will quickly sense when they are ready for the processor. The visual cue is uniform softness across pieces. Do not crowd the pieces together, because trapped cold spots slow warming and make blending inconsistent.
- Process the butter, oil and salt for 1-2 minutes, scraping the sides of the processor periodically, till all lumps have disappeared and the mixture is smooth and soft. It will be quite liquid, but don't worry, it will firm up in the fridge.: Microwaving can create pockets of melted fat and pockets of still cold solids, producing a lumpy or grainy final product. The smell might shift slightly as fats heat unevenly, and the texture becomes harder to control. If you notice any melted puddles, chill and rework rather than proceeding, since rushing here often ruins the emulsion. Many people err by assuming quicker is better, but patience preserves smoothness.
- Pour the softened butter into a container that can be sealed airtight (like a Tupperware). Refrigerate for 1-2 hours until fully chilled and firm.: As the ingredients meet, you will hear the processor hum and see ribbons of butter and oil fold together. The aroma of the dairy will lift while the oil adds a glossy sheen. Starting with room temperature butter ensures the avocado oil disperses evenly and the salt dissolves into the mixture. If you use cold butter, the processor will strain, and the blend may remain chunky; if overly warm, it will separate.
- This Homemade Spreadable Butter will last up to 3 months in the refrigerator. It is spreadable straight from the refrigerator. Do not leave the butter at room temperature too long or it will start to separate. If this happens, you can stir the oil back into the butter before refrigerating again.: As you process, watch for a silky, homogeneous texture and a pale, glossy color. The sound of the motor will change slightly as the mixture smooths, and you will smell the rich butter come forward. This step is about building a stable emulsion, so periodic scraping ensures no pockets of unblended butter remain. If you underestimate the time, lumps will persist; if you overwork at high heat, the mixture may warm too much and separate, so pulse and check frequently.
- It will be quite liquid, but don't worry, it will firm up in the fridge: Right after blending the mixture will pour easily and have a shiny, almost satiny texture. This liquidity is normal, the oil and butter are fully combined and the fat matrix will solidify as it cools. You can judge readiness by the sheen and absence of visible lumps. A mistake to avoid is assuming liquid means failed emulsion; chilling is the intended step to set the texture.
- Pour the softened butter into a container that can be sealed airtight (like a Tupperware): Transfer while the mixture is still pourable, paying attention to keeping the container clean and dry. The airtight seal prevents the spread from absorbing fridge odors and helps it keep longer. Listen for the soft plop as the mixture settles into the container, and smooth the surface with a spatula if you want a neat presentation. Leaving air gaps can speed oxidation, so fill thoughtfully.
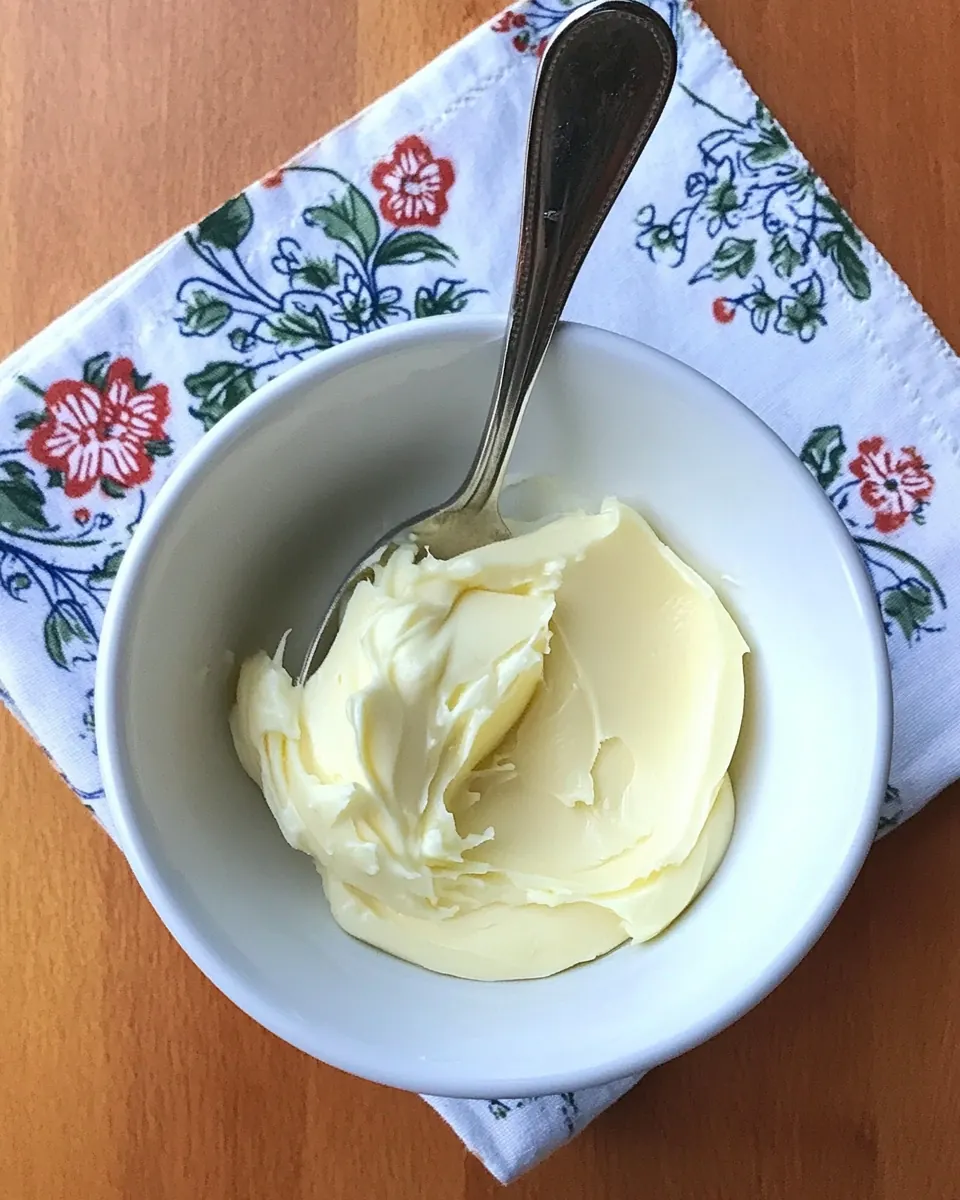
- Refrigerate for 1-2 hours until fully chilled and firm: During chilling, the fats recrystallize and the texture becomes scoopable but stable, giving you the ideal spreadability. You will notice the surface lose sheen and become more matte as it firms. Chilling also lets flavors meld, so salt distributes evenly. A common error is not chilling long enough, which results in overly soft consistency; conversely over chilling is fine, but you may prefer a short rest for easier scooping.
- This Homemade Spreadable Butter will last up to 3 months in the refrigerator: Stored properly, it keeps well and maintains flavor and texture. You will see a consistent pale color and the spread will remain smooth when scooped. Check occasionally for any off smells; proper sealing and refrigeration are key for longevity. A pitfall is leaving it out too long between uses, which can lead to separation and a thin film of oil on top.
- It is spreadable straight from the refrigerator: When you take it out, the spread should glide across toast without dragging, and it will impart an even, creamy coating. The tactile sensation is smooth and slightly cool, perfect for immediate use. If you find separation after a long rest, simply stir the oil back in before resealing. Avoid leaving it at room temperature for extended periods, as that invites separation and potential spoilage.
Recipe Variations about Homemade Spreadable Butter
You can tailor Homemade Spreadable Butter to your pantry and preferences. Below are ideas to vary texture and flavor while keeping the basic method intact. Each tip begins with a bold opener to highlight the variation.
- Use neutral oil – Swap avocado oil for a neutral oil if you want a cleaner buttery flavor without any green notes.
- Try a buttery olive oil – A buttery flavored olive oil will add depth and a hint of fruitiness that complements toast and vegetables.
- Adjust salt to taste – Start with the listed amount of salt and increase carefully after chilling to avoid over seasoning.
- Portion into small tubs – Divide the spread into smaller containers so you only open what you need, keeping the rest fresher longer.
- Firm up for piping – Chill slightly longer if you want a firmer texture suitable for piping decorative shapes onto rolls.
- Make ahead for gatherings – Prepare jars a few days in advance to simplify hosting, the flavors will marry nicely in the fridge.
Serve This Homemade Spreadable Butter With
This spread brings everyday foods up a notch and fits many occasions. Whether you are serving a casual breakfast or assembling a picnic, this butter is versatile and ready to elevate simple plates. Below are detailed pairing ideas and serving suggestions rendered as a list for easy reference.
- Warm bread and toast – Slather generously on warm slices for immediate enjoyment, the cool creamy texture against hot bread is wonderfully satisfying.
- Rolls at dinner – Serve a small crock at the table for family style dinners, guests can help themselves to add richness to rolls and buns.
- Vegetable finishing – Add a spoonful to steamed or roasted vegetables for an instant glossy finish and flavor lift.
- Pasta finishing – Toss a bit into hot pasta for a silky coating when you want a quick, rich sauce without cream.
- Picnics and gatherings – Bring a sealed container to outdoor meals; it spreads easily on crackers and bread and keeps well chilled in a cooler.
- Storage tips – Keep in an airtight container in the fridge for up to three months; for longer storage, freeze in small portions and thaw as needed.
FAQ
Conclusion
What makes this recipe special is its elegant simplicity, producing a silky, scoopable spread from just three ingredients. Try this version of Homemade Spreadable Butter to elevate everyday bread, rolls, and vegetables with minimal effort. It’s quick to prepare, customizable, and reliable, so you’ll find yourself reaching for it often. Give it a go and keep a tub in the fridge to make ordinary bites feel thoughtfully prepared and delicious.
Homemade Spreadable Butter
Equipment
- Food Processor
Ingredients
- 1 cup unsalted butter (I prefer organic) Softens and provides the creamy base for the spreadable butter, contributing fat, body, and rich mouthfeel; chill slightly before blending to achieve a smooth emulsion when combined with oil and salt.
- 3/4 cup avocado oil (you may substitute a neutral-flavored or buttery-flavored olive oil) Adds lightness and fluidity to the butter, creating a spreadable texture and helping to suspend flavors; choose a neutral or buttery-flavored oil to complement without overpowering.
- 1/4 teaspoons ea salt, or to taste Balances and enhances overall flavor, drawing out buttery and savory notes while allowing adjustment to personal taste; dissolve evenly into the softened butter for consistent seasoning.
Instructions
- Let the butter slowly come to room temperature. To speed this process, cut the butter into small chunks and separate them from each other. Do not try to speed things up in the microwave, even at half power... you’ll change the texture of the butter.: As you begin, you will notice the butter soften; it will yield under gentle pressure and the edges will lose their rigid shape. The softened butter smells fresh and slightly sweet, a sign that the fats are ready to blend. This gentle softening helps the butter emulsify with the oil rather than separating. Avoid rushing this by microwaving, because uneven warming creates grainy texture and can break the emulsion. A common mistake is trying to melt it, which leads to oily separation rather than a smooth spread.
- Place the room temperature butter into a food processor along with the oil and sea salt.: When you chop the butter into pieces you increase surface area so it warms evenly, which shortens wait time without overheating. The small chunks will feel cool but pliable, and your hands will quickly sense when they are ready for the processor. The visual cue is uniform softness across pieces. Do not crowd the pieces together, because trapped cold spots slow warming and make blending inconsistent.
- Process the butter, oil and salt for 1-2 minutes, scraping the sides of the processor periodically, till all lumps have disappeared and the mixture is smooth and soft. It will be quite liquid, but don't worry, it will firm up in the fridge.: Microwaving can create pockets of melted fat and pockets of still cold solids, producing a lumpy or grainy final product. The smell might shift slightly as fats heat unevenly, and the texture becomes harder to control. If you notice any melted puddles, chill and rework rather than proceeding, since rushing here often ruins the emulsion. Many people err by assuming quicker is better, but patience preserves smoothness.
- Pour the softened butter into a container that can be sealed airtight (like a Tupperware). Refrigerate for 1-2 hours until fully chilled and firm.: As the ingredients meet, you will hear the processor hum and see ribbons of butter and oil fold together. The aroma of the dairy will lift while the oil adds a glossy sheen. Starting with room temperature butter ensures the avocado oil disperses evenly and the salt dissolves into the mixture. If you use cold butter, the processor will strain, and the blend may remain chunky; if overly warm, it will separate.
- This Homemade Spreadable Butter will last up to 3 months in the refrigerator. It is spreadable straight from the refrigerator. Do not leave the butter at room temperature too long or it will start to separate. If this happens, you can stir the oil back into the butter before refrigerating again.: As you process, watch for a silky, homogeneous texture and a pale, glossy color. The sound of the motor will change slightly as the mixture smooths, and you will smell the rich butter come forward. This step is about building a stable emulsion, so periodic scraping ensures no pockets of unblended butter remain. If you underestimate the time, lumps will persist; if you overwork at high heat, the mixture may warm too much and separate, so pulse and check frequently.
- It will be quite liquid, but don't worry, it will firm up in the fridge: Right after blending the mixture will pour easily and have a shiny, almost satiny texture. This liquidity is normal, the oil and butter are fully combined and the fat matrix will solidify as it cools. You can judge readiness by the sheen and absence of visible lumps. A mistake to avoid is assuming liquid means failed emulsion; chilling is the intended step to set the texture.
- Pour the softened butter into a container that can be sealed airtight (like a Tupperware): Transfer while the mixture is still pourable, paying attention to keeping the container clean and dry. The airtight seal prevents the spread from absorbing fridge odors and helps it keep longer. Listen for the soft plop as the mixture settles into the container, and smooth the surface with a spatula if you want a neat presentation. Leaving air gaps can speed oxidation, so fill thoughtfully.
- Refrigerate for 1-2 hours until fully chilled and firm: During chilling, the fats recrystallize and the texture becomes scoopable but stable, giving you the ideal spreadability. You will notice the surface lose sheen and become more matte as it firms. Chilling also lets flavors meld, so salt distributes evenly. A common error is not chilling long enough, which results in overly soft consistency; conversely over chilling is fine, but you may prefer a short rest for easier scooping.
- This Homemade Spreadable Butter will last up to 3 months in the refrigerator: Stored properly, it keeps well and maintains flavor and texture. You will see a consistent pale color and the spread will remain smooth when scooped. Check occasionally for any off smells; proper sealing and refrigeration are key for longevity. A pitfall is leaving it out too long between uses, which can lead to separation and a thin film of oil on top.
- It is spreadable straight from the refrigerator: When you take it out, the spread should glide across toast without dragging, and it will impart an even, creamy coating. The tactile sensation is smooth and slightly cool, perfect for immediate use. If you find separation after a long rest, simply stir the oil back in before resealing. Avoid leaving it at room temperature for extended periods, as that invites separation and potential spoilage.
Notes
- Use neutral oil - Swap avocado oil for a neutral oil if you want a cleaner buttery flavor without any green notes.
- Try a buttery olive oil - A buttery flavored olive oil will add depth and a hint of fruitiness that complements toast and vegetables.
- Adjust salt to taste - Start with the listed amount of salt and increase carefully after chilling to avoid over seasoning.
- Portion into small tubs - Divide the spread into smaller containers so you only open what you need, keeping the rest fresher longer.
- Firm up for piping - Chill slightly longer if you want a firmer texture suitable for piping decorative shapes onto rolls.
- Make ahead for gatherings - Prepare jars a few days in advance to simplify hosting, the flavors will marry nicely in the fridge.