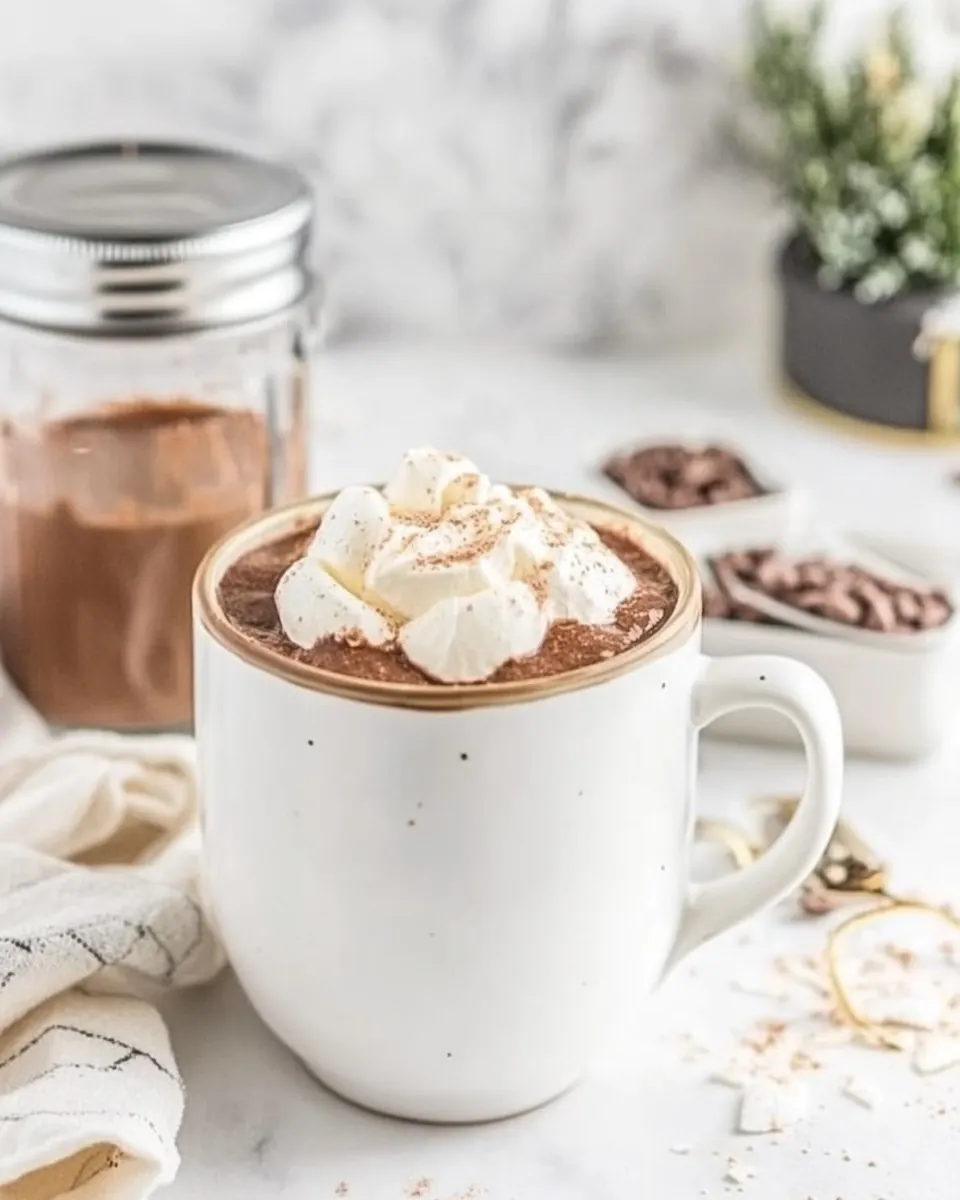
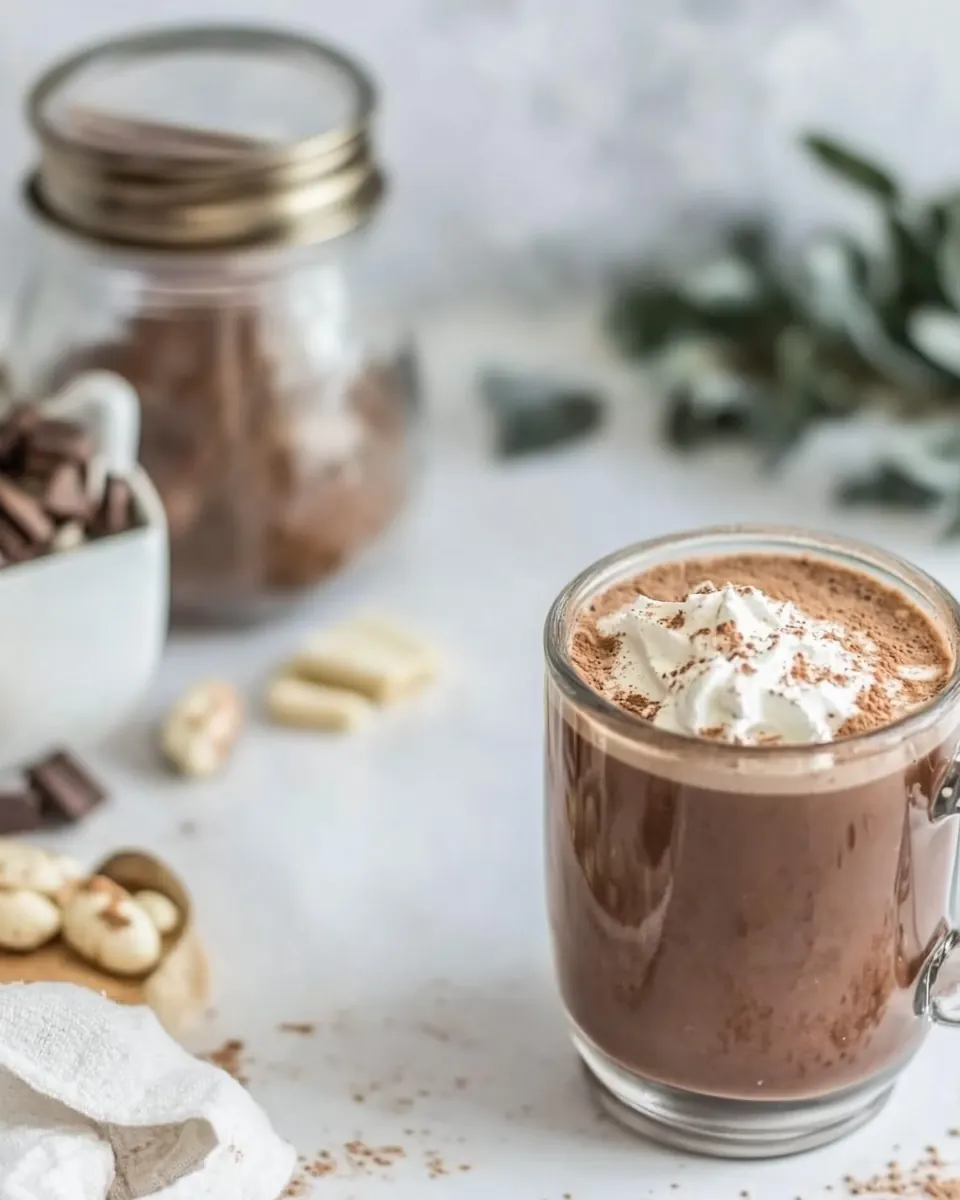
Homemade Hot Chocolate Mix
Homemade Hot Chocolate Mix is one of those recipes I keep on a low shelf in the pantry for nights when I want something comforting but perfectly controlled, and I still remember the first time I ground chunks of unsweetened chocolate into a soft powder, the kitchen filling with a warm, deep aroma that felt like a soft blanket. I made a big batch that day because friends were coming over for an impromptu movie night, and serving mugs of steaming mix stretched a little joy across the evening.
That batch taught me how simple it is to make a mix that tastes richer than anything from a packet, yet stores nicely so you can pull it out anytime. Over the years I have tweaked amounts and learned small tricks, but the heart of this recipe remains the same: good chocolate, straight cocoa, and a hint of salt to sharpen the flavors. When I make it now, I think about those late nights when a warm cup felt like an invitation to slow down.
Recipe Snapshot
8 mins
5 mins
3 mins
Easy
210 kcal
American
Gluten-Free, Low FODMAP
Desserts
Food processor, Small saucepan, Whisk, Airtight container
The Appeal of This Homemade Hot Chocolate Mix
Deep Chocolate Without the Fuss
I love that Homemade Hot Chocolate Mix delivers a deep chocolate flavor without complicated steps. By combining finely chopped unsweetened chocolate with unsweetened cocoa powder, the mix captures both cocoa intensity and chocolate richness. The texture is powdery and dissolves smoothly in hot milk, giving you a luscious, velvety cup every time.
Customizable Sweetness and Creaminess
This mix gives you control. I often adjust sweetness by scooping a touch less of the mix into my mug if I plan to add a sweet topping. The inclusion of nonfat dry milk powder means the drink gets creamy body even with lower fat milks, so you can choose the milk you like and still end up with a satisfyingly smooth result.
Long Shelf Life and Convenience
One of the reasons I keep a jar in the pantry is how well it stores. When sealed in an airtight container, the mix stays flavorful for weeks, so I can make a big batch and not worry about it going stale. It is a lifesaver for sudden guests or chilly evenings when I want something soothing in minutes.
Balanced Sweetness and Brightness
The recipe balances sweet and bitter elements: granulated sugar tames the chocolate, while a pinch of kosher salt brightens the whole cup. That small contrast makes the chocolate taste rounder and more satisfying, and it is a trick I use often when adjusting flavors.
Versatile Base for Flavors
I appreciate that Homemade Hot Chocolate Mix acts as a blank canvas. Once you have the base, you can stir in spices or extracts to suit your mood, though even on its own it feels complete. The clean, concentrated flavor means a little goes a long way, and you can tailor each mug to the moment.
Shopping List for Homemade Hot Chocolate Mix
These staples form the backbone of a great stashable mix, chosen so each element plays a clear role. Think of the list as a small team: the chocolate and cocoa lay down the chocolate foundation, the dry milk gives body, sugar provides balance, cornstarch smooths texture, and salt and vanilla round everything out. Together they create a powdered mix that dissolves cleanly into hot milk and produces a rich, comforting cup.
- 1 cup (200 g) granulated sugar: Sweeten and balance the mix while helping dissolve cocoa and chocolate; contributes bulk and texture and helps control sweetness level in each serving. Use fine granulated sugar for even incorporation and adjust slightly if you prefer less sweetness. Store in an airtight container to prevent clumping and moisture absorption.
- 6 ounces (170.1 g) unsweetened chocolate, finely chopped: Provide deep chocolate flavor and richness while melting into hot liquid to create a smooth, intense base; finely chopping promotes even melting and prevents grainy bits. Use high-quality unsweetened chocolate for best flavor and slightly bittersweet notes. Grate or chop just before mixing for easier blending with dry ingredients.
- 1 cup (86 g) unsweetened cocoa powder: Deliver concentrated cocoa flavor and help thicken the drink when reconstituted; contributes chocolate color and a robust, slightly bitter backbone to balance sugar. Sift to remove lumps and ensure smooth distribution throughout the dry mix for consistent cups. Use natural or Dutch-processed cocoa depending on desired acidity and flavor profile.
- 1/2 cup (64 g) nonfat dry milk powder: Add creamy dairy solids and enhance mouthfeel without refrigeration; boosts body and gives a milky finish when combined with hot water or milk. Choose nonfat powder for a lighter caloric contribution while still providing dairy flavor and protein. Whisk well into hot liquid to prevent clumping and achieve a smooth texture.
- 5 teaspoons cornstarch: Act as a light thickening agent to create a slightly velvety, stable beverage; helps prevent separation and gives the hot chocolate a pleasant coating mouthfeel. Dissolve thoroughly into the dry mix to avoid pockets and ensure consistent thickness once prepared. Use cornstarch sparingly to maintain balance without gumminess.
- 1 teaspoon vanilla extract: Impart warm, aromatic sweetness that elevates and rounds out the chocolate flavor; provides a subtle floral-vanilla note that enhances perceived richness. Add at mixing or when preparing servings to preserve volatile aromatic compounds. Use pure vanilla extract for the most natural flavor integration.
- 3/4 teaspoon (0.75 teaspoon) kosher salt: Enhance and balance sweetness by sharpening flavors and reducing flatness; contributes a savory note that brightens chocolate and ties other components together. Measure carefully to avoid over-salting, which can overwhelm the drink. Kosher salt granules dissolve readily and help release chocolate aromatics.
Step by Step Guide for Homemade Hot Chocolate Mix
These directions show how to transform pantry ingredients into a shelf stable mix and then how to prepare a perfectly hot mug from that mix. I like to keep the process relaxed and sensory focused because the small details are what make each cup feel special.
- Process all of the ingredients in a food processor until ground to a powder, 30 to 60 seconds. Transfer to an airtight container and store at room temperature for up to 2 months.: The moment you pulse the ingredients you'll hear a rapid chopping sound and then a steady, smoother whir as everything becomes fine; the smell changes too, shifting from separate sugar and chocolate notes to a unified, toasted cocoa aroma. This milling step matters because grinding the unsweetened chocolate and granulated sugar into a consistent powder ensures the mix dissolves in hot milk without gritty bits, producing a silkier mouthfeel. A common mistake is under processing, which leaves little chocolate shards that float and create clumps in the cup; to avoid that, scrape the bowl once and pulse again until the texture is uniformly fine. If your processor gets warm, pause briefly to prevent melting the chocolate, which would make the mix sticky.
- To make hot chocolate: Heat 1 cup of milk (whole, 2% or 1%) in a small saucepan over medium heat until it starts to steam and bubbles appear around the edge of the saucepan. Add 1/4 cup of the hot chocolate mix and continue to heat, whisking constantly, until simmering, 2 to 3 minutes longer. Pour into a mug and serve.: As you spoon the finished powder into a clean jar you'll notice a deep, concentrated chocolate scent and a satiny, dry texture that resists clumping when stored properly. Storing in an airtight container protects the mix from moisture and odors, preserving flavor and texture; I recommend a glass jar with a tight lid because it creates a stable environment and lets you see how full the jar is. A typical misstep is leaving the container partially open, which can let humidity in and create lumps, so always check the seal and keep the jar in a cool, dark place away from direct heat. Label the container with the date so you use the mix within the recommended time frame.
- To make hot chocolate: Heat 1 cup of milk (whole, 2% or 1%) in a small saucepan over medium heat until it starts to steam and bubbles appear around the edge of the saucepan : You will see tiny bubbles forming at the rim and smell the milk warming; that steam signal means it is hot enough to dissolve the mix without scalding. Heating the milk gently rather than boiling preserves a creamy texture and prevents a cooked flavor, which keeps the chocolate tasting fresh and balanced. A common error is bringing the milk to a vigorous boil, causing it to scorch or form a skin; watch closely and lower the heat as soon as you see the first bubbles. Stir occasionally with a whisk to keep the milk moving and distribute heat evenly.
- Add 1/4 cup of the hot chocolate mix and continue to heat, whisking constantly, until simmering, 2 to 3 minutes longer: When the powder hits the hot surface, you'll notice a faint popping sound as it rehydrates and releases aroma; whisking produces a glossy, slightly thickened surface and integrates air so the drink feels lighter. This stage develops the final texture and allows the cornstarch and nonfat dry milk powder to activate, creating that velvety mouthfeel; whisk in steady, circular motions to prevent settling and lumps. One pitfall is dumping the mix in and walking away, which can lead to clumps; constant whisking prevents that and also helps gauge the readiness by observing small, even bubbles forming around the edge. If the mixture seems too thick, reduce the heat and whisk vigorously to loosen it up.
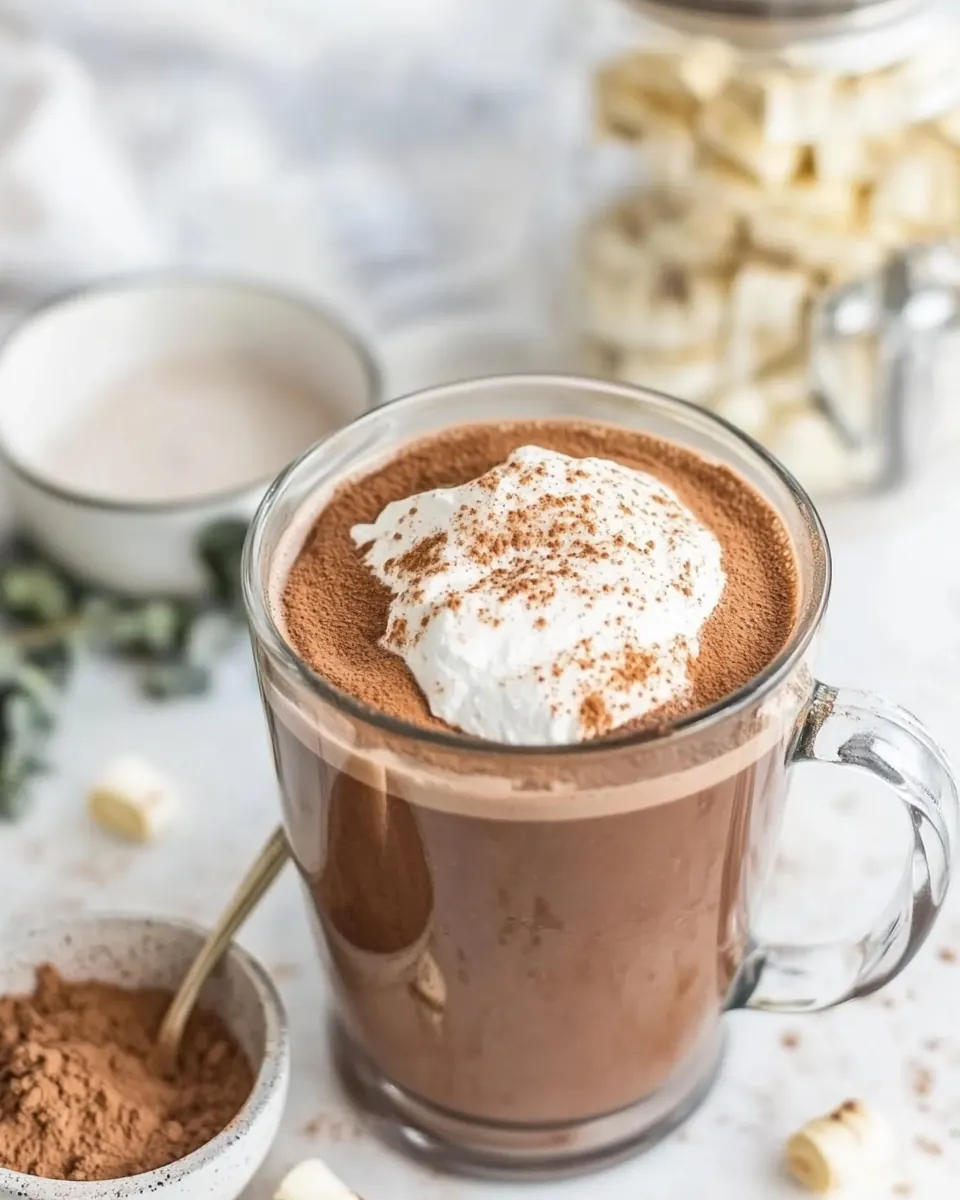
- Pour into a mug and serve: As you pour, you'll notice the cup filling with a deep brown liquid that shimmers slightly from the dissolved fats, and the scent becomes rich and inviting. Serving immediately preserves the temperature and texture, and I often garnish with a light dusting of extra unsweetened cocoa powder or a tiny pinch of kosher salt on top to highlight the flavor contrast. A common mistake is letting the drink sit too long, which can lead to cooling and slight thickening as the cornstarch continues to set; enjoy it right away for the best experience. Clean your saucepan soon after serving, because cooled chocolate residue can be stubborn to remove.
How to Switch It Up
I like to tweak the base mix slightly depending on mood and occasion. These suggestions focus on small, safe changes that amplify flavor and presentation without altering the core recipe.
- Spiced Touch Add a pinch of ground cinnamon or a small scraping of fresh nutmeg to the milk while heating to introduce a warming spice note that plays beautifully with the unsweetened cocoa powder.
- Richer Mouthfeel Use whole milk or a blend of milk and a splash of cream for a more luxurious texture when you want an indulgent treat.
- Lower Sweetness Scoop a little less than the suggested 1/4 cup into your mug to reduce sweetness without changing the chocolate intensity, letting the natural cocoa bitterness come forward.
- Frothy Finish After whisking, use a handheld frother to aerate the surface, creating a cafe style foam and a lighter finished texture.
- Mini Batch Gifts Portion into small jars and tie with a ribbon for a homemade gift that stores well and feels personal and thoughtful.
Great Combinations for Homemade Hot Chocolate Mix
Serving Homemade Hot Chocolate Mix is all about comfort and pairing it with simple complements that enhance warmth and sweetness. These ideas cover casual sips, holiday treats, and storage advice to keep your mix ready for any cozy moment.
- Simple Biscuit Pairing Serve with buttered tea biscuits or plain cookies; the mild crumb provides contrast to the rich cup and makes for a charming snack pairing.
- Breakfast Companion Offer alongside a stack of pancakes or waffles for a weekend morning where the hot chocolate acts as a dessert like drink, turning breakfast into a treat.
- Evening Wind Down Enjoy a mug during quiet evenings or after a walk in cold weather, pairing it with a soft blanket and a short read for restorative downtime.
- Gift Occasions Package small jars as hostess or holiday gifts; include brewing instructions and suggested milk options for an easy, thoughtful present.
- Storage Tips Keep the mix in an airtight container at cool room temperature, and use within three months for peak flavor and odor protection.
- Seasonal Pairings For winter gatherings, serve with spiced cookies or a slice of fruit bread to balance the chocolate density and add textural variety.
FAQ
Conclusion
This Homemade Hot Chocolate Mix stands out because it combines real unsweetened chocolate and quality unsweetened cocoa powder to create a rich, dependable cup that stores well and is easy to personalize. Give it a try the next chilly evening or package a small jar for a thoughtful gift; you will find that a little planning delivers big comfort. I hope this mix becomes a pantry staple for your cozy moments and family gatherings.
Homemade Hot Chocolate Mix
Equipment
- Food Processor
- Small Saucepan
- Whisk
- Airtight Container
Ingredients
- 1 cup (200 g) granulated sugar Sweeten and balance the mix while helping dissolve cocoa and chocolate; contributes bulk and texture and helps control sweetness level in each serving. Use fine granulated sugar for even incorporation and adjust slightly if you prefer less sweetness. Store in an airtight container to prevent clumping and moisture absorption.
- 6 ounces (170.1 g) unsweetened chocolate, finely chopped Provide deep chocolate flavor and richness while melting into hot liquid to create a smooth, intense base; finely chopping promotes even melting and prevents grainy bits. Use high-quality unsweetened chocolate for best flavor and slightly bittersweet notes. Grate or chop just before mixing for easier blending with dry ingredients.
- 1 cup (86 g) unsweetened cocoa powder Deliver concentrated cocoa flavor and help thicken the drink when reconstituted; contributes chocolate color and a robust, slightly bitter backbone to balance sugar. Sift to remove lumps and ensure smooth distribution throughout the dry mix for consistent cups. Use natural or Dutch-processed cocoa depending on desired acidity and flavor profile.
- 1/2 cup (64 g) nonfat dry milk powder Add creamy dairy solids and enhance mouthfeel without refrigeration; boosts body and gives a milky finish when combined with hot water or milk. Choose nonfat powder for a lighter caloric contribution while still providing dairy flavor and protein. Whisk well into hot liquid to prevent clumping and achieve a smooth texture.
- 5 teaspoons cornstarch Act as a light thickening agent to create a slightly velvety, stable beverage; helps prevent separation and gives the hot chocolate a pleasant coating mouthfeel. Dissolve thoroughly into the dry mix to avoid pockets and ensure consistent thickness once prepared. Use cornstarch sparingly to maintain balance without gumminess.
- 1 teaspoon vanilla extract Impart warm, aromatic sweetness that elevates and rounds out the chocolate flavor; provides a subtle floral-vanilla note that enhances perceived richness. Add at mixing or when preparing servings to preserve volatile aromatic compounds. Use pure vanilla extract for the most natural flavor integration.
- 3/4 teaspoon (0.75 teaspoon) kosher salt Enhance and balance sweetness by sharpening flavors and reducing flatness; contributes a savory note that brightens chocolate and ties other components together. Measure carefully to avoid over-salting, which can overwhelm the drink. Kosher salt granules dissolve readily and help release chocolate aromatics.
Instructions
- Process all of the ingredients in a food processor until ground to a powder, 30 to 60 seconds. Transfer to an airtight container and store at room temperature for up to 2 months.: The moment you pulse the ingredients you'll hear a rapid chopping sound and then a steady, smoother whir as everything becomes fine; the smell changes too, shifting from separate sugar and chocolate notes to a unified, toasted cocoa aroma. This milling step matters because grinding the unsweetened chocolate and granulated sugar into a consistent powder ensures the mix dissolves in hot milk without gritty bits, producing a silkier mouthfeel. A common mistake is under processing, which leaves little chocolate shards that float and create clumps in the cup; to avoid that, scrape the bowl once and pulse again until the texture is uniformly fine. If your processor gets warm, pause briefly to prevent melting the chocolate, which would make the mix sticky.
- To make hot chocolate: Heat 1 cup of milk (whole, 2% or 1%) in a small saucepan over medium heat until it starts to steam and bubbles appear around the edge of the saucepan. Add 1/4 cup of the hot chocolate mix and continue to heat, whisking constantly, until simmering, 2 to 3 minutes longer. Pour into a mug and serve.: As you spoon the finished powder into a clean jar you'll notice a deep, concentrated chocolate scent and a satiny, dry texture that resists clumping when stored properly. Storing in an airtight container protects the mix from moisture and odors, preserving flavor and texture; I recommend a glass jar with a tight lid because it creates a stable environment and lets you see how full the jar is. A typical misstep is leaving the container partially open, which can let humidity in and create lumps, so always check the seal and keep the jar in a cool, dark place away from direct heat. Label the container with the date so you use the mix within the recommended time frame.
- To make hot chocolate: Heat 1 cup of milk (whole, 2% or 1%) in a small saucepan over medium heat until it starts to steam and bubbles appear around the edge of the saucepan : You will see tiny bubbles forming at the rim and smell the milk warming; that steam signal means it is hot enough to dissolve the mix without scalding. Heating the milk gently rather than boiling preserves a creamy texture and prevents a cooked flavor, which keeps the chocolate tasting fresh and balanced. A common error is bringing the milk to a vigorous boil, causing it to scorch or form a skin; watch closely and lower the heat as soon as you see the first bubbles. Stir occasionally with a whisk to keep the milk moving and distribute heat evenly.
- Add 1/4 cup of the hot chocolate mix and continue to heat, whisking constantly, until simmering, 2 to 3 minutes longer: When the powder hits the hot surface, you'll notice a faint popping sound as it rehydrates and releases aroma; whisking produces a glossy, slightly thickened surface and integrates air so the drink feels lighter. This stage develops the final texture and allows the cornstarch and nonfat dry milk powder to activate, creating that velvety mouthfeel; whisk in steady, circular motions to prevent settling and lumps. One pitfall is dumping the mix in and walking away, which can lead to clumps; constant whisking prevents that and also helps gauge the readiness by observing small, even bubbles forming around the edge. If the mixture seems too thick, reduce the heat and whisk vigorously to loosen it up.
- Pour into a mug and serve: As you pour, you'll notice the cup filling with a deep brown liquid that shimmers slightly from the dissolved fats, and the scent becomes rich and inviting. Serving immediately preserves the temperature and texture, and I often garnish with a light dusting of extra unsweetened cocoa powder or a tiny pinch of kosher salt on top to highlight the flavor contrast. A common mistake is letting the drink sit too long, which can lead to cooling and slight thickening as the cornstarch continues to set; enjoy it right away for the best experience. Clean your saucepan soon after serving, because cooled chocolate residue can be stubborn to remove.
Notes
- Spiced Touch Add a pinch of ground cinnamon or a small scraping of fresh nutmeg to the milk while heating to introduce a warming spice note that plays beautifully with the unsweetened cocoa powder.
- Richer Mouthfeel Use whole milk or a blend of milk and a splash of cream for a more luxurious texture when you want an indulgent treat.
- Lower Sweetness Scoop a little less than the suggested 1/4 cup into your mug to reduce sweetness without changing the chocolate intensity, letting the natural cocoa bitterness come forward.
- Frothy Finish After whisking, use a handheld frother to aerate the surface, creating a cafe style foam and a lighter finished texture.
- Mini Batch Gifts Portion into small jars and tie with a ribbon for a homemade gift that stores well and feels personal and thoughtful.