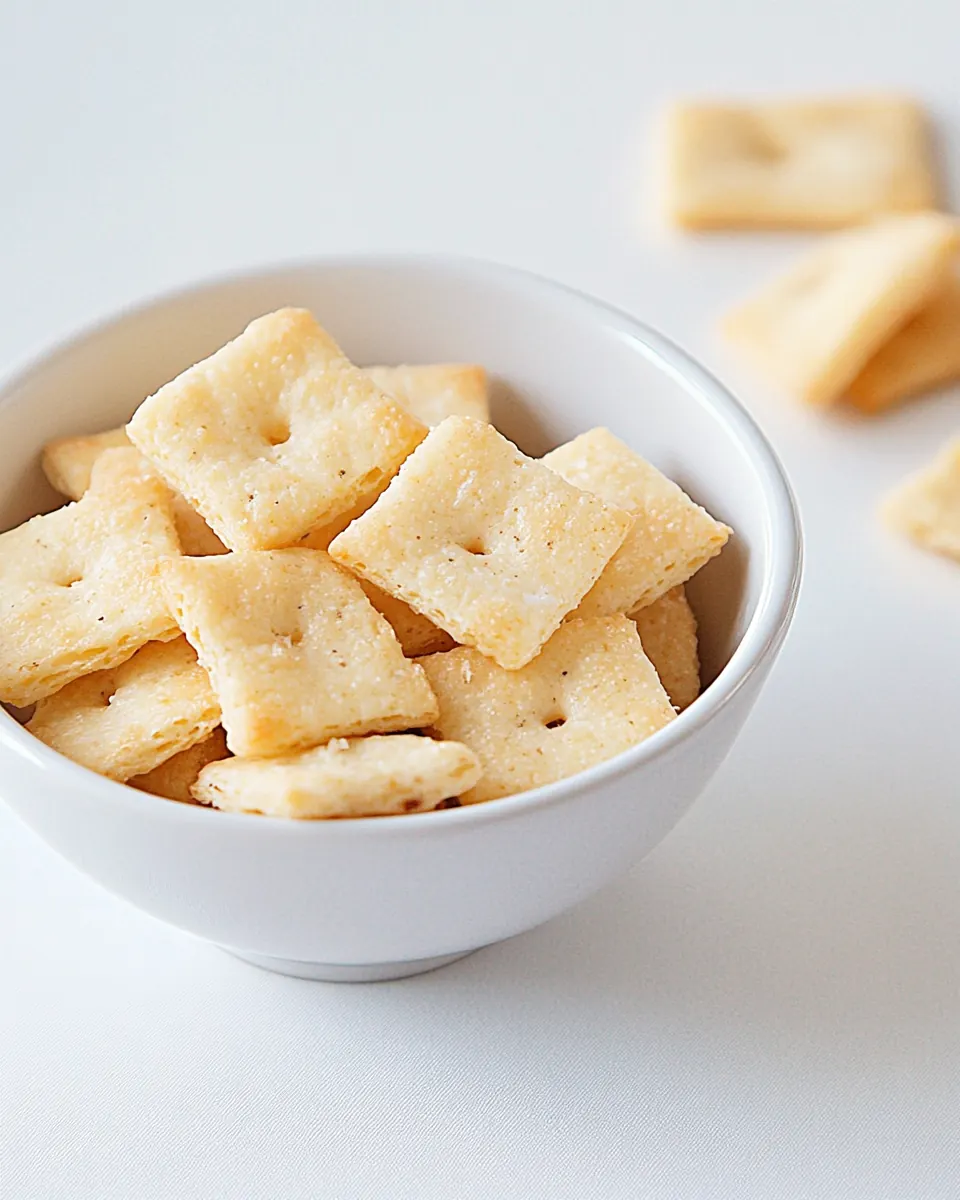
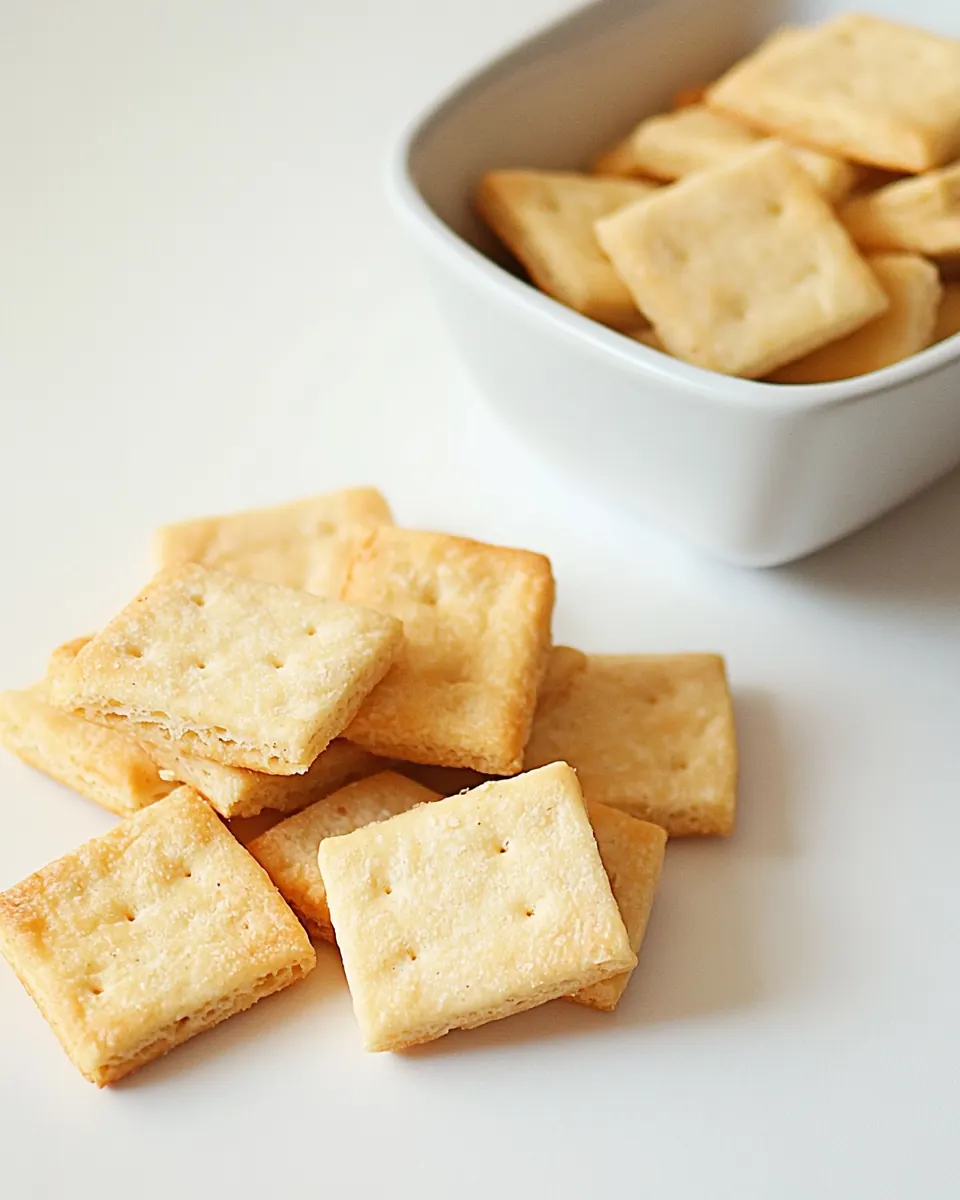
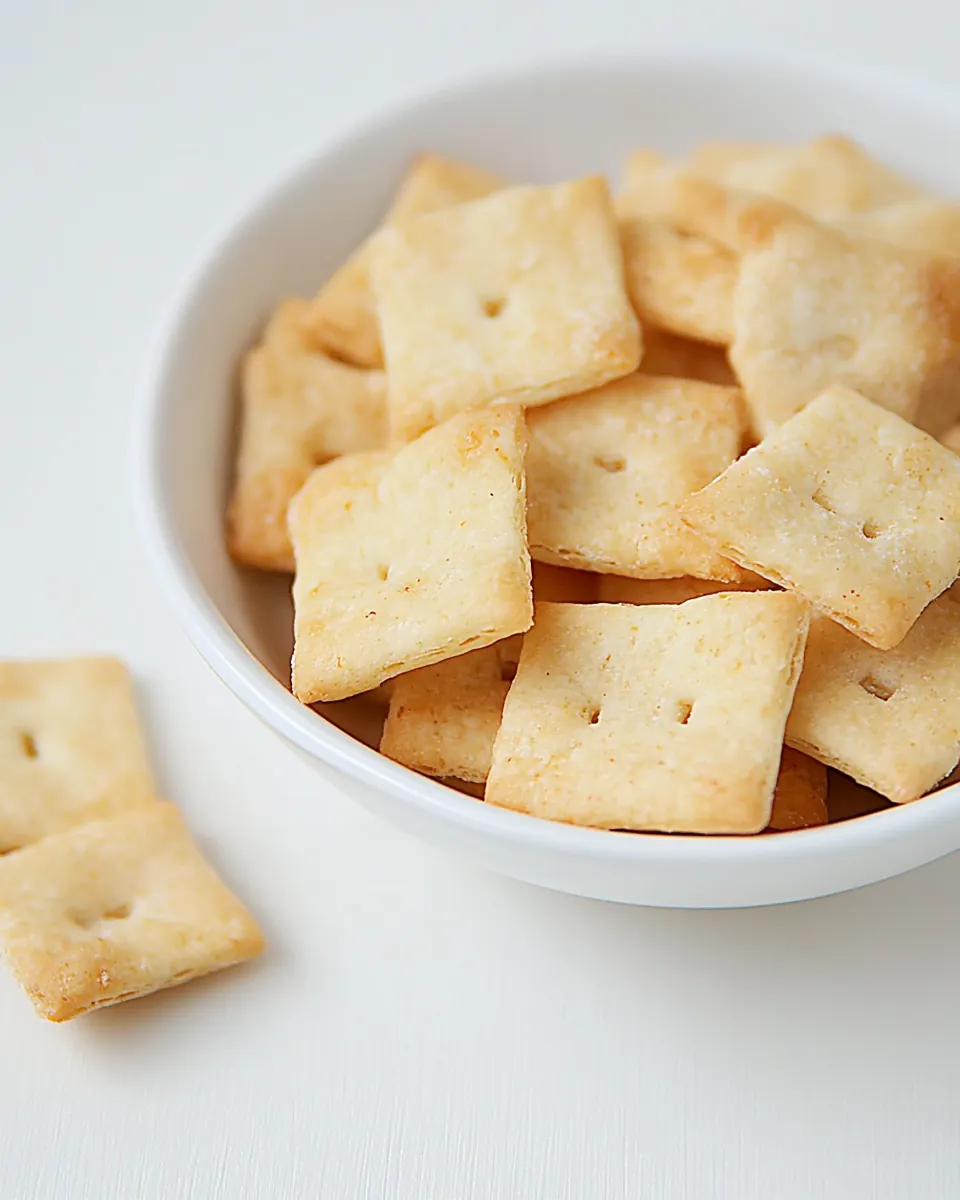
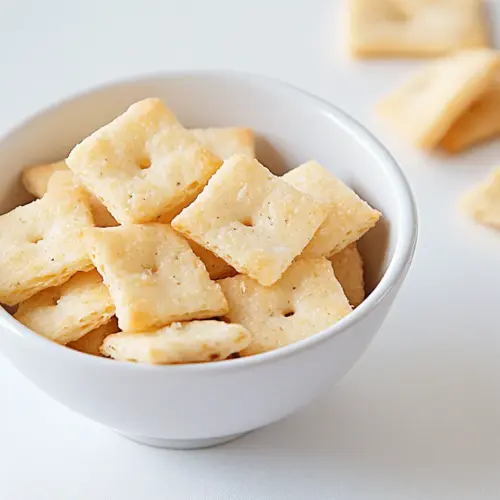
Gluten Free Cheese Crackers
Gluten Free Cheese Crackers started as my weekend experiment when I wanted something crunchy and cheesy that my niece could safely snack on, without the usual wheat. I remember pulling out a couple of flours I’d never used together before, feeling equal parts curious and hopeful. The first bite was a revelation, a tiny, crisp square that tasted richer than its simple ingredients suggested, and I kept stealing them while the timer ticked down.
I made another batch the following week for a casual family movie night, and watching everyone reach for one after another convinced me these crackers were worth sharing. They travel well in a lunchbox, and they pair quietly with soups or bright spreads. Over time I tuned the hydration and the rolling thickness so the texture would be reliably crisp yet not fragile, and now this little recipe lives in my regular rotation.
Recipe Snapshot
22 mins
10 mins
12 mins
Medium
150 kcal
American
Gluten-Free, Low FODMAP
Appetizers
sheet pan, Mixing Bowls, Kids Lunch Box
The Beauty of This Gluten Free Cheese Crackers
They are reliably crunchy
I love how Gluten Free Cheese Crackers deliver a satisfying snap every time, whether you bake them thin for a brittle crunch or slightly thicker for a chewier bite. The combination of brown rice flour and tapioca flour creates a dry, light matrix that bakes into crispness, and that texture is what keeps me coming back.
Simple pantry ingredients, big payoff
We rarely need special shopping runs for these crackers. Most of the items are pantry staples, so I can whip them up when we need a quick snack. The presence of sharp cheddar cheese carries the flavor, while a touch of garlic powder and salt gives the crackers personality without fuss.
Flexible for different diets and occasions
I appreciate that these crackers are naturally gluten free, and they fit into many eating styles without complicated swaps. I make them for casual nibbling during a movie night, for a kiddo friendly school snack, or to serve alongside a light soup, and they never feel out of place.
Kid friendly and portable
These crackers pack well into a Kids Lunch Box and don’t crumble into dust if you handle them gently. That portability means they are my go to when I need a portable, crunchy snack that won’t soften too quickly.
Customizable finishing touches
I like that you can brush the tops with a bit of melted butter or oil and sprinkle extra cheese or sea salt to make the crackers look and taste a bit more special. Those final little choices help me tailor them for company or for everyday snacking.
What You’ll Need for Gluten Free Cheese Crackers

I approach these ingredients as a tight team where texture, flavor, and binding all come from a few focused players. The flours give structure, the cheddar cheese provides both fat and intense savory flavor, and the small amounts of liquid and melted butter bring the dough together without making it gummy. Each element pulls its weight so the crackers bake thin and crisp rather than dense.
- 1/2 cup brown rice flour: Provide a nutty, slightly sweet base that contributes structure and a tender crumb to the crackers; brown rice flour helps absorb moisture and supports gluten-free texture. Use as measured to maintain proper dough consistency and prevent excessive crumbliness during baking.
- 1/2 cup tapioca flour: Add a light, chewy texture and fine crispness to the crackers while helping to bind the dough; tapioca flour increases elasticity and yields a golden, crisp edge. Balance with other flours to avoid gummy results and ensure easy rolling.
- 3/4 teaspoons salt: Enhance overall flavor by bringing out savory notes and balancing the richness of cheese; salt also tightens dough proteins and controls fermentation if used with leaveners. Measure accurately to avoid oversalting, which can overwhelm the delicate gluten-free base.
- 1/4 teaspoon garlic powder: Impart a subtle savory depth and aromatic lift that complements cheese without overpowering it; garlic powder distributes evenly through the dough for consistent flavor. Use sparingly to maintain balance with salt and cheddar.
- cup finely grated sharp cheddar cheese: Provide concentrated savory, salty, and creamy flavor that defines the crackers and contributes fat and melt for richness; finely grated sharp cheddar also helps bind the dough and brown during baking. Pack and measure the cheese to ensure even distribution and avoid clumping.
- 2 tablespoons butter, melted or 1 teaspoon vegetable oil: Contribute fat for tenderness and flavor while aiding in dough cohesion; melted butter adds richness and a buttery finish, while vegetable oil offers a dairy-free alternative. Mix thoroughly so fat coats the flours, promoting flakiness and preventing dryness.
- 3 5 tablespoons water: Adjust dough moisture to achieve pliable but not sticky consistency so it can be rolled and cut thinly; water hydrates the flours and helps bind ingredients. Add gradually to reach the optimal texture, using toward the lower end for drier climates and slightly more in humid conditions.
Recipe Directions for Gluten Free Cheese Crackers
Baking these crackers is a simple, hands on process that rewards attention to small cues like the dough texture and the color at the edge of each cracker. I like to move steadily through the steps and keep sensory notes in mind so the outcome feels consistent every time.
- Preheat the oven to 350 F.: The moment you preheat you start the transformation of moisture to crispness, and you can already smell the faint warm, toasty note from the empty oven as it climbs. A properly preheated oven ensures the crackers begin setting on contact with heat, which helps create an even golden color, rather than slowly drying and becoming tough. A common mistake is placing the crackers into an oven that is not hot enough, which can lead to a limp or dense texture, so always wait until the temperature reaches 350 F. If your oven runs cool, allow a few extra minutes, and consider using an oven thermometer to confirm temperature.
- In a large bowl, combine the flours, salt, garlic powder, and cheese.: As you mix these dry ingredients, notice the change in aroma when the cheddar cheese meets the flours, giving off a nutty, slightly tangy scent. The tactile contrast between the slightly gritty brown rice flour and the silky tapioca flour is important because it influences how the dough will hydrate. Mixing the seasoning now ensures even distribution so every cracker is seasoned equally. Avoid over mixing to prevent the cheese from clumping; if the cheese lumps form, break them apart with your fingers so they are dispersed.
- Add the melted butter and water 1 tablespoon at a time mixing to combine after each addition.: Introducing melted butter and water gradually lets you control the dough consistency, so you can stop as soon as the mixture holds together without becoming sticky. The butter adds a rich mouthfeel and helps with browning, and the water activates the flours so they knit into a cohesive dough. One pitfall is adding all the water at once, which can make the dough too wet and tough to roll, so add one tablespoon and mix, then decide if more is needed.
- Once a dough forms, knead it into a ball.: The knead should be gentle and brief, just enough to bring the dough into a smooth ball, and you will notice the dough becoming more uniform and slightly tacky. Kneading aligns the little bits of cheddar cheese and helps even hydration, which matters for an even bake. If you knead too vigorously, especially with tapioca present, the dough can become gummy, so stop once the surface looks coherent.
- Place the dough on parchment paper or a nonstick rolling mat. Roll out into a rectangular shape until the dough is about ?-inch thick.: Rolling will spread the dough into an even layer, and when it is the right thickness you can hear a faint papery sound as the rolling pin glides. The suggested thickness produces crackers that crisp up in the oven while still holding shape. Uneven rolling causes thin edges to brown faster than the center, so check the thickness visually and by touch. A typical issue is making the dough too thin near the edges, so roll from the center outwards to keep it even.
- Slice into crackers with a knife, pizza slicer, or cookie cutters (you can re-roll scraps and rough edges to make more.): Cutting reveals the true texture of the rolled dough, and using a sharp pizza cutter or knife gives clean edges that bake evenly. Re rolling scraps is economical, but be mindful that repeated rolling can toughen the dough, so combine scraps sparingly. If your crackers crumble when cutting, the dough may be too dry, so lightly press the pieces back together before recutting.
- Transfer the parchment paper with the crackers to a baking sheet. For a more golden look, lightly spray or brush the tops of the crackers with melted butter or oil. Sprinkle extra sea salt and cheese over the top, if desired.: Brushing with a little butter encourages browning and gives the surface a subtle sheen, which enhances both look and flavor as it heats. The extra sprinkle of cheese and sea salt crisps and toasts, delivering a pleasing crunch and visual appeal. Avoid drenching the tops with too much fat, which can make the crackers greasy instead of crisp; a light brush is all it needs.
- Bake for about 12 minutes, until starting to turn golden. Turn the oven off, but leave the crackers in the oven for 5 minutes. Remove from the oven and let cool completely. Store in an airtight container.: As they bake you will see the edges take on a warm, golden hue and a roasted, cheesy aroma will fill the kitchen. Turning the oven off and leaving the crackers inside lets residual heat continue crisping without over browning, producing a more reliable texture. A typical error is removing the crackers as soon as the timer dings; if they look slightly pale, the residual heat step will finish them. Cool completely to avoid steam softening them before storage.
Expert Tips about Gluten Free Cheese Crackers
These tips reflect years of small adjustments I use every time I bake a batch so the crackers are consistent, crisp, and flavorful. I include practical swaps and handling notes so you can feel confident with texture and timing.
- Grate the cheese finely — Finely grated cheddar cheese blends more uniformly into the dough and prevents pockets of greasy melt which can make some crackers soggy.
- Measure flours by spooning and leveling — Because both brown rice flour and tapioca flour can be compacted, spooning them into a cup and leveling gives a more accurate measure than scooping directly from the bag.
- Start with less water — Add the water one tablespoon at a time to reach a dough that holds together without stickiness, this avoids a gummy dough that is hard to roll.
- Use parchment for easy transfer — Rolling on parchment paper or a nonstick mat lets you lift the whole sheet to the baking tray, reducing handling that could break delicate crackers.
- Brush lightly for browning — A thin brush of melted butter or oil before baking enhances browning and flavor, but too much will yield greasy, heavy crackers.
- Cool fully before storing — Letting crackers cool completely ensures they remain crisp in an airtight container, storing while warm invites steam and softness.
What to Pair With Gluten Free Cheese Crackers
These crackers are versatile and can be dressed up or kept simple depending on the occasion. Here are serving ideas and storage suggestions that help you bring them to the table with confidence.
- Snack plate pairing — Arrange the crackers with mild spreads and sliced vegetables for a simple afternoon platter, the crispy texture complements creamy elements well.
- Soup companion — Serve alongside a warm bowl for lunch or light dinner, the crackers provide crunch and a savory contrast to a smooth soup.
- Lunchbox addition — Pack a portion in a Kids Lunch Box for a portable snack that travels well, just keep them separate from moist items to avoid softening.
- Party nibble — Offer them as a crispy bite at casual gatherings, paired with small bowls of olives or chopped pickles for a salty balance.
- Storage tips — Store in an airtight container at room temperature for up to five days, and avoid humid environments which can soften the crackers.
- Seasonal serving — They work year round, from picnic spreads in summer to cozy indoor snack boards in cooler months, their crispness feels appropriate for every season.
FAQ
Conclusion
These Gluten Free Cheese Crackers stand out because they turn a few simple pantry ingredients into a crisp, savory snack everyone reaches for. They are easy enough for a midweek treat yet polished enough for sharing, and the texture and cheesy flavor make them feel more indulgent than their brief ingredient list suggests. Give them a try for an afternoon nibble or packed lunch, and you may find they become a dependable go to in your snack rotation. I hope you enjoy the crunch and the way the cheese flavor comes through with each bite, and that they make snack time a little more special for you.
Gluten Free Cheese Crackers
Equipment
- Sheet Pan
- Mixing Bowls
- Kids Lunch Box
Ingredients
- 1/2 cup brown rice flour Provide a nutty, slightly sweet base that contributes structure and a tender crumb to the crackers; brown rice flour helps absorb moisture and supports gluten-free texture. Use as measured to maintain proper dough consistency and prevent excessive crumbliness during baking.
- 1/2 cup tapioca flour Add a light, chewy texture and fine crispness to the crackers while helping to bind the dough; tapioca flour increases elasticity and yields a golden, crisp edge. Balance with other flours to avoid gummy results and ensure easy rolling.
- 3/4 teaspoons salt Enhance overall flavor by bringing out savory notes and balancing the richness of cheese; salt also tightens dough proteins and controls fermentation if used with leaveners. Measure accurately to avoid oversalting, which can overwhelm the delicate gluten-free base.
- 1/4 teaspoon garlic powder Impart a subtle savory depth and aromatic lift that complements cheese without overpowering it; garlic powder distributes evenly through the dough for consistent flavor. Use sparingly to maintain balance with salt and cheddar.
- cup finely grated sharp cheddar cheese Provide concentrated savory, salty, and creamy flavor that defines the crackers and contributes fat and melt for richness; finely grated sharp cheddar also helps bind the dough and brown during baking. Pack and measure the cheese to ensure even distribution and avoid clumping.
- 2 tablespoons butter, melted or 1 teaspoon vegetable oil Contribute fat for tenderness and flavor while aiding in dough cohesion; melted butter adds richness and a buttery finish, while vegetable oil offers a dairy-free alternative. Mix thoroughly so fat coats the flours, promoting flakiness and preventing dryness.
- 3 -5 tablespoons water Adjust dough moisture to achieve pliable but not sticky consistency so it can be rolled and cut thinly; water hydrates the flours and helps bind ingredients. Add gradually to reach the optimal texture, using toward the lower end for drier climates and slightly more in humid conditions.
Instructions
- Preheat the oven to 350 F.: The moment you preheat you start the transformation of moisture to crispness, and you can already smell the faint warm, toasty note from the empty oven as it climbs. A properly preheated oven ensures the crackers begin setting on contact with heat, which helps create an even golden color, rather than slowly drying and becoming tough. A common mistake is placing the crackers into an oven that is not hot enough, which can lead to a limp or dense texture, so always wait until the temperature reaches 350 F. If your oven runs cool, allow a few extra minutes, and consider using an oven thermometer to confirm temperature.
- In a large bowl, combine the flours, salt, garlic powder, and cheese.: As you mix these dry ingredients, notice the change in aroma when the cheddar cheese meets the flours, giving off a nutty, slightly tangy scent. The tactile contrast between the slightly gritty brown rice flour and the silky tapioca flour is important because it influences how the dough will hydrate. Mixing the seasoning now ensures even distribution so every cracker is seasoned equally. Avoid over mixing to prevent the cheese from clumping; if the cheese lumps form, break them apart with your fingers so they are dispersed.
- Add the melted butter and water 1 tablespoon at a time mixing to combine after each addition.: Introducing melted butter and water gradually lets you control the dough consistency, so you can stop as soon as the mixture holds together without becoming sticky. The butter adds a rich mouthfeel and helps with browning, and the water activates the flours so they knit into a cohesive dough. One pitfall is adding all the water at once, which can make the dough too wet and tough to roll, so add one tablespoon and mix, then decide if more is needed.
- Once a dough forms, knead it into a ball.: The knead should be gentle and brief, just enough to bring the dough into a smooth ball, and you will notice the dough becoming more uniform and slightly tacky. Kneading aligns the little bits of cheddar cheese and helps even hydration, which matters for an even bake. If you knead too vigorously, especially with tapioca present, the dough can become gummy, so stop once the surface looks coherent.
- Place the dough on parchment paper or a nonstick rolling mat. Roll out into a rectangular shape until the dough is about ?-inch thick.: Rolling will spread the dough into an even layer, and when it is the right thickness you can hear a faint papery sound as the rolling pin glides. The suggested thickness produces crackers that crisp up in the oven while still holding shape. Uneven rolling causes thin edges to brown faster than the center, so check the thickness visually and by touch. A typical issue is making the dough too thin near the edges, so roll from the center outwards to keep it even.
- Slice into crackers with a knife, pizza slicer, or cookie cutters (you can re-roll scraps and rough edges to make more.): Cutting reveals the true texture of the rolled dough, and using a sharp pizza cutter or knife gives clean edges that bake evenly. Re rolling scraps is economical, but be mindful that repeated rolling can toughen the dough, so combine scraps sparingly. If your crackers crumble when cutting, the dough may be too dry, so lightly press the pieces back together before recutting.
- Transfer the parchment paper with the crackers to a baking sheet. For a more golden look, lightly spray or brush the tops of the crackers with melted butter or oil. Sprinkle extra sea salt and cheese over the top, if desired.: Brushing with a little butter encourages browning and gives the surface a subtle sheen, which enhances both look and flavor as it heats. The extra sprinkle of cheese and sea salt crisps and toasts, delivering a pleasing crunch and visual appeal. Avoid drenching the tops with too much fat, which can make the crackers greasy instead of crisp; a light brush is all it needs.
- Bake for about 12 minutes, until starting to turn golden. Turn the oven off, but leave the crackers in the oven for 5 minutes. Remove from the oven and let cool completely. Store in an airtight container.: As they bake you will see the edges take on a warm, golden hue and a roasted, cheesy aroma will fill the kitchen. Turning the oven off and leaving the crackers inside lets residual heat continue crisping without over browning, producing a more reliable texture. A typical error is removing the crackers as soon as the timer dings; if they look slightly pale, the residual heat step will finish them. Cool completely to avoid steam softening them before storage.
Notes
- Grate the cheese finely — Finely grated cheddar cheese blends more uniformly into the dough and prevents pockets of greasy melt which can make some crackers soggy.
- Measure flours by spooning and leveling — Because both brown rice flour and tapioca flour can be compacted, spooning them into a cup and leveling gives a more accurate measure than scooping directly from the bag.
- Start with less water — Add the water one tablespoon at a time to reach a dough that holds together without stickiness, this avoids a gummy dough that is hard to roll.
- Use parchment for easy transfer — Rolling on parchment paper or a nonstick mat lets you lift the whole sheet to the baking tray, reducing handling that could break delicate crackers.
- Brush lightly for browning — A thin brush of melted butter or oil before baking enhances browning and flavor, but too much will yield greasy, heavy crackers.
- Cool fully before storing — Letting crackers cool completely ensures they remain crisp in an airtight container, storing while warm invites steam and softness.