Easter Buttercream Board
Easter Buttercream Board is one of those festive projects I reach for when I want dessert to feel like a party without a lot of stress. I first made this years ago for a neighborhood egg hunt, and what started as a playful idea on parchment turned into the kind of centerpiece everyone hovered around. The first time I plated a frosted bunny face, kids and grown ups lined up to add a jelly bean or a sprinkle, and that kind of communal joy is exactly why I keep returning to this concept.
There is something wonderfully tactile about assembling a board where vanilla frosting meets sprinkles and chewy jelly beans. I love how a simple canvas of buttercream becomes a conversation starter, and how the textures invite people to taste as they graze. Over the years I have learned a few small tricks to make the design pop and to keep the frosting soft and scoopable for guests.
When I set up my Easter Buttercream Board, I think about color and balance more than anything else. I arrange clusters of assorted dippers so there is a mix of crunchy, chewy, and chocolatey bites, and I keep a spare piping bag on hand for last minute touch ups. The result feels casual, celebratory, and very Easter appropriate, without taking over the kitchen.
Recipe Snapshot
10 mins
10 mins
Medium
200 kcal
American
Vegan, Gluten-Free
Desserts
Parchment paper, Offset spatula, Serving plate, Piping bag or decorator tube
The Appeal of This Easter Buttercream Board
Instant visual appeal
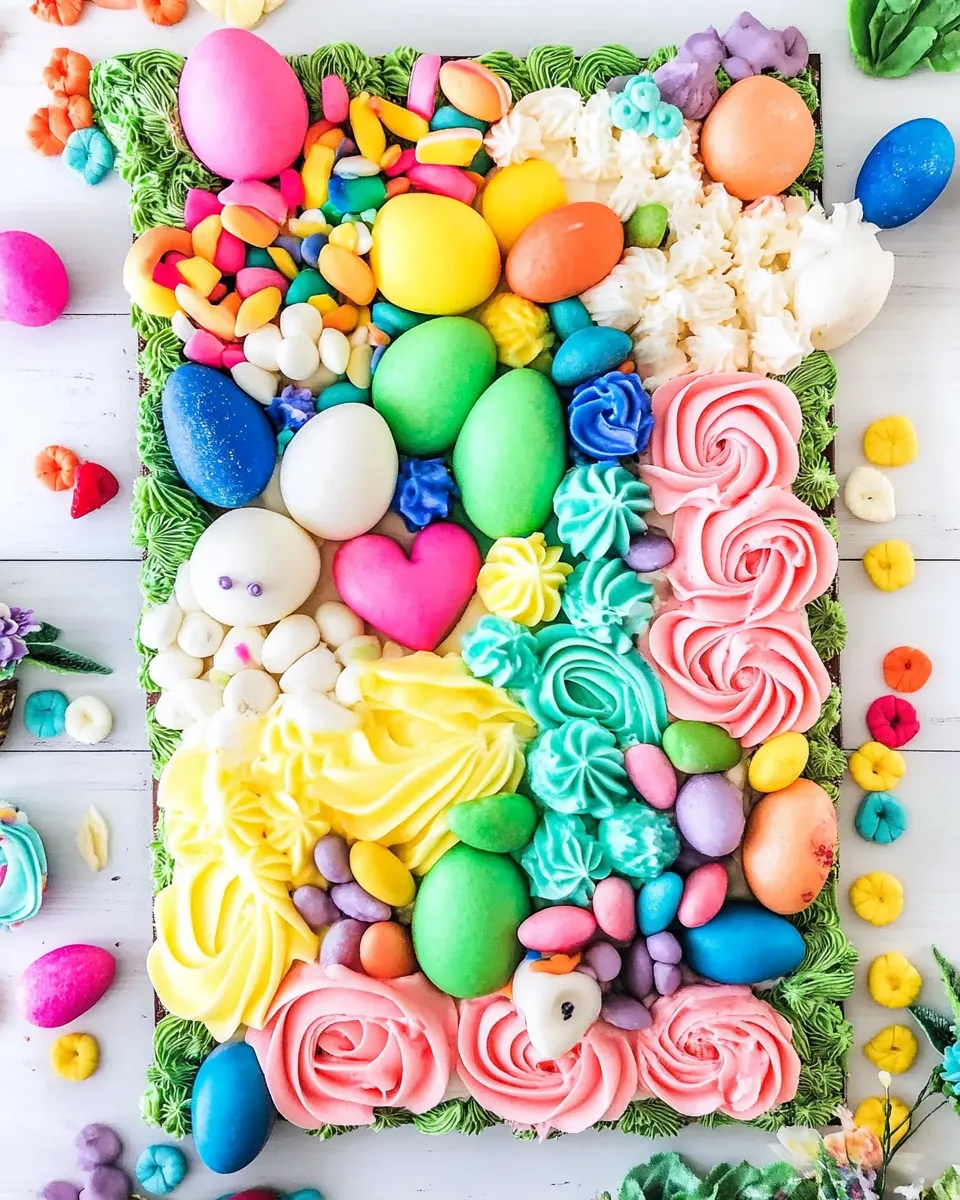
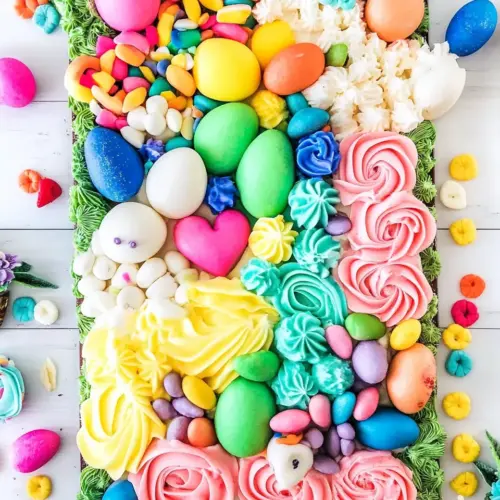
When I make the Easter Buttercream Board, the first thing I notice is how quickly it becomes the centerpiece. The contrast of smooth vanilla frosting with colorful pink sprinkles and jelly beans draws attention, and that visual energy encourages guests to gather. I find that a well decorated board makes even simple candies feel elevated, and the presentation gets compliments every single time.
Very approachable for all skill levels
I appreciate that this boards works whether you are decorating by hand or using a piping bag. You do not need professional skills to create a charming bunny face. I often invite kids to help me outline shapes, and their enthusiasm makes the process feel like part of the celebration rather than a chore. If you can spread frosting, you can handle this.
Flexible ingredient options
One of the things I love is how the recipe accepts swaps. Use store bought vanilla frosting or homemade buttercream, and pick any assorted dippers you prefer. I always keep some candy eggs and cookies as alternatives. This flexibility helps when you are shopping last minute, and it makes the board a great way to use up seasonal candies.
Interactive and social
I enjoy how the Easter Buttercream Board becomes an activity, not just a dish. Guests can customize their bites, and that small interactivity turns snacking into a memory. For family gatherings, the board becomes a playful station where people return again and again, trying different combinations of sprinkles and jelly beans.
Quick to assemble, big on impact
Finally, the time investment is minimal compared to the payoff. With just a few minutes of prep you can create a festive display that feels special. I like recipes that deliver a lot of charm without demanding hours of work, and this board fits that bill perfectly.
What to Buy for Easter Buttercream Board
For this project I choose ingredients that read well together on a board, both visually and texturally. The vanilla frosting is the canvas, the black decorator icing and pink sprinkles provide detail and color, and the jelly beans with assorted dippers supply variety and bite. Each item plays a clear role in the final presentation, so I buy enough of every element to create clusters and contrast.
- 1 recipe vanilla frosting or a can from the store: Spread generously to create a smooth, creamy base for decorating; adds sweetness and structure to the board. Provide an easy canvas for piping, smoothing, and holding other candies in place, while offering familiar vanilla flavor that complements bright toppings.
- Black decorator icing: Pipe finely to add detail and contrast for eyes, outlines, or small accents; provides strong color and precise application. Use sparingly for facial features or accents on candies to make designs pop against the lighter frosting surface.
- Pink sprinkles: Sprinkle liberally to add color, texture, and playful crunch to the board; delivers visual interest and bite-sized bursts of sweetness. Scatter over the frosting or press into edges for festive coverage that helps tie together assorted decorations.
- Jelly Beans: Scatter strategically to offer pops of color, varied shapes, and chewy texture across the board; contributes fun, nostalgic flavor. Arrange in groups or patterns to create focal points and to encourage guests to pick and enjoy different flavors.
- Assorted Dippers: Arrange creatively to provide additional dipping options and varied textures, such as cookies, pretzels, or fruit; enhances the board’s variety. Offer contrasting flavors and shapes that pair well with frosting and candies, inviting guests to mix and match.
Making Easter Buttercream Board
This is a relaxed, hands on assembly. Lay out your parchment, sketch the bunny face, transfer it, and fill with frosting. As you work, pay attention to textures, and keep spare candies on hand for final touches.
- Cut parchment paper to fit your serving plate. Using a pencil, draw the outline of the bunny face: The moment you cut the parchment paper you can feel the project take shape, and the crisp edge helps you center the design visually. I listen for that faint paper sound as I trim, which tells me the paper will lay flat without buckling. Why this matters, the parchment acts as your temporary template so it must sit flush to avoid uneven transfer of frosting . A common hiccup is using a parchment piece that is too small, which forces you to squash the design; always err on the side of slightly larger so you can trim after placement.
- on the parchment. Lightly add some frosting to each corner and turn it (drawing side down): When you anchor the parchment with small dollops of frosting at each corner, the paper will adhere to the plate and not slide as you flip it. I press gently and listen for a faint suction as it settles, indicating good contact. This step ensures the filled areas align correctly when you remove the parchment. A typical mistake is using too much frosting for anchoring, which can smear the board underneath, so keep the anchor pieces small and tidy.
- onto the serving plate.: As you lower the parchment onto the plate, aim for a smooth lay down so there are no trapped air pockets. I watch the edge as it meets the plate, making sure the lines line up straight, and then lightly press the center to secure the template. The reason this matters is that a stable template ensures the transferred design keeps its intended shape. If the paper shifts during placement, lift and realign rather than trying to correct with extra frosting , which can create lumps.
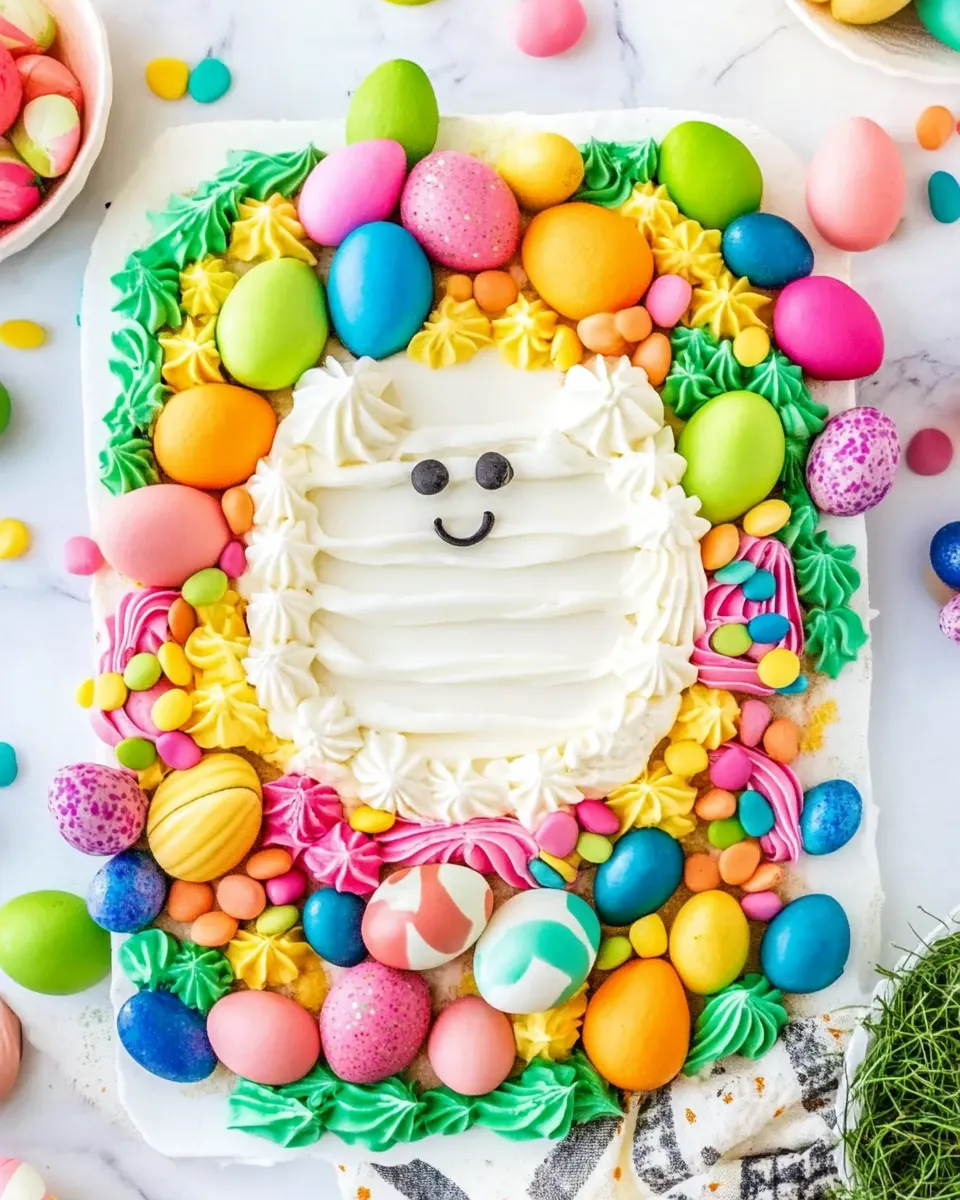
- Frost the parchment paper design (either by hand or use a piping bag) to fill in the bunny face.: The texture of the frosting is most noticeable here; I spread it so the surface becomes satiny and smooth, which catches the light and frames the details. Use a small offset spatula for broad areas and a piping bag for tight corners; the spatula makes a sweeping motion across the parchment creating a leveled surface while the piping bag gives control for ears and inner features. You will smell the sweetness of the vanilla frosting as you work and see air pockets pop leaving a glossy finish. This technique matters because a smooth fill highlights the contrast with the black decorator icing and sprinkles . One error I see is overworking the frosting which can introduce visible streaks or air bubbles, so aim for confident, single strokes rather than repeated sanding motions.
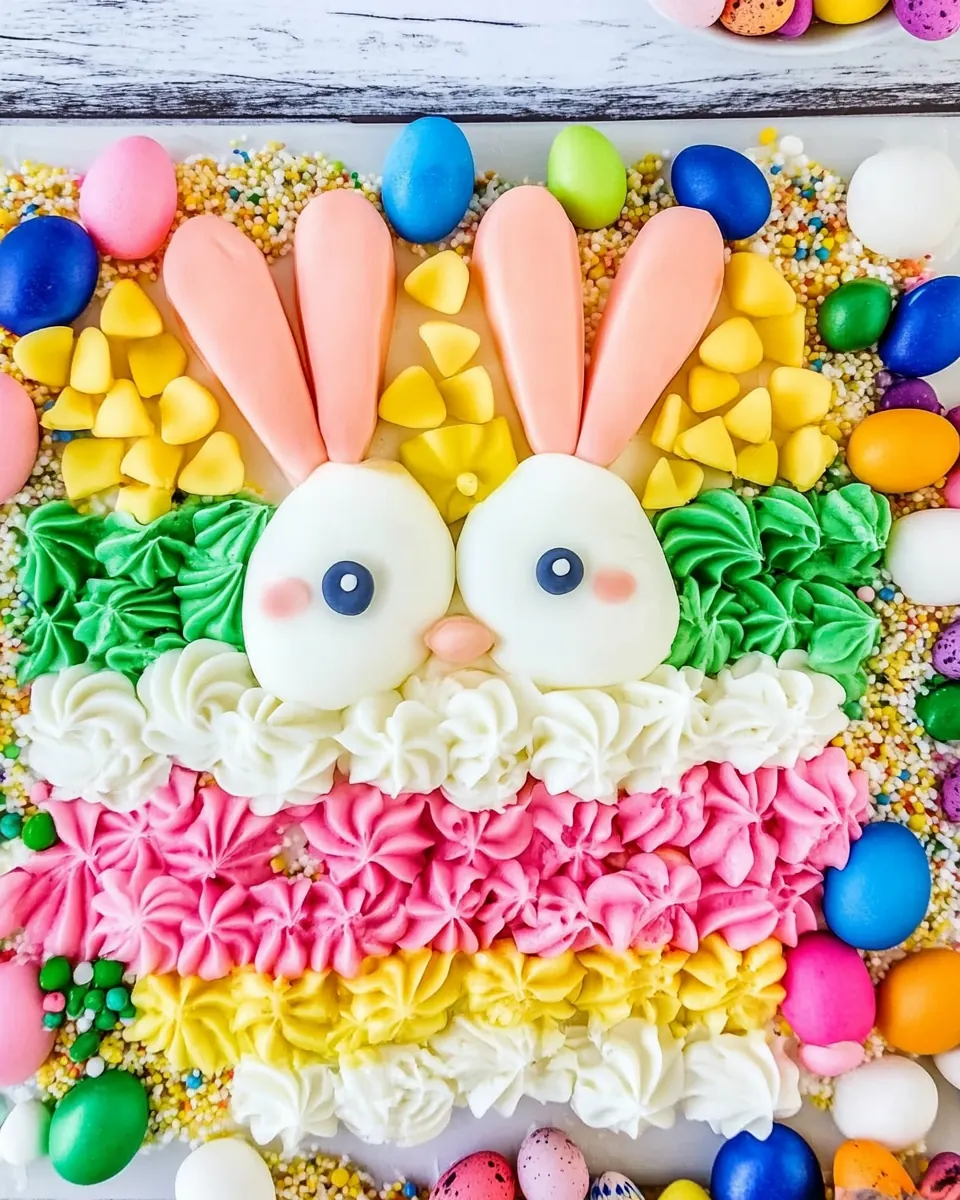
- Give the bunny 2 black eyes and a pink nose (from decorator icing or jelly beans) and whiskers: When you add black decorator icing eyes and a pink sprinkles nose or a jelly bean nose, the features instantly animate the face. I apply the eyes as two small dots, then step back to ensure they are evenly spaced, which preserves a friendly expression. The nose can be a piped heart shape or a single jelly bean , and the contrast of color against the pale buttercream makes it readable from across the table. A detail to watch is symmetry; uneven eyes can make the face look lopsided, so adjust before the icing sets.
- and a mouth.: Crafting the mouth adds character, whether a tiny smile or a surprised O. I use a thin line of black decorator icing and keep the pressure light so the stroke is delicate and not blobbed. The subtle shadow the line creates against the frosting gives a three dimensional feel. Why this matters, a confident mouth completes the expression and signals the board is ready for guests. If the line looks too thick, gently remove it with a toothpick and try again; hardened corrections are harder to hide once the icing sets.
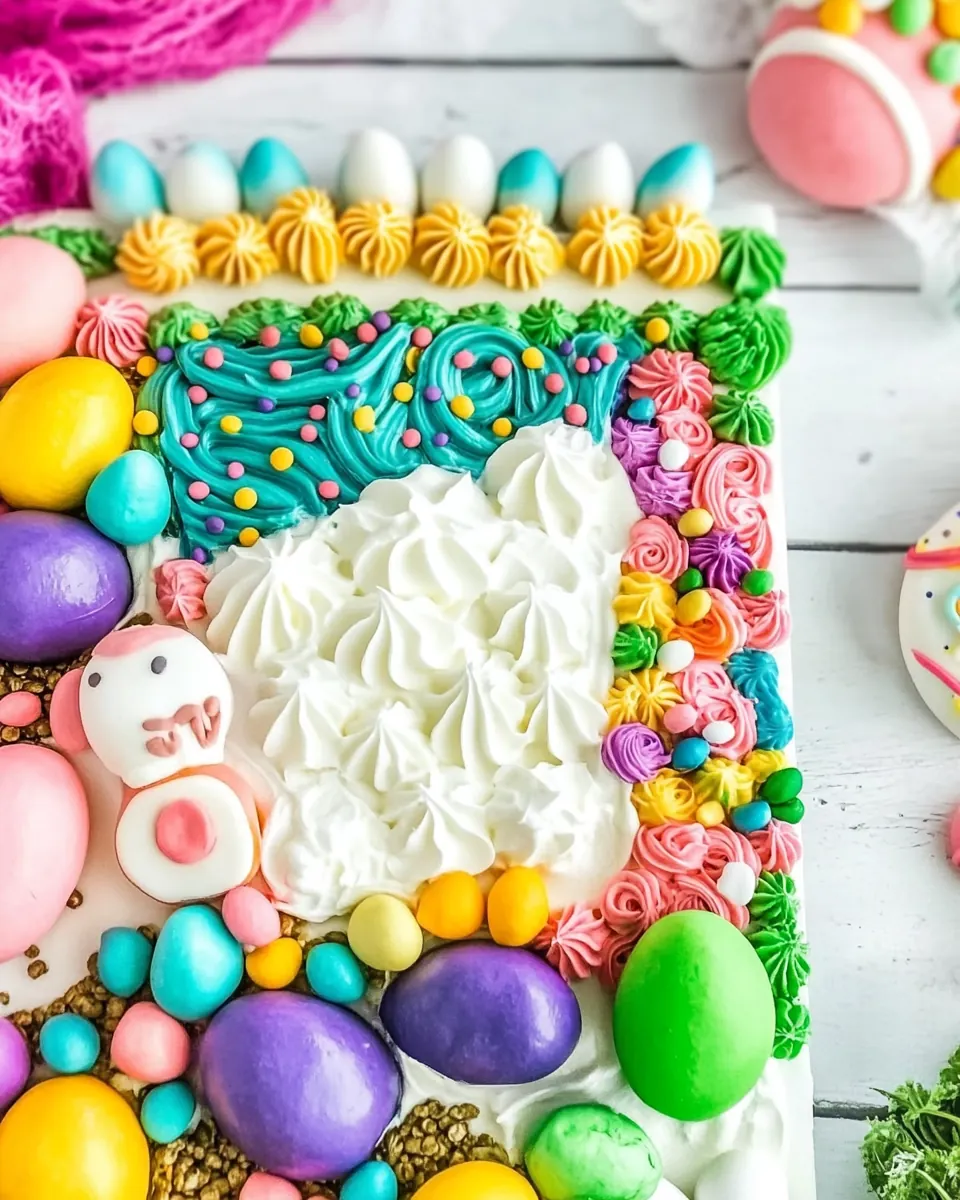
- Surround the frosting face with assorted dippers.: Placing the assorted dippers around the bunny creates texture and invites sharing, and arranging them in clusters helps guests navigate choices. I group crunchy items on one side, chewy on another, and small chocolates in a pile so each cluster reads as a mini station. The visual rhythm of shapes and colors encourages grazing. A trap is overstuffing the area right up to the frosting edge, which can make it awkward to scoop the face; leave a clear margin so the design remains the focal point and is easy to access.
Recipe Notes about Easter Buttercream Board
I keep notes handy so the next time I assemble this board it is even smoother. These tips cover timing, storage, and smart swaps so you can adapt the board to your pantry and celebration style. Read them before shopping and again while you assemble to avoid common pitfalls.
- Serve within 2 hours. The frosting will start to firm up if it sits too long, which makes scooping less pleasant. Aim to assemble close to serving time so guests enjoy the soft, creamy texture.
- Use any dippers you like. Candy eggs, jelly beans, chocolate bunnies, Peeps, or Easter cookies all work well. I often mix textures for interest, and I suggest at least one crunchy and one chewy option.
- Loosen thick frosting. If your vanilla frosting is very thick, add milk a teaspoon at a time until it spreads smoothly. This keeps the surface glossy and easy to work with when filling the parchment design.
- Plan the color palette. Choose coordinating colors for sprinkles and jelly beans to create a cohesive look. Too many clashing colors can make the board look cluttered.
- Anchor the parchment. Small dabs of frosting at the corners prevent slipping when you flip the template, making the transfer cleaner and saving time on corrections.
- Keep extras on hand. Have an extra piping bag and a few spare candies for last minute touch ups or replacements if something shifts during serving.
Serving Ideas for Easter Buttercream Board
The board suits casual gatherings and holiday parties where grazing is welcome. I usually place it at the center of a table so everyone can help themselves, and I pair it with simple drinks that do not overpower the sweet flavors. Consider the occasion and available space when planning the layout for the best presentation.
- Family brunch center. Place the Easter Buttercream Board on the middle of the table so kids can pick candies between bites of their meal. It works well with warm beverages and light pastries.
- Party dessert station. Create a small dessert area with napkins and small plates. The board becomes the focal point for quick, casual helpings during an Easter gathering or spring party.
- Kid friendly activity. Set out small spoons and let children decorate their own cookies with frosting from the board. The interactive nature makes it excellent for family oriented events.
- Seasonal pairings. Pair with fresh fruit or simple cookies to balance sweetness, and choose pastel colored candies to keep a springtime theme. This makes the board feel seasonally appropriate for spring and Easter occasions.
- Storage tips. If you must store leftovers, cover tightly and refrigerate for up to 24 hours, though the texture of the frosting may harden slightly. Bring to room temperature before serving again for best texture.
- Occasion flexibility. Although it is perfect for Easter, you can adapt the design for birthdays or baby showers by swapping candies and sprinkles while keeping the same assembly method.
FAQ
Conclusion
The Easter Buttercream Board shines because it turns simple ingredients into an interactive, festive centerpiece that brings people together. Its charm is in the easy assembly, playful details, and the mix of textures that invite grazing and conversation. Give it a try at your next spring gathering, set out a few spare candies for last minute touch ups, and enjoy watching guests smile as they customize their bites. This board proves you do not need complicated techniques to create a memorable dessert experience.
Easter Buttercream Board
Equipment
- Parchment Paper
- Offset Spatula
- Serving plate
- Piping bag or decorator tube
Ingredients
- 1 recipe vanilla frosting or a can from the store Spread generously to create a smooth, creamy base for decorating; adds sweetness and structure to the board. Provide an easy canvas for piping, smoothing, and holding other candies in place, while offering familiar vanilla flavor that complements bright toppings.
- Black decorator icing Pipe finely to add detail and contrast for eyes, outlines, or small accents; provides strong color and precise application. Use sparingly for facial features or accents on candies to make designs pop against the lighter frosting surface.
- Pink sprinkles Sprinkle liberally to add color, texture, and playful crunch to the board; delivers visual interest and bite-sized bursts of sweetness. Scatter over the frosting or press into edges for festive coverage that helps tie together assorted decorations.
- Jelly Beans Scatter strategically to offer pops of color, varied shapes, and chewy texture across the board; contributes fun, nostalgic flavor. Arrange in groups or patterns to create focal points and to encourage guests to pick and enjoy different flavors.
- Assorted Dippers Arrange creatively to provide additional dipping options and varied textures, such as cookies, pretzels, or fruit; enhances the board’s variety. Offer contrasting flavors and shapes that pair well with frosting and candies, inviting guests to mix and match.
Instructions
- Cut parchment paper to fit your serving plate. Using a pencil, draw the outline of the bunny face: The moment you cut the parchment paper you can feel the project take shape, and the crisp edge helps you center the design visually. I listen for that faint paper sound as I trim, which tells me the paper will lay flat without buckling. Why this matters, the parchment acts as your temporary template so it must sit flush to avoid uneven transfer of frosting . A common hiccup is using a parchment piece that is too small, which forces you to squash the design; always err on the side of slightly larger so you can trim after placement.
- on the parchment. Lightly add some frosting to each corner and turn it (drawing side down): When you anchor the parchment with small dollops of frosting at each corner, the paper will adhere to the plate and not slide as you flip it. I press gently and listen for a faint suction as it settles, indicating good contact. This step ensures the filled areas align correctly when you remove the parchment. A typical mistake is using too much frosting for anchoring, which can smear the board underneath, so keep the anchor pieces small and tidy.
- onto the serving plate.: As you lower the parchment onto the plate, aim for a smooth lay down so there are no trapped air pockets. I watch the edge as it meets the plate, making sure the lines line up straight, and then lightly press the center to secure the template. The reason this matters is that a stable template ensures the transferred design keeps its intended shape. If the paper shifts during placement, lift and realign rather than trying to correct with extra frosting , which can create lumps.
- Frost the parchment paper design (either by hand or use a piping bag) to fill in the bunny face.: The texture of the frosting is most noticeable here; I spread it so the surface becomes satiny and smooth, which catches the light and frames the details. Use a small offset spatula for broad areas and a piping bag for tight corners; the spatula makes a sweeping motion across the parchment creating a leveled surface while the piping bag gives control for ears and inner features. You will smell the sweetness of the vanilla frosting as you work and see air pockets pop leaving a glossy finish. This technique matters because a smooth fill highlights the contrast with the black decorator icing and sprinkles . One error I see is overworking the frosting which can introduce visible streaks or air bubbles, so aim for confident, single strokes rather than repeated sanding motions.
- Give the bunny 2 black eyes and a pink nose (from decorator icing or jelly beans) and whiskers: When you add black decorator icing eyes and a pink sprinkles nose or a jelly bean nose, the features instantly animate the face. I apply the eyes as two small dots, then step back to ensure they are evenly spaced, which preserves a friendly expression. The nose can be a piped heart shape or a single jelly bean , and the contrast of color against the pale buttercream makes it readable from across the table. A detail to watch is symmetry; uneven eyes can make the face look lopsided, so adjust before the icing sets.
- and a mouth.: Crafting the mouth adds character, whether a tiny smile or a surprised O. I use a thin line of black decorator icing and keep the pressure light so the stroke is delicate and not blobbed. The subtle shadow the line creates against the frosting gives a three dimensional feel. Why this matters, a confident mouth completes the expression and signals the board is ready for guests. If the line looks too thick, gently remove it with a toothpick and try again; hardened corrections are harder to hide once the icing sets.
- Surround the frosting face with assorted dippers.: Placing the assorted dippers around the bunny creates texture and invites sharing, and arranging them in clusters helps guests navigate choices. I group crunchy items on one side, chewy on another, and small chocolates in a pile so each cluster reads as a mini station. The visual rhythm of shapes and colors encourages grazing. A trap is overstuffing the area right up to the frosting edge, which can make it awkward to scoop the face; leave a clear margin so the design remains the focal point and is easy to access.
Notes
- Serve within 2 hours. The frosting will start to firm up if it sits too long, which makes scooping less pleasant. Aim to assemble close to serving time so guests enjoy the soft, creamy texture.
- Use any dippers you like. Candy eggs, jelly beans, chocolate bunnies, Peeps, or Easter cookies all work well. I often mix textures for interest, and I suggest at least one crunchy and one chewy option.
- Loosen thick frosting. If your vanilla frosting is very thick, add milk a teaspoon at a time until it spreads smoothly. This keeps the surface glossy and easy to work with when filling the parchment design.
- Plan the color palette. Choose coordinating colors for sprinkles and jelly beans to create a cohesive look. Too many clashing colors can make the board look cluttered.
- Anchor the parchment. Small dabs of frosting at the corners prevent slipping when you flip the template, making the transfer cleaner and saving time on corrections.
- Keep extras on hand. Have an extra piping bag and a few spare candies for last minute touch ups or replacements if something shifts during serving.