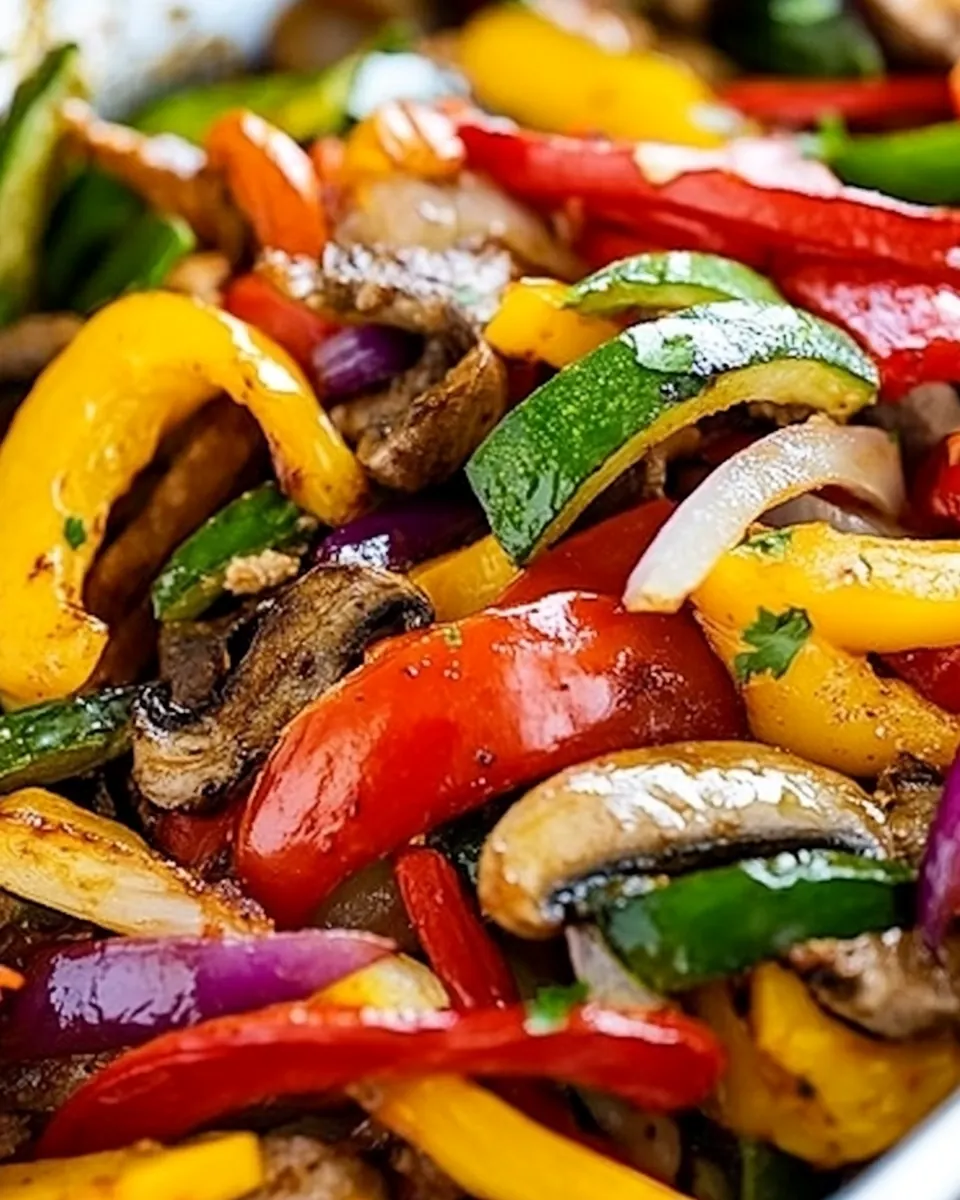
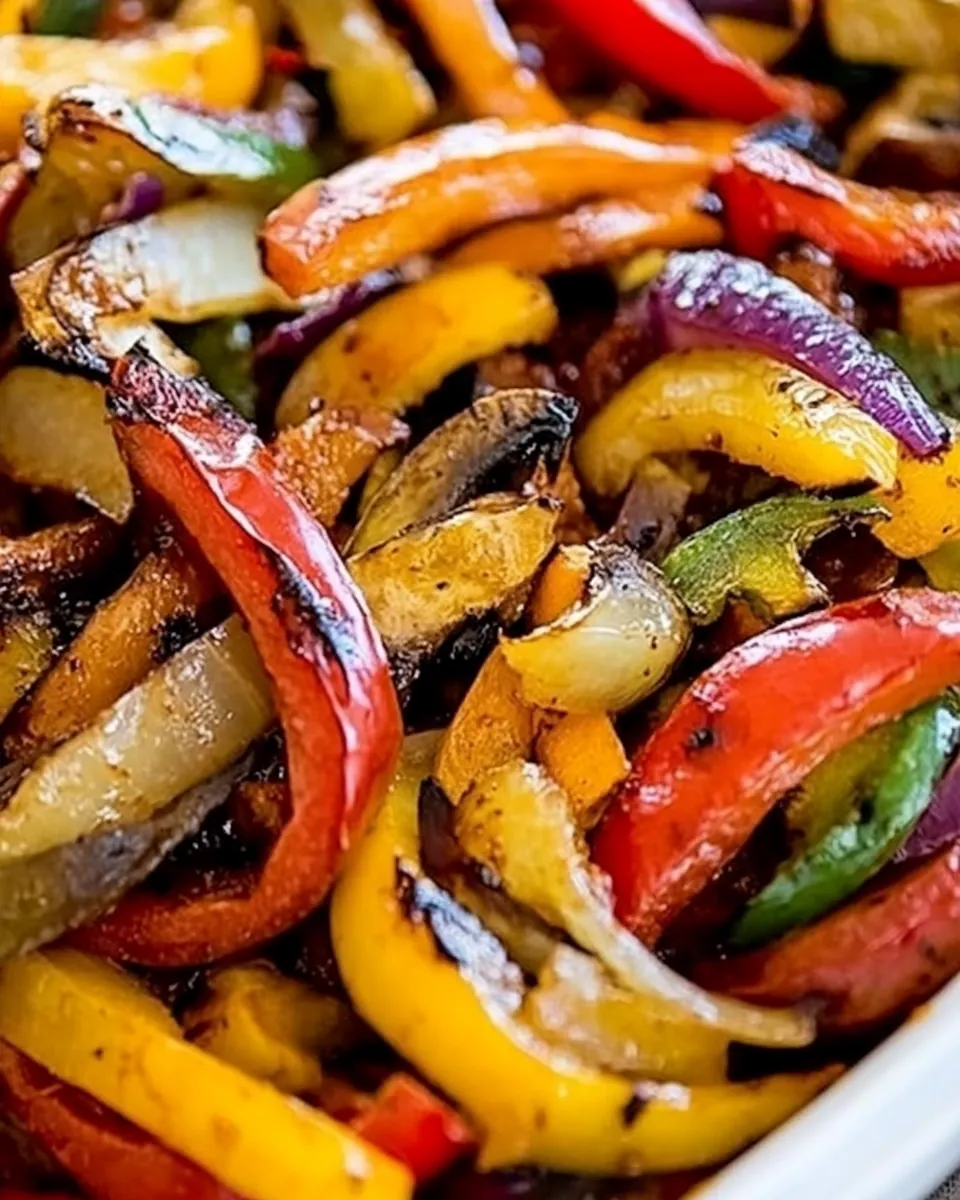
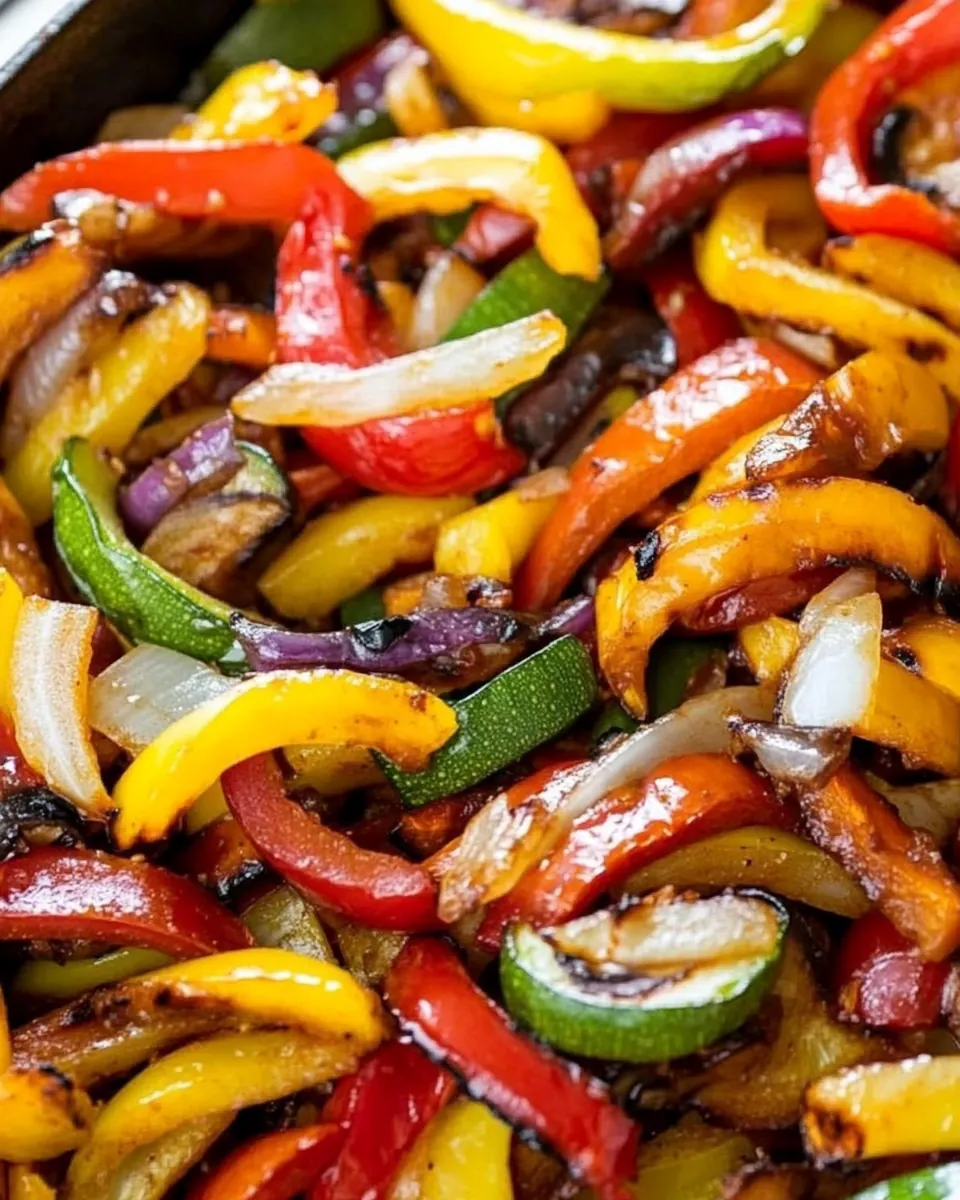
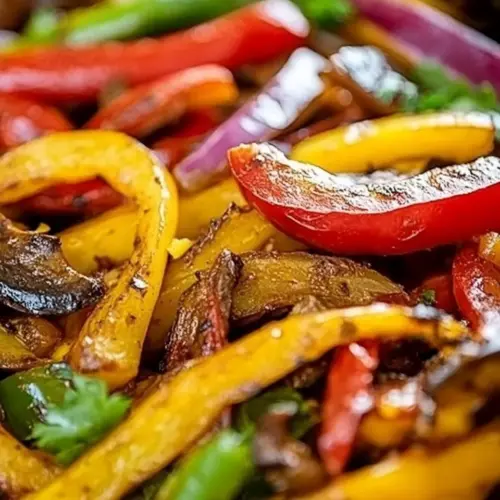
Fajita Veggies
Fajita Veggies has been my go to when I want something bright, fast, and utterly satisfying for weeknight dinners. The first time I made these, I was coming home exhausted but determined to eat something colorful and fresh. I grabbed a few bell peppers and an onion, and the sizzling that followed felt like a small celebration. The aroma of hot oil meeting sweet peppers and the tiny pop of garlic convinced me this would never be just a side dish again.
Over time I learned to treat this mix as a base for so many meals. I’ll toss it into warmed tortillas, fold it into grain bowls, or serve it beside roasted proteins. Each version sings a little differently depending on the pepper colors you choose and the skillet you use. I love that I can make a big batch in under 20 minutes and still have leftovers that taste fresh the next day.
Cooking these Fajita Veggies taught me to pay attention to simple things like a properly heated pan and timely stirring. Those small moves protect the texture and keep the garlic from turning bitter. I still remember how crunchy the peppers remained the first time I nailed it, the onions softened but not collapsed, the garlic fragrant without dark bits. It felt like a small victory, and that feeling is why this recipe has a permanent place in my weeknight rotation.
Recipe Snapshot
15 mins
7 mins
8 mins
Medium
150 kcal
Mexican
Keto, Paleo
Dinner
Large skillet, Knife, Cutting board
Why This Fajita Veggies Is a Winner
Quick to Cook
I love how the Fajita Veggies come together in a flash. From prep to plate, you are looking at a very short window before dinner is served. That speed matters on busy nights when I want something real and satisfying without fussing.
Versatile Flavors
These veggies are a brilliant supporting act. I often use them for tacos, tossed into rice bowls, or folded into warm flatbreads. The simple seasoning makes them flexible, so I can pair them with different proteins and sides and they still feel cohesive.
Bright and Colorful
The trio of bell peppers brings texture, sweetness, and visual appeal to the plate. I find that the color contrast makes a weeknight meal feel celebratory, and guests always comment on the vibrant look before they taste them.
Controlled Texture
Getting the timing right keeps the peppers crisp tender and the onion soft but not mushy. I appreciate how easy it is to control the final texture by watching the pan and using the suggested timing, which means reliable results every time.
Minimal Ingredients, Maximum Impact
With just a few pantry staples like olive oil, salt, and dried oregano, these fajita veggies deliver on flavor without requiring a long shopping list. I often have everything on hand, which makes it my fallback when plans change.
Ingredients Overview for Fajita Veggies
These ingredients are straightforward and designed to highlight the peppers and onions. The philosophy here is simple, fresh produce elevated by a little oil and seasoning. The key players are the bell peppers for color and sweetness, the onion for savory depth, and the garlic for an aromatic punch. The oil helps conduct heat and build slight char while the oregano and salt tie everything together.
- 3 bell peppers: Choose vibrant bell peppers to add sweet crunch and bright color to the fajita mix. Slice them into strips to ensure even cooking and maximum surface area for caramelization. Sauté over high heat so they develop slight char and maintain a tender-crisp texture.
- 2 onions: Slice thinly to provide a savory, slightly sweet base that balances the peppers' brightness. Cook until translucent and lightly browned to deepen flavor through Maillard reactions. Combine with peppers to create the classic fajita aroma and mouthfeel.
- 1 garlic clove: Minced finely to deliver a pungent, aromatic boost that enhances overall savory depth. Add toward the end of cooking to avoid bitterness and maintain fresh garlic fragrance. Lightly sauté to release oils that meld with the other aromatics.
- 2 tablespoon olive oil: Use olive oil to coat vegetables for even heat transfer and to carry flavors. Heat until shimmering before adding peppers and onions to promote quick searing and prevent sticking. Choose extra-virgin for richer flavor or lighter olive oil for higher smoke point depending on cooking temperature.
- 1/2 teaspoon salt: Sprinkle salt to amplify natural flavors and help draw moisture from the vegetables for better caramelization. Season gradually while cooking and taste-adjust at the end to avoid over-salting. Use fine salt for even distribution across sliced vegetables.
- 1/4 teaspoon dried oregano: Crush dried oregano lightly to release herbal, slightly peppery notes that complement the smoky fajita profile. Sprinkle during cooking to allow rehydration and infusion into the oil-coated vegetables. Pair modestly with salt to avoid overpowering the fresh pepper and onion flavors.
How to Prepare Fajita Veggies
These steps are meant to be detailed and sensory, guiding you through each moment at the stove. Keep your skillet hot and your movements deliberate. The directions below expand on each line from the original recipe to help you get predictable, delicious results every time.
- Slice the top off each pepper, then cut each side away from the core. Discard the core and seeds and cut the pepper into thin strips.: The scent of raw bell peppers is faintly grassy and fresh when you first slice them, and you will notice a clean, crisp sound as the knife parts the flesh. This technique removes bitter membranes and seeds, which keeps the final texture pleasant and the flavor pure. A common problem is leaving too much core attached, which results in uneven strips and bitter bites. Take your time to trim carefully so each piece cooks evenly.
- Peel and thinly slice the onion.: As you slice into strips the layers separate cleanly, producing long ribbons that will char along the edges without falling apart. Thin strips allow quick cooking and a pleasant balance between tender interior and slightly crisp exterior. Cutting them too thick will slow cooking and risk underdone centers, while overly thin ribbons might become limp.
- Peel and finely chop the garlic.: When you thinly slice the onion its concentric rings fall apart into delicate, translucent segments that soften beautifully in the pan. The knife will produce a soft, almost whispering sound as it moves through the layers. If slices are uneven you will end up with some pieces burned and some raw, so steady, consistent cuts are important; avoid rushing this step.
- Add the oil to a large non-stick/cast-iron skillet over high heat.: The aroma of freshly chopped garlic is immediate and bright, a warm, savory note that will perfume the kitchen. Finely chopping ensures small bits distribute throughout the dish, giving burst points of flavor without overpowering. If pieces are too large they can char and turn bitter, so aim for uniformly small pieces and hold back adding them until later in the process.
- When the oil is hot, add the peppers and onions to the pan.: When the olive oil hits the hot pan it will thin and start to shimmer, a sign you are ready to add vegetables. The skillet should be large enough so the peppers lay in a single layer to encourage searing. Using too small a pan crowds the vegetables and creates steam rather than a sear, which reduces color and flavor development.
- Cook for 4 minutes without stirring, then stir and cook for a further 2 minutes.: You will hear an immediate sizzle as moisture meets hot oil, and that sound signals the start of browning. Spread them out so each piece contacts the pan surface. Stirring too often at this moment prevents good browning; let them sit briefly so edges can caramelize for deeper flavor.
- Add in the salt, oregano, and chopped garlic.: During the first few minutes the peppers will blister and the onions will begin to soften, turning translucent at the edges. Resist the urge to move them, this allows Maillard flavors to form, creating sweet, savory notes. Overstirring is a common mistake that yields pale, steamed vegetables; let the surface develop color before folding.
- Stir constantly, cooking for 1 minute more. Then remove the veggies from the pan and serve. Or allow to cool in a bowl to store for later.: The kitchen will fill with a warm, herby perfume as the oregano wakes up and the garlic releases its oils. Adding these toward the end preserves their brightness and prevents the garlic from burning. If you add the garlic too early it will darken and taste acrid, so timing here is key.
- Stir constantly cooking for 1 minute more: This brief, energetic stirring distributes the seasonings and finishes cooking the garlic without letting it overcook. You will see glossy, slightly reduced juices coating the pieces and hear a lively sizzle. If you skip this final minute you may end with unevenly seasoned vegetables; constant movement ensures everything tastes balanced.
- Then remove the veggies from the pan and serve Or allow to cool in a bowl to store for later: The sound of the skillet settling is the cue to stop cooking, because residual heat will continue to soften the veg. Removing them prevents overcooking and preserves their texture. If you intend to store them cool quickly to avoid lingering heat which will continue to break down the vegetables and can lead to a mushy result.
Recipe Tips about Fajita Veggies
These tips expand on what I have learned from countless pans of peppers and onions. They focus on timing, texture, and small habits that make a big difference. Follow them to keep your Fajita Veggies vibrant and flavorful every time.
- Choose firm peppers Select bell peppers with glossy skins and no soft spots for the best texture and longer storage life.
- Preheat your pan A properly heated skillet gives you the immediate sizzle that creates caramelized edges and deep flavor.
- Thinly slice the onion Even slices make sure the onion softens at the same rate as the peppers, avoiding raw cores or overcooked bits.
- Add garlic late Introducing the garlic in the final minute preserves its flavor and prevents bitterness from burning.
- Use medium high heat This level encourages searing without forcing the oil to smoke, which helps build those tasty browned edges.
- Cool quickly for storage If storing leftovers spread the veggies in a shallow container so they cool faster and maintain texture.
Serving This Fajita Veggies
Serving these vegetables can be casual or a bit more deliberate, depending on the occasion. They work for weeknight dinners, casual lunches, and gatherings. Here are ideas for pairing and presenting them.
- Taco style Warm tortillas and pile on the Fajita Veggies with a squeeze of citrus for an easy weeknight taco option.
- Burrito bowls Serve over rice or grains with beans and greens for a balanced, colorful bowl ideal for lunches.
- As a side Offer alongside grilled proteins for a vibrant vegetable accompaniment that brightens the plate.
- Meal prep Store in airtight containers and reheat gently to preserve texture for quick lunches through the week.
- Occasions These veggies are perfect for casual dinners, potlucks, and family gatherings where approachable, shareable food is appreciated.
- Seasonal pairing They pair beautifully with summer produce or winter roasted mains when you want a splash of color on the table.
FAQ
Conclusion
What makes this recipe special is how quickly it transforms a few humble ingredients into something vibrant and flavorful. The balance of sweet peppers, softened onions, fragrant garlic, and a touch of oregano creates a versatile mix that brightens many meals. I encourage you to make these Fajita Veggies when you need something easy that still feels thoughtful. They are quick to prepare, endlessly adaptable, and a reliable way to add color and texture to your plate without fuss.
Fajita Veggies
Equipment
- Large Skillet
- Knife
- Cutting Board
Ingredients
- 3 bell peppers Choose vibrant bell peppers to add sweet crunch and bright color to the fajita mix. Slice them into strips to ensure even cooking and maximum surface area for caramelization. Sauté over high heat so they develop slight char and maintain a tender-crisp texture.
- 2 onions Slice thinly to provide a savory, slightly sweet base that balances the peppers' brightness. Cook until translucent and lightly browned to deepen flavor through Maillard reactions. Combine with peppers to create the classic fajita aroma and mouthfeel.
- 1 garlic clove Minced finely to deliver a pungent, aromatic boost that enhances overall savory depth. Add toward the end of cooking to avoid bitterness and maintain fresh garlic fragrance. Lightly sauté to release oils that meld with the other aromatics.
- 2 tablespoon olive oil Use olive oil to coat vegetables for even heat transfer and to carry flavors. Heat until shimmering before adding peppers and onions to promote quick searing and prevent sticking. Choose extra-virgin for richer flavor or lighter olive oil for higher smoke point depending on cooking temperature.
- 1/2 teaspoon salt Sprinkle salt to amplify natural flavors and help draw moisture from the vegetables for better caramelization. Season gradually while cooking and taste-adjust at the end to avoid over-salting. Use fine salt for even distribution across sliced vegetables.
- 1/4 teaspoon dried oregano Crush dried oregano lightly to release herbal, slightly peppery notes that complement the smoky fajita profile. Sprinkle during cooking to allow rehydration and infusion into the oil-coated vegetables. Pair modestly with salt to avoid overpowering the fresh pepper and onion flavors.
Instructions
- Slice the top off each pepper, then cut each side away from the core. Discard the core and seeds and cut the pepper into thin strips.: The scent of raw bell peppers is faintly grassy and fresh when you first slice them, and you will notice a clean, crisp sound as the knife parts the flesh. This technique removes bitter membranes and seeds, which keeps the final texture pleasant and the flavor pure. A common problem is leaving too much core attached, which results in uneven strips and bitter bites. Take your time to trim carefully so each piece cooks evenly.
- Peel and thinly slice the onion.: As you slice into strips the layers separate cleanly, producing long ribbons that will char along the edges without falling apart. Thin strips allow quick cooking and a pleasant balance between tender interior and slightly crisp exterior. Cutting them too thick will slow cooking and risk underdone centers, while overly thin ribbons might become limp.
- Peel and finely chop the garlic.: When you thinly slice the onion its concentric rings fall apart into delicate, translucent segments that soften beautifully in the pan. The knife will produce a soft, almost whispering sound as it moves through the layers. If slices are uneven you will end up with some pieces burned and some raw, so steady, consistent cuts are important; avoid rushing this step.
- Add the oil to a large non-stick/cast-iron skillet over high heat.: The aroma of freshly chopped garlic is immediate and bright, a warm, savory note that will perfume the kitchen. Finely chopping ensures small bits distribute throughout the dish, giving burst points of flavor without overpowering. If pieces are too large they can char and turn bitter, so aim for uniformly small pieces and hold back adding them until later in the process.
- When the oil is hot, add the peppers and onions to the pan.: When the olive oil hits the hot pan it will thin and start to shimmer, a sign you are ready to add vegetables. The skillet should be large enough so the peppers lay in a single layer to encourage searing. Using too small a pan crowds the vegetables and creates steam rather than a sear, which reduces color and flavor development.
- Cook for 4 minutes without stirring, then stir and cook for a further 2 minutes.: You will hear an immediate sizzle as moisture meets hot oil, and that sound signals the start of browning. Spread them out so each piece contacts the pan surface. Stirring too often at this moment prevents good browning; let them sit briefly so edges can caramelize for deeper flavor.
- Add in the salt, oregano, and chopped garlic.: During the first few minutes the peppers will blister and the onions will begin to soften, turning translucent at the edges. Resist the urge to move them, this allows Maillard flavors to form, creating sweet, savory notes. Overstirring is a common mistake that yields pale, steamed vegetables; let the surface develop color before folding.
- Stir constantly, cooking for 1 minute more. Then remove the veggies from the pan and serve. Or allow to cool in a bowl to store for later.: The kitchen will fill with a warm, herby perfume as the oregano wakes up and the garlic releases its oils. Adding these toward the end preserves their brightness and prevents the garlic from burning. If you add the garlic too early it will darken and taste acrid, so timing here is key.
- Stir constantly cooking for 1 minute more: This brief, energetic stirring distributes the seasonings and finishes cooking the garlic without letting it overcook. You will see glossy, slightly reduced juices coating the pieces and hear a lively sizzle. If you skip this final minute you may end with unevenly seasoned vegetables; constant movement ensures everything tastes balanced.
- Then remove the veggies from the pan and serve Or allow to cool in a bowl to store for later: The sound of the skillet settling is the cue to stop cooking, because residual heat will continue to soften the veg. Removing them prevents overcooking and preserves their texture. If you intend to store them cool quickly to avoid lingering heat which will continue to break down the vegetables and can lead to a mushy result.
Notes
- Choose firm peppers Select bell peppers with glossy skins and no soft spots for the best texture and longer storage life.
- Preheat your pan A properly heated skillet gives you the immediate sizzle that creates caramelized edges and deep flavor.
- Thinly slice the onion Even slices make sure the onion softens at the same rate as the peppers, avoiding raw cores or overcooked bits.
- Add garlic late Introducing the garlic in the final minute preserves its flavor and prevents bitterness from burning.
- Use medium high heat This level encourages searing without forcing the oil to smoke, which helps build those tasty browned edges.
- Cool quickly for storage If storing leftovers spread the veggies in a shallow container so they cool faster and maintain texture.