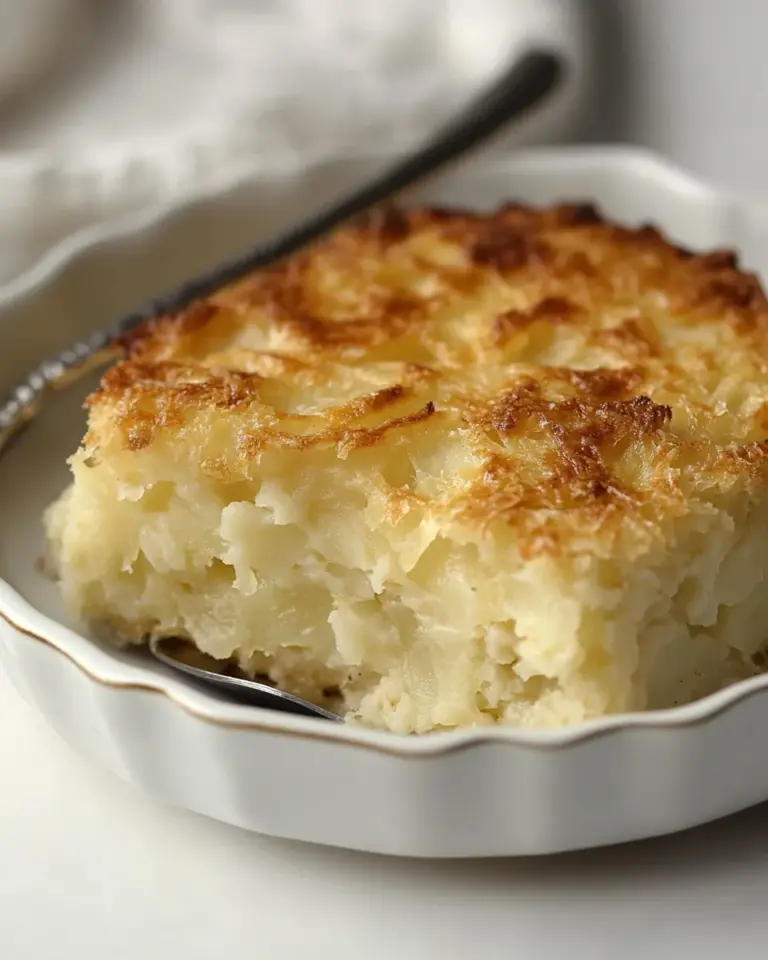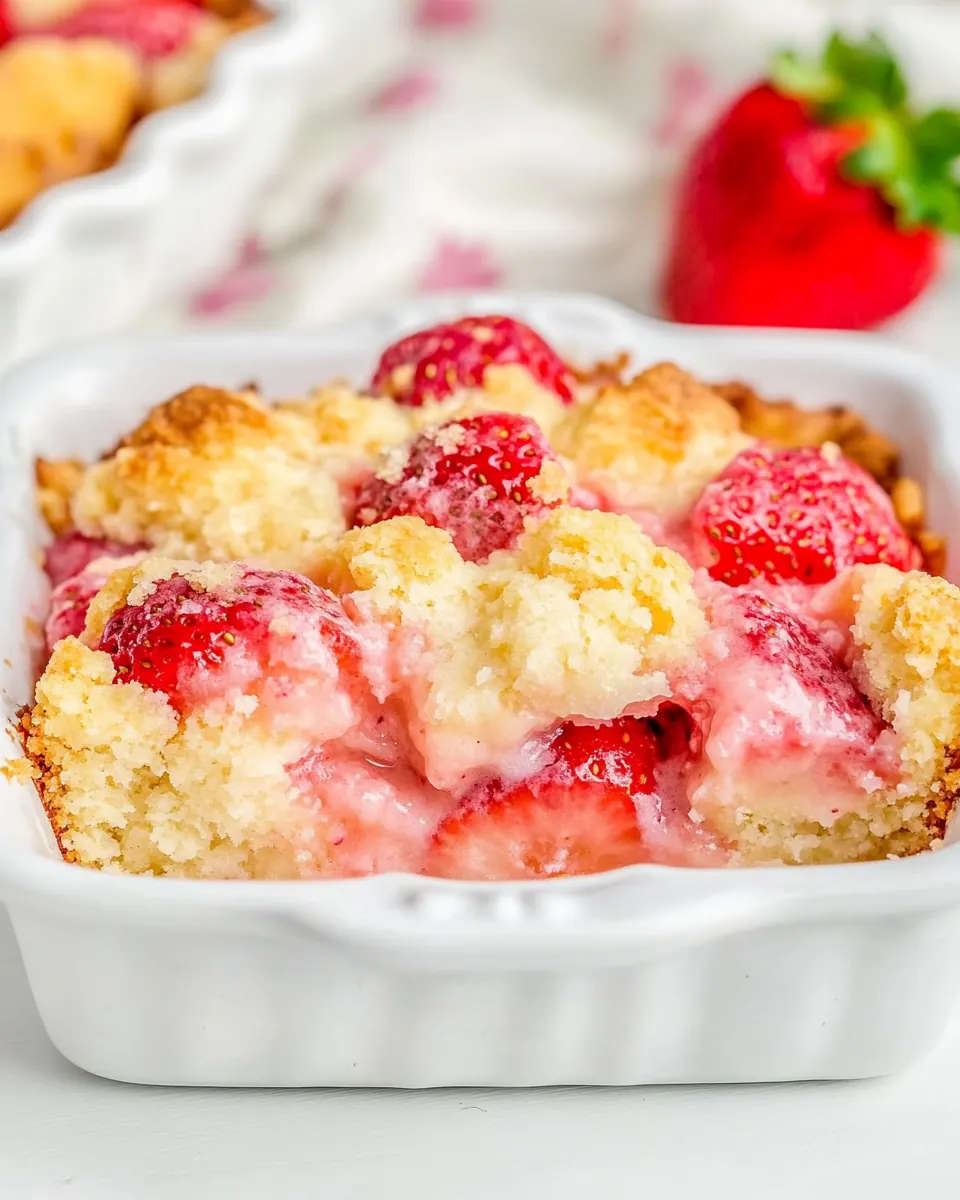
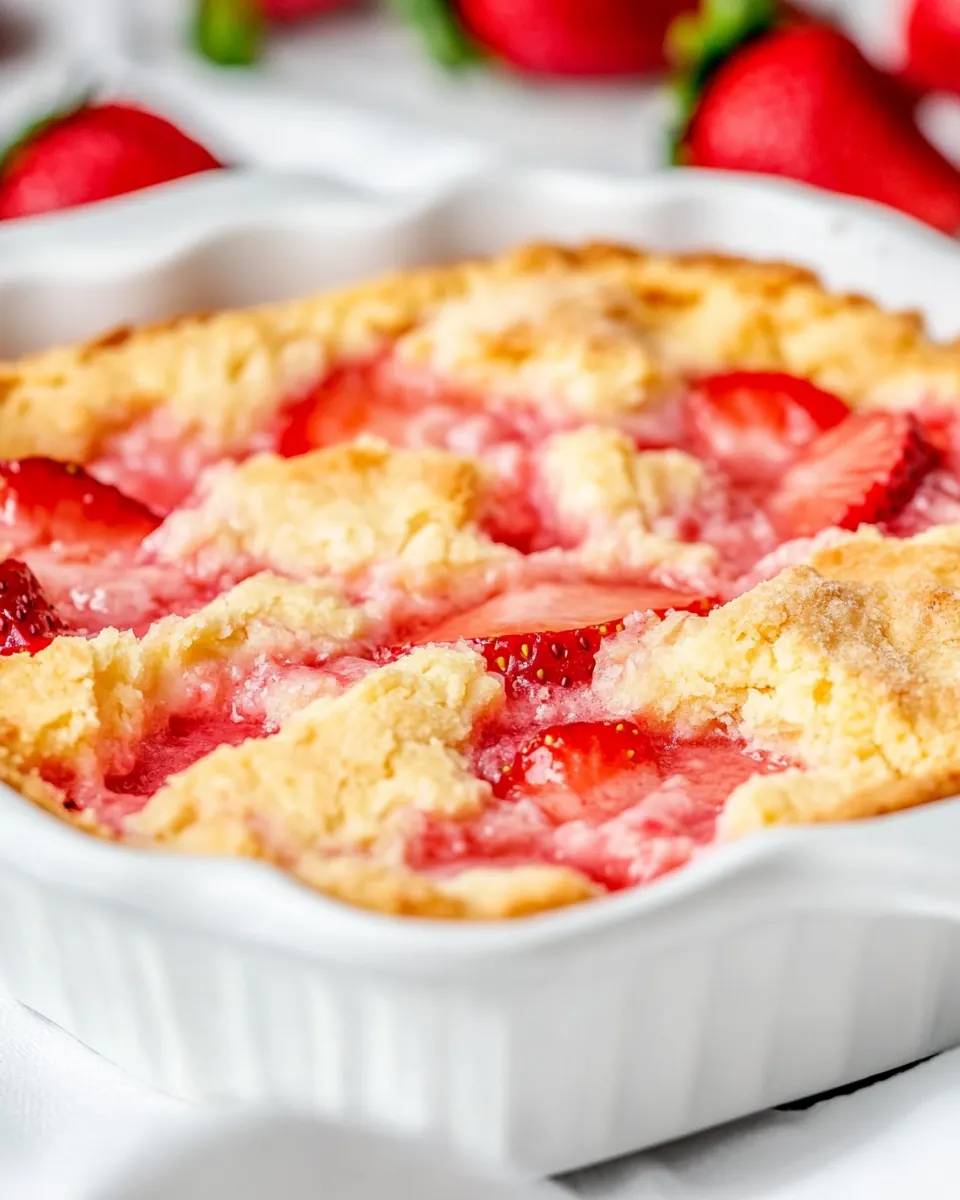
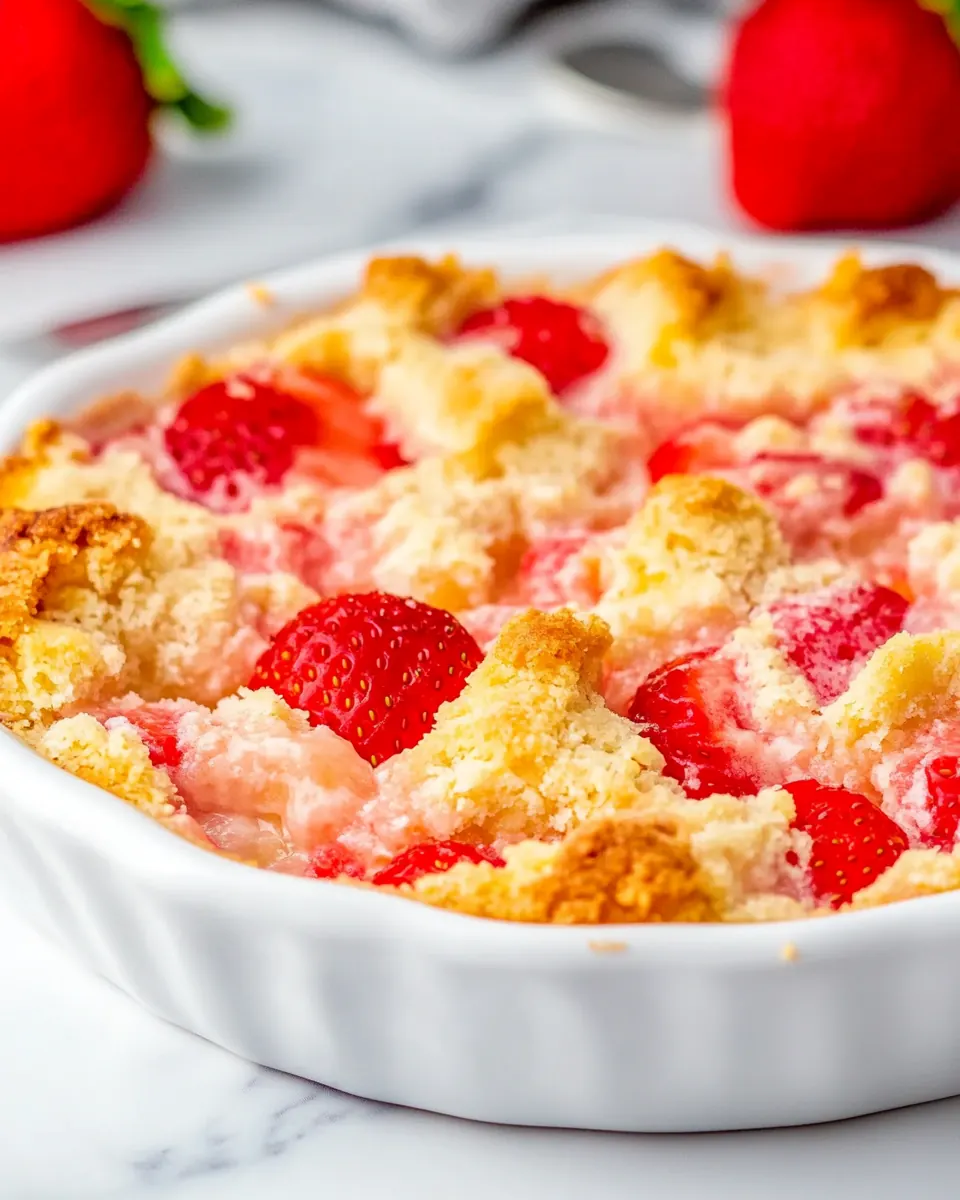
Easy Strawberry Cobbler
Easy Strawberry Cobbler has been my go to for warm spring gatherings when I want something that feels homemade without a lot of fuss.
I still remember the first time I baked this cobbler for a backyard get together, how the kitchen filled with the bright aroma of berries and melted butter as guests trickled in. That evening I learned that a simple mix of pantry staples and fresh strawberries can create a dessert that everyone raves about, and I loved how the bubbling fruit paired with the tender cake like topping. Over the years I have fine tuned little habits that keep the texture just right, and I enjoy serving it straight from the pan so people can dig in family style.
When I make Easy Strawberry Cobbler I like to lean into easy rituals, like preheating the oven early and letting the butter melt in the baking dish so the batter sets around it and forms those lovely pockets of richness. You will find this recipe forgiving, and it has saved my weekend dessert plans more than once when I needed something quick yet utterly satisfying. If you want a dessert that tastes like spring and is approachable for new bakers, this is one I often recommend to friends.
Recipe Snapshot
50 mins
5 mins
45 mins
Medium
300 kcal
American
Gluten-Free, Low FODMAP
Desserts
19×13 inch porcelain or glass baking pan, Oven
The Best Thing About This Easy Strawberry Cobbler
One pan, big flavor
I love that Easy Strawberry Cobbler delivers bold fruit flavor with minimal cleanup. The method uses a single baking dish so you get more time visiting and less time at the sink. That simplicity is a huge reason I keep this recipe on rotation.
Impressive texture contrast
The contrast between the soft, jammy strawberries and the tender, slightly crisp top is what keeps people coming back for seconds. I find the gentle soak of the batter into the butter creates pockets that are almost custardy, while the exposed top caramelizes and gives pleasant chew.
Flexible and forgiving
This cobbler is forgiving to variations in fruit ripeness and oven differences. If your fruit is very juicy, it will take a bit longer to set, but the final result is still delicious. I often swap in other seasonal fruit and still get great results, which is why I bring this to potlucks when I need a crowd pleaser.
Quick to pull together
With only a handful of staples like all purpose flour, granulated sugar, and butter, you can mix the batter in minutes. I appreciate recipes that let me focus on the company and not complicated steps, and this one fits that bill beautifully.
Comfort food energy
This dessert is nostalgic without being fussy, it evokes cozy kitchens and outdoor picnics. I enjoy how Easy Strawberry Cobbler reads as both a casual treat and a special finish to a spring dinner, making it a staple in my recipe file.
Ingredients for Easy Strawberry Cobbler
These ingredients build a balance of structure, sweetness, and bright fruit. The dry ingredients create a tender cake like topping that bakes up golden, the butter provides richness and helps the batter develop pockets as it bakes, and the strawberries bring acidity and natural sweetness that melt into a syrupy filling. Together they yield a cobbler that is both cozy and fresh.
- 1 1/2 cups all purpose flour: Provide structure and bulk to the cobbler batter, creating the framework that holds liquids and leavens while contributing to a tender crumb when properly mixed and measured.
- 1/2 cup unsalted butter, cubed into about 8 pats or pieces: Add rich fat and moisture to the dough, creating flakiness and a buttery flavor; keep cold until cutting in to ensure a light, tender texture.
- 1 cup granulated sugar: Sweeten the cobbler and aid in browning of the crust; also helps balance the fruit's acidity and can influence texture by dissolving into liquids.
- 2 1/2 teaspoons baking powder: Leaven the batter by producing gas when heated, helping the cobbler rise and become airy; ensure it is fresh for reliable lift.
- 1/2 teaspoons salt: Enhance overall flavor by balancing sweetness and amplifying other flavors; also helps control yeast activity and strengthens gluten slightly.
- 1 1/4 cups whole milk, (whole milk recommended but 2% or plant-based milk may be used): Provide liquid to hydrate the dry ingredients and contribute to tenderness and richness; choice of milk affects flavor and final texture.
- 2 cups fresh strawberries, cleaned, hulled, and halved or quartered depending on size of the berry: Offer fresh fruity flavor, juiciness, and natural sweetness while contributing moisture; distribute evenly for consistent fruit pockets and tart-sweet balance.
Directions for Easy Strawberry Cobbler

This cobbler comes together quickly, and the hands on time is short, but the baking stage benefits from attention. Below I walk through each step with sensory cues, why the technique matters, and what to watch for so your cobbler turns out just right.
- Preheat oven to 350 F. Add the cubed butter pieces to the bottom of the baking pan, scattered evenly, and place it in the oven while the oven is preheating in order to melt the butter, about 10 minutes.: As the oven warms you will notice a dry heat building, which helps the top of the cobbler set and brown evenly. Preheating ensures predictable baking times and even texture, since a cold oven can lead to undercooked centers. A common misstep is skipping preheat, which can cause the batter to absorb too much melted butter before it bakes, altering the crumb and timing; always wait until your oven reaches temperature before moving on.
- While the oven is preheating, make the batter by adding the flour, sugar, baking powder, and salt to a large mixing bowl and whisk to combine.: You will hear a quiet settling as the butter melts and see it transform from solid to a glossy pool, which is important because the batter will be poured over it and the interaction yields the characteristic pockets and crisp edges. Letting the butter melt partially on the heat concentrates flavor in the pan and encourages the batter to bake around the fat producing a layered texture. Beware of fully browning the butter unless you want a nuttier flavor, and use oven mitts when handling the hot pan to avoid burns.
- Add the milk (tip– add a teaspoon of vanilla or almond extract now too if you'd like for extra flavor) and whisk until just combined.: The dry ingredients will form a uniform mixture, and you should hear the light whisking sound as they blend; this helps distribute the baking powder so the topping rises evenly. A consistent dry mix prevents pockets of leavening or salt that can create uneven flavor. Avoid overworking the dry mix with vigorous beating once liquid is added, since that can activate gluten and make the topping tough.
- After about 10 minutes, remove the baking pan from the oven (make sure the butter is melted) and evenly pour the batter over the top of the butter. Do NOT mix, just pour the batter over the butter and let it be.: As you pour in the milk the batter will loosen and become slightly glossy, and you will see streaks disappear as the whisk moves through. Whisk until the mixture is homogenous but still slightly lumpy; over mixing will produce a denser topping. Some cooks like to add a teaspoon of vanilla or almond extract here for flavor, but that is optional. A common mistake is over-whisking which strengthens gluten and yields a chewy texture, so stop when the batter just comes together.
- Evenly sprinkle the strawberries over the top and bake for about 45 minutes, or until the cobbler is set and done. Baking Tips– Because all fruit has and releases different amounts of natural liquids and juices, baking time will vary. Start checking about 35-40 minutes, but if your cobbler takes longer than 45 minutes to bake, that's fine. Bake it until it's done. If the top is browning more quickly than you want before it's setting up, tent the pan by loosely draping a sheet of foil loosely over the top. If you're baking in a metal pan rather than porcelain, glass, or ceramic, your cobbler will likely bake more quickly (5-8 minutes, or so is my guess) so start checking it earlier.: You should see shimmering melted butter in the pan and when you pour the batter it will float and begin to sink slowly, creating pockets where the batter interacts with the fat. This separation is key to the cobbler structure, as the batter will bake around the melted butter and rise differently than if it were mixed in. Resist the urge to stir, because stirring will blend the fat with the batter and eliminate the unique layered effect. A frequent error is mixing here which yields a denser, more uniform cake rather than the classic cobbler texture.
- Serve immediately plain or with ice cream, whipped topping, Cool Whip, etc.: You will see the strawberries sink slightly and begin to release juices that bubble at the edges; the aroma will sweeten and the top will take on a warm golden hue. Bake time can vary depending on fruit juiciness and pan material, so start checking around 35 to 40 minutes; when the center is set and a toothpick comes out with moist crumbs rather than wet batter, it is done. If the top is browning too quickly, tent loosely with foil to prevent over browning while the center finishes. A common pitfall is assuming the color alone indicates doneness; always check the set in the center.
- Storage– Leftovers will keep airtight in the fridge for up to 4 days. Reheat individual portions of leftovers in the microwave for about 10-15 seconds, if desired. While you can technically freeze this recipe for up to 3 months, it's not one I advocate freezing since the fruit texture will change and leftovers could be very soggy.: As you spoon portions the contrast between warm, syrupy strawberries and the tender topping is most pronounced, and the steam will carry that fresh berry scent. Serving warm also heightens the buttery aroma and the sensation of soft and slightly crisp textures. If serving with a cold accompaniment like ice cream, be mindful of timing so the contrast remains. Avoid letting the cobbler sit too long at room temperature uncovered, which can cause the top to soften and lose some of its texture.
- Storage Leftovers will keep airtight in the fridge for up to 4 days: When cooled slightly transfer to an airtight container or cover the pan tightly, and you will notice the texture gets softer as the strawberries continue to release juices. Reheat individual portions briefly in the microwave for about 10 to 15 seconds to bring back warmth and loosen the filling. While freezing is possible, the fruit texture changes and leftovers can become soggy, so I rarely recommend freezing; if you do freeze expect a different mouthfeel on thawing.
Change It Up
If you want to vary this cobbler, small swaps and additions make a big difference without complicating the method. Below I share practical ways to alter texture, flavor, and presentation so you can tailor the recipe to the season or your pantry.
- Use mixed berries Try combining strawberries with blueberries or raspberries for a more complex berry profile while keeping the same total fruit volume.
- Swap milk types Whole milk gives the richest topping, but 2 percent or a neutral plant based milk will work if you need a lighter option.
- Add a spice A pinch of cinnamon or nutmeg in the dry mix pairs beautifully with cooked berries and adds warmth, but add conservatively so it does not overpower the fruit.
- Top with nuts Toasted chopped nuts sprinkled on the finished cobbler bring crunch, but add them at the end to preserve texture.
- Try zest Grating a little lemon or orange zest over the strawberries before baking brightens the fruit and lifts the overall flavor.
- Adjust sugar Reduce the granulated sugar slightly if your strawberries are exceptionally sweet, but remember sugar aids browning so reduce in small increments.
Accompaniments for Easy Strawberry Cobbler
This cobbler is versatile to serve and pairs well with a few simple accompaniments that enhance its warm fruit character. Below are ideas for serving styles and occasions, plus storage and seasonal pairing notes to help you plan.
- Classic scoop Serve warm with a scoop of vanilla ice cream for a temperature contrast and creamy balance to the warm strawberries.
- Whipped topping A dollop of lightly sweetened whipped cream brightens the dish and adds an airy texture that pairs with the tender topping.
- Casual potluck This pan style cobbler is ideal for gatherings like picnics and potlucks, where you can serve directly from the baking dish and people can help themselves.
- Seasonal twist For spring and early summer, emphasize fresh strawberries and pair with light desserts; in cooler months, consider adding warming spices for a cozy finish.
- Storage tips Store leftovers airtight in the refrigerator for up to four days, and reheat individual portions briefly to restore warmth without overcooking the fruit.
- Serving size Cut into eight portions for a family dessert, or serve smaller scoops at a gathering to let people sample other sweets as well.
FAQ
Conclusion
Easy Strawberry Cobbler is special because it turns a few pantry staples and fresh berries into a dessert that feels both nostalgic and effortlessly elegant. The combination of buttery pockets in the topping and warm, syrupy strawberries makes every bite comforting and vibrant. Give it a try the next time you want a dessert that is quick to assemble but makes a big impression, and enjoy serving it warm so the flavors really shine. It is a recipe I return to again and again because it reliably delivers comfort and bright fruit flavor with minimal fuss.
Easy Strawberry Cobbler
Equipment
- 19×13 inch porcelain or glass baking pan
- Oven
Ingredients
- 1 1/2 cups all purpose flour Provide structure and bulk to the cobbler batter, creating the framework that holds liquids and leavens while contributing to a tender crumb when properly mixed and measured.
- 1/2 cup unsalted butter, cubed into about 8 pats or pieces Add rich fat and moisture to the dough, creating flakiness and a buttery flavor; keep cold until cutting in to ensure a light, tender texture.
- 1 cup granulated sugar Sweeten the cobbler and aid in browning of the crust; also helps balance the fruit's acidity and can influence texture by dissolving into liquids.
- 2 1/2 teaspoons baking powder Leaven the batter by producing gas when heated, helping the cobbler rise and become airy; ensure it is fresh for reliable lift.
- 1/2 teaspoons salt Enhance overall flavor by balancing sweetness and amplifying other flavors; also helps control yeast activity and strengthens gluten slightly.
- 1 1/4 cups whole milk, (whole milk recommended but 2% or plant-based milk may be used) Provide liquid to hydrate the dry ingredients and contribute to tenderness and richness; choice of milk affects flavor and final texture.
- 2 cups fresh strawberries, cleaned, hulled, and halved or quartered depending on size of the berry Offer fresh fruity flavor, juiciness, and natural sweetness while contributing moisture; distribute evenly for consistent fruit pockets and tart-sweet balance.
Instructions
- Preheat oven to 350 F. Add the cubed butter pieces to the bottom of the baking pan, scattered evenly, and place it in the oven while the oven is preheating in order to melt the butter, about 10 minutes.: As the oven warms you will notice a dry heat building, which helps the top of the cobbler set and brown evenly. Preheating ensures predictable baking times and even texture, since a cold oven can lead to undercooked centers. A common misstep is skipping preheat, which can cause the batter to absorb too much melted butter before it bakes, altering the crumb and timing; always wait until your oven reaches temperature before moving on.
- While the oven is preheating, make the batter by adding the flour, sugar, baking powder, and salt to a large mixing bowl and whisk to combine.: You will hear a quiet settling as the butter melts and see it transform from solid to a glossy pool, which is important because the batter will be poured over it and the interaction yields the characteristic pockets and crisp edges. Letting the butter melt partially on the heat concentrates flavor in the pan and encourages the batter to bake around the fat producing a layered texture. Beware of fully browning the butter unless you want a nuttier flavor, and use oven mitts when handling the hot pan to avoid burns.
- Add the milk (tip– add a teaspoon of vanilla or almond extract now too if you'd like for extra flavor) and whisk until just combined.: The dry ingredients will form a uniform mixture, and you should hear the light whisking sound as they blend; this helps distribute the baking powder so the topping rises evenly. A consistent dry mix prevents pockets of leavening or salt that can create uneven flavor. Avoid overworking the dry mix with vigorous beating once liquid is added, since that can activate gluten and make the topping tough.
- After about 10 minutes, remove the baking pan from the oven (make sure the butter is melted) and evenly pour the batter over the top of the butter. Do NOT mix, just pour the batter over the butter and let it be.: As you pour in the milk the batter will loosen and become slightly glossy, and you will see streaks disappear as the whisk moves through. Whisk until the mixture is homogenous but still slightly lumpy; over mixing will produce a denser topping. Some cooks like to add a teaspoon of vanilla or almond extract here for flavor, but that is optional. A common mistake is over-whisking which strengthens gluten and yields a chewy texture, so stop when the batter just comes together.
- Evenly sprinkle the strawberries over the top and bake for about 45 minutes, or until the cobbler is set and done. Baking Tips– Because all fruit has and releases different amounts of natural liquids and juices, baking time will vary. Start checking about 35-40 minutes, but if your cobbler takes longer than 45 minutes to bake, that's fine. Bake it until it's done. If the top is browning more quickly than you want before it's setting up, tent the pan by loosely draping a sheet of foil loosely over the top. If you're baking in a metal pan rather than porcelain, glass, or ceramic, your cobbler will likely bake more quickly (5-8 minutes, or so is my guess) so start checking it earlier.: You should see shimmering melted butter in the pan and when you pour the batter it will float and begin to sink slowly, creating pockets where the batter interacts with the fat. This separation is key to the cobbler structure, as the batter will bake around the melted butter and rise differently than if it were mixed in. Resist the urge to stir, because stirring will blend the fat with the batter and eliminate the unique layered effect. A frequent error is mixing here which yields a denser, more uniform cake rather than the classic cobbler texture.
- Serve immediately plain or with ice cream, whipped topping, Cool Whip, etc.: You will see the strawberries sink slightly and begin to release juices that bubble at the edges; the aroma will sweeten and the top will take on a warm golden hue. Bake time can vary depending on fruit juiciness and pan material, so start checking around 35 to 40 minutes; when the center is set and a toothpick comes out with moist crumbs rather than wet batter, it is done. If the top is browning too quickly, tent loosely with foil to prevent over browning while the center finishes. A common pitfall is assuming the color alone indicates doneness; always check the set in the center.
- Storage– Leftovers will keep airtight in the fridge for up to 4 days. Reheat individual portions of leftovers in the microwave for about 10-15 seconds, if desired. While you can technically freeze this recipe for up to 3 months, it's not one I advocate freezing since the fruit texture will change and leftovers could be very soggy.: As you spoon portions the contrast between warm, syrupy strawberries and the tender topping is most pronounced, and the steam will carry that fresh berry scent. Serving warm also heightens the buttery aroma and the sensation of soft and slightly crisp textures. If serving with a cold accompaniment like ice cream, be mindful of timing so the contrast remains. Avoid letting the cobbler sit too long at room temperature uncovered, which can cause the top to soften and lose some of its texture.
- Storage Leftovers will keep airtight in the fridge for up to 4 days: When cooled slightly transfer to an airtight container or cover the pan tightly, and you will notice the texture gets softer as the strawberries continue to release juices. Reheat individual portions briefly in the microwave for about 10 to 15 seconds to bring back warmth and loosen the filling. While freezing is possible, the fruit texture changes and leftovers can become soggy, so I rarely recommend freezing; if you do freeze expect a different mouthfeel on thawing.
Notes
- Use mixed berries Try combining strawberries with blueberries or raspberries for a more complex berry profile while keeping the same total fruit volume.
- Swap milk types Whole milk gives the richest topping, but 2 percent or a neutral plant based milk will work if you need a lighter option.
- Add a spice A pinch of cinnamon or nutmeg in the dry mix pairs beautifully with cooked berries and adds warmth, but add conservatively so it does not overpower the fruit.
- Top with nuts Toasted chopped nuts sprinkled on the finished cobbler bring crunch, but add them at the end to preserve texture.
- Try zest Grating a little lemon or orange zest over the strawberries before baking brightens the fruit and lifts the overall flavor.
- Adjust sugar Reduce the granulated sugar slightly if your strawberries are exceptionally sweet, but remember sugar aids browning so reduce in small increments.