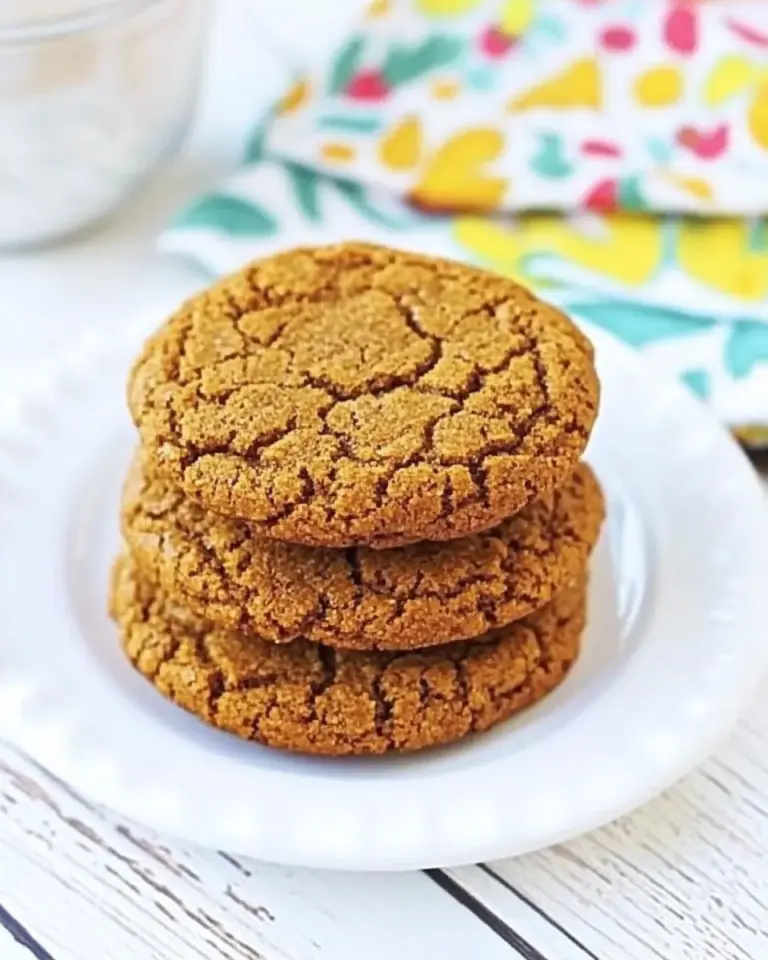
Pumpkin Chocolate Chip Bars
Pumpkin Chocolate Chip Bars have been my go to when I need a cozy, crowd pleasing dessert that travels well and still tastes like home. The first time I baked these, I was bringing treats to a neighborhood potluck on a crisp October afternoon, and the tray came back empty faster than any other dish. I remember the warm, pumpkin scented kitchen and the sweet, nutty smell of chocolate filling the air as friends reached for seconds.
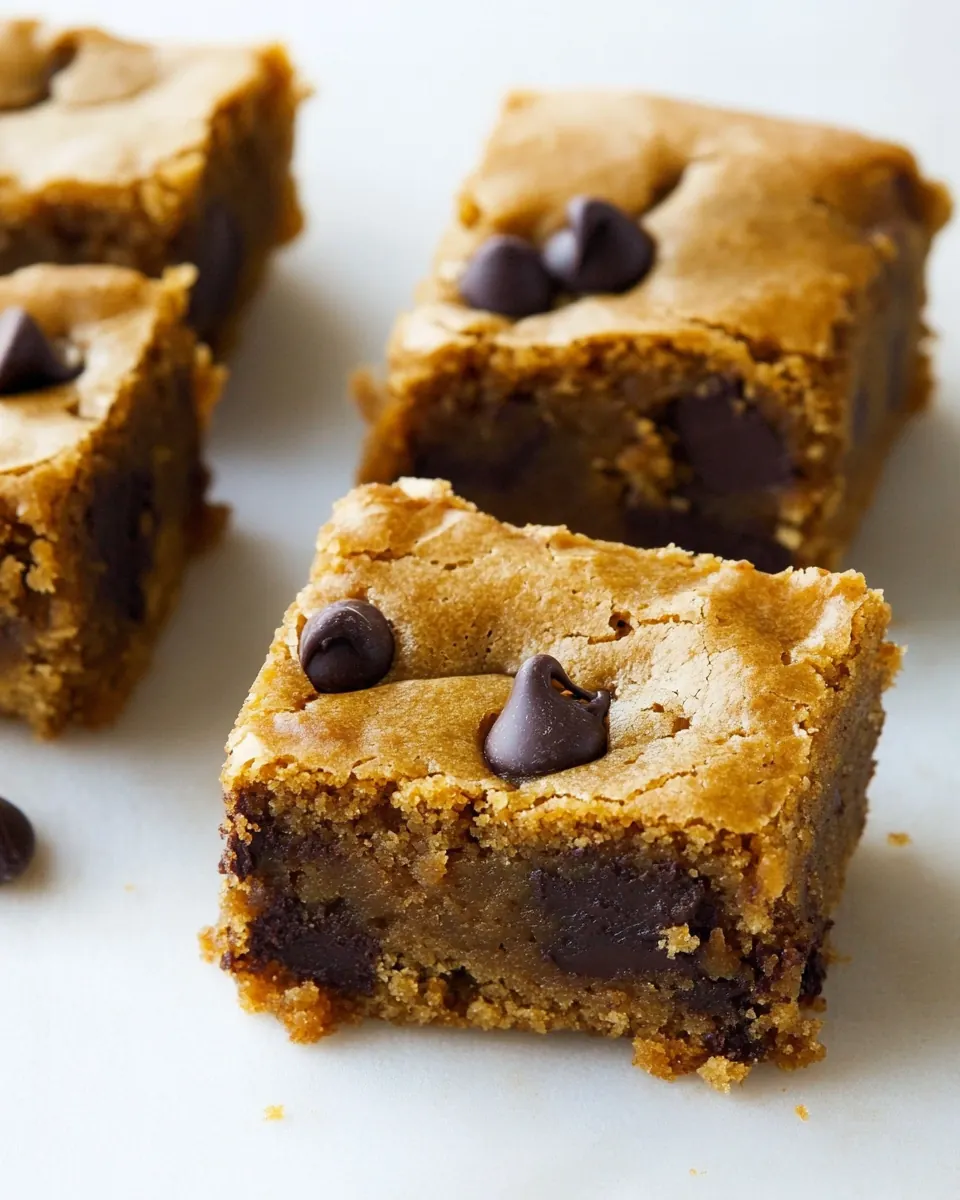
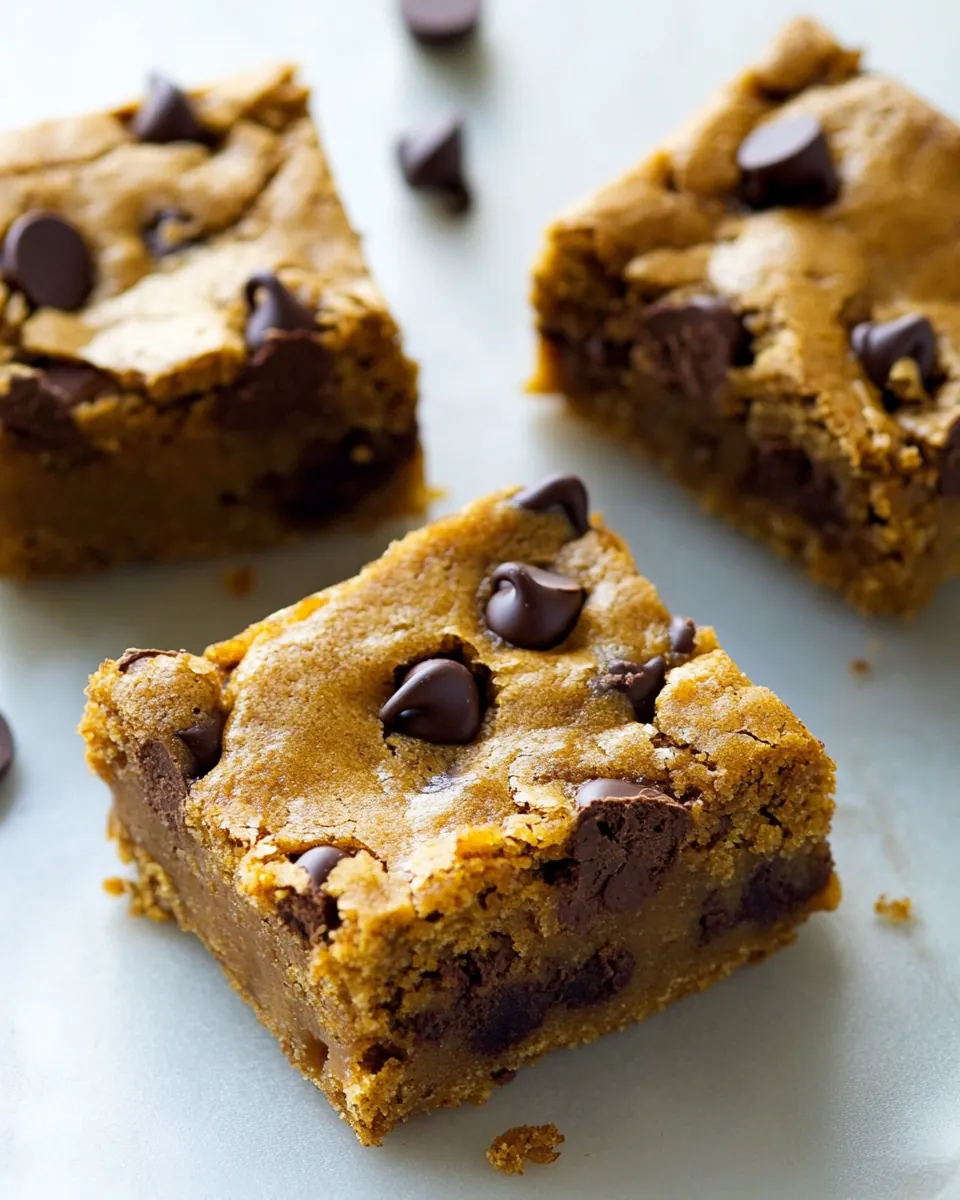
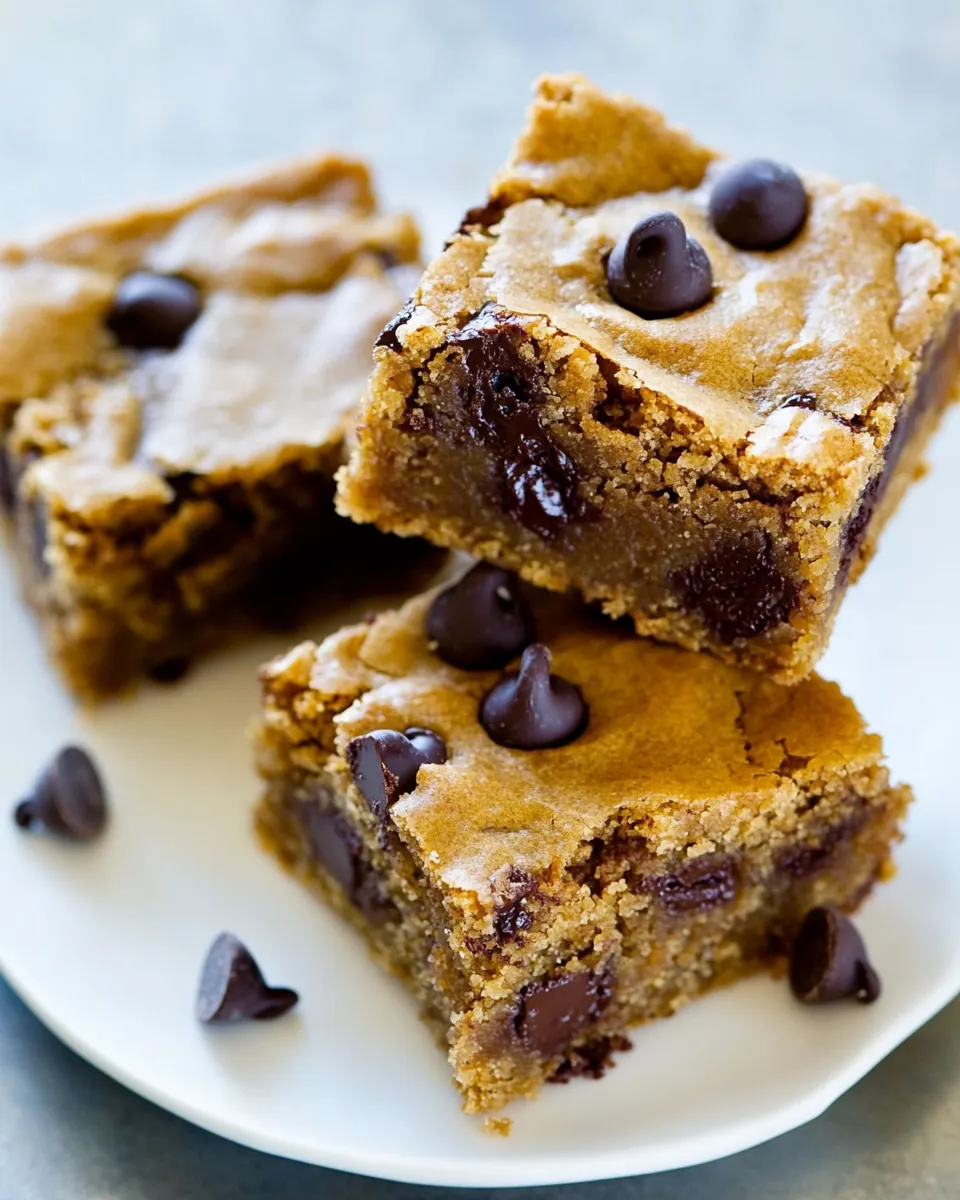
Over the years I have tweaked the batter a bit to balance moisture and structure, because I want each square to be tender, not cakey, and to hold together without crumbling. When I serve Pumpkin Chocolate Chip Bars I like how the pumpkin flavor sings without being overpowering, and the pockets of melted semisweet chocolate chips add the right burst of sweetness. These bars became my October staple, handed out at school bake sales and tucked into care packages.
Recipe Snapshot
45 mins
10 mins
35 mins
Medium
200 kcal
American
Gluten-Free, Low FODMAP
Desserts
9-by-13-inch baking pan, Parchment paper, Mixer, Offset spatula, Serrated knife
What We Adore About This Pumpkin Chocolate Chip Bars
They capture classic fall flavors
I love how Pumpkin Chocolate Chip Bars concentrate all the best parts of seasonal baking, the earthy pumpkin and warm spice coming together in every bite. The aroma while they bake draws people to the kitchen, and I find that nostalgia sells these bars more than any fancy technique.
Easy to make, easy to share
These bars are forgiving, and that makes them perfect for busy afternoons. I appreciate recipes that let me multitask, because I often juggle kids homework, phone calls, and dinner prep while something bakes. You can mix everything in one bowl, pour into a pan, and walk away confident they will turn out.
Texture that holds up
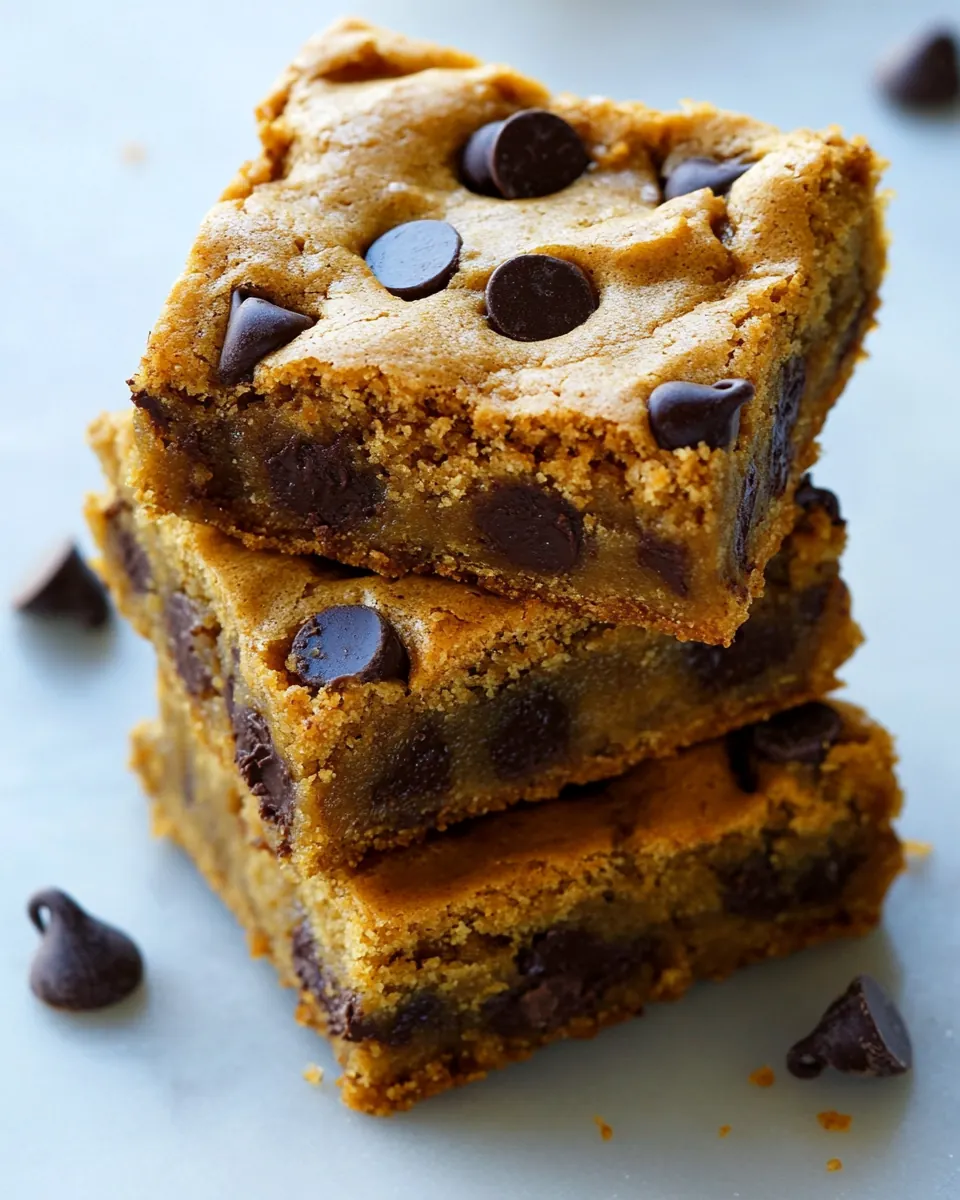
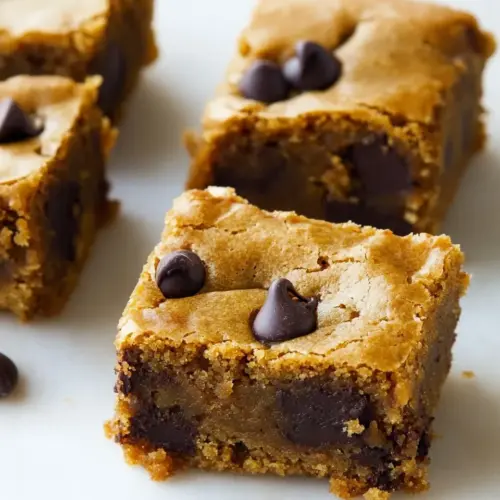
What stands out to me is the texture balance, soft and slightly chewy, with a tender crumb that never falls apart. The chocolate chips melt into little pockets that contrast the moist pumpkin batter, so every square has variety in each bite.
Versatile for occasions
I bring these to everything from Halloween parties to casual afternoon coffee dates. They travel well, refrigerate nicely, and are simple to portion. I also like that they suit different serving needs, whether on a dessert table or wrapped individually as gifts.
Beginner friendly with room for tweaks
I’ve taught friends to make these on a whim, and they always succeed. The recipe tolerates small ingredient swaps or slight timing adjustments, so you can personalize sweetness or spice levels without breaking the final result.
Pumpkin Chocolate Chip Bars Ingredients
These ingredients are intentionally straightforward, focused on pantry staples that harmonize to make a moist, flavorful bar. The key players are the pumpkin puree for moisture and richness, the all purpose flour for structure, and the semisweet chocolate chips for pockets of sweet contrast. Together they create a tender yet sliceable bar that showcases autumn spices without overwhelming the palate.
- 1/2 cup unsalted butter, melted: Melted and rich, provides fat and moisture to create tender, soft bars while enhancing flavor depth; helps distribute heat evenly during baking and contributes to a golden-brown crust.
- 1 1/2 cups sugar: Sweet and granular, balances pumpkin earthiness and adds structure by dissolving into the batter; contributes to browning and helps create a slightly chewy texture in the finished bars.
- 2 large eggs: Beaten and binding, adds lift and structure by trapping air and setting the batter as it bakes; contributes richness and helps emulsify wet and dry components.
- 1 tablespoon vanilla extract: Aromatic and sweet, imparts fragrant flavor notes that complement pumpkin and chocolate; enhances overall depth and rounds out the sweetness profile of the bars.
- 1 cup canned pumpkin puree: Pureed and moist, provides primary pumpkin flavor, moisture, and tender crumb while reducing the need for excess fat; adds natural color and subtle sweetness to the batter.
- 2 cups all-purpose flour: Starchy and structural, supplies the bulk and gluten needed to form the bar’s crumb and chew; helps absorb moisture and creates the framework that holds other ingredients together.
- 1 teaspoon pumpkin-pie spice: Warm and spiced, contributes characteristic pumpkin pie flavor with cinnamon, nutmeg, and clove notes; intensifies aroma and balances sweetness for a cozy taste profile.
- 1 teaspoon baking soda: Leavening and reactive, produces carbon dioxide to help the batter rise and develop a light yet dense texture; also interacts with acidic components to affect flavor and crumb.
- 1 teaspoon kosher salt: Salty and enhancing, intensifies and balances sweetness while elevating other flavors; controls overall taste and helps regulate yeast-free leavening reactions.
- 1 1/2 cups semisweet chocolate chips: Sweet and melty, adds pockets of concentrated chocolate flavor and texture contrast; melts during baking to create gooey bites and complements the pumpkin’s earthiness.
Pumpkin Chocolate Chip Bars Instructions
These instructions walk you through each stage with sensory cues so you can trust the outcome. I like to chat through small details because timing and texture matter more than exact perfection. Read each step slowly, and you will hear and see when it is right.
- Preheat oven to 350 degrees and line the bottom and sides of a 9-by-13-inch baking pan with parchment paper or grease the pan.: The kitchen fills with a faint warm scent as the oven approaches 350 degrees , which helps set your expectations for baking time. Lining the pan with parchment prevents sticking and makes it easier to lift the bars out when cooled, preserving clean edges. Rub a little melted butter on the pan if you skip parchment to add flavor and prevent adhesion. A common pitfall is skipping parchment and over greasing, which can create oily spots; take a moment to ensure the paper is snug and has no folds that will warp during baking.
- In a large bowl, beat the butter and sugar on medium-high speed until smooth with a mixer; beat in eggs and vanilla until combined. Beat in pumpkin puree. Reduce speed to low, and mix in flour, pumpkin pie spice, baking soda, and salt until just combined. Fold in chocolate chips reserving 1/4 cup for the top.: As you mix, you will notice the melted butter and sugar amalgamate into a glossy mixture that smells rich and slightly caramelized. When you add the eggs and vanilla , the batter lightens visually and becomes more cohesive, producing a ribbon-like fall from the beater which indicates proper emulsification. This step creates the base texture; if you under-mix, the sugar may remain grainy, and if you over-mix, the batter could trap too much air and collapse during baking, so stop when smooth and uniform.
- Spread batter evenly in prepared pan and sprinkle with reserved chips. Bake until edges begin to pull away from sides of pan and a toothpick inserted in center comes out with just a few moist crumbs attached, 28 to 35 minutes. Do not overbake! Cool completely in pan.: When you incorporate the pumpkin , the aroma shifts to a cozy, earthy note, and the batter will become visibly darker and thicker. The puree adds moisture and richness, so ensure it blends fully with no streaks, scraping the bowl sides so there are no concentrated pockets. If you add cold puree straight from the can, the batter may tighten; try to temper components to similar temperatures. A mistake here is adding too much puree, which can lead to an underbaked center, so stick to the measured amount.
- Lift cake from pan, peel off parchment and use a serrated knife to cut into 24 squares.: On low speed the dry mix will disappear into the wet batter without creating excess gluten, yielding a tender crumb. The scent of pumpkin pie spice will bloom as it disperses, and you should see a uniform batter with no streaks of all purpose flour . Mixing just until combined preserves lightness; overmixing activates the flour and can make the bars tough, so stop when you no longer see dry pockets. If the batter feels slack, let it rest for a few minutes to hydrate the flour before moving on.
- Fold in chocolate chips reserving 1/4 cup for the top: As you fold in the semisweet chocolate chips , pockets of dark brown will punctuate the orange batter, promising melty bites. Folding is gentler than stirring, helping keep the air incorporated while distributing chips evenly. Reserve the quarter cup so the top looks attractive after baking. Beware of overworking here, which can cause the chips to break apart or partially melt into the batter, losing distinct chocolate pockets.
- Spread batter evenly in prepared pan and sprinkle with reserved chips: The batter should spread easily into the pan, and you can smooth the surface with a spatula to create uniform thickness that bakes evenly. The reserved chips on top will create a glossy studded finish and give a visual cue when the bars are done. If the batter is lumpy, tap the pan gently on the counter to release air bubbles and level the surface. A mistake to avoid is pressing the batter too thin at the edges, which can overbrown and dry out.
- Bake until edges begin to pull away from sides of pan and a toothpick inserted in center comes out with just a few moist crumbs attached, 28 to 35 minutes: During baking you will notice the aroma intensify, with sweet and spiced notes filling the kitchen; the surface will set and the edges will take on a light golden tone. Watch for the visual cue of edges pulling slightly from the pan and test with a toothpick; a few moist crumbs means the bars are tender and not overbaked. Avoid opening the oven repeatedly, which drops temperature and affects rise. Overbaking leads to dry bars, so err on the side of slightly underdone in the center because they continue to set as they cool.
- Do not overbake! Cool completely in pan: Cooling in the pan lets the bars firm up and finish cooking gently from residual heat, which produces clean slices. As they cool you will sense a soft crackle from settling, and the top will become less glossy. Resist the urge to cut while warm because warm bars tend to crumble; patience here preserves shape and presentation. A common error is inverting the pan too soon, which can cause the bars to break apart.
- Lift cake from pan, peel off parchment and use a serrated knife to cut into 24 squares: Lifting the slab on the parchment reveals a uniform underside and makes slicing straightforward. Using a serrated knife with a gentle sawing motion creates neat edges without compressing the crumb, and wiping the blade between cuts keeps slices tidy. If your bars feel sticky, chill briefly to firm up before slicing. Avoid pressing down hard with the knife which will compress the texture and create uneven pieces.
Helpful Hints
These practical notes will help you reproduce my best batch every time, and they highlight common adjustments I make depending on weather and oven quirks. Read them before you start, and keep the list handy while you bake.
- Room temperature ingredients: Bringing eggs and canned pumpkin closer to room temperature helps the batter combine evenly, reducing mixing time and improving texture.
- Check oven accuracy: An oven thermometer can prevent over or under baking, since many ovens run a few degrees off the set 350 degrees.
- Fresh baking soda: Ensure your baking soda is fresh; old leavening can lead to dense, flat bars instead of the desired tender lift.
- Even spreading: Use an offset spatula to smooth the batter so the bars bake uniformly and you avoid a thin, crispy edge on one side.
- Chill for cleaner cuts: If you prefer perfectly square bars, chill the pan briefly after cooling, then slice with a serrated knife for neater edges.
How to Serve Pumpkin Chocolate Chip Bars
These bars are versatile, appealing for casual gatherings or as an after school treat. They pair well with coffee, tea, or a warm cider and are easy to portion for sharing. Consider these serving ideas for different occasions and storage guidance so you can plan ahead.
- Casual snack plate: Arrange a variety of sizes on a platter for coffee hour, highlighting the bars with a few whole semisweet chocolate chips sprinkled on top for a homemade look.
- Party dessert table: Stack squares on a tiered stand for visual impact, and include small signs noting they feature pumpkin and spice so guests know what to expect.
- Lunchbox addition: Wrap individual squares in parchment for an easy grab and go treat that stays fresh for a couple of days at room temperature.
- Seasonal gatherings: For Halloween or fall celebrations, serve alongside warm beverages and encourage guests to take slices home; they travel well and keep their texture.
- Storage tips: Store in an airtight container at room temperature for up to three days or refrigerate for up to five days, separating layers with parchment to prevent sticking.
- Freezing: Freeze cooled squares in a single layer on a tray, then transfer to a freezer bag for up to two months; thaw at room temperature when ready to serve.
FAQ
Conclusion
These Pumpkin Chocolate Chip Bars shine because they combine cozy autumn spices with tender pumpkin and pockets of melty chocolate, producing a reliable and crowd pleasing treat. Give them a try next time you want something that travels well and satisfies a range of tastes. They are approachable, forgiving, and perfect for sharing, so bake a pan and enjoy the comforting flavors with friends and family.
Pumpkin Chocolate Chip Bars
Equipment
- 9-by-13-inch baking pan
- Parchment Paper
- Mixer
- Offset Spatula
- Serrated Knife
Ingredients
- 1/2 cup unsalted butter, melted Melted and rich, provides fat and moisture to create tender, soft bars while enhancing flavor depth; helps distribute heat evenly during baking and contributes to a golden-brown crust.
- 1 1/2 cups sugar Sweet and granular, balances pumpkin earthiness and adds structure by dissolving into the batter; contributes to browning and helps create a slightly chewy texture in the finished bars.
- 2 large eggs Beaten and binding, adds lift and structure by trapping air and setting the batter as it bakes; contributes richness and helps emulsify wet and dry components.
- 1 tablespoon vanilla extract Aromatic and sweet, imparts fragrant flavor notes that complement pumpkin and chocolate; enhances overall depth and rounds out the sweetness profile of the bars.
- 1 cup canned pumpkin puree Pureed and moist, provides primary pumpkin flavor, moisture, and tender crumb while reducing the need for excess fat; adds natural color and subtle sweetness to the batter.
- 2 cups all-purpose flour Starchy and structural, supplies the bulk and gluten needed to form the bar’s crumb and chew; helps absorb moisture and creates the framework that holds other ingredients together.
- 1 teaspoon pumpkin-pie spice Warm and spiced, contributes characteristic pumpkin pie flavor with cinnamon, nutmeg, and clove notes; intensifies aroma and balances sweetness for a cozy taste profile.
- 1 teaspoon baking soda Leavening and reactive, produces carbon dioxide to help the batter rise and develop a light yet dense texture; also interacts with acidic components to affect flavor and crumb.
- 1 teaspoon kosher salt Salty and enhancing, intensifies and balances sweetness while elevating other flavors; controls overall taste and helps regulate yeast-free leavening reactions.
- 1 1/2 cups semisweet chocolate chips Sweet and melty, adds pockets of concentrated chocolate flavor and texture contrast; melts during baking to create gooey bites and complements the pumpkin’s earthiness.
Instructions
- Preheat oven to 350 degrees and line the bottom and sides of a 9-by-13-inch baking pan with parchment paper or grease the pan.: The kitchen fills with a faint warm scent as the oven approaches 350 degrees , which helps set your expectations for baking time. Lining the pan with parchment prevents sticking and makes it easier to lift the bars out when cooled, preserving clean edges. Rub a little melted butter on the pan if you skip parchment to add flavor and prevent adhesion. A common pitfall is skipping parchment and over greasing, which can create oily spots; take a moment to ensure the paper is snug and has no folds that will warp during baking.
- In a large bowl, beat the butter and sugar on medium-high speed until smooth with a mixer; beat in eggs and vanilla until combined. Beat in pumpkin puree. Reduce speed to low, and mix in flour, pumpkin pie spice, baking soda, and salt until just combined. Fold in chocolate chips reserving 1/4 cup for the top.: As you mix, you will notice the melted butter and sugar amalgamate into a glossy mixture that smells rich and slightly caramelized. When you add the eggs and vanilla , the batter lightens visually and becomes more cohesive, producing a ribbon-like fall from the beater which indicates proper emulsification. This step creates the base texture; if you under-mix, the sugar may remain grainy, and if you over-mix, the batter could trap too much air and collapse during baking, so stop when smooth and uniform.
- Spread batter evenly in prepared pan and sprinkle with reserved chips. Bake until edges begin to pull away from sides of pan and a toothpick inserted in center comes out with just a few moist crumbs attached, 28 to 35 minutes. Do not overbake! Cool completely in pan.: When you incorporate the pumpkin , the aroma shifts to a cozy, earthy note, and the batter will become visibly darker and thicker. The puree adds moisture and richness, so ensure it blends fully with no streaks, scraping the bowl sides so there are no concentrated pockets. If you add cold puree straight from the can, the batter may tighten; try to temper components to similar temperatures. A mistake here is adding too much puree, which can lead to an underbaked center, so stick to the measured amount.
- Lift cake from pan, peel off parchment and use a serrated knife to cut into 24 squares.: On low speed the dry mix will disappear into the wet batter without creating excess gluten, yielding a tender crumb. The scent of pumpkin pie spice will bloom as it disperses, and you should see a uniform batter with no streaks of all purpose flour . Mixing just until combined preserves lightness; overmixing activates the flour and can make the bars tough, so stop when you no longer see dry pockets. If the batter feels slack, let it rest for a few minutes to hydrate the flour before moving on.
- Fold in chocolate chips reserving 1/4 cup for the top: As you fold in the semisweet chocolate chips , pockets of dark brown will punctuate the orange batter, promising melty bites. Folding is gentler than stirring, helping keep the air incorporated while distributing chips evenly. Reserve the quarter cup so the top looks attractive after baking. Beware of overworking here, which can cause the chips to break apart or partially melt into the batter, losing distinct chocolate pockets.
- Spread batter evenly in prepared pan and sprinkle with reserved chips: The batter should spread easily into the pan, and you can smooth the surface with a spatula to create uniform thickness that bakes evenly. The reserved chips on top will create a glossy studded finish and give a visual cue when the bars are done. If the batter is lumpy, tap the pan gently on the counter to release air bubbles and level the surface. A mistake to avoid is pressing the batter too thin at the edges, which can overbrown and dry out.
- Bake until edges begin to pull away from sides of pan and a toothpick inserted in center comes out with just a few moist crumbs attached, 28 to 35 minutes: During baking you will notice the aroma intensify, with sweet and spiced notes filling the kitchen; the surface will set and the edges will take on a light golden tone. Watch for the visual cue of edges pulling slightly from the pan and test with a toothpick; a few moist crumbs means the bars are tender and not overbaked. Avoid opening the oven repeatedly, which drops temperature and affects rise. Overbaking leads to dry bars, so err on the side of slightly underdone in the center because they continue to set as they cool.
- Do not overbake! Cool completely in pan: Cooling in the pan lets the bars firm up and finish cooking gently from residual heat, which produces clean slices. As they cool you will sense a soft crackle from settling, and the top will become less glossy. Resist the urge to cut while warm because warm bars tend to crumble; patience here preserves shape and presentation. A common error is inverting the pan too soon, which can cause the bars to break apart.
- Lift cake from pan, peel off parchment and use a serrated knife to cut into 24 squares: Lifting the slab on the parchment reveals a uniform underside and makes slicing straightforward. Using a serrated knife with a gentle sawing motion creates neat edges without compressing the crumb, and wiping the blade between cuts keeps slices tidy. If your bars feel sticky, chill briefly to firm up before slicing. Avoid pressing down hard with the knife which will compress the texture and create uneven pieces.
Notes
- Room temperature ingredients: Bringing eggs and canned pumpkin closer to room temperature helps the batter combine evenly, reducing mixing time and improving texture.
- Check oven accuracy: An oven thermometer can prevent over or under baking, since many ovens run a few degrees off the set 350 degrees.
- Fresh baking soda: Ensure your baking soda is fresh; old leavening can lead to dense, flat bars instead of the desired tender lift.
- Even spreading: Use an offset spatula to smooth the batter so the bars bake uniformly and you avoid a thin, crispy edge on one side.
- Chill for cleaner cuts: If you prefer perfectly square bars, chill the pan briefly after cooling, then slice with a serrated knife for neater edges.