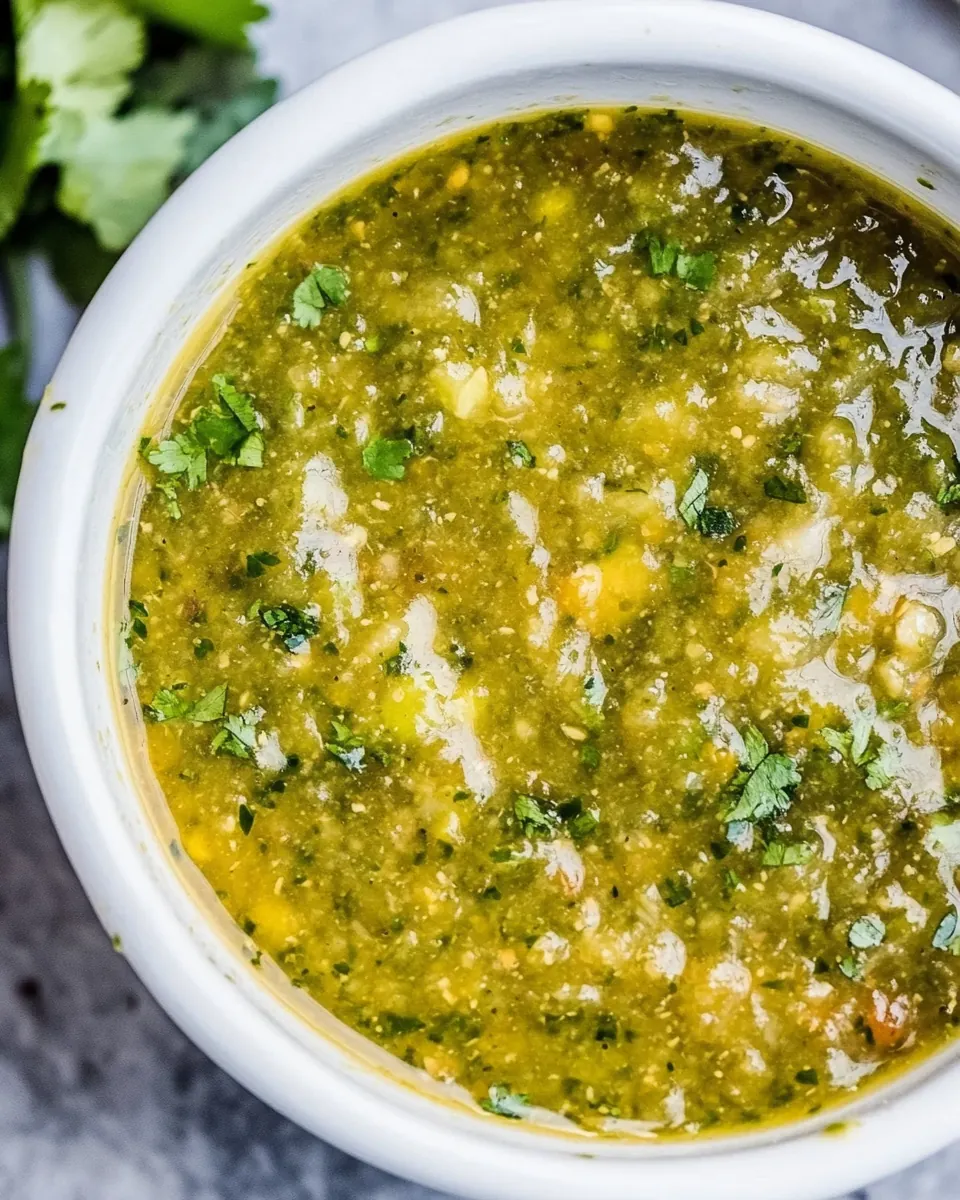
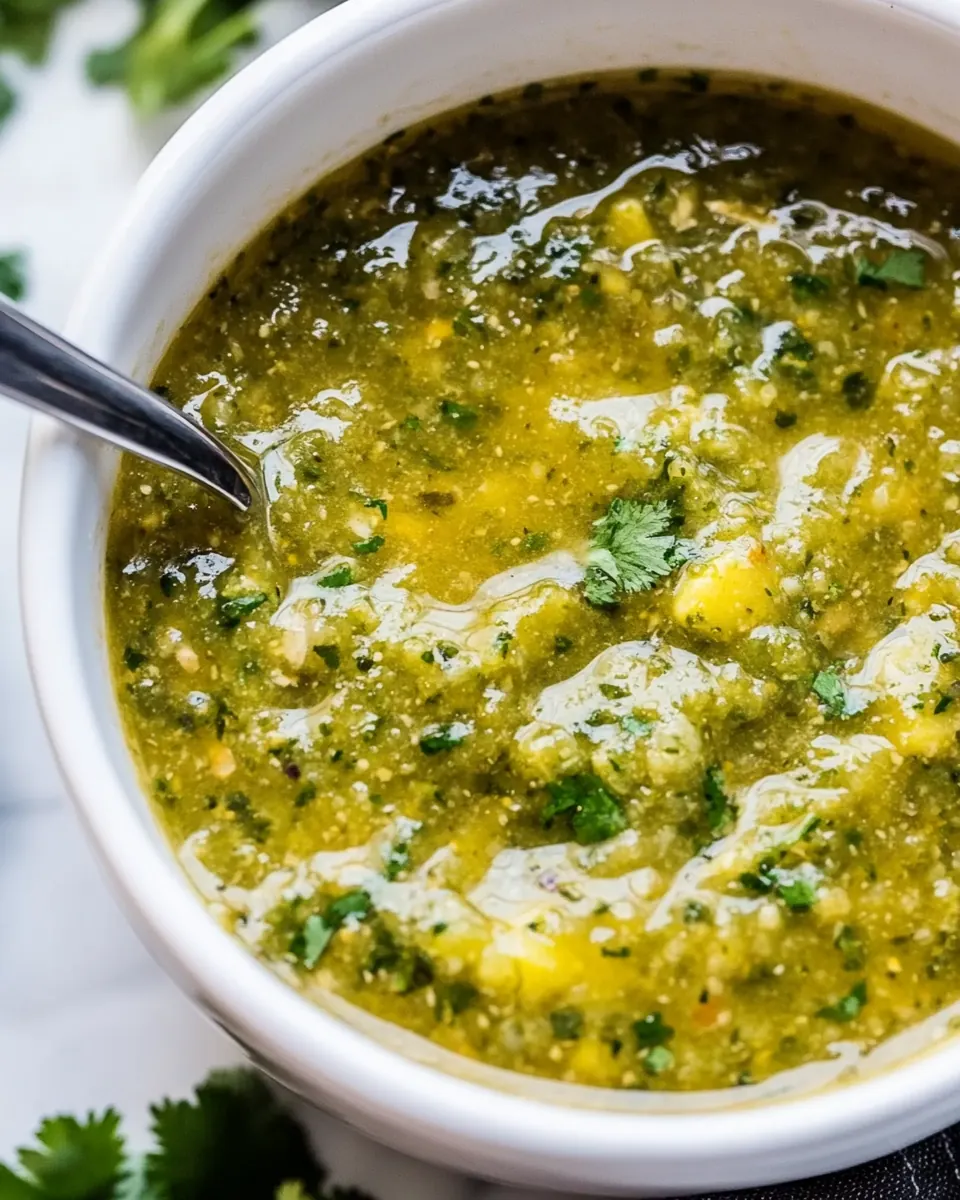
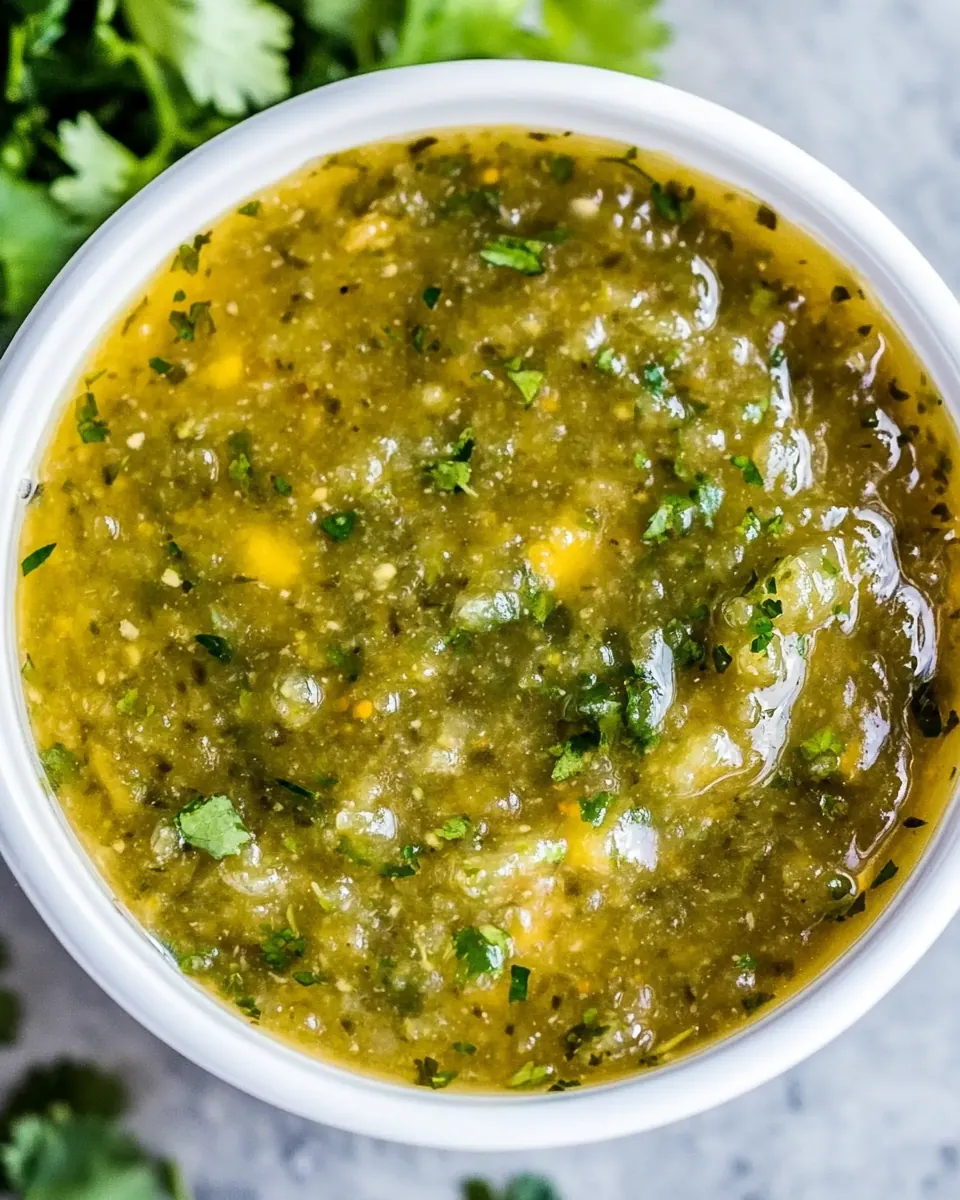
Homemade Salsa Verde
Homemade Salsa Verde is the kind of sauce I reach for when I want bright, tangy flavor with a little smoky depth. The first time I made this version, I remember standing at the oven as the tomatillos blistered, the air filling with that sharp, green aroma that promises heat and freshness. I like to think of it as a little jar of sunshine that livens up weeknight tacos, grilled vegetables, or a simple bowl of chips.
Over the years I’ve adjusted the balance of heat, citrus, and a touch of sweetness so the salsa feels layered rather than flat. I tend to roast the vegetables until they show charred spots, because that char brings a savory backbone that complements the bright tomatillos and herbal lift of cilantro. When guests ask for the recipe, they note how clean and forward the flavors are, yet how complex the finish tastes.
Recipe Snapshot
30 mins
10 mins
20 mins
Easy
60 kcal
Mexican
Gluten-Free, Vegan
Appetizers
Oven, Baking sheet, Blender, Medium saucepan
Why This Homemade Salsa Verde Is So Good
Roasted depth with fresh brightness
I love how roasting the tomatillos, garlic, onion, and chiles adds an almost smoky, caramelized note that makes this salsa feel gourmet while staying simple to prepare. The charred skins create a savory contrast to the salsa brightness, and I often find that this small step is what elevates the final jar.
Flexible heat for every palate
One of the best things about this recipe is how easy it is to dial the spice up or down. Using jalapeños keeps things milder, while serranos bring a sharper heat. I appreciate that this recipe gives you control, whether you are serving kids or a crowd that loves a serious kick.
Make ahead and taste improvement
It genuinely improves after a night in the fridge, when the flavors meld and mellow. I often make a batch the day before a gathering, because the resting time lets the acid of the lime and the aromatics from the cilantro and onion knit into a rounder, more integrated salsa.
Versatility across dishes
This is not just a chip dip. I use it as a finishing sauce for grilled vegetables, a tangy topping for fish, or a spoonful stirred into rice. Its bright, herbal personality lifts simple plates, and I always keep a jar in the fridge for last minute flavor boosts.
Simple pantry ingredients, big payoff
What I most adore is that you only need a few straightforward items like olive oil, chicken broth, and pantry staples to make something that tastes far more complex than the effort suggests. The technique matters more than exotic items, which makes it approachable for home cooks.
Recipe Ingredients for Homemade Salsa Verde
These ingredients create a balanced, bright salsa that is both tart and savory. The tomatillos give the salsa its signature tang, while the chiles and garlic provide heat and bite. The small additions of olive oil, chicken broth, and a pinch of sugar round out the flavors and help with texture and mouthfeel.
- 2 unpeeled garlic cloves: Provide pungent aromatics and depth when crushed or minced; unpeeled cloves offer a slightly milder, roasted note when blistered or sautéed. Complement bright tomatillo acidity and enhance overall savory balance in the salsa verde. Release essential oils that meld with cilantro and chiles to build layered flavor.
- 1 pound fresh tomatillos husked, washed and stems removed: Contribute bright, tangy, and slightly citrusy acidity as the primary base of the salsa; husked and washed tomatillos bring a juicy, firm texture that purees smoothly. Provide a vegetal backbone that balances heat from the chiles and the richness of oil. Cooked or roasted tomatillos develop sweeter, more complex flavors while maintaining their characteristic tartness.
- 1 onion peeled & quartered: Add sweet, aromatic savoriness when softened or roasted; quartered onion breaks down easily during blending to create body and mild sweetness. Help balance the tomatillo acidity and the chiles' heat while contributing a subtle umami quality. Caramelization of the onion can lend additional depth and mellow sharpness.
- 2 3 jalapeno chiles or 2 serrano chiles; stems removed: Deliver spicy heat and bright vegetal flavor that defines the salsa's kick; jalapenos provide moderate heat while serranos offer a sharper, more intense spice. Adjust number used to control overall spiciness and remove seeds for milder results. Char or roast the chiles to introduce smoky notes that enhance complexity.
- 3 tablespoons olive oil divided: Provide richness and a cohesive mouthfeel while lightly carrying flavor components when divided between cooking and finishing. Offer a subtle fruitiness and smooth texture to the sauce, helping to blend acidity and heat. Use sparingly to avoid overpowering fresher ingredients while ensuring a balanced emulsion.
- 1/4 cup chopped fresh cilantro: Contribute fresh, herbaceous brightness and a citrusy-green aroma that lifts the salsa; chopped cilantro also adds a leafy texture and visual contrast. Pair well with lime and tomatillo to create classic Mexican flavor profiles. Stirred in near the end preserves its volatile flavors and vibrant color.
- 1/2 1 teaspoon granulated sugar divided: Add a touch of sweetness to counterbalance acidity and tone down any harshness; dividing the sugar allows adjustment during cooking and tasting. Help round overall flavor and enhance perceived balance without making the salsa noticeably sweet. Small increments prevent masking the salsa's bright and savory notes.
- 1/2 cup low-sodium chicken broth: Provide savory depth and a bit of liquid for blending that helps achieve a smooth, saucy consistency; low-sodium chicken broth imparts umami without overwhelming saltiness. Enhance mouthfeel and body while allowing better control of final seasoning. Use conservatively to maintain the freshness of the other ingredients.
- 1 2 tablespoons fresh lime juice divided: Bring fresh acidity and a zesty finish that brightens the salsa and ties flavors together; dividing the lime juice allows for adjustment after tasting. Add citrusy aromatics that complement cilantro and tomatillos while cutting through oil and richness. Squeezed last preserves volatile flavors and keeps the profile lively.
- 1/2 teaspoon coarse kosher salt: Season and enhance all flavors by providing structured saltiness that brings out sweetness and acidity; coarse kosher salt also helps draw moisture from produce when needed. Allow for precise seasoning while blending, ensuring a balanced final taste. Use measured amounts and adjust to preference.
- 1/4 teaspoon freshly ground black pepper: Introduce subtle warmth and a hint of bitterness that rounds savory notes when freshly ground; black pepper contributes mild heat and aromatic complexity. Complement other seasonings and support the overall flavor profile without dominating. Grind fresh for best fragrance and even seasoning distribution.
Recipe Directions for Homemade Salsa Verde
These directions guide you from blistered vegetables to a simmered, flavorful salsa. I like to move deliberately through each step to capture the right textures and avoid overcooking, and I find the small extras are worth the attention.
- Adjust oven rack to upper-middle position and set oven to broil. Line a large, rimmed baking sheet with aluminum foil.: As you start, the oven's intense heat produces rapid charring, providing audible sizzling and a hint of toasted aroma; this high heat is what creates the desired caramelized edges on the vegetables, which add essential smoky undertones to the salsa, and a common mistake to avoid is placing the rack too low where the vegetables may cook unevenly instead of blistering properly.
- Place garlic, tomatillos, onion, and chiles on the baking sheet and drizzle with 1 1/2 tablespoons olive oil. Set the baking sheet on the oven rack and broil the vegetables until the skins on the tomatillos have darkened and are partially charred.: When the vegetables hit the hot foil they'll glisten and begin to steam as their skins start to ripple, and coating them with olive oil helps promote even browning and prevents sticking; if you skip coating you risk dry, uneven charring, which will result in duller flavor and a less silky final texture.
- Peel the garlic and scrape all the ingredients (including vegetables, juices & oil) from the baking sheet to a blender.: You'll hear a light sizzling and see the tomatillos blister and blacken in spots, the scent shifting from grassy to slightly roasted, and it's important not to walk away because they can go from nicely charred to burnt quickly; a frequent error is overcharring everything into bitterness, so rotate the pan if some pieces are cooking faster than others.
- Add cilantro, sugar, broth, lime juice, kosher salt, and black pepper. Purée to desired consistency (I prefer the salsa fairly smooth).: After roasting the garlic peels slip off easily and the pan will be fragrant with concentrated juices and oil, which you want to capture for flavor, and scraping everything preserves those caramelized bits that boost complexity; a common misstep is discarding the pan juices which leaves the salsa flatter and less aromatic.
- In a medium saucepan, heat the remaining 1 1/2 tablespoons oil and pour the tomatillo salsa into the pan. Set the heat to medium and bring the salsa to a simmer. Reduce heat to low and cook until mixture reduces to about 2 cups, about 10 minutes. Season to taste with additional sugar, salt, pepper and lime juice, if needed.: Once in the blender, adding the chopped cilantro , a touch of granulated sugar , chicken broth , lime juice , kosher salt , and black pepper delivers acidity, herb, and seasoning to balance the roasted base, and you should notice a bright green flash and a citrusy scent when you pulse; be careful not to overseason early, because simmering concentrates flavors and you can always adjust later.
- The salsa is even better when made the day before serving. Keep refrigerated, up to 1 week, in an airtight container.: The blender will turn the roasted mix into a glossy, green puree, releasing steam and a perfume of herb and citrus, and choosing a smoother texture makes the salsa cling well to chips or tacos; avoid overheating the blender if the mixture is still very hot, and pulse gradually to prevent splattering and an uneven texture.
- In a medium saucepan heat the remaining 1 1/2 tablespoons oil and pour the tomatillo salsa into the pan: Warming a pan and adding the remaining olive oil then the salsa loosens any thick spots and helps flavors bloom while creating a gentle shimmer on the surface, and you should notice a faint gentle bubble as the mixture warms; do not pour into a cold pan as the salsa may stick or not reduce evenly.
- Set the heat to medium and bring the salsa to a simmer: As the salsa reaches a simmer you'll hear a soft bubbling and see small steam wisps rising, and this stage encourages evaporation so the flavors concentrate, enhancing body and mouthfeel; avoid boiling vigorously because that can flatten delicate lime notes and make the salsa taste cooked rather than bright.
- Reduce heat to low and cook until mixture reduces to about 2 cups about 10 minutes: On low heat the salsa will quietly thicken, the aroma becoming richer and the liquid developing a slightly glossy sheen, and paying attention to this reduction helps achieve a balanced intensity without being watery; don't rush by using too high heat, which can reduce unevenly and leave you with a grainy texture.
- Season to taste with additional sugar salt pepper and lime juice if needed: After the reduction taste and adjust with small increments of granulated sugar , kosher salt , black pepper , and lime juice so each element sings in harmony, and you should perceive a rounder flavor and brighter finish when balanced correctly; a common error is over-salting in one go, so add cautiously and taste as you go.
- The salsa is even better when made the day before serving: Resting the salsa overnight in the fridge allows aromatics to meld and the acid to soften, creating a deeper, more harmonious flavor with subtle textural changes, and storing it airtight preserves brightness; avoid leaving it at room temperature for long periods where freshness could be compromised.
Tips and Tricks about Homemade Salsa Verde

This salsa is forgiving, but a few focused tips will help you get perfect results every time. Below are technique, storage, and flavor adjustment suggestions that I use regularly, explained so you can tailor the recipe to your palate and schedule.
- Roast with attention, watch closely under the broiler so vegetables char in places without turning black; moving them around helps ensure even blistering.
- Taste before seasoning, since reductions concentrate salt and acid, add small amounts and re-taste after the sauce has simmered and cooled slightly.
- Control heat at the stem, remove seeds and ribs from peppers to reduce spiciness, or include them for a more intense punch.
- Adjust texture, if the salsa is too thick after simmering, stir in a tablespoon of chicken broth or water until you reach the desired consistency.
- Make ahead, refrigeration for at least a day mellows and unifies the flavors, making the salsa taste more rounded and less sharp.
Serving Options for Homemade Salsa Verde
This salsa is versatile and bright, making it suitable for a range of occasions and pairings. Whether you are hosting a casual gathering or building a composed dinner plate, you can use it in many ways that highlight its fresh acidity and roasted depth.
- Classic chip dip, serve chilled or at room temperature in a bowl with tortilla chips for casual snacking or parties.
- Taco topper, spoon over grilled fish, shrimp, or roasted vegetables to add brightness and counterpoint to richer proteins.
- Rice and grains, stir a few tablespoons into cooked rice or quinoa for a lively, herbaceous side dish.
- Marinade or finishing sauce, brush on grilled items during the last minute of cooking or drizzle over just before serving for an instant flavor lift.
- Make ahead storage, keep in an airtight container in the refrigerator up to one week, and bring to room temperature before serving to restore the aroma.
- Occasions, perfect for casual lunches, summer barbecues, weeknight dinners, or as part of a Ramadan iftar spread where bright condiments are welcome.
FAQ
Conclusion
Homemade Salsa Verde stands out for its bright tang, subtle smokiness, and adaptable heat level. It’s a simple recipe that rewards a bit of attention during roasting and simmering, producing a sauce that enhances everything from chips to grilled vegetables. Give it a try this week, and you might find yourself reaching for it as a quick flavor upgrade for meals and snacks alike. Try making a double batch so you always have a jar on hand to brighten your dishes and impress guests with minimal effort.

Homemade Salsa Verde
Equipment
- Oven
- Baking Sheet
- Blender
- Medium Saucepan
Ingredients
- 2 unpeeled garlic cloves Provide pungent aromatics and depth when crushed or minced; unpeeled cloves offer a slightly milder, roasted note when blistered or sautéed. Complement bright tomatillo acidity and enhance overall savory balance in the salsa verde. Release essential oils that meld with cilantro and chiles to build layered flavor.
- 1 pound fresh tomatillos husked, washed and stems removed Contribute bright, tangy, and slightly citrusy acidity as the primary base of the salsa; husked and washed tomatillos bring a juicy, firm texture that purees smoothly. Provide a vegetal backbone that balances heat from the chiles and the richness of oil. Cooked or roasted tomatillos develop sweeter, more complex flavors while maintaining their characteristic tartness.
- 1 onion peeled & quartered Add sweet, aromatic savoriness when softened or roasted; quartered onion breaks down easily during blending to create body and mild sweetness. Help balance the tomatillo acidity and the chiles' heat while contributing a subtle umami quality. Caramelization of the onion can lend additional depth and mellow sharpness.
- 2 -3 jalapeno chiles or 2 serrano chiles; stems removed Deliver spicy heat and bright vegetal flavor that defines the salsa's kick; jalapenos provide moderate heat while serranos offer a sharper, more intense spice. Adjust number used to control overall spiciness and remove seeds for milder results. Char or roast the chiles to introduce smoky notes that enhance complexity.
- 3 tablespoons olive oil divided Provide richness and a cohesive mouthfeel while lightly carrying flavor components when divided between cooking and finishing. Offer a subtle fruitiness and smooth texture to the sauce, helping to blend acidity and heat. Use sparingly to avoid overpowering fresher ingredients while ensuring a balanced emulsion.
- 1/4 cup chopped fresh cilantro Contribute fresh, herbaceous brightness and a citrusy-green aroma that lifts the salsa; chopped cilantro also adds a leafy texture and visual contrast. Pair well with lime and tomatillo to create classic Mexican flavor profiles. Stirred in near the end preserves its volatile flavors and vibrant color.
- 1/2 - 1 teaspoon granulated sugar divided Add a touch of sweetness to counterbalance acidity and tone down any harshness; dividing the sugar allows adjustment during cooking and tasting. Help round overall flavor and enhance perceived balance without making the salsa noticeably sweet. Small increments prevent masking the salsa's bright and savory notes.
- 1/2 cup low-sodium chicken broth Provide savory depth and a bit of liquid for blending that helps achieve a smooth, saucy consistency; low-sodium chicken broth imparts umami without overwhelming saltiness. Enhance mouthfeel and body while allowing better control of final seasoning. Use conservatively to maintain the freshness of the other ingredients.
- 1 -2 tablespoons fresh lime juice divided Bring fresh acidity and a zesty finish that brightens the salsa and ties flavors together; dividing the lime juice allows for adjustment after tasting. Add citrusy aromatics that complement cilantro and tomatillos while cutting through oil and richness. Squeezed last preserves volatile flavors and keeps the profile lively.
- 1/2 teaspoon coarse kosher salt Season and enhance all flavors by providing structured saltiness that brings out sweetness and acidity; coarse kosher salt also helps draw moisture from produce when needed. Allow for precise seasoning while blending, ensuring a balanced final taste. Use measured amounts and adjust to preference.
- 1/4 teaspoon freshly ground black pepper Introduce subtle warmth and a hint of bitterness that rounds savory notes when freshly ground; black pepper contributes mild heat and aromatic complexity. Complement other seasonings and support the overall flavor profile without dominating. Grind fresh for best fragrance and even seasoning distribution.
Instructions
- Adjust oven rack to upper-middle position and set oven to broil. Line a large, rimmed baking sheet with aluminum foil.: As you start, the oven's intense heat produces rapid charring, providing audible sizzling and a hint of toasted aroma; this high heat is what creates the desired caramelized edges on the vegetables, which add essential smoky undertones to the salsa, and a common mistake to avoid is placing the rack too low where the vegetables may cook unevenly instead of blistering properly.
- Place garlic, tomatillos, onion, and chiles on the baking sheet and drizzle with 1 1/2 tablespoons olive oil. Set the baking sheet on the oven rack and broil the vegetables until the skins on the tomatillos have darkened and are partially charred.: When the vegetables hit the hot foil they'll glisten and begin to steam as their skins start to ripple, and coating them with olive oil helps promote even browning and prevents sticking; if you skip coating you risk dry, uneven charring, which will result in duller flavor and a less silky final texture.
- Peel the garlic and scrape all the ingredients (including vegetables, juices & oil) from the baking sheet to a blender.: You'll hear a light sizzling and see the tomatillos blister and blacken in spots, the scent shifting from grassy to slightly roasted, and it's important not to walk away because they can go from nicely charred to burnt quickly; a frequent error is overcharring everything into bitterness, so rotate the pan if some pieces are cooking faster than others.
- Add cilantro, sugar, broth, lime juice, kosher salt, and black pepper. Purée to desired consistency (I prefer the salsa fairly smooth).: After roasting the garlic peels slip off easily and the pan will be fragrant with concentrated juices and oil, which you want to capture for flavor, and scraping everything preserves those caramelized bits that boost complexity; a common misstep is discarding the pan juices which leaves the salsa flatter and less aromatic.
- In a medium saucepan, heat the remaining 1 1/2 tablespoons oil and pour the tomatillo salsa into the pan. Set the heat to medium and bring the salsa to a simmer. Reduce heat to low and cook until mixture reduces to about 2 cups, about 10 minutes. Season to taste with additional sugar, salt, pepper and lime juice, if needed.: Once in the blender, adding the chopped cilantro , a touch of granulated sugar , chicken broth , lime juice , kosher salt , and black pepper delivers acidity, herb, and seasoning to balance the roasted base, and you should notice a bright green flash and a citrusy scent when you pulse; be careful not to overseason early, because simmering concentrates flavors and you can always adjust later.
- The salsa is even better when made the day before serving. Keep refrigerated, up to 1 week, in an airtight container.: The blender will turn the roasted mix into a glossy, green puree, releasing steam and a perfume of herb and citrus, and choosing a smoother texture makes the salsa cling well to chips or tacos; avoid overheating the blender if the mixture is still very hot, and pulse gradually to prevent splattering and an uneven texture.
- In a medium saucepan heat the remaining 1 1/2 tablespoons oil and pour the tomatillo salsa into the pan: Warming a pan and adding the remaining olive oil then the salsa loosens any thick spots and helps flavors bloom while creating a gentle shimmer on the surface, and you should notice a faint gentle bubble as the mixture warms; do not pour into a cold pan as the salsa may stick or not reduce evenly.
- Set the heat to medium and bring the salsa to a simmer: As the salsa reaches a simmer you'll hear a soft bubbling and see small steam wisps rising, and this stage encourages evaporation so the flavors concentrate, enhancing body and mouthfeel; avoid boiling vigorously because that can flatten delicate lime notes and make the salsa taste cooked rather than bright.
- Reduce heat to low and cook until mixture reduces to about 2 cups about 10 minutes: On low heat the salsa will quietly thicken, the aroma becoming richer and the liquid developing a slightly glossy sheen, and paying attention to this reduction helps achieve a balanced intensity without being watery; don't rush by using too high heat, which can reduce unevenly and leave you with a grainy texture.
- Season to taste with additional sugar salt pepper and lime juice if needed: After the reduction taste and adjust with small increments of granulated sugar , kosher salt , black pepper , and lime juice so each element sings in harmony, and you should perceive a rounder flavor and brighter finish when balanced correctly; a common error is over-salting in one go, so add cautiously and taste as you go.
- The salsa is even better when made the day before serving: Resting the salsa overnight in the fridge allows aromatics to meld and the acid to soften, creating a deeper, more harmonious flavor with subtle textural changes, and storing it airtight preserves brightness; avoid leaving it at room temperature for long periods where freshness could be compromised.
Notes
- Roast with attention, watch closely under the broiler so vegetables char in places without turning black; moving them around helps ensure even blistering.
- Taste before seasoning, since reductions concentrate salt and acid, add small amounts and re-taste after the sauce has simmered and cooled slightly.
- Control heat at the stem, remove seeds and ribs from peppers to reduce spiciness, or include them for a more intense punch.
- Adjust texture, if the salsa is too thick after simmering, stir in a tablespoon of chicken broth or water until you reach the desired consistency.
- Make ahead, refrigeration for at least a day mellows and unifies the flavors, making the salsa taste more rounded and less sharp.