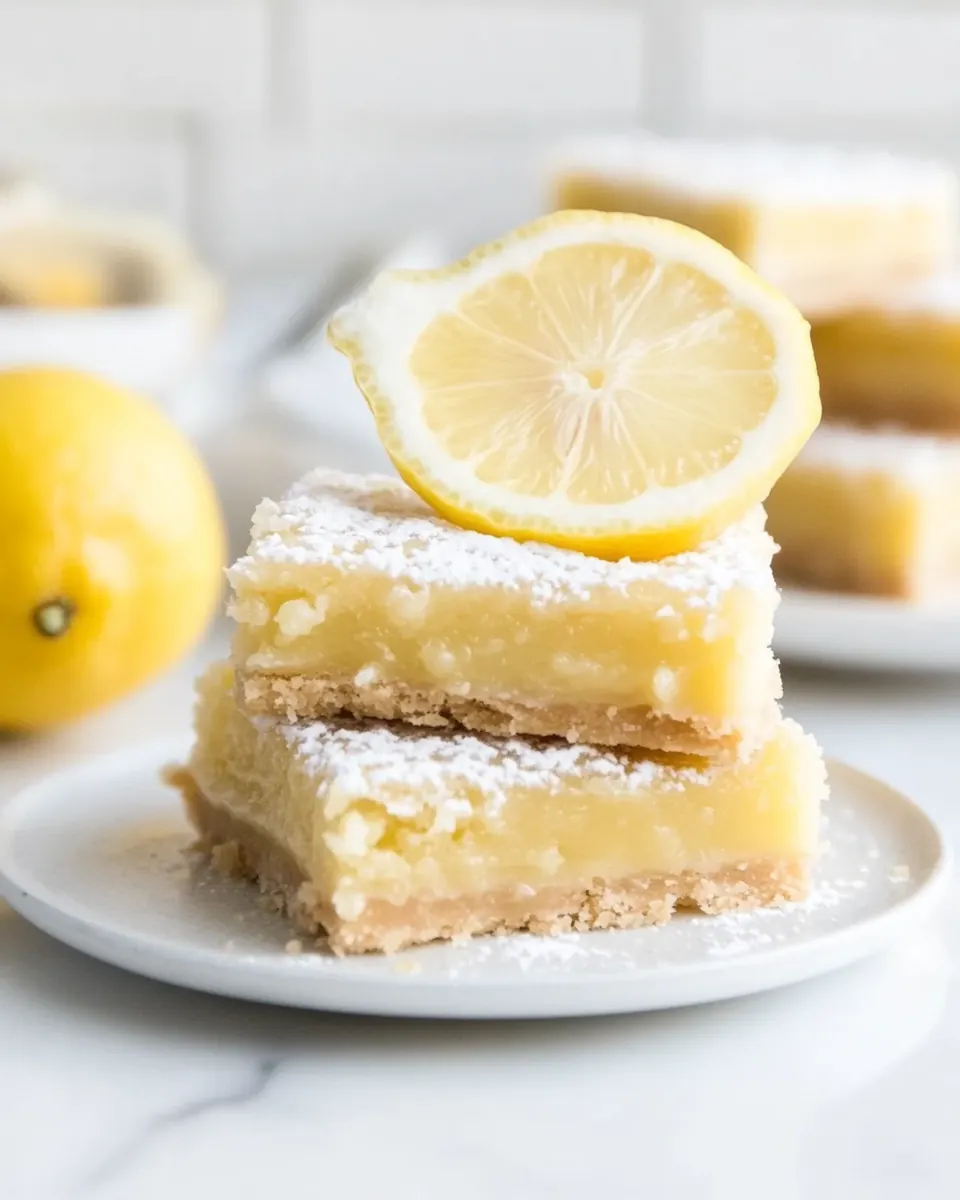
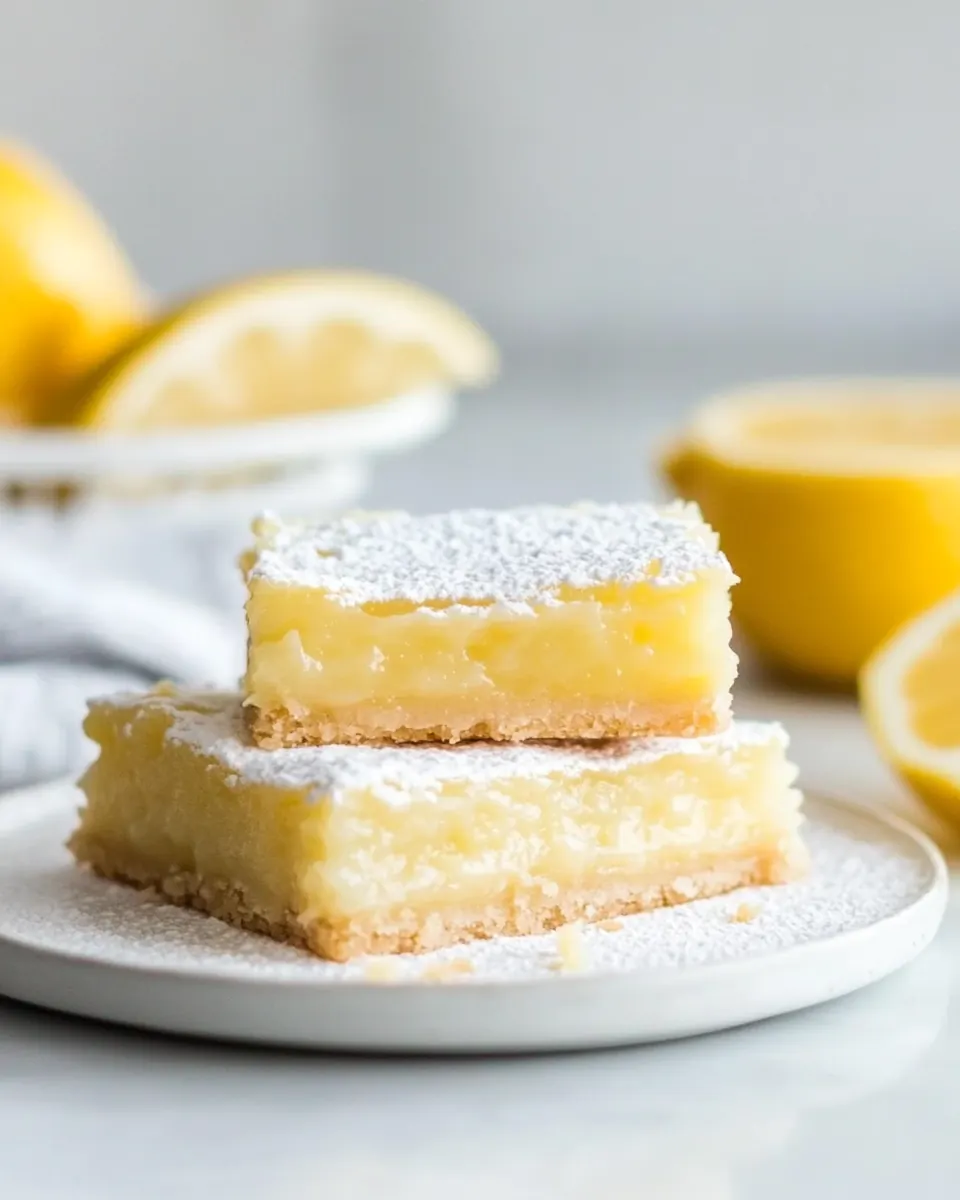
Easy Lemon Bars
Easy Lemon Bars are one of those recipes I return to when I want bright flavor with very little fuss. The first time I made them I was chasing the memory of a bakery square I had enjoyed as a kid, and the balance between the slightly crumbly base and the tangy lemon layer surprised me in the best way. I still remember the faint citrus perfume that filled the kitchen as the filling baked, and how every forkful felt like a small sunny celebration.
I tend to bring these Easy Lemon Bars to potlucks and family gatherings because they travel well and please a crowd. Over the years I tweaked the crust-to-filling ratio until it felt right to my taste, and now they are my go to for a dessert that feels homemade without being fussy. When friends ask for an easy yet impressive sweet, this is what I make, and I love how the powdered sugar dusting makes each square look polished, even when the slices are imperfect.
Recipe Snapshot
1 hr 5 mins
10 mins
55 mins
Medium
150 kcal
American
Gluten-Free, Low FODMAP
Desserts
13 x 9 inch baking dish, mixing bowl, measuring cup, whisk
Why You’ll Love This Easy Lemon Bars
Bright, focused flavor
I love how Easy Lemon Bars deliver a concentrated lemon punch. The lemon juice cuts through the sweetness, giving each bite a lively acidity that keeps you coming back. I find this brightness makes them a perfect finish to a heavy meal because they feel cleansing and refreshing.
Simple technique, big payoff
Working with a shortbread style crust and a custardy filling is straightforward, yet the result reads as elegant. I appreciate recipes that reward attention to simple steps, and these bars do exactly that. From my experience, pressing the crust evenly and watching the filling set are the two moments that determine success.
Make ahead friendly
I’ve made these a day ahead for parties, and they hold up beautifully. Chilling tightens the filling and makes slicing neater. I often bake them in the morning for an evening gathering, and the flavor actually improves after a little rest.
Kid approved and crowd pleasing
Kids and adults alike reach for seconds, probably because the texture combines a tender, slightly crumbly base with a silky lemon layer. I like dishing them up for casual get togethers where folks want something sweet but not overwhelming.
Flexible and forgiving
I’ve experimented with slightly different baking times and pan sizes, and these bars still shine. The recipe is forgiving if your oven runs hot or if you press the crust a bit thicker, though I do recommend watching the edge browning to avoid over baking.
Everything You Need for Easy Lemon Bars
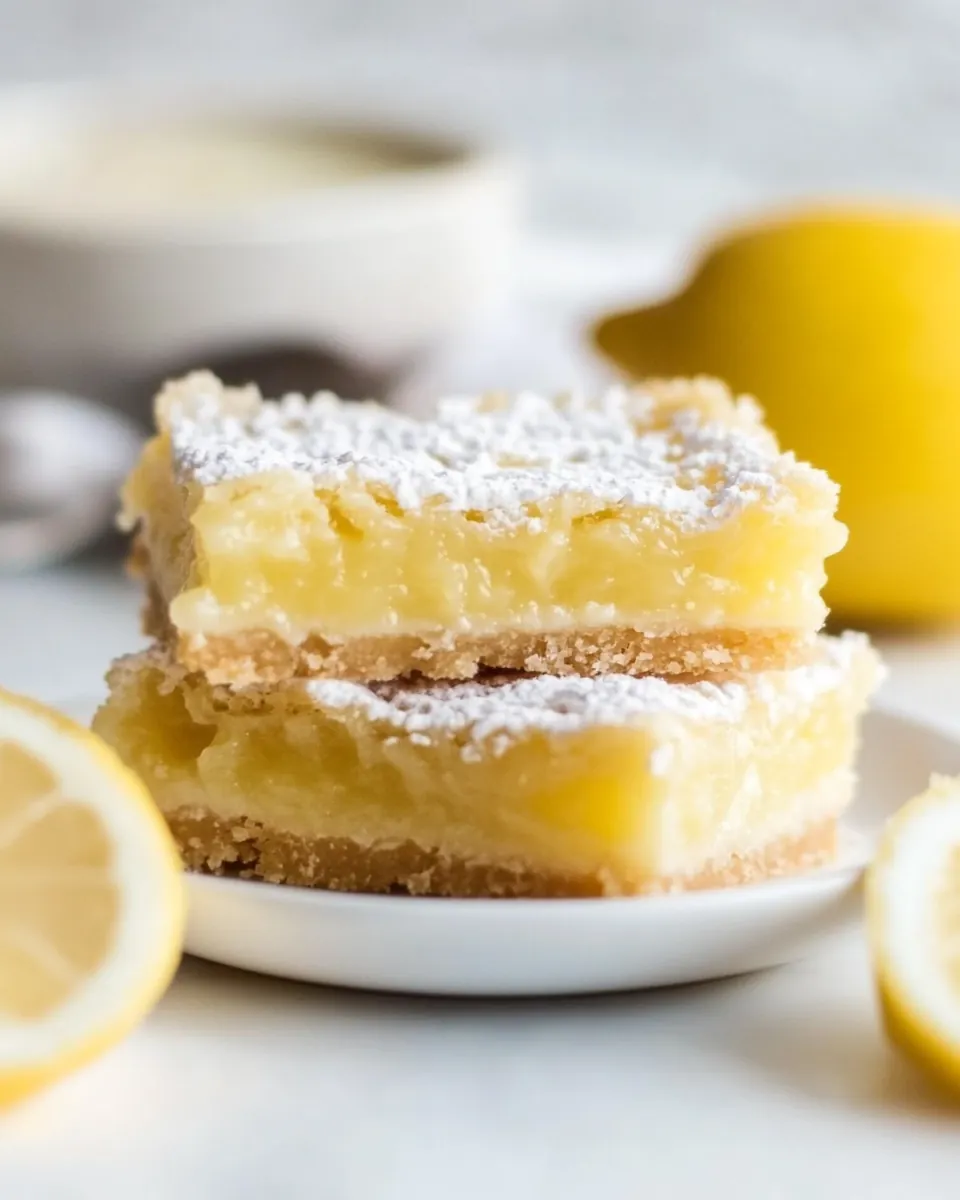
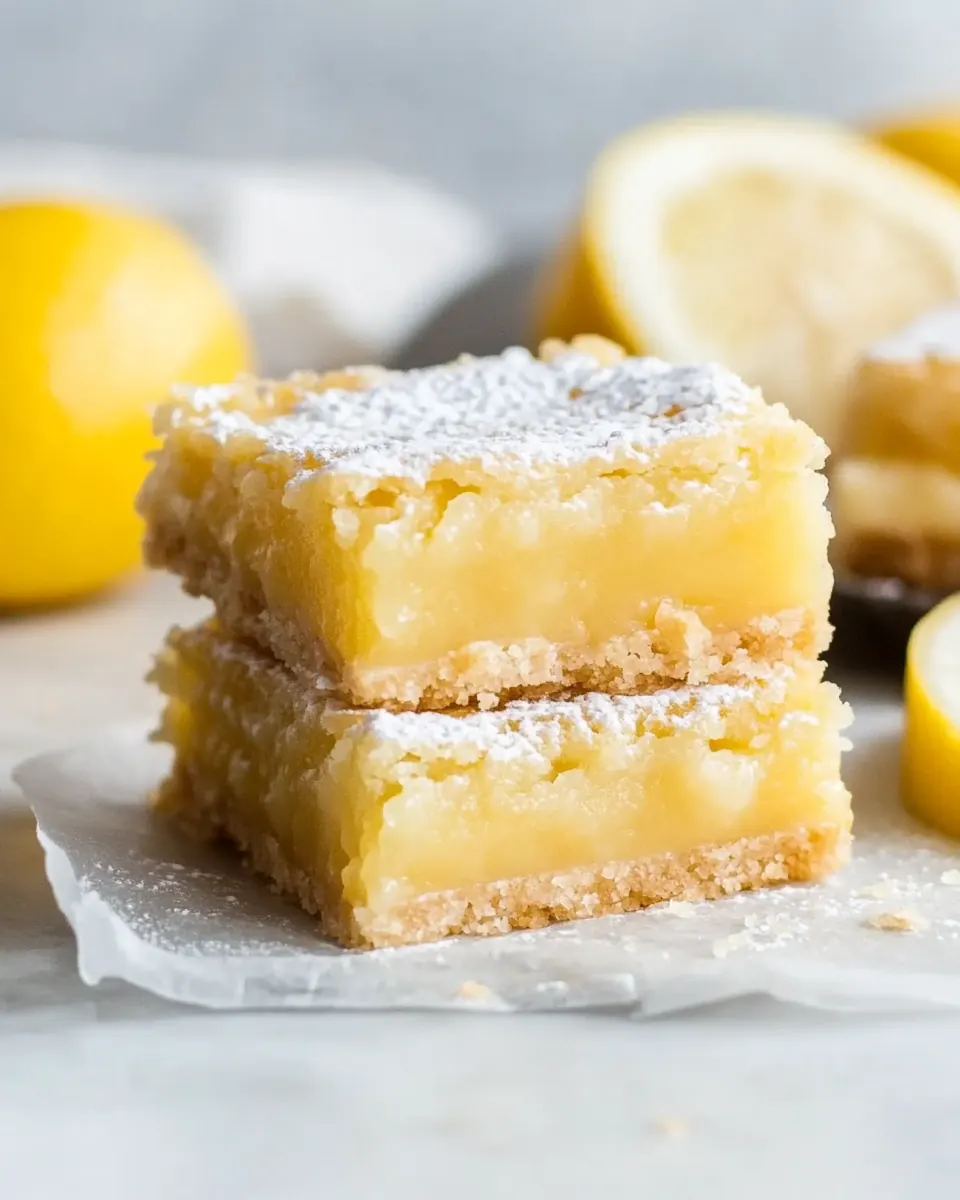
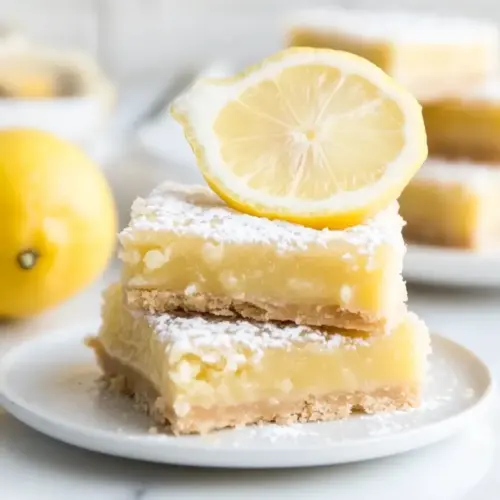
These ingredients are straightforward and work together to create the classic contrast of a buttery shortbread base and a tangy, custard like lemon topping. The base gives structure and a tender crumb, while the lemon filling provides the bright acidity and silkiness. A little sugar balances the tartness, and a dusting of powdered sugar adds the finishing touch that makes each square look special.
- 8 ounces butter at room temperature: Cream until soft and spreadable to create a tender, rich base for the crust; helps bind dry ingredients and contributes buttery flavor and flakiness to the shortbread layer.
- 3 1/2 cups granulated sugar divided use: Sweeten and balance tartness while providing bulk to both crust and filling; divide use so some sugar creates structure in the crust while the remainder sweetens and sets the lemon topping.
- 3 cups all-purpose flour divided use: Provide structure and body by forming the crumb and holding the crust together; divided use allows some flour to create a sturdy base while the rest thickens the lemon filling.
- 6 eggs at room temperature: Whisk until incorporated to enrich the filling with moisture, protein, and structure; eggs help set the lemon custard as it bakes and give a smooth, cohesive texture.
- 1 cup lemon juice: Add bright, acidic flavor and liquid to form the tangy filling; lemon juice reacts with eggs and sugar to create a balanced, zesty custard that sets when baked.
- 1 teaspoon vanilla extract: Enhance and round out flavors by adding a subtle sweet-vanilla note; vanilla helps mellow sharp citrus and elevates the overall aroma of the bars.
- 1/2 teaspoons salt: Season lightly to enhance sweetness and balance flavors; salt strengthens dough structure and brightens the lemon filling when used in small amount.
- powdered sugar for dusting: Dust lightly after baking to add a delicate sweetness and an attractive finish; powdered sugar softens the tartness on the surface and creates a classic presentation.
Making This Easy Lemon Bars
This method blends a tender shortbread style crust with a silky lemon filling. I find that small attentions, like pressing the crust evenly and watching the filling’s edge color, make all the difference. Read each step fully so you know how the textures should look and feel as you proceed.
- Preheat oven to 350 degrees.: Warm, slightly citrusy aromas will develop in the kitchen as the oven reaches temperature, and starting with a properly preheated oven ensures the crust and filling begin cooking immediately and evenly. You will hear the oven click as it cycles, and the interior should register steady heat if you use an oven thermometer. A common mistake is skipping preheat, which can cause uneven rise and a soggy filling, so always wait until the oven is fully ready.
- Cream together butter, 1/2 cup granulated sugar, and 2 cups flour.: As you cream the butter with the granulated sugar , you will notice the mixture go from pale and glossy to slightly denser, and when you add the all purpose flour it will become crumbly but cohesive. The tactile sensation should be that the crumbs stick together when pressed. This technique creates a tender shortbread texture by distributing the fat evenly. Avoid over mixing, which can develop too much gluten and make the crust tough.
- When the mixture is crumbly, press it into a 13 x 9-inch baking dish. Press dough out evenly so that it has a uniform height throughout the pan. Bake for approximately 15 minutes, and remove from the oven.: Pressing the dough evenly will produce uniform color and bake time, and you should feel a slight resistance as you compact the crumbs into a flat layer. Use the back of a measuring cup for a smooth surface, and aim for consistent thickness across the pan to avoid thin edges that brown too fast. One mistake is leaving the crust uneven, which causes uneven baking and sections that are either underdone or overly crisp.
- In a bowl, mix together eggs, 3 cups granulated sugar, lemon juice, 1 cup flour, vanilla, and salt.: A uniform surface encourages even browning and a consistent bite in every square. When done right, the crust will look smooth and compact before it goes into the oven. If the crust is patchy, the filling can pool in low spots and make slicing messy later, so take a little extra time to level it now.
- Mix until the filling is uniform in texture, and pour over the cooked shortbread cookie crust.: During this short bake you will smell warm, buttery notes and notice the edges beginning to color slightly. The crust should feel set rather than doughy when you gently touch the pan edge with a spatula. Leaving it in longer can result in an overly hard base, while removing it too early risks a soggy underlayer, so aim for that brief golden edge as your cue.
- Bake for an additional 30 to 35 minutes. Allow this to cool to room temperature before dusting with powdered sugar.: As you whisk these ingredients the mixture will turn glossy and pourable, and the lemon aroma will intensify. The eggs and granulated sugar create a custard like foundation, while the all purpose flour helps the filling set without being cakey. Over mixing can incorporate too much air, which makes the filling puff then crack, so stir until smooth and uniform in texture only.
- Be sure to refrigerate these cookies when not being served.: Pouring a smooth, even filling across the warm crust will produce a clean layer that bakes into a glossy top. You may hear a faint hiss as warm crust meets the cooler filling, and the visual should be a level, pale yellow surface before it returns to the oven. Pour gently to avoid disturbing the crust, and if you see pooling in one area nudge the pan to spread the mixture evenly.
- Bake for an additional 30 to 35 minutes: While baking the aroma will shift toward sweeter, zesty notes, and the edges of the filling will begin to gain a faint golden color. The center should look set and no longer jiggle like liquid; a slight wobble at the very center is okay because it will firm as it cools. A frequent misstep is under baking, leaving the filling loose, so look for those browning edges and a mostly set center as your sign.
- Allow this to cool to room temperature before dusting with powdered sugar: As they cool, the filling firms and becomes easier to slice, and the aromas mellow into a balanced lemon sweetness. Dust the powdered sugar only after the bars have cooled so it stays visible rather than melting into the surface. Cutting too soon can lead to sloppy slices, so be patient and let the texture settle.
- Be sure to refrigerate these cookies when not being served: Chilling tightens the filling and keeps the bars fresh, and you will notice the texture becomes more like a firm custard. Refrigeration also helps when you want clean slices for serving later. Leaving them at room temperature for extended periods can soften the crust and invite spoilage, so store covered in the fridge between servings.
Tips and Variations
These tips help you refine texture, flavor, and presentation so your Easy Lemon Bars look and taste their best. I include small variations that keep the recipe accessible and adaptable to what you have on hand.
- Use fresh lemon juice: Freshly squeezed lemon juice gives superior brightness and aroma compared to bottled juice, and it makes the filling taste lively and true to citrus. If you have a lemon zester, a little zest folded into the filling amplifies fragrance, but keep it minimal to avoid bitterness.
- Chill before slicing: After cooling to room temperature, refrigerate the bars for at least an hour to firm the filling. This makes slicing tidy squares much easier and prevents the filling from smearing, which is especially helpful if you are transporting them to a gathering.
- Evenly press crust: Press the shortbread base with the back of a measuring cup to create a compact, uniform layer. An even crust ensures consistent bake across the pan, avoiding very thin edges that brown too quickly or thick spots that stay doughy.
- Watch the edges: The filling is done when the edges start to turn a faint golden color while the center is mostly set. If the center is still very jiggly, return to the oven in short increments to avoid over baking the edges.
- Dust just before serving: Apply the powdered sugar right before you present the bars to guests so it looks fresh and delicate. If you dust too early, it will absorb moisture and fade, reducing the visual contrast that makes each square pop.
Side Dish Ideas for Easy Lemon Bars
Easy Lemon Bars are a versatile sweet that pairs well with light accompaniments and seasonal gatherings. Whether you are serving these at a casual brunch or a celebratory dinner, the lemon brightness complements a range of flavors and occasions. Below are serving ideas, storage notes, and pairing suggestions to help you present them beautifully.
- Serve with fresh berries: A small side of mixed berries keeps the plate bright and enhances the citrus notes, offering a fresh contrast to the buttery crust.
- Afternoon tea or coffee: These bars pair wonderfully with a hot cup of tea or coffee, making them ideal for afternoon get togethers or baked goods tables at events.
- Party platter presentation: Cut into neat squares and arrange on a platter with a light dusting of powdered sugar, adding a few sprigs of mint for color if desired.
- Make ahead for holidays: Bake a day early and refrigerate, then slice and serve chilled during busy holiday spreads where you need reliable, make ahead desserts.
- Storage tips: Store covered in the refrigerator for up to five days, and bring to room temperature briefly before serving if you prefer a softer feel. For longer storage, freeze uncut bars wrapped tightly for up to one month, thaw overnight in the fridge.
- Occasion pairings: These bars work well for brunch, baby showers, spring gatherings, or picnic style events where a light, citrusy dessert is appreciated.
FAQ
Conclusion
What makes this recipe special is the bright contrast between a tender shortbread base and a silky, tangy lemon layer. If you love desserts that feel fresh and homemade without complicated technique, these bars are an easy, reliable choice. Give them a try for your next gathering or as a cheery weeknight treat, and enjoy how a few simple ingredients create a dessert that looks and tastes like you spent way more time on it than you did.
Easy Lemon Bars
Equipment
- 13 x 9-inch baking dish
- Mixing Bowl
- Measuring Cup
- Whisk
Ingredients
- 8 ounces butter at room temperature Cream until soft and spreadable to create a tender, rich base for the crust; helps bind dry ingredients and contributes buttery flavor and flakiness to the shortbread layer.
- 3 1/2 cups granulated sugar divided use Sweeten and balance tartness while providing bulk to both crust and filling; divide use so some sugar creates structure in the crust while the remainder sweetens and sets the lemon topping.
- 3 cups all-purpose flour divided use Provide structure and body by forming the crumb and holding the crust together; divided use allows some flour to create a sturdy base while the rest thickens the lemon filling.
- 6 eggs at room temperature Whisk until incorporated to enrich the filling with moisture, protein, and structure; eggs help set the lemon custard as it bakes and give a smooth, cohesive texture.
- 1 cup lemon juice Add bright, acidic flavor and liquid to form the tangy filling; lemon juice reacts with eggs and sugar to create a balanced, zesty custard that sets when baked.
- 1 teaspoon vanilla extract Enhance and round out flavors by adding a subtle sweet-vanilla note; vanilla helps mellow sharp citrus and elevates the overall aroma of the bars.
- 1/2 teaspoons salt Season lightly to enhance sweetness and balance flavors; salt strengthens dough structure and brightens the lemon filling when used in small amount.
- powdered sugar for dusting Dust lightly after baking to add a delicate sweetness and an attractive finish; powdered sugar softens the tartness on the surface and creates a classic presentation.
Instructions
- Preheat oven to 350 degrees.: Warm, slightly citrusy aromas will develop in the kitchen as the oven reaches temperature, and starting with a properly preheated oven ensures the crust and filling begin cooking immediately and evenly. You will hear the oven click as it cycles, and the interior should register steady heat if you use an oven thermometer. A common mistake is skipping preheat, which can cause uneven rise and a soggy filling, so always wait until the oven is fully ready.
- Cream together butter, 1/2 cup granulated sugar, and 2 cups flour.: As you cream the butter with the granulated sugar , you will notice the mixture go from pale and glossy to slightly denser, and when you add the all purpose flour it will become crumbly but cohesive. The tactile sensation should be that the crumbs stick together when pressed. This technique creates a tender shortbread texture by distributing the fat evenly. Avoid over mixing, which can develop too much gluten and make the crust tough.
- When the mixture is crumbly, press it into a 13 x 9-inch baking dish. Press dough out evenly so that it has a uniform height throughout the pan. Bake for approximately 15 minutes, and remove from the oven.: Pressing the dough evenly will produce uniform color and bake time, and you should feel a slight resistance as you compact the crumbs into a flat layer. Use the back of a measuring cup for a smooth surface, and aim for consistent thickness across the pan to avoid thin edges that brown too fast. One mistake is leaving the crust uneven, which causes uneven baking and sections that are either underdone or overly crisp.
- In a bowl, mix together eggs, 3 cups granulated sugar, lemon juice, 1 cup flour, vanilla, and salt.: A uniform surface encourages even browning and a consistent bite in every square. When done right, the crust will look smooth and compact before it goes into the oven. If the crust is patchy, the filling can pool in low spots and make slicing messy later, so take a little extra time to level it now.
- Mix until the filling is uniform in texture, and pour over the cooked shortbread cookie crust.: During this short bake you will smell warm, buttery notes and notice the edges beginning to color slightly. The crust should feel set rather than doughy when you gently touch the pan edge with a spatula. Leaving it in longer can result in an overly hard base, while removing it too early risks a soggy underlayer, so aim for that brief golden edge as your cue.
- Bake for an additional 30 to 35 minutes. Allow this to cool to room temperature before dusting with powdered sugar.: As you whisk these ingredients the mixture will turn glossy and pourable, and the lemon aroma will intensify. The eggs and granulated sugar create a custard like foundation, while the all purpose flour helps the filling set without being cakey. Over mixing can incorporate too much air, which makes the filling puff then crack, so stir until smooth and uniform in texture only.
- Be sure to refrigerate these cookies when not being served.: Pouring a smooth, even filling across the warm crust will produce a clean layer that bakes into a glossy top. You may hear a faint hiss as warm crust meets the cooler filling, and the visual should be a level, pale yellow surface before it returns to the oven. Pour gently to avoid disturbing the crust, and if you see pooling in one area nudge the pan to spread the mixture evenly.
- Bake for an additional 30 to 35 minutes: While baking the aroma will shift toward sweeter, zesty notes, and the edges of the filling will begin to gain a faint golden color. The center should look set and no longer jiggle like liquid; a slight wobble at the very center is okay because it will firm as it cools. A frequent misstep is under baking, leaving the filling loose, so look for those browning edges and a mostly set center as your sign.
- Allow this to cool to room temperature before dusting with powdered sugar: As they cool, the filling firms and becomes easier to slice, and the aromas mellow into a balanced lemon sweetness. Dust the powdered sugar only after the bars have cooled so it stays visible rather than melting into the surface. Cutting too soon can lead to sloppy slices, so be patient and let the texture settle.
- Be sure to refrigerate these cookies when not being served: Chilling tightens the filling and keeps the bars fresh, and you will notice the texture becomes more like a firm custard. Refrigeration also helps when you want clean slices for serving later. Leaving them at room temperature for extended periods can soften the crust and invite spoilage, so store covered in the fridge between servings.
Notes
- Use fresh lemon juice: Freshly squeezed lemon juice gives superior brightness and aroma compared to bottled juice, and it makes the filling taste lively and true to citrus. If you have a lemon zester, a little zest folded into the filling amplifies fragrance, but keep it minimal to avoid bitterness.
- Chill before slicing: After cooling to room temperature, refrigerate the bars for at least an hour to firm the filling. This makes slicing tidy squares much easier and prevents the filling from smearing, which is especially helpful if you are transporting them to a gathering.
- Evenly press crust: Press the shortbread base with the back of a measuring cup to create a compact, uniform layer. An even crust ensures consistent bake across the pan, avoiding very thin edges that brown too quickly or thick spots that stay doughy.
- Watch the edges: The filling is done when the edges start to turn a faint golden color while the center is mostly set. If the center is still very jiggly, return to the oven in short increments to avoid over baking the edges.
- Dust just before serving: Apply the powdered sugar right before you present the bars to guests so it looks fresh and delicate. If you dust too early, it will absorb moisture and fade, reducing the visual contrast that makes each square pop.