Lemon Crinkle Cookies
Lemon Crinkle Cookies landed on my baking table the first spring I wanted something bright, tart, and utterly cheerful to bring to a neighborhood potluck. I remember grating lemon zest over the counter while the sunlight poured through the window, and the kitchen instantly smelled like citrus candy. That aroma alone told me these were going to be different from ordinary cookies, and I felt a little thrill knowing guests would ask for the recipe.
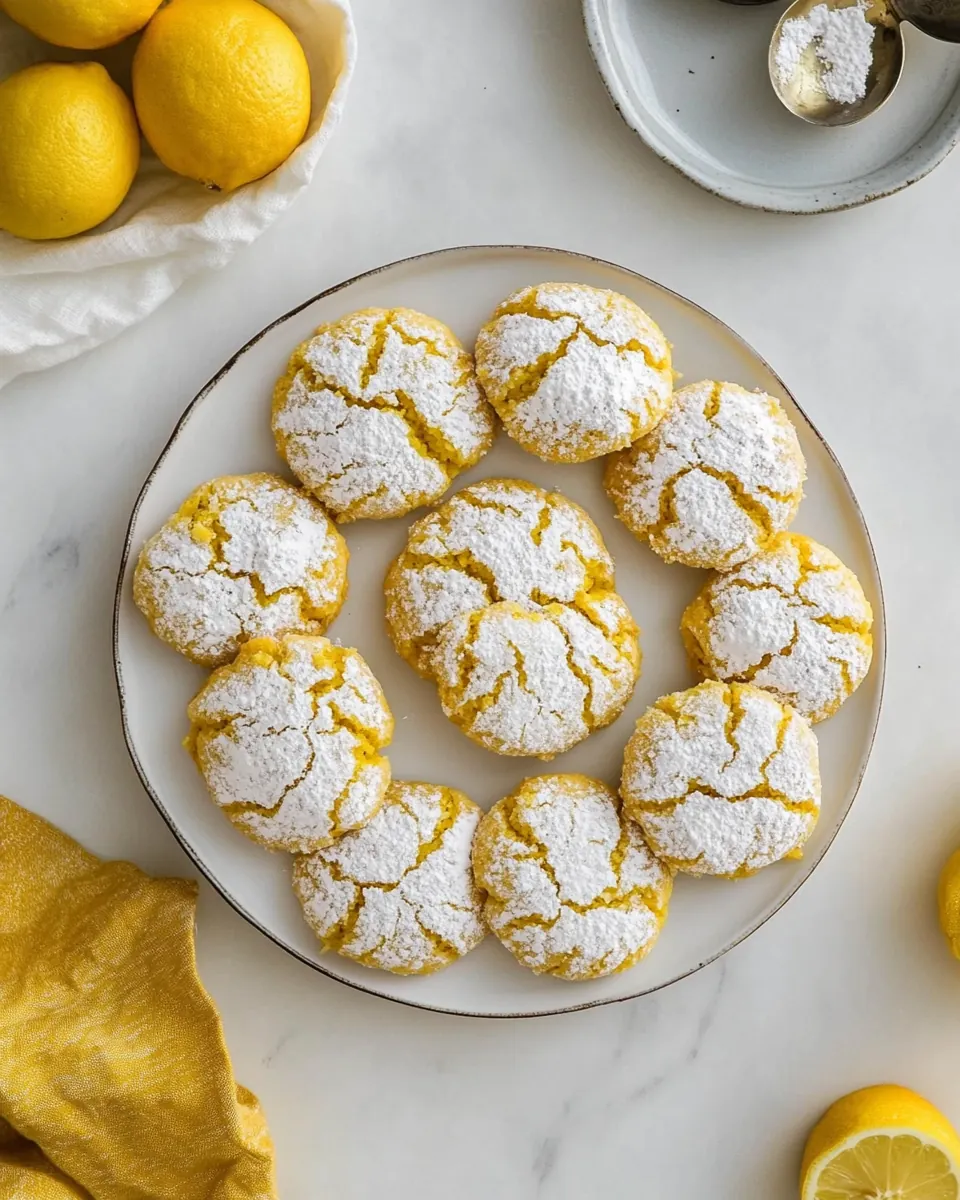
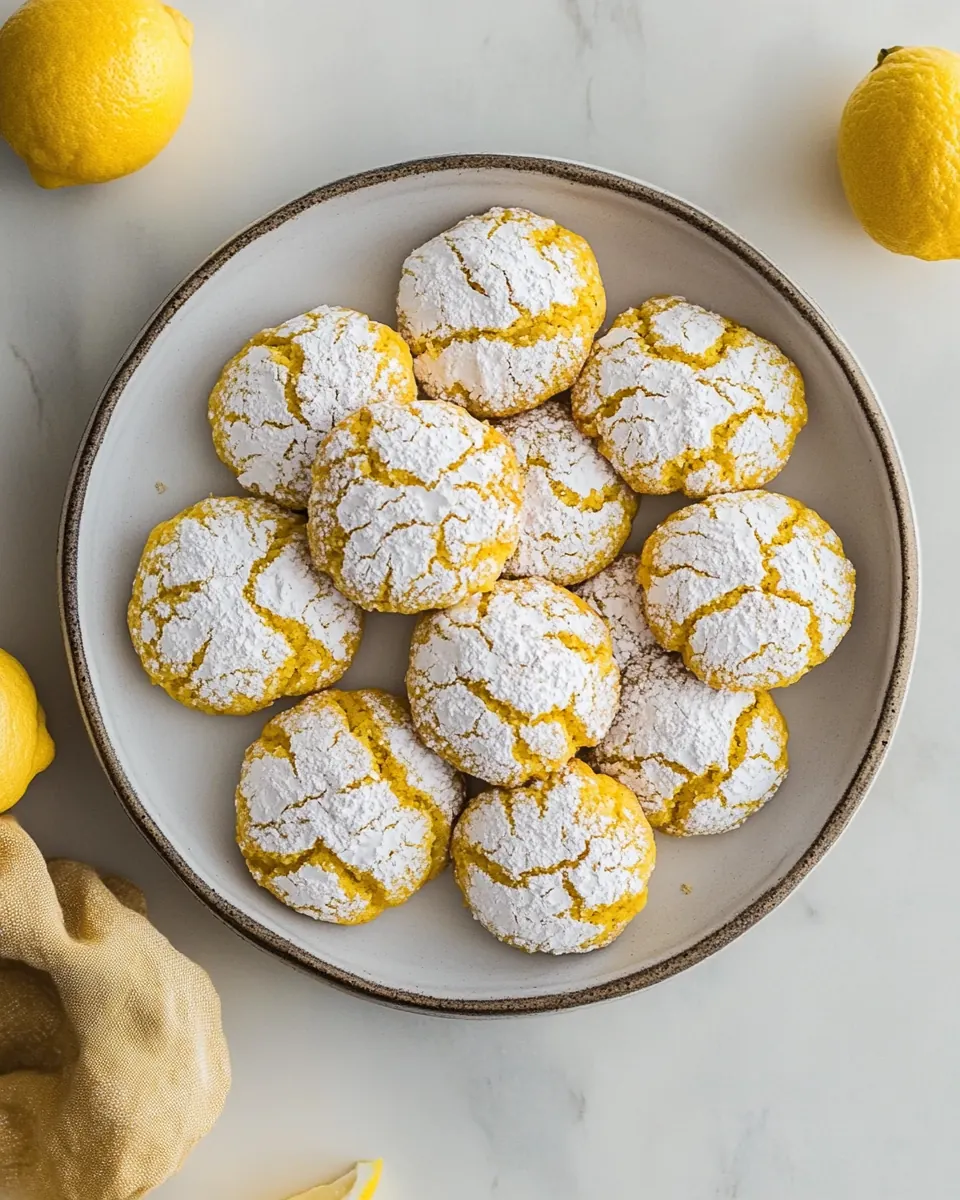
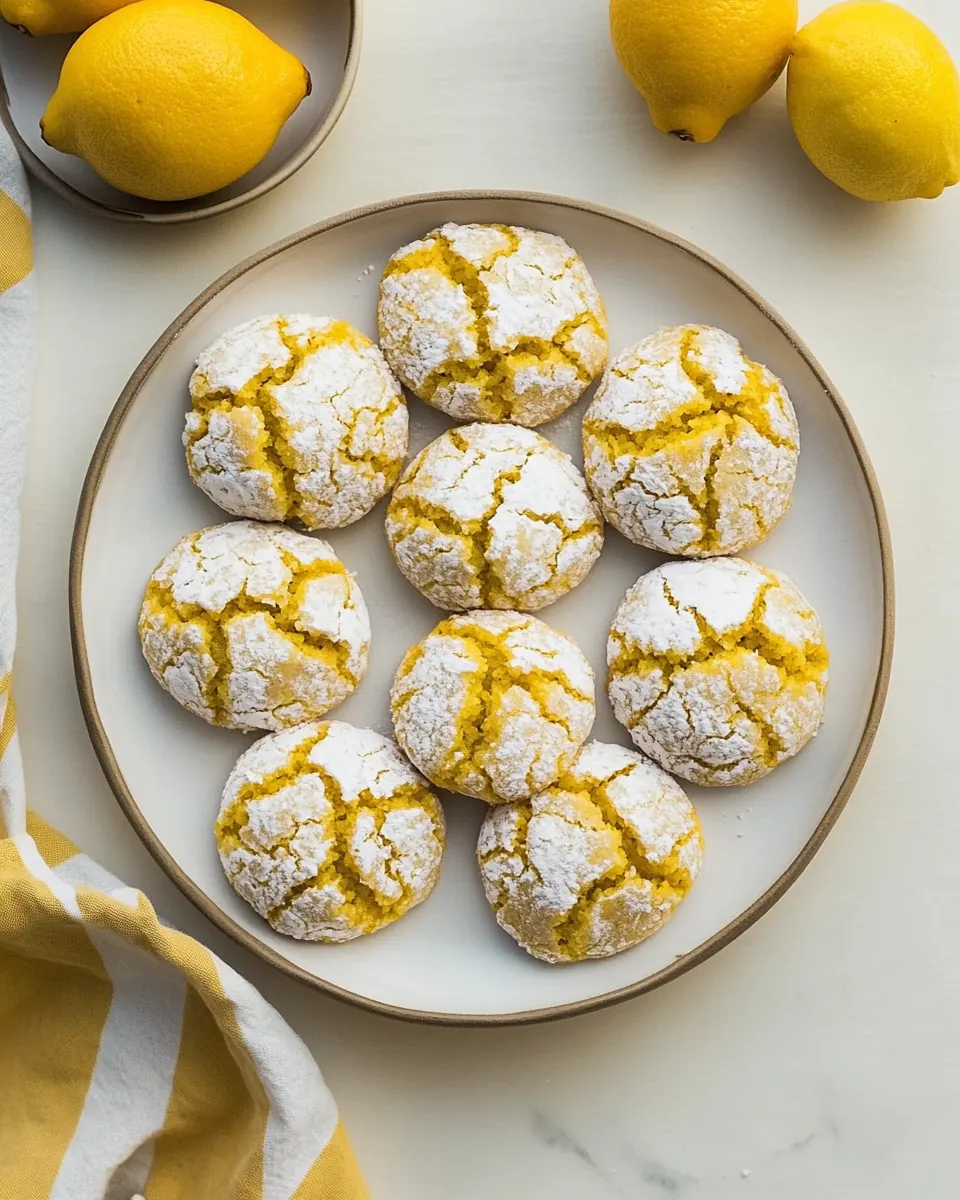
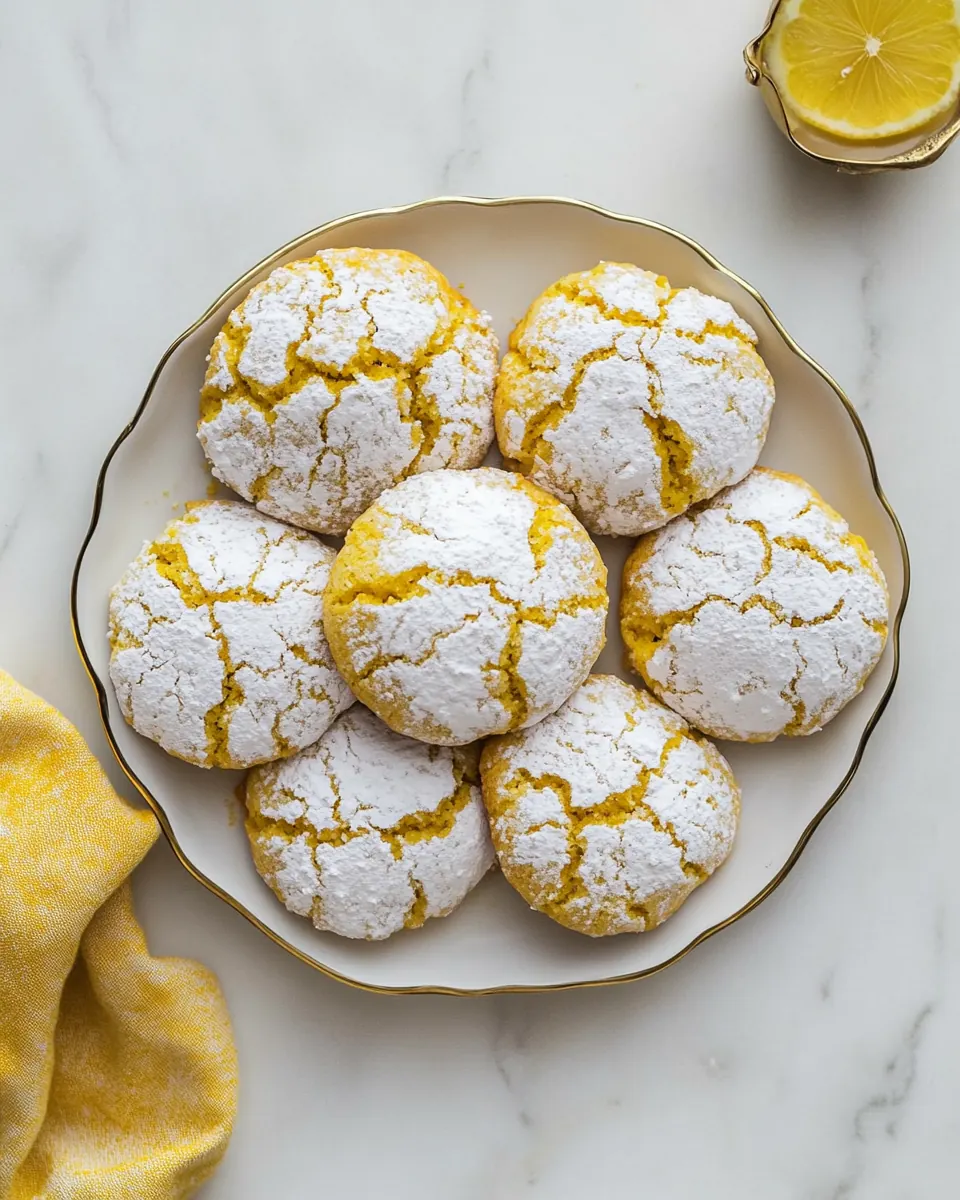
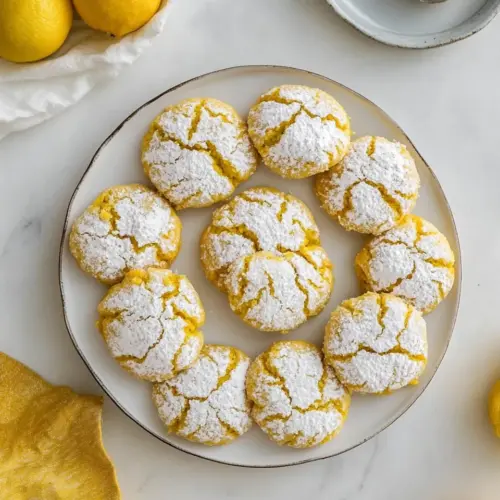
Years later I still reach for this recipe when I want a cookie that looks charming and tastes like sunshine. The powdered sugar crust gives each cookie a snowball look that contrasts beautifully with the yellow interior. I often find myself sneaking a warm one from the cooling rack, feeling the tender crumb and the gentle lemon tang on my tongue. It is a small, joyful ritual I recommend.
Recipe Snapshot
35 mins
15 mins
20 mins
Easy
150 kcal
American
Gluten-Free, Low FODMAP
Desserts
Stand mixer, Electric hand mixer, Mixing bowls, Measuring cups, Cookie scoop, Parchment paper, Baking sheets
The Magic of This Lemon Crinkle Cookies
Bright citrus flavor that sings
I adore how Lemon Crinkle Cookies deliver instant lemon impact without being cloying. The combination of fresh Zest from three lemons and balanced sugar keeps the flavor lively, and I always notice guests pause as the scent hits them before the first bite.
Textural contrast that surprises
These cookies present a soft, tender interior and a crinkled, powdered sugar exterior. When you bite in, you get a slight tooth from the sugar crust, then a pillowy center. I love that contrast, it makes each bite interesting and keeps people reaching for another.
Quick and forgiving method
The technique is straightforward, and the dough chills to firm up when needed. I appreciate recipes that are forgiving, and these let you recover from a too soft dough with an extra chill. That flexibility makes them a reliable choice during busy afternoons.
Visually charming for gatherings
With their snowy powdered sugar coating and gentle yellow hue, Lemon Crinkle Cookies are perfect for springtime parties, tea, or a simple tray of treats. They photograph beautifully and never look fussy, even when you make them quickly for a last minute event.
Simple pantry ingredients
Most of the ingredients are pantry staples, which means I can pull these together on short notice. The recipe trusts a few key players to carry the flavor, and that reliability is why I return to it season after season.
Main Ingredients for Lemon Crinkle Cookies
These ingredients are selected to play off one another: the all-purpose flour forms the cookie structure, the white sugar and powdered sugar provide sweetness and the signature crinkle look, and the lemon zest brings bright acidity. Together, they balance texture and flavor so each cookie is tender, aromatic, and visually appealing.
- 1 3/4 all-purpose flour, (210 g): Provide structure and bulk to the cookies, giving them a tender crumb when properly measured and mixed; sift or whisk before use to ensure even distribution and to avoid dense spots. Combine with the leavening agents so the dough holds shape while remaining soft after baking.
- 1/2 teaspoon baking powder: Lightly leaven the dough to give a gentle rise and slight lift without creating large air pockets; mix evenly with the flour to ensure consistent texture. Reacts with acidic components to balance crumb and spread.
- 1/2 teaspoon baking soda: Act as an additional leavening agent to help the cookies rise and develop a delicate crumb; distribute evenly through the dry ingredients to prevent uneven puffing. Works with baking powder and acidic ingredients for optimal lift.
- 1/4 teaspoon kosher salt: Enhance flavor and balance sweetness while strengthening gluten slightly; use kosher salt for consistent salinity and to improve overall taste profile. Dissolves into the dough to accentuate lemon and buttery notes.
- 3/4 cup white sugar: Provide sweetness and contribute to spread and chewiness; creaming with fats incorporates air for lighter texture while granules help with slight crisp edges. Dissolve sufficiently into wet ingredients to avoid graininess.
- Zest from three lemons: Impartment of concentrated citrus oil and aroma that brightens flavor, offering a pronounced lemon note and slight bitterness; finely grate to avoid large bits. Fold into wet ingredients so flavor disperses evenly throughout the dough.
- 1/4 cup unsalted butter, at room temperature: Contribute richness, flavor, and tender mouthfeel while helping to create a soft crumb; ensure butter is at room temperature for proper creaming with sugar. Helps with structure and browning during baking.
- 1/4 cup neutral oil: Add moisture and keep cookies tender and slightly softer by contributing fat without the solidity of butter; use a neutral oil to avoid altering the lemon flavor. Mix with other fats to control spread and chewiness.
- 2 large eggs: Provide structure, richness, and emulsification; eggs bind ingredients, add moisture, and support leavening for a cohesive dough. Beat in one at a time to ensure even incorporation and a smooth texture.
- 1 teaspoon pure vanilla extract: Deliver a subtle background flavor and enhance sweetness perception; use pure vanilla extract sparingly to complement the lemon without overpowering it. Mix into wet ingredients for even distribution.
- 2 drops yellow food coloring gel: Intensify color for an attractive appearance without affecting flavor significantly; gel coloring provides concentrated pigment so only a drop or two is needed. Stir into the batter until hue is uniform.
- 3/4 cup powdered sugar, sifted: Create the crackled, powdered coating and add a delicate sweetness on the exterior; sifting prevents lumps and helps achieve an even, snowy finish. Roll chilled dough balls in the sugar just before baking for signature crinkles.
Putting Together Lemon Crinkle Cookies
These instructions unfold in a clear sequence that builds texture and flavor step by step. I like to keep the work area tidy, and I recommend reading through all steps before beginning. With a few small sensory cues and a little patience, you will achieve the classic crinkled look and tender interior.
- In a medium bowl, whisk together the flour, baking powder, baking soda & salt. Set aside.: As you combine the dry ingredients you will notice the faint dusty aroma of the all-purpose flour , and the act of whisking aerates the mixture so the cookie crumb stays light. The visual cue is a uniform pale blend with no streaks of baking soda or powder. This step matters because even distribution prevents chemical hotspots that can leave unpleasant tastes or uneven rise. A common mistake is skimping on the sift or whisk, which can cause small pockets of leavener and uneven texture in the baked cookie.
- In the bowl of a stand-up mixer (or with an electric hand mixer), combine the sugar, lemon zest, butter, oil & vanilla extract. Beat until very smooth & fluffy, about 1 minute. Add in 2-3 drops of food coloring gel & mix again. Add the eggs and beat once more. Pour in the dry ingredients & combine until no flour flecks are visible. Chill the dough for 30 minutes to firm up.: When you first add the white sugar and lemon zest , rub them together against the sides of the bowl to release citrus oils, and you will immediately smell bright lemon perfume. Adding the butter , oil , and vanilla next creates a creamy emulsion, and as you beat the mixture it will become smoother and slightly paler, showing that air is being incorporated. This aeration helps with a tender crumb and a soft lift. Watch for gritty sugar fragments to disappear as a sign it is ready. A common error is overbeating once eggs are added, which can make the dough too loose.
- Preheat the oven to 350 F. Line two baking sheets with parchment paper. Using a medium cookie scoop, scoop out balls of cookie dough & roll them in the sifted powdered sugar. Be sure to really cake it on. Place 6 cookies per baking sheet and bake for 12-13 minutes, until the centers are set. They’ll puff up a bit but fall as they cool. Repeat with the coating & baking with the remaining batter.: You will feel the bowl warm a touch and hear a steady whir from the mixer, while the batter goes from coarse to silky. Smoothness indicates that the butter and oil have emulsified with the sugar and zest , creating a fine texture that helps cookies spread correctly. If the mixture looks curdled or greasy, stop and scrape down the bowl, then continue briefly. Overbeating at high speed can also incorporate too much air, leading to excessive rise and then collapse.
- Add in 2-3 drops of food coloring gel & mix again.: The tiny amount of yellow food coloring gel deepens the visual warmth of the dough; you should see a soft pastel yellow emerge. Mixing briefly ensures even color without streaks. This step is purely aesthetic but it enhances the finished appearance under the powdered sugar crust. If you add too much coloring, the dough can look unnaturally bright and streaky.
- Add the eggs and beat once more.: Adding the eggs binds the mixture and enriches the dough, giving it elasticity that shows in the texture when baked. After beating, the batter should look glossy and have a cohesive ribbon-like quality when the beater lifts through it. If the eggs are too cold, the mixture might seize and look lumpy, so room temperature eggs help it come together smoothly. If it seems curdled, let the bowl sit for a minute then beat gently.
- Pour in the dry ingredients & combine until no flour flecks are visible.: As you fold in the dry mix, watch for the transformation from shaggy to unified dough. The scent will shift subtly as the citrus blends with the flour, and the texture will become thicker. It is important not to overmix, because excessive stirring develops gluten in the all-purpose flour and can produce a tougher cookie. A common mistake is continuing to mix long after the flour has disappeared, which negatively impacts tenderness.
- Chill the dough for 30 minutes to firm up.: Chilling calms the dough, solidifying the butter and oil , and it helps control spread during baking. You will notice the dough become more scoopable and less sticky, making it easier to roll in the powdered sugar. The aroma will mellow a bit while the dough rests, allowing flavors to meld. If you skip chilling and the dough is too soft, your cookies may flatten; if that happens, return the dough to the fridge for an additional 15 to 30 minutes.
- Preheat the oven to 350 F.: As the oven warms you might smell residual lemon from the dough, and the preheated environment ensures an immediate gentle rise when the cookies go in. A correctly preheated oven promotes even baking and proper crinkle formation. Using an oven thermometer helps here, since many ovens run slightly hot or cool. Putting cookies into a cold oven is a frequent misstep that alters texture and spread.
- Line two baking sheets with parchment paper.: Preparing your pans with parchment paper prevents sticking and helps the bottoms brown evenly. The sheets should be cool and flat so the cookies sit level while baking. This small step saves time on cleanup and keeps the cookie bottoms from overbrowning. Avoid greasing the parchment, it can change how the cookie spreads and bakes.
- Using a medium cookie scoop, scoop out balls of cookie dough & roll them in the sifted powdered sugar.: When you scoop, the dough should feel slightly tacky but hold shape. Rolling each ball generously in the powdered sugar creates the signature snowy crust that will crack as the cookie expands. The visual cue is an opaque, well coated ball before it goes into the oven. A common mistake is a light dusting rather than a heavy coating, which reduces the crinkle contrast on the finished cookie.
- Be sure to really cake it on.: Pressing the powdered sugar into the surface until it forms a thick coating ensures deep, visible cracks when the cookie puffs and then settles. The thicker coating also gives a delicate sweetness and melt on the lips. If you skip this, the crinkle effect will be modest and the cookies will look less striking.
- Place 6 cookies per baking sheet and bake for 12 to 13 minutes, until the centers are set.: During baking you will see them puff, edges will look slightly firm, and the centers will move less when the sheet is nudged. The smell deepens into warm lemon and sweet sugar, and the powdered sugar will show fine fractures as the cookies expand. This timing yields a soft, slightly chewy center. Overbaking will dry them out, so remove them when the centers appear set but not hard.
- They’ll puff up a bit but fall as they cool.: After they come out of the oven, the cookies will gently deflate and develop the classic crinkled appearance. Cooling on the sheet for a few minutes lets them stabilize; when you transfer them to a rack, they will finish firming yet remain tender. If you try to move them too soon, they may break or spread further, so patience is rewarded.
- Repeat with the coating & baking with the remaining batter.: Continue rolling and baking in batches, making sure each tray has consistent spacing and that the oven is back to temperature before the next load. The smell in the kitchen will keep guests curious, and you can adjust any timing tweaks as you go. A common oversight is crowding the sheet, which impacts airflow and leads to uneven baking, so keep consistent spacing across batches.
Make It Your Own
These small tweaks let you personalize the cookies without changing their essence. I like to experiment with zest amounts and chilling time, and each adjustment alters the final bite in subtle, satisfying ways.
- Boost the lemon intensity: Increase the amount of lemon zest to four lemons if you want a more pronounced citrus note. Fresh zest carries volatile oils that heighten aroma, and you will notice the scent immediately when you begin mixing. Be mindful to avoid the bitter pith while zesting.
- Adjust chewiness: For slightly chewier centers, reduce chilling time by 10 to 15 minutes so the dough spreads a touch more. The cookies will be a bit thinner and springier, which some people prefer. Make sure to watch bake time closely to prevent drying out.
- Use an extra coating: Double roll the dough balls in the powdered sugar for a brighter white crackle. This produces stronger contrast between the sugar crust and the lemon interior, enhancing presentation. Too much handling can melt the coating, so work quickly.
- Swap mixing speed: Start mixing wet ingredients on low, then increase to medium to avoid splatter and ensure even emulsification. Gentle control avoids overheating the butter and maintains a smooth texture. Overworking at high speed can introduce excess air, causing uneven rise.
- Storing: Place cooled cookies in an airtight container with parchment between layers for up to three days. This keeps the edges tender and prevents the powdered sugar from rubbing off too much. Avoid refrigeration which can dry them out.
Pairing Suggestions for Lemon Crinkle Cookies
Lemon Crinkle Cookies pair well with light beverages and simple accompaniments that highlight their citrus character. Whether serving at a tea, a spring gathering, or a casual coffee break, consider complementary textures and flavors that let the lemon shine.
- Tea service: Offer with a pot of delicate black tea or a floral herbal blend to complement the citrus without overpowering it. The warmth and tannins contrast nicely with the sweet, tender cookie, making it a cozy pairing for afternoon guests.
- Brunch tray: Arrange alongside fresh fruit and yogurt for a visually appealing spread. The bright fruit echoes the lemon flavor and adds juicy texture, while the cookies bring a sweet finish to savory brunch items.
- Springtime parties: These cookies fit perfectly on a spring dessert table, paired with light cheeses or small tartlets for variety. Their cheerful look makes them a focal point, and guests will appreciate the approachable sweetness.
- Gift boxes: Layer in treat boxes with parchment and a small note. They travel well for short periods and make a thoughtful homemade gift for neighbors or hosts during spring celebrations.
- Storage tips: Keep in an airtight container at room temperature for up to three days. For longer storage, freeze baked cookies in a single layer, then transfer to a container; thaw at room temperature before serving to preserve texture.
FAQ
Conclusion
Lemon Crinkle Cookies stand out because they combine bright citrus aroma with a tender, snowy exterior that feels both nostalgic and fresh. I encourage you to try them when you want a simple, cheerful bake that travels well to gatherings and pleases a crowd. These cookies are forgiving, quick to make, and deliver a pop of lemon that is both uplifting and comforting. With a little attention to chilling and a generous powdered sugar coating, you will end up with cookies that look charming and taste delightful. Share them with friends or keep a jar on the counter for a sunny pick me up.
Lemon Crinkle Cookies
Equipment
- Stand mixer
- electric hand mixer
- Mixing Bowls
- Measuring Cups
- Cookie Scoop
- Parchment Paper
- Baking Sheets
Ingredients
- 1 3/4 all-purpose flour, (210 g) Provide structure and bulk to the cookies, giving them a tender crumb when properly measured and mixed; sift or whisk before use to ensure even distribution and to avoid dense spots. Combine with the leavening agents so the dough holds shape while remaining soft after baking.
- 1/2 teaspoon baking powder Lightly leaven the dough to give a gentle rise and slight lift without creating large air pockets; mix evenly with the flour to ensure consistent texture. Reacts with acidic components to balance crumb and spread.
- 1/2 teaspoon baking soda Act as an additional leavening agent to help the cookies rise and develop a delicate crumb; distribute evenly through the dry ingredients to prevent uneven puffing. Works with baking powder and acidic ingredients for optimal lift.
- 1/4 teaspoon kosher salt Enhance flavor and balance sweetness while strengthening gluten slightly; use kosher salt for consistent salinity and to improve overall taste profile. Dissolves into the dough to accentuate lemon and buttery notes.
- 3/4 cup white sugar Provide sweetness and contribute to spread and chewiness; creaming with fats incorporates air for lighter texture while granules help with slight crisp edges. Dissolve sufficiently into wet ingredients to avoid graininess.
- Zest from three lemons Impartment of concentrated citrus oil and aroma that brightens flavor, offering a pronounced lemon note and slight bitterness; finely grate to avoid large bits. Fold into wet ingredients so flavor disperses evenly throughout the dough.
- 1/4 cup unsalted butter, at room temperature Contribute richness, flavor, and tender mouthfeel while helping to create a soft crumb; ensure butter is at room temperature for proper creaming with sugar. Helps with structure and browning during baking.
- 1/4 cup neutral oil Add moisture and keep cookies tender and slightly softer by contributing fat without the solidity of butter; use a neutral oil to avoid altering the lemon flavor. Mix with other fats to control spread and chewiness.
- 2 large eggs Provide structure, richness, and emulsification; eggs bind ingredients, add moisture, and support leavening for a cohesive dough. Beat in one at a time to ensure even incorporation and a smooth texture.
- 1 teaspoon pure vanilla extract Deliver a subtle background flavor and enhance sweetness perception; use pure vanilla extract sparingly to complement the lemon without overpowering it. Mix into wet ingredients for even distribution.
- 2 drops yellow food coloring gel Intensify color for an attractive appearance without affecting flavor significantly; gel coloring provides concentrated pigment so only a drop or two is needed. Stir into the batter until hue is uniform.
- 3/4 cup powdered sugar, sifted Create the crackled, powdered coating and add a delicate sweetness on the exterior; sifting prevents lumps and helps achieve an even, snowy finish. Roll chilled dough balls in the sugar just before baking for signature crinkles.
Instructions
- In a medium bowl, whisk together the flour, baking powder, baking soda & salt. Set aside.: As you combine the dry ingredients you will notice the faint dusty aroma of the all-purpose flour , and the act of whisking aerates the mixture so the cookie crumb stays light. The visual cue is a uniform pale blend with no streaks of baking soda or powder. This step matters because even distribution prevents chemical hotspots that can leave unpleasant tastes or uneven rise. A common mistake is skimping on the sift or whisk, which can cause small pockets of leavener and uneven texture in the baked cookie.
- In the bowl of a stand-up mixer (or with an electric hand mixer), combine the sugar, lemon zest, butter, oil & vanilla extract. Beat until very smooth & fluffy, about 1 minute. Add in 2-3 drops of food coloring gel & mix again. Add the eggs and beat once more. Pour in the dry ingredients & combine until no flour flecks are visible. Chill the dough for 30 minutes to firm up.: When you first add the white sugar and lemon zest , rub them together against the sides of the bowl to release citrus oils, and you will immediately smell bright lemon perfume. Adding the butter , oil , and vanilla next creates a creamy emulsion, and as you beat the mixture it will become smoother and slightly paler, showing that air is being incorporated. This aeration helps with a tender crumb and a soft lift. Watch for gritty sugar fragments to disappear as a sign it is ready. A common error is overbeating once eggs are added, which can make the dough too loose.
- Preheat the oven to 350 F. Line two baking sheets with parchment paper. Using a medium cookie scoop, scoop out balls of cookie dough & roll them in the sifted powdered sugar. Be sure to really cake it on. Place 6 cookies per baking sheet and bake for 12-13 minutes, until the centers are set. They’ll puff up a bit but fall as they cool. Repeat with the coating & baking with the remaining batter.: You will feel the bowl warm a touch and hear a steady whir from the mixer, while the batter goes from coarse to silky. Smoothness indicates that the butter and oil have emulsified with the sugar and zest , creating a fine texture that helps cookies spread correctly. If the mixture looks curdled or greasy, stop and scrape down the bowl, then continue briefly. Overbeating at high speed can also incorporate too much air, leading to excessive rise and then collapse.
- Add in 2-3 drops of food coloring gel & mix again.: The tiny amount of yellow food coloring gel deepens the visual warmth of the dough; you should see a soft pastel yellow emerge. Mixing briefly ensures even color without streaks. This step is purely aesthetic but it enhances the finished appearance under the powdered sugar crust. If you add too much coloring, the dough can look unnaturally bright and streaky.
- Add the eggs and beat once more.: Adding the eggs binds the mixture and enriches the dough, giving it elasticity that shows in the texture when baked. After beating, the batter should look glossy and have a cohesive ribbon-like quality when the beater lifts through it. If the eggs are too cold, the mixture might seize and look lumpy, so room temperature eggs help it come together smoothly. If it seems curdled, let the bowl sit for a minute then beat gently.
- Pour in the dry ingredients & combine until no flour flecks are visible.: As you fold in the dry mix, watch for the transformation from shaggy to unified dough. The scent will shift subtly as the citrus blends with the flour, and the texture will become thicker. It is important not to overmix, because excessive stirring develops gluten in the all-purpose flour and can produce a tougher cookie. A common mistake is continuing to mix long after the flour has disappeared, which negatively impacts tenderness.
- Chill the dough for 30 minutes to firm up.: Chilling calms the dough, solidifying the butter and oil , and it helps control spread during baking. You will notice the dough become more scoopable and less sticky, making it easier to roll in the powdered sugar. The aroma will mellow a bit while the dough rests, allowing flavors to meld. If you skip chilling and the dough is too soft, your cookies may flatten; if that happens, return the dough to the fridge for an additional 15 to 30 minutes.
- Preheat the oven to 350 F.: As the oven warms you might smell residual lemon from the dough, and the preheated environment ensures an immediate gentle rise when the cookies go in. A correctly preheated oven promotes even baking and proper crinkle formation. Using an oven thermometer helps here, since many ovens run slightly hot or cool. Putting cookies into a cold oven is a frequent misstep that alters texture and spread.
- Line two baking sheets with parchment paper.: Preparing your pans with parchment paper prevents sticking and helps the bottoms brown evenly. The sheets should be cool and flat so the cookies sit level while baking. This small step saves time on cleanup and keeps the cookie bottoms from overbrowning. Avoid greasing the parchment, it can change how the cookie spreads and bakes.
- Using a medium cookie scoop, scoop out balls of cookie dough & roll them in the sifted powdered sugar.: When you scoop, the dough should feel slightly tacky but hold shape. Rolling each ball generously in the powdered sugar creates the signature snowy crust that will crack as the cookie expands. The visual cue is an opaque, well coated ball before it goes into the oven. A common mistake is a light dusting rather than a heavy coating, which reduces the crinkle contrast on the finished cookie.
- Be sure to really cake it on.: Pressing the powdered sugar into the surface until it forms a thick coating ensures deep, visible cracks when the cookie puffs and then settles. The thicker coating also gives a delicate sweetness and melt on the lips. If you skip this, the crinkle effect will be modest and the cookies will look less striking.
- Place 6 cookies per baking sheet and bake for 12 to 13 minutes, until the centers are set.: During baking you will see them puff, edges will look slightly firm, and the centers will move less when the sheet is nudged. The smell deepens into warm lemon and sweet sugar, and the powdered sugar will show fine fractures as the cookies expand. This timing yields a soft, slightly chewy center. Overbaking will dry them out, so remove them when the centers appear set but not hard.
- They’ll puff up a bit but fall as they cool.: After they come out of the oven, the cookies will gently deflate and develop the classic crinkled appearance. Cooling on the sheet for a few minutes lets them stabilize; when you transfer them to a rack, they will finish firming yet remain tender. If you try to move them too soon, they may break or spread further, so patience is rewarded.
- Repeat with the coating & baking with the remaining batter.: Continue rolling and baking in batches, making sure each tray has consistent spacing and that the oven is back to temperature before the next load. The smell in the kitchen will keep guests curious, and you can adjust any timing tweaks as you go. A common oversight is crowding the sheet, which impacts airflow and leads to uneven baking, so keep consistent spacing across batches.
Notes
- Boost the lemon intensity: Increase the amount of lemon zest to four lemons if you want a more pronounced citrus note. Fresh zest carries volatile oils that heighten aroma, and you will notice the scent immediately when you begin mixing. Be mindful to avoid the bitter pith while zesting.
- Adjust chewiness: For slightly chewier centers, reduce chilling time by 10 to 15 minutes so the dough spreads a touch more. The cookies will be a bit thinner and springier, which some people prefer. Make sure to watch bake time closely to prevent drying out.
- Use an extra coating: Double roll the dough balls in the powdered sugar for a brighter white crackle. This produces stronger contrast between the sugar crust and the lemon interior, enhancing presentation. Too much handling can melt the coating, so work quickly.
- Swap mixing speed: Start mixing wet ingredients on low, then increase to medium to avoid splatter and ensure even emulsification. Gentle control avoids overheating the butter and maintains a smooth texture. Overworking at high speed can introduce excess air, causing uneven rise.
- Storing: Place cooled cookies in an airtight container with parchment between layers for up to three days. This keeps the edges tender and prevents the powdered sugar from rubbing off too much. Avoid refrigeration which can dry them out.