
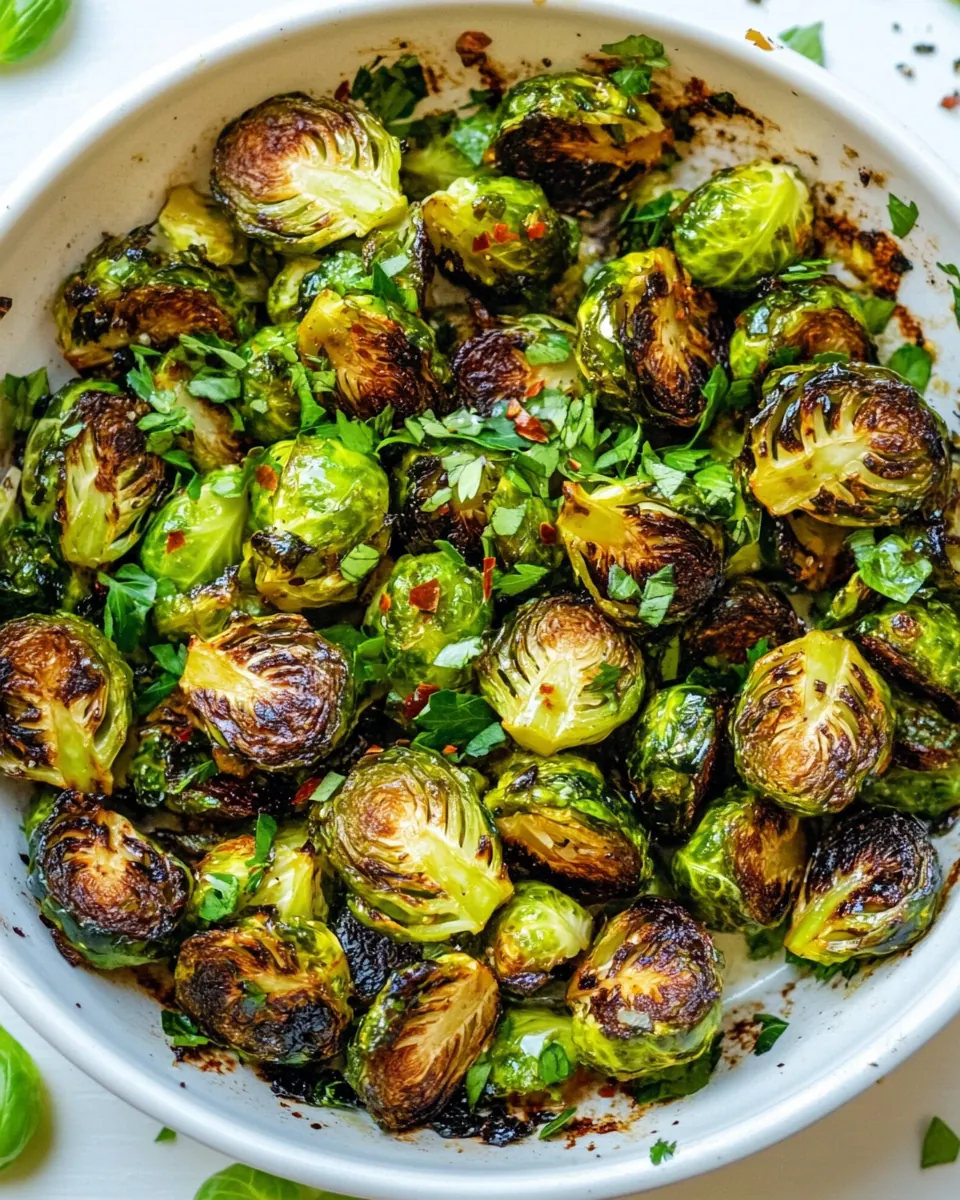
Sauteed Brussels Sprouts
Sauteed Brussels Sprouts is the side I turn to when I want something green, nutty, and slightly sweet on the plate. The first time I made this, I was racing the clock before friends arrived, and the way the cut sides caramelized in the pan felt like a small kitchen miracle. I still remember the moment I lifted the lid and a wave of toasty, slightly charred aroma hit me, promising the crunchy tenderness I love.
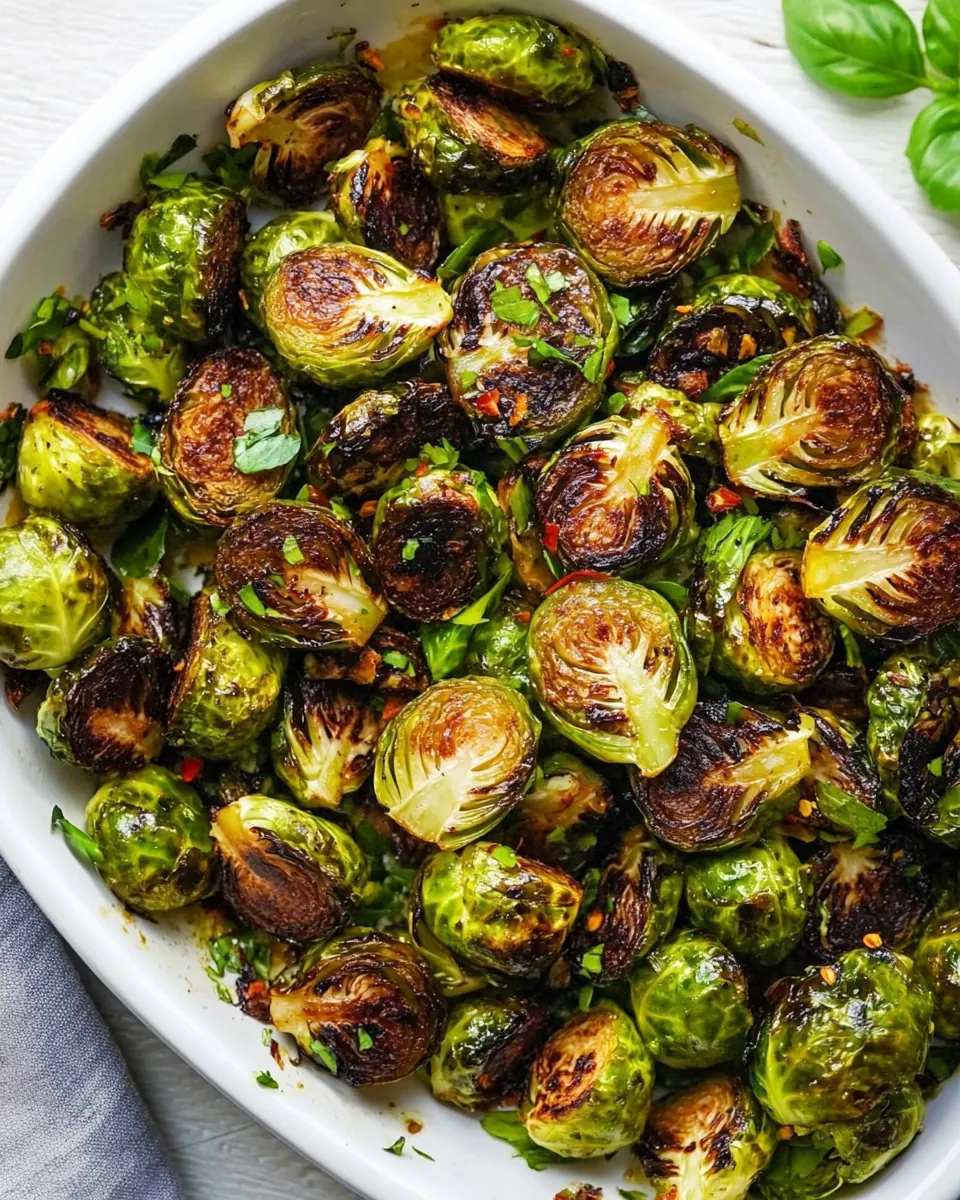
Over the years I have tweaked timings and small details until the result became reliably brilliant. I often pick up a bag of Brussels sprouts at the market and plan a few different meals around them, because they play well with many flavors. Sometimes I lean toward bright citrus, and other times I reach for a splash of balsamic vinegar for depth. Those little choices matter, and they are what made me fall for this recipe.
Recipe Snapshot
20 mins
5 mins
15 mins
Easy
150 kcal
American
Keto, Gluten-Free
Side Dishes
Cast iron skillet, Wooden spoon, Spatula
Why This Sauteed Brussels Sprouts Is So Good
1. Texture that sings
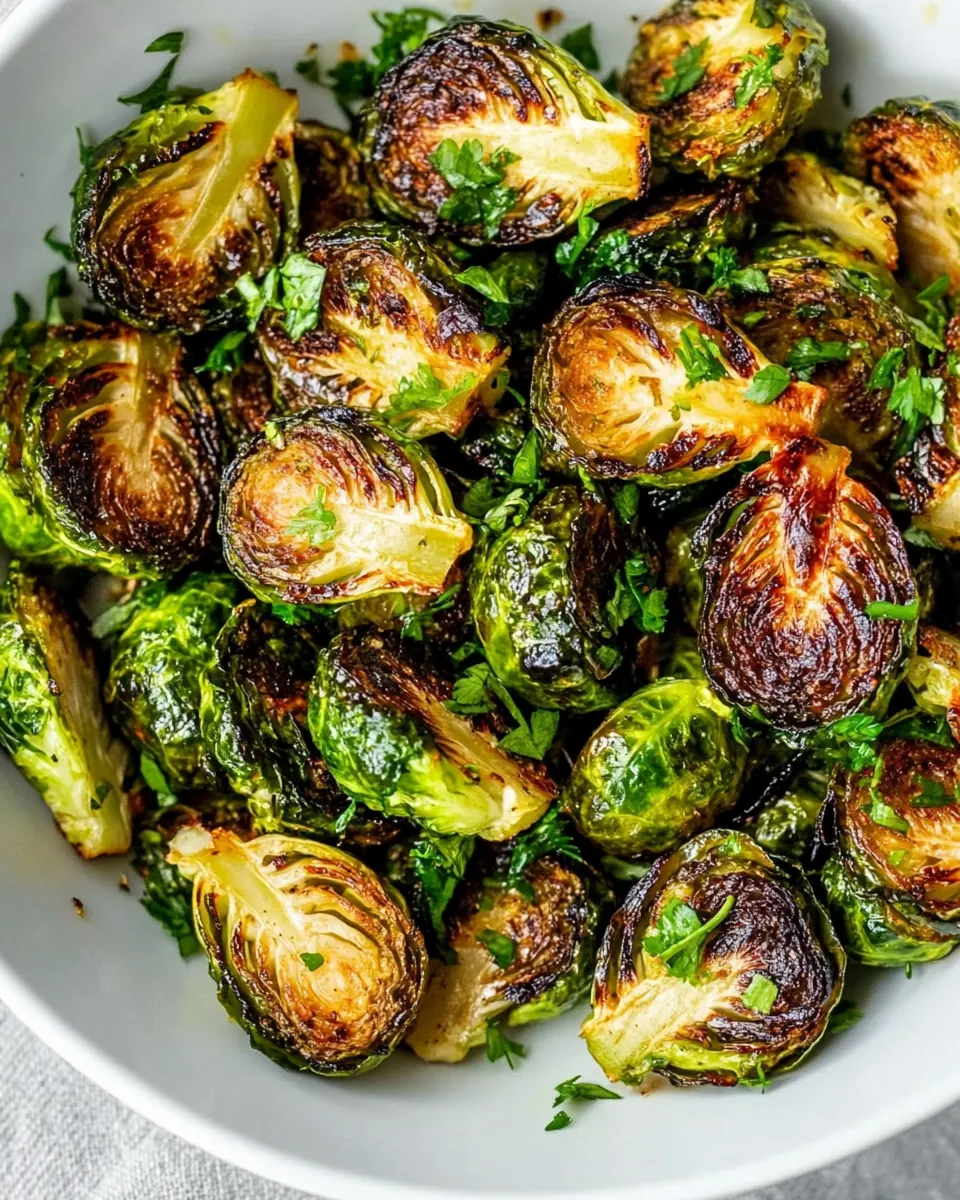
I love how Sauteed Brussels Sprouts delivers contrast, crisp edges, and tender centers. The high heat sears the cut sides so you get crunchy, browned surfaces while the insides stay soft. That play of textures keeps every bite interesting.
2. Fast and forgiving
This dish is wonderfully quick, which is why I make it on busy weeknights. Even if you misjudge the timing a bit, the sprouts hold up well, and a quick splash of vinegar revives the flavors. It’s a forgiving recipe for cooks at every level.
3. Customizable finishing touches
I appreciate how a few optional add ins can change the whole mood. A handful of pine nuts toasted in the residual heat adds crunch and a toasty note. A sprinkle of fresh herbs makes the plate sing. You get to decide what accent you want.
4. Simple pantry friendly
The ingredient list is short and pantry friendly, so I often have everything on hand. A little olive oil, salt, and pepper are the backbone, and they let the natural flavor of the Brussels sprouts shine through without fuss.
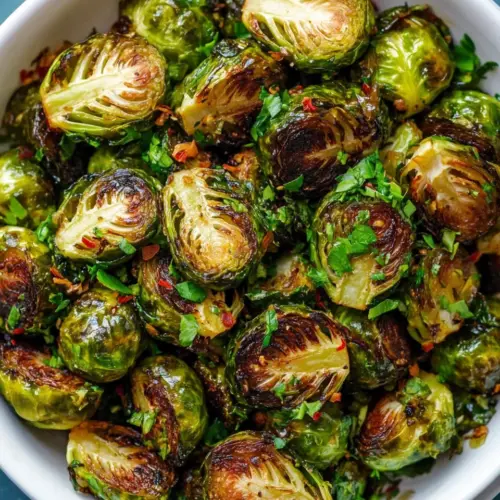
5. Crowd pleaser and seasonal
When I bring this to gatherings, it vanishes quickly, which is always satisfying. It feels especially at home in fall and holiday spreads, offering a bright, caramelized green that complements heavier mains.
What to Gather for Sauteed Brussels Sprouts
The philosophy behind these ingredients is all about highlighting the natural, slightly sweet, and nutty character of Brussels sprouts. A bit of high heat, a quality fat like extra virgin olive oil, and just enough salt and pepper coax out caramelization. The acid from balsamic vinegar or lemon juice brightens the dish, while optional nuts, herbs, and cheese add texture and finishing complexity.
- 1 pound Brussels sprouts trimmed and halved: Trimmed and halved for even cooking and maximum caramelization; deliver a nutty, slightly bitter base and substantial texture when sautéed until tender and golden.
- 2 tablespoons extra virgin olive oil: Coat and sear the sprouts to promote browning and develop flavor; serve as the primary cooking fat that adds fruitiness and helps crisp edges.
- 1/2 teaspoon kosher salt: Season early to help draw out moisture and enhance natural flavors; provide balanced salinity that brings forward savory notes without overwhelming the dish.
- 1/4 teaspoon ground black pepper: Season at the end or during cooking to add a subtle heat and depth; offer aromatic warmth that complements the sprouts and contrasts the acid component.
- 1 tablespoon balsamic vinegar or lemon juice: Brighten and balance richness by deglazing the pan or finishing the dish; contribute acidity that lifts flavors and adds a pleasant tang to the finished sprouts.
- 1 to 2 tablespoons raw pine nuts or chopped raw walnuts, almonds, or pecans () (optional): Toast or scatter at the end for crunchy texture and a toasty, buttery note; can be swapped between pine nuts and chopped tree nuts to vary flavor and crunch (optional).
- Chopped fresh herbs like parsley, cilantro or mint () (optional): Scatter freshly chopped herbs just before serving to introduce herbal brightness and color; provide fresh, green aromatics that lighten the dish (optional).
- A handful of Parmesan, feta, or goat cheese () (optional): Crumble or shave over the finished sprouts to add creaminess, umami, or tang depending on cheese choice; contribute a savory finishing touch that enriches mouthfeel (optional).
How to Prepare Sauteed Brussels Sprouts
I like to keep the action focused when I cook these, because the pan moves quickly from browned to overdone. With everything prepped, you can execute confidently and watch the transformation. Now follow the steps below and lean into the sensory cues I describe so you know you are on track.
- Heat a large cast iron or similar sturdy bottomed skillet over medium high for 4 minutes. Add the oil. As soon as the oil is hot and shining (but before it starts smoking), swirl to coat the pan, then add the halved Brussels sprouts. Shake the skillet a little and prod them so that as many as possible are cut-side down. Let sit completely undisturbed for 5 to 8 minutes, until they develop a dark, tasty, caramelized sear.: The pan should become hot enough to give a loud, lively sizzle when food hits it, which promotes immediate caramelization. You will notice the metal warming and a faint shimmer if you hold your hand above it, not touching. This preheating time is crucial because a cold pan will steam the Brussels sprouts instead of searing them, yielding limp, pale results. If the oil begins to smoke, turn the heat down slightly; smoking means you are at the verge of burning the fat, which creates off flavors. A common mistake here is not waiting long enough, which prevents a crisp, golden crust from forming.
- Add the salt and pepper. With a wooden spoon or spatula, stir the Brussels sprouts. Continue cooking, stirring every few minutes, until the Brussels sprouts are browned all over and just turning tender on the inside, about 6 to 8 additional minutes.: As the oil melts and spreads across the skillet, you will see it glisten and thin, indicating it is ready. The surface will have a shimmering quality rather than appearing dull. Swirl the pan so the oil coats every inch, ensuring that each sprout will meet the hot surface evenly. If the oil looks cloudy or smokes at once, the pan may be too hot, so reduce the heat briefly and let it cool a bit. Avoid adding too little oil, which can cause sticking, and too much, which leads to shallow frying rather than searing.
- Remove the pan from the heat. Stir in the vinegar, then the pine nuts or almonds. Let the residual heat of the skillet toast the nuts, stirring them very often so that they toast evenly on all sides and do not burn (if they aren’t toasting, return the skillet to low heat). As soon as the nuts are toasted, transfer the sprouts to a serving plate and sprinkle with fresh herbs. Enjoy hot.: When you add the Brussels sprouts , you should hear an immediate, assertive sizzle that tells you the pan is at the right temperature. Place them cut side down to maximize contact. If the sizzle is weak, the pan needs more heat. Too vigorous splattering means the oil was too hot or the sprouts were wet, so pat them dry beforehand. A frequent error is adding crowded sprouts, which causes steaming instead of searing, so leave a little space.
- Shake the skillet a little and prod them so that as many as possible are cut side down: A gentle shake and nudge help arrange the sprouts so the flat, cut surfaces meet the skillet evenly. You want as many of those cut surfaces touching the metal as possible to get deep browning, which yields a nutty, slightly sweet flavor. Visual cues include a glossy, deepening brown at the edges after a few minutes. Resist the temptation to stir during this period, because movement disrupts the sear. Overhandling here is the number one way to lose that crisp, caramelized exterior.
- Let sit completely undisturbed for 5 to 8 minutes until they develop a dark, tasty, caramelized sear: During this time, the sprouts will darken and the smell will shift toasty and slightly sweet, signaling Maillard reactions at work. You may see tiny browned bits forming on the pan surface; that is flavor building. If you lift a sprout and it sticks badly, it likely needs another minute to release naturally, which indicates the sear is incomplete. A common mistake is flipping too early, which tears the surface and prevents those deep flavors from developing.
- Add the salt and pepper: When you finally season, the spark of salt will bring forward the natural sweetness developed by the sear. The aroma will lift as the black pepper warms against the hot pan. Salt applied at this stage helps draw out moisture and aids additional browning as you continue cooking. Be careful not to oversalt since optional cheeses can add extra saltiness later. If the dish tastes flat, it usually needs a pinch more acid or salt at the end, rather than more fat.
- With a wooden spoon or spatula stir the Brussels sprouts: The sound will change to a softer sizzle as more surfaces brown, and you will see color spreading from the original seared faces to the sides. Stirring here redistributes heat and browning opportunities so the sprouts caramelize all over. Press down gently on a larger sprout to feel the tender interior; it should yield slightly but still hold shape. Avoid vigorous stirring, which can bruise the pieces and make them mushy.
- Continue cooking stirring every few minutes until the Brussels sprouts are browned all over and just turning tender on the inside about 6 to 8 additional minutes: Expect a progression from firm and bright to slightly yielding with an inviting, toasted scent. The visual cue is an even, warm brown on the cut sides and a fork slipping into the center with gentle resistance. If you see blackened char rather than golden brown spots, the heat was too high or the pan was overcrowded. One pitfall is assuming color alone equals doneness, so always test tenderness with a fork.
- Remove the pan from the heat: Pulling the skillet off the burner stops active cooking immediately, preserving the texture you achieved. The residual heat in the pan will continue to carry the cooking a touch, which is useful for finishing touches. This pause gives you control, preventing overcooking while you add delicate ingredients that should not be exposed to high heat. A typical error is leaving it on the burner and over softening the sprouts.
- Stir in the vinegar then the pine nuts or almonds: Adding balsamic vinegar off the heat keeps its bright acidity intact and awakens the flavors. The scent will pop, and you may notice a gentle hiss as it meets the warm surface. Tossing in raw nuts at this point lets the residual heat toast them without burning, producing a warm, nutty fragrance and satisfying crunch. If the nuts are not toasting, briefly return the pan to low heat and stir constantly; watch carefully because nuts can go from toasted to burnt in seconds. Avoid adding nuts too early, since they can scorch under high heat.
- Let the residual heat of the skillet toast the nuts stirring them very often so that they toast evenly on all sides and do not burn: The nuts will develop a golden sheen and a deeper aroma when they are ready, and you can taste a nutty, buttery note that complements the sprouts. Stirring prevents hot spots and burning, and the visual cue is even, light brown color across the pieces. If you smell bitterness, they are overdone and will taste charred, so remove them immediately. Rushing this step by turning the heat too high causes uneven toasting.
- As soon as the nuts are toasted transfer the sprouts to a serving plate and sprinkle with fresh herbs: The transfer preserves the crisp exterior, and adding herbs provides a fresh green finish that brightens each bite. The final plate should look glossy, speckled with toasted nuts and flecks of herb. Serve while hot to enjoy the contrast of warm sprouts and cool herbs. If you wait too long, the textures can soften; reheat gently if needed rather than resorting to high heat, which can scorch the herbs.
Tips for Success
These tips distill small habits that make a big difference when you cook Sauteed Brussels Sprouts. Read them and incorporate the ones that fit your routine.
- Prep everything first so you can focus on timing and heat once the skillet is hot.
- Dry thoroughly after rinsing the Brussels sprouts to ensure a crisp sear instead of steaming.
- Use a heavy pan like cast iron for steady heat that promotes even caramelization.
- Keep the heat honest medium high is ideal, but lower it if the oil smokes to avoid bitter notes.
- Add acid last off the heat to maintain a bright finishing flavor that lifts the whole dish.
- Toast nuts carefully in residual heat while stirring often to achieve even golden color without burning.
Serving Suggestions
This section outlines how I like to plate and enjoy Sauteed Brussels Sprouts. Think about contrasts in texture, temperature, and complementary flavors to make each serving feel thoughtful and complete.
- Simple weeknight plate serve alongside a roasted protein and a starchy side for a balanced meal.
- Holiday spread place in a warm serving bowl with extra toasted nuts and a dusting of cheese as part of a festive table.
- Light lunch toss into a bowl with a scoop of grain and a spoonful of tangy cheese for a satisfying midday meal.
- Seasonal pairing this shines in fall when produce is at its best, pairing well with roasted root vegetables and braised greens.
- Storage tips refrigerate in an airtight container for up to four days, and reheat gently in a skillet to revive texture.
- Occasions great for casual dinners, potlucks, or as a vegetable side during holiday feasts.
FAQ
Conclusion
Sauteed Brussels Sprouts stand out for their caramelized edges, tender interiors, and quick, flexible preparation that fits both weeknight dinners and holiday spreads. Try this recipe to enjoy a simple, flavorful vegetable dish that highlights the natural sweetness and nuttiness of the sprouts. With minimal ingredients and a few thoughtful techniques, you can produce a reliably delicious side that will likely become a regular on your table. I hope you give it a go and make it your own with the optional add ins and finishing touches.
Sauteed Brussels Sprouts
Equipment
- Cast-Iron Skillet
- Wooden Spoon
- Spatula
Ingredients
- 1 pound Brussels sprouts trimmed and halved Trimmed and halved for even cooking and maximum caramelization; deliver a nutty, slightly bitter base and substantial texture when sautéed until tender and golden.
- 2 tablespoons extra virgin olive oil Coat and sear the sprouts to promote browning and develop flavor; serve as the primary cooking fat that adds fruitiness and helps crisp edges.
- 1/2 teaspoon kosher salt Season early to help draw out moisture and enhance natural flavors; provide balanced salinity that brings forward savory notes without overwhelming the dish.
- 1/4 teaspoon ground black pepper Season at the end or during cooking to add a subtle heat and depth; offer aromatic warmth that complements the sprouts and contrasts the acid component.
- 1 tablespoon balsamic vinegar or lemon juice Brighten and balance richness by deglazing the pan or finishing the dish; contribute acidity that lifts flavors and adds a pleasant tang to the finished sprouts.
- 1 to 2 tablespoons raw pine nuts or chopped raw walnuts, almonds, or pecans (optional) Toast or scatter at the end for crunchy texture and a toasty, buttery note; can be swapped between pine nuts and chopped tree nuts to vary flavor and crunch (optional).
- Chopped fresh herbs like parsley, cilantro or mint (optional) Scatter freshly chopped herbs just before serving to introduce herbal brightness and color; provide fresh, green aromatics that lighten the dish (optional).
- A handful of Parmesan, feta, or goat cheese (optional) Crumble or shave over the finished sprouts to add creaminess, umami, or tang depending on cheese choice; contribute a savory finishing touch that enriches mouthfeel (optional).
Instructions
- Heat a large cast iron or similar sturdy bottomed skillet over medium high for 4 minutes. Add the oil. As soon as the oil is hot and shining (but before it starts smoking), swirl to coat the pan, then add the halved Brussels sprouts. Shake the skillet a little and prod them so that as many as possible are cut-side down. Let sit completely undisturbed for 5 to 8 minutes, until they develop a dark, tasty, caramelized sear.: The pan should become hot enough to give a loud, lively sizzle when food hits it, which promotes immediate caramelization. You will notice the metal warming and a faint shimmer if you hold your hand above it, not touching. This preheating time is crucial because a cold pan will steam the Brussels sprouts instead of searing them, yielding limp, pale results. If the oil begins to smoke, turn the heat down slightly; smoking means you are at the verge of burning the fat, which creates off flavors. A common mistake here is not waiting long enough, which prevents a crisp, golden crust from forming.
- Add the salt and pepper. With a wooden spoon or spatula, stir the Brussels sprouts. Continue cooking, stirring every few minutes, until the Brussels sprouts are browned all over and just turning tender on the inside, about 6 to 8 additional minutes.: As the oil melts and spreads across the skillet, you will see it glisten and thin, indicating it is ready. The surface will have a shimmering quality rather than appearing dull. Swirl the pan so the oil coats every inch, ensuring that each sprout will meet the hot surface evenly. If the oil looks cloudy or smokes at once, the pan may be too hot, so reduce the heat briefly and let it cool a bit. Avoid adding too little oil, which can cause sticking, and too much, which leads to shallow frying rather than searing.
- Remove the pan from the heat. Stir in the vinegar, then the pine nuts or almonds. Let the residual heat of the skillet toast the nuts, stirring them very often so that they toast evenly on all sides and do not burn (if they aren’t toasting, return the skillet to low heat). As soon as the nuts are toasted, transfer the sprouts to a serving plate and sprinkle with fresh herbs. Enjoy hot.: When you add the Brussels sprouts , you should hear an immediate, assertive sizzle that tells you the pan is at the right temperature. Place them cut side down to maximize contact. If the sizzle is weak, the pan needs more heat. Too vigorous splattering means the oil was too hot or the sprouts were wet, so pat them dry beforehand. A frequent error is adding crowded sprouts, which causes steaming instead of searing, so leave a little space.
- Shake the skillet a little and prod them so that as many as possible are cut side down: A gentle shake and nudge help arrange the sprouts so the flat, cut surfaces meet the skillet evenly. You want as many of those cut surfaces touching the metal as possible to get deep browning, which yields a nutty, slightly sweet flavor. Visual cues include a glossy, deepening brown at the edges after a few minutes. Resist the temptation to stir during this period, because movement disrupts the sear. Overhandling here is the number one way to lose that crisp, caramelized exterior.
- Let sit completely undisturbed for 5 to 8 minutes until they develop a dark, tasty, caramelized sear: During this time, the sprouts will darken and the smell will shift toasty and slightly sweet, signaling Maillard reactions at work. You may see tiny browned bits forming on the pan surface; that is flavor building. If you lift a sprout and it sticks badly, it likely needs another minute to release naturally, which indicates the sear is incomplete. A common mistake is flipping too early, which tears the surface and prevents those deep flavors from developing.
- Add the salt and pepper: When you finally season, the spark of salt will bring forward the natural sweetness developed by the sear. The aroma will lift as the black pepper warms against the hot pan. Salt applied at this stage helps draw out moisture and aids additional browning as you continue cooking. Be careful not to oversalt since optional cheeses can add extra saltiness later. If the dish tastes flat, it usually needs a pinch more acid or salt at the end, rather than more fat.
- With a wooden spoon or spatula stir the Brussels sprouts: The sound will change to a softer sizzle as more surfaces brown, and you will see color spreading from the original seared faces to the sides. Stirring here redistributes heat and browning opportunities so the sprouts caramelize all over. Press down gently on a larger sprout to feel the tender interior; it should yield slightly but still hold shape. Avoid vigorous stirring, which can bruise the pieces and make them mushy.
- Continue cooking stirring every few minutes until the Brussels sprouts are browned all over and just turning tender on the inside about 6 to 8 additional minutes: Expect a progression from firm and bright to slightly yielding with an inviting, toasted scent. The visual cue is an even, warm brown on the cut sides and a fork slipping into the center with gentle resistance. If you see blackened char rather than golden brown spots, the heat was too high or the pan was overcrowded. One pitfall is assuming color alone equals doneness, so always test tenderness with a fork.
- Remove the pan from the heat: Pulling the skillet off the burner stops active cooking immediately, preserving the texture you achieved. The residual heat in the pan will continue to carry the cooking a touch, which is useful for finishing touches. This pause gives you control, preventing overcooking while you add delicate ingredients that should not be exposed to high heat. A typical error is leaving it on the burner and over softening the sprouts.
- Stir in the vinegar then the pine nuts or almonds: Adding balsamic vinegar off the heat keeps its bright acidity intact and awakens the flavors. The scent will pop, and you may notice a gentle hiss as it meets the warm surface. Tossing in raw nuts at this point lets the residual heat toast them without burning, producing a warm, nutty fragrance and satisfying crunch. If the nuts are not toasting, briefly return the pan to low heat and stir constantly; watch carefully because nuts can go from toasted to burnt in seconds. Avoid adding nuts too early, since they can scorch under high heat.
- Let the residual heat of the skillet toast the nuts stirring them very often so that they toast evenly on all sides and do not burn: The nuts will develop a golden sheen and a deeper aroma when they are ready, and you can taste a nutty, buttery note that complements the sprouts. Stirring prevents hot spots and burning, and the visual cue is even, light brown color across the pieces. If you smell bitterness, they are overdone and will taste charred, so remove them immediately. Rushing this step by turning the heat too high causes uneven toasting.
- As soon as the nuts are toasted transfer the sprouts to a serving plate and sprinkle with fresh herbs: The transfer preserves the crisp exterior, and adding herbs provides a fresh green finish that brightens each bite. The final plate should look glossy, speckled with toasted nuts and flecks of herb. Serve while hot to enjoy the contrast of warm sprouts and cool herbs. If you wait too long, the textures can soften; reheat gently if needed rather than resorting to high heat, which can scorch the herbs.
Notes
- Prep everything first so you can focus on timing and heat once the skillet is hot.
- Dry thoroughly after rinsing the Brussels sprouts to ensure a crisp sear instead of steaming.
- Use a heavy pan like cast iron for steady heat that promotes even caramelization.
- Keep the heat honest medium high is ideal, but lower it if the oil smokes to avoid bitter notes.
- Add acid last off the heat to maintain a bright finishing flavor that lifts the whole dish.
- Toast nuts carefully in residual heat while stirring often to achieve even golden color without burning.