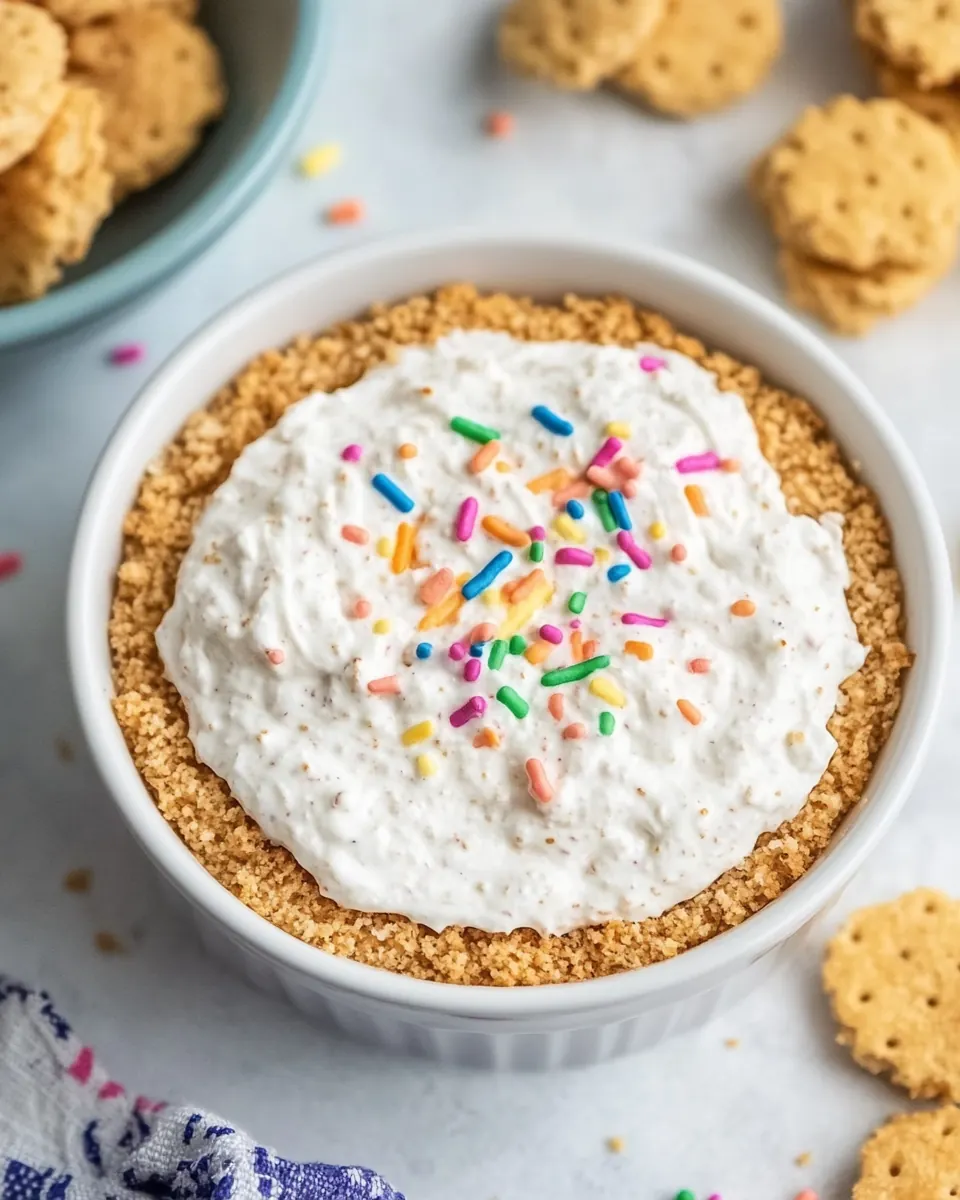
Dunkaroo Dip
Dunkaroo Dip is the kind of fun, nostalgic treat that always makes me smile the moment I scoop it up with a cookie. I first tasted this playful dip at a neighborhood potluck where someone had resurrected a childhood favorite, and I remember how everyone gravitated to the bowl, laughing as they dunked cookies and compared whose scoop was the fluffiest. That afternoon stuck with me, so I began refining the mix until it hit the perfect balance of sweet, creamy, and colorful.
Over the years I have turned Dunkaroo Dip into my go to dessert for casual get togethers and last minute celebrations. I keep a box of funfetti cake mix in the pantry so I can quickly heat treat it, and a container of whipped topping in the freezer for emergencies. When I bring this dip, people comment on how airy the texture is and how the sprinkles add a joyful crunch, which always makes me grin.
Recipe Snapshot
15 mins
10 mins
5 mins
Easy
200 kcal
American
Gluten-Free, AIP
Desserts
Baking sheet, Large bowl, Hand mixer, Spatula
Why This Dunkaroo Dip Works
It captures childhood joy in one bowl
I love that Dunkaroo Dip taps into nostalgic memories, yet it feels fresh when served at grown up gatherings. The colorful sprinkles bring a playful crunch, and that contrast with the creamy base keeps people coming back for more.
Quick assembly, big payoff
One of the reasons I reach for this recipe is speed. With minimal prep you get a dessert that looks festive and tastes indulgent. I usually have the components on hand, so it’s my fallback when I need something impressive fast.
Textural harmony
The combo of heat treated funfetti cake mix, airy whipped topping, and smooth vanilla pudding or yogurt creates a creamy yet slightly grainy base that holds sprinkles and dippers well. That texture contrast makes each bite interesting.
Flexible for sharing
I appreciate that Dunkaroo Dip scales easily. Make a small bowl for a family snack, or multiply the recipe for a party. It pairs beautifully with simple cookies and crackers, so presentation is easy and crowd pleasing.
No baking skill required
Even though you heat treat the cake mix briefly, there is no real baking technique to master. I like that anyone can produce consistent, photogenic results with this recipe, which makes it a great choice for beginners and experienced cooks alike.
What Goes Into Dunkaroo Dip

This little bowl of happiness relies on a handful of playful, pantry friendly ingredients. The philosophy is simple, combine a flavored dry mix for nostalgic cake like notes, add a cloud of whipped topping for lift, fold in a creamy binder for body, and finish with sprinkles for personality. Each player has a job: the dry mix contributes flavor and a soft crumbly texture, the whipped topping provides air and lightness, the pudding or yogurt lends silkiness and structure, and the sprinkles provide visual joy and tiny bursts of crunch.
- 1 box funfetti cake mix: Provides a sweet, colorful cake-flavored base and structure for the dip; adds powdered sugar, flavoring, and stabilizers that help create a thick, dessert-like texture when mixed.
- 1 8 ounce container whipped topping thawed: Adds light, airy creaminess and volume while contributing a smooth, fluffy mouthfeel; helps bind and aerate the mixture for scoopable consistency.
- 3/4 cup vanilla pudding or yogurt: Contributes creamy, vanilla flavor and additional body; helps round out sweetness and adjust thickness depending on whether pudding or yogurt is used.
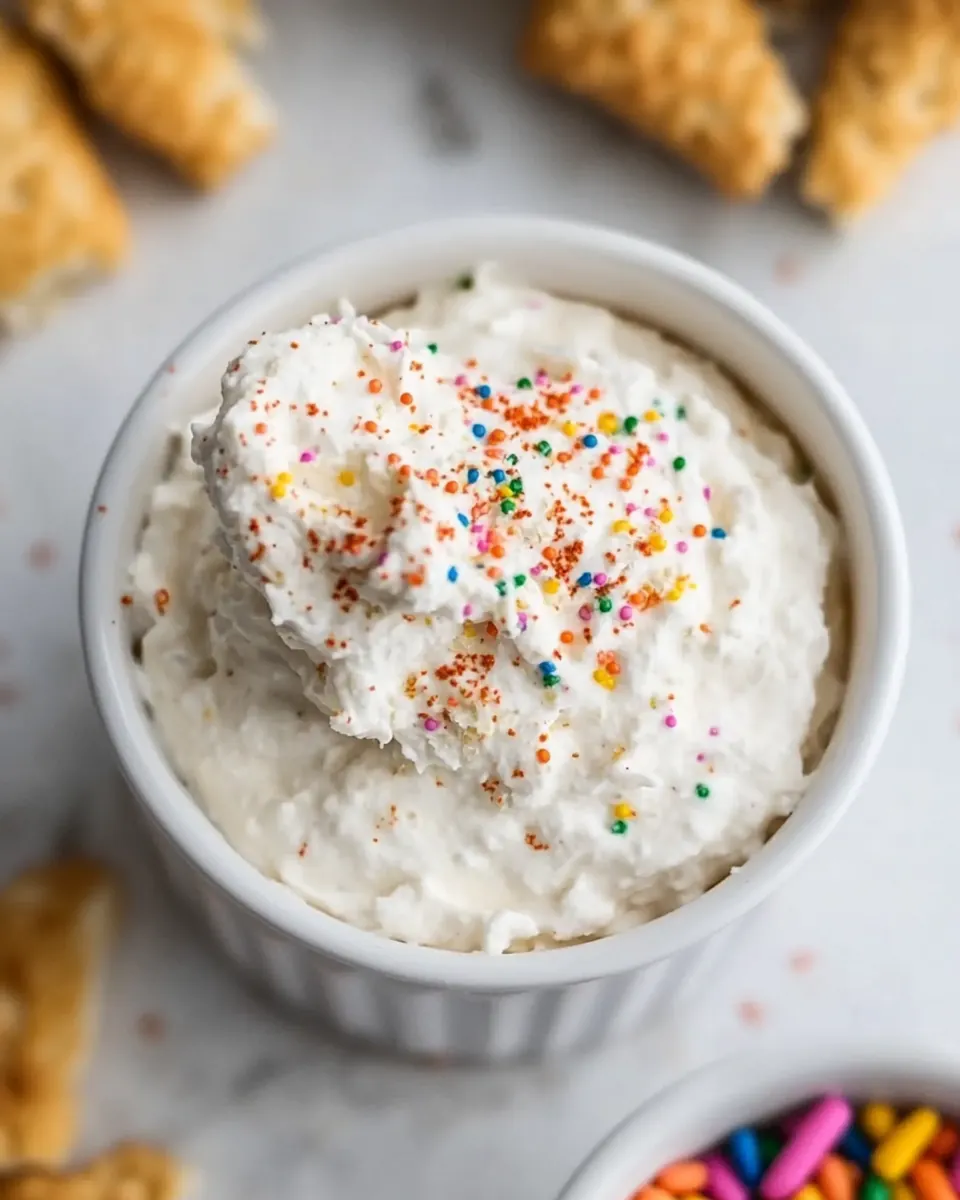
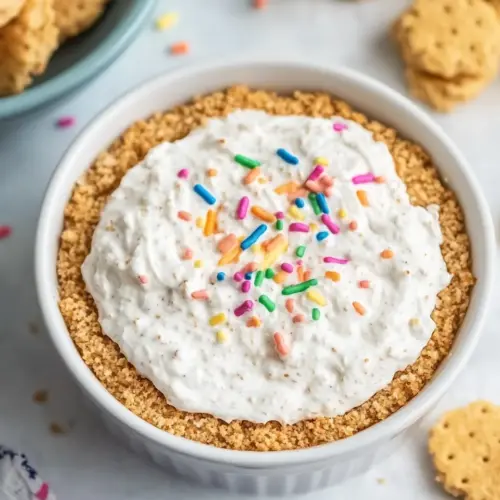
- 1/4 cup rainbow sprinkles: Adds bright bursts of color and a playful crunchy contrast; provides visual appeal and a little textural pop when folded into or sprinkled on top.
The Process for Making Dunkaroo Dip
This recipe is delightfully straightforward, but I like to walk through each stage so you sense the textures and avoid small pitfalls. The directions below follow the original steps, expanded with sensory cues, the reasons behind each technique, and a common troubleshooting tip to keep you confident.
- Heat treat the cake mix to make it safe to eat raw by spreading it out evenly onto a baking sheet. Bake at 350 degrees Fahrenheit for 5 minutes, stirring halfway through to prevent burning. Let it cool completely.: As you spread the funfetti cake mix across a baking sheet, notice the soft pastel flecks and the faint sugary aroma, which will develop further during the brief heating. Even heat exposure is important so every grain reaches the safe temperature, and spreading it to a thin, even layer helps with that. The reason for this step is food safety, raw flour can harbor bacteria and heat treating reduces that risk, while lightly toasting the mix adds depth. A common error is piling the mix in a mound, which leads to uneven heating and some unheated pockets. Keep the layer as flat as possible and use a spatula to level it.
- In a large bowl add the cooled cake mix, whipped topping, and vanilla pudding. Whip with a hand mixer until fluffy and no lumps of cake mix remain.: When you place the pan in a warming oven set to 350 degrees Fahrenheit , the air will coax out a warm, biscuity scent as the sugars and flour take on gentle color. Stirring halfway ensures the outer edges do not overcook while the center finishes, and the slight toasting mellows raw flour bitterness. Timing matters here because a few extra minutes can quickly lead to browning and a bitter taste, while too little time leaves the flour untreated. If you notice darkening along the edges, remove it immediately to avoid a burnt flavor.
- Fold in the rainbow sprinkles.: After removing the tray from the oven, the surface will hiss briefly as residual heat dissipates, then the aroma will settle into a warm, toasty note. Cooling is crucial because adding warm cake mix to chilled ingredients will melt the structure of the dip and deflate the whipped topping, creating a runny result. Spread it on the sheet to hasten cooling, and resist the urge to stir in other components while it is still warm. A common mistake is starting the assembly too soon; if the mix is even slightly warm, chill it or wait until it reaches room temperature.
- Serve with a variety of cookies, such as graham crackers, animal crackers, vanilla wafers.: When you combine the cooled cake mix with the chilled whipped topping and vanilla pudding in a roomy bowl, the ingredients sit side by side initially, looking like separate textures and colors. This is where structure is built, so choosing a bowl with some room to maneuver is helpful, and it allows the mixer to incorporate air without spilling. The pudding provides moisture and body, while the whipped topping ensures the dip stays light.
- Whip with a hand mixer until fluffy and no lumps of cake mix remain: As you blend with a hand mixer, listen for the even hum and watch the mixture transform into a cloudlike mass; the texture should be smooth, with tiny flecks of cake mix fully integrated. The goal is a stable, airy consistency that will cling to dippers. Overbeating can break down the whipped topping and create a watery mixture, while underbeating leaves unpleasant pockets of dry mix. If you see streaks of dry mix, continue in short bursts and scrape the bowl to ensure uniformity.
- Fold in the rainbow sprinkles: Gently folding in the rainbow sprinkles keeps their colors bright and prevents them from dissolving into the base. Use a gentle folding motion with a rubber spatula to preserve the airiness and the visual contrast the sprinkles provide. If you stir vigorously, you risk dulling their appearance and altering the dip distribution. A useful cue is to stop once the sprinkles are evenly distributed, while still seeing distinct flecks of color throughout.
- Serve with a variety of cookies, such as graham crackers, animal crackers, vanilla wafers: Arrange a selection of dippers on a platter so guests can choose their favorite textures; crunchy graham crackers and crisp animal crackers offer different mouthfeels against the creamy dip. Presentation matters, and the colorful dip looks happiest with a neat ring of cookies around the bowl. If the dip seems a bit loose, chilling it for 10 to 15 minutes firms the texture and helps it cling to cookies. Avoid using overly wet dippers which can break apart and leach moisture into the dip.
Ways to Customize
There are a few simple ways to tweak Dunkaroo Dip while keeping the spirit of the recipe intact. Below are thoughtful ideas that preserve the texture and bright look, each expanded into practical guidance so you can personalize the dip for different occasions.
- Play with the binder: Substitute the vanilla pudding for a thick Greek yogurt to introduce a tangy counterpoint, which pairs well with very sweet dippers and can balance the overall sweetness.
- Adjust sweetness: If you prefer a milder profile, reduce the amount of pudding slightly or choose a lower sugar whipped topping, then chill to let flavors meld without compromising texture.
- Make it loco for parties: Double or triple the recipe and assemble in a shallow serving bowl so guests can dip easily, and keep extra sprinkles on the side for topping individual servings.
- Change the dippers: Offer a selection of sturdy cookies and crackers so guests can test different textures; softer wafers will soak quickly while crunchier crackers will highlight the dip’s creaminess.
- Prep ahead: You can prepare the dip up to a day ahead and store it covered in the fridge; give it a gentle fold before serving to restore loftiness if it settles slightly.
Serving Suggestions
Dunkaroo Dip loves casual, convivial settings where people graze and chat. Below are detailed serving ideas to match occasions and storage notes so your presentation feels intentional and simple.
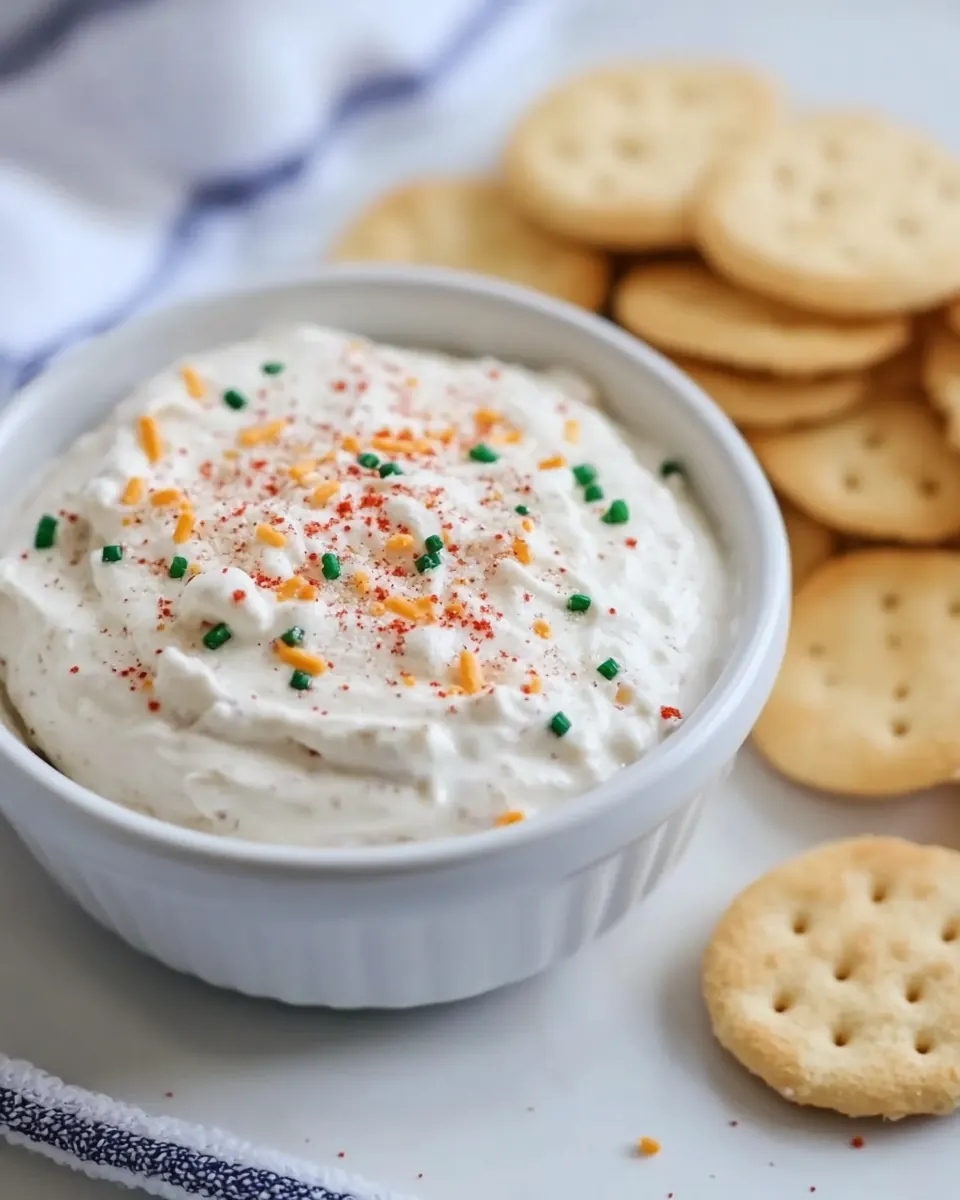
- Party platter style: Spoon the dip into a shallow bowl, surround it with an assortment of cookies such as graham crackers, animal crackers, and vanilla wafers, and place extra sprinkles in a small dish for guests to add. This setup encourages sharing and keeps the display colorful and inviting.
- Kid friendly snack: For an after school treat, portion the dip into small cups with a few cookies on the side for individual servings. This reduces mess and makes it easy for kids to grab and go while preserving the playful vibe.
- Potluck contribution: Transport the dip in a sealed container and arrange cookies on a platter when you arrive. Keep the dip chilled in a cooler with ice packs if it will sit out for long, then pull it out just before serving to maintain texture and safety.
- Celebration centerpiece: Use the dip as part of a dessert board, with fruit skewers and pretzels added for variety. The bright colors of the sprinkles add a festive look that works well for birthdays and casual celebrations.
- Storage tips: Store leftovers in an airtight container in the refrigerator for up to 2 days, as the texture softens over time. Before serving again, give the dip a gentle fold to reincorporate any separated components and chill briefly to firm it up.
- Seasonal pairing: While appropriate year round, the colorful presentation is especially fun for spring and summer gatherings where bright desserts complement outdoor settings, and it also adds cheer during holiday cookie exchanges when paired with sturdy vanilla wafers.
FAQ
Conclusion
What makes this recipe special is its playful combination of textures and nostalgic flavor, all achieved with a few pantry staples and minimal effort. I encourage you to give Dunkaroo Dip a try the next time you need a quick, crowd pleasing dessert or snack. It’s unfussy, colorful, and reliably brings smiles whether you serve it to kids after school or as an easy dessert at a casual gathering.
Dunkaroo Dip
Equipment
- Baking Sheet
- Large Bowl
- Hand Mixer
- Spatula
Ingredients
- 1 box funfetti cake mix Provides a sweet, colorful cake-flavored base and structure for the dip; adds powdered sugar, flavoring, and stabilizers that help create a thick, dessert-like texture when mixed.
- 1 8 ounce container whipped topping thawed Adds light, airy creaminess and volume while contributing a smooth, fluffy mouthfeel; helps bind and aerate the mixture for scoopable consistency.
- 3/4 cup vanilla pudding or yogurt Contributes creamy, vanilla flavor and additional body; helps round out sweetness and adjust thickness depending on whether pudding or yogurt is used.
- 1/4 cup rainbow sprinkles Adds bright bursts of color and a playful crunchy contrast; provides visual appeal and a little textural pop when folded into or sprinkled on top.
Instructions
- Heat treat the cake mix to make it safe to eat raw by spreading it out evenly onto a baking sheet. Bake at 350 degrees Fahrenheit for 5 minutes, stirring halfway through to prevent burning. Let it cool completely.: As you spread the funfetti cake mix across a baking sheet, notice the soft pastel flecks and the faint sugary aroma, which will develop further during the brief heating. Even heat exposure is important so every grain reaches the safe temperature, and spreading it to a thin, even layer helps with that. The reason for this step is food safety, raw flour can harbor bacteria and heat treating reduces that risk, while lightly toasting the mix adds depth. A common error is piling the mix in a mound, which leads to uneven heating and some unheated pockets. Keep the layer as flat as possible and use a spatula to level it.
- In a large bowl add the cooled cake mix, whipped topping, and vanilla pudding. Whip with a hand mixer until fluffy and no lumps of cake mix remain.: When you place the pan in a warming oven set to 350 degrees Fahrenheit , the air will coax out a warm, biscuity scent as the sugars and flour take on gentle color. Stirring halfway ensures the outer edges do not overcook while the center finishes, and the slight toasting mellows raw flour bitterness. Timing matters here because a few extra minutes can quickly lead to browning and a bitter taste, while too little time leaves the flour untreated. If you notice darkening along the edges, remove it immediately to avoid a burnt flavor.
- Fold in the rainbow sprinkles.: After removing the tray from the oven, the surface will hiss briefly as residual heat dissipates, then the aroma will settle into a warm, toasty note. Cooling is crucial because adding warm cake mix to chilled ingredients will melt the structure of the dip and deflate the whipped topping, creating a runny result. Spread it on the sheet to hasten cooling, and resist the urge to stir in other components while it is still warm. A common mistake is starting the assembly too soon; if the mix is even slightly warm, chill it or wait until it reaches room temperature.
- Serve with a variety of cookies, such as graham crackers, animal crackers, vanilla wafers.: When you combine the cooled cake mix with the chilled whipped topping and vanilla pudding in a roomy bowl, the ingredients sit side by side initially, looking like separate textures and colors. This is where structure is built, so choosing a bowl with some room to maneuver is helpful, and it allows the mixer to incorporate air without spilling. The pudding provides moisture and body, while the whipped topping ensures the dip stays light.
- Whip with a hand mixer until fluffy and no lumps of cake mix remain: As you blend with a hand mixer, listen for the even hum and watch the mixture transform into a cloudlike mass; the texture should be smooth, with tiny flecks of cake mix fully integrated. The goal is a stable, airy consistency that will cling to dippers. Overbeating can break down the whipped topping and create a watery mixture, while underbeating leaves unpleasant pockets of dry mix. If you see streaks of dry mix, continue in short bursts and scrape the bowl to ensure uniformity.
- Fold in the rainbow sprinkles: Gently folding in the rainbow sprinkles keeps their colors bright and prevents them from dissolving into the base. Use a gentle folding motion with a rubber spatula to preserve the airiness and the visual contrast the sprinkles provide. If you stir vigorously, you risk dulling their appearance and altering the dip distribution. A useful cue is to stop once the sprinkles are evenly distributed, while still seeing distinct flecks of color throughout.
- Serve with a variety of cookies, such as graham crackers, animal crackers, vanilla wafers: Arrange a selection of dippers on a platter so guests can choose their favorite textures; crunchy graham crackers and crisp animal crackers offer different mouthfeels against the creamy dip. Presentation matters, and the colorful dip looks happiest with a neat ring of cookies around the bowl. If the dip seems a bit loose, chilling it for 10 to 15 minutes firms the texture and helps it cling to cookies. Avoid using overly wet dippers which can break apart and leach moisture into the dip.
Notes
- Play with the binder: Substitute the vanilla pudding for a thick Greek yogurt to introduce a tangy counterpoint, which pairs well with very sweet dippers and can balance the overall sweetness.
- Adjust sweetness: If you prefer a milder profile, reduce the amount of pudding slightly or choose a lower sugar whipped topping, then chill to let flavors meld without compromising texture.
- Make it loco for parties: Double or triple the recipe and assemble in a shallow serving bowl so guests can dip easily, and keep extra sprinkles on the side for topping individual servings.
- Change the dippers: Offer a selection of sturdy cookies and crackers so guests can test different textures; softer wafers will soak quickly while crunchier crackers will highlight the dip’s creaminess.
- Prep ahead: You can prepare the dip up to a day ahead and store it covered in the fridge; give it a gentle fold before serving to restore loftiness if it settles slightly.