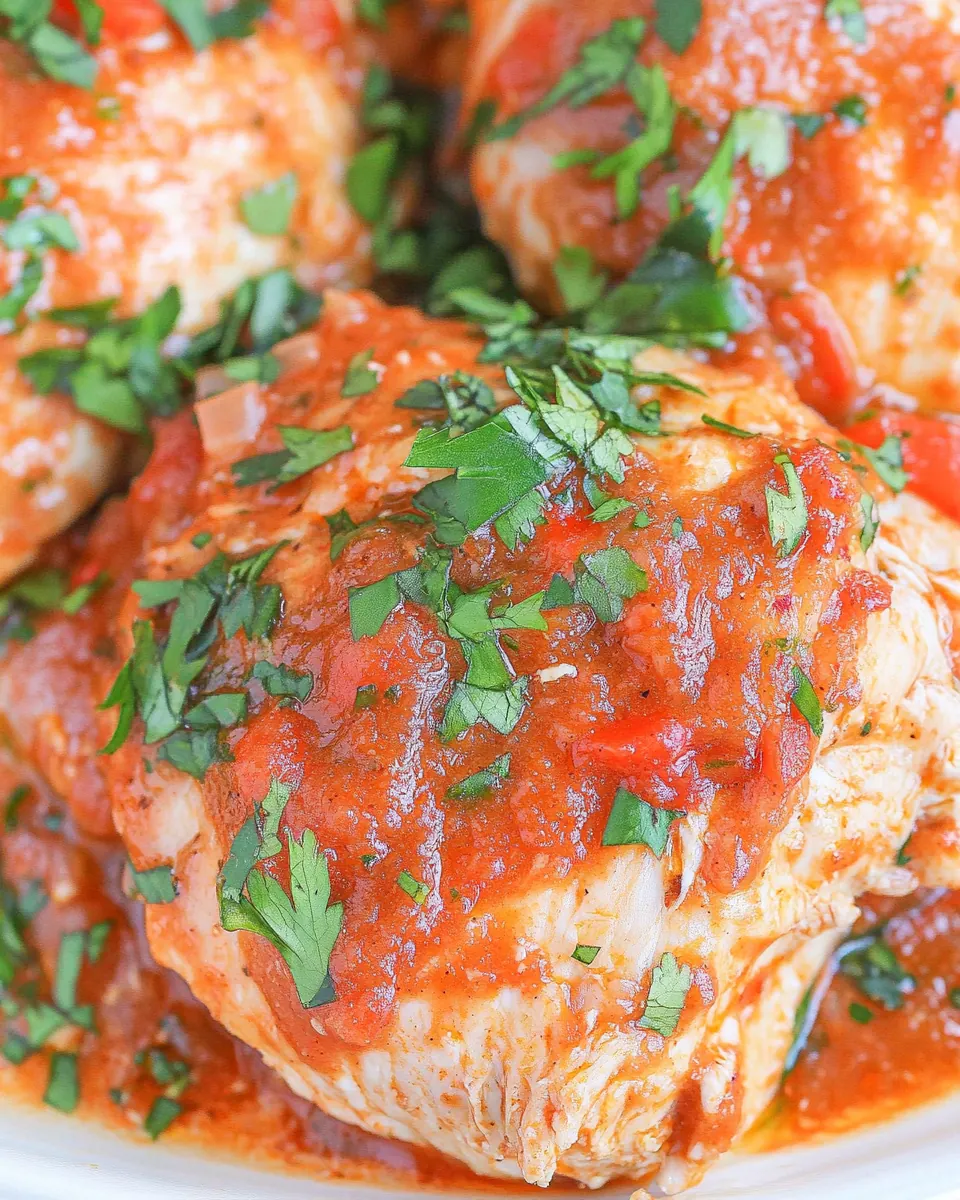
Dump and Cook Instant Pot Mexican Chicken
Dump and Cook Instant Pot Mexican Chicken is one of those recipes I reach for when life is chaotic and I still want something bold, satisfying, and effortless on the table. The first time I made it, I remember unloading a week of errands and deadlines into the sink, then dumping everything into the pot, half skeptical and half hopeful. By the time I sat down, the kitchen smelled smoky, bright, and warmly spiced in a way that felt like a reward for doing nothing dramatic at all.
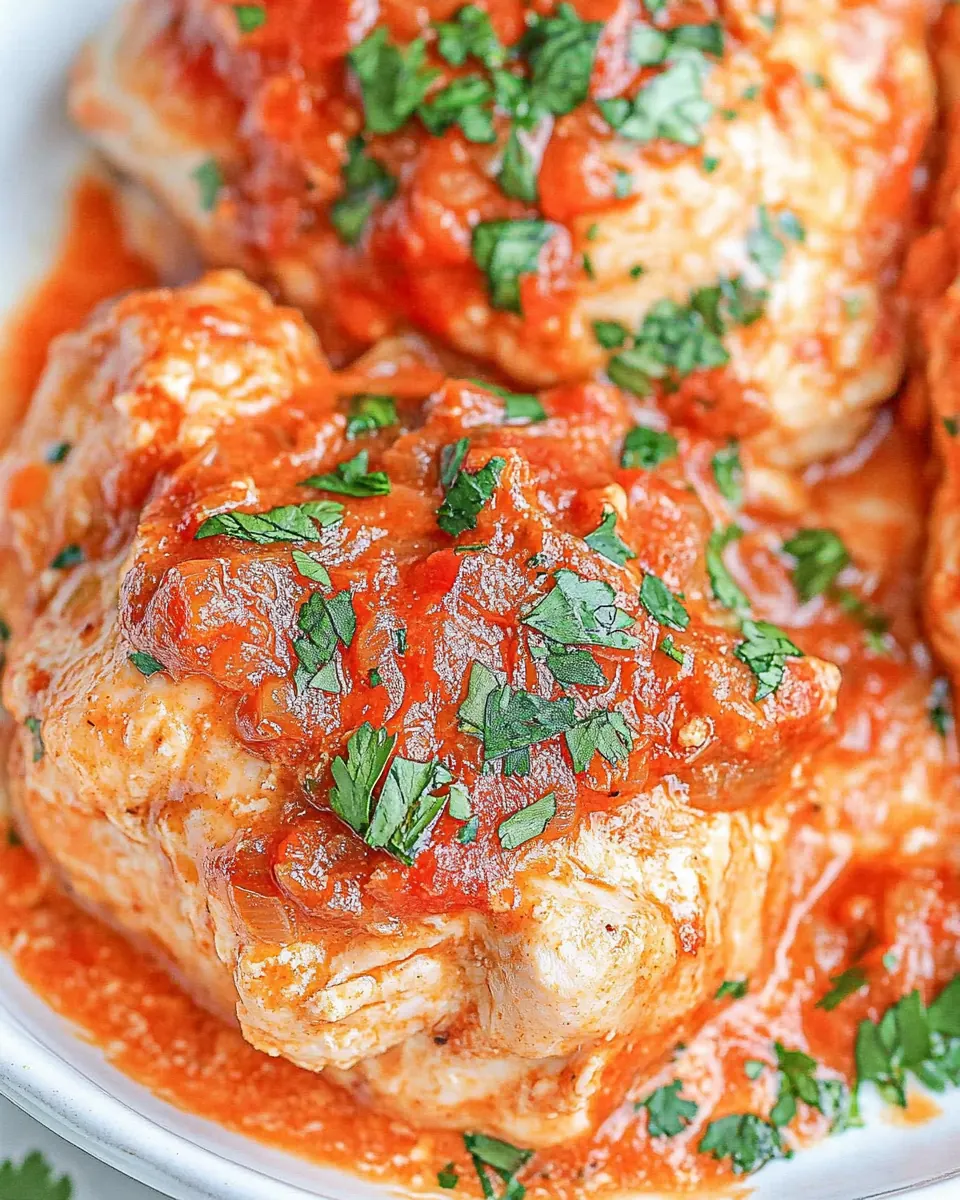
I have a habit of testing convenience recipes to see if they survive a real weeknight, and this Dump and Cook Instant Pot Mexican Chicken passed with flying colors. The texture of the chicken came out shreddable and juicy, while the sauce reduced into something that clung to each bite. I like that it lets the pantry do the heavy lifting so I can concentrate on fresh finishes, like squeezing extra lime and scattering cilantro.
Over time I’ve tweaked the balance of spices, and I’ve learned little habits that make the result more vibrant each time, whether I am feeding family or meal prepping for the week. The combination of canned fire roasted tomatoes and a splash of liquid smoke gives depth, and the optional adobo brings a smoky heat that plays nicely with the citrus brightness of the lime. It is a recipe that rewards small choices: extra jalapeno for heat, a forkful of sauce for moisture, or reserving a cup of broth to thin things for tacos.
Recipe Snapshot
30 mins
15 mins
15 mins
Medium
350 kcal
Mexican
Gluten-Free, Low FODMAP
Dinner
Instant Pot, Tongs, Mixing bowl, Forks
The Magic of This Dump and Cook Instant Pot Mexican Chicken
Fast and Reliable
I love how dependable this Dump and Cook Instant Pot Mexican Chicken is. When life is unpredictable, I want a recipe that behaves every time, and this one delivers. Layering ingredients into the Instant Pot and walking away is liberating, and the pressure cooking locks in juices so the chicken never dries out. That predictability makes it my go to for busy nights and spontaneous guests.
Bold Flavor With Minimal Effort
The seasoning profile here is compact but striking. With spices like cumin, chili powder, and smoked paprika, the dish achieves depth without fuss. The canned fire roasted diced tomatoes and a touch of adobo or liquid smoke create layers of complexity, so you get restaurant level taste from pantry staples. I appreciate recipes that maximize flavor for minimal stirring.
Versatile for Meals
I often transform the shredded chicken into different meals across the week. It works brilliantly in tacos, over rice, folded into enchiladas, or served over a salad. That versatility means I can cook once and eat several well varied meals. It saves time and makes planning lunches effortless, which I find incredibly practical.
Meal Prep Friendly
When I meal prep, I value textures that hold up in the fridge. The sauce here thickens and clings to the chicken, preserving moisture so reheated portions remain satisfying. I portion into containers with a little extra salsa on the side and I have quick, flavorful lunches. The recipe scales well too, so making a double batch is never a problem.
Easy to Customize
I enjoy small tweaks that make the recipe my own. More lime zest brightens it, extra cilantro gives a fresh finish, and sliced jalapenos add a lively crunch. If I want it smoky, I include the liquid smoke. If I need mild heat, I skip the adobo. Those little customizations let me tailor the dish without derailing the simplicity that makes it great.
Recipe Ingredients for Dump and Cook Instant Pot Mexican Chicken
These ingredients are about balance and convenience. I choose pantry friendly canned goods and straightforward spices so the dish is both accessible and layered. The chicken is the star, but the supporting cast of aromatics, spices, and canned tomatoes builds a sauce that is bold and cohesive.
- 5 6 chicken breasts boneless and skinless: Cook thoroughly and provide lean protein; ensures the dish has tender, shred-ready chicken that soaks up the sauce and spices.
- 1 medium yellow onion thinly sliced: Slice thinly to release sweet, savory layers and soften during pressure cooking, adding body and aromatic depth to the dish.
- 4 cloves garlic minced: Mince finely to distribute pungent, aromatic flavor throughout the sauce and enhance savory complexity when cooked with the chicken.
- 1 1/2 teaspoons ground cumin: Season evenly to introduce warm, earthy notes that complement chili and tomato flavors and anchor the overall Mexican spice profile.
- 2 teaspoons chili powder: Sprinkle to contribute smoky, mildly spicy heat and a classic chili flavor that elevates the dish’s southwestern character.
- 3/4 teaspoons ancho chile pepper powder: Stir in for a deep, fruity chile heat that adds complexity and richness without overpowering the other spices.
- 1 teaspoon smoked paprika: Add to impart subtle smoky sweetness and color that reinforces the layered flavors typical of Mexican-inspired recipes.
- 1 teaspoon lime juice: Squeeze to bring bright acidity that balances richness and enhances the freshness of the finished chicken and salsa.
- 1 teaspoon lime zest: Zest to infuse citrusy, aromatic oils that lift and brighten the overall flavor, complementing the lime juice’s acidity.
- 1 tablespoon adobo sauce (optional): Optional: stir in a small amount to add tangy, smoky depth and concentrated chipotle flavor for extra boldness.
- 1/2 teaspoon oregano: Sprinkle to contribute herbaceous, slightly bitter notes that round out the spice blend and enhance savory complexity.
- 15 oz can fire-roasted diced tomatoes drained: Drain and add to supply chunky tomato texture and roasted, slightly charred tomato flavor that melds with the spices.
- 4 oz can diced green chiles mild: Drain and include for mild, slightly tangy heat plus a touch of green chile flavor and extra tomato-like texture.
- 1 cup salsa red or green: Pour in to add saucy body, tomato-based flavor, and moisture that helps create a cohesive, ready-to-serve shredded chicken.
- 1 cup chicken broth reduced sodium: Pour to provide savory liquid for pressure cooking, enhancing flavor while keeping the chicken moist and tender.
- 1 teaspoon liquid smoke (optional): Optional: add sparingly to introduce an intense smoky aroma that simulates cooking over wood or charcoal.
- 2 tablespoons cornstarch: Mix with water to create a slurry and thicken the sauce, giving the finished dish a silky, clingy texture.
- 4 tablespoons water: Combine with cornstarch slurry to activate as a thickening agent and create a glossy, well-bodied sauce consistency.
- Fresh jalapenos sliced: Slice and garnish to add fresh, crisp heat and visual contrast, allowing diners to adjust spice level to taste.
- Fresh cilantro chopped: Chop and sprinkle to contribute bright, herbaceous freshness and a pop of color that complements the spicy, smoky flavors.
Recipe Directions for Dump and Cook Instant Pot Mexican Chicken
These directions are straightforward and forgiving, built around pressure cooking and a final thickening stage. I like to read the whole sequence before starting so I can stage bowls and utensils. The method is fast, and the sensory cues will guide you if you pay attention.
- Add all ingredients from the 'to cook the chicken' section to the inner pot of the Instant Pot, starting with the chicken breast and layering the rest of the ingredients. No need to stir.: As you layer everything into the inner pot, take a moment to notice the visual contrast between the pale chicken and the colorful spices and canned goods, the tomatoes adding bright red and the green chiles peeking through. The aroma will be faint at this stage, more of raw spices and tomato, but you will catch occasional whiffs of garlic and onion as you work. Layering rather than stirring helps keep the chicken from clumping and ensures the spices distribute during pressure cooking; the steam and motion inside the pot will marry flavors for you. A common mistake is overhandling the meat, which can cause uneven cooking, so resist the urge to mix everything thoroughly. Also avoid adding too much extra liquid here, because the canned tomatoes have moisture and the recipe relies on controlled liquid for proper pressure build up.
- Close the lid, and make sure the valve is set to 'sealing'.: When you secure the lid and set the valve to sealing , you are creating the pressurized environment that makes the process fast and tenderizing. You should hear a satisfying click when the lid locks, and the valve should look clearly positioned. The pot will hiss slightly as it comes to pressure, and that steady sound means the internal temperature is rising. A frequent error is forgetting to set the valve to sealing, which prevents pressure from building and will result in undercooked chicken . Double check the gasket and lid alignment if you notice steam escaping from the edge, as faulty sealing can affect cook times.
- Press the Pressure Cook or Manual button and use the +/- buttons to set the timer for 15 minutes.: Selecting Pressure Cook and entering 15 minutes engages the high heat, sealed environment that rapidly breaks down connective tissues and infuses the chicken with flavor. As it preheats, you might hear faint sputtering or the occasional pop, which is normal as liquid heats and settles. This timing is calibrated for boneless, skinless breasts; the end result should be tender enough to shred. A common mistake is reducing the time too much, expecting instant results, which can leave the meat tough. Conversely, extremely long times can yield overly soft, shreddy results that lack bite, so stick to the recommendation for best texture.
- Once the timer beeps, do a 10 minutes Natural Pressure Release, then open the valve to release any remaining pressure. When the pin drops, carefully open the pot.: The gentle sound of slowly escaping steam during natural release will be different than a quick vent, and it signals that the chicken is finishing in residual heat, which helps retain moisture. After waiting 10 minutes, manually venting will clear remaining pressure, and you should wait until the pin drops before opening to avoid a burst of hot steam. When you lift the lid, expect a warm, savory cloud of aroma, and you may see bubbling at the edges. A typical pitfall is rushing to open the pot, risking burns from superheated steam, so always use a towel or utensil to nudge the valve if needed and stand back when venting.
- Use chicken tongs to remove the chicken breasts to a large bowl and shred them using two forks.: The chicken will be hot and succulent, and transferring it out lets you control shredding without overmixing the sauce. As you shred, notice the steam and the moist texture; perfect shredding yields soft, ribbon like pieces that still hold structure. Shredding in a bowl helps collect juices that you can toss back with the meat, preserving flavor. A common mistake is shredding right in the pot, which stirs up residual sauce and can make the texture gummy. Use two forks and gentle strokes to keep the meat airy.
- In a small bowl, stir together the cornstarch and water until smooth.: Mixing the cornstarch with cold water creates a glossy slurry that prevents lumps and gives you a controlled thickening agent. The texture should be silky with no visible powder, and it will thicken quickly when introduced to heat. This step matters because uncooked cornstarch tastes starchy; dissolving it ensures a smooth finish. A common error is adding cornstarch directly to hot liquid without pre mixing, which often creates clumps and uneven thickness, so whisk until perfectly smooth.
- Click on saute and add the mixture to the pot. Cook for several minutes, stirring often until the sauce thickens.: When you switch to saute , the pot will bring the sauce to a simmer and the cornstarch slurry will activate, creating a silky, clingy coating for the chicken . Listen for steady bubbling and watch as the sauce shifts from watery to glossy and slightly reduced, the aroma intensifying as tomatoes and spices concentrate. Stirring often prevents the sauce from sticking to the bottom and ensures even thickening. Beware of boiling too vigorously, which can break down the cornstarch and thin the sauce again, so aim for a gentle simmer and moderate heat. If you see small burnt bits collecting, reduce heat and stir more frequently to avoid a scorched flavor.
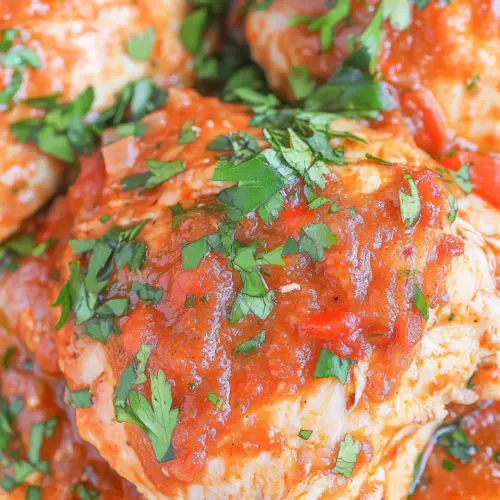
- Toss the shredded chicken with as much of the sauce as you'd like and serve topped with cilantro and jalapenos.: This finishing moment is sensory rich, with the steam carrying smoky, tangy notes and the verdant pop of freshly chopped cilantro adding brightness. Tossing allows you to decide how saucy you want the final dish, whether lightly coated or luxuriously sauced. The sliced jalapenos add crisp texture and a fresh heat contrast, and a squeeze of extra lime can lift the whole plate. A typical mistake is adding all the sauce to the meat without tasting, which can overwhelm or underseason, so adjust to your preference and reserve a bit of sauce if you want to serve it on the side.
Expert Tips about Dump and Cook Instant Pot Mexican Chicken

These tips are distilled from repeated tests and small refinements that consistently improved the dish for me. They focus on timing, texture, and flavor balance so you get predictable, outstanding results.
- Timing is everything: Stick to the 15 minute pressure cook plus the 10 minute natural release for tender, shreddable chicken. Shortening the time will produce meat that resists shredding, while extreme extensions can lead to an overly soft, mealy texture.
- Control the liquid: Drain the canned fire roasted diced tomatoes to keep the sauce from becoming too thin. Excess liquid can dilute flavors and force you to over reduce, which changes the balance of spices.
- Start with reduced sodium broth: Using reduced sodium chicken broth gives you better seasoning control, since canned salsas and chiles often contain salt. You can always salt at the end to taste.
- Make a smooth slurry: Whisk the cornstarch into cold water until no grit remains to ensure a lump free sauce that becomes glossy and silky when heated. This small step makes a big difference in mouthfeel.
- Customize heat consciously: Add adobo sauce or leave it out based on your audience. The adobo provides concentrated heat and smokiness, so add incrementally and taste as you go to avoid overpowering the dish.
- Finish fresh: Add chopped cilantro and sliced jalapenos right before serving to preserve brightness and texture. The fresh garnish cuts through the richness and adds a lively contrast that uplift the whole plate.
What to Serve Alongside Dump and Cook Instant Pot Mexican Chicken
This dish is flexible and suits many serving scenarios, from casual weeknight dinners to meal prep and festive gatherings. Below I outline ideas for sides, occasions, storage, and pairing notes so you can present it with confidence.
- Classic taco night: Warm corn or flour tortillas make a simple vessel for the shredded chicken, with extra lime wedges and chopped cilantro on the side for personalization. Offer sliced jalapenos and a bowl of reserved sauce for those who want more moisture.
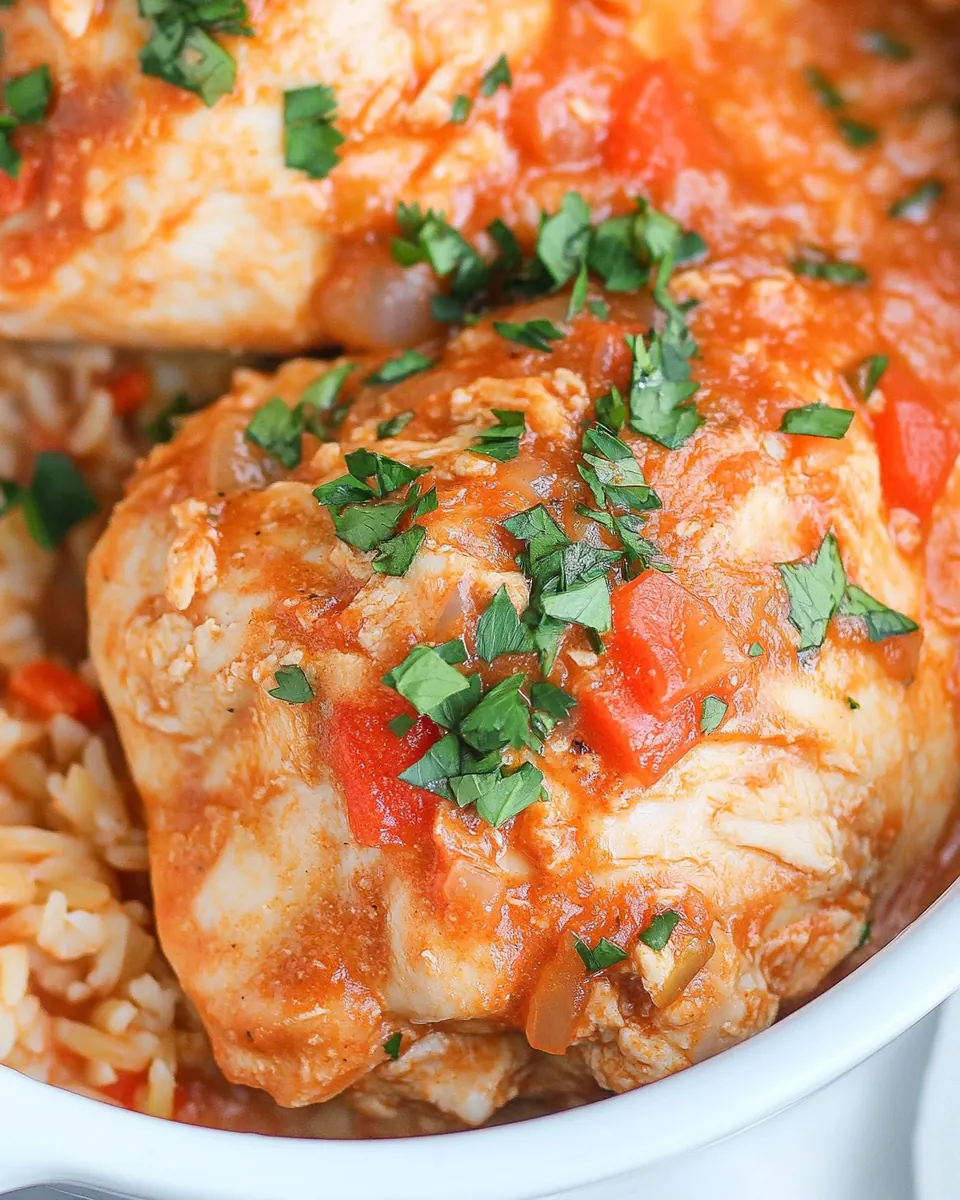
- Rice bowls: Serve the chicken over steamed rice with a scoop of salsa and a sprinkle of fresh cilantro. This is a hearty, family friendly option that works well for lunch or dinner and is easy to pack for meals on the go.
- Salad topping: Use the shredded chicken as a warm protein for a composed salad with crunchy greens and a squeeze of lime. Serving it this way is lighter but still full flavored, ideal for daytime meals or those seeking a balanced plate.
- Occasions: The recipe fits casual dinners, weeknight meal prep, and relaxed gatherings. It is also suitable for Ramadan if you want a make ahead savory option to break fast, because it reheats well and provides comforting protein and warmth.
- Storage and reheating: Refrigerate in airtight containers for up to four days, and reheat gently on the stove or in the microwave, adding a splash of reserved broth or water to restore moisture. For longer storage, freeze in portions for up to three months and thaw overnight in the fridge before reheating.
- Seasonal pairings: In cooler months, pair the chicken with warm rice and roasted vegetables for a comforting plate. In warmer seasons, serve with crisp slaw or a citrusy salad to keep the meal bright and refreshing.
FAQ
Conclusion
This recipe shines because it combines convenience with bold, layered flavor in a single pot. Once you dump the ingredients and let the Instant Pot do the work, you are rewarded with tender, flavorful shredded chicken and a sauce that clings deliciously to every bite. Give it a try on a busy evening or when you want make ahead meals that still feel special. I hope it becomes a reliable weeknight favorite in your rotation, offering both ease and unmistakable Mexican inspired character.
Dump and Cook Instant Pot Mexican Chicken
Equipment
- Instant Pot
- Tongs
- Mixing Bowl
- Forks
Ingredients
- 5 -6 chicken breasts boneless and skinless Cook thoroughly and provide lean protein; ensures the dish has tender, shred-ready chicken that soaks up the sauce and spices.
- 1 medium yellow onion thinly sliced Slice thinly to release sweet, savory layers and soften during pressure cooking, adding body and aromatic depth to the dish.
- 4 cloves garlic minced Mince finely to distribute pungent, aromatic flavor throughout the sauce and enhance savory complexity when cooked with the chicken.
- 1 1/2 teaspoons ground cumin Season evenly to introduce warm, earthy notes that complement chili and tomato flavors and anchor the overall Mexican spice profile.
- 2 teaspoons chili powder Sprinkle to contribute smoky, mildly spicy heat and a classic chili flavor that elevates the dish’s southwestern character.
- 3/4 teaspoons ancho chile pepper powder Stir in for a deep, fruity chile heat that adds complexity and richness without overpowering the other spices.
- 1 teaspoon smoked paprika Add to impart subtle smoky sweetness and color that reinforces the layered flavors typical of Mexican-inspired recipes.
- 1 teaspoon lime juice Squeeze to bring bright acidity that balances richness and enhances the freshness of the finished chicken and salsa.
- 1 teaspoon lime zest Zest to infuse citrusy, aromatic oils that lift and brighten the overall flavor, complementing the lime juice’s acidity.
- 1 tablespoon adobo sauce optional Optional: stir in a small amount to add tangy, smoky depth and concentrated chipotle flavor for extra boldness.
- 1/2 teaspoon oregano Sprinkle to contribute herbaceous, slightly bitter notes that round out the spice blend and enhance savory complexity.
- 15 oz can fire-roasted diced tomatoes drained Drain and add to supply chunky tomato texture and roasted, slightly charred tomato flavor that melds with the spices.
- 4 oz can diced green chiles mild Drain and include for mild, slightly tangy heat plus a touch of green chile flavor and extra tomato-like texture.
- 1 cup salsa red or green Pour in to add saucy body, tomato-based flavor, and moisture that helps create a cohesive, ready-to-serve shredded chicken.
- 1 cup chicken broth reduced sodium Pour to provide savory liquid for pressure cooking, enhancing flavor while keeping the chicken moist and tender.
- 1 teaspoon liquid smoke optional Optional: add sparingly to introduce an intense smoky aroma that simulates cooking over wood or charcoal.
- 2 tablespoons cornstarch Mix with water to create a slurry and thicken the sauce, giving the finished dish a silky, clingy texture.
- 4 tablespoons water Combine with cornstarch slurry to activate as a thickening agent and create a glossy, well-bodied sauce consistency.
- Fresh jalapenos sliced Slice and garnish to add fresh, crisp heat and visual contrast, allowing diners to adjust spice level to taste.
- Fresh cilantro chopped Chop and sprinkle to contribute bright, herbaceous freshness and a pop of color that complements the spicy, smoky flavors.
Instructions
- Add all ingredients from the 'to cook the chicken' section to the inner pot of the Instant Pot, starting with the chicken breast and layering the rest of the ingredients. No need to stir.: As you layer everything into the inner pot, take a moment to notice the visual contrast between the pale chicken and the colorful spices and canned goods, the tomatoes adding bright red and the green chiles peeking through. The aroma will be faint at this stage, more of raw spices and tomato, but you will catch occasional whiffs of garlic and onion as you work. Layering rather than stirring helps keep the chicken from clumping and ensures the spices distribute during pressure cooking; the steam and motion inside the pot will marry flavors for you. A common mistake is overhandling the meat, which can cause uneven cooking, so resist the urge to mix everything thoroughly. Also avoid adding too much extra liquid here, because the canned tomatoes have moisture and the recipe relies on controlled liquid for proper pressure build up.
- Close the lid, and make sure the valve is set to 'sealing'.: When you secure the lid and set the valve to sealing , you are creating the pressurized environment that makes the process fast and tenderizing. You should hear a satisfying click when the lid locks, and the valve should look clearly positioned. The pot will hiss slightly as it comes to pressure, and that steady sound means the internal temperature is rising. A frequent error is forgetting to set the valve to sealing, which prevents pressure from building and will result in undercooked chicken . Double check the gasket and lid alignment if you notice steam escaping from the edge, as faulty sealing can affect cook times.
- Press the Pressure Cook or Manual button and use the +/- buttons to set the timer for 15 minutes.: Selecting Pressure Cook and entering 15 minutes engages the high heat, sealed environment that rapidly breaks down connective tissues and infuses the chicken with flavor. As it preheats, you might hear faint sputtering or the occasional pop, which is normal as liquid heats and settles. This timing is calibrated for boneless, skinless breasts; the end result should be tender enough to shred. A common mistake is reducing the time too much, expecting instant results, which can leave the meat tough. Conversely, extremely long times can yield overly soft, shreddy results that lack bite, so stick to the recommendation for best texture.
- Once the timer beeps, do a 10 minutes Natural Pressure Release, then open the valve to release any remaining pressure. When the pin drops, carefully open the pot.: The gentle sound of slowly escaping steam during natural release will be different than a quick vent, and it signals that the chicken is finishing in residual heat, which helps retain moisture. After waiting 10 minutes, manually venting will clear remaining pressure, and you should wait until the pin drops before opening to avoid a burst of hot steam. When you lift the lid, expect a warm, savory cloud of aroma, and you may see bubbling at the edges. A typical pitfall is rushing to open the pot, risking burns from superheated steam, so always use a towel or utensil to nudge the valve if needed and stand back when venting.
- Use chicken tongs to remove the chicken breasts to a large bowl and shred them using two forks.: The chicken will be hot and succulent, and transferring it out lets you control shredding without overmixing the sauce. As you shred, notice the steam and the moist texture; perfect shredding yields soft, ribbon like pieces that still hold structure. Shredding in a bowl helps collect juices that you can toss back with the meat, preserving flavor. A common mistake is shredding right in the pot, which stirs up residual sauce and can make the texture gummy. Use two forks and gentle strokes to keep the meat airy.
- In a small bowl, stir together the cornstarch and water until smooth.: Mixing the cornstarch with cold water creates a glossy slurry that prevents lumps and gives you a controlled thickening agent. The texture should be silky with no visible powder, and it will thicken quickly when introduced to heat. This step matters because uncooked cornstarch tastes starchy; dissolving it ensures a smooth finish. A common error is adding cornstarch directly to hot liquid without pre mixing, which often creates clumps and uneven thickness, so whisk until perfectly smooth.
- Click on saute and add the mixture to the pot. Cook for several minutes, stirring often until the sauce thickens.: When you switch to saute , the pot will bring the sauce to a simmer and the cornstarch slurry will activate, creating a silky, clingy coating for the chicken . Listen for steady bubbling and watch as the sauce shifts from watery to glossy and slightly reduced, the aroma intensifying as tomatoes and spices concentrate. Stirring often prevents the sauce from sticking to the bottom and ensures even thickening. Beware of boiling too vigorously, which can break down the cornstarch and thin the sauce again, so aim for a gentle simmer and moderate heat. If you see small burnt bits collecting, reduce heat and stir more frequently to avoid a scorched flavor.
- Toss the shredded chicken with as much of the sauce as you'd like and serve topped with cilantro and jalapenos.: This finishing moment is sensory rich, with the steam carrying smoky, tangy notes and the verdant pop of freshly chopped cilantro adding brightness. Tossing allows you to decide how saucy you want the final dish, whether lightly coated or luxuriously sauced. The sliced jalapenos add crisp texture and a fresh heat contrast, and a squeeze of extra lime can lift the whole plate. A typical mistake is adding all the sauce to the meat without tasting, which can overwhelm or underseason, so adjust to your preference and reserve a bit of sauce if you want to serve it on the side.
Notes
- Timing is everything: Stick to the 15 minute pressure cook plus the 10 minute natural release for tender, shreddable chicken. Shortening the time will produce meat that resists shredding, while extreme extensions can lead to an overly soft, mealy texture.
- Control the liquid: Drain the canned fire roasted diced tomatoes to keep the sauce from becoming too thin. Excess liquid can dilute flavors and force you to over reduce, which changes the balance of spices.
- Start with reduced sodium broth: Using reduced sodium chicken broth gives you better seasoning control, since canned salsas and chiles often contain salt. You can always salt at the end to taste.
- Make a smooth slurry: Whisk the cornstarch into cold water until no grit remains to ensure a lump free sauce that becomes glossy and silky when heated. This small step makes a big difference in mouthfeel.
- Customize heat consciously: Add adobo sauce or leave it out based on your audience. The adobo provides concentrated heat and smokiness, so add incrementally and taste as you go to avoid overpowering the dish.
- Finish fresh: Add chopped cilantro and sliced jalapenos right before serving to preserve brightness and texture. The fresh garnish cuts through the richness and adds a lively contrast that uplift the whole plate.