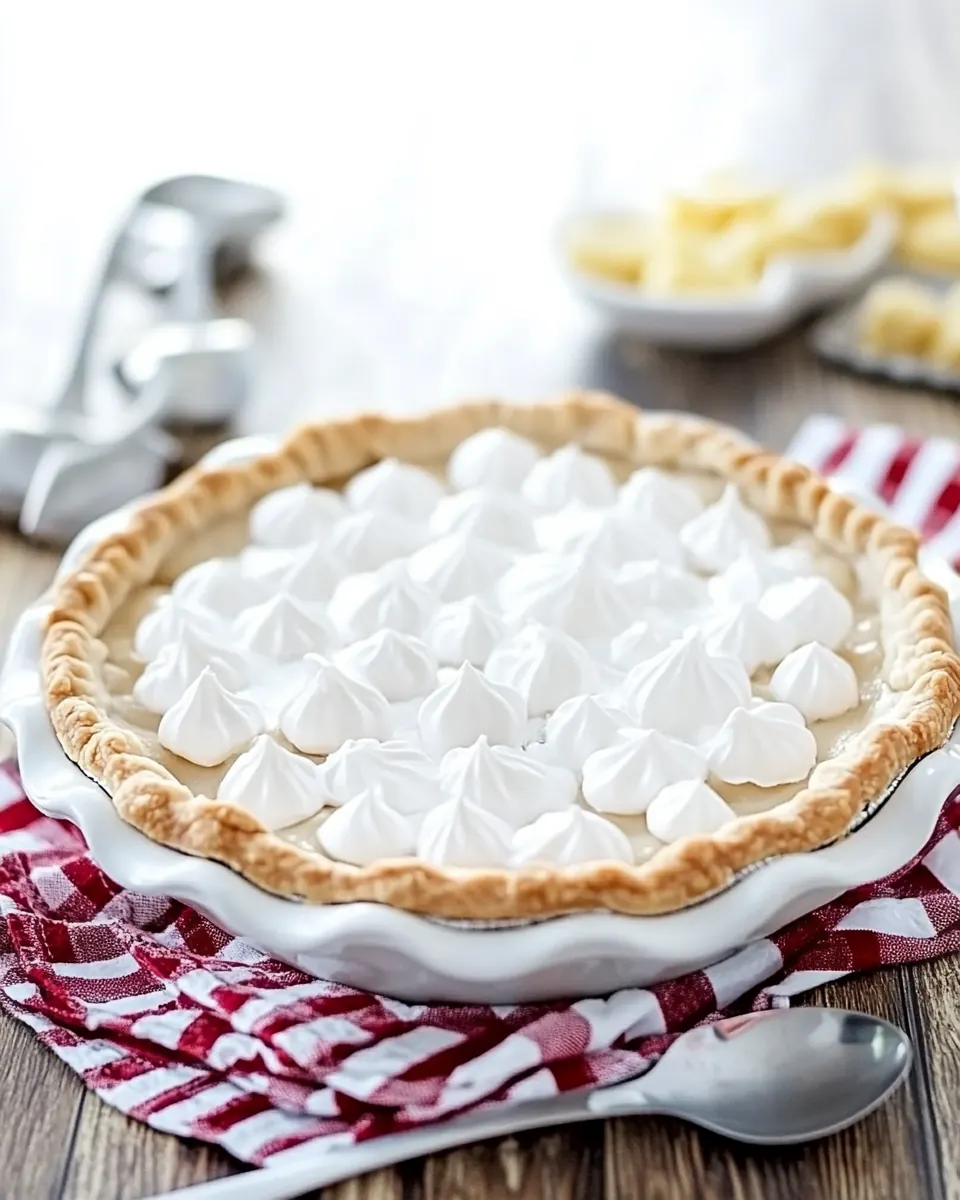
Ding Dong Pie
Ding Dong Pie is one of those nostalgic treats that always brings a grin to my face, and the first time I made it I felt like a kid again. I remember standing in a busy kitchen, a box of snack cakes open on the counter, and thinking this could be something playful and comforting all at once. The smell that filled the room as it baked was warm and sweet, and friends gathered before I even had a chance to slice it.
That evening I learned how simple pleasures can become something memorable with just a few pantry items and a little patience. The combination of cake pieces folded into a custardy batter and baked in a flaky shell felt almost rebellious, in the best way. It is a recipe I reach for when I want to share a slice that sparks conversation, not just satisfy a sweet tooth. Over time I experimented with the texture and timing until it set just right in the center, and now I always know the exact moment to pull it from the oven.
Recipe Snapshot
50 mins
10 mins
40 mins
Medium
300 kcal
American
Keto, Gluten-Free
Desserts
Oven, Pie Pan, Mixing Bowl, Whisk
What Sets This Ding Dong Pie Apart
Comforting nostalgia with a twist
I love that Ding Dong Pie taps into childhood memories while feeling grown up on the table. The way the soft cake pieces soak a rich, eggy mixture produces a tender bite that is both familiar and intriguingly different from a standard pie. For gatherings, it becomes an instant conversation starter.
Easy to assemble, big on impact
This recipe is forgiving, and that is one reason I keep it in my repertoire. With simple steps and common ingredients like eggs and butter, you can produce something that looks like it required far more effort. That reliability makes it perfect for last minute entertaining.
Playful texture contrast
The contrast between the soft cake pieces and the flaky pie crust creates textural interest that keeps each bite exciting. I enjoy how the cake soaks just enough of the custard to be tender, while the crust gives a crisp frame to the filling.
Flexible and forgiving
I appreciate recipes that allow small tweaks without ruining the result. The mixing step calls for gentle folding so the cake remains in pieces. I have learned to resist overmixing, because it preserves those little pockets of cake that make each forkful interesting.
Shareable and crowd friendly
Because this makes a full pie, it is naturally suited for groups. I often bring it to potlucks because it travels well and serves easily. The combination of sweet and custardy notes tends to please a wide range of palates.
Ingredients Overview for Ding Dong Pie

The ingredients here are straightforward and purposeful, designed to create a custard like filling studded with cake pieces and held in a crisp pie crust. The key players are the Ding Dong cakes for texture, the eggs and butter for richness, and the sugar and vanilla for flavor. Together they form a simple chemistry where the eggs set the structure and the cake soaks up enough moisture to become tender without collapsing.
- 10 Ding Dong Cakes, unwrapped: Layering whole cakes provides the pie with concentrated chocolate and cream flavors while offering structure; use unwrapped Ding Dong Cakes to create the dense filling and recognizable texture. Ensure cakes are evenly distributed to avoid large air pockets and to maintain consistent slices when serving.
- 3 eggs: Beating eggs binds the filling components and helps set the custard-like interior during baking; whisk until combined for a smooth texture. Use room-temperature eggs if possible to integrate more evenly with melted butter and other liquids.
- 8 tbsp butter, melted: Pouring melted butter adds richness and helps moisten the cake layers so they meld together into a cohesive filling; stir it in thoroughly to distribute fat evenly. Butter also contributes to browning and a silky mouthfeel in the finished pie.
- 1/3 cups sugar: Dissolving sugar sweetens the filling and balances the bitter or tangy flavors from the cakes and vinegar; measure carefully to achieve the desired sweetness. Ensure sugar is well incorporated so the texture remains smooth rather than grainy.
- 1 tsp vanilla extract: Adding vanilla extract enhances and rounds out the overall flavor profile by contributing warm, aromatic notes that complement chocolate and cream. Use measured vanilla to avoid overpowering other delicate flavors in the pie.
- 1 tbsp white vinegar: Incorporating white vinegar provides a mild tang that brightens the sweet components and can interact with eggs to slightly tenderize the filling; add sparingly. Vinegar can also help balance the richness of butter and dense cake layers.
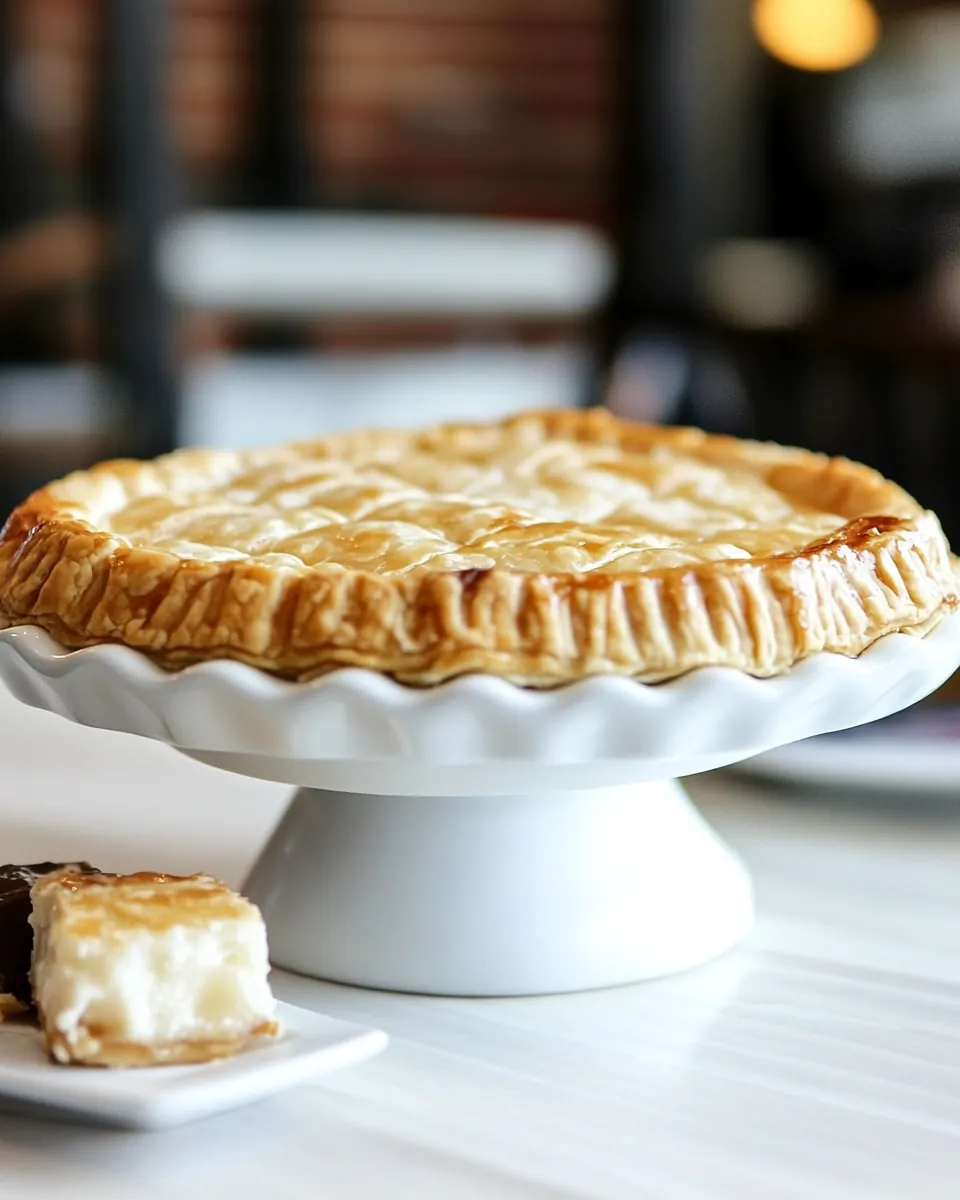
- 1 Pie Crust: Fitting a pie crust serves as the vessel for holding the cake-based filling and provides a crisp, contrasting texture; use a prepared crust to save time or blind-bake if a firmer base is desired. Ensure crust edges are crimped or protected to prevent over-browning during baking.
Making Ding Dong Pie
This pie is simple in concept but rewarding in practice. Follow each step with attention to texture and timing, and you will be rewarded with a set, tender filling surrounded by a flaky crust. Below I expand each direction into rich, sensory focused guidance so you know what to expect at every moment.
- Preheat oven to 350 degrees F.: You will notice the oven warming and a faint dry heat filling the kitchen, which primes the environment for even baking. Preheating matters because it ensures the custard begins to set immediately when it enters the oven, reducing the chance of an underbaked center. While the oven warms, arrange your tools and ingredients so you stay organized. A common misstep is skipping preheat which can lengthen bake time and throw off your timing.
- Place pie crust in pie pan and set aside.: As you fit the crust into the pan, feel its pliability and press gently to remove air pockets, smoothing the edges with your fingers. The visual cue to look for is a snug, even fit against the pan walls, with no large folds. Setting it aside allows you to prepare the filling without rushing, and prevents overhandling the crust. Avoid stretching the dough which can cause shrinkage during baking.
- Whisk together the eggs, butter, sugar, vanilla and vinegar. Cut each ding dong into 4 pieces, then gently fold into the mixture. Do not over mix.: As you whisk, you will hear a light slapping sound from the whisk hitting the bowl and see the mixture transition into a glossy, pale blend. This step creates the custard base, and the way the ingredients emulsify affects the final texture, giving a smooth, creamy body. Why this matters, gentle whisking avoids incorporating excessive air that can create bubbles or an uneven set. A typical mistake is using very hot melted butter when mixing, which can cook the eggs ; let the butter cool slightly before combining.
- Pour into the pie shell and bake for 40 minutes or until set in the center.: Cutting the Ding Dong cakes reveals their sponge texture, and folding disperses them without turning them into mush. When you fold, feel the resistance of the cake as it gives way, and watch for even distribution of pieces. The purpose is to create pockets of cake throughout the custard rather than a uniform batter, which leads to pleasant textural contrast. Overmixing will break down the cakes too much and produce a uniform mass, losing the playful texture.
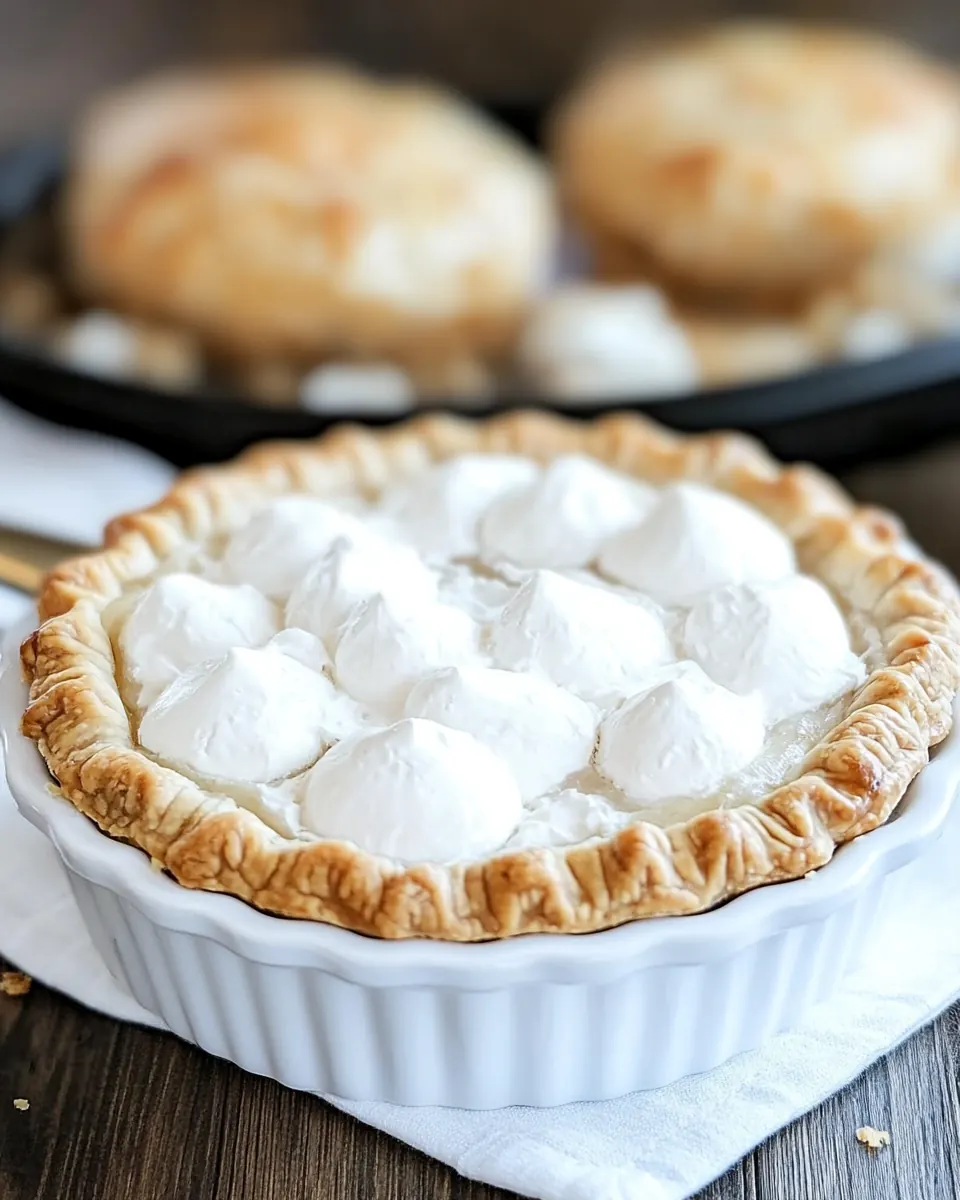
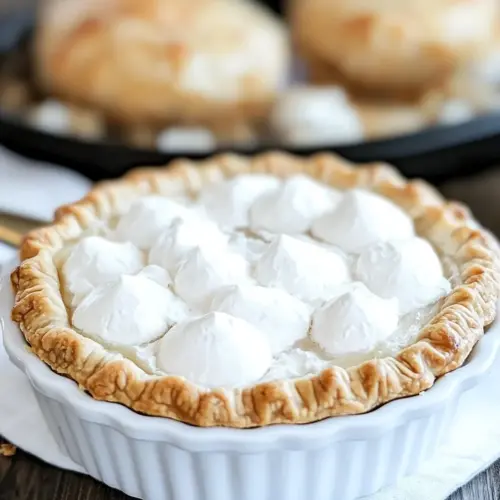
- Let cool and serve with a dollop of whip cream on top! Enjoy!: As the pie bakes you will notice a gentle rise and a golden edge forming, and the aroma will shift from raw batter to warm, sweet custard. The center should jiggle slightly but not be liquid when gently shaken, that is the visual cue for doneness. Baking fully is important because underbaking leaves a watery center, while overbaking can make the custard dry and rubbery. If the crust begins to brown too quickly, tent with foil to protect the edges while the center finishes setting.
- Let cool and serve with a dollop of whip cream on top! Enjoy!: Cooling allows the custard to finish setting and makes slicing cleaner, you will see the filling firm and slightly sink as it rests. The aroma will mellow and the texture will become more cohesive, so patience here improves presentation and mouthfeel. Serve with a small dollop of cream if you like, which adds a cool, airy contrast. A common oversight is slicing too early which leads to a sloppy wedge, so allow adequate cooling time before serving.
Recipe Variations about Ding Dong Pie
I like offering ways to personalize this pie while keeping the core technique intact. The suggestions below are practical and easy to implement for home bakers who want to add a twist or adapt to what is on hand.
- Mini tart version: Use smaller tart shells to make individual portions, which shortens bake time and creates charming single serve pastries that are great for parties.
- Crust swap: Try a graham cracker crust for a sweeter, sturdier base that pairs well with cake pockets and gives a crunchy contrast to the custard.
- Top with nuts: Scatter chopped nuts on top before baking for added crunch and a toasty note, watching closely to avoid burning.
- Whipped topping: Serve with a lightly sweetened whipped cream for a cool, airy complement that brightens each bite.
- Make ahead: Bake the pie and refrigerate overnight to allow flavors to meld, then bring to room temperature before serving for best texture.
Serve This Ding Dong Pie With
This pie is versatile for casual gatherings and celebratory moments. It works well for dessert after a family meal, an afternoon tea, or a potluck where you want something playful yet satisfying. Below are serving ideas, pairings, and storage tips to help you present it at its best.
- Simple slice presentation: Serve wedges at room temperature with a small dollop of cream on top for an inviting finish that highlights the custard and cake contrast.
- Festive occasions: Bring this to a potluck or holiday table where its nostalgic appeal will spark conversation, and label it clearly so guests know what to expect.
- Seasonal pairings: In cooler months, pair with a warm beverage to complement the sweet, baked notes; in warmer months, serve slightly chilled with a light fruity drink.
- Storage tips: Refrigerate leftovers covered, they will keep for several days and may benefit from a brief return to room temperature before serving for the best texture.
- Serving style: For casual get togethers, pre slice the pie so guests can help themselves, or plate individual slices with a small spoonful of cream for a more polished presentation.
FAQ
Conclusion
Ding Dong Pie stands out because it marries playful snack cake texture with a rich, set custard inside a flaky crust. Give it a try when you want a dessert that nods to nostalgia while delivering delicious contrast in every bite. It is an approachable recipe that travels well to gatherings and rewards a little patience, so gather a few simple ingredients, follow the steps, and enjoy serving something both familiar and pleasantly surprising.
Ding Dong Pie
Equipment
- Oven
- Pie Pan
- Mixing Bowl
- Whisk
Ingredients
- 10 Ding Dong Cakes, unwrapped Layering whole cakes provides the pie with concentrated chocolate and cream flavors while offering structure; use unwrapped Ding Dong Cakes to create the dense filling and recognizable texture. Ensure cakes are evenly distributed to avoid large air pockets and to maintain consistent slices when serving.
- 3 eggs Beating eggs binds the filling components and helps set the custard-like interior during baking; whisk until combined for a smooth texture. Use room-temperature eggs if possible to integrate more evenly with melted butter and other liquids.
- 8 tbsp butter, melted Pouring melted butter adds richness and helps moisten the cake layers so they meld together into a cohesive filling; stir it in thoroughly to distribute fat evenly. Butter also contributes to browning and a silky mouthfeel in the finished pie.
- 1/3 cups sugar Dissolving sugar sweetens the filling and balances the bitter or tangy flavors from the cakes and vinegar; measure carefully to achieve the desired sweetness. Ensure sugar is well incorporated so the texture remains smooth rather than grainy.
- 1 tsp vanilla extract Adding vanilla extract enhances and rounds out the overall flavor profile by contributing warm, aromatic notes that complement chocolate and cream. Use measured vanilla to avoid overpowering other delicate flavors in the pie.
- 1 tbsp white vinegar Incorporating white vinegar provides a mild tang that brightens the sweet components and can interact with eggs to slightly tenderize the filling; add sparingly. Vinegar can also help balance the richness of butter and dense cake layers.
- 1 Pie Crust Fitting a pie crust serves as the vessel for holding the cake-based filling and provides a crisp, contrasting texture; use a prepared crust to save time or blind-bake if a firmer base is desired. Ensure crust edges are crimped or protected to prevent over-browning during baking.
Instructions
- Preheat oven to 350 degrees F.: You will notice the oven warming and a faint dry heat filling the kitchen, which primes the environment for even baking. Preheating matters because it ensures the custard begins to set immediately when it enters the oven, reducing the chance of an underbaked center. While the oven warms, arrange your tools and ingredients so you stay organized. A common misstep is skipping preheat which can lengthen bake time and throw off your timing.
- Place pie crust in pie pan and set aside.: As you fit the crust into the pan, feel its pliability and press gently to remove air pockets, smoothing the edges with your fingers. The visual cue to look for is a snug, even fit against the pan walls, with no large folds. Setting it aside allows you to prepare the filling without rushing, and prevents overhandling the crust. Avoid stretching the dough which can cause shrinkage during baking.
- Whisk together the eggs, butter, sugar, vanilla and vinegar. Cut each ding dong into 4 pieces, then gently fold into the mixture. Do not over mix.: As you whisk, you will hear a light slapping sound from the whisk hitting the bowl and see the mixture transition into a glossy, pale blend. This step creates the custard base, and the way the ingredients emulsify affects the final texture, giving a smooth, creamy body. Why this matters, gentle whisking avoids incorporating excessive air that can create bubbles or an uneven set. A typical mistake is using very hot melted butter when mixing, which can cook the eggs ; let the butter cool slightly before combining.
- Pour into the pie shell and bake for 40 minutes or until set in the center.: Cutting the Ding Dong cakes reveals their sponge texture, and folding disperses them without turning them into mush. When you fold, feel the resistance of the cake as it gives way, and watch for even distribution of pieces. The purpose is to create pockets of cake throughout the custard rather than a uniform batter, which leads to pleasant textural contrast. Overmixing will break down the cakes too much and produce a uniform mass, losing the playful texture.
- Let cool and serve with a dollop of whip cream on top! Enjoy!: As the pie bakes you will notice a gentle rise and a golden edge forming, and the aroma will shift from raw batter to warm, sweet custard. The center should jiggle slightly but not be liquid when gently shaken, that is the visual cue for doneness. Baking fully is important because underbaking leaves a watery center, while overbaking can make the custard dry and rubbery. If the crust begins to brown too quickly, tent with foil to protect the edges while the center finishes setting.
- Let cool and serve with a dollop of whip cream on top! Enjoy!: Cooling allows the custard to finish setting and makes slicing cleaner, you will see the filling firm and slightly sink as it rests. The aroma will mellow and the texture will become more cohesive, so patience here improves presentation and mouthfeel. Serve with a small dollop of cream if you like, which adds a cool, airy contrast. A common oversight is slicing too early which leads to a sloppy wedge, so allow adequate cooling time before serving.
Notes
- Mini tart version: Use smaller tart shells to make individual portions, which shortens bake time and creates charming single serve pastries that are great for parties.
- Crust swap: Try a graham cracker crust for a sweeter, sturdier base that pairs well with cake pockets and gives a crunchy contrast to the custard.
- Top with nuts: Scatter chopped nuts on top before baking for added crunch and a toasty note, watching closely to avoid burning.
- Whipped topping: Serve with a lightly sweetened whipped cream for a cool, airy complement that brightens each bite.
- Make ahead: Bake the pie and refrigerate overnight to allow flavors to meld, then bring to room temperature before serving for best texture.