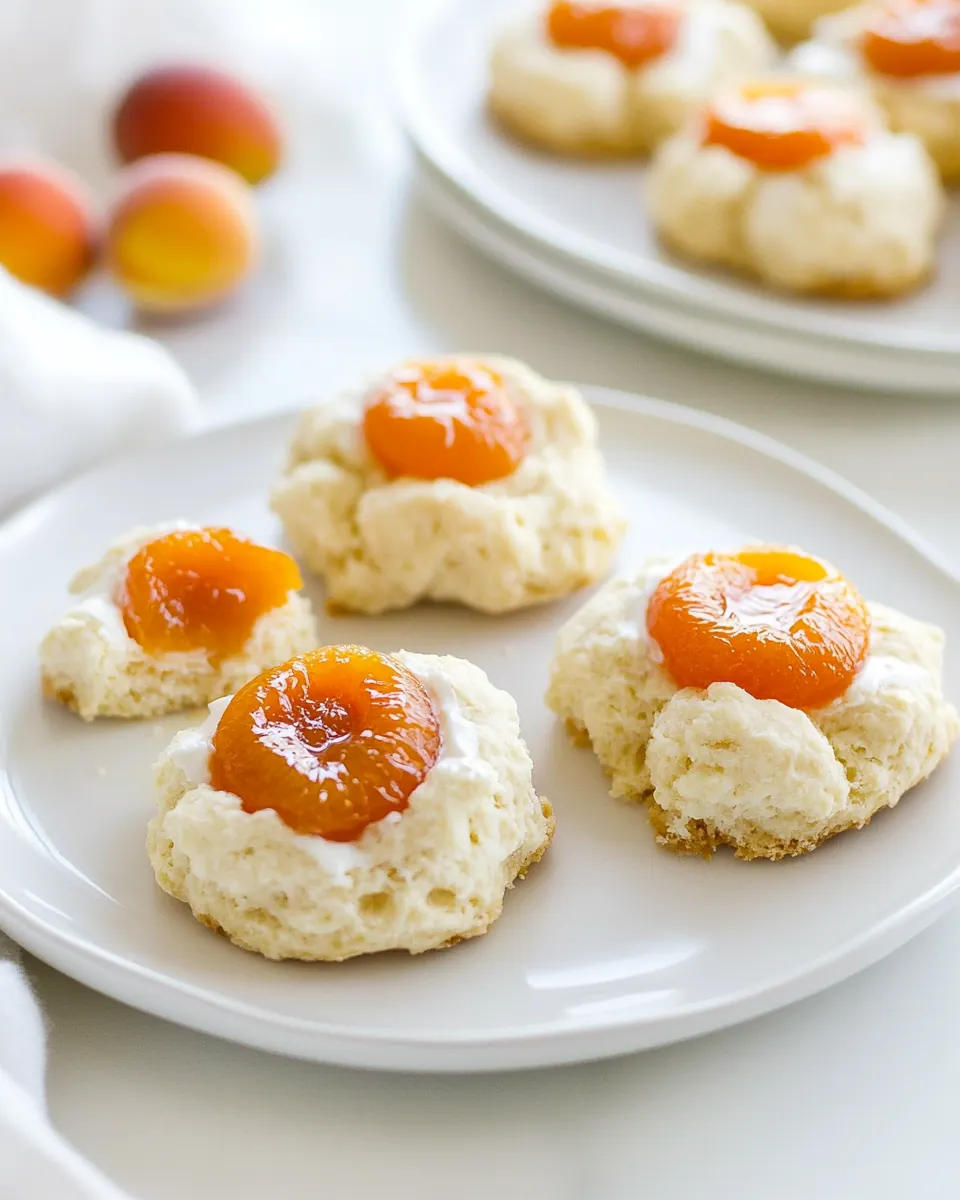
Apricots Cream Thumbprint Scones
Apricots Cream Thumbprint Scones started as a sticky afternoon experiment when I wanted something that felt like a jammy biscuit and a tender scone had a baby. I remember rifling through the pantry for something bright and slightly tart, and the jar of apricot jam caught my eye. I wanted the scones to be soft inside, with pockets of fruit and a sweet, creamy finish that made a cup of tea feel like company.
My first batch was a lesson in texture more than technique. I learned that using cold heavy cream keeps the dough tender, while a handful of diced dried apricots adds chew and surprise. I also found that a little spoonful of thickened jam in the center gives each scone a jewel like burst, so every bite has a glossy, fruity kernel surrounded by crumbly, buttery pastry. Over several tries I tuned the balance so the exterior gets lightly golden while the interior remains pillowy.
Recipe Snapshot
45 mins
15 mins
30 mins
Medium
220 kcal
American
Gluten-Free, Vegan
Desserts
oven, baking sheet, parchment paper, saucepan, mixing bowl, ice cream scoop
The Best Thing About This Apricots Cream Thumbprint Scones
Bright fruit forward flavor
I love how apricots bring a sunny note that cuts through the richness. The jam and diced dried apricots work together to layer fresh and concentrated fruit flavors, so each bite feels lively and balanced.
Rich but tender crumb
Using cold heavy cream as the sole liquid gives the scones a luxuriously soft interior, without becoming cake like. The fat in the heavy cream creates pockets of flakiness while keeping the crumb moist, which I find irresistible for teatime.
Little bursts of texture
The addition of chopped white chocolate chunks adds a creamy counterpoint to the fruit. These soft melts contrast with the slightly chewy dried apricots, so your mouth is treated to multiple textures in a single bite.
Simple technique, spectacular results
There is a comforting simplicity to the dough, you mix, scoop, indent, and fill. That approachable process means this recipe is friendly to home bakers, and I always enjoy how dependable it is once you stick to a few small rules.
Versatile and shareable
These scones travel well and make a lovely addition to brunches or a springtime bake sale. I often bring a batch to friends, because they look polished but are easy to scale up, and people always ask for the recipe.
What to Gather for Apricots Cream Thumbprint Scones

These ingredients are intentionally straightforward, focusing on a few key players that define texture and flavor. The dry staples give structure, the heavy cream supplies richness, and the two forms of apricot, jam and dried fruit, layer fruit intensity. White chocolate brings a mellow sweetness that complements the apricot without overpowering it.
- 1 cup 240 g apricot jam: Provides concentrated apricot flavor and sweetness to fill the thumbprint centers; warms and loosens when gently heated and sets slightly to hold shape, contributing fruity contrast to the scone's tender crumb.
- 1 teaspoon cornstarch: Thickens the jam filling slightly when dissolved and cooked, helping it stay in the indentation; stabilizes moisture to prevent runniness during baking.
- 3 1/2 cups 435 g all-purpose flour: Forms the structural base of the scones, creating gluten for texture and framework; balances hydration and absorbs fats and liquids to produce a tender, flaky crumb.
- 1/2 cup 100 g granulated sugar, plus more for sprinkling: Sweetens the dough evenly while tenderizing the crumb by interacting with the fat and liquid; sprinkles on top add sparkle and light crunch after baking.
- 2 tablespoons baking powder: Leavens the dough by producing gas bubbles that create lift and lightness; distributed evenly through the flour to ensure uniform rise and tender texture.
- 3/4 teaspoons salt: Enhances overall flavor balance by moderating sweetness and strengthening gluten; contributes to proper seasoning so the scone's flavors are more defined.
- 2 1/2 cups 600 g heavy cream, plus more for brushing: Provides richness, moisture, and tenderness through fat content; hydrates the dry ingredients and promotes a soft, creamy interior while aiding browning and brushing on top adds shine.
- 3/4 cup 100 g dried apricots, diced into 1/4-inch chunks: Adds concentrated fruity chew and texture contrast when diced; provides bursts of tart-sweet flavor dispersed throughout the dough for interest in every bite.
- 1/2 cup 100 g chopped white chocolate chunks: Contributes pockets of sweet, creamy chocolate that melt into creamy bits while baking; offers subtle vanilla-like richness and complements the apricot flavor.
Cooking Method for Apricots Cream Thumbprint Scones
These directions are straightforward but rewarding. I approach the dough with a light hand and focus on small sensory cues so every batch comes out tender and well risen. Read each step fully so you can notice smells, textures, and common pitfalls before you begin.
- Preheat oven to 350 degrees F. Line two baking sheets with parchment paper or silicone mats.: As the oven warms you should smell a faint dry warmth and the kitchen will feel ready for baking, which sets the stage for even rise. Preheating ensures the scones begin to make steam on contact, aiding lift. A common mistake is skipping preheat which causes uneven baking and flatter scones, so always wait until the oven reaches full temperature.
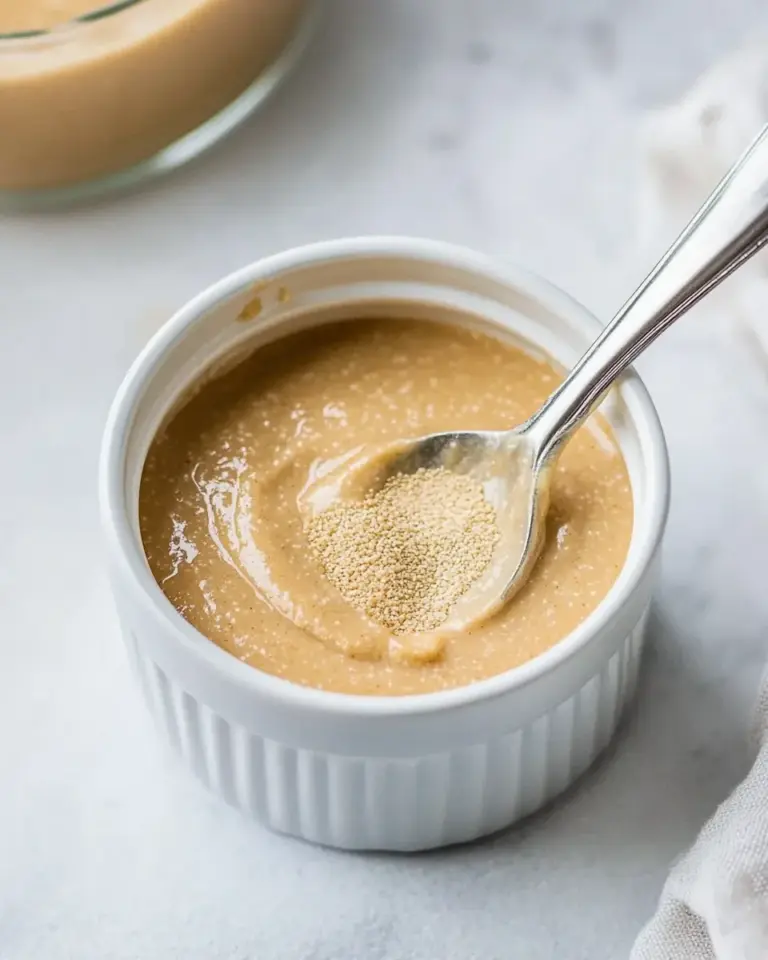
- In a small saucepan, melt apricot jam over medium heat. Whisk cornstarch with 1 tablespoon cool water and add to jam. Cook, stirring occasionally, until mixture thickens and starts to bubble. Remove from heat and refrigerate until cool.: You will see the jam change from glossy and runny to thicker and more paste like, smelling concentrated and fruity. This thickening step prevents the jam from bleeding into the dough during baking, which preserves the thumbprint well. Stirring occasionally prevents scorching, and chilling firms the jam so it holds shape. Avoid boiling vigorously, which can break down the fruit and make the jam too runny.
- In a large bowl or the bowl of a stand mixer, combine flour, sugar, baking powder, and salt. Add heavy cream, apricots, and white chocolate and stir or mix on low speed until evenly moistened. Dough will be very thick and stiff.: You'll notice a shaggy, dense mixture forming as the heavy cream incorporates, with pockets of diced apricots and white chocolate visible. This texture is key to tender scones, because overmixing develops gluten and makes them tough. A frequent error is overworking the dough; stop mixing once the dry flecks are hydrated and the add ins are evenly distributed.
- Using an ice cream scoop or large cookie scoop, portion equal sized scoops onto prepared baking sheets, leaving two inches of space between them.: The scooped rounds should sit tall and slightly domed on the parchment, and you may hear a soft pat as they settle. Even spacing allows hot air to circulate so the sides bake evenly. If you press each mound to shape them, you may compress the dough too much and lose lift, so trust the scoop for consistent sizes.
- Make a deep impression into the center of each scone using your thumb or the back of a teaspoon. Spoon a heaping teaspoon of thickened apricot jam into each impression.: When you press the indent you can feel the dough give beneath your thumb and the surface will slightly crack, which is fine. The jam should sit glossy and slightly domed in the cavity, catching the light, rather than pooling around the base. Overfilling will cause the jam to bubble over during baking, so aim for a heaping teaspoon, not a tablespoon.
- Lightly brush the outsides of scones (not the jam) with half and half or cream. Sprinkle with sugar.: Brushing the exterior helps the scone tops turn a gentle golden hue and gives them a pleasing sheen, while the sugar adds a faint crispness. You should see the milk or heavy cream glisten then set during baking. If you brush too much, the exterior can become soggy, so use a light touch and avoid the jam itself.
- Bake for 25 to 30 minutes or until bottoms are brown and tops are lightly golden. Let cool for 15 minutes before serving.: During baking the scones will emit a warm, toasty aroma and the tops will develop a pale golden tint while the bottoms deepen to light brown, signaling they are done. Letting them rest allows steam to settle and the jam to firm slightly, making them easier to handle. Cutting into them too soon risks a gummy interior, so patience is rewarded here.
Making Adjustments

These quick adjustments will help you tailor the scones to your preferences without changing the core method. Small tweaks affect texture and rise more than flavor, so adjust sparingly and observe how the dough behaves.
- Chill the jam: Cooling the thickened apricot jam before filling ensures the centers stay intact during baking and do not run.
- Control sweetness: If you prefer less sugar, reduce the granulated sugar in the dough slightly and keep the jam amount the same for balance.
- Even scooping: Use an ice cream scoop for uniform scones, which helps them bake evenly and look consistent on a platter.
- Brush lightly: Apply a thin coat of heavy cream to the tops only, which promotes gentle browning without oversaturating the exterior.
- Storage: Cool completely before storing in an airtight container at room temperature for up to two days, or freeze cooled scones for longer keeping.
Best Served With
These scones are excellent for relaxed mornings and casual gatherings. I often serve them warm with a pot of tea or coffee, and they pair well with light brunch spreads. They also travel well for picnic style meals or a springtime dessert table.
- Warm with tea: Serve slightly warm with a pot of black or herbal tea for a cozy morning pairing that highlights the jammy centers.
- Brunch spread: Arrange alongside fruit salads and small pastries for a varied brunch plate that feels indulgent but approachable.
- Picnic friendly: Wrap cooled scones in parchment and pack them for a spring picnic, where they can be enjoyed at room temperature without fuss.
- Storage tips: Keep in an airtight container for two days at room temperature, or freeze individually wrapped scones for up to one month, then thaw and warm briefly before serving.
- Seasonal pairing: These are especially welcome in spring, when stone fruit shines and lighter gatherings are common, but they work anytime you want a bright, creamy baked treat.
FAQ
Conclusion
These scones stand out because they pair jammy apricot centers with a rich, tender cream based dough, giving you a soft interior and a lightly golden exterior. You should give them a try because they come together with minimal fuss and reward you with elegant, bakery style results perfect for sharing. I hope you enjoy the contrast of chewy dried apricot, creamy white chocolate pockets, and the jewel like apricot thumbprint, it makes simple baking feel celebratory.

Apricots Cream Thumbprint Scones
Equipment
- Oven
- Baking Sheet
- Parchment Paper
- Saucepan
- Mixing Bowl
- Ice Cream Scoop
Ingredients
- 1 cup 240 g apricot jam Provides concentrated apricot flavor and sweetness to fill the thumbprint centers; warms and loosens when gently heated and sets slightly to hold shape, contributing fruity contrast to the scone's tender crumb.
- 1 teaspoon cornstarch Thickens the jam filling slightly when dissolved and cooked, helping it stay in the indentation; stabilizes moisture to prevent runniness during baking.
- 3 1/2 cups 435 g all-purpose flour Forms the structural base of the scones, creating gluten for texture and framework; balances hydration and absorbs fats and liquids to produce a tender, flaky crumb.
- 1/2 cup 100 g granulated sugar, plus more for sprinkling Sweetens the dough evenly while tenderizing the crumb by interacting with the fat and liquid; sprinkles on top add sparkle and light crunch after baking.
- 2 tablespoons baking powder Leavens the dough by producing gas bubbles that create lift and lightness; distributed evenly through the flour to ensure uniform rise and tender texture.
- 3/4 teaspoons salt Enhances overall flavor balance by moderating sweetness and strengthening gluten; contributes to proper seasoning so the scone's flavors are more defined.
- 2 1/2 cups 600 g heavy cream, plus more for brushing Provides richness, moisture, and tenderness through fat content; hydrates the dry ingredients and promotes a soft, creamy interior while aiding browning and brushing on top adds shine.
- 3/4 cup 100 g dried apricots, diced into 1/4-inch chunks Adds concentrated fruity chew and texture contrast when diced; provides bursts of tart-sweet flavor dispersed throughout the dough for interest in every bite.
- 1/2 cup 100 g chopped white chocolate chunks Contributes pockets of sweet, creamy chocolate that melt into creamy bits while baking; offers subtle vanilla-like richness and complements the apricot flavor.
Instructions
- Preheat oven to 350 degrees F. Line two baking sheets with parchment paper or silicone mats.: As the oven warms you should smell a faint dry warmth and the kitchen will feel ready for baking, which sets the stage for even rise. Preheating ensures the scones begin to make steam on contact, aiding lift. A common mistake is skipping preheat which causes uneven baking and flatter scones, so always wait until the oven reaches full temperature.
- In a small saucepan, melt apricot jam over medium heat. Whisk cornstarch with 1 tablespoon cool water and add to jam. Cook, stirring occasionally, until mixture thickens and starts to bubble. Remove from heat and refrigerate until cool.: You will see the jam change from glossy and runny to thicker and more paste like, smelling concentrated and fruity. This thickening step prevents the jam from bleeding into the dough during baking, which preserves the thumbprint well. Stirring occasionally prevents scorching, and chilling firms the jam so it holds shape. Avoid boiling vigorously, which can break down the fruit and make the jam too runny.
- In a large bowl or the bowl of a stand mixer, combine flour, sugar, baking powder, and salt. Add heavy cream, apricots, and white chocolate and stir or mix on low speed until evenly moistened. Dough will be very thick and stiff.: You'll notice a shaggy, dense mixture forming as the heavy cream incorporates, with pockets of diced apricots and white chocolate visible. This texture is key to tender scones, because overmixing develops gluten and makes them tough. A frequent error is overworking the dough; stop mixing once the dry flecks are hydrated and the add ins are evenly distributed.
- Using an ice cream scoop or large cookie scoop, portion equal sized scoops onto prepared baking sheets, leaving two inches of space between them.: The scooped rounds should sit tall and slightly domed on the parchment, and you may hear a soft pat as they settle. Even spacing allows hot air to circulate so the sides bake evenly. If you press each mound to shape them, you may compress the dough too much and lose lift, so trust the scoop for consistent sizes.
- Make a deep impression into the center of each scone using your thumb or the back of a teaspoon. Spoon a heaping teaspoon of thickened apricot jam into each impression.: When you press the indent you can feel the dough give beneath your thumb and the surface will slightly crack, which is fine. The jam should sit glossy and slightly domed in the cavity, catching the light, rather than pooling around the base. Overfilling will cause the jam to bubble over during baking, so aim for a heaping teaspoon, not a tablespoon.
- Lightly brush the outsides of scones (not the jam) with half and half or cream. Sprinkle with sugar.: Brushing the exterior helps the scone tops turn a gentle golden hue and gives them a pleasing sheen, while the sugar adds a faint crispness. You should see the milk or heavy cream glisten then set during baking. If you brush too much, the exterior can become soggy, so use a light touch and avoid the jam itself.
- Bake for 25 to 30 minutes or until bottoms are brown and tops are lightly golden. Let cool for 15 minutes before serving.: During baking the scones will emit a warm, toasty aroma and the tops will develop a pale golden tint while the bottoms deepen to light brown, signaling they are done. Letting them rest allows steam to settle and the jam to firm slightly, making them easier to handle. Cutting into them too soon risks a gummy interior, so patience is rewarded here.
Notes
- Chill the jam: Cooling the thickened apricot jam before filling ensures the centers stay intact during baking and do not run.
- Control sweetness: If you prefer less sugar, reduce the granulated sugar in the dough slightly and keep the jam amount the same for balance.
- Even scooping: Use an ice cream scoop for uniform scones, which helps them bake evenly and look consistent on a platter.
- Brush lightly: Apply a thin coat of heavy cream to the tops only, which promotes gentle browning without oversaturating the exterior.
- Storage: Cool completely before storing in an airtight container at room temperature for up to two days, or freeze cooled scones for longer keeping.