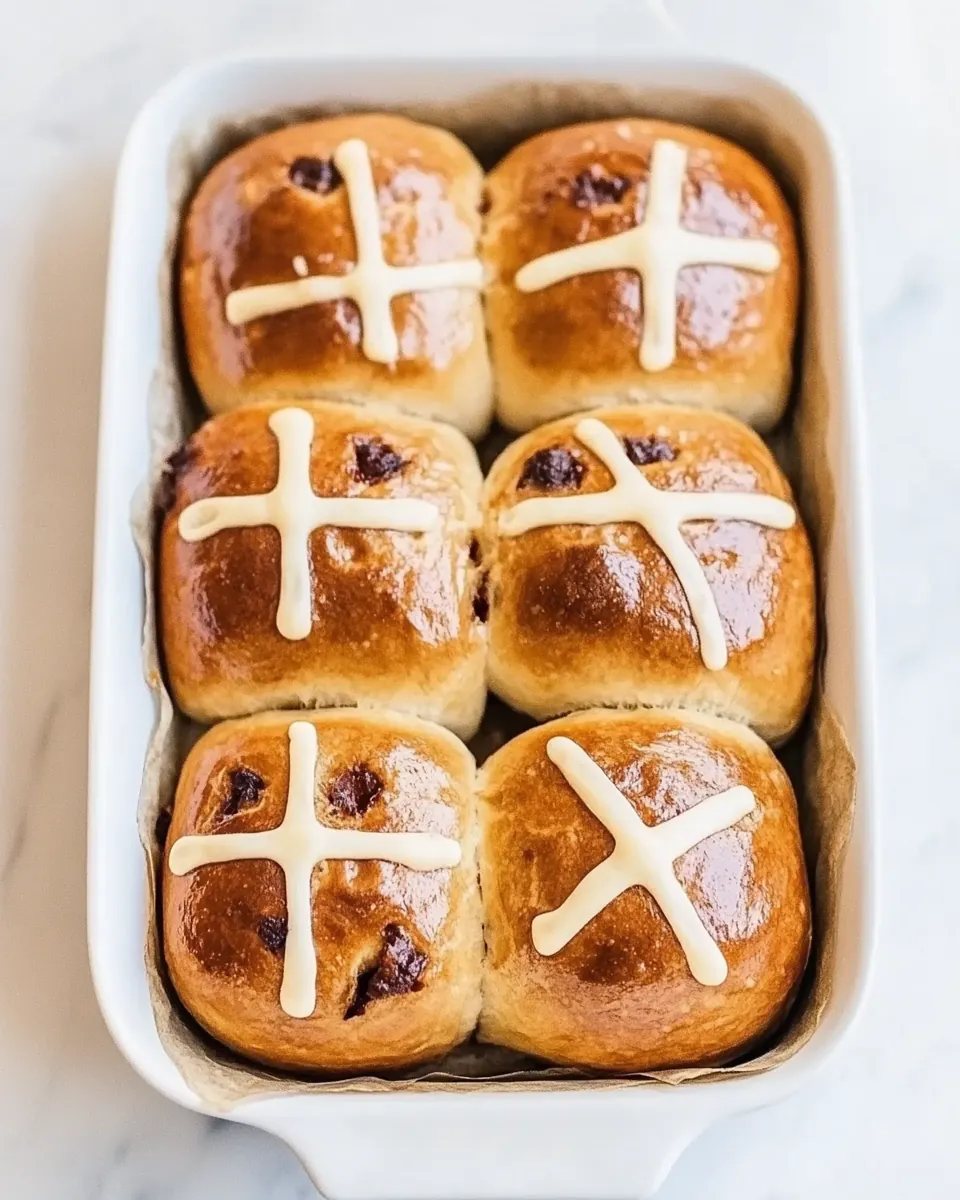
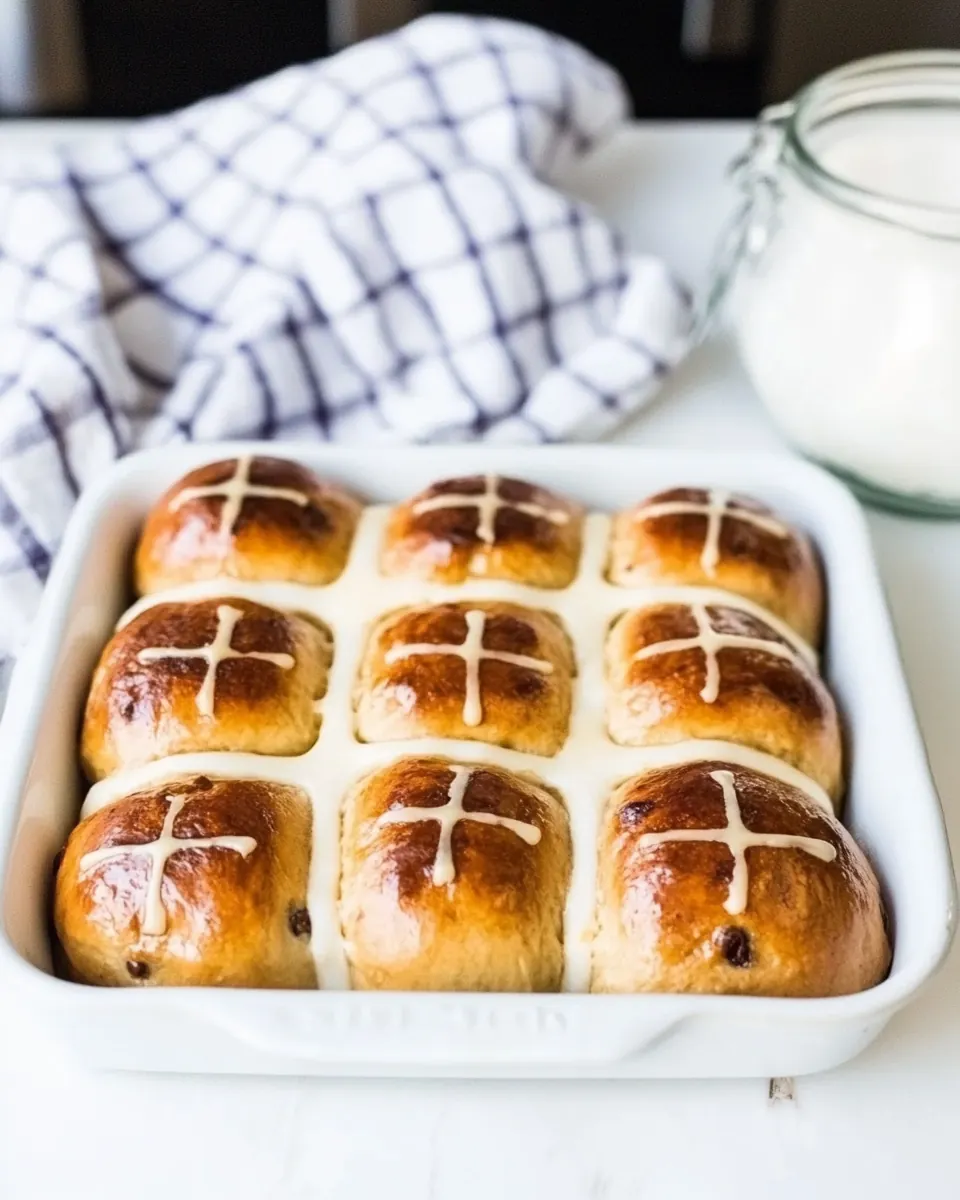
Homemade Hot Cross Buns
Homemade Hot Cross Buns are the kind of bread I reach for when I want comfort that feels slightly ceremonial, warm from the oven, and scented with orange and spice. The first time I made these I was nervous about working with enriched dough, but the gentle rhythm of mixing, kneading, and waiting taught me patience in the best possible way. I remember pulling a tray of glossy, apricot glazed buns from the oven and feeling like I had produced something a little magical that morning.
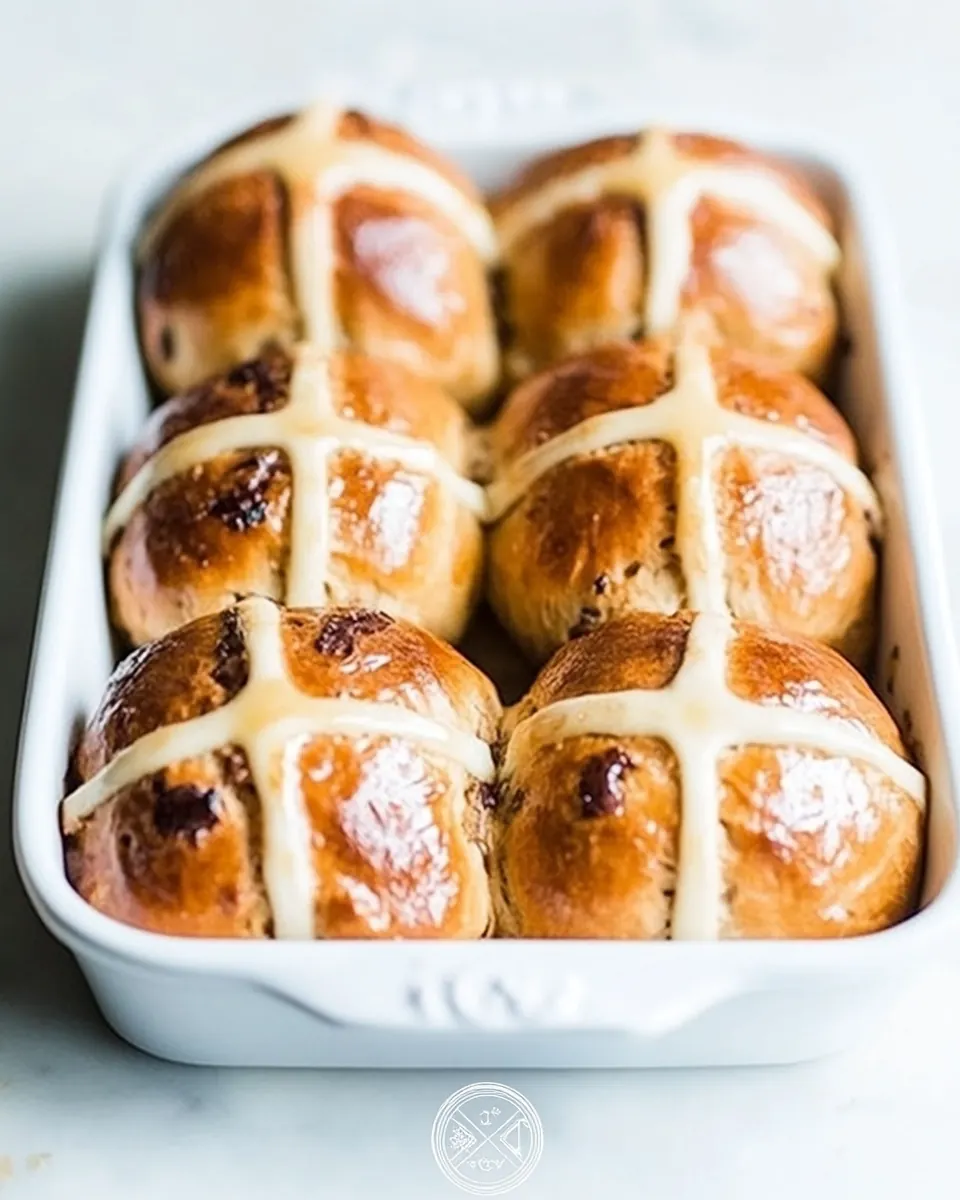
Years later I still make Homemade Hot Cross Buns for gatherings and quiet weekend breakfasts. I love how the dough yields a tender crumb, studded with currants, while the crosses mark each bun like punctuation. The orange zest brightens the spice, and the apricot glaze gives the tops that irresistible sheen. Every time I tuck the buns into a warm towel to proof, the smell of spice and butter fills the kitchen and I find myself smiling, thinking about who I might share them with.
What keeps me coming back is that these buns are both festive and approachable. They ask for a little time and attention, but they reward you with rows of glossy, golden buns that make morning feel special. Whether you pull them from the oven for Easter brunch or a cozy Sunday, they have a way of slowing things down and bringing people together. I often find myself breaking one open, steam rising as I pull apart the soft interior, and I think about how simple ingredients can become something memorable.
Recipe Snapshot
45 mins
20 mins
25 mins
Medium
220 kcal
American
Gluten-Free, Low FODMAP
Desserts
Stand mixer, Hook attachment, Mixing bowls, Baking pan, Parchment paper, Saucepan, Piping bag, Cooling rack
The Charm of This Homemade Hot Cross Buns
Classic, comforting flavor
I find that the combination of orange zest, pumpkin pie spice, and currants captures a timeless flavor profile that is both homey and slightly elevated. The spice warms the palate without overpowering the delicate bread base, so every bite tastes layered and balanced.
Great texture that is easy to hit
The technique in this recipe gives you a soft, slightly sticky dough that bakes into buns with a tender crumb and a thin, glossy crust. I love how the dough is forgiving, and with a little attention to dough feel during kneading, you reliably get that pillowy interior that makes these buns feel special.
Beautiful presentation with minimal fuss
Those piped crosses and the apricot glaze transform simple buns into something you can proudly bring to a brunch table. I appreciate how the small step of piping a flour and water cross gives a classic look without complicated decorating skills.
Flexible timing and make ahead options
These buns can be made ahead, refrigerated, or even frozen, which makes them practical for busy weekends or holiday planning. I often proof them and then chill them briefly before final shaping if my schedule is tight, and I still end up with excellent results.
Kid friendly and crowd pleasing
Everyone I serve these to, from curious kids to picky eaters, ends up enjoying them. They are slightly sweet, warmly spiced, and not overcomplicated. I like that they make mornings feel like an event without needing a bakery trip.
What You Need for Homemade Hot Cross Buns
These ingredients work together to create a rich, tender enriched dough with bright highlights and a glossy finish. The milk and eggs create softness and structure, the bread flour builds strength for good rise, and the butter adds richness. Currants and orange zest provide bursts of flavor, while the glaze gives shine and a hint of sweetness. Together they create balance between texture and flavor.
- 1 1/3 cups whole milk, 112° to 115°: Warm and scald to feed the yeast and create a tender dough; temperature between 112° and 115° ensures yeast activation without killing it. Adds moisture and contributes to the enriched texture typical of hot cross buns. Incorporate gradually with dry ingredients for even hydration.
- 2/3 cup caster sugar: Sweeten the dough and help feed the yeast for rise; caster sugar dissolves quickly for even sweetness distribution. Contributes to browning and caramelization of the crust during baking. Adjust amount carefully to balance sweetness without inhibiting yeast.
- 1 package active yeast: Activate to leaven the dough and provide structure through fermentation; active yeast produces carbon dioxide that lightens the buns. Proof in warm milk and sugar mixture to confirm activity before mixing. Use fresh yeast for reliable rise and consistent texture.
- 5 cups bread flour: Build structure and gluten development for a chewy, bread-like crumb; bread flour's higher protein content yields strong gluten networks. Combine with liquids and knead until smooth and elastic for proper rise. Measure accurately to maintain dough hydration.
- 1 teaspoons salt: Season the dough and strengthen gluten marginally while balancing flavor; a small amount of salt controls yeast activity and enhances overall taste. Distribute evenly to avoid localized salty spots. Add after initial mixing if using direct yeast contact concerns.
- 2 teaspoons pumpkin pie spice: Spice the dough with warm, aromatic notes reminiscent of traditional hot cross buns; pumpkin pie spice blends cinnamon, nutmeg, and cloves for depth. Infuse during mixing so flavors permeate the crumb. Adjust to taste but keep characteristic spice presence.
- 8 tablespoons unsalted butter: Enrich the dough to create a tender, moist crumb and add buttery flavor; unsalted butter allows precise salt control. Soften or melt slightly for easy incorporation into the dough. Add during mixing for even fat distribution.
- zest of 1 orange: Provide bright citrus aroma and lift with fresh orange zest; oils from the zest add a fragrant, tangy complexity. Grate finely to avoid bitter pith and incorporate during mixing for uniform flavor. Complements the sweetness and spices in the buns.
- 1 cup currants: Add chewy bursts of fruity sweetness and traditional authenticity; currants distribute throughout the buns for texture and flavor. Soak or toss in flour to prevent sinking and ensure even distribution. Fold in during final stages of mixing.
- 2 large eggs: Enrich the dough with moisture, fat, and structure; large eggs contribute to binding, color, and tenderness. Beat before adding for uniform incorporation and to help emulsify fats and liquids. Ensure room temperature eggs for better integration.
- 1 teaspoon vanilla: Enhance overall flavor with warm, sweet aromatic notes; vanilla deepens the bun's flavor profile and complements citrus and spice. Add to wet ingredients to ensure even distribution throughout the dough. Use pure vanilla for best flavor.
- 1/2 cup apricot jam: Glaze the baked buns for shine and a subtle sweet finish; apricot jam warms into a smooth, spreadable glaze. Strain and warm before brushing to remove lumps and ensure an even coating. Apply while buns are warm for optimum adhesion and sheen.
- 3 tablespoons bread flour: Thicken and pipe the cross decoration on top of buns; a small amount of bread flour combines with water to form a paste that holds shape when piped. Mix into a smooth batter free of lumps for clean crosses. Pipe before baking for traditional appearance.
- 3 tablespoons water: Bind the flour for the cross paste and adjust consistency; water hydrates the flour to form a pipeable mixture for topping. Start with the recommended amount and add a little more if needed for desired thickness. Use at room temperature to avoid lumps.
How to Cook Homemade Hot Cross Buns
These directions guide you through mixing, kneading, proofing, shaping, and glazing. I like to stay present during each stage, paying attention to dough feel and the aromas unfolding. Follow the sensory cues rather than the clock alone for best results.
- In the bowl of a stand mixer, whisk together the warm milk, 1 tablespoon of sugar, and yeast until combined. Let stand for 5-7 minutes or until a raft forms.: The moment you combine the warm milk , a spoonful of sugar , and the yeast , you should notice a faint yeasty aroma and a slight shimmer on the surface as the yeast begins to hydrate. This step wakes the yeast up, and when it sits for 5 to 7 minutes you may see foamy bubbles form, which is the best sign that fermentation is active. It's crucial the milk is near the specified warmth because if it is too hot you risk killing the yeast, and if it is too cool the yeast will be sluggish and the dough will not rise properly. A mistake here is rushing past the foam check, so always wait the full 5 to 7 minutes to confirm a raft forms before moving on.
- In the meantime, in a separate bowl, whisk together the flour, remaining sugar, salt, and spices until combined.: As you whisk the dry bread flour , remaining sugar , salt , and pumpkin pie spice , inhale the warm fragrance of the spices which hints at the final flavor. This dry mix distributes the seasoning and salt evenly so every bite tastes consistent. If you skip thorough whisking, you might end up with salty or overly spiced pockets, so take the extra minute to sift or whisk well. The visual cue is an even colored flour mixture with no clumps of spice.
- Cut the butter into the flour mixture using a pastry knife until it is about the size of rice. You may need to use your hands to further break it up.: When you work the softened butter into the flour, aim for pea to rice sized pieces; these fat pockets will melt during baking and create tender layers inside the crumb. The texture you are aiming for is slightly pebbly, not greasy. If the butter gets too warm and smears, the dough can become heavy and not trap air well. A common mistake is overworking the mixture so that the butter disappears completely, which reduces tenderness, so stop when you see the tiny butter bits.
- Fold the orange zest and currants into the dry mixture.: As you fold in the orange zest and currants , you'll see flecks of bright zest and dark fruit stud the mixture, promising flavor in every bite. The currants will cling to the dough and create pockets of sweet tang. Tossing them into the flour first helps them distribute evenly and prevents them from sinking to the bottom of the dough during proofing. Be careful not to overmix here, because heavy handling can bruise the currants or pack the zest too densely in one spot.
- Fix the hook attachment to the stand mixer and begin to mix on low speed while adding 1 cup of the flour mixture at a time until mixed in.: As you add the dry mix to the activated yeast mixture in increments, the bowl will slowly come together into a shaggy dough. Low speed protects the yeast and encourages gluten development without overheating. You will notice the dough beginning to pull away from the bowl slightly as enough flour is incorporated. Avoid dumping all the flour at once, which can create lumps and reduce even hydration; instead, use the incremental approach for a consistent, elastic dough.
- Next, add in 1 egg at a time until mixed in, and then add in the vanilla until mixed in.: Adding the eggs one at a time helps them absorb into the dough evenly, resulting in a cohesive, glossy texture. Once the vanilla goes in, you'll detect a warm, rounded aroma that complements the spices. If eggs are added too quickly or not incorporated, the dough can separate or become unevenly hydrated. A good sign is a smooth, slightly sticky dough that holds together when lifted.
- Turn the speed to low-medium and knead for about 4 to 5 minutes. The dough should be a little sticky.: During kneading the dough becomes elastic and slightly glossy, and when you press it with a finger it should spring back slowly. You should sense a soft tackiness rather than a wet stickiness, which indicates good hydration. This stage builds the gluten network that traps the gases for a good rise; under-kneaded dough will be dense, while over-kneaded dough can feel tough. If your dough feels excessively sticky, add a tablespoon of bread flour at a time, but avoid adding too much as it will dry the crumb.
- Cover the bowl and let proof in a warm dark place until doubled in size, which can take up to 2 hours.: As the dough proofs, it will expand and release a sweet, fermented scent. The visual cue of doubling is the easiest signal that fermentation did its job. Place the bowl somewhere drafts won't disturb it, because uneven temperature can lead to inconsistent rise. A common mistake is rushing this stage; if the dough is under-proofed, the buns will be tight and heavy rather than light and tender.
- Next, transfer the dough to a clean surface lightly dusted with flour and knead the dough for 1 to 2 minutes.: After the first rise, a gentle knead deflates large bubbles and redistributes the currants so each bun gets fruit. You should feel the dough soften and become smoother under your hands, with a faint resilience when you press it. Overworking now can make the dough dense, so keep it brief and purposeful.
- Form 15 individual dough balls and roll them into a round shape and place them into a large baking pan lined with parchment paper. Proof them for 1 more hour covered with a towel.: When shaping each bun, cup the dough in your hands and roll it against the counter to create surface tension, which helps the buns hold a round shape during proofing and baking. Arrange them with a little space in the lined pan because they will expand as they proof. If you roll them unevenly, some buns will bake differently, so aim for uniform size for consistent baking.
- While proofing, whisk together flour and water and then transfer it to a piping bag with the tip cut off or with a small round tip.: During this second proof, the buns should nearly double and feel airy to the touch. The surface will become slightly smooth and springy. If you under-proof here, the crosses and internal crumb will be dense; if you over-proof, the buns may collapse in the oven. Keep an eye on the visual cues rather than the clock alone.
- Once the buns are done proofing use the flour-water mixture and pipe crosses on each bun.: The flour and water paste should be smooth and pipeable, not runny or too stiff. This mixture will bake into pale raised crosses, so consistency matters. If it is too thin it will spread and lose shape, and if too thick it will tear the buns when piped, so aim for pipeable thickness.
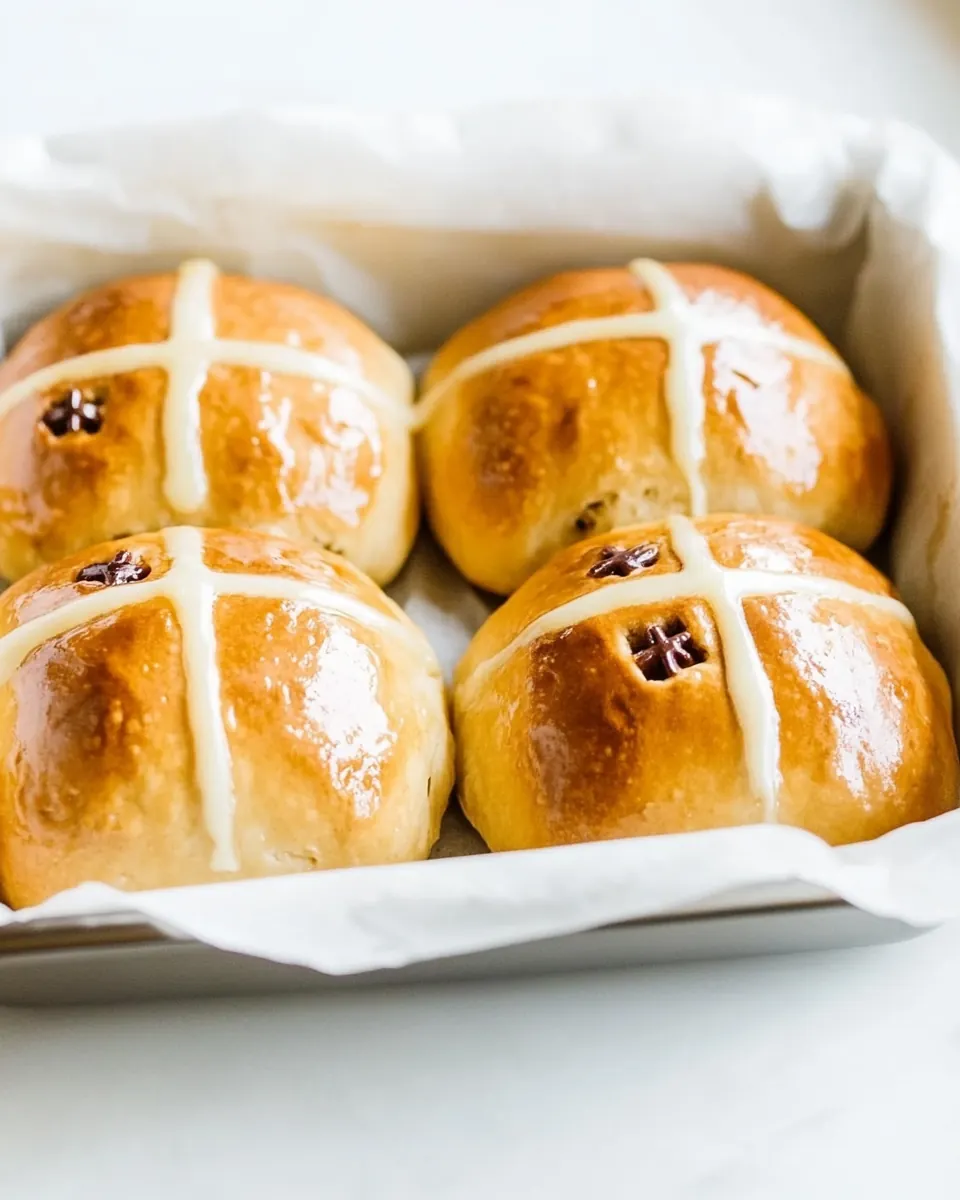
- Bake in the oven at 350° for 22 to 25 minutes or until golden brown on top and cooked through.: As you pipe, the paste should sit neatly on the surface, creating clean lines. The cross will slightly puff and set during baking, providing a classic look. If you pipe too heavily the paste can crack, and if you pipe too light it may disappear, so steady pressure and consistent lines give the best results.
- Transfer the buns to a cooling rack.: As the buns bake you will smell butter and orange and see the tops turn a warm golden brown. The sound is subtle, but you'll notice the kitchen filling with aroma. Test doneness by tapping the bottom, which should sound hollow, and by checking an internal temperature if you like. Be careful not to overbake, which will dry the crumb.
- In the meantime, melt some apricot jam in a small sauce pan just until melted and then brush the tops of the warm buns with it. Serve.: Moving the buns to a rack prevents the bottoms from steaming and becoming soggy, preserving the crispness of the crust. The buns will still be hot and fragile, so handle gently. A mistake is leaving them in the hot pan, which traps moisture and softens the crust.
- In the meantime, melt some apricot jam in a small sauce pan just until melted and then brush the tops of the warm buns with it: The melted apricot jam adds gloss and a touch of sticky sweetness that finishes the buns beautifully. Brush while the buns are warm so the glaze soaks slightly into the crust, creating shine and flavor. If the jam is overheated it can caramelize and darken, so warm it just until fluid.
- Serve: When you serve these buns, they should be warm and aromatic, with a tender interior and glossy tops. Pulling one apart will release steam and show the soft crumb studded with currants , inviting a taste. Serve soon after glazing for the best texture and appearance.
Substitutions and Tips
There are small adjustments you can make to tailor these buns to your kitchen and schedule. Below are practical, detailed tips I use when I make Homemade Hot Cross Buns, based on hands on trials and little refinements that really help.
- Make ahead strategy: If you want to save time on the day of serving, complete the first proof in the bowl, then refrigerate the dough overnight. The slow cold fermentation deepens flavor and you can shape and proof the next morning for fresher results.
- Currant swap: If you do not have access to currants, raisins are an acceptable substitute; toss them in a little flour first so they do not sink to the bottom of the dough while proofing.
- Glaze tips: Warm the apricot jam gently and strain it if there are large pieces of fruit to ensure a smooth glossy finish. Brush immediately while the buns are hot for best adhesion.
- Proofing environment: For a consistent proof, place the covered bowl or pan in an oven with the light on or near a warm water bath. Avoid direct heat sources that can dry the dough surface.
- Consistency checks: During kneading, judge readiness by feel not time; the dough should be slightly tacky and elastic. If it is too sticky, add a tablespoon of bread flour at a time until manageable.
Best Served With
These buns are versatile and shine in multiple contexts. I like to serve them warm for breakfast or brunch, as a cozy addition to holiday spreads, or as a special weekend treat. Below are ways I recommend serving and pairing them, including storage and timing suggestions to keep them tasting their best.
- Warm from the oven: Serve the buns immediately after glazing while they are still warm to enjoy the tender crumb and glossy tops at their peak.
- Brunch pairing: These buns are lovely alongside a simple tea or coffee selection and can be the sweet centerpiece for a leisurely mid morning meal.
- Holiday table: For Easter or spring gatherings, present the buns in a lined basket or on a platter, wrapped in a towel to keep them warm and fresh for guests.
- Storage: Store cooled buns covered in the refrigerator for up to five days, or freeze individually wrapped for up to three months; thaw in the refrigerator before reheating.
- Reheating: Rewarm the desired number of buns in a 13×9 pan covered with foil at 350° for 6 to 8 minutes or until warm, then reglaze if you like to restore shine.
- Seasonal serving: In spring they feel festive for Easter brunch, while in cooler months they make cozy weekend treats when you want something slightly spiced and homey.
FAQ
Conclusion
These Homemade Hot Cross Buns shine because they balance tender enriched dough with bright citrus, warm spices, and a glossy apricot finish, producing a bake that feels both classic and comforting. If you enjoy hands on baking that rewards you with aromatic, glossy buns perfect for brunch or holiday mornings, this recipe is worth trying. Give them a go, take your time with the proofs, and enjoy that special moment when the oven opens and the kitchen fills with scent.
Homemade Hot Cross Buns
Equipment
- Stand mixer
- Hook attachment
- Mixing Bowls
- Baking Pan
- Parchment Paper
- Saucepan
- Piping Bag
- Cooling rack
Ingredients
- 1 1/3 cups whole milk, 112° to 115° Warm and scald to feed the yeast and create a tender dough; temperature between 112° and 115° ensures yeast activation without killing it. Adds moisture and contributes to the enriched texture typical of hot cross buns. Incorporate gradually with dry ingredients for even hydration.
- 2/3 cup caster sugar Sweeten the dough and help feed the yeast for rise; caster sugar dissolves quickly for even sweetness distribution. Contributes to browning and caramelization of the crust during baking. Adjust amount carefully to balance sweetness without inhibiting yeast.
- 1 package active yeast Activate to leaven the dough and provide structure through fermentation; active yeast produces carbon dioxide that lightens the buns. Proof in warm milk and sugar mixture to confirm activity before mixing. Use fresh yeast for reliable rise and consistent texture.
- 5 cups bread flour Build structure and gluten development for a chewy, bread-like crumb; bread flour's higher protein content yields strong gluten networks. Combine with liquids and knead until smooth and elastic for proper rise. Measure accurately to maintain dough hydration.
- 1 teaspoons salt Season the dough and strengthen gluten marginally while balancing flavor; a small amount of salt controls yeast activity and enhances overall taste. Distribute evenly to avoid localized salty spots. Add after initial mixing if using direct yeast contact concerns.
- 2 teaspoons pumpkin pie spice Spice the dough with warm, aromatic notes reminiscent of traditional hot cross buns; pumpkin pie spice blends cinnamon, nutmeg, and cloves for depth. Infuse during mixing so flavors permeate the crumb. Adjust to taste but keep characteristic spice presence.
- 8 tablespoons unsalted butter Enrich the dough to create a tender, moist crumb and add buttery flavor; unsalted butter allows precise salt control. Soften or melt slightly for easy incorporation into the dough. Add during mixing for even fat distribution.
- zest of 1 orange Provide bright citrus aroma and lift with fresh orange zest; oils from the zest add a fragrant, tangy complexity. Grate finely to avoid bitter pith and incorporate during mixing for uniform flavor. Complements the sweetness and spices in the buns.
- 1 cup currants Add chewy bursts of fruity sweetness and traditional authenticity; currants distribute throughout the buns for texture and flavor. Soak or toss in flour to prevent sinking and ensure even distribution. Fold in during final stages of mixing.
- 2 large eggs Enrich the dough with moisture, fat, and structure; large eggs contribute to binding, color, and tenderness. Beat before adding for uniform incorporation and to help emulsify fats and liquids. Ensure room temperature eggs for better integration.
- 1 teaspoon vanilla Enhance overall flavor with warm, sweet aromatic notes; vanilla deepens the bun's flavor profile and complements citrus and spice. Add to wet ingredients to ensure even distribution throughout the dough. Use pure vanilla for best flavor.
- 1/2 cup apricot jam Glaze the baked buns for shine and a subtle sweet finish; apricot jam warms into a smooth, spreadable glaze. Strain and warm before brushing to remove lumps and ensure an even coating. Apply while buns are warm for optimum adhesion and sheen.
- 3 tablespoons bread flour Thicken and pipe the cross decoration on top of buns; a small amount of bread flour combines with water to form a paste that holds shape when piped. Mix into a smooth batter free of lumps for clean crosses. Pipe before baking for traditional appearance.
- 3 tablespoons water Bind the flour for the cross paste and adjust consistency; water hydrates the flour to form a pipeable mixture for topping. Start with the recommended amount and add a little more if needed for desired thickness. Use at room temperature to avoid lumps.
Instructions
- In the bowl of a stand mixer, whisk together the warm milk, 1 tablespoon of sugar, and yeast until combined. Let stand for 5-7 minutes or until a raft forms.: The moment you combine the warm milk , a spoonful of sugar , and the yeast , you should notice a faint yeasty aroma and a slight shimmer on the surface as the yeast begins to hydrate. This step wakes the yeast up, and when it sits for 5 to 7 minutes you may see foamy bubbles form, which is the best sign that fermentation is active. It's crucial the milk is near the specified warmth because if it is too hot you risk killing the yeast, and if it is too cool the yeast will be sluggish and the dough will not rise properly. A mistake here is rushing past the foam check, so always wait the full 5 to 7 minutes to confirm a raft forms before moving on.
- In the meantime, in a separate bowl, whisk together the flour, remaining sugar, salt, and spices until combined.: As you whisk the dry bread flour , remaining sugar , salt , and pumpkin pie spice , inhale the warm fragrance of the spices which hints at the final flavor. This dry mix distributes the seasoning and salt evenly so every bite tastes consistent. If you skip thorough whisking, you might end up with salty or overly spiced pockets, so take the extra minute to sift or whisk well. The visual cue is an even colored flour mixture with no clumps of spice.
- Cut the butter into the flour mixture using a pastry knife until it is about the size of rice. You may need to use your hands to further break it up.: When you work the softened butter into the flour, aim for pea to rice sized pieces; these fat pockets will melt during baking and create tender layers inside the crumb. The texture you are aiming for is slightly pebbly, not greasy. If the butter gets too warm and smears, the dough can become heavy and not trap air well. A common mistake is overworking the mixture so that the butter disappears completely, which reduces tenderness, so stop when you see the tiny butter bits.
- Fold the orange zest and currants into the dry mixture.: As you fold in the orange zest and currants , you'll see flecks of bright zest and dark fruit stud the mixture, promising flavor in every bite. The currants will cling to the dough and create pockets of sweet tang. Tossing them into the flour first helps them distribute evenly and prevents them from sinking to the bottom of the dough during proofing. Be careful not to overmix here, because heavy handling can bruise the currants or pack the zest too densely in one spot.
- Fix the hook attachment to the stand mixer and begin to mix on low speed while adding 1 cup of the flour mixture at a time until mixed in.: As you add the dry mix to the activated yeast mixture in increments, the bowl will slowly come together into a shaggy dough. Low speed protects the yeast and encourages gluten development without overheating. You will notice the dough beginning to pull away from the bowl slightly as enough flour is incorporated. Avoid dumping all the flour at once, which can create lumps and reduce even hydration; instead, use the incremental approach for a consistent, elastic dough.
- Next, add in 1 egg at a time until mixed in, and then add in the vanilla until mixed in.: Adding the eggs one at a time helps them absorb into the dough evenly, resulting in a cohesive, glossy texture. Once the vanilla goes in, you'll detect a warm, rounded aroma that complements the spices. If eggs are added too quickly or not incorporated, the dough can separate or become unevenly hydrated. A good sign is a smooth, slightly sticky dough that holds together when lifted.
- Turn the speed to low-medium and knead for about 4 to 5 minutes. The dough should be a little sticky.: During kneading the dough becomes elastic and slightly glossy, and when you press it with a finger it should spring back slowly. You should sense a soft tackiness rather than a wet stickiness, which indicates good hydration. This stage builds the gluten network that traps the gases for a good rise; under-kneaded dough will be dense, while over-kneaded dough can feel tough. If your dough feels excessively sticky, add a tablespoon of bread flour at a time, but avoid adding too much as it will dry the crumb.
- Cover the bowl and let proof in a warm dark place until doubled in size, which can take up to 2 hours.: As the dough proofs, it will expand and release a sweet, fermented scent. The visual cue of doubling is the easiest signal that fermentation did its job. Place the bowl somewhere drafts won't disturb it, because uneven temperature can lead to inconsistent rise. A common mistake is rushing this stage; if the dough is under-proofed, the buns will be tight and heavy rather than light and tender.
- Next, transfer the dough to a clean surface lightly dusted with flour and knead the dough for 1 to 2 minutes.: After the first rise, a gentle knead deflates large bubbles and redistributes the currants so each bun gets fruit. You should feel the dough soften and become smoother under your hands, with a faint resilience when you press it. Overworking now can make the dough dense, so keep it brief and purposeful.
- Form 15 individual dough balls and roll them into a round shape and place them into a large baking pan lined with parchment paper. Proof them for 1 more hour covered with a towel.: When shaping each bun, cup the dough in your hands and roll it against the counter to create surface tension, which helps the buns hold a round shape during proofing and baking. Arrange them with a little space in the lined pan because they will expand as they proof. If you roll them unevenly, some buns will bake differently, so aim for uniform size for consistent baking.
- While proofing, whisk together flour and water and then transfer it to a piping bag with the tip cut off or with a small round tip.: During this second proof, the buns should nearly double and feel airy to the touch. The surface will become slightly smooth and springy. If you under-proof here, the crosses and internal crumb will be dense; if you over-proof, the buns may collapse in the oven. Keep an eye on the visual cues rather than the clock alone.
- Once the buns are done proofing use the flour-water mixture and pipe crosses on each bun.: The flour and water paste should be smooth and pipeable, not runny or too stiff. This mixture will bake into pale raised crosses, so consistency matters. If it is too thin it will spread and lose shape, and if too thick it will tear the buns when piped, so aim for pipeable thickness.
- Bake in the oven at 350° for 22 to 25 minutes or until golden brown on top and cooked through.: As you pipe, the paste should sit neatly on the surface, creating clean lines. The cross will slightly puff and set during baking, providing a classic look. If you pipe too heavily the paste can crack, and if you pipe too light it may disappear, so steady pressure and consistent lines give the best results.
- Transfer the buns to a cooling rack.: As the buns bake you will smell butter and orange and see the tops turn a warm golden brown. The sound is subtle, but you'll notice the kitchen filling with aroma. Test doneness by tapping the bottom, which should sound hollow, and by checking an internal temperature if you like. Be careful not to overbake, which will dry the crumb.
- In the meantime, melt some apricot jam in a small sauce pan just until melted and then brush the tops of the warm buns with it. Serve.: Moving the buns to a rack prevents the bottoms from steaming and becoming soggy, preserving the crispness of the crust. The buns will still be hot and fragile, so handle gently. A mistake is leaving them in the hot pan, which traps moisture and softens the crust.
- In the meantime, melt some apricot jam in a small sauce pan just until melted and then brush the tops of the warm buns with it: The melted apricot jam adds gloss and a touch of sticky sweetness that finishes the buns beautifully. Brush while the buns are warm so the glaze soaks slightly into the crust, creating shine and flavor. If the jam is overheated it can caramelize and darken, so warm it just until fluid.
- Serve: When you serve these buns, they should be warm and aromatic, with a tender interior and glossy tops. Pulling one apart will release steam and show the soft crumb studded with currants , inviting a taste. Serve soon after glazing for the best texture and appearance.
Notes
- Make ahead strategy: If you want to save time on the day of serving, complete the first proof in the bowl, then refrigerate the dough overnight. The slow cold fermentation deepens flavor and you can shape and proof the next morning for fresher results.
- Currant swap: If you do not have access to currants, raisins are an acceptable substitute; toss them in a little flour first so they do not sink to the bottom of the dough while proofing.
- Glaze tips: Warm the apricot jam gently and strain it if there are large pieces of fruit to ensure a smooth glossy finish. Brush immediately while the buns are hot for best adhesion.
- Proofing environment: For a consistent proof, place the covered bowl or pan in an oven with the light on or near a warm water bath. Avoid direct heat sources that can dry the dough surface.
- Consistency checks: During kneading, judge readiness by feel not time; the dough should be slightly tacky and elastic. If it is too sticky, add a tablespoon of bread flour at a time until manageable.