Coconut Frosting Recipe
Coconut Frosting Recipe has been my secret weapon for turning simple cakes and brownies into memorable treats ever since I first spooned a silky swirl over a pan of warm chocolate squares at a neighborhood bake sale.
That afternoon stuck with me because the frosting was light, slightly tropical, and addictive without being overpowering, and I kept being asked who made it. Over the years I refined the balance between the rich butter, the fine dust of powdered sugar, and the bright whisper of coconut extract, learning how little adjustments to the heavy whipping cream change the texture from pipeable to spreadable.
I love making a batch before guests arrive, because it gives me a chance to taste and tweak while I chat and sip tea. One time I frosted warm brownies right before serving, and the contrast between the gooey chocolate and the cool, creamy Coconut Frosting Recipe had everyone asking for seconds. I’m drawn to recipes that let me be present and playful, and this frosting does that, since it’s forgiving and quick yet feels special.
Sometimes I make it plain for a layer cake, other times I mix in a spoonful of shredded coconut for texture. Sharing it has taught me one thing: a great frosting bridges homemade comfort and a little culinary flourish, and that is exactly what I get from Coconut Frosting Recipe.
Recipe Snapshot
20 mins
20 mins
Easy
150 kcal
American
Gluten-Free, Low FODMAP
Desserts
Hand mixer, Large bowl, Spatula
What Sets This Coconut Frosting Recipe Apart
1. Flavor that’s familiar yet unexpected
I adore how the Coconut Frosting Recipe manages to be both classic and surprisingly bright. The base of butter and powdered sugar gives the expected creamy, sweet backbone, while the coconut extract adds a fragrant note that lifts the whole bite. I find this contrast keeps people intrigued, so it works brilliantly on plain cakes and chocolatier desserts alike.
2. Texture you can control
What I love most is the control you have over mouthfeel. Adding heavy whipping cream tablespoon by tablespoon lets me dial the frosting from thick and pipeable to thinner and spreadable. That tweakability means I can use the same recipe for cupcakes, layer cakes, or a quick brownie glaze, and I rarely need multiple recipes.
3. Speed and simplicity
There is comfort in a recipe that does not demand fancy equipment or obscure ingredients. With simple pantry staples like butter, powdered sugar, and a touch of salt, you get a frosting that comes together in minutes. I think of this as my go to when friends drop by unexpectedly, because it is fast yet feels indulgent.
4. Versatility at serving time
I often use the Coconut Frosting Recipe as a canvas. It plays well with chocolate, citrus, and tropical fruits, so I’ll pair it with lemon cakes or spread it over brownies. The flavor is flexible, so I can easily nudge it towards a more pronounced coconut profile with coconut milk or cream of coconut if I want a bolder result.
5. Make ahead and store with confidence
One practical reason I’m fond of this frosting is how well it keeps. I’ll often make a batch a day ahead, refrigerate it, and then let it come back to room temperature while giving it a quick re whip. That reliability makes it ideal for parties and busy baking days, because it behaves predictably after chilling.
Recipe Ingredients for Coconut Frosting Recipe
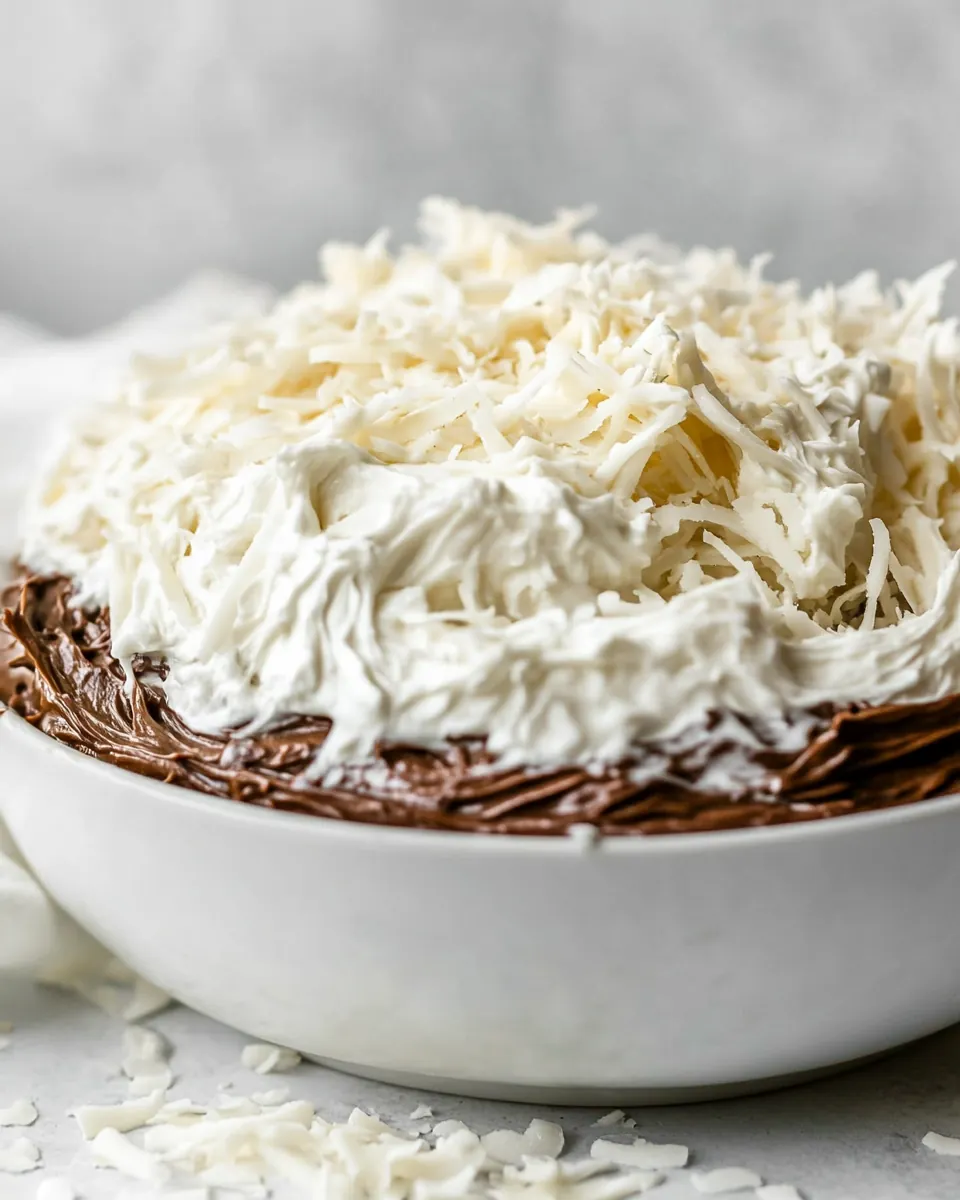
These ingredients are deliberately simple and complementary. The butter creates a rich, silky base, powdered sugar brings structure and sweetness, and small amounts of salt and extracts sharpen and layer the flavors. The optional brownies listed reflect serving ideas rather than an essential ingredient, but they show how this frosting can transform a basic dessert.
- 1 cup (225 g) unsalted butter, softened: Creamy and softened to provide a smooth, spreadable base for the frosting; contributes rich flavor, structure, and moisture while helping to aerate when beaten with sugar.
- 4 cups (452 g) powdered sugar: Finely powdered to dissolve easily into butter and create a silky texture; adds the primary sweetness and helps thicken the frosting for pipeable consistency.
- 1/2 teaspoons salt: Slightly savory element used sparingly to balance sweetness and enhance overall flavor depth; prevents the frosting from tasting flat and rounds out the profile.
- 1 teaspoon coconut extract: Concentrated and aromatic to impart distinct coconut flavor without adding extra liquid; boosts tropical notes and pairs well with the buttery base for a pronounced coconut character.
- 1/2 teaspoon vanilla extract: Warm and floral in small measure to support and round out the flavor profile; enhances complexity by complementing both the coconut extract and butter richness.
- 2 3 tablespoons heavy whipping cream (see note): Adjustable liquid component used to loosen or thicken the frosting to desired consistency; adds creaminess and sheen while allowing control over spreadability and piping ability.
- 1 recipe brownies () (optional): Optional baked component used as a serving base or mix-in to create a textured dessert; provides a chocolatey contrast and transforms the frosting into a layered treat when included.
Cooking Method for Coconut Frosting Recipe

I keep the method straightforward so the frosting comes together reliably every time. The process focuses on aeration and control, letting you build a light texture without overwhipping. Below I expand each instruction into detailed steps so you can sense when you are doing it right.
- To make the frosting, beat butter in a large bowl with a hand mixer until smooth.: When you start, you will hear a gentle whipping sound as the beaters cut through the softened butter , and you should see it lighten slightly in color and become glossy, signaling that enough air has been incorporated. Use a medium low speed to avoid splatter, and scrape the bowl once to ensure uniformity. The smell will be rich and creamy, with the butter scent prominent but not greasy. This initial aeration sets the stage for a fluffy frosting, because a well whipped base traps air that makes the final texture light. A common mistake is using butter that is too cold, which will yield lumpiness; if that happens let it sit a bit longer at room temperature and re beat gently. If the butter seems too soft, chill briefly and resume at a lower speed. Keep the bowl tilted toward you to check texture as you whip.
- Slowly beat in powdered sugar until crumbly. Beat in salt and extracts. Add milk, 1 tablespoon at a time, until you reach your desired consistency.: As you add the powdered sugar in batches, the sound will shift to a faint, silky whisper and the mixture may momentarily look dry or crumbly before smoothing out, which is normal. Work at low speed to prevent sugar clouds and to let the sugar dissolve into the butter steadily, producing a smoother finish. The tiny sugar particles will begin to amalgamate with the fats, producing a thicker, more stable body. If you rush and add all the powdered sugar at once, you risk a grainy texture and airborne dust, so patience matters. One troubleshooting tip is to pause and scrape the sides often, ensuring no pockets of dry sugar remain, because undissolved sugar will give a gritty mouthfeel in the end product.
- Frost brownies or any recipe as desired. Store in refrigerator for up to 4 days or freeze frosting in an airtight container for up to 3 months.: After the base looks cohesive, you will add the salt , coconut extract , and vanilla extract , and immediately you will notice the aroma shift as the extracts bloom in the fats. Mix briefly at low speed so the fragrance distributes evenly; extracts are concentrated, so they can quickly dominate if overmixed or overmeasured. The salt will sharpen the sweetness, making flavors pop, so taste a small dab before proceeding. A common error is adding too much extract in one go; measure carefully and adjust gradually because it is difficult to remove excess once incorporated.
- Add milk, 1 tablespoon at a time, until you reach your desired consistency.: Introduce the heavy whipping cream slowly, watching how each spoonful transforms the frosting from stiff to silky, and listening for the subtle change in whipping sound as the beaters move through a softer mixture. This is where the frosting becomes adjustable for piping or spreading, so add one tablespoon, then pause, and test the texture on a spoon or the back of your hand. The cream also brings a slight dairy aroma that mellows the concentrated extracts. A typical pitfall is adding too much liquid too fast, which makes the frosting limp; correct this by adding a little more powdered sugar or chilling briefly before re whipping. If you prefer a firmer consistency for piping intricate designs, aim for the lower end of the liquid range.
- Frost brownies or any recipe as desired. Store in refrigerator for up to 4 days or freeze frosting in an airtight container for up to 3 months.: When you spread the frosting, you should feel it move smoothly, leaving slight peaks if you drag your spatula through it, and it will retain shape without collapsing, indicating proper stability. If frosting warm brownies , allow them to cool slightly to prevent melting. The refrigerator firming step is useful for adjusting texture before serving, and frozen frosting can be thawed in the refrigerator and re whipped briefly for freshness. One common oversight is skipping the chill for carved cakes, which can make finishing difficult; chill for stability when precision is needed. Also avoid leaving frosted desserts at room temperature for prolonged periods if using perishable dairy in warm environments.
Recipe Tips about Coconut Frosting Recipe

This frosting benefits from a few practical habits that make results consistent and reliable. Below are focused, experience driven tips that expand on the notes and method, helping you finish with confident technique and a delicious outcome.
- Soften your butter correctly before starting: letting your butter sit at room temperature for about 30 to 45 minutes ensures it is soft enough to whip without melting, producing a creamier texture and preventing lumps.
- Add powdered sugar gradually to avoid a gritty texture: mixing in the powdered sugar in batches lets it dissolve into the fats, giving a smooth finish and reducing the need for excessive whipping.
- Measure extracts precisely because they are potent: start with the recipe amounts of coconut extract and vanilla extract, then adjust in small increments to prevent an overpowering or perfumy flavor.
- Use heavy cream for stability over lower fat liquids: the higher fat content of heavy whipping cream makes the frosting richer and more stable, which is especially helpful if you plan to pipe decorations.
- Keep a small bowl of water handy to smooth spatula edges: dipping your spatula in warm water and blotting it before smoothing helps create cleaner finishes on cakes and brownies.
- Store properly for longevity by refrigerating in an airtight container up to four days, or freeze portions for up to three months, thawing in the refrigerator and re whipping if necessary for freshness.
Serving Ideas for Coconut Frosting Recipe
This frosting pairs wonderfully across occasions and dessert types, and it is easy to adapt for casual gatherings or more formal celebrations. Below I outline serving suggestions, storage notes, and seasonal pairings to help you present the frosting with confidence.
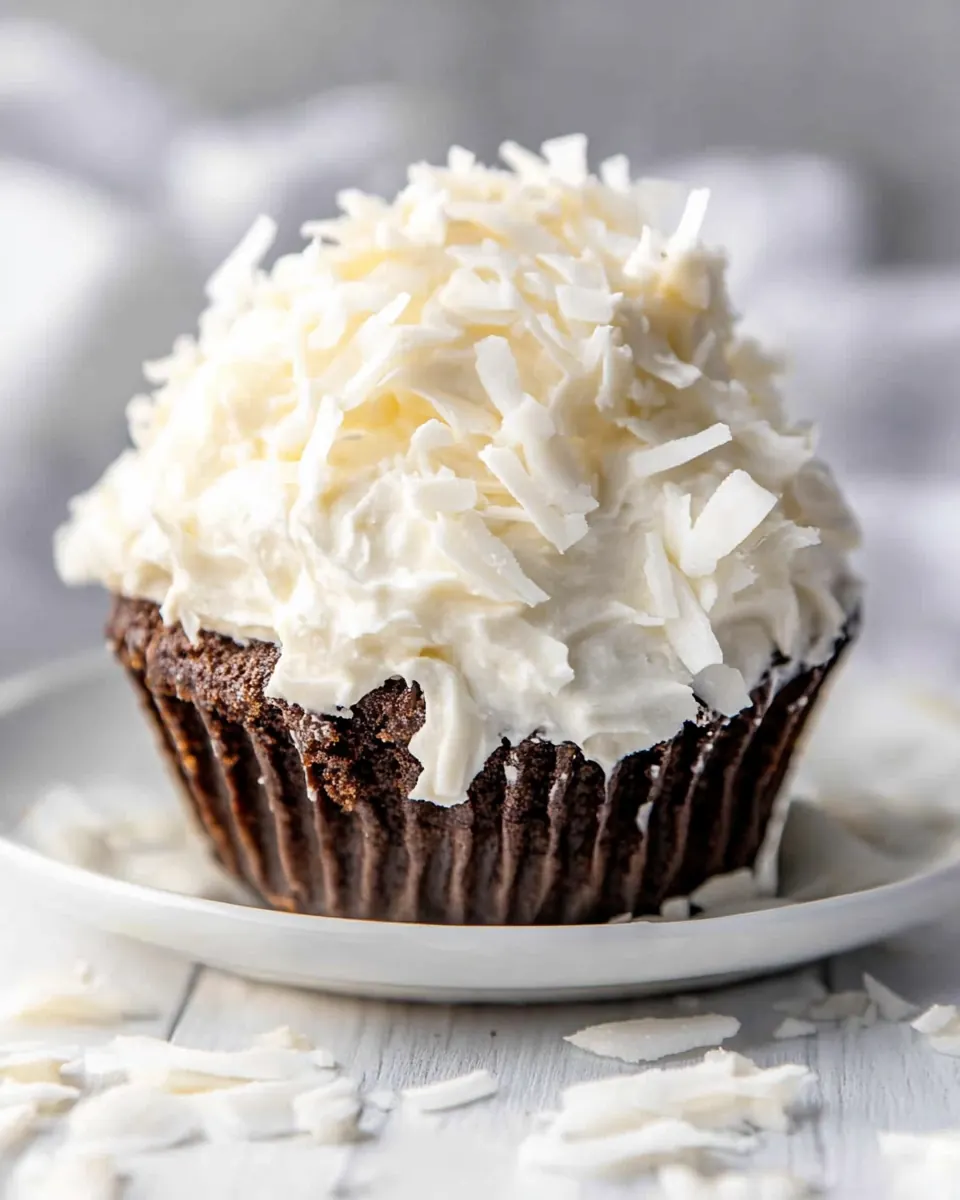
- Piped cupcakes for birthdays: Use a medium round tip to pipe swirls of Coconut Frosting Recipe on vanilla or chocolate cupcakes for an elegant, crowd pleasing finish ideal for casual parties or informal celebrations.
- Frosted layer cake for special occasions: Fill and crumb coat a layer cake with the frosting, chill briefly, then apply a smooth, even final coat. This works well for showers and small dinner parties where a refined look matters.
- Brownie topping for potlucks: Spread the frosting over cooled brownies and chill so slices hold together during transport. This is perfect for picnics and community meals because it combines easy serving with a gourmet twist.
- Seasonal pairing with tropical fruit: Serve slices of frosted cake alongside fresh pineapple or mango for summer gatherings, using the coconut notes to echo tropical flavors without overwhelming them.
- Ramadan and holiday dessert table: Offer frosted squares or cupcakes as part of a dessert spread for Ramadan iftar or other holiday gatherings, where the frosting’s comforting sweetness complements tea and coffee.
- Storage and make ahead: Make the frosting up to three months ahead by freezing in airtight containers, thawing overnight in the refrigerator, and re whipping briefly. For short term storage, refrigerate up to four days and bring to room temperature before use.
- Presentation tips: Garnish with a light dusting of toasted coconut or a single toasted coconut flake for visual contrast, and serve on a platter lined with parchment for easier slicing and cleanup.
FAQ
Conclusion
What makes this recipe special is its perfect balance of creamy richness and delicate coconut character, creating a frosting that feels both familiar and a little exotic. It’s quick to make, forgiving in technique, and versatile enough to top cupcakes, layer cakes, or brownies for almost any occasion. I encourage you to try it as written first so you can taste the baseline, then play with small tweaks like adding a little toasted coconut or swapping a splash of coconut milk to make it your own. Enjoy the simple pleasure of homemade frosting that elevates everyday desserts.
Coconut Frosting Recipe
Equipment
- Hand Mixer
- Large Bowl
- Spatula
Ingredients
- 1 cup (225 g) unsalted butter, softened Creamy and softened to provide a smooth, spreadable base for the frosting; contributes rich flavor, structure, and moisture while helping to aerate when beaten with sugar.
- 4 cups (452 g) powdered sugar Finely powdered to dissolve easily into butter and create a silky texture; adds the primary sweetness and helps thicken the frosting for pipeable consistency.
- 1/2 teaspoons salt Slightly savory element used sparingly to balance sweetness and enhance overall flavor depth; prevents the frosting from tasting flat and rounds out the profile.
- 1 teaspoon coconut extract Concentrated and aromatic to impart distinct coconut flavor without adding extra liquid; boosts tropical notes and pairs well with the buttery base for a pronounced coconut character.
- 1/2 teaspoon vanilla extract Warm and floral in small measure to support and round out the flavor profile; enhances complexity by complementing both the coconut extract and butter richness.
- 2 -3 tablespoons heavy whipping cream (see note) Adjustable liquid component used to loosen or thicken the frosting to desired consistency; adds creaminess and sheen while allowing control over spreadability and piping ability.
- 1 recipe brownies (optional) Optional baked component used as a serving base or mix-in to create a textured dessert; provides a chocolatey contrast and transforms the frosting into a layered treat when included.
Instructions
- To make the frosting, beat butter in a large bowl with a hand mixer until smooth.: When you start, you will hear a gentle whipping sound as the beaters cut through the softened butter , and you should see it lighten slightly in color and become glossy, signaling that enough air has been incorporated. Use a medium low speed to avoid splatter, and scrape the bowl once to ensure uniformity. The smell will be rich and creamy, with the butter scent prominent but not greasy. This initial aeration sets the stage for a fluffy frosting, because a well whipped base traps air that makes the final texture light. A common mistake is using butter that is too cold, which will yield lumpiness; if that happens let it sit a bit longer at room temperature and re beat gently. If the butter seems too soft, chill briefly and resume at a lower speed. Keep the bowl tilted toward you to check texture as you whip.
- Slowly beat in powdered sugar until crumbly. Beat in salt and extracts. Add milk, 1 tablespoon at a time, until you reach your desired consistency.: As you add the powdered sugar in batches, the sound will shift to a faint, silky whisper and the mixture may momentarily look dry or crumbly before smoothing out, which is normal. Work at low speed to prevent sugar clouds and to let the sugar dissolve into the butter steadily, producing a smoother finish. The tiny sugar particles will begin to amalgamate with the fats, producing a thicker, more stable body. If you rush and add all the powdered sugar at once, you risk a grainy texture and airborne dust, so patience matters. One troubleshooting tip is to pause and scrape the sides often, ensuring no pockets of dry sugar remain, because undissolved sugar will give a gritty mouthfeel in the end product.
- Frost brownies or any recipe as desired. Store in refrigerator for up to 4 days or freeze frosting in an airtight container for up to 3 months.: After the base looks cohesive, you will add the salt , coconut extract , and vanilla extract , and immediately you will notice the aroma shift as the extracts bloom in the fats. Mix briefly at low speed so the fragrance distributes evenly; extracts are concentrated, so they can quickly dominate if overmixed or overmeasured. The salt will sharpen the sweetness, making flavors pop, so taste a small dab before proceeding. A common error is adding too much extract in one go; measure carefully and adjust gradually because it is difficult to remove excess once incorporated.
- Add milk, 1 tablespoon at a time, until you reach your desired consistency.: Introduce the heavy whipping cream slowly, watching how each spoonful transforms the frosting from stiff to silky, and listening for the subtle change in whipping sound as the beaters move through a softer mixture. This is where the frosting becomes adjustable for piping or spreading, so add one tablespoon, then pause, and test the texture on a spoon or the back of your hand. The cream also brings a slight dairy aroma that mellows the concentrated extracts. A typical pitfall is adding too much liquid too fast, which makes the frosting limp; correct this by adding a little more powdered sugar or chilling briefly before re whipping. If you prefer a firmer consistency for piping intricate designs, aim for the lower end of the liquid range.
- Frost brownies or any recipe as desired. Store in refrigerator for up to 4 days or freeze frosting in an airtight container for up to 3 months.: When you spread the frosting, you should feel it move smoothly, leaving slight peaks if you drag your spatula through it, and it will retain shape without collapsing, indicating proper stability. If frosting warm brownies , allow them to cool slightly to prevent melting. The refrigerator firming step is useful for adjusting texture before serving, and frozen frosting can be thawed in the refrigerator and re whipped briefly for freshness. One common oversight is skipping the chill for carved cakes, which can make finishing difficult; chill for stability when precision is needed. Also avoid leaving frosted desserts at room temperature for prolonged periods if using perishable dairy in warm environments.
Notes
- Soften your butter correctly before starting: letting your butter sit at room temperature for about 30 to 45 minutes ensures it is soft enough to whip without melting, producing a creamier texture and preventing lumps.
- Add powdered sugar gradually to avoid a gritty texture: mixing in the powdered sugar in batches lets it dissolve into the fats, giving a smooth finish and reducing the need for excessive whipping.
- Measure extracts precisely because they are potent: start with the recipe amounts of coconut extract and vanilla extract, then adjust in small increments to prevent an overpowering or perfumy flavor.
- Use heavy cream for stability over lower fat liquids: the higher fat content of heavy whipping cream makes the frosting richer and more stable, which is especially helpful if you plan to pipe decorations.
- Keep a small bowl of water handy to smooth spatula edges: dipping your spatula in warm water and blotting it before smoothing helps create cleaner finishes on cakes and brownies.
- Store properly for longevity by refrigerating in an airtight container up to four days, or freeze portions for up to three months, thawing in the refrigerator and re whipping if necessary for freshness.