Classic Fried Green Tomatoes
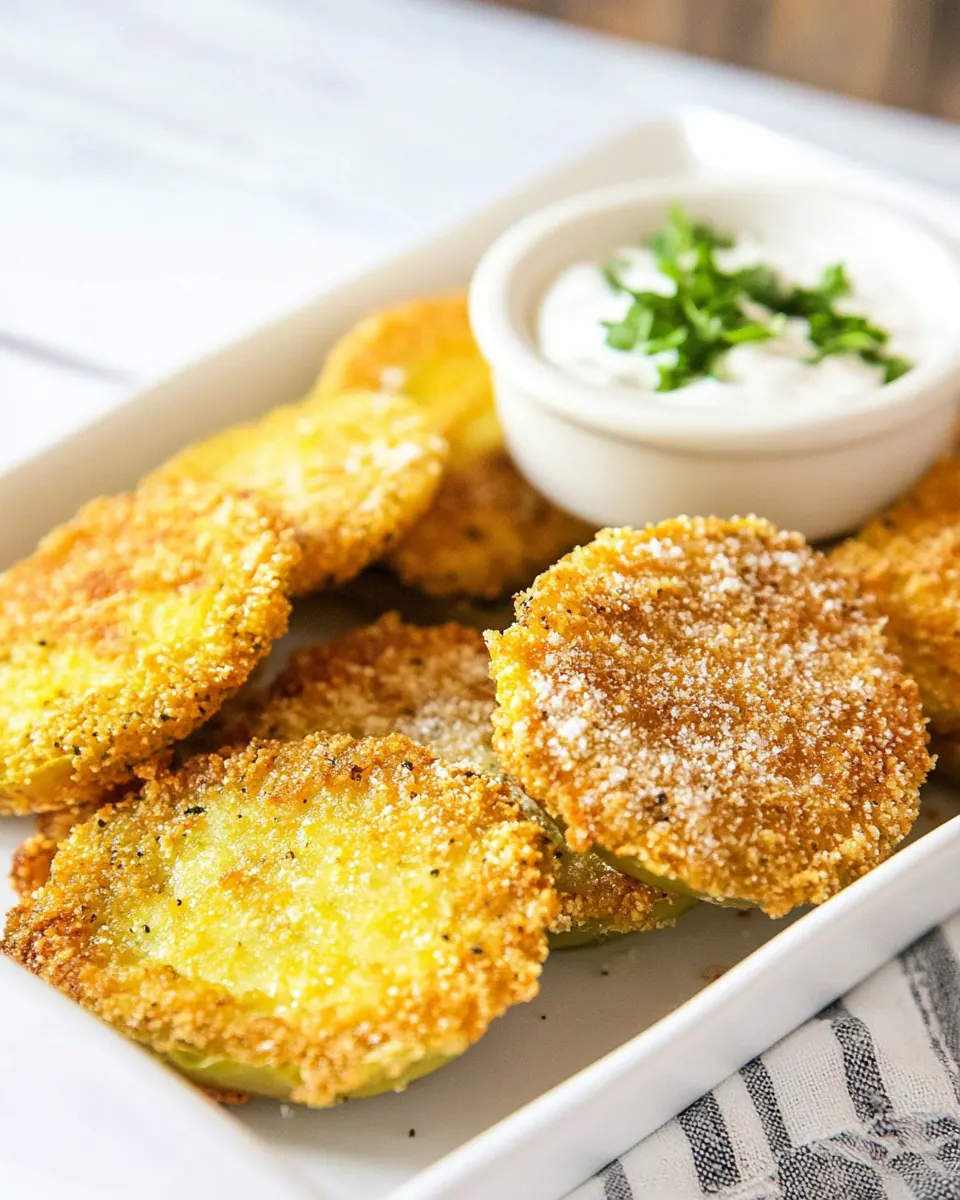
Classic Fried Green Tomatoes take me back to sunbaked porches and the loud chirp of cicadas, a Southern staple that always felt like a warm, crunchy hello from summer. I remember the first time I tried them, a plate of bronzed rounds arriving beside a pitcher of sweet iced tea, the breading crackling when my fork nudged it. From that moment on, this dish became my go to for casual gatherings and last minute weekend dinners.
Over the years I’ve learned to respect the balance between the tartness of the tomato and the savory crunch of the coating, and I love how a simple dredge routine can transform a humble tomato into something a little bit magical. Friends often ask how I get such a steady crust, and the trick is patience at the dredging station and precise oil temperature so the exterior is crisp while the inside stays juicy.
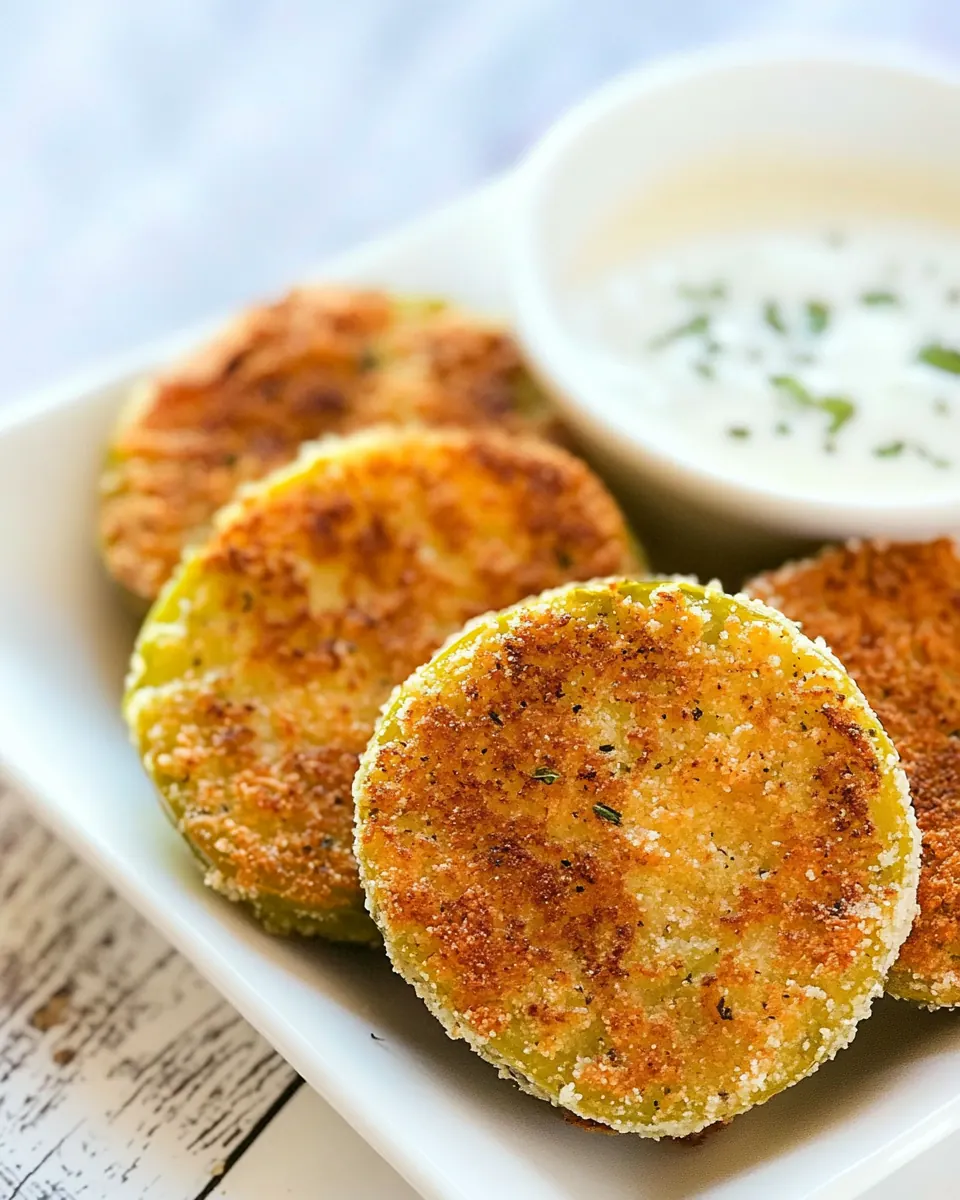
When I make Classic Fried Green Tomatoes now, I think about rhythm. There is a comforting cadence to slice, coat, and fry, and each batch seems to bring people closer around the skillet. I enjoy swapping stories while the oil warms, and watching the tomatoes turn a glowing, golden brown is always satisfying. Once plated with a small bowl of cool, tangy Ranch dressing, the contrast of hot and cold, crisp and creamy, never fails to get everyone reaching.
Recipe Snapshot
19 mins
15 mins
4 mins
Easy
250 kcal
American
Gluten-Free, Low FODMAP
Appetizers
Large, sturdy skillet (ie, cast-iron)
Why You’ll Love This Classic Fried Green Tomatoes
They celebrate simple ingredients
I love that Classic Fried Green Tomatoes showcase just a few pantry staples, and the spotlight stays on the bright acidity of the tomato. A little flour, a splash of buttermilk, and a crunchy mix of cornmeal and breadcrumbs turn an unripe fruit into a crunchy marvel. The recipe proves you do not need elaborate components to make a memorable bite.
Texture contrast is everything
One of the reasons I keep coming back to this recipe is the interplay between the crunchy exterior and the slightly soft, tangy interior. The coating foams and crackles in the pan, creating that irresistible crispiness, while the tomato stays firm enough to hold its shape. That contrast keeps every bite interesting and satisfying.
Perfect for gatherings
These fried slices travel well from skillet to plate, making them ideal for casual entertaining. I like serving them straight from the pan, and watching friends admire the color and pop a piece into their mouths. They work as a starter, a side, or a snack, and people instinctively dig in when the dipping sauce appears.
Flexible and forgiving
There is room for improvisation here, which is a big plus for me. The dredging station can be set up in minutes, and you can adjust the spice level by varying smoked paprika and cayenne pepper. If a slice loses some breading while frying, that is okay, it still crisps beautifully and tastes great.
Fast and satisfying
Another reason I recommend this recipe is speed. With just a short time at the stove you can have golden, crunchy rounds ready to serve. That quick turnaround makes Classic Fried Green Tomatoes a fantastic option for easy weeknight dinners or last minute snacks when guests drop by.
What’s In This Classic Fried Green Tomatoes

These ingredients form a simple, dependable team. The goal is to create a sturdy, flavorful crust that complements the tart, firm tomato. The wet and dry components cooperate to help the breading adhere, while spices lift the flavor profile so each bite has a little kick. Choosing the right cornmeal texture and keeping the buttermilk handy are small details that make a noticeable difference.
- vegetable oil for frying: Used for deep or shallow frying, provides neutral flavor and high smoke point to crisp the coating without burning; keep a few inches in a heavy skillet or Dutch oven and maintain consistent temperature for even browning; choose vegetable oil to allow the tomatoes' flavors to shine while achieving a golden, crunchy crust.
- 1 cup all-purpose flour: Serves as the primary dry dredge to create a base layer that helps wet batter and coatings adhere; contributes mild structure to the crust and absorbs some moisture from tomato slices to prevent sogginess; whisk briefly to remove lumps before setting up assembly stations for efficient breading.
- 1 cup buttermilk: Acts as the wet component to moisten the flour and bind the crumb and cornmeal to the tomato slices; tenderizes the coating slightly and adds a subtle tang that complements the tomato; use cold buttermilk for better adhesion and a slightly tangy finish.
- 1/2 cup cornmeal finely ground, heaping: Adds gritty texture and a slightly sweet corn flavor to the coating for extra crunch; balances with the finer flours and breadcrumbs to produce a pleasing, coarse crust that browns well; sift or stir to redistribute any settled fines so the mixture remains uniform.
- 1/2 cup breadcrumbs heaping: Provides extra crunch and a familiar breadcrumb texture that browns to a crisp exterior; helps fill gaps between cornmeal and flour for an even, sturdy coating that resists falling off during frying; use fresh or lightly toasted breadcrumbs for best crispness.
- 1/2 teaspoon smoked paprika: Imparts a mild smoky warmth that deepens the overall flavor of the crust without overpowering the tomatoes; adds aromatic interest and pairs well with cornmeal and buttermilk; measure carefully so the smokiness enhances but does not dominate.
- 1/2 teaspoon cayenne pepper: Contributes a bright, spicy heat that livens the coating and contrasts the tomatoes' acidity; distributes through the dry mixture to provide a subtle kick in every bite; adjust amount cautiously to match heat preference without overwhelming other flavors.
- 1 teaspoon Kosher salt: Provides essential seasoning to the coating, enhancing the natural flavor of tomatoes and other ingredients; dissolves into the wet and dry mixtures to ensure even taste throughout the crust; use Kosher salt for its clean saltiness and easy measurement.
- 1/2 teaspoon black pepper freshly ground: Adds subtle peppery heat and aromatic complexity when freshly ground into the coating; balances salt and spices to round out the seasoning profile; grind just before mixing to retain optimal flavor and aroma.
- 3 medium green tomatoes sliced about 1/4" to 1/2", usually 3 slices each: Offers firm, slightly acidic slices that hold shape during breading and frying; choose medium green tomatoes and slice evenly about 1/4" to 1/2" so each piece fries uniformly and the interior stays slightly tender while the exterior crisps; pat slices dry to improve coating adhesion.
- Ranch dressing for dipping: Serves as a cool, creamy dip that complements the hot, crunchy tomatoes with tanginess and herby notes; provides contrast in texture and temperature for a satisfying bite; offer alongside to balance richness and spice.
Instructions for Classic Fried Green Tomatoes
Frying these tomatoes is a rhythmic process that rewards attention. I like to narrate each step out loud while I work, it keeps me focused and makes the kitchen feel lively. Below are the cleaned, ordered steps rewritten into rich, sensory oriented guidance so you know exactly what to look and listen for.
- Add enough of the oil to a large sturdy skillet (ie, cast-iron) to fill it to about 1/2-inch to 1-inch in depth. Heat over medium-high heat to 350°F.: The moment the oil starts to shimmer you will notice a faint, warm scent of toasted fat that signals readiness. As the skillet warms, tiny ripples will cross the oil surface, and occasional wisps of steam may rise. Using a thermometer is invaluable, because maintaining about 350°F ensures the crust crisps quickly without absorbing excess oil. One common mistake is rushing the heat, which causes uneven browning and greasy texture. If you see the oil smoking, reduce the heat immediately to prevent burning; if the oil is too cool, the coating soaks up oil and becomes heavy.
- Meanwhile, set up a dredging station with three small to medium-sized baking pans or bowls. Place the flour in the first pan, buttermilk in the second, and mix in the third pan the cornmeal, breadcrumbs, paprika, cayenne, salt, and pepper.: A well organized station lets you move smoothly from one bowl to the next, and you will be able to feel the rhythm as each slice passes through layers. The dry mixture should look cohesive and have a slightly speckled appearance from the paprika and cayenne pepper . I often tap the cornmeal mixture gently to level it, so the breadcrumbs do not clump. A typical oversight is crowding the pans, which leads to clumsy transfers and uneven coating; leave enough space so each slice can be handled comfortably.
- Place the sliced tomatoes first in the flour, flipping to coat and cover. Shake off excess and then lower into the buttermilk. Shake off excess and then add to the cornmeal/breadcrumb mixture. Use your fingers to help the breading adhere to the tomato. It's okay if the tomato is not 100% coated with the breading.: You will notice the flour attaching like a thin veil, and when the slices meet the buttermilk they should glisten slightly. Press the slices gently into the dry mix so the cornmeal and breadcrumbs cling, and the surface takes on a textured, pebbled look. This tactile step is key for adhesion, and the small imperfections in coating are normal. Avoid overhandling, which can squeeze juices out of the tomato , making it soggy when fried.
- Working in batches, carefully add the tomatoes to the hot oil. Cook them for about 2 minutes, and then use a fork and metal spatula or tongs to carefully flip the tomatoes over. Fry for another couple of minutes, or until they are golden brown. Transfer to a plate lined with paper towels. Repeat with remaining tomatoes.: As each slice hits the oil you should hear a lively, steady sizzle, like a soft crackling applause. The sound will mellow slightly as the moisture in the tomato escapes and the crust sets. Look for an even golden brown color forming at the edges, and an aroma of toasted breadcrumbs will spread through the kitchen. Flipping gently prevents the crust from tearing; a loud pop or excessive bubbling can mean the oil is too hot. Drain on paper towels to remove excess oil; overcrowding the pan causes uneven color and soggy texture, so work in small batches.
- Serve at once with homemade ranch dressing (or your favorite dipping sauce).: The contrast between the warm, crunchy slices and the chilled, tangy Ranch dressing is immediate and delightful, and you will notice how the dressing softens the spicy notes from the cayenne pepper . Serve on a warm platter so the tomatoes stay crisp longer, and offer extra napkins because the exterior can be slightly oily right out of the pan. A common misstep is letting the fried slices sit too long, which causes the crust to lose its crispness; serve promptly for the best texture.
Recipe Notes about Classic Fried Green Tomatoes

I like to think of these notes as small refinements that make a big difference. Below are practical tips and options that I rely on every time I cook Classic Fried Green Tomatoes, expanded from the recipe notes for clarity and usefulness.
- Video reference: Watch a short demonstration if you are unsure about the dredging rhythm or oil temperature, it clarifies hand movements and timing visually and can prevent common mistakes.
- Selecting tomatoes: Use firm, unripe vine tomatoes for the right tartness and texture; avoid naturally green when ripe varieties which have different flavor profiles.
- Yield guidance: Expect about three slices per medium tomato, typically yielding nine fried slices, and double the recipe when serving a crowd to keep batches small and crisp.
- Baking and air frying: If you prefer a lower oil method, follow the blog instructions for oven or air fryer adaptations, remembering these methods will yield a less crunchy, yet still tasty result.
- Reheating: Reheat in an air fryer at 400°F for a couple of minutes to restore some crispness without overcooking the interior.
- Make ahead dressing: The Ranch dressing can be made a few days ahead and chilled, which deepens the flavor and is convenient for entertaining.
Perfect Matches for Classic Fried Green Tomatoes
These serving ideas help you pair the fried slices thoughtfully, whether you are planning a casual lunch or a relaxed dinner. The suggestions below cover side dishes, occasions, storage, and seasonal pairings, presented in a list for quick reference.
- Casual gatherings: Serve a platter of Classic Fried Green Tomatoes at backyard parties or potlucks, accompanied by bowls of Ranch dressing for dipping so guests can nibble while mingling.
- Lunch option: Pair the tomatoes with a crisp green salad and crusty bread for a balanced midday meal that showcases both texture and acidity.
- Side for dinner: Offer them alongside a simple protein and roasted vegetables to add a crunchy, tangy element to a family style dinner.
- Seasonal pairing: These shine in summer when green tomatoes are abundant in gardens, and they pair well with bright, herby sides that echo the fresh season.
- Storage tips: Store cooled fried slices in an airtight container in the refrigerator for up to two days; reheat briefly in an air fryer to revive some crispness before serving.
- Occasions: They are great for casual brunches, holiday sides when you want a Southern touch, or any relaxed gathering where shareable finger foods are welcome.
FAQ
Conclusion
Classic Fried Green Tomatoes stand out for their delicious contrast of crunchy, golden coating and tart, firm tomato center. They are quick to prepare, rely on pantry staples, and bring a nostalgic Southern flair to any table. Give them a try at your next casual meal or gathering, and enjoy how the crispy texture and tangy dipping sauce elevate simple ingredients into a crowd pleasing dish. I hope this recipe becomes one of your easy go to favorites when green tomatoes are in season.

Classic Fried Green Tomatoes
Equipment
- Large, sturdy skillet (ie, cast-iron)
Ingredients
- vegetable oil for frying Used for deep or shallow frying, provides neutral flavor and high smoke point to crisp the coating without burning; keep a few inches in a heavy skillet or Dutch oven and maintain consistent temperature for even browning; choose vegetable oil to allow the tomatoes' flavors to shine while achieving a golden, crunchy crust.
- 1 cup all-purpose flour Serves as the primary dry dredge to create a base layer that helps wet batter and coatings adhere; contributes mild structure to the crust and absorbs some moisture from tomato slices to prevent sogginess; whisk briefly to remove lumps before setting up assembly stations for efficient breading.
- 1 cup buttermilk Acts as the wet component to moisten the flour and bind the crumb and cornmeal to the tomato slices; tenderizes the coating slightly and adds a subtle tang that complements the tomato; use cold buttermilk for better adhesion and a slightly tangy finish.
- 1/2 cup cornmeal finely ground, heaping Adds gritty texture and a slightly sweet corn flavor to the coating for extra crunch; balances with the finer flours and breadcrumbs to produce a pleasing, coarse crust that browns well; sift or stir to redistribute any settled fines so the mixture remains uniform.
- 1/2 cup breadcrumbs heaping Provides extra crunch and a familiar breadcrumb texture that browns to a crisp exterior; helps fill gaps between cornmeal and flour for an even, sturdy coating that resists falling off during frying; use fresh or lightly toasted breadcrumbs for best crispness.
- 1/2 teaspoon smoked paprika Imparts a mild smoky warmth that deepens the overall flavor of the crust without overpowering the tomatoes; adds aromatic interest and pairs well with cornmeal and buttermilk; measure carefully so the smokiness enhances but does not dominate.
- 1/2 teaspoon cayenne pepper Contributes a bright, spicy heat that livens the coating and contrasts the tomatoes' acidity; distributes through the dry mixture to provide a subtle kick in every bite; adjust amount cautiously to match heat preference without overwhelming other flavors.
- 1 teaspoon Kosher salt Provides essential seasoning to the coating, enhancing the natural flavor of tomatoes and other ingredients; dissolves into the wet and dry mixtures to ensure even taste throughout the crust; use Kosher salt for its clean saltiness and easy measurement.
- 1/2 teaspoon black pepper freshly ground Adds subtle peppery heat and aromatic complexity when freshly ground into the coating; balances salt and spices to round out the seasoning profile; grind just before mixing to retain optimal flavor and aroma.
- 3 medium green tomatoes sliced about 1/4" to 1/2", usually 3 slices each Offers firm, slightly acidic slices that hold shape during breading and frying; choose medium green tomatoes and slice evenly about 1/4" to 1/2" so each piece fries uniformly and the interior stays slightly tender while the exterior crisps; pat slices dry to improve coating adhesion.
- Ranch dressing for dipping Serves as a cool, creamy dip that complements the hot, crunchy tomatoes with tanginess and herby notes; provides contrast in texture and temperature for a satisfying bite; offer alongside to balance richness and spice.
Instructions
- Add enough of the oil to a large sturdy skillet (ie, cast-iron) to fill it to about 1/2-inch to 1-inch in depth. Heat over medium-high heat to 350°F.: The moment the oil starts to shimmer you will notice a faint, warm scent of toasted fat that signals readiness. As the skillet warms, tiny ripples will cross the oil surface, and occasional wisps of steam may rise. Using a thermometer is invaluable, because maintaining about 350°F ensures the crust crisps quickly without absorbing excess oil. One common mistake is rushing the heat, which causes uneven browning and greasy texture. If you see the oil smoking, reduce the heat immediately to prevent burning; if the oil is too cool, the coating soaks up oil and becomes heavy.
- Meanwhile, set up a dredging station with three small to medium-sized baking pans or bowls. Place the flour in the first pan, buttermilk in the second, and mix in the third pan the cornmeal, breadcrumbs, paprika, cayenne, salt, and pepper.: A well organized station lets you move smoothly from one bowl to the next, and you will be able to feel the rhythm as each slice passes through layers. The dry mixture should look cohesive and have a slightly speckled appearance from the paprika and cayenne pepper . I often tap the cornmeal mixture gently to level it, so the breadcrumbs do not clump. A typical oversight is crowding the pans, which leads to clumsy transfers and uneven coating; leave enough space so each slice can be handled comfortably.
- Place the sliced tomatoes first in the flour, flipping to coat and cover. Shake off excess and then lower into the buttermilk. Shake off excess and then add to the cornmeal/breadcrumb mixture. Use your fingers to help the breading adhere to the tomato. It's okay if the tomato is not 100% coated with the breading.: You will notice the flour attaching like a thin veil, and when the slices meet the buttermilk they should glisten slightly. Press the slices gently into the dry mix so the cornmeal and breadcrumbs cling, and the surface takes on a textured, pebbled look. This tactile step is key for adhesion, and the small imperfections in coating are normal. Avoid overhandling, which can squeeze juices out of the tomato , making it soggy when fried.
- Working in batches, carefully add the tomatoes to the hot oil. Cook them for about 2 minutes, and then use a fork and metal spatula or tongs to carefully flip the tomatoes over. Fry for another couple of minutes, or until they are golden brown. Transfer to a plate lined with paper towels. Repeat with remaining tomatoes.: As each slice hits the oil you should hear a lively, steady sizzle, like a soft crackling applause. The sound will mellow slightly as the moisture in the tomato escapes and the crust sets. Look for an even golden brown color forming at the edges, and an aroma of toasted breadcrumbs will spread through the kitchen. Flipping gently prevents the crust from tearing; a loud pop or excessive bubbling can mean the oil is too hot. Drain on paper towels to remove excess oil; overcrowding the pan causes uneven color and soggy texture, so work in small batches.
- Serve at once with homemade ranch dressing (or your favorite dipping sauce).: The contrast between the warm, crunchy slices and the chilled, tangy Ranch dressing is immediate and delightful, and you will notice how the dressing softens the spicy notes from the cayenne pepper . Serve on a warm platter so the tomatoes stay crisp longer, and offer extra napkins because the exterior can be slightly oily right out of the pan. A common misstep is letting the fried slices sit too long, which causes the crust to lose its crispness; serve promptly for the best texture.
Notes
- Video reference: Watch a short demonstration if you are unsure about the dredging rhythm or oil temperature, it clarifies hand movements and timing visually and can prevent common mistakes.
- Selecting tomatoes: Use firm, unripe vine tomatoes for the right tartness and texture; avoid naturally green when ripe varieties which have different flavor profiles.
- Yield guidance: Expect about three slices per medium tomato, typically yielding nine fried slices, and double the recipe when serving a crowd to keep batches small and crisp.
- Baking and air frying: If you prefer a lower oil method, follow the blog instructions for oven or air fryer adaptations, remembering these methods will yield a less crunchy, yet still tasty result.
- Reheating: Reheat in an air fryer at 400°F for a couple of minutes to restore some crispness without overcooking the interior.
- Make ahead dressing: The Ranch dressing can be made a few days ahead and chilled, which deepens the flavor and is convenient for entertaining.